

Page 1
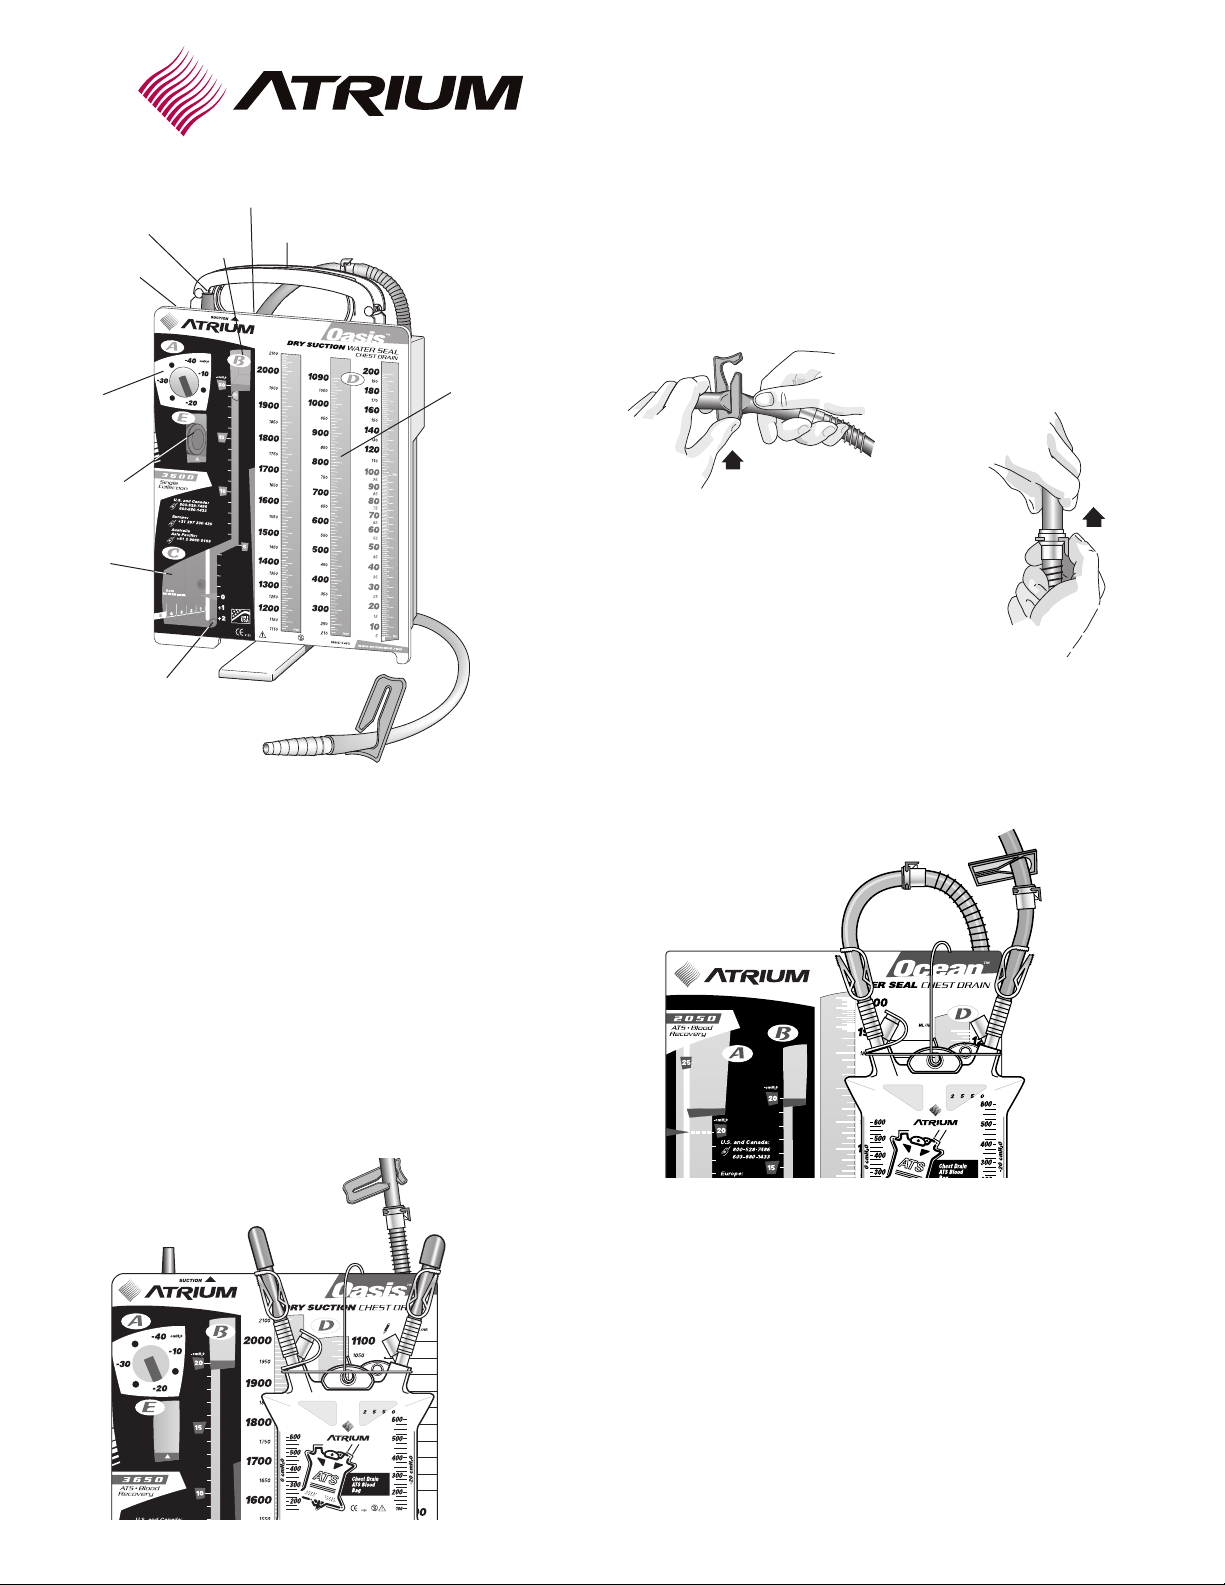
ry
D
Suction
ontrol
C
Regulator
Suction
onitor
M
ellows
B
ir Leak
A
Monitor
Positive
Pressure
Release
Valve
P
Pressure
Float Ball
uction
S
Port
atient
anual High
M
Negativity Vent
ater
W
eal
S
Chamber
Swing Out
Floor Stand
asy-to-Grip
E
Handle
Patient
Connector
n-line
I
Connector
atient
P
ube
T
Clamp
ollection
C
Chamber
2550 In-line ATS Bag
Step 2: To Connect In-Line ATS Bag To Chest Drain
To begin, move the open patient tube clamp next to
the in-line connector for convenient system set up
and easy visual check. Close the patient tube slide
clamp firmly and separate by depressing connector
lock.
Move clamp next to connector –
close prior to connector separation
Once separated, remove cap from female ATS bag connector and
insert male patient tube connector. Remove second ATS bag capand
insert male ATS bagconnector into female chest drain connector. Inline ATS bag is now connected to chest drain and patient.
Depress connector
l
ock and pull tube
up to separate
n In-Line ATS Bag (2550)
Atrium’s 2550 in-line ATS bag is a compact postoperative ATS
collection device for use with Atrium chest drains equipped with
in-line patient tube connectors. Atrium’s locking “auto-connect”
in-line tubing connectors provide rapid conversion from collection
mode to reinfusion mode in seconds.
Step 1: Placement Onto Chest Drain Or Bed Rail
Atrium’s advanced hanger design provides quick and easy positioning directly onto the front face of the chest drain or adjacent
bed rail as shown. For added security during patient transit, the
hanger can be placed over the chest drain handle. Firmly close
both ATS bag clamps prior to connector cap removal.
Move patient tube clamp
next to in-line connector
Position ATS bag
hanger on front
face or over handle
Close
clamps
prior to
cap
removal
Attach ATS bag
to chest drain
Attach
patient
tube to
ATS bag
Step 3: Open Clamps To Begin Blood Collection
Open both in-line ATS bag clamps prior to opening patient tube
clamp to bring ATS bag pressure to proper vacuum level. Open the
patient tube clamp after both ATS bag clamps have been opened.
All clamps must remain fully open at all times when ATS bag is
connected to patient. Patient tube and ATS bag should be free of
dependent loops to ensure maximum drainage efficiency. Do not
leave patient tube slide clamp closed after in-line ATS bag
attachment to patient.
Page 2
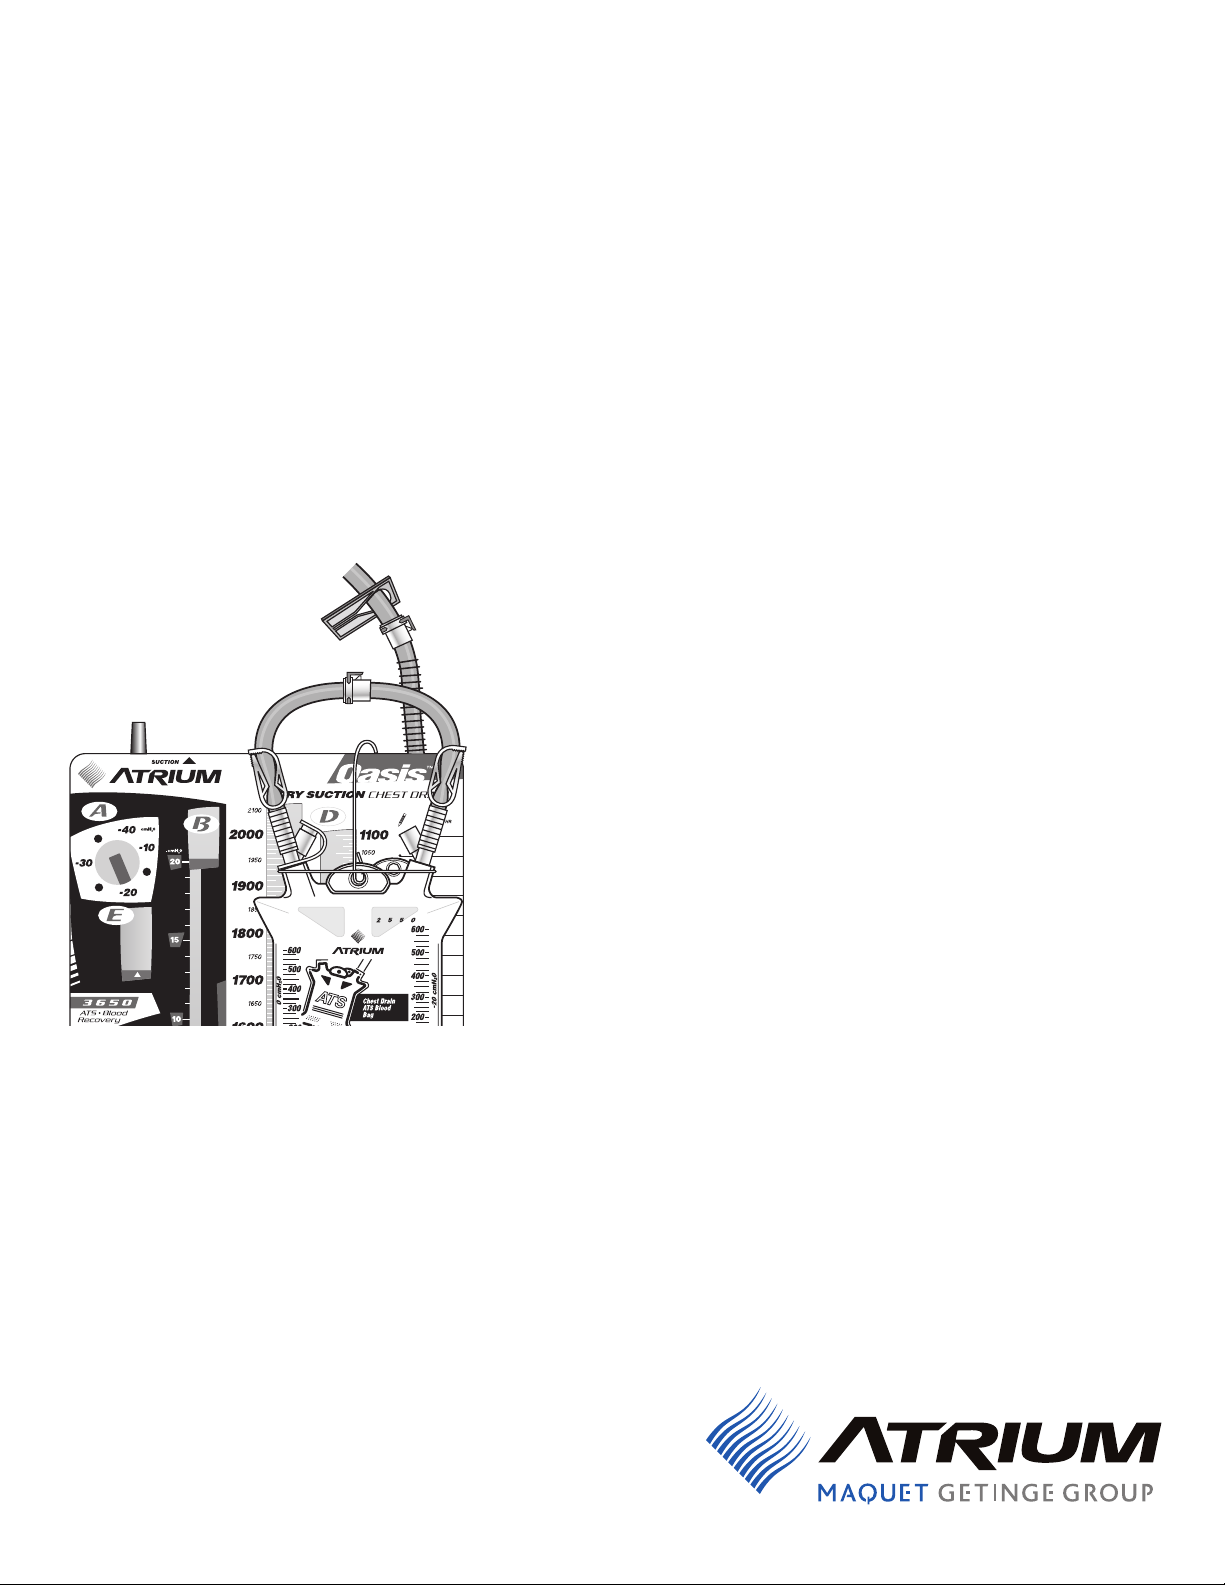
Reading And Recording Blood Volume
The in-line ATS bag deflects slightly under vacuum and is therefore
calibrated on one side under vacuum pressure. The opposite side is
calibrated for non-vacuum conditions. All fluid level calibrations are
in 25ml increments, up to a maximum collection volume of 600ml.
All ml increments are approximate.
Step 4: To Disconnect In-Line ATS Bag From Chest Drain
To remove in-line ATS bag from the chest drain, securely close
patient tube clamp and both ATS bag clamps. Dis con nect “chest
drain” side first, then disconnect the “patient side” connector. Immediately place the male patient tube con nector into the female chest
drain connector, and open patient tube clamp. Reconnect ATS bag
connectors to each other. ATS bag is now ready to be handled for
reinfusion use.
Caution: Open patient tube slide clamp immediately following
recon nec tion to chest drain or new in-line ATS bag. Do not keep
patient tube clamp closed during chest drain age or patient transit.
Open patient
tube clamp
Reconnect ATS bag
connectors to
each other
after
reconnection
to chest drain
Keep
ATS bag
clamps
closed
n ATS Bag Reinfusion Set Up And
Priming
A microemboli blood filter and I.V. blood set are required forunwashed
blood reinfusion. Caution:A new microemboli blood filter must be
used for each new ATS bag. Priming of the blood filter and I.V. set is
accomplished by the following steps:
1. Prime I.V. blood administration set and microemboli blood filter with
sterile saline.
2. After chest drain disconnection, invert in-line ATS bag with spike port
pointing upward and remove tethered cap using sterile technique.
Insert saline filter spike into ATS bag spike port using a firm twisting
motion. Return ATS bag to upright position and place on standard
height I.V. pole.
3. Open filtered air vent located on top of ATS bag first, then open the
I.V. clamp to complete priming. All remaining air within the I.V. circuit
must be evacuated prior to patient connection. Close I.V. clamp when
fully primed. I.V. is now ready for patient connection. Caution: Fail-
ure to purge all air fromthe entire I.V. circuit prior to patient connection can result in air emboli.
n ATS Bag Reinfusion
Follow all hospital protocols for administering autologous whole blood
reinfusion for both gravity drip or pressure infuser application:
1. Attach distal end of fully primed I.V. set to patient and open I.V. line
clamp to begin patient infusion.
2. For non-pressure infusion, open filtered air vent for maximum flow
rate.
3. For pressure infuser application, filtered air vent must remain closed.
Maximum in-line bag infuser pressure is 150mmHg. Caution: Do
not reinfuse entire blood contents completely through blood filter
and I.V. set, as air emboli can result.
Have a question or need help in a hurry?
Call Atrium toll free at 1-800-528-7486.
Visit us online atwww.atriummed.com
Federal (USA) law restricts this device to sale by or on the order of a
physician. Refer to Instructions for Use for current indications, warnings,
contraindications, and precautions.
© Atrium Medical Corporation 2013. All Rights Reserved Printed in
U.S.A. 11/13 · Ocean and Oasis are trademarks of Atrium Medical
Corporation, a MAQUET GETINGE GROUP company · 5 Wentworth
Drive, Hudson NH 03051 USA · 603-880-6718
Caution: Anticoagulant therapy and dosage recommen dations are
the discretion of a physician and should be monitored carefully during and after patient reinfusion.
 Loading...