

Page 1
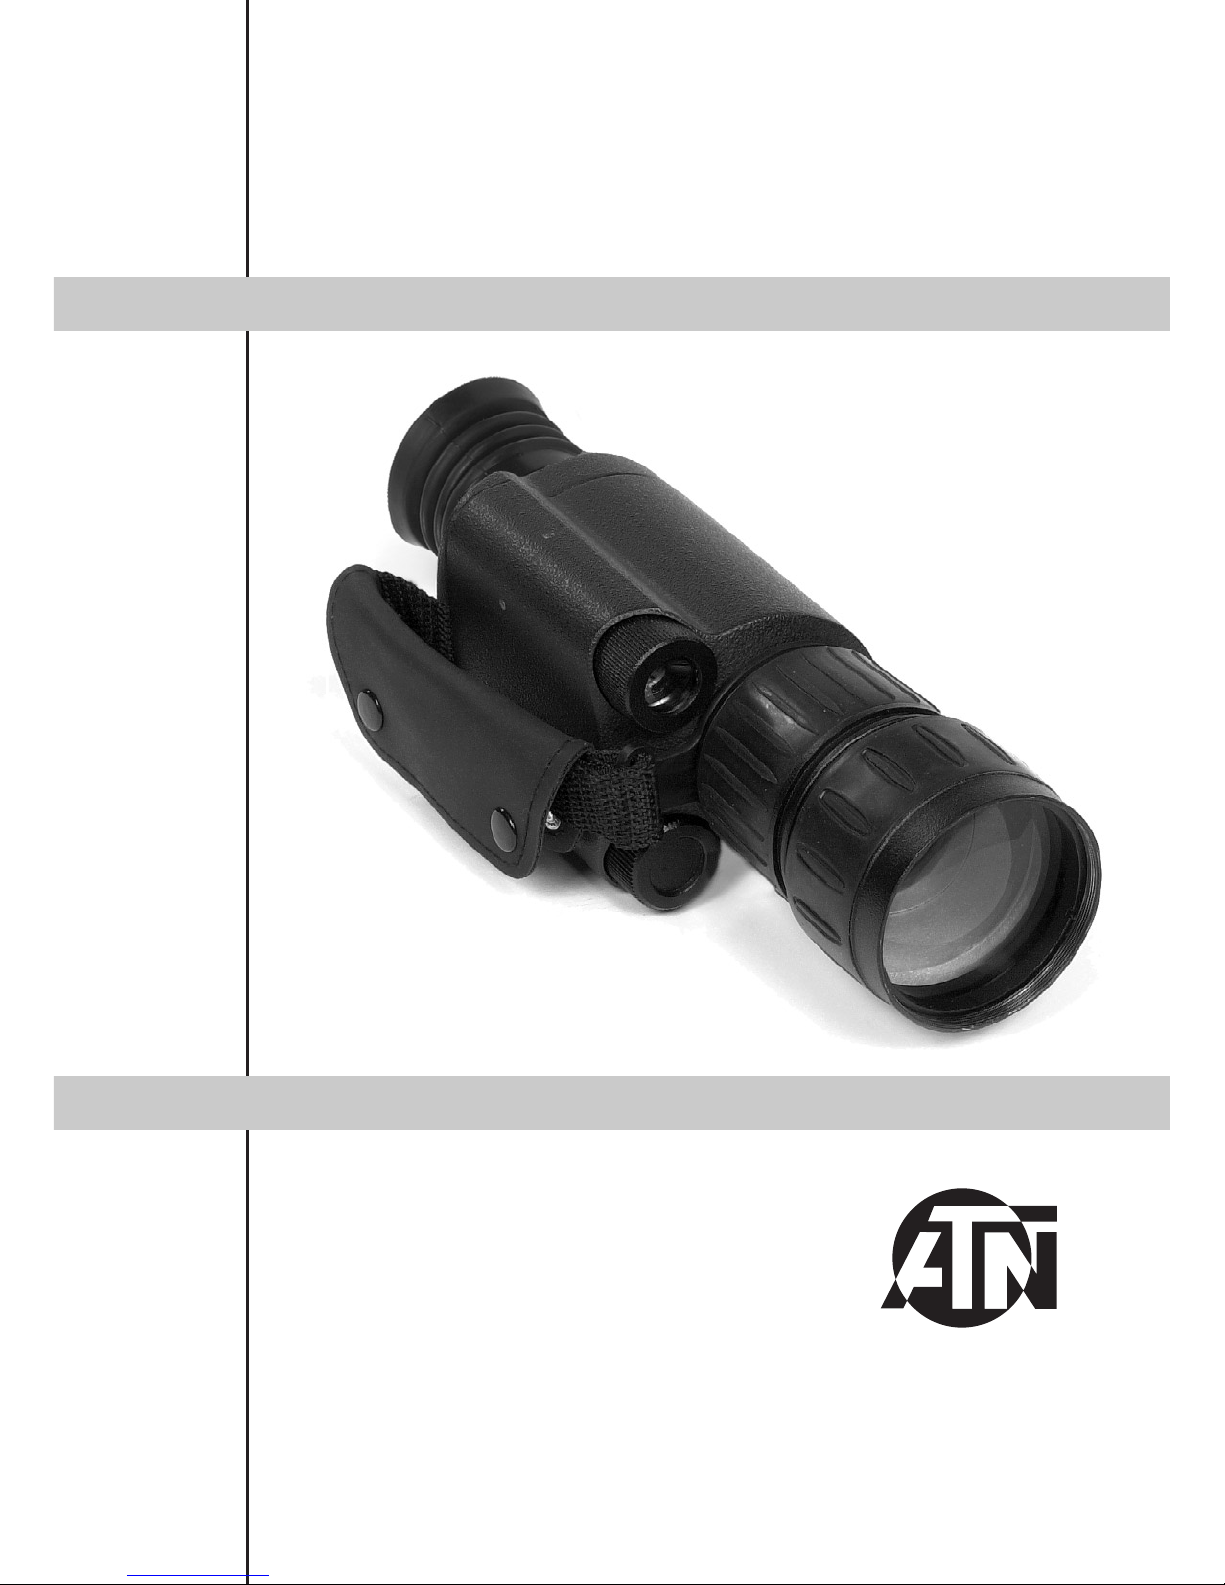
user`s guide
ATN MO2-1
Important Export Restrictions! Commodities, prod-
ucts, te chn ol og ie s a nd ser v i c e s contained i n t h i s manual
are subject to one or more of the export control laws and
r eg ul at i o ns o f t h e U. S. G ov e rn me nt a n d t h ey fa l l u nd er t he
control jurisdiction of either the US Department of State
or the US BIS-Department of Commerce. It is unlawful
and strictly prohibited to export, or attempt to export or
otherwise transfer or sell any hardware or technical data
or furnish any service to any foreign person, whether
abroad o r in the Uni te d S t ates, f or w hich a license or writte n approval o f the U.S. Governmen t is re quired, w ith out
first obtaining the required license or written approval
from the Department of the U.S. Government having
jurisdiction. Diversion contrary to U.S. law is prohibited.
AMERICAN
TECHNOLOGIES
NETWORK
CORP.
Page 2
The information in this manual furnished for information use only, is subject to change without notice, is not to be
const rue d as a com mit ment by AT N C orp.
ATN Cor p. as sum es no responsib ility or liabil ity fo r any err ors or in acc ura cies t hat may appear in this b ook .
©2008 ATN Corp. All right reserved.
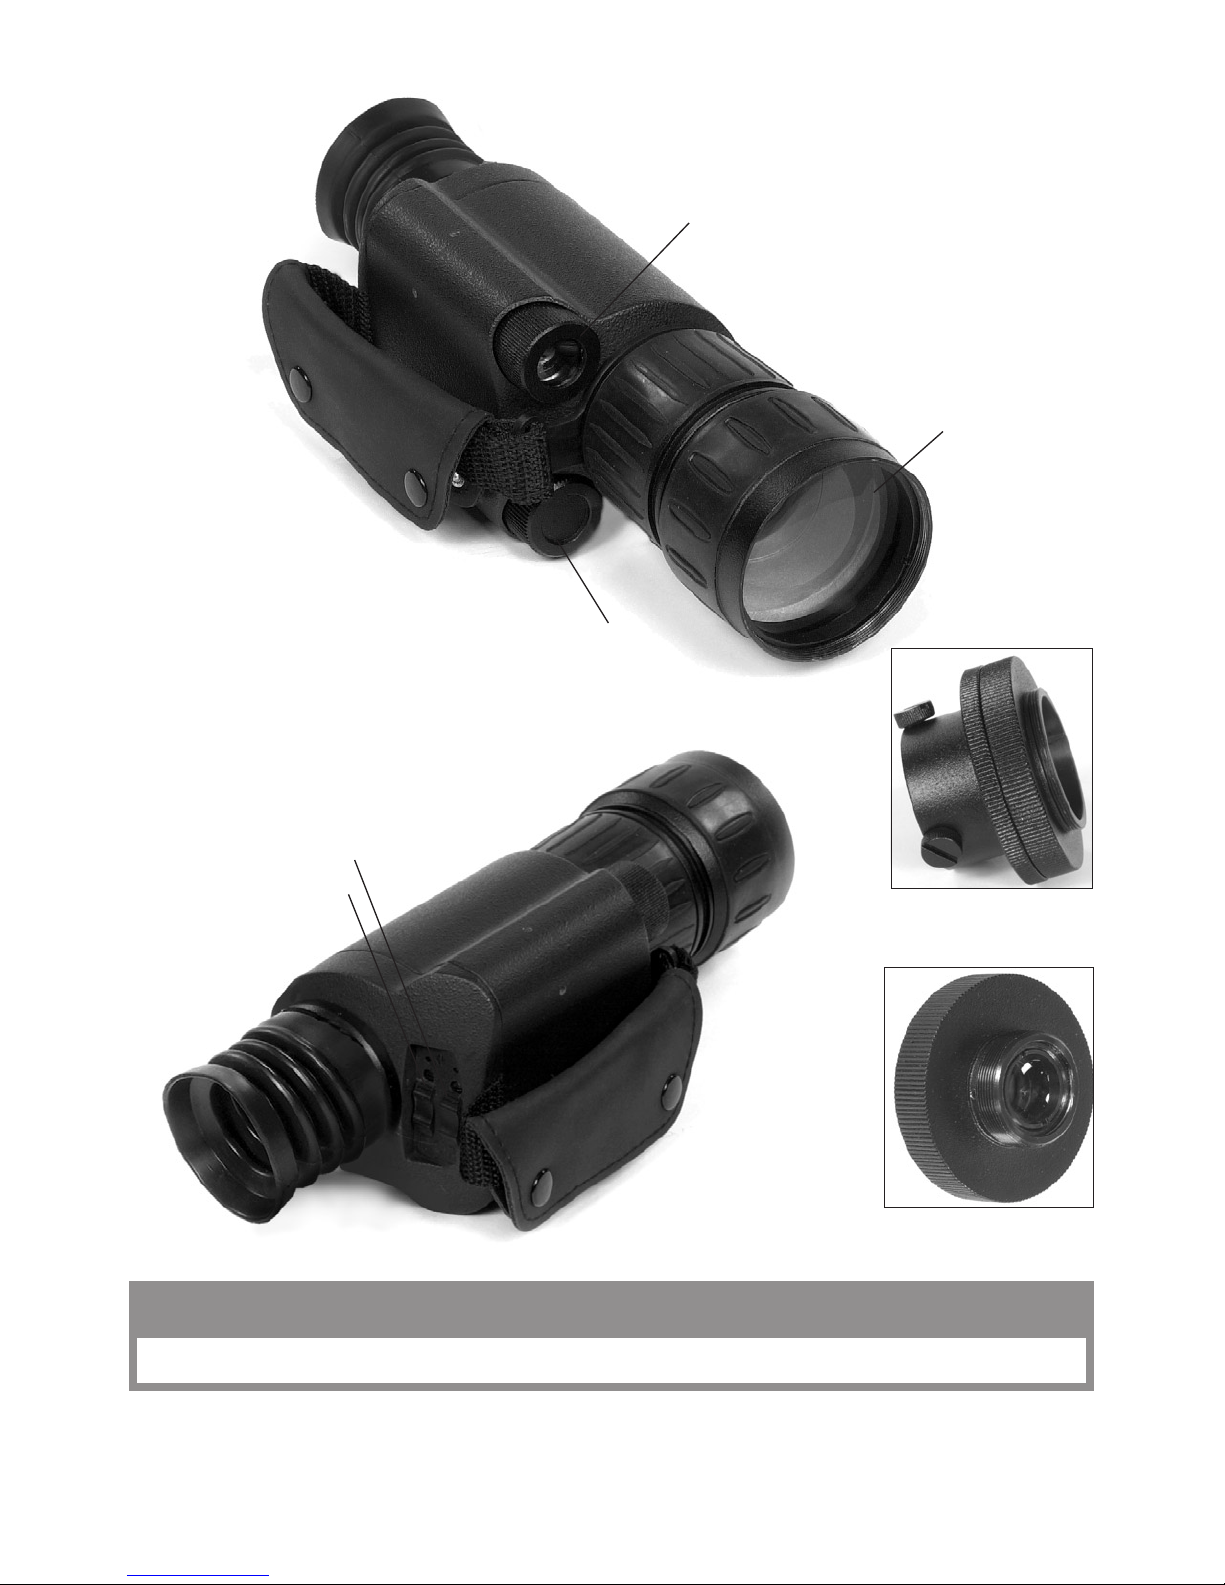
Main power switch
IR power switch
Battery housing
Built-in IR illuminator
90 mm F 1:1.7 lens
Camera adapter
(optional)
Doubler
(optional)
Th is pro ducT con Tain s n aTur al r ubber laTe x wh ich may cause all ergic reacT ions.
CAUTION:
Page 3

2
f e a t u r e s
• Automatic brightness control
• Built-in IR illuminator
• Total darkness technology
• Camera/Camcorder adaptable
• M anual focus
• Rugged and versatile design
• Adjustable eyepiece
• H igh res. 1
st
Gen.+ intensifier tube
• Water and dust resistant
• Superb 3X lens system
• Daylight filters
s p e c i f i c a t i o n s
Magnification ....................... 3X
Intensifier Tube .................... 1
st
Gen.; high res.
Lens System ........................ 90 mm; F1:1.7
Field of View ........................ 15°
Resolution............................ 40 lp/mm
Range of Focus .................... 1.5m to
Power Supply ....................... 3V Lithium CR123A Battery
Battery Life .......................... 12 hours
Dimensions .......................... 20 0 x 60 x 6 0 mm (8" x 2.5" x 2.5")
Weight .................................. 0.6kg (1.3 l bs)
Diopter Adjustment .............. ±5
Operating Temperature ....... -40°C to +50°C
Storage Temperature .......... -5 0°C to +70°C
a p p l i c a t i o n
The ATN MO2-1 Night Vision Monocular is designed for observation and identification of
objects at low light levels (less than 1.0 lux) in the temperature range from - 4 0°C to + 50°C.
The ATN MO2-1 Night Vision Monocular is a complex optico-electronic system for individual
use. The device consists of the objective lens assembly, ocular lens assembly, IR illuminator,
and the body. The body contains the image intensifier tube assembly with the integrated high
voltage power source and the battery housing. The battery housing cover is near to the lens for
the IR illuminator. Objective lens protective cover (not shown) is designed to protect the MO2-1
from high-level illumination. The pinhole at the center of the protective cover allows an user to
check the operation ability of the device in daylight conditions.
MASTER POWER SWITCH
The device is switched on by turning the main switch located on the rear side of the scope. The
MO2-1 is controlled by a built-in computer that regulates the functions of the scope.
INFRA-RED (IR) ILLUMINATOR
Infra-red (IR) Illuminators are common for night vision technology. The IR light enhances
greatly the performance of your scope, while remaining almost invisible to a naked eye. In
dark environment, power up the scope. Now, find a scene and examine it without the IR on
then with IR powered up. Note the difference in illumination. It is important to remember that
* ATN reserves the right to change the above specifications at any time without notice
Page 4

3
the IR illuminator is simply an infra-red light source, and like any light source it may loose its
effective ness over a great distan ce.
The MO2-1 IR illuminator is the ATN100M and is located near the battery compartment. You
may need a different field of IR beam coverage. If so the beam is focusable. By turning the lens
of the IR you can change the beam width slightly.
NOTE: The IR automatically turn off when the unit’s main power switch is turned off.
FOCUSING
• Observe the scene and adjust the diopter for optimal image clarity. Focus the front lens until
the image and the grain become both sharp.
• You may now enter a dark environment or simply shut the lights off in order to darken the
room.
• Next, remove the lens cap/daylight filter. Adjust the front lens for distance of the focus. You
should not have to readjust the diopter.
NOTE: We suggest that you focus the diopter during daylight with the protective lens cover on.
• You may now enter a dark environment or simply shut the lights off in order to darken the
room.
• Next, remove the lens cap/daylight filter. Adjust front lens for distance of the focus. You
should not have to readjust the diopter.
NOTE: The front lens should be readjusted as you view objects at different distances.
p r e p a r a t i o n f o r o p e r a t i o n
Before getting started make sure to follow these steps:
• Take the monocular out of t he c ase.
• Install the battery into the housing with the polarity order shown at imprint on the body. Bat-
tery type: 3 Volt Lithium CR123A.
• Switch on the monocular with the protective lens cover still attached to the lens.
• Make sure that the green luminance of the light intensifier tube is present.
• If the device is not to be used for extended period of time (more than 10 days) remove the
battery.
• Avoid touchin g lense s. If finger p rints or tra c es of d irt or d ust ap p ear, clea n surfa c e with a soft
dust cloth and glass c leaner.
• Keep lens cap /prote ctive l ens cover on wh en n ot in use.
• Avoid contact with dust, steam, and gas.
• T he M O2-1 is not har mful to the user or the environment.
• Do not disassemble except to clean the front lens and the eyepiece: it will void your war-
ranty.
• Evaluate the scopes function by looking through it in a lit environment with the daylight filter
lens cap on. Never use in daylight wit hout the daylight filter lens cap on.
c a m e r a a d a p t e r
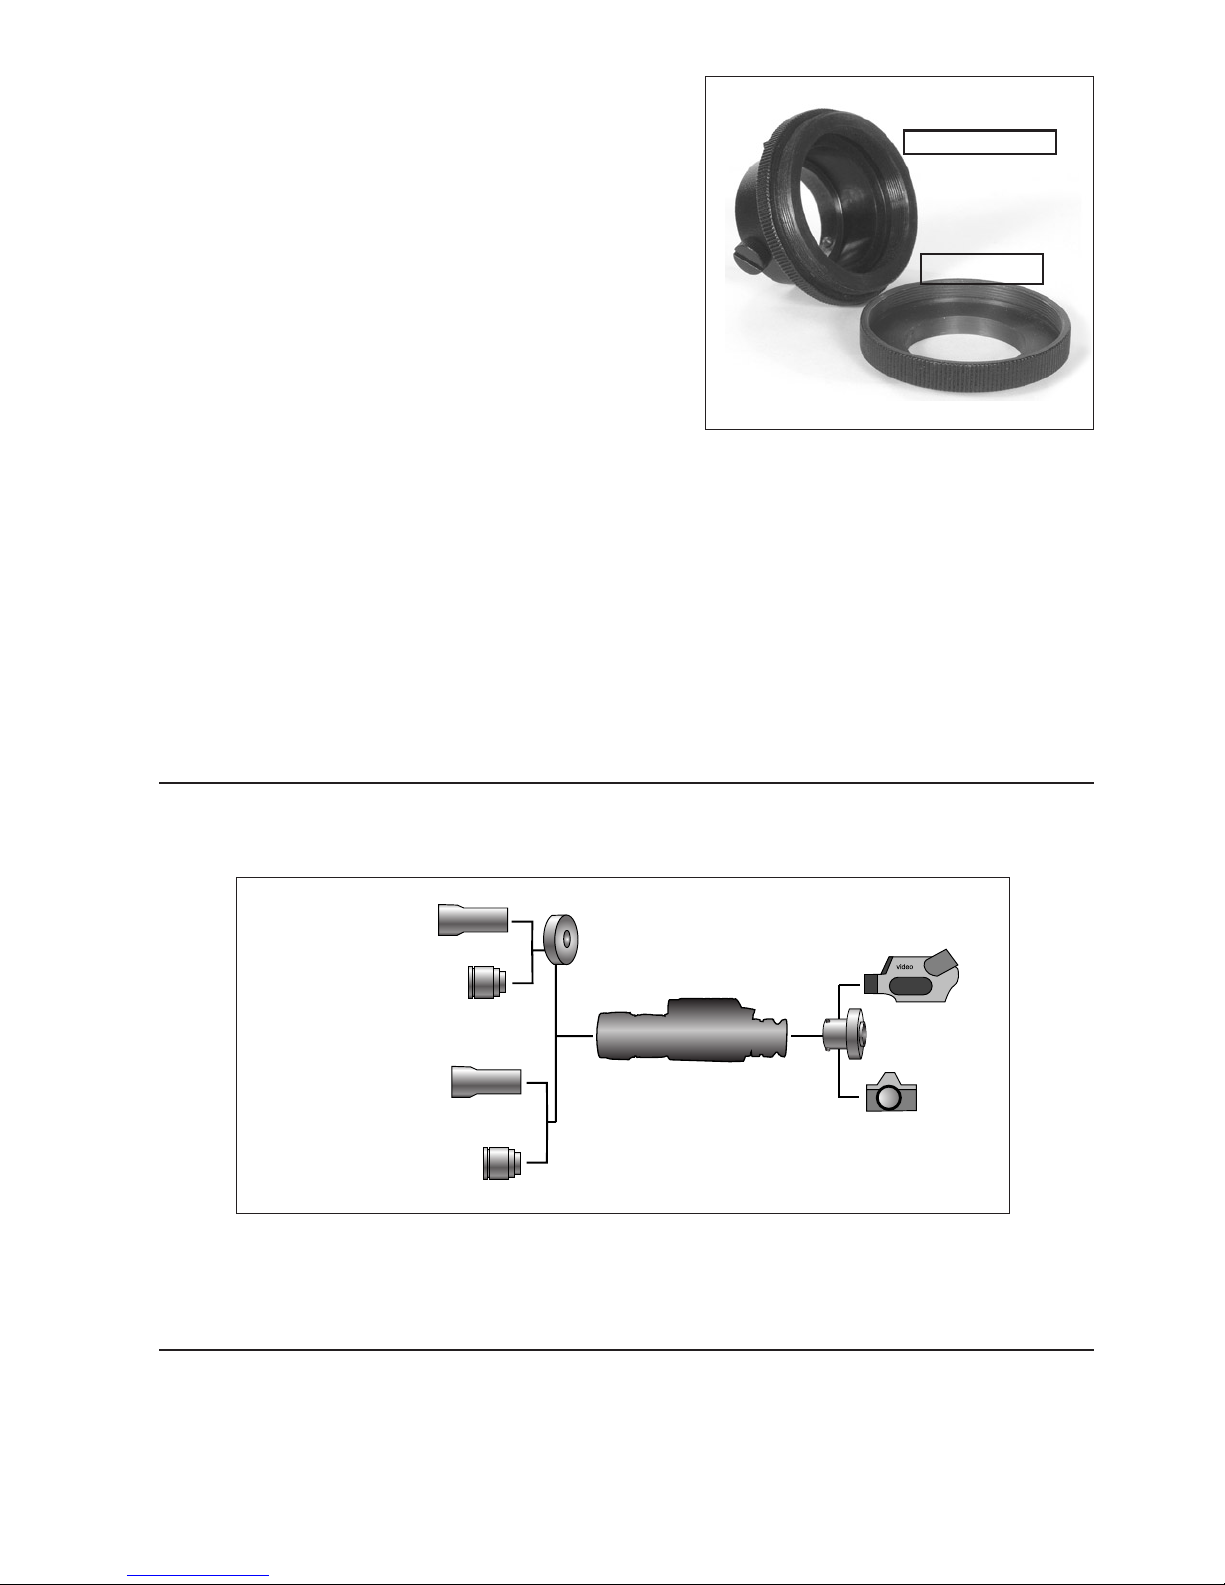
To use your MO2-1 scop e with a 35-mm camera or camc order you will need the following:
1) If you plan to use a camcorder, then your camcorder must have a MACRO feature. Most
modern camcord ers today have a MACRO feature built-in.
2) If you plan to use a 35-mm camera you will need a MACRO lens. If you don’t have one we
advise that you cont act your lo cal camera store.
Page 5
4
3) You may or may not need a STEP-UP or STEP-
DOWN ring in order to adapt the camera adapter
to your lens.
NOTE: The camera adapter comes with 37-mm and
52-mm threads. If you need other sizes your local
camera store should be able to help.
• Remove the rubber eyecup from the MO2-1.
• Screw the camera adapter onto the front of the lens
on your Video camera lens or your 35-mm camera
lens.
• Loosen the three set screws on the camera
adapter.
• Place the camera adapter over the M O2-1 eye-
piece.
• Tighten the three set screws to fit snugly to the MO 2-1 eyepiece.
• You may need to focus the 35-mm camera or video camera in combination with the MO2-1 in
order to g et t he s har pest possible image.
• We suggest that you find an open space to work in. Focus the MO2-1 so that t he s c en e is at its
sharpest. For the best results you should disable the auto focus (if any) on either the 35-mm
camera or the video camera and manually focus the 35-mm camera or the video camera.
Once the image is sharp simply adjust the MO2-1 front l ens to chan ge the focus.
• An important thing to remember is that you are not taking a picture of an object that is far away
from you, but you are actually taking a picture of the phosphorous screen of the MO2-1 that
is only 2- 3 in ches away.
d o u b l e r
Unscrew 90 mm lens off the body of the MO2-1 (make sure that the unit is turned off). Screw
the doubler into the body of the MO2-1 instead of the 90 mm lens. Screw the 90 mm lens into
the doubler.
NOTE: When attaching the doubler do not be afraid to use a little force.
c l e a n i n g t h e e y e p i e c e
You may need to clean the eyepiece of the MO2-1 from time to time in order to guarantee top
per for mance. Whe n you receive your MO2-1 you sh ould check for dust on the eyepiece of t he
unit.
Joint ring
Camera adapter
Sta nda rd 9 0mm
lens
Any “C” mou nt le ns
Sta nda rd 9 0mm
lens
Any “C” mou nt le ns
Doubler
Video
Camera
adapter
35 mm Camera
Page 6

5
First you will need to remove the eyepiece. To do that you will initially need to loosen the 2
set screws that can be found on the base. Then unscrew the eyepiece counter-clockwise to
remove it.
NOTE: You do not have to remove the set screws completely, they are very small and it is very
easy to misplace them.
CAUTION: Use only Photographic lens cleaning tissue for lens surfaces. Be careful not to
scratch or smudge any of these surfaces. When using compressed air to blow dust away, make
sure to avoid inverting the can while spraying. This can cause frozen propellant to exit the can,
which can cause s erious problems with the glass and p hos phor screen.
w a r n i n g s a n d c a u t i o n s
• Always remember to turn off the Ni ght Storm when it is not in use. If you do not plan on using
your aries scope for a period of more than 10 days, you should remove the batteries.
• Keep lens cap /d aylight filter on whe n no t in use .
• Avoid contact with dust, steam, and gas.
• T he N ight Storm is n ot harmful to the user or the environme nt.
• Do not disassemble except to clean the front lens and the eyepiece: it will void your
warranty.
• Evaluate the scopes function by looking through it in a lit environment with the protective lens
cover on. Never use in daylight without the daylight filter lens cap on. Do not surpass ten
minutes of testing.
• Never point the Night Storm at a bright light source. If the scope shuts off automatically
after directing it at a bright light source, turn the unit off and wait 1 - 2 minutes before turning
the unit back on.
• Adverse atmospheric conditions such as fog, smog, or haze and a lack of ambient light
(moon or starlight) may diminish the effective viewing distance. All technical data for this unit
wa s compiled in a controlled environment.
• If you use the rubber eyecaps for a long period of time, you may suffer skin inflammation. If
you develop any symptoms, consult a doctor immediately.
t r o u b l e s h o o t i n g
Q: Flashes, flickers, or cli cking oc cur while operating.
S: If it occurs within the first five minutes of inserting new batteries, it is normal and the device
will resume normal operation soon thereafter. If it occurs for more than 10 minutes, contact your
dealer or other authorized representative for instructions.
Q: Dark spots on screen.
S: These are cosmetic blemishes in the intensifier tube or dust particles accumulated on the
screen. Just like a TV, night vision intensifier tubes attract dust particles. These are easily
cleaned using photo-type cleaning equipment.
Q: Imag e not cl ear.
S: Adjust front lens at ni ght. If pro blem persists, turn on IR.
Q: Fixed-pattern noise in a honeycomb shape.
S: Usually a cosmetic blemish characterized by a faint honeycomb-type pattern. It usually
occ urs when viewing very bright ligh ts. Adjust the brightness of the unit to r educe noise.
Q: LED’s keep turning off after a few moments.
S: This is the normal mode of operation. It will increase your scope batteries life and make you
harder to detect
Page 7

6
2 y e a r p r o d u c t w a r r a n t y
This product is guaranteed to be free from manufacturing defects in material and workmanship under
normal use for a period of 2 (two) years from the date of purchase. In the event a defect that is covered
by the foregoing warranty occurs during the applicable period stated above, ATN, at its option, will eithe r re pair or r epla ce th e pr oduct , an d suc h act ion o n th e par t of ATN sh all be th e fu ll ex tent of ATN’s li ability, and the Customer’s sole and exclusive remedy. This warranty does not cover a product (a) used
in other than its normal and customary manner; (b) subjected to misuse; (c) subjected to alterations,
modifications or repairs by the Customer of by any party other than ATN without prior written consent of
ATN; (d) special order or “close-out” merchandise or merchandise sold “as-is” by either ATN or the ATN
dealer; or (e) merchandise that has been discontinued by the manufacturer and either parts or replacement u nits a re not avai la ble du e to re as ons beyond t he contr ol of ATN. AT N shal l not b e respons ib le fo r
any defects or damage that in ATN’s opinion is a result from the mishandling, abuse, misuse, improper
storage or improper operation, including use in conjunction with equipment which is electrically or
mechanically incompatible with or of inferior quality to the product, as well as failure to maintain the environmental conditions specified by the manufacturer. CUSTOMER IS H ERE BY N OTIFIED THAT OP-
ERAT IO N O F T HE EQ UI PM ENT D UR ING D AYL IGHT H OU RS O R U ND ER A NY EXC ES SI VE LI GHT
CONDITIONS MAY PERMANENTLY DAMAGE THE INTERNAL COMPONENTS OF THE UNIT AND
SAID DA MAGE WILL NOT BE COVERED U ND ER T HI S WARRANT Y. This warranty is extended only
to t he or iginal purch a ser. An y bre ach of this warr a nty sh all b e waived un less t he cus tomer notif ies ATN
at the address noted below within the applicable warranty period.
The customer understands and agrees that except for the foregoing warranty, no other warranties
written or oral, statutory, expressed or implied, including any implied warranty of merchantability or
fitness for a particular purpose, shall apply to the product. All such implied warranties are hereby and
expressly disclaimed.
LIMITATION OF LIABILITY
ATN will not be liable for any claims, actions, suits, proceedings, costs, expenses, damages or liabilities a rising o ut of t he use of thi s produc t. O perat io n and u s e of t he prod uc t are t he sole r e sponsib ility of
the Customer. ATN’s sole undertaking is limited to providing the products and services outlined herein
in accordance with the terms and conditions of this Agreement. The provision of products sold and
services performed by ATN to the Customer shall not be interpreted, construed, or regarded, either
exp ressly o r impl i ed, a s being for t he benef it of or cre ating a ny o bl igati on tow ard an y thir d party o f legal
entity outside ATN and the Customer; ATN’s obligations under this Agreement extend solely to the
Customer. ATN’s liability hereunder for damages, r egardless of the form or ac tion, shall not ex-
ceed the f ees o r o t h e r charges p ai d t o AT N by the c us to me r o r c ustomer’s d e aler. ATN s ha ll not ,
in any event, be l ia bl e f or special, in di re ct, in ci de ntal , o r c on s e quential dam ag es, i nc lu di ng , b ut
not li mi te d to, lost in co me , l o st reve nu e, or lost prof it , w he th er s uc h d am ag es were foreseeabl e
or not at the time of purchase, and whether or not such damages arise out of a breach of warranty, a bre ach of agre ement, neglige nce , st ric t liability or any o ther th eory of lia bil ity.
PRODUCT WARRANTY REGISTRATION
In order to validate the warranty on your product, ATN must receive a completed Product Warranty
Registration Card for each unit or complete warranty registration on our website at www.atncorp.com.
Please complete the included form and immediately mail it to our Service Center: ATN Corporation,
1341 San Mateo Avenu e, Sou th San Francisco, CA 9 4080.
OBTAINING WARRANTY SERVICE
To obtain warranty service on your unit, End-user must notify ATN service department by calling 800910-2862 or 650-989-5100 or via e-mail [email protected] to receive a Return Merchandise
Authorization number (RMA). When returning please take or send the product, postage paid, with
a copy of your sales receipt to our service center, ATN Corporation at the address noted above. All
merchandise must be fully insured with the correct postage; ATN will not be responsible for improper
postage or, missing or damaged merchandise during shipment. When sending product back, please
clearly mark the RMA# on the outside of the shipping box. Please include a letter that indicates your
RMA#, Name, Re turn Address, reason for servi ce return, C ontact information such as valid telephone
num bers a nd /or e-ma il ad dress and p roof of pu rchas es th at wi ll he lp us to es tabli s h the val i d sta r t dat e
of the warranty. Product merchandise returns that do not have an RMA listed may be refused or a
significant delay in processing may occur. Estima te d Warra nt y s er vice t im e i s 10-20 b us in es s d ays.
End-user/customer is responsible for postage to ATN for warranty service. ATN will cover return postage/shipping after warranty repair to end-user/customer only if product is covered by aforementioned
warranty. ATN will return product after warranty service by domestic UPS ground and /or domestic mail.
Any other requested or required shipping method the postage/shipping fee will be the responsibility of
the end-user/customer
.
07032008
Page 8

For customer service and technical support, please contact
American Technologies Network Corp.
North American Office
1341 San Mateo Avenue, Sout h San Fran cisc o, CA 94080
Toll Free Phone: 800-910-2862
Phone: 650-989-5100; fax: 650-875-0129
Ewww.atncorp.com
©2008 ATN Corporation
 Loading...