

Page 1

Data Gateway Interface
USER GUIDE
Description
The Atmel® Data Gateway Interface is a USB interface for handling the lowlevel transport of data to and from a target MCU. DGI is available on a
selection of tools and on-board debuggers, such as the Power Debugger
and the EDBG, as found on Xplained Pro.
DGI provides several interfaces utilizing the same API for configuration and
communication. Each interface implements an abstraction to a physical
communication interface, such as SPI and UART, or represents a service not
directly tied to a physical communication interface, such as the timestamp
interface.
Atmel-32223A-Data-Gateway-Interface_User Guide-09/2016
Page 2

Table of Contents
Description.......................................................................................................................1
1. USB Communication................................................................................................. 3
2. Protocol......................................................................................................................4
2.1. DGI_CMD_SIGN_ON...................................................................................................................5
2.2. DGI_CMD_SIGN_OFF.................................................................................................................5
2.3. DGI_CMD_GET_VERSION......................................................................................................... 6
2.4. DGI_CMD_SET_MODE............................................................................................................... 6
2.5. DGI_CMD_TARGET_RESET.......................................................................................................7
2.6. DGI_CMD_INTERFACES_LIST...................................................................................................7
2.7. DGI_CMD_INTERFACES_ENABLE............................................................................................8
2.8. DGI_CMD_INTERFACES_SET_CONFIG................................................................................... 8
2.9. DGI_CMD_INTERFACES_GET_CONFIG...................................................................................9
2.10. DGI_CMD_INTERFACES_POLL_DATA......................................................................................9
2.11. DGI_CMD_INTERFACES_SEND_DATA................................................................................... 10
2.12. DGI_CMD_INTERFACES_STATUS...........................................................................................10
3. Interfaces.................................................................................................................12
3.1. Timestamp..................................................................................................................................12
3.1.1. Parsing.........................................................................................................................12
3.1.2. Configuration............................................................................................................... 14
3.2. GPIO...........................................................................................................................................14
3.2.1. Parsing.........................................................................................................................14
3.2.2. Configuration............................................................................................................... 14
3.3. SPI..............................................................................................................................................14
3.3.1. Parsing.........................................................................................................................15
3.3.2. Configuration............................................................................................................... 15
3.4. USART....................................................................................................................................... 15
3.4.1. Parsing.........................................................................................................................15
3.4.2. Configuration............................................................................................................... 15
3.5. I2C.............................................................................................................................................. 16
3.5.1. Parsing.........................................................................................................................16
3.5.2. Configuration............................................................................................................... 16
3.6. Power......................................................................................................................................... 16
3.6.1. Parsing.........................................................................................................................16
3.6.2. Configuration............................................................................................................... 18
4. Revision History.......................................................................................................21
Atmel Data Gateway Interface [USER GUIDE]
Atmel-32223A-Data-Gateway-Interface_User Guide-09/2016
2
Page 3

1. USB Communication
The DGI USB device consists of two endpoints; one OUT Bulk endpoint for sending commands from the
PC, and one IN Bulk endpoint for receiving responses. The endpoint size of both the IN and OUT
endpoint must be taken into account when communicating with the device. A completed packet is
recognized by the transfer having a length of less than the endpoint size. If a packet has a length which is
a multiple of the endpoint size, the last transfer must be a zero length transfer to complete the packet.
All communication is initiated by the host computer sending a command packet over the OUT endpoint.
All commands are given a response over the IN endpoint. Unrecognized commands will receive an error
response.
Commands can have a maximum length of 256 bytes. Responses to most commands are only a few
bytes. However, responses can be several thousand bytes when polling incoming data from the DGI
buffer.
The USB device is a custom implementation, not following any predefined USB classes, and will therefore
require the installation of a driver on most systems.
Atmel Data Gateway Interface [USER GUIDE]
Atmel-32223A-Data-Gateway-Interface_User Guide-09/2016
3
Page 4
2. Protocol
All values in the protocol are big endian. Command packets consists of a command byte, a 2-byte length
and command-specific parameters. The length field only counts the bytes in parameters, and will be 0 for
commands without parameters.
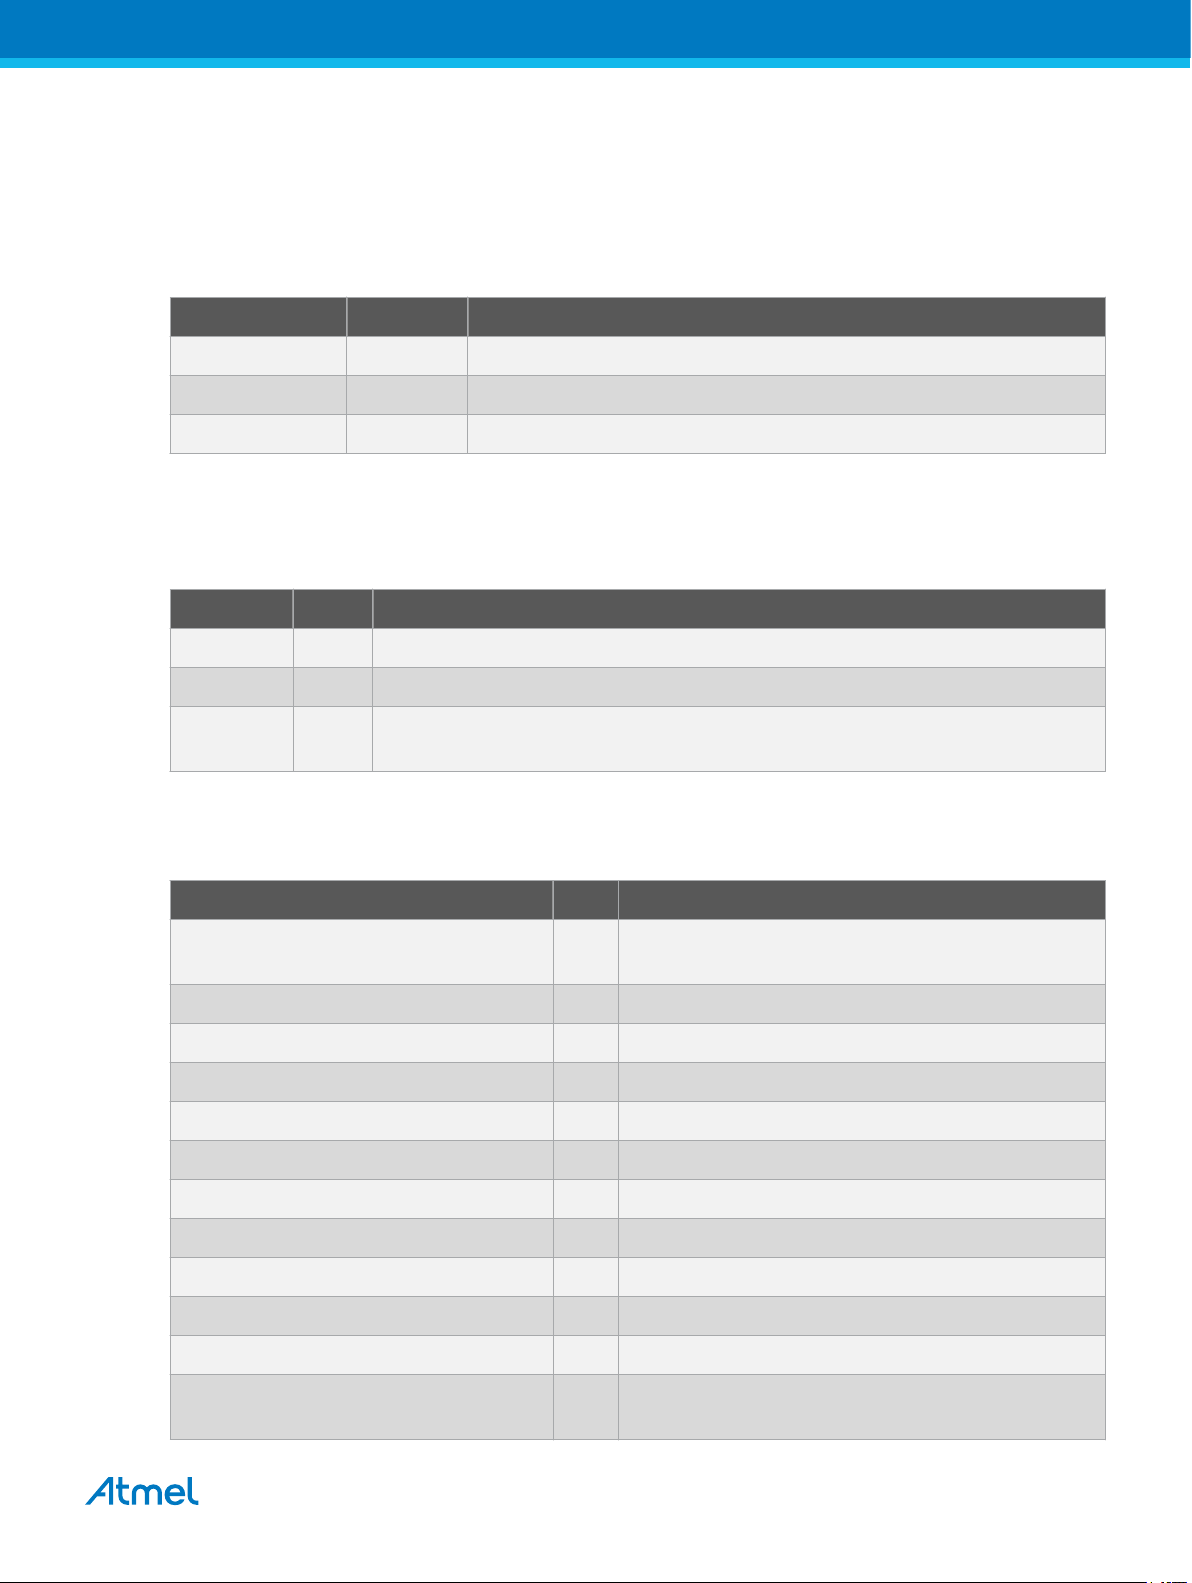
Table 2-1. Command Packet
Field Size Description
Command 1 Byte The identifier of the command to be executed.
Length 2 Bytes Amount of trailing data in parameters (n).
Parameters n Bytes Command-specific parameters.
All received packets are parsed, executed, and responded to by a response code. The response packet
consists of the received command byte, a status code, and parameters, depending on the command and
status code. Unknown commands will receive an error response.
Table 2-2. Response Packet
Field Size Description
Command 1 Byte The identifier of the command that was executed.
Status Code 1 Byte Response indicating the status of the executed command.
Parameters n Bytes Some status codes have parameters. The parsing of the parameters are
command-specific.
Below is a list of the supported commands and possible response codes. Refer to the following subsections for details.
Table 2-3. List of Commands
Name Value Description
DGI_CMD_SIGN_ON 0x00 Initializes DGI and returns a verification string. Must
be the first command called.
DGI_CMD_SIGN_OFF 0x01 Disconnects and stops all interfaces.
DGI_CMD_GET_VERSION 0x02 Returns the version of the DGI implementation.
DGI_CMD_SET_MODE 0x0A Sets the operating mode of DGI.
DGI_CMD_INTERFACES_LIST 0x08 Lists all available interface identifiers.
DGI_CMD_INTERFACES_ENABLE 0x10 Used to enable/disable interfaces.
DGI_CMD_INTERFACES_STATUS 0x11 Fetches the status for the interfaces.
DGI_CMD_INTERFACES_SET_CONFIG 0x12 Sets the configuration for the specified interface.
DGI_CMD_INTERFACES_GET_CONFIG 0x13 Gets the configuration for the specified interface.
DGI_CMD_INTERFACES_SEND_DATA 0x14 Sends data for transmission over specified interface.
DGI_CMD_INTERFACES_POLL_DATA 0x15 Returns the data buffer for the specified interface.
DGI_CMD_TARGET_RESET 0x20 Controls the state of the reset line of the target
device.
Atmel Data Gateway Interface [USER GUIDE]
Atmel-32223A-Data-Gateway-Interface_User Guide-09/2016
4
Page 5

Table 2-4. List of Responses
Name Value Description
DGI_RESP_OK 0x80 Verifies that the command was executed correctly.
DGI_RESP_FAIL 0x99 An error occurred during execution of the command. Usually caused
DGI_RESP_DATA 0xA0 The command was executed correctly and returned data. The data is
DGI_RESP_UNKNOWN 0xFF The received command identifier is unknown.
2.1. DGI_CMD_SIGN_ON
The sign on command is always the very first command to be called. It will initialize all states, buffers, and
interfaces to a known starting point. A tool-specific string is returned as an acknowledgment of the sign
on.
Table 2-5. Command Packet
Field Size Description
DGI_CMD_SIGN_ON (0x00) 1 Byte Command ID.
by wrong usage of the protocol.
command-specific and must be parsed accordingly.
Length (0) 2 Bytes No parameters.
Table 2-6. Response Packet
Field Size Description
DGI_CMD_SIGN_ON (0x00) 1 Byte Command ID.
DGI_RESP_DATA (0xA0) 1 Byte Response code.
Length 2 Bytes Length, n, of the acknowledgment string.
String n Bytes Acknowledgment string.
2.2. DGI_CMD_SIGN_OFF
The sign off command is the last command to be called. It will de-initialize all states, buffers, and
interfaces.
Table 2-7. Command Packet
• EDBG = "EDBG Data Gateway Interface"
• Power Debugger = "Powerdebugger Data Gateway
Interface"
• Atmel-ICE = "Atmel-ICE Data Gateway Interface"
Field Size Description
DGI_CMD_SIGN_OFF (0x01) 1 Byte Command ID.
Length (0) 2 Bytes No parameters.
Atmel Data Gateway Interface [USER GUIDE]
Atmel-32223A-Data-Gateway-Interface_User Guide-09/2016
5
Page 6
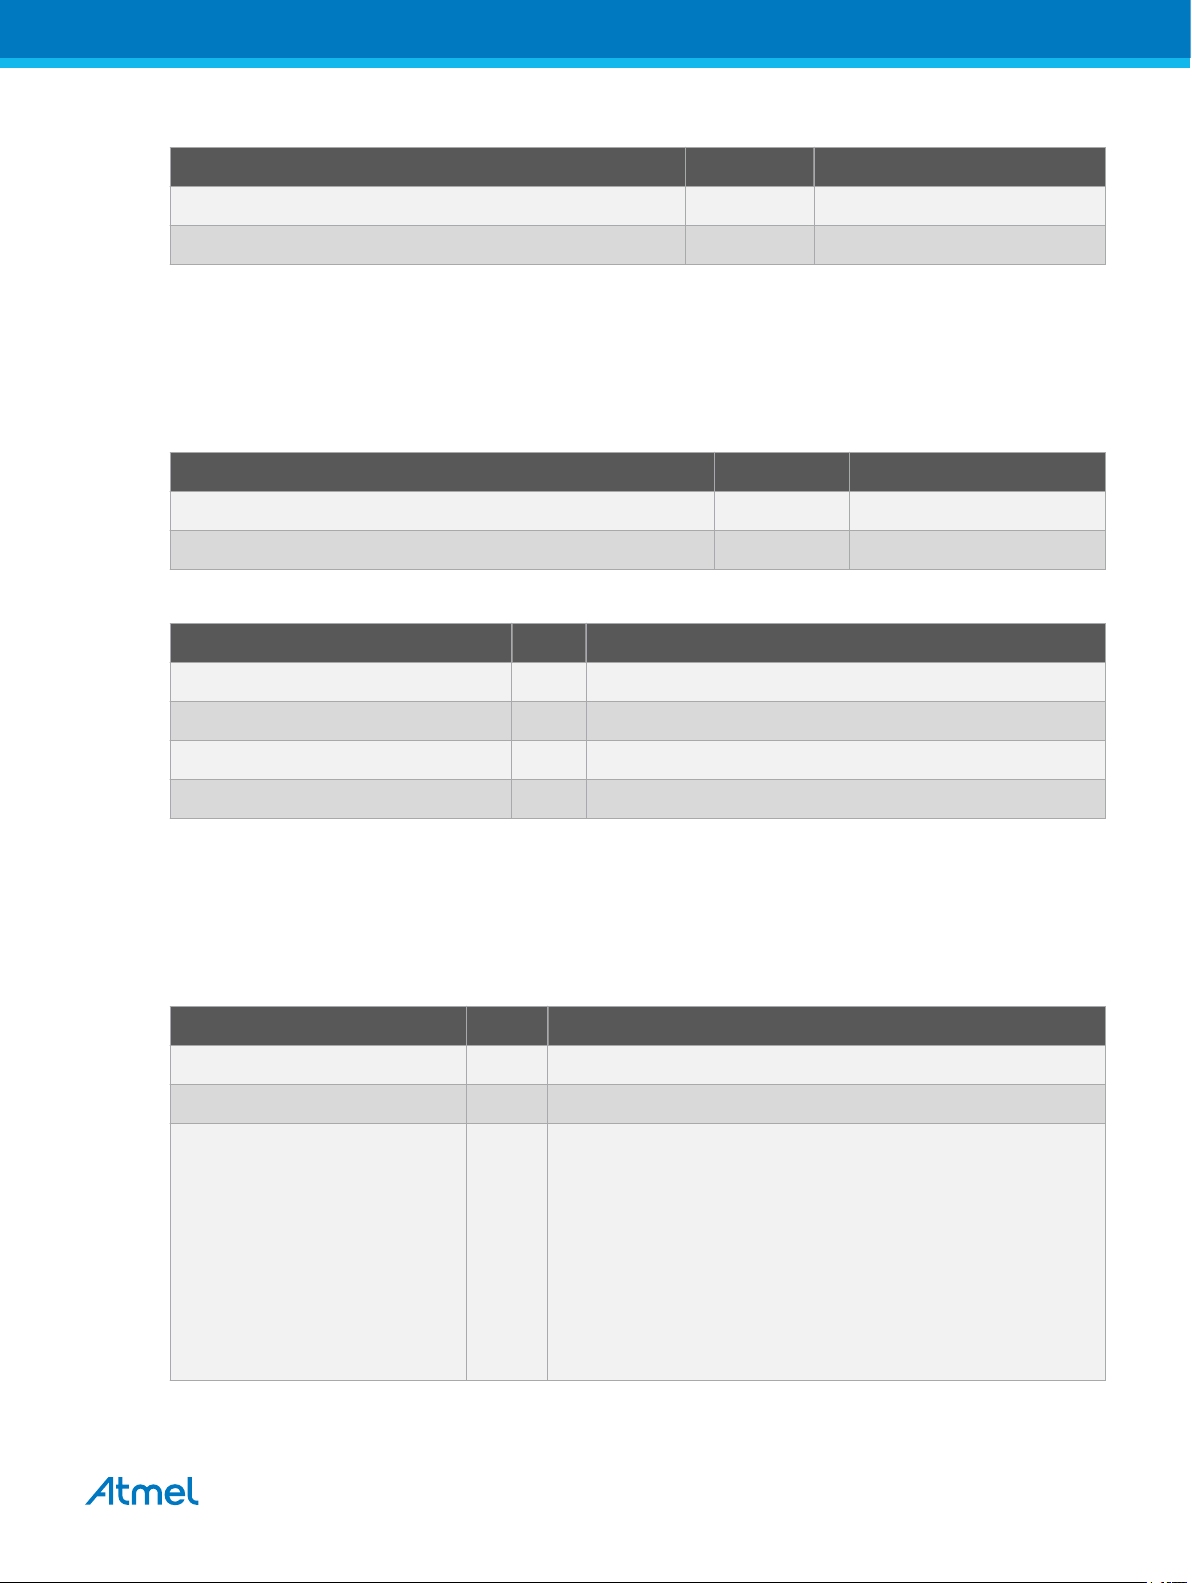
Table 2-8. Response Packet
Field Size Description
DGI_CMD_SIGN_OFF (0x01) 1 Byte Command ID.
DGI_RESP_OK (0x80) 1 Byte Response code.
2.3. DGI_CMD_GET_VERSION
This command gets the version number of the DGI implementation. The latest version at the time of
writing is 3.1.
Table 2-9. Command Packet
Field Size Description
DGI_CMD_GET_VERSION (0x02) 1 Byte Command ID.
Length (0) 2 Bytes No parameters.
Table 2-10. Response Packet
Field Size Description
DGI_CMD_GET_VERSION (0x02) 1 Byte Command ID.
DGI_RESP_DATA (0xA0) 1 Byte Response code.
Major version 1 Byte Incremented only for big breaking changes.
Minor version 1 Byte Incremented for each change relevant to the protocol.
2.4. DGI_CMD_SET_MODE
This command changes the operating mode of certain aspects of the DGI mechanisms and protocol.
Affected commands will have details in the command specific sections.
Table 2-11. Command Packet
Field Size Description
DGI_CMD_SET_MODE (0x0A) 1 Byte Command ID.
Length (1) 2 Bytes
Mode 1 Byte Each bit corresponds to a specific setting. Default value is 0.
• Bit 2
0: Use 2 byte length for poll response.
1: Use 4 byte length for poll response.
• Bit 0
0: Poll response does not include overflow indicator.
1: Add buffer overflow indicator to poll response.
Atmel Data Gateway Interface [USER GUIDE]
Atmel-32223A-Data-Gateway-Interface_User Guide-09/2016
6
Page 7

Table 2-12. Response Packet
Field Size Description
DGI_CMD_SET_MODE (0x0A) 1 Byte Command ID.
DGI_RESP_OK (0x80) 1 Byte Response code.
2.5. DGI_CMD_TARGET_RESET
This command sets the state of the reset line.
Table 2-13. Command Packet
Field Size Description
DGI_CMD_TARGET_RESET (0x20) 1 Byte Command ID.
Length (1) 2 Bytes
Reset state 1 Byte • Bit 0
0: Not asserted (released, pulled high by external
pull-up).
1: Asserted (pulled low).
Table 2-14. Response Packet
Field Size Description
DGI_CMD_TARGET_RESET (0x20) 1 Byte Command ID.
DGI_RESP_OK (0x80) 1 Byte Response code.
2.6. DGI_CMD_INTERFACES_LIST
This command is used to discover the available interfaces on the tool. It will receive a list of all interfaces.
Table 2-15. Command Packet
Field Size Description
DGI_CMD_INTERFACES_LIST (0x08) 1 Byte Command ID.
Length (0) 2 Bytes No parameters.
Table 2-16. Response Packet
Field Size Description
DGI_CMD_INTERFACES_LIST (0x08) 1 Byte Command ID.
DGI_RESP_DATA (0x80) 1 Byte Response code.
Count (n) 1 Byte Number of interfaces in following list.
Interface list n Bytes List of identifiers for available interfaces.
Related Links
Atmel Data Gateway Interface [USER GUIDE]
Atmel-32223A-Data-Gateway-Interface_User Guide-09/2016
7
Page 8

Interfaces on page 12
2.7. DGI_CMD_INTERFACES_ENABLE
This command controls the off/on state of the interfaces. A list of multiple interface states can be passed.
The return code will stop execution and return a failure response for the first interface failing status
update.
Table 2-17. Command Packet
Field Size Description
DGI_CMD_INTERFACES_ENABLE (0x10) 1 Byte Command ID.
Length (n×2) 2 Bytes
Interface ID 1 Byte Identifier of interface.
State to set Possible values are:
Table 2-18. Response Packet
• 0: Off.
• 1: On.
• 2: On, timestamped.
Field Size Description
DGI_CMD_INTERFACES_ENABLE (0x10) 1 Byte Command ID.
DGI_RESP_OK (0x80) 1 Byte Response code.
Related Links
Timestamp on page 12
2.8. DGI_CMD_INTERFACES_SET_CONFIG
This command sets the configuration of an interface. See the interface specific section for details.
Table 2-19. Command Packet
Field Size Description
DGI_CMD_INTERFACES_SET_CONFIG (0x12) 1 Byte Command ID.
Length (1+6×n) 2 Bytes
Interface ID 1 Byte Identifier of interface to set configuration for.
Config ID 2 Bytes Identifier of configuration parameter to set.
Config value 4 Bytes Value of configuration parameter. Repeated
Repeated n times.
n times.
Atmel Data Gateway Interface [USER GUIDE]
Atmel-32223A-Data-Gateway-Interface_User Guide-09/2016
8
Page 9

Table 2-20. Response Packet
Field Size Description
DGI_CMD_INTERFACES_SET_CONFIG (0x12) 1 Byte Command ID.
DGI_RESP_OK (0x80) 1 Byte Response code.
2.9. DGI_CMD_INTERFACES_GET_CONFIG
This command gets the configuration of an interface. See the interface specific section for details.
Table 2-21. Command Packet
Field Size Description
DGI_CMD_INTERFACES_GET_CONFIG (0x13) 1 Byte Command ID.
Length (1) 2 Bytes
Interface ID 1 Byte Identifier of interface to set configuration for.
Table 2-22. Response Packet
Field Size Description
DGI_CMD_INTERFACES_GET_CONFIG (0x13) 1 Byte Command ID.
DGI_RESP_DATA (0xA0) 1 Byte Response code.
Length 2 Bytes Length, n, of configuration.
Config ID 2 Bytes Identifier of configuration parameter to set.
Config value 4 Bytes Value of configuration parameter. Repeated
2.10. DGI_CMD_INTERFACES_POLL_DATA
This command polls data from the receive buffer of an interface. It needs to be called often to avoid
overflow conditions in the device buffers. Only call this command for interfaces that are on and does not
have timestamping enabled. Data for interfaces using timestamped mode can be polled from the
timestamp interface. See the timestamp section for details. The mode set command affects the response
of this command.
Table 2-23. Command Packet
Field Size Description
DGI_CMD_INTERFACES_POLL_DATA (0x15) 1 Byte Command ID.
Length (1) 2 Bytes
Repeated n times.
n times.
Interface ID 1 Byte Identifier of interface to poll data from.
Atmel Data Gateway Interface [USER GUIDE]
Atmel-32223A-Data-Gateway-Interface_User Guide-09/2016
9
Page 10

Table 2-24. Response Packet
Field Size Description
DGI_CMD_INTERFACES_POLL_DATA
(0x15)
DGI_RESP_DATA (0xA0) 1 Byte Response code.
Length (n) 2/4 Bytes
Overflow indicator* 0/4 Bytes A non-zero value means an
Data n Bytes Raw data that has been received
Related Links
Timestamp on page 12
2.11. DGI_CMD_INTERFACES_SEND_DATA
This command sends data over the specified interface. The interface must be enabled first. Data is
buffered and will be sent to the master at the clock speed determined by the configuration, or at the
speed determined by the master of the physical interface (as for SPI, I2C, and USART). The command
will return true as long as the data buffer is free. If there is pending data in the send buffer already, this
command will return a failure.
Table 2-25. Command Packet
1 Byte Command ID.
Amount of data received
depending on
mode set
overflow has occurred. Only
available if specifically set by a set
mode command. Not included in
the length field even if enabled.
from the interface.
Field Size Description
DGI_CMD_INTERFACES_SEND_DATA (0x14) 1 Byte Command ID.
Length (1+n) 2 Bytes n is limited to 250 bytes.
Interface ID 1 Byte Identifier of interface to send data to.
Data n Bytes Data to send over interface.
Table 2-26. Response Packet
Field Size Description
DGI_CMD_INTERFACES_SEND_DATA (0x14) 1 Byte Command ID.
DGI_RESP_OK (0x80) 1 Byte Response code.
2.12. DGI_CMD_INTERFACES_STATUS
This command gets the status of all available subscriptions.
Atmel Data Gateway Interface [USER GUIDE]
Atmel-32223A-Data-Gateway-Interface_User Guide-09/2016
10
Page 11

Table 2-27. Command Packet
Field Size Description
DGI_CMD_INTERFACES_STATUS (0x11) 1 Byte Command ID.
Length (0) 2 Bytes
Table 2-28. Response Packet
Field Size Description
DGI_CMD_INTERFACES_STATUS (0x11) 1 Byte Command ID.
DGI_RESP_DATA (0xA0) 1 Byte Response code.
Interface ID 1 Byte Identifier for interface. This byte is repeated for each
interface.
Status 1 Byte Status of interface.
• Bit 0: Started.
• Bit 1: Timestamped mode.
• Bit 2: Overflow occurred.
This byte is repeated for each interface.
Atmel Data Gateway Interface [USER GUIDE]
Atmel-32223A-Data-Gateway-Interface_User Guide-09/2016
11
Page 12

3. Interfaces
All functionality of DGI is centered around the implemented interfaces. All interfaces uses the same USB
protocol, but every interface has it's own configuration parameters and handling of communication. For
details refer to the interface-specific sections. Note that not all interfaces are available on all boards
implementing the DGI device. The available interfaces can be read through the USB protocol.
Table 3-1. List of Interfaces
Name Identifier Description
Timestamp 0x00 Service interface which appends timestamps to all received events
SPI 0x20 Communicates directly over SPI in slave mode.
USART 0x21 Communicates directly over USART in slave mode.
I2C 0x22 Communicates directly over I2C in slave mode.
GPIO 0x30 Monitors and controls the state of GPIO pins.
on associated interfaces.
Power 0x40 (data) and 0x41
Reserved 0xFF Special identifier used to indicate no interface.
Related Links
DGI_CMD_INTERFACES_LIST on page 7
3.1. Timestamp
The data returned over the timestamp interface is a sequential stream of timestamped packets of data
belonging to the interfaces that has timestamping enabled. The first byte in each packet is the interface
identifier and will decide how the rest of the packet must be parsed.
The timestamp is relying on a 16-bit timer, which is sampled and embedded into each packet. The timer
tick frequency can be read from the timestamp configuration. It is in the area of about half a microsecond.
When the timer overflows, a packet will be embedded in the stream to indicate this event. Note that if a
data packet is being embedded as the timer overflows, an overflow packet will not be embedded. Instead
it will be indicated in the header of the data packet.
All timestamped packets are generated from module interrupts within the DGI device, which can not be
interrupted by the timer overflow interrupt. This means that there is a possibility that the timer has
overflowed before the timer was sampled and embedded. To be able to keep the timestamp in sync and
accurate for such events the packets are also embedding the timer overflow bit. This bit is sampled after
the timer itself, and can potentially be set even if the sampled timer value was in sync.
(sync events)
Receives data and sync events from attached power measurement
co-processors.
3.1.1. Parsing
The timestamp data is a buffer containing data from several interfaces in the order they were received.
Each entry has the format as shown below.
Atmel Data Gateway Interface [USER GUIDE]
Atmel-32223A-Data-Gateway-Interface_User Guide-09/2016
12
Page 13

Table 3-2. Data Format
Field Size Description
Interface ID 1 Byte Identifies the interface this entry is related to.
Interface specific data n Bytes The length and interpretation of data is specific to the interface ID.
To handle the timestamp properly declare a variable to accumulate the ticks as the timer overflows
(hereby denoted by Tc). The timestamp of an entry (hereby denoted by T) is the sum of Tc and the
timestamp tag of the entry (hereby denoted by Tt). Note that T is a value of ticks since sampling was
started. The length of a tick can be found in the configuration section. While iterating the data coming
from the timestamp interface, resolve the interface ID and handle the timestamp and interpretation of the
data according to the details in the following sections.
Timestamp [0x00]
An entry with the timestamp interface ID is embedded for every overflow of the 16-bit timer. Tc should be
incremented by 216 = 65536. The data section of this entry contains a counter that is incremented once
for each entry of this type.
Table 3-3. Timestamp Specific Data
Field Size Description
Counter 1 Byte Incremented for each entry of this type.
SPI [0x20], USART [0x21], I2C [0x22], GPIO [0x30]
For each character received over SPI, I2C, USART, or a change on the GPIO lines an entry is made in the
timestamp buffer. The entry contains a sample of the 16-bit timer (Tt) which must be added to Tc to get T.
It also contains a timer overflow flag which requires special consideration. If this byte is non-zero it means
that the timer has overflowed during handling the current entry, and Tt must be examined to decide if it
happened before or after the timestamp was sampled. If Tt is less than 256 or so, the overflow happened
prior to sampling and Tc must be incremented by 216 prior to calculating T. In the other case, Tt is greater
than 256, Tc is incremented by 216 after T has been calculated. The overflow flag is cleared after this, so
no entry with the timestamp ID will be embedded in the stream for this overflow.
Table 3-4. Specific Data
Field Size Description
Timestamp 2 Byte The 16-bit timer value.
Timer overflow flag 1 Byte If this is non-zero the timer has overflowed during the handling of this entry.
Data 1 Byte The received data.
Power sync [0x41]
An entry of this type is embedded for every 1000 samples, and gives the timestamp of the n×1000th
sample in the power stream. In this context, n denotes the count of entry occurrences of this type since
the power interface was started. The structure of this entry is the same as described above for SPI,
USART, etc. The data field contains a counter which is incremented for each entry of this type.
Atmel Data Gateway Interface [USER GUIDE]
Atmel-32223A-Data-Gateway-Interface_User Guide-09/2016
13
Page 14

Table 3-5. Specific data
Field Size Description
Timestamp 2 Byte The 16-bit timer value.
Timer overflow flag 1 Byte If this is non-zero the timer has overflowed during the handling of this entry.
Counter 1 Byte Incremented for each packet.
3.1.2. Configuration
The timestamp configuration contains the timer tick frequency (denoted by fT) and prescaler (denoted by
p). These values can be used to calculate a timestamp in seconds (denoted by t) from the tick count
(denoted by T) by the formula =
Table 3-6. Configuration Parameters
Field ID Description
Prescaler 0 Prescaler, p, of the tick duration.
Frequency 1 Frequency, fT, of the timer module.
.
3.2. GPIO
The GPIO interface consists of four lines available, which can be individually set to input or output
through the configuration interface. This interface can only be used in timestamp mode. Input lines are
monitored and will trigger an entry to be added to the timestamp buffer on each change. Output lines can
be controlled through the send data command.
3.2.1. Parsing
Each received data byte corresponds to an input pattern on the GPIO pins. If a bit is 1 it means that the
corresponding GPIO pin is high, a 0 means a low level.
3.2.2. Configuration
The GPIO configuration controls the direction of the pins.
Table 3-7. Configuration Parameters
Field ID Description
Input pins 0 Setting a bit to 1 means the pin is monitored.
Output pins 1 Setting a bit to 1 means the pin is set to output and can be controlled by the send
command.
3.3. SPI
The SPI interface is used for serial transfer of data. It operates in slave mode, and requires the master to
initiate all communication. Whenever the SPI master does a transfer a character is added in the incoming
buffer and a character is sent from the SPI send buffer. If no data is availabe in the send buffer it will send
Atmel Data Gateway Interface [USER GUIDE]
Atmel-32223A-Data-Gateway-Interface_User Guide-09/2016
14
Page 15

0xFF as an idle character. This must be taken into consideration in the protocol to be able to distinguish
idle characters from real data.
To avoid the risk of getting out of synchronization with the SPI transfer and starting receiving data in the
middle of a character, the configuration allows for forcing the interface to wait for the chip select line to
toggle before starting.
3.3.1. Parsing
The data received over the SPI interface is the raw data. No special handling is required.
3.3.2. Configuration
The SPI configuration controls the mode of transfer used.
Table 3-8. Configuration Parameters
Field ID Description
Character length 0 The number of bits in one character (5-8).
SPI mode 1 Sets the transfer mode used for SPI:
• 0: Clock idle low, sample on rising edge
• 1: Clock idle low, sample on falling edge
• 2: Clock idle high, sample on falling edge
• 3: Clock idle high, sample on rising edge
Force CS sync 2 Setting this parameter will make the SPI interface wait for a chip select toggle
3.4. USART
The USART interface is used for serial transmission of data. It can operate in both synchronous and
asynchronous modes. In synchronous mode the USART works in slave mode and the clock line must be
supplied from an external master.
3.4.1. Parsing
The data received over the USART interface is the raw data. No special handling is required.
3.4.2. Configuration
The configuration sets the transfer parameters of the USART.
Table 3-9. Configuration Parameters
Field ID Description
Baud rate 0 The transfer speed of the interface in asynchronous mode.
Character length 1 The number of bits of data in each character (5-8).
before starting SPI transfers.
Parity type 2 The type of parity bit; 0 = Even, 1 = Odd, 2 = Space, 3 = Mark, 4 = None
Atmel Data Gateway Interface [USER GUIDE]
Atmel-32223A-Data-Gateway-Interface_User Guide-09/2016
15
Page 16

Field ID Description
Stop bits 3 Count of stop bits used; 0 = 1 bit, 1 = 1.5 bits, 2 = 2 bits
Synchronous mode 4 If this is non-zero synchronous mode will be used. Otherwise asynchronous
3.5. I2C
The I2C interface is used to transfer data serially. It operates in slave mode and must therefore have a
master connected to control the data flow.
Data is transmitted from the master by addressing the slave with the write flag. Then data can be sent
byte by byte to the slave device.
To support transferring data from the PC to the I2C master, the master has to poll the slave device
regularly by sending the address with the read flag. The first byte read indicates the count of bytes of data
waiting. If it is non-zero there is waiting data, and this data must be read out byte by byte in the same
operation (no stop or repeated start).
3.5.1. Parsing
The data received over the I2C interface is the raw data. No special handling is required.
3.5.2. Configuration
mode is used.
The I2C configuration sets the operation parameters of the interface.
Table 3-10. Configuration Parameters
Field ID Description
Speed 0 The expected operation speed of the interface in Hertz helps the slave device adjust the
Address 1 Address of the slave device.
3.6. Power
The power interface is used to transfer power measurements and related data. It relies on a coprocessor
that does the power measurements and transmits a stream of formatted data.
There are currently two flavors of the power measurement coprocessor, which are referred to as the XAM
and the PAM. XAM is used on Xplained Pro boards that is embedding power measurement capabilities.
PAM is used on the Power Debugger and offers a greater feature set. Look in the documentation for the
Xplained Pro and Power Debugger for more details about the feature sets.
3.6.1. Parsing
The data coming from the power interface is a stream of packets of variable length. The upper 2 bits of
the first byte of each packet describes the type and decides the rest of the interpretation. Below is a table
of valid packet types.
timings. Up to 400kHz is supported.
Atmel Data Gateway Interface [USER GUIDE]
Atmel-32223A-Data-Gateway-Interface_User Guide-09/2016
16
Page 17

Table 3-11. Packet Types
Type ID (upper 2 bits) Description
Primary sample 0b10 3-byte packet of A channel current sample.
Auxiliary sample 0b00 2-byte packet of B channel current sample and A and B channel
voltage sample.
Notification 0b11 Notification packet for special events.
Reserver 0b01
Notification
The notification packet is 1 byte long in total. It provides a way to give notifications about events.
Table 3-12. Notification Interpretation
Field Bit position Description
ID 7:6 Set to 0b11 for this packet.
Extended 5 Reserved for future use.
Type 4 If 0, data field contains an event, otherwise it's a sample rate.
Data 3:0 Type of event or sample rate
Table 3-13. Events
Event Value Description
Sync tick 0 This event is embedded in the stream after every 1000 samples for PAM.
Primary sample
The primary sample packet contains a sample of the A channel current. It holds information about the
range of the current sample, which must be used to index the correct calibration values.
Table 3-14. Primary Sample Interpretation
Field Bit position Description
ID 23:22 Set to 0b10 for this packet.
Range 21:20 For XAM the range field is used as an index for the calibration to be used.
For PAM, 0 means low range, 1 means high range and 2 means invalid
sample and the previous value should be used instead.
Sample rate 19:16 The sample rate can be ignored as this is constant for the current
implementation. For XAM it is 16kHz. For PAM it is 62.5kHz.
Sample 15:0 The raw value of the sample is used together with the calibration data to
calculate the actual current value.
Auxiliary sample
The auxiliary sample packet transmits A- and B-channel voltage and B-channel current. It is currently only
used for PAM. Whenever such a packet is received it should be timestamped with the same timestamp as
the latest primary packet.
Atmel Data Gateway Interface [USER GUIDE]
Atmel-32223A-Data-Gateway-Interface_User Guide-09/2016
17
Page 18

Table 3-15. Auxiliary Sample Interpretation
Field Bit position Description
ID 15:14 Set to 0b00 for this packet.
Channel 13:12 0 = B Current, 1 = B Voltage, 2 = A Voltage.
Sample 11:0 For voltage data divide the raw value by -200 to get the measured voltage. For
3.6.2. Configuration
The power configuration consists of a generic section that can be used to control the power measurement
and related functionality. There is also a section that is specific to the type of power coprocessor used.
The specific section contains the calibration that is required to interpret the incoming data and get the
correct output values.
Table 3-16. Generic Configuration Parameters
Field ID Description
Type 0 Type of coprocessor for power measurement.
current data use the calibration values.
• XAM = 0x10
• PAM = 0x11
Channel 1 Setting a bit to 1 will activate the related channel; bit 0=A, bit 1=B.
Calibrate 2 For XAM, any write will trigger calibration. For PAM, the value will decide the type of
calibration performed; 2 = Reset to factory, 3 = A channel, 4 = B channel.
Lock range 3 For PAM, setting to 1 will lock the A channel in high range. For XAM, not
implemented.
Output voltage 4 For PAM, sets the output voltage of the target supply to the given value in mV. For
XAM, not implemented.
XAM
The XAM coprocessor calibration start at parameter ID 10. It consists of four blocks of configuration
parameters, one for each supported range. The blocks has the structure as described in the table below.
Note that 'N' refers to the range index.
Table 3-17. XAM Range Calibration Parameters
Field ID Type Description
Token N×12 + 10 uint16 The lower byte contains the id of the range on the form 0xnn (n =
N+1). Note that the sample field in the data packet uses 0indexing, where this field uses 1-indexing. The upper byte
identifies the state of the calibration:
• 0 = Uncalibrated
• 1 = Factory calibrated
• 2 = User calibrated
Offset
correction
N×12 + 13 uint16 Subtract this value from the raw value to correct offset error.
Atmel Data Gateway Interface [USER GUIDE]
Atmel-32223A-Data-Gateway-Interface_User Guide-09/2016
18
Page 19

Field ID Type Description
Float gain
N×12 + 14 float Multiply the offset corrected raw value with this gain correction.
correction
µA Resolution N×12 + 20 float Resolution in µA. Factor to multiply the corrected raw value with to
get the current in µA.
PAM
The PAM coprocessor, having a wider range, has a more complex model for calibration. To read the PAM
calibration it is necessary to read the entire block of parameter values from 10 to 175 into a buffer. The
buffer can then be parsed into the following sections:
The 32-byte header:
Table 3-18. PAM Calibration Header
Field Offset Type Description
Format 0 uint8 Calibration format version. Set to 2 for this version.
Data invalidation 1 uint8 Is set to zero to indicate successful calibration
Local A-channel
calibration
2 int16 Contains an averaged offset value for the high range of channel
A, as used internally by the PAM.
User calibration flag 4 uint8 Indicates whether the calibration data is the result of a factory
( 0 ) or user ( 1 ) calibration.
The 512-byte A-Channel calibration parameters:
The 'N' parameter represents the eight voltage ranges on the PAM, as determined by this formula:
= 1.6 +
Table 3-19. PAM CHA Calibration Parameters
. Use the calibration point that is closest to the actual voltage reported by the tool.
1.8
Field Offset Type Description
Format 0 uint8
Data invalidation 1 uint8 Is set to zero to indicate successful calibration
High range calibration
data
Low range calibration
data
N×60 + 8 see below Contains the calibration data for voltage N for the high
range of the A-channel as described below.
N×60 + 22 see below Contains the calibration data for voltage N for the low
range of the A-channel as described below.
For each calibration voltage, the PAM A-channel calibration data contains a two-segment linearization for
each range. The top segment of the low range and the low segment of the high range use the same
calibration currents and helps ensure a good transition between the ranges.
Table 3-20. PAM CHA Calibration Data
Field Offset Type Description
High level offset 0 int16
High level gain 2 float
Atmel Data Gateway Interface [USER GUIDE]
Atmel-32223A-Data-Gateway-Interface_User Guide-09/2016
19
Page 20

Field Offset Type Description
Crosspoint 6 int16 The cross-point indicates the raw data value where the high and low
segment meet.
Low level offset 8 int16
Low level gain 10 float
The B-Channel calibration data is contained in the remainder of the calibration:
The 'N' parameter represents the eight voltage ranges on the PAM.
Table 3-21. PAM CHB Calibration Parameters
Field Offset Type Description
Format 0 uint8
Data invalidation 1 uint8 Is set to zero to indicate successful calibration
Offset N×14 + 2 int16
Gain N×14 + 4 float
Atmel Data Gateway Interface [USER GUIDE]
Atmel-32223A-Data-Gateway-Interface_User Guide-09/2016
20
Page 21

4. Revision History
Doc Rev. Date Comments
32223A 09/2016 Initial document release.
Atmel Data Gateway Interface [USER GUIDE]
Atmel-32223A-Data-Gateway-Interface_User Guide-09/2016
21
Page 22

Atmel Corporation 1600 Technology Drive, San Jose, CA 95110 USA T: (+1)(408) 441.0311 F: (+1)(408) 436.4200 | www.atmel.com
©
2016 Atmel Corporation. / Rev.: Atmel-32223A-Data-Gateway-Interface_User Guide-09/2016
Atmel®, Atmel logo and combinations thereof, Enabling Unlimited Possibilities®, and others are registered trademarks or trademarks of Atmel Corporation in U.S. and
other countries. Other terms and product names may be trademarks of others.
DISCLAIMER: The information in this document is provided in connection with Atmel products. No license, express or implied, by estoppel or otherwise, to any
intellectual property right is granted by this document or in connection with the sale of Atmel products. EXCEPT AS SET FORTH IN THE ATMEL TERMS AND
CONDITIONS OF SALES LOCATED ON THE ATMEL WEBSITE, ATMEL ASSUMES NO LIABILITY WHATSOEVER AND DISCLAIMS ANY EXPRESS, IMPLIED
OR STATUTORY WARRANTY RELATING TO ITS PRODUCTS INCLUDING, BUT NOT LIMITED TO, THE IMPLIED WARRANTY OF MERCHANTABILITY,
FITNESS FOR A PARTICULAR PURPOSE, OR NON-INFRINGEMENT. IN NO EVENT SHALL ATMEL BE LIABLE FOR ANY DIRECT, INDIRECT,
CONSEQUENTIAL, PUNITIVE, SPECIAL OR INCIDENTAL DAMAGES (INCLUDING, WITHOUT LIMITATION, DAMAGES FOR LOSS AND PROFITS, BUSINESS
INTERRUPTION, OR LOSS OF INFORMATION) ARISING OUT OF THE USE OR INABILITY TO USE THIS DOCUMENT, EVEN IF ATMEL HAS BEEN ADVISED
OF THE POSSIBILITY OF SUCH DAMAGES. Atmel makes no representations or warranties with respect to the accuracy or completeness of the contents of this
document and reserves the right to make changes to specifications and products descriptions at any time without notice. Atmel does not make any commitment to
update the information contained herein. Unless specifically provided otherwise, Atmel products are not suitable for, and shall not be used in, automotive
applications. Atmel products are not intended, authorized, or warranted for use as components in applications intended to support or sustain life.
SAFETY-CRITICAL, MILITARY, AND AUTOMOTIVE APPLICATIONS DISCLAIMER: Atmel products are not designed for and will not be used in connection with any
applications where the failure of such products would reasonably be expected to result in significant personal injury or death (“Safety-Critical Applications”) without
an Atmel officer's specific written consent. Safety-Critical Applications include, without limitation, life support devices and systems, equipment or systems for the
operation of nuclear facilities and weapons systems. Atmel products are not designed nor intended for use in military or aerospace applications or environments
unless specifically designated by Atmel as military-grade. Atmel products are not designed nor intended for use in automotive applications unless specifically
designated by Atmel as automotive-grade.
 Loading...