

Page 1
APPLICATION NOTE
Atmel AVR1939: XMEGA-C3 Xplained Getting Started Guide
Atmel XMEGA C
Features
• Atmel
®
AVR® ATxmega384C3 microcontroller
• OLED display with 128x32 pixels resolution
• Analog sensors
• Ambient light sensor
• Temperature sensor
• Analog filter
• Digital I/O
• Two mechanical buttons
• Two user LEDs, one power LED and one status LED
• Four expansion headers
• Touch
• Two Atmel AVR QTouch
®
button
• Memory
• microSD Card
Introduction
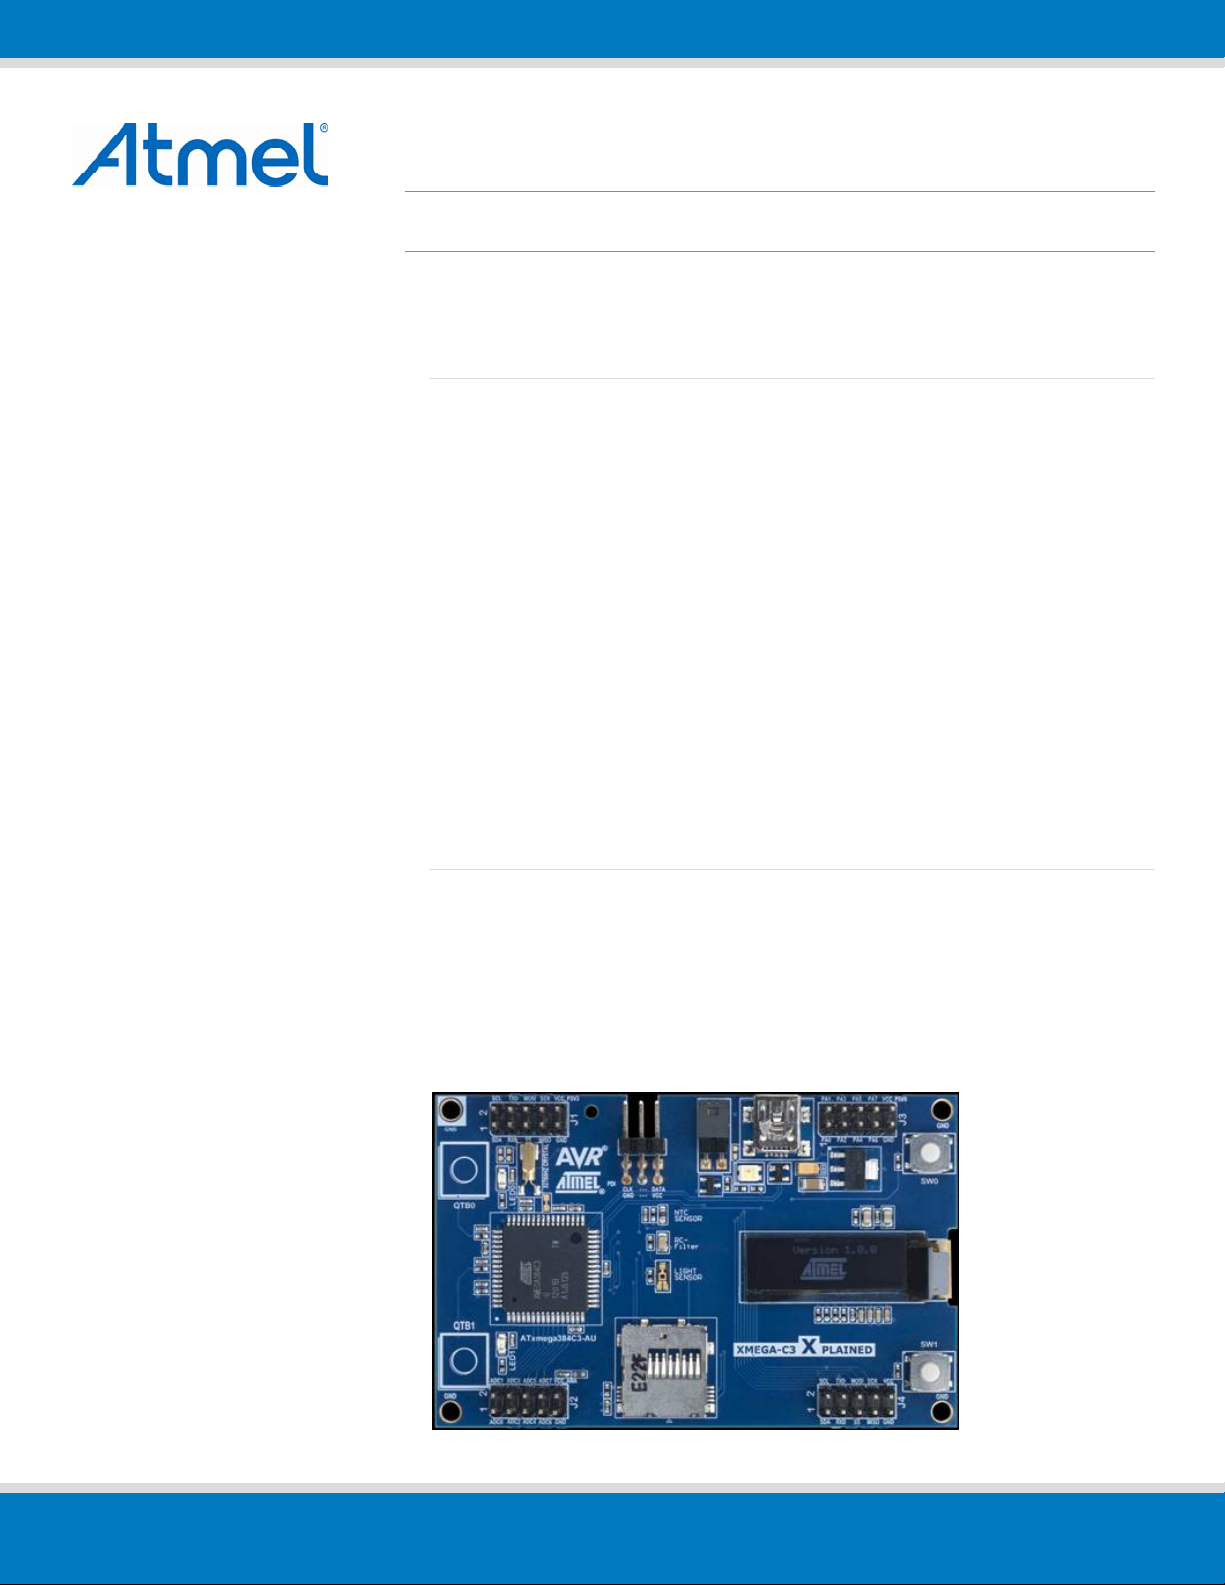
The Atmel AVR XMEGA-C3 Xplained evaluation kit is a hardware platform to evaluate the Atmel ATxmega384C3 microcontroller.
®
The kit offers a larger range of features that enables the Atmel AVR XMEGA
get started using XMEGA peripherals right away and understand how to integrate the
XMEGA device in their own design.
user to
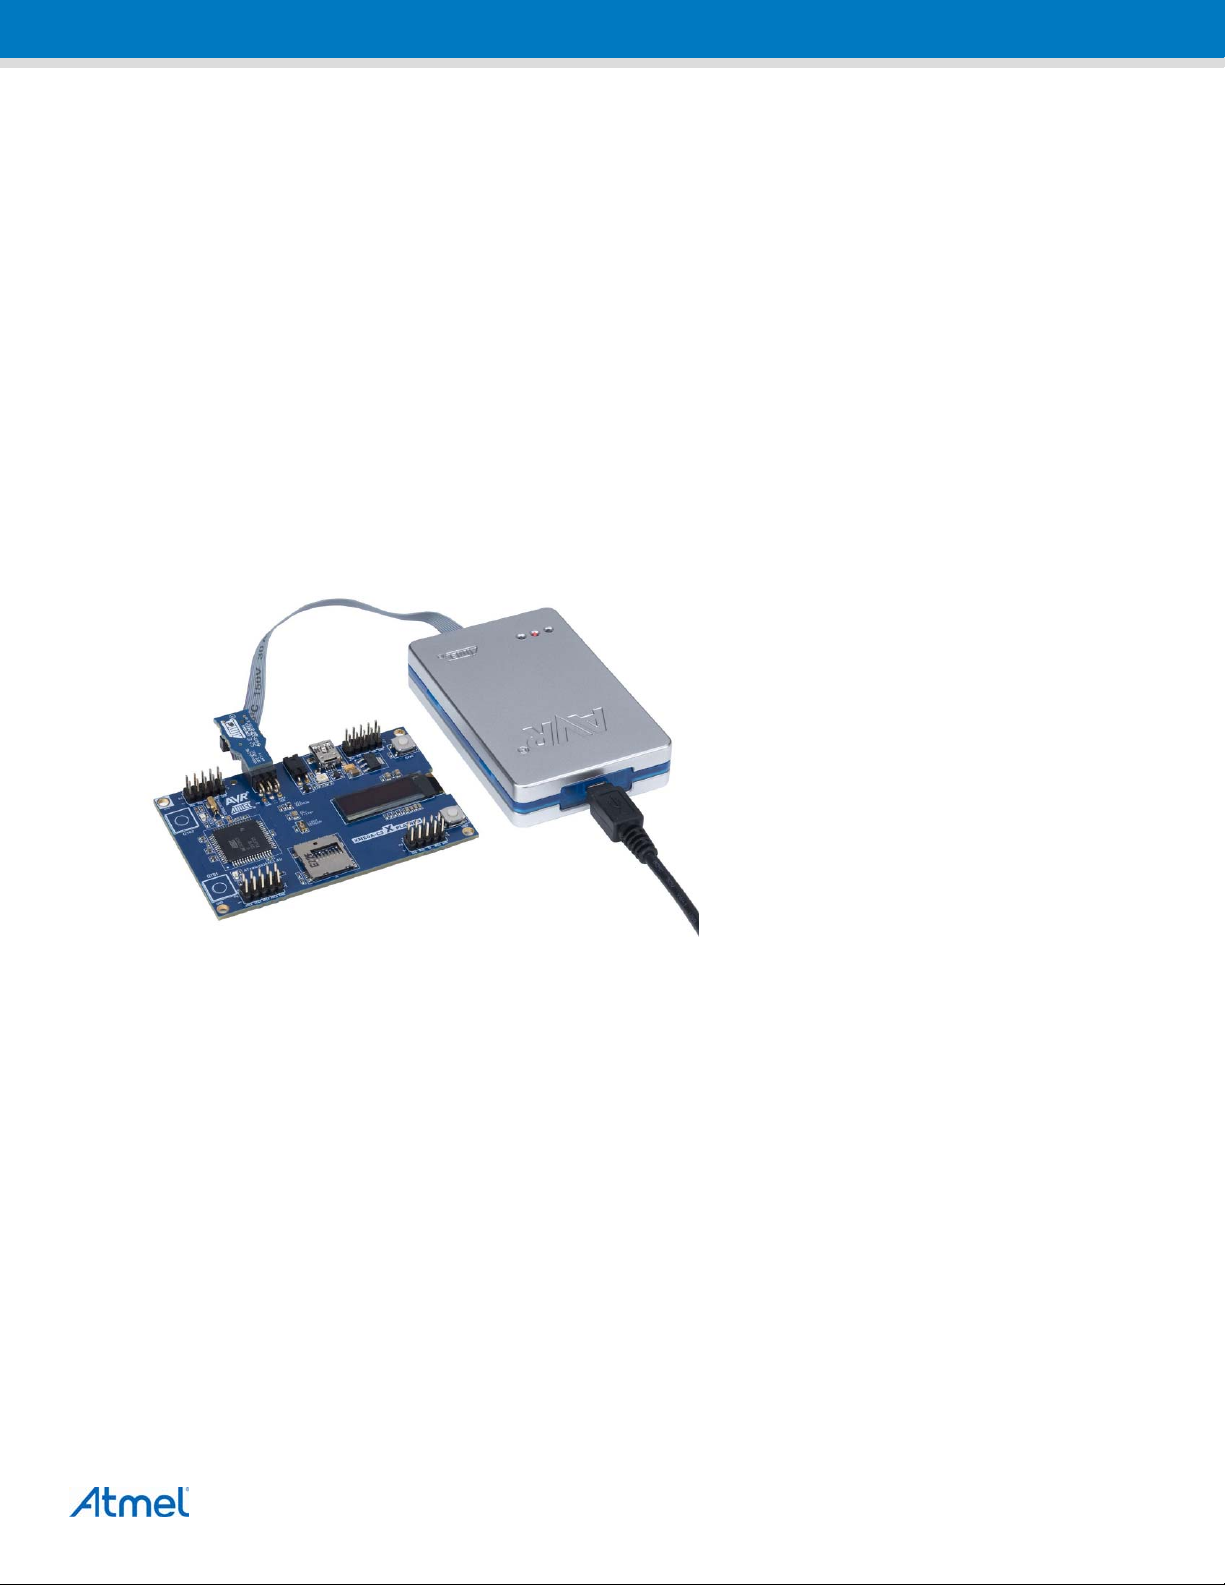
Figure 1. XMEGA-C3 Xplained evaluation kit.
42054A−AVR−02/2013
Page 2

Table of Contents
1. Board overview .................................................................................... 3
2. Quick-start ............................................................................................ 4
2.1 Programming the kit .......................................................................................... 6
2.1.1 Using the bootloader ........................................................................... 6
2.1.2 Using a programming tool ................................................................... 6
3. Connecting the
3.1 USB power supply ............................................................................................. 7
3.2 Atmel AVR JTAGICE3 ...................................................................................... 7
3.3 Atmel AVR ONE! ............................................................................................... 7
3.4 Atmel AVR JTAGICE mkll ................................................................................. 8
3.5 Atmel AVR Dragon ............................................................................................ 8
4. Tools and d
5. EVALUATI
6. Revision history
kit ................................................................................ 7
ocumentation for the Atmel XMEGA-C3 Xplained ............. 9
ON BOARD/KIT IMPORTANT NOTICE ........................... 10
.................................................................................. 11
Atmel AVR1939: XMEGA-C3 Xplained Getting Started Guide [APPLICATION NOTE]
42054A−AVR−02/2013
2
Page 3
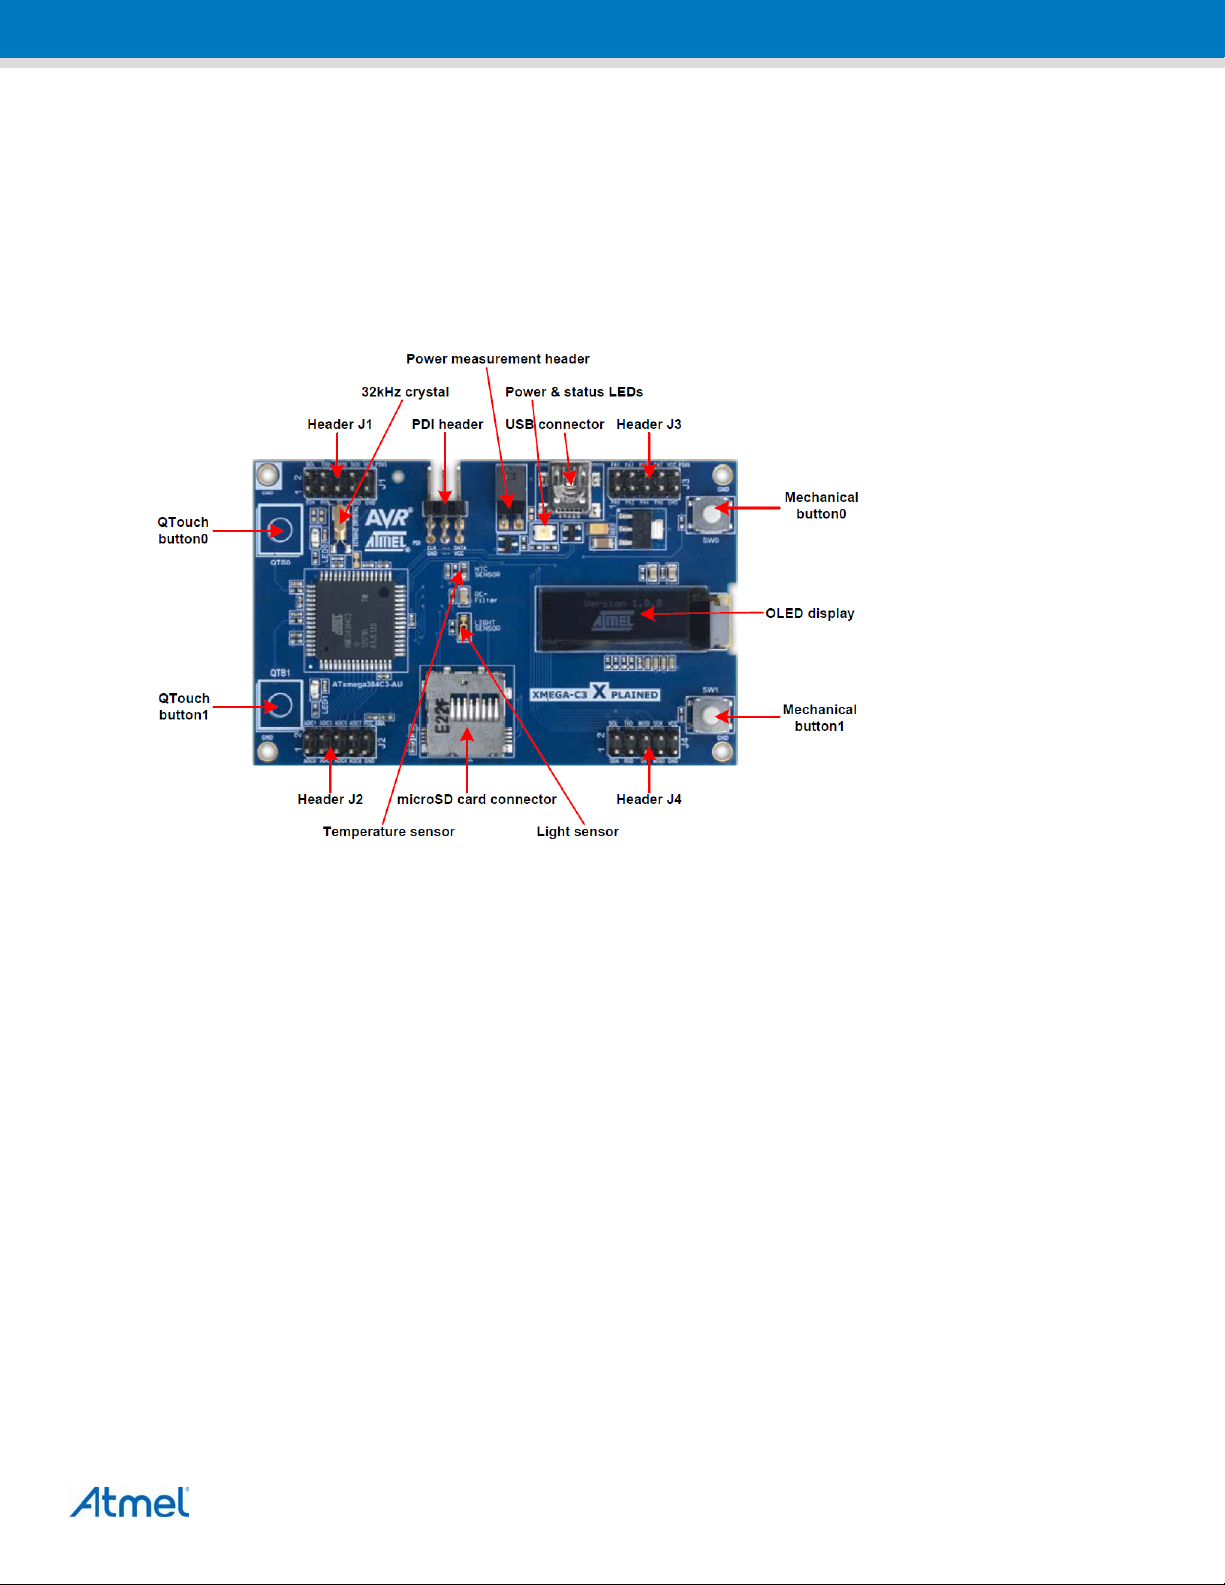
1. Board overview
Figure 1-1 shows most of the available features on the board. For more detailed information on the Atmel XMEGA-C3
Xplained hardware, take a look at the Atmel application note “Atmel AVR1925: XMEGA-C3 Xplained Hardware User’s
Guide”.
Figure 1-1. Overview of XMEGA-C3 Xplained kit.
Atmel AVR1939: XMEGA-C3 Xplained Getting Started Guide [APPLICATION NOTE]
42054A−AVR−02/2013
3
Page 4
2. Quick-start
To be able to run the preprogrammed code, you need to connect the Atmel AVR XMEGA-C3 Xplained evaluation kit
with a USB cable (standard A to mini-B or mini AB) to a PC or USB hub.
Once the kit is powered, the display first shows explanation of how to use the demonstration; SW1 pressed will skip this
explanation.
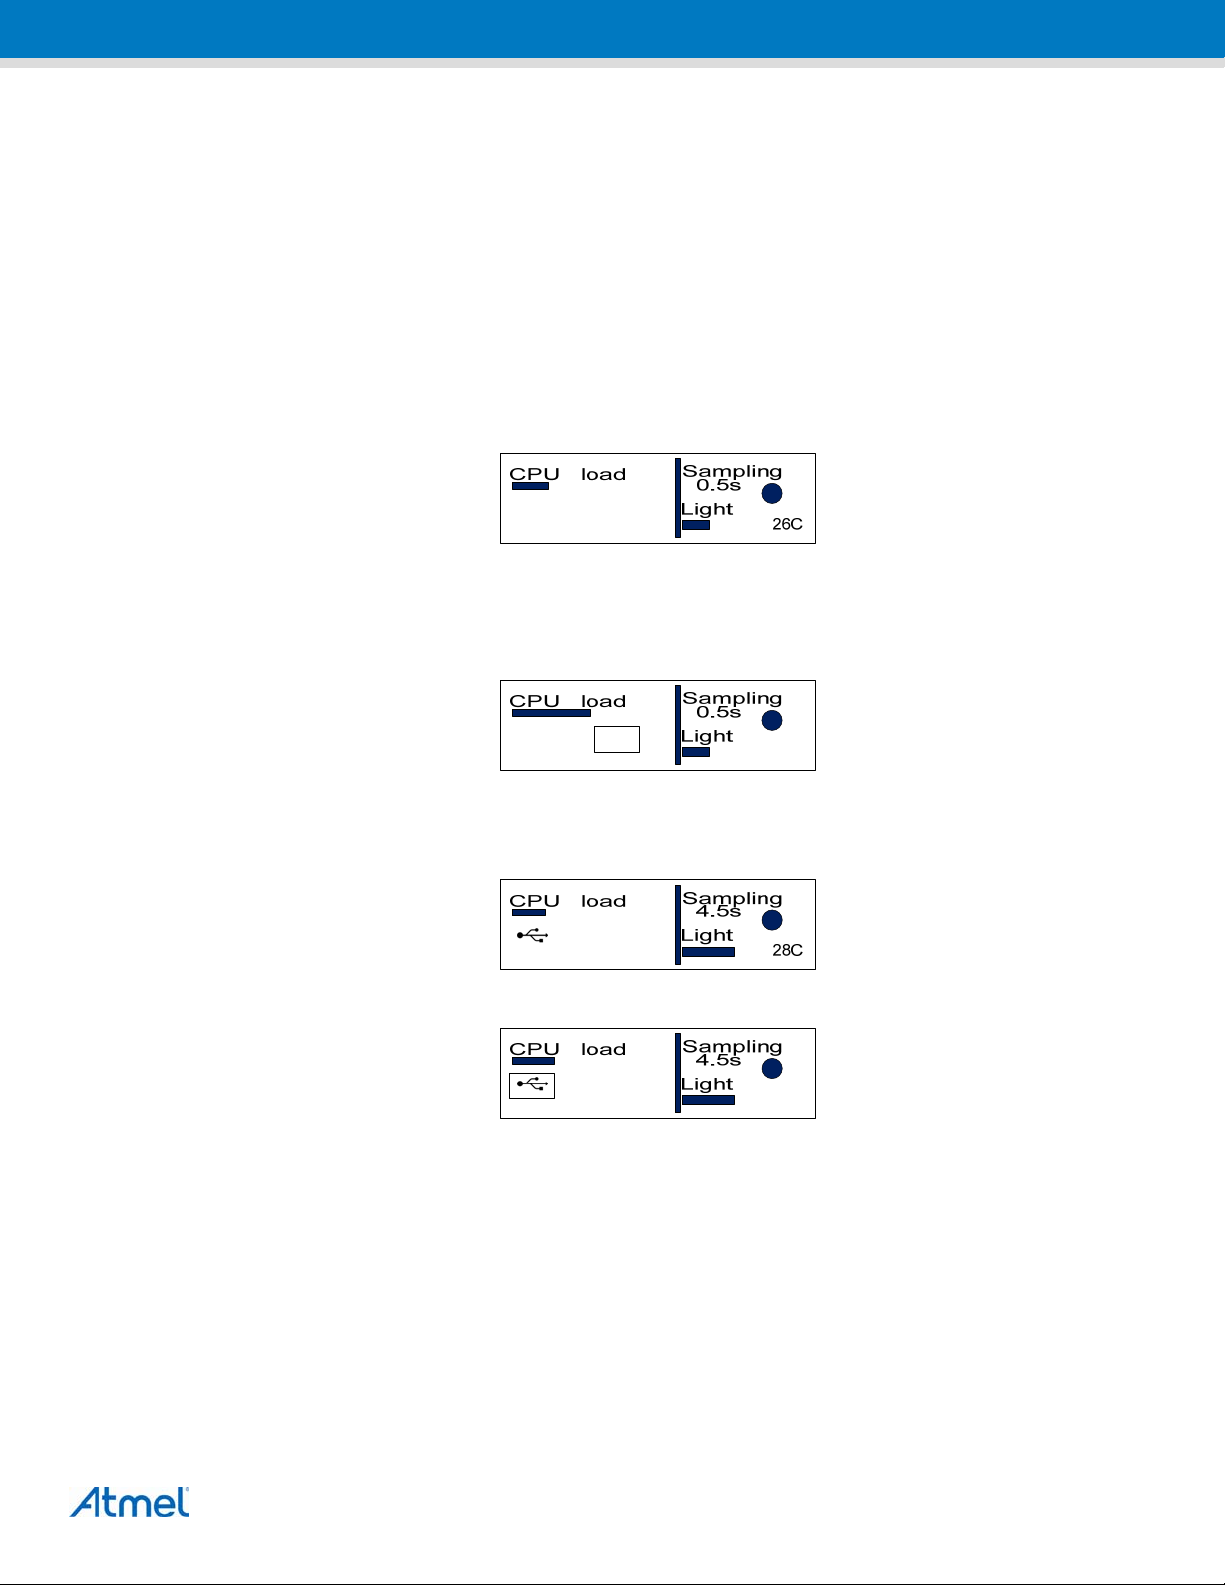
The application starts then a sensor acquisition task scheduled by the real-time counter (RTC). The temperature and
light sensors values are displayed on the OLED. Pressing QTB0 increases sampling rate per 0.5s. Pressing QTB1 decreases sampling rate per 0.5s.
Figure 2-1. Default display during sensors acquisition.
When a microSD card is inserted, microSD icon is displayed. During microSD card installation, a rectangle shows the
read/write access and the CPU load is increased consequently.
Figure 2-2. Display when microSD card is active.
uSD
Pressing SW0 activates USB, the USB icon is displayed.
Figure 2-3. Display when USB is activated.
Figure 2-4. Display when the USB Host opens the Virtual Port.
CPU activity varies according to demo modes. When USB is activated, display will show a CPU load light increase while
USB Host accesses to microSD with multiple read/write operations will increase consequently this CPU load.
The demo application allows also the XMEGA-C3 Xplained board to communicate with a USB device composite including:
26C
28C
• a USB Mass Storage Class (MSC)
• a USB Communication Device Class (CDC)
The MSC interface uses the native driver from USB host O.S. and does not require a specific setup. Thus, the microSD
card is mounted as an external disk in O.S.
Atmel AVR1939: XMEGA-C3 Xplained Getting Started Guide [APPLICATION NOTE]
42054A−AVR−02/2013
4
Page 5
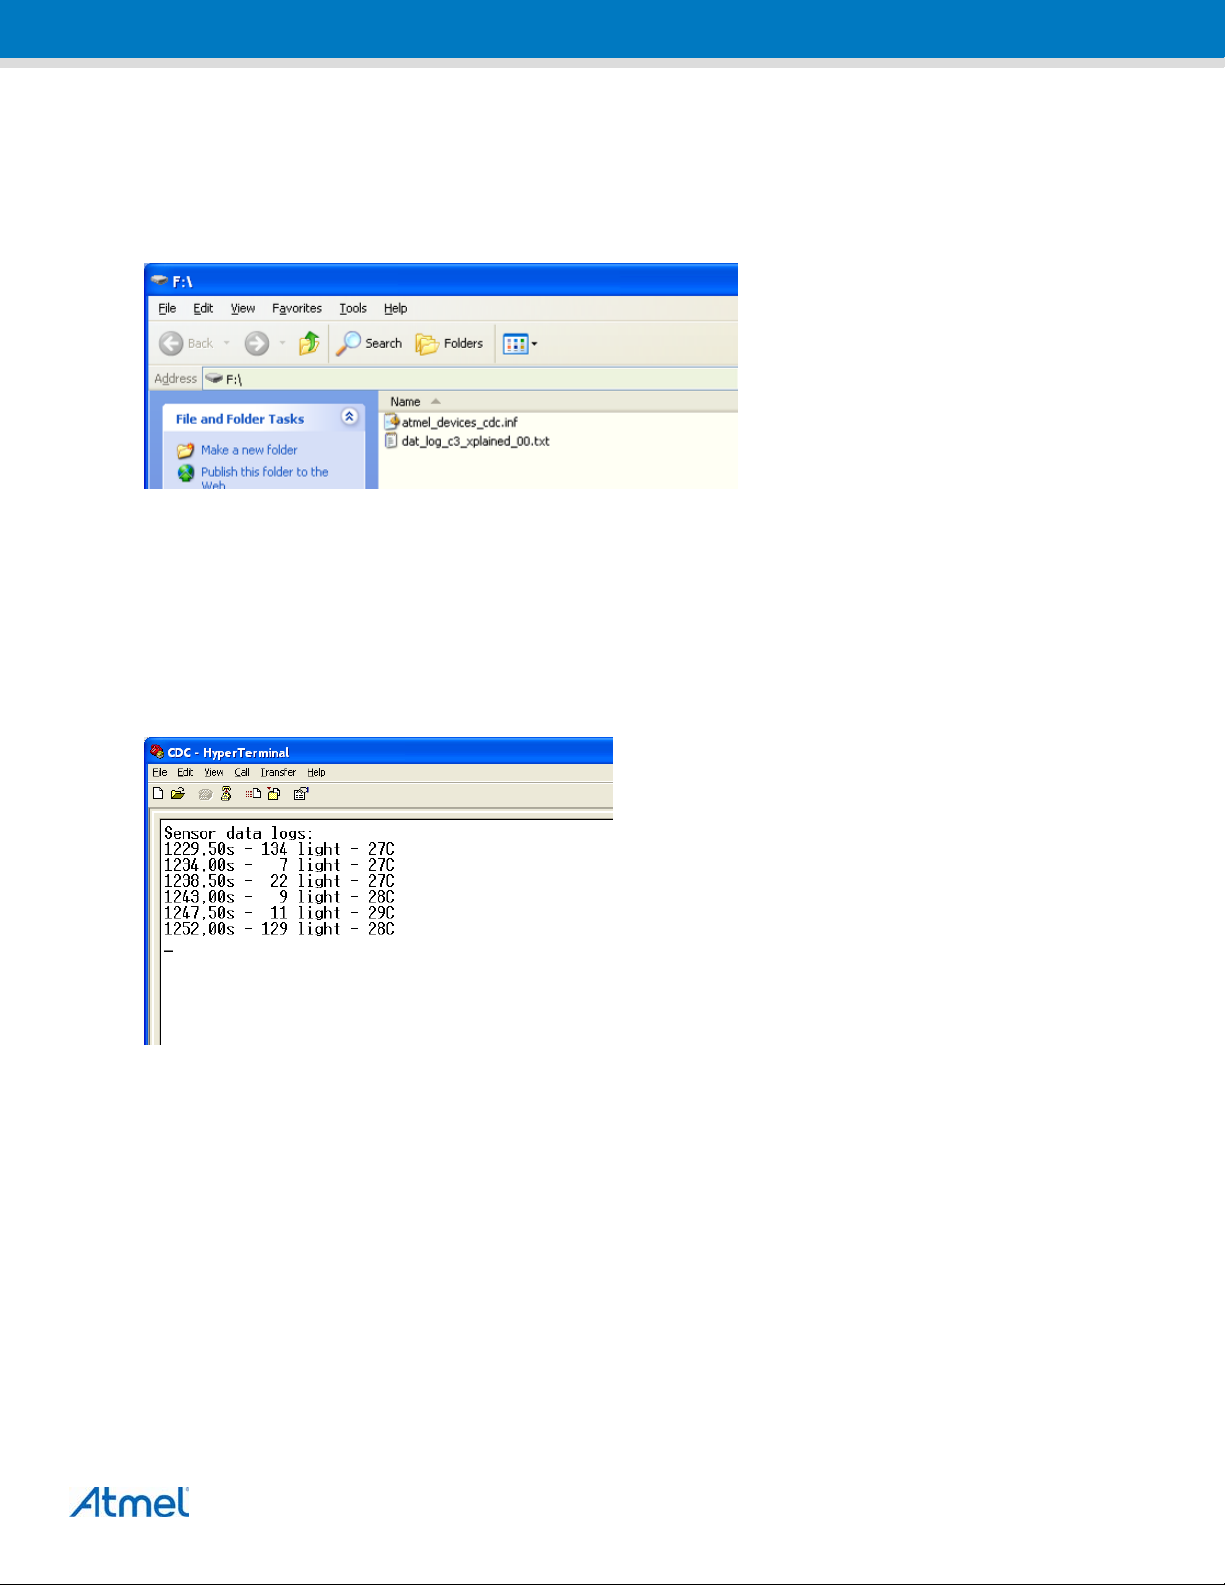
To avoid a file system corruption, the data logging is stopped on microSD while the USB is enabled. All sensor data
logged on the microSD card are stored in a file named dat_log_c3_xplained_xx.txt where xx will be incremented from
00 for each new session of sensors data storage on the card.
Figure 2-5. USB Mass Storage Class and removable disk content.
The CDC interface uses the native driver from UNIX® O.S., but requires a specific one on Windows® O.S. When the
USB feature is disabled, the Windows driver file is created by demo application on the microSD card. After USB MSC
startup or through another SD card reader, the atmel_devices_cdc.inf file can be selected to install the new USB CDC
interface.
After having installed the CDC driver, the Virtual COM port can be opened through a terminal.
Figure 2-6. USB Communication Device Class.
Note:
The demo application for the XMEGA-C3 Xplained is available through the Atmel Software Framework (ASF), version
3.5.0 or later. The demo application is available as an example project in Studio 6 and can be accessed by clicking File
-> New -> Example Project, and selecting “Demo application for XMEGA-C3 Xplained”. In-depth documentation for the
demo application is available in the Atmel AVR1940 XMEGA-C3 Xplained Software User Guide.
To modify the example code or write new code and compile it, you need a toolchain for the Atmel AVR microcontrollers
and an IDE to edit and debug code. Atmel provides both with Studio 6. More information about all available documentation and tools is available in the Chapter 4.
The Virtual COM port is not connected to a true RS232 COM port, thus the baudrate and parity parameters can
be ignored.
Atmel AVR1939: XMEGA-C3 Xplained Getting Started Guide [APPLICATION NOTE]
42054A−AVR−02/2013
5
Page 6

2.1 Programming the kit
2.1.1 Using the bootloader
The kit can be programmed either from an external programming tool or through a USB bootloader which is preprogrammed on the device. The bootloader is evoked by pushing the push button (SW0) during power-on, for example
push and hold the button and hence connect an USB cable to the kit. Programming can be performed through the DFU
programmer FLIP. How to use FLIP to download new firmware to the kit is described in-depth in the application note
Atmel AVR1929: USB DFU Bootloader for XMEGA A3.
2.1.2 Using a programming tool
If it is desired to program the kit without the help of the on-chip bootloader, or if debugging is required, it is possible to
do this with various tools. The most common tools and how they can be connected are listed in Chapter 3. Atmel
®
dio
6 can be used as front-end for these programming tools.
Stu-
Atmel AVR1939: XMEGA-C3 Xplained Getting Started Guide [APPLICATION NOTE]
42054A−AVR−02/2013
6
Page 7
3. Connecting the kit
3.1 USB power supply
Connect a USB cable between the board and a PC or a USB power supply to power the kit. This is all that is needed.
When power is applied the power/status LED will light up in green.
Do not power the board without having the jumper next to the USB connector or an amperemeter mounted.
When connecting the Atmel XMEGA-C3 Xplained to a PC, the operating system will request a driver file for installing
the serial communication driver. This driver file is available in micro SD card which was written by the initial application
firmware. The driver file supports both 32- and 64-bit versions of Windows XP and Windows 7. Driver installs are not
necessary on Linux
3.2 Atmel AVR JTAGICE3
Figure 3-1. The 100mil PDI adapter must be used to connect to the kit.
®
operating systems.
3.3 Atmel AVR ONE!
The AVR ONE! PDI connector can be connected to the XMEGA-C3 Xplained kit with a standoff adapter (adapter is
marked with "nr.1").
Atmel AVR1939: XMEGA-C3 Xplained Getting Started Guide [APPLICATION NOTE]
42054A−AVR−02/2013
7
Page 8

Figure 3-2. Connecting Atmel AVR ONE! to an Atmel XMEGA-C3 Xplained board.
3.4 Atmel AVR JTAGICE mkll
The grey female 10-pin header on the AVR JTAGICE mkII has to be used when connecting to the kit. The opening in
the board is made to fit the orientation tab on the header.
Note: When using PDI with the AVR JTAGICE mkII it is necessary to use the squid cable. Follow the instructions in
the AVR JTAGICE mkII manual and the silkscreen description for the programming header.
Figure 3-3. Connecting AVR JTAGICE mkll to an XMEGA-C3 Xplained board.
3.5 Atmel AVR Dragon
In order to connect the AVR Dragon™ to the XMEGA-C3 Xplained, a 6-pin header cable is needed. Connect the cable
between the JTAG connector on the AVR Dragon kit and the XMEGA-C3 Xplained JTAG connector. Pin 1 on the
XMEGA-C3 Xplained kit is marked with a square pad.
Atmel AVR1939: XMEGA-C3 Xplained Getting Started Guide [APPLICATION NOTE]
42054A−AVR−02/2013
8
Page 9

4. Tools and documentation for the Atmel XMEGA-C3 Xplained
The following list contains links to the most relevant documents, software and tools for the XMEGA-C3 Xplained:
Xplained products
Atmel AVR
consists of a series of low cost MCU boards for evaluation and demonstration of feature and capabilities of different
MCU families.
Xplained USB CDC driver
The driver file supports both 32- and 64-bit versions of Windo
on Linux operating systems.
XMEGA-C3 Xplained schematics
Package cont
AVR1925: XMEGA-C3 Xplained Hardware Users Guide
Hard
AVR1939: XMEGA-C3 Xplained Getting Started Guide
This document.
AVR1940: XMEGA-C3 Xplained Software User Guide
User Guide fo
Xplained is a series of small-sized and easy-to-use evaluation kits for 8- and 32-bit AVR microcontrollers. It
ws XP and Windows 7. Driver installs are not necessary
aining schematics, BOM, assembly drawings, 3D plots, layer plots…
ware Users Guide for the XMEGA-C3 Xplained.
r the XMEGA-C3 Xplained demo software.
AVR1916: XMEGA USB DFU Bootloaders
User Guide fo
Atmel Studio 6
Free Atmel IDE for develop
Atmel FLIP (Flexible In-system Programmer)
BatchISP (FLI
the FLIP installation. It can be used to communicate with the preprogrammed USB DFU bootloader.
Atmel JTAGICE3
Mid-range development tool
bolic debugging, NanoTrace (if supported by the device) and device programming.
Atmel AVR JTAGICE mkII
A mid-range development to
debugging, NanoTrace (if supported by the device) and device programming (superseded by JTAGICE3).
Atmel AVR ONE!
A professsion
source level symbolic debugging, program trace and device programming. AVR ONE! supports the complete development cycle and is the fastest debugging tool offered from Atmel.
Atmel AVR Dragon
The AVR
bug (OCD) capability.
IAR Embedded Workbench
IAR™ Embedded Workbench is a commercial C/C++ compiler that is available for 8-bit AVR. There is a 30 day evaluation version as well as a 4k (code size limited) kick-start version available from their website.
r the XMEGA USB DFU bootloaders
ment of C/C++ and assembler code for Atmel microcontrollers.
P) is a command line tool for programming the flash and EEPROM memories of the AVR and is part of
for Atmel 8- and 32-bit AVR microcontrollers with on-chip debugging for source level sym-
ol for Atmel 8- and 32-bit AVR devices with on-chip debugging for source level symbolic
al development tool for all Atmel 8- and 32-bit AVR devices with On-Chip Debug capability. It is used for
Dragon sets a new standard for low cost development tools for 8- and 32-bit AVR devices with On Chip De-
®
for Atmel AVR
Atmel AVR1939: XMEGA-C3 Xplained Getting Started Guide [APPLICATION NOTE]
42054A−AVR−02/2013
9
 Loading...