

Page 1
Atmel AVR1935: XMEGA-A3BU Xplained Getting
Started Guide
Features
• Atmel® AVR® ATxmega256A3BU microcontroller
• FSTN LCD display with 128x32 pixels resolution
• Battery backup
• Analog sensors
- Ambient light sensor
- Temperature sensor
• Analog filter
• Digital I/O
- Three mechanical buttons
- Two user LEDs
- One power LED
- One status LED
- Four expansion headers
• Touch
- One Atmel AVR QTouch
• Memory
- Atmel AVR AT45DB642D DataFlash® serial flash
• Footprints for external memory
• Atmel AVR AT25DF series industry standard serial
®
button
8-bit Atmel
Microcontrollers
Application Note
1 Introduction
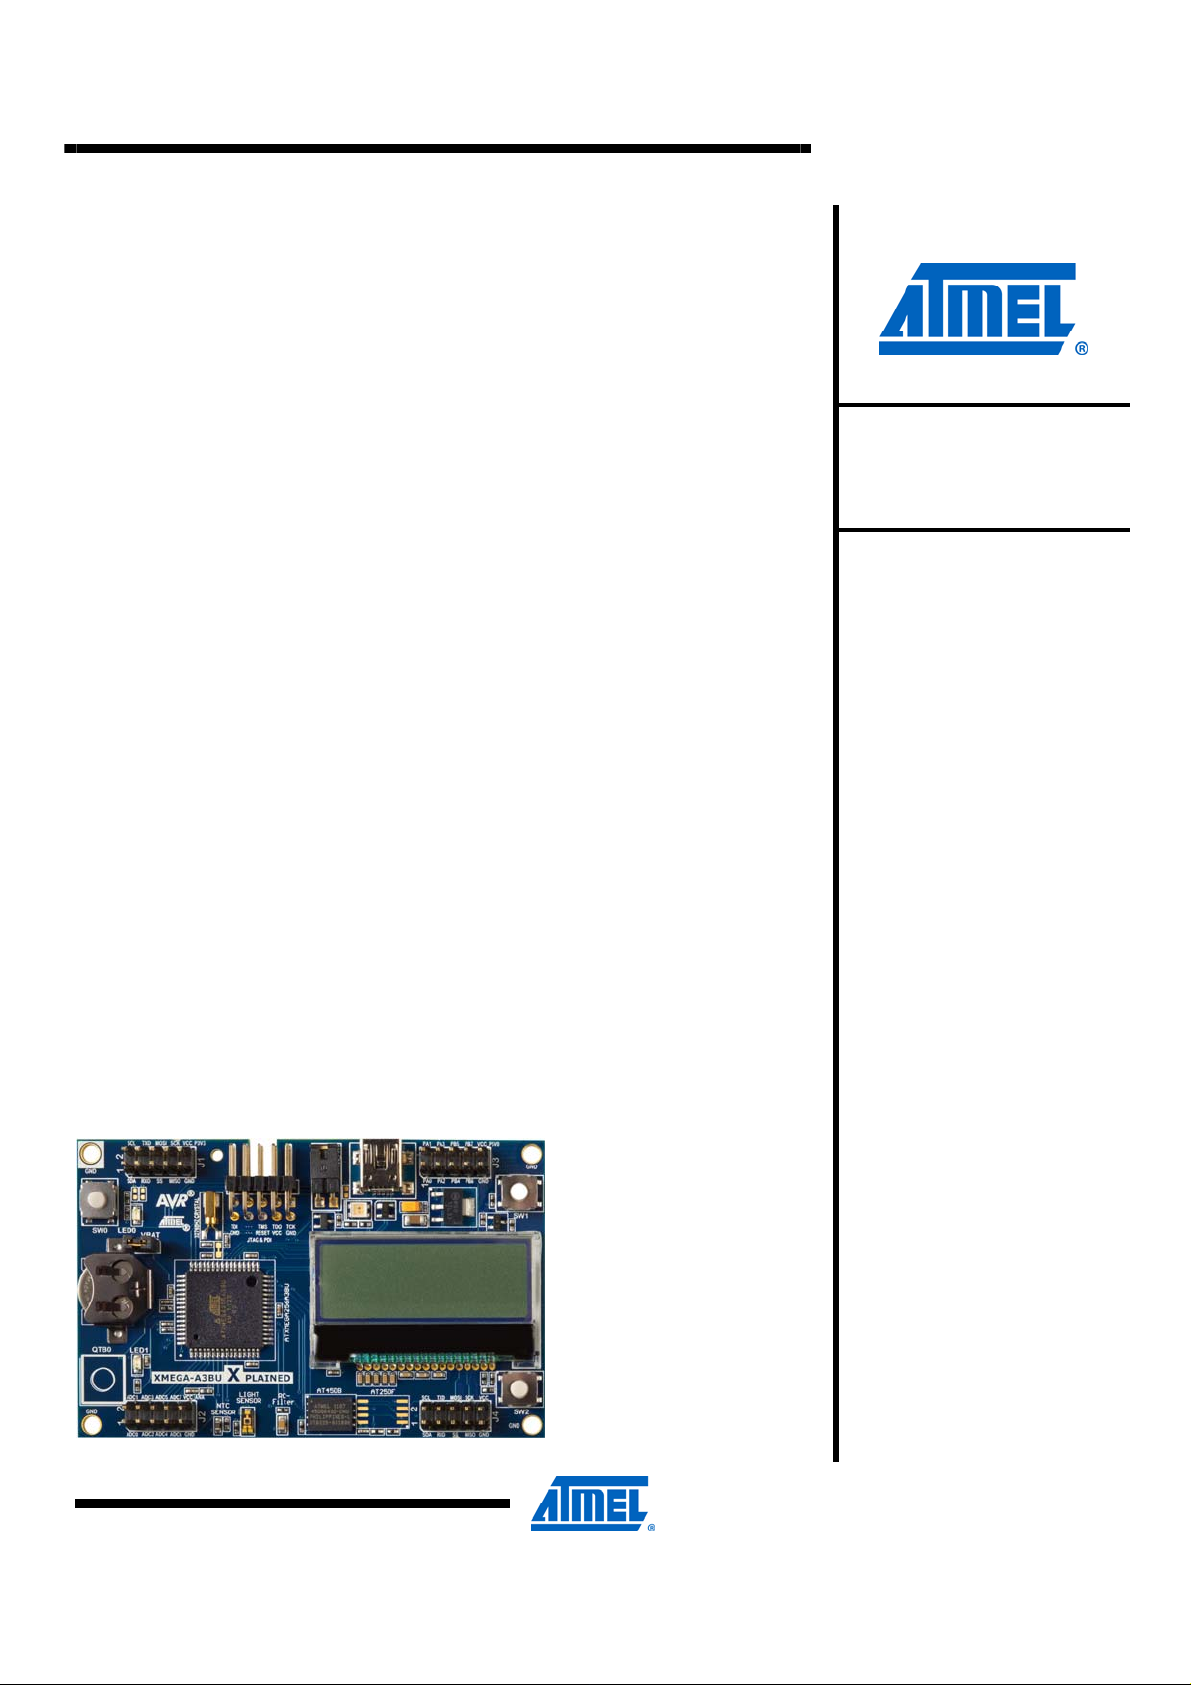
The Atmel AVR XMEGA®-A3BU Xplained evaluation kit is a hardware platform to
evaluate the Atmel ATxmega256A3BU microcontroller.
The kit offers a larger range of features that enables the Atmel AVR XMEGA user
to get started using XMEGA peripherals right away and understand how to
integrate the XMEGA device in their own design.
Figure 1-1. XMEGA-A3BU Xplained evaluation kit.
Rev. 8324B-AVR-09/11
Page 2
2 Board overview
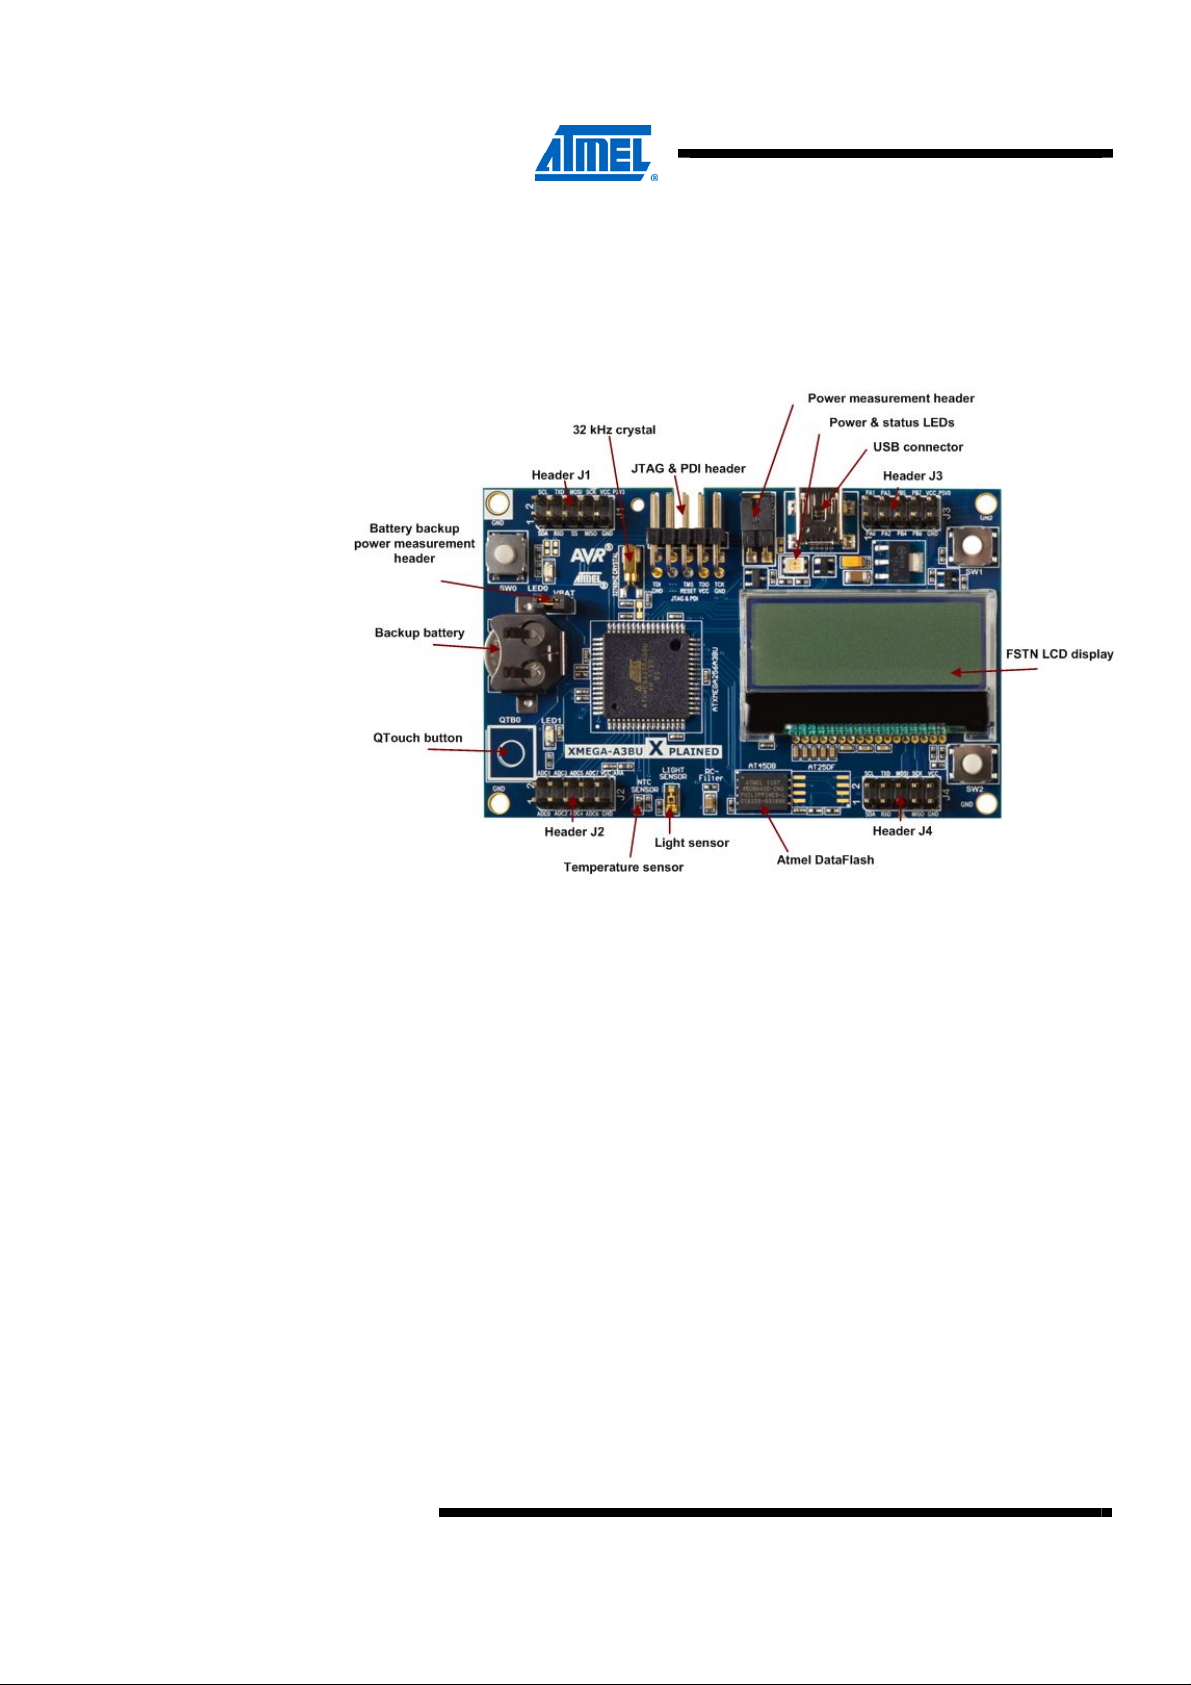
Figure 2-1 shows most of the available features on the board. For more detailed
information on the Atmel XMEGA-A3BU Xplained hardware, take a look at the Atmel
application note “AVR1923: XMEGA-A3BU Xplained Hardware User’s Guide”.
Figure 2-1. Overview of the Atmel AVR XMEGA-A3BU Xplained kit.
2
Atmel AVR1935
8324B-AVR-09/11
Page 3

3 Quick-start
Atmel AVR1935
To be able to run the preprogrammed code, you need to connect the Atmel AVR
XMEGA-A3BU Xplained evaluation kit with a USB cable (standard A to mini-B or mini
AB) to a PC or USB hub. Once the kit is powered it is possible to browse the menu
system with the on-board mechanical buttons and the touch button. The functions for
the buttons are:
• Top left mechanical button (SW0): Enter a menu
• Bottom left touch button (QTB0): Return from a menu
• Top right mechanical button (SW1): Browse the menu up
• Bottom right mechanical button (SW2): Browse the menu down
The demo application allows also the XMEGA-A3BU Xplained board to communicate
with a computer using USB with a CDC (Communications Device Class) setup,
allowing the keyboard to be used to navigate in the demo application. When the
XMEGA-A3BU Xplained board is connected for the first time, Windows will try to
install a driver for “Virtual CDC Com”. A driver file, XPLAINED_Virtual_Com_Port.inf,
is located in the demo application directory or can be downloaded from the Atmel
web-site (Xplained USB CDC driver download). If the driver i
the board will show up in the Device Manager under Ports (XPLAINED Virtual Com
Port (COM**)). This COM port can now be interfaced with your favorite terminal
software. The connection parameters are as follows:
s successfully installed,
• Baud rate: 115200 baud
• Data bits: 8
• Parity: None
• Stop bits: 1
• Flow control: None
If the connection has been successfully established, you should be greeted by this
text on the screen of your terminal:
Welcome to the XMEGA-A3BU Xplained Demo CDC interface!
Key bindings for LCD menu control:
Enter : Enter
Backspace : Back
Arrow Up : Up Arrow
Arrow Down : Down Arrow
The demo application for the XMEGA-A3BU Xplained is available through the Atmel
AVR Software Framework (ASF), version 2.6.0 or later. The demo application is
available as an example project in AVR Studio
File -> New -> Example Project, and selecting “Demo application for XMEGA-A3BU
Xplained”. In-depth documentation for the demo application is available in the
XMEGA-A3BU Xplained Software User Guide.
To modify the example code or write new code and compile it, you need a toolchain
for the Atmel AVR microcontrollers and an IDE to edit and debug code. Atmel
provides both with Studio 5. More information about all available documentation and
tools is available in the chapter 5.
®
5 and can be accessed by clicking
8324B-AVR-09/11
3
 Loading...