

Active Thermal Management
The trusted name in thermal protection
Dual-cool Installation Instructions
The Active Thermal Management Dual-cool is a self-contained ventilating system designed to
cool audio-video installations in closets or cabinets, whether the equipment is on shelves or in
racks.
Rack-mounted systems
To save valuable space on the front rails of the rack, Dual-cool can be mounted to the rack’s rear
rails. It will protrude into the rack only 7”, allowing it to be located behind equipment that does
not extend the full depth of the rack. It should be located near the top of the rack so that heat
sources are below it.
Shelf-mounted systems
Fasten the (optional) wall mount bracket securely 12” to 18” above the top shelf. The mounting
holes are spaced 16” apart; fasten it securely into wall studs. Using the screws provide, fasten the
Dual-cool to the bracket as shown.
All installations
Connect the tubing supplied with the Dual-cool to its exhaust port and run it to the area where the
hot air is to be exhausted. Use the backflow blocker (supplied) to hold the tubing against the wall
or ceiling into which a 4” hole has been made for air flow as shown. Attach the backflow
blocker to the wall or ceiling first, making certain that the movable disc is positioned to prevent
air from flowing towards the Dual-cool, then connect the tubing to the backflow blocker.
After mounting the Dual-cool, connect the output lead from the power supply to the power input
jack on the side of the Dual-cool’s chassis, and plug the power supply into an AC outlet.
Plug the thermal probe into its connector on the Dual-cool’s chassis. If the probe is in an
environment below about 90 degrees, the fans should not run.
25570 Rye Canyon Rd. Valencia, California 91355
(661) 294-7999 voice (661) 294-1115 fax
techinfo@activethermal.com www.activethermal.com
Using a hair dryer (NOT an open flame or heat shrink gun), warm the tip of the thermal
probe. At 90 degrees, the fans should begin to turn at a moderate speed. At about 100
degrees, the fans’ speed should increase.
The thermal probe should be placed where it will be most effective. It can either be
located on the major heat-producing component in the enclosure or near the top, where it
can sense the combined heat of all components in the enclosure. Some experimentation
may be necessary to find the optimum location for the probe.
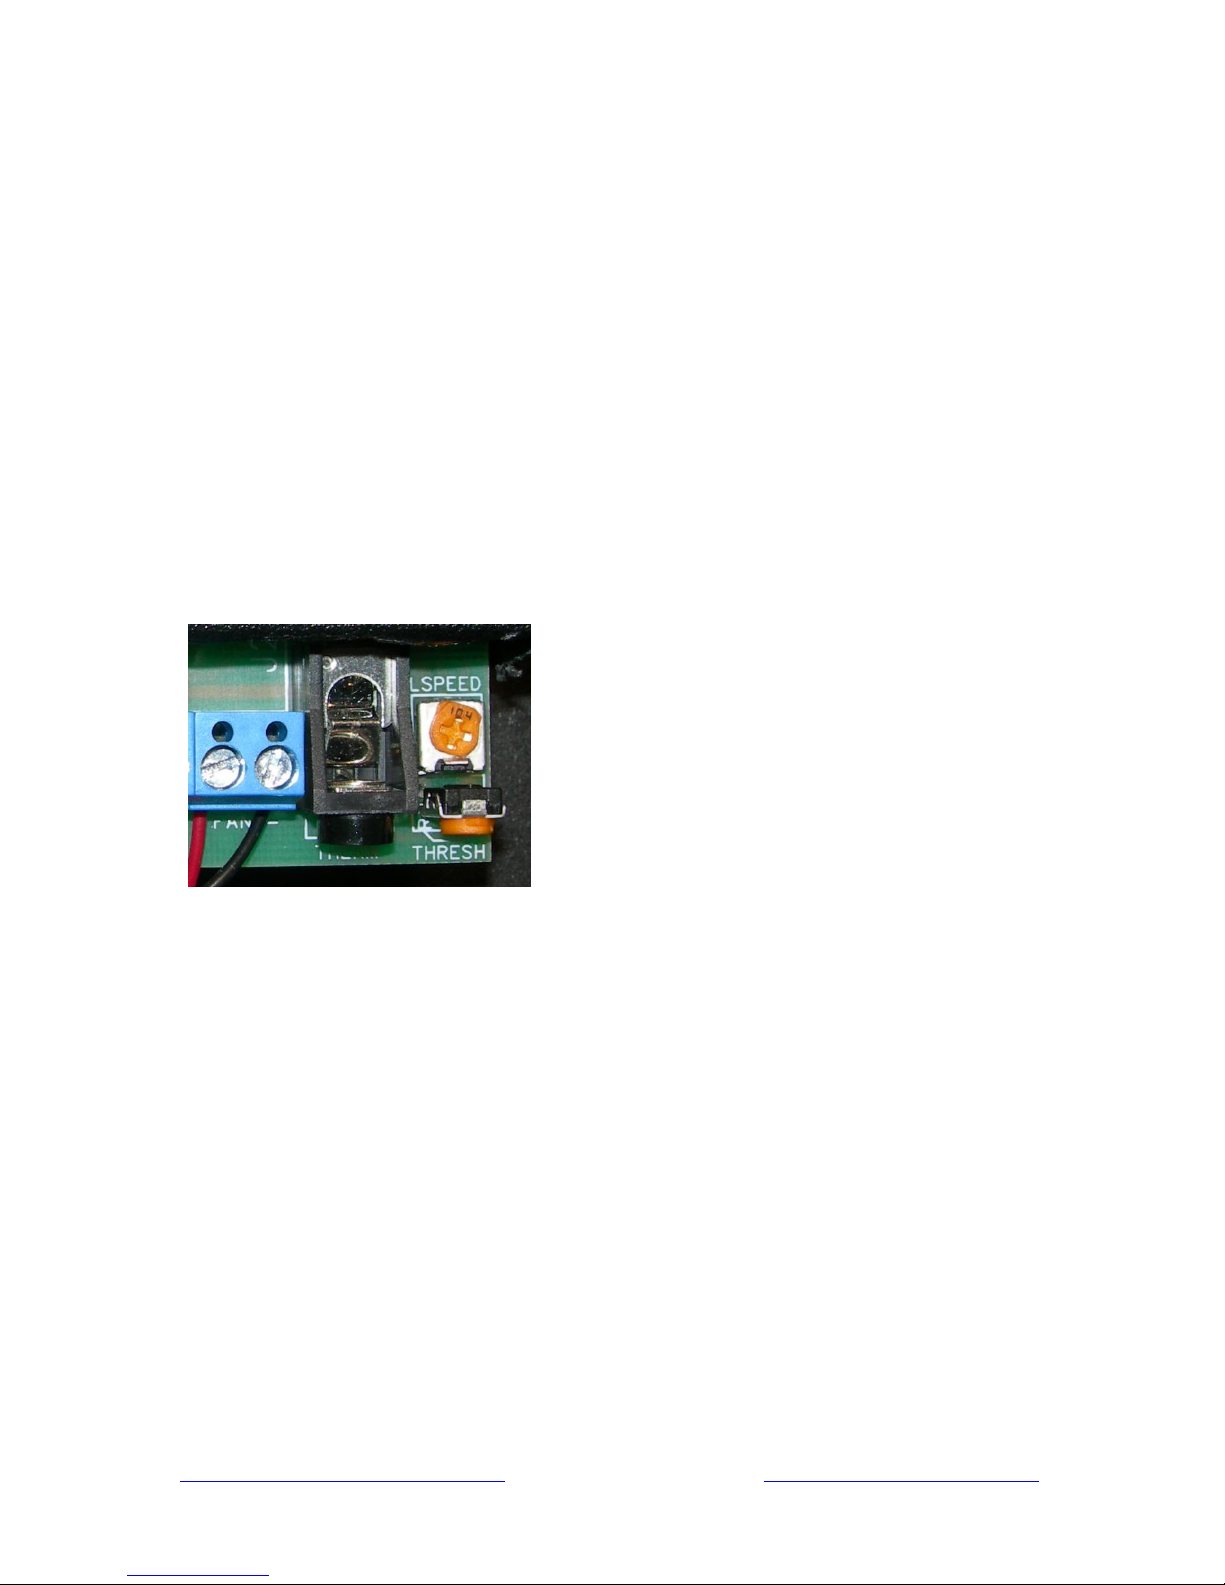
There are potentiometers on the printed wiring board inside the Dual-cool which control
the low-speed cut-in temperature and speed. Set at the factory to 90° and 50% of full
speed, these controls should not require adjustments. Should you wish to change the
factory settings, remove the 2 screws fastening the cover to the Dual-cool and slide it off.
The temperature at which low speed operation begins can be adjusted by turning the
“THRESH” control; how fast the fans turn in low speed operation can be adjusted by
turning the “L SPEED” control as shown in the picture below.
Note: High speed operation will always begin 10
degrees above the low speed starting temperature.
There are 3 leds on the pc board to aid the installer.
The green led simply indicates that power is
present. The yellow led will light to indicate lowspeed operation, and the red led lights when the
Dual-cool is in full speed mode (the yellow led will
remain lighted).
25570 Rye Canyon Rd. Valencia, California 91355
(661) 294-7999 voice (661) 294-1115 fax
techinfo@activethermal.com www.activethermal.com
 Loading...