

Page 1
Installation Guide
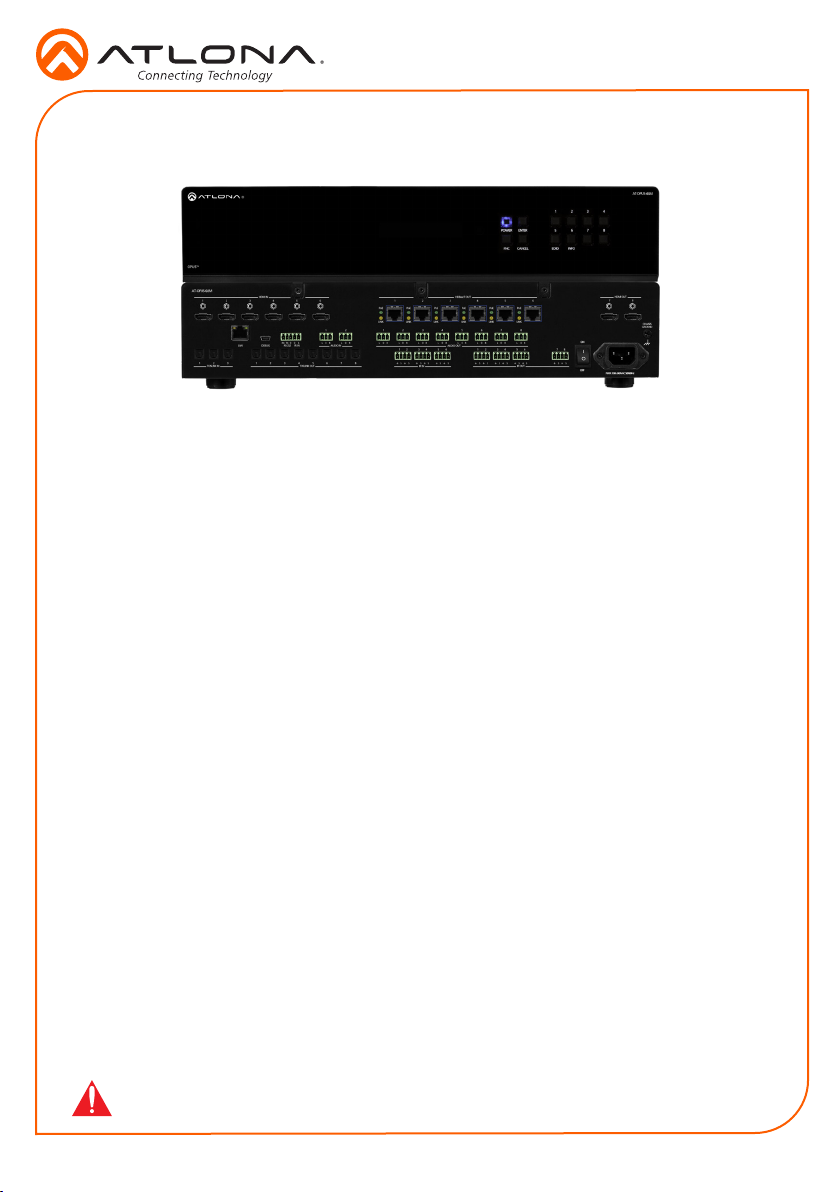
AT-OPUS-68M
Opus 4K HDR HDMI to HDBaseT 6x8 Matrix Switcher
AT-OPUS-68M
The Atlona AT-OPUS-68M is part of the Opus™ Series of HDMI® to HDBaseT™ matrix switchers for high dynamic range (HDR) formats. The 6x8 matrix switcher is HDCP 2.2 compliant and
support 4K/UHD video @ 60 Hz with 4:4:4 chroma sampling, as well as HDMI data rates up to 18
Gbps. The Opus Series enables exible routing to HDBaseT outputs plus two additional HDMI
outputs, and is compatible with the Atlona AT-OPUS-RX receiver or AT-JUNO-451-HDBT switcher for transmission of HDMI, Ethernet pass-through, and bidirectional IR and RS-232 control
signals up to 330 feet (100 meters) over CAT6a/7 cable. Visually lossless VESA Display Stream
Compression (DSC) enables HDR and 4K/60 4:4:4 signal extension over HDBaseT with little to
no latency. Opus matrix switchers are equipped with a comprehensive host of audio and control
system integration features, making them ideal for a wide range of residential and commercial
applications requiring multi-zone AV distribution.
Package Contents
1 x AT-OPUS-68M
1 x Captive screw connector, 5-pin
7 x Captive screw connector, 4-pin
10 x Captive screw connector, 3-pin
1 x Pair rack mount ears
4 x Feet w/screws
1 x IEC power cord
1 x IR remote control
1 x Installation Guide
IMPORTANT: Visit https://atlona.com/product/AT-OPUS-68M for the latest rmware
updates and User Manual.
1
Page 2
Installation Guide
AT-OPUS-68M
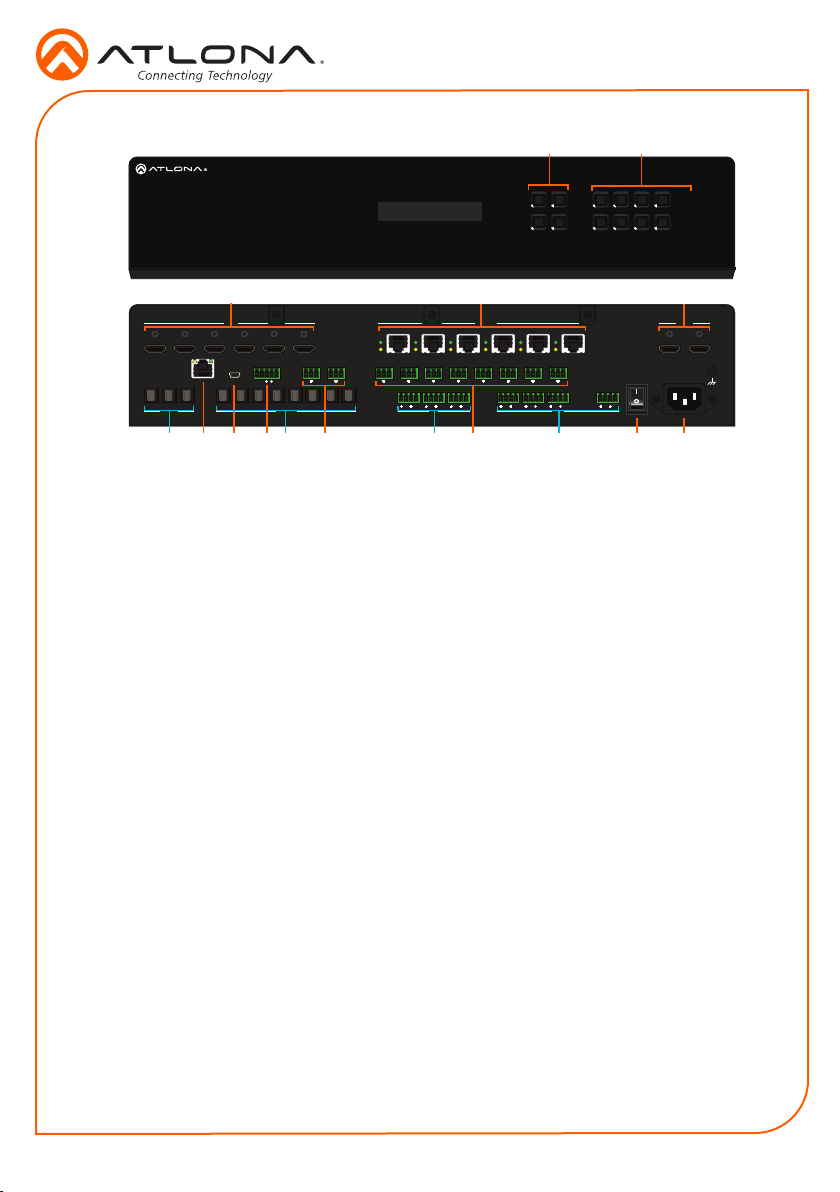
Panel Descriptions
TM
OPUS
3
AT-OPUS-68M
AT-OPUS-810M
1 2 3
1 2
TOSLINK IN
HDMI IN
4
5 6 1 2 3 4 5 6
1 2 1
RX STX
LAN DEBUG IR INRS-232
3 1 2 3 456 7 8
TOSLINK OUT
RL
AUDIO IN
6 7 8 9 11 1310 12 14 15 16
1 Function Buttons
Power - Sets the unit in and out of
standby.
Enter - Used for making selections.
FNC - Use to switch number buttons to
their secondary function.
CANCEL - Navigates back one step in the
OSD.
2 Number Buttons
Use for selection of inputs and outputs.
1 - Press FNC + 1 to route selected input
to all outputs.
2 - Press FNC + 2 to turn the front IR
receiver on and o.
3 - Press FNC + 5 to open the EDID menu.
4 - Press FNC + 6 to display the device
rmware. Press 6 again to view more info.
3 HDMI IN
Connect HDMI cables to these ports from
HDMI sources.
4 HDBaseT OUT
Connect a CAT5e/6/6a/7 cable from this
port to an HDBaseT receiver.
5 HDMI OUT
Connect HDMI cables from these ports to
local HDMI displays.
6 TOSLINK IN
Connect digital audio sources to these
ports.
7 LAN
Connect an Ethernet cable from this port
to a Local Area Network (LAN).
1
POWER ENTER 6 7 85
CANCEL INFOEDIDFNC
4
HDBaseT OUT
PoE
LINK
L
RL
R
PoE
PoE
LINK
LINK
2 3 4 5 6 7 8
RL RL RL
1 23456 1 2
S S
S S
SS
IR IN IR OUT
AUDIO OUT
PoE
LINK
RLRL
S S S S
3 456
PoE
LINK
RL
S S S S
PoE
LINK
L
R
2
1 2 3 4
ON
7 8
AT-OPUS-68M
5
HDMI OUT
7
8
CHASSIS
GROUND
8 DEBUG
Connect a mini USB cable from this port
to a PC to troubleshoot the unit.
9 Control Port
Connect a third party controller or PC
to control the matrix through either IR or
RS-232
10 TOSLINK OUT
These ports provide digital audio output to
audio DSPs, ampliers, or player devices.
11 AUDIO IN
Connect unbalanced 2CH audio sources
to these ports.
12 IR IN
Connect a control system to these ports
to route IR signals to the corresponding
HDBaseT outputs.
13 AUDIO OUT
This port provides source audio 2CH deembedding and direct audio loop through
for the audio inputs.
14 IR OUT
These ports provide an output for IR
signals to each source and the two local
HDMI outputs.
15 Power Switch
Toggle this switch to power the unit on
or o.
16 100-240VAC 50/60Hz Power Port
Connect the included IEC cord from this
port to the wall for power.
2
Page 3
Installation Guide
GND
S
L R
S S
AT-OPUS-68M
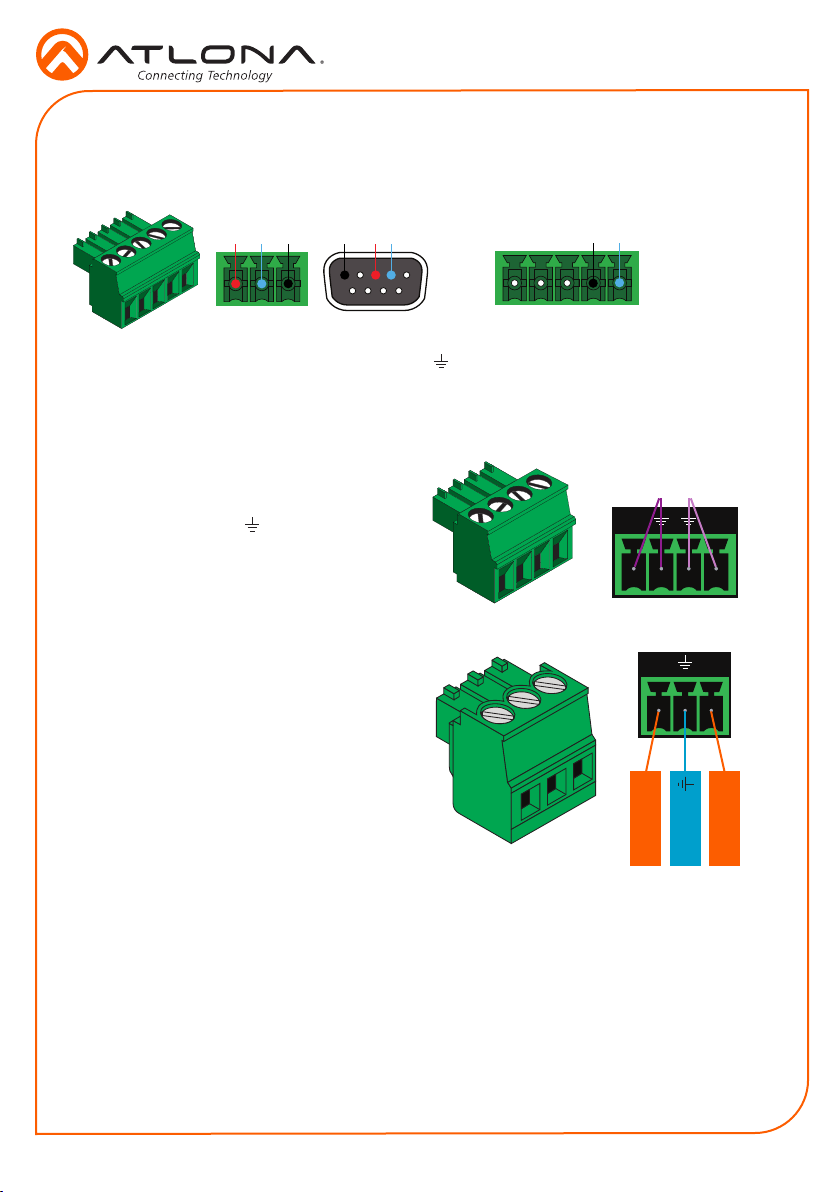
Control
A 5-pin captive screw connector for control has been included. The rst three terminals are RS-
232 control, the last two terminals are for IR.
RS-232 IR
GNDRX TX
GND RX
TX
Pin out will be determined by the
RS-232 cable and connect as
RX (receive), TX (transmit) and
(Ground).
IR
4-pin captive screw connectors have been
included for IR routing. Each 4-pin connect
will provide connection for 2 IR ports. All IR
ports will use a Ground ( ) and signal (S)
wire.
Audio
Connect to an audio DSP, amplier, or other
audio distribution or player devices. Only
unbalanced 2CH connections are compatible
with the 3-pin captive screw audio ports.
IR IN is connected by a ground and
signal wire. Use with 3rd party control
systems. For easy termination, Atlona
recommends using the 2 meter IR
cable AT-LC-CS-IR-2M.
1 2
+
Positive L
Unbalanced
Ground
+
Positive R
Mounting Instructions
The AT-OPUS-68M can be mounted in a standard 19-inch rack or placed freestanding on top of
a desk or table.
Rack installation
1. Remove the front two case screws from the sides of the case.
2. Attach the included rack ears to each side of the AT-OPUS-68M using the case screws.
3
Page 4

HDMI OUT
9 10
8
CHASSIS
GROUND
7
PoE
PoE
LINK
PoE
LINK
HDBaseT OUT
ON
PoE
LINK
R
L
R
PoE
LINK
L
R
7 8 9 10
L
PoE
PoE
LINK
PoE
LINK
RL
2 3 4 5 6 7 8 9 10
6
LINK
R
5
L
4
RL
3
HDMI IN
1 2 1
RL
LAN DEBUG IR INRS-232
3 4 1 2 3 4
AUDIO IN
RX STX
6 7 8
5
TOSLINK OUT
AT-OPUS-810M
1 2 3 4 5 6 7 8 1 2 3 4 5 6
TOSLINK IN
1 2
S S
RL
1 2
IR IN IR OUT
S S
SS
R
L
9 10
S S
LINK
6
RL
5
S
S
R
3 4
L
S S
R
AUDIO OUT
L
S S
8 1 2
7
S S
S S
1 2 3 4
6 7 8
5
POWER ENTER
CANCEL INFOEDIDFNC
TM
OPUS
3. Install the Opus matrix into a rack, using four rack screws.
NOTE: Increase the air ow as needed to
maintain the recommended temperature inside
the rack.
NOTE: Do not exceed the maximum weight
loads for the rack. Install heaver equipment in
the lower part of the rack for stability.
Installation Guide
AT-OPUS-68M
AT-OPUS-68M
TM
OPUS
HDMI OUT
9 10
8
CHASSIS
GROUND
7
PoE
PoE
LINK
PoE
LINK
10
HDBaseT OUT
ON
PoE
LINK
R
L
R
PoE
LINK
L
R
78 9 10
L
PoE
S S
LINK
6
RL
5
S
S
PoE
R
LINK
34
L
S S
R
PoE
AUDIO OUT
L
LINK
S S
2 3 4 5 6 7 8 9
LINK
R
L
4
RL
3
HDMI IN
RL
12
S S
SS
1 2 1
R
L
RL
AUDIO IN
9 10
AT-OPUS-810M
1 2 3 4 5 6 7 8 1 2 3 4 5 6
RX STX
6 7 8
5
TOSLINK OUT
LAN DEBUG IR INRS-232
3 4 1 2 3 4
TOSLINK IN
1 2
8 12
RL
7
S S
6
5
S S
S S
IR IN IR OUT
TM
OPUS
AT-OPUS-68M
1 2 3 4
6 7 8
5
POWERENTER
CANCEL INFOEDIDFNC
Surface mounting
The AT-OPUS-68M can be placed freestanding on top of a desk, a table, or in a cabinet. To
prevent damage to the surfaces or unnecessary movement of the matrix, four feet have been
included.
1. Turn the unit upside down.
2. Install each foot using the included feet screws, the rubber grips of the feet should be facing
up during installation.
3. Turn the unit right-side up and place it in the desired location.
4
Page 5

Installation Guide
AT-OPUS-810M
AT-OPUS-68M
AT-HDR-H2H-44M
AT-OPUS-68M
OPUS
TM
1 2
TOSLINK IN
CANCEL INFOEDIDFNC
POWER ENTER 6 7 8 9
1 2 3 4
10
5
AT-OPUS-810M
ON
GROUND
CHASSIS
7
HDMI OUT
8
S S
S S
L
R
S
L
S
R
5
RL
6 7 8
LINK
S S
L
R
LINK
PoE
HDBaseT OUT
LINK
PoE
PoE
L
R
SS
IR IN IR OUT
S S
1 2
RL
S S
3
RL
4
L
5 6 1 2 3 4
R
LINK
2 3 4 5 6 7 8
AUDIO OUT
RL
LINK
PoE
LINK
PoE
PoE
Installation
1. Connect up to 6 HDMI sources to the HDMI IN ports.
2. Connect up to 6 HDBaseT receivers (AT-OPUS-RX or AT-JUNO-451-HDBT) to the HDBaseT
OUT ports.
3. Connect up to 2 local HDMI displays to the HDMI OUT ports.
4. Connect up to 3 digital audio sources to the TOSLINK IN ports.
5. Connect up to 2 unbalanced analog audio inputs to the AUDIO IN ports.
6. Connect the TOSLINK OUT ports to an audio distribution device.
7. Connect the 2CH analog AUDIO OUT ports to a DSP, or audio amplier.
8. *Optional* For control, connect to the captive screw port for IR and RS-232.
9. *Optional* For IP control and/or Ethernet routing, connect a network switch to the LAN port.
10. *Optional* For IR routing to and from sources and zones, connect a control system, IR
receivers, or IR emitters to the IR IN and IR OUT ports.
11. Connect the included IEC power cord to the 100-240VAC 50/60Hz power port.
12. Connect the power cord to an AC outlet.
3 1 2 3 4
LAN DEBUG IR INRS-232
TOSLINK OUT
5
6 7 8
RX STX
AUDIO IN
RL
1 2 1
1 2 3 4 5 6 1 2 3 4 5 6
HDMI IN
5
Page 6

Installation Guide
AT-OPUS-68M
WebGUI
The OPUS matrix includes a built-in webGUI, which allows easy management and control of all
features. Follow the instructions below to access the webGUI.
1. View the IP address of the unit using the front panel OSD.
• Press the FNC button.
• Press button 6 (INFO). The rmware version will display on the front panel screen.
• Press button 6 again to bring up the IP address.
NOTE: If the unit is not receiving an IP address from a DHCP server, the unit will default
to 192.168.0.150 255.255.255.0. To set the unit to a set static IP, press the FNC button
followed by 4. Select the Static IP option and press enter. The default static IP address
and netmask is 192.168.1.254 255.255.0.0.
2. Launch a web browser and enter the IP address of the unit.
3. The OPUS Login page will be displayed.
4. Enter the following information on the Login page.
Login: admin
Password: Atlona
5. Click the Login button.
AMS 2.0
For full conguration of the OPUS, AMS 2.0 is available from https://atlona.com/AMS for free.
Two options can be used for installation: The free Linux based software download or the easy to
install server hardware (AT-AMS-HW).
Once AMS has been set up:
1. Open a browser on the same network as AMS 2.0 and go to the IP of AMS 2.0.
a. View the AMS 2.0 installation instructions on how to nd the IP of the software.
2. Enter the login information on the AMS 2.0 page, then click the Login button.
3. View the OPUS manual for routing and conguration.
6
Page 7

Connection Diagram
DISPLAY
BluRay Player
POWER
4-Channel
Professional Amplifer
I
0
Audio Distribution
Game Console
Game Console
CH5 CH6 CH7 CH8
SET-TOP BOX
Cable Box
Game Console
Game Console
HDBaseT
Audio / Video
Audio
224
OK
Audio / Video
AT-OPUS-810M
1 2 3 4 5 6 7 8 1 2 3 4 5 6
LAN DEBUG IR INRS-232
3 4 1 2 3 4
TOSLINK IN
1 2
AT-JUNO-451-HDBT
TM
X
UNO
J
Installation Guide
AT-OPUS-68M
AT-VGW-250
ELOCITY
V
HDBaseT
TM
AV LAN
GATEWAY
USB
USB
USB
USB USB-C AUDIO OUT
Ethernet
Audio / Video
AT-OPUS-RX
AT-OPUS-68M
PoE
HDMI OUTIR IN IR OUT RS-232AUDIO IN ETHERNET LINK PoE DEBUGHDBaseT IN
RECEIVER
SP S
RXTX
AT-OPUS-RX
Ethernet
Audio
PWR
LINK
TM
OPUS
DISPLAY
4
media4
Media Player
Control System
Audio / Video
Ethernet
AT-OPUS-68M
HDMI OUT
9 10
8
CHASSIS
GROUND
7
PoE
PoE
LINK
PoE
LINK
10
HDBaseT OUT
ON
PoE
LINK
R
L
R
PoE
LINK
L
R
7 8 9 10
L
PoE
S S
LINK
6
RL
5
S
S
PoE
R
LINK
3 4
L
S S
R
PoE
AUDIO OUT
L
LINK
S S
8 1 2
RL
7
S S
2 3 4 5 6 7 8 9
6
LINK
R
5
L
S S
4
RL
3
S S
HDMI IN
RL
1 2
IR IN IR OUT
S S
SS
1 2 1
R
L
RL
AUDIO IN
9 10
RX STX
6 7 8
5
TOSLINK OUT
TM
OPUS
AT-JUNO-451-HDBT
POWER INPUT FW
INPUT
1 2 3 4
1 2 3 4
6 7 8
5
POWER ENTER
CANCEL INFOEDIDFNC
Troubleshooting
Problem Solution
I am not receiving
multichannel audio or 3D
video.
• By default, multichannel audio and 3D will not pass
unless all devices support those features. Set each port’s
EDID through the front panel, webGUI, or RS-232.
What rmware am I on? • To view the device rmware version, press the FNC
button, followed by button 6 (INFO). The rmware will
appear on the front panel OSD.
What’s my baud rate? • To view the baud rate of the RS-232 port, press the FNC
button, followed by button 6, then press button 2. The
baud rate will appear on the front panel OSD.
What’s my IP? • To view the IP address of the unit, press the FNC button,
followed by the 6 button twice.
• If the unit is connected to a non-DHCP network, press
FNC, followed by the 4 button. Select the Static IP
option and press Enter. The default static IP address and
netmask is 192.168.1.254 255.255.0.0.
7
Page 8

Installation Guide
AT-OPUS-68M
Version 1
atlona.com • 408.962.0515 • 877.536.3976
© 2018 Atlona Inc. All rights reserved. “Atlona” and the Atlona logo are registered trademarks of Atlona Inc. All other brand names and trademarks or registered
trademarks are the property of their respective owners. Pricing, specications and availability subject to change without notice. Actual products, product images, and
online product images may vary from images shown here.
8
 Loading...