

Page 1
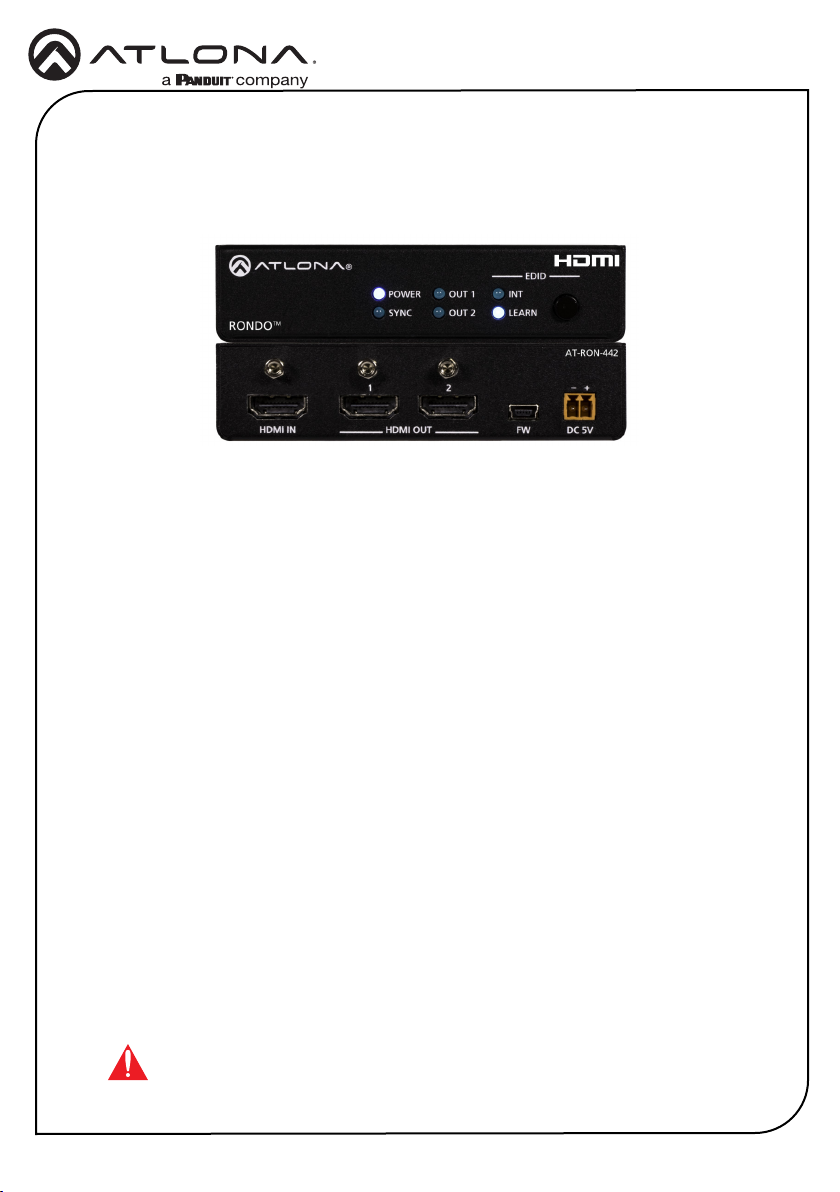
Installation Guide
AT-RON-442
4K HDR Two-Output HDMI Distribution Amplier
AT-RON-442
The Atlona Rondo™ 442 (AT-RON-442) is a 1×2 HDMI distribution amplier for high dynamic
range (HDR) formats. Part of the comprehensive family of Atlona 4K HDR integration products, it
is HDCP 2.2 compliant and supports 4K/UHD video @ 60 Hz with 4:4:4 chroma sampling, as well
as HDMI data rates up to 18 Gbps. The Rondo 442 is ideal for applications requiring the latest as
well as emerging 4K/UHD and HDR sources and displays. This Rondo Series HDMI distribution
amplier includes EDID management features, front panel LED indicators for power and signal
status, and the capability to cascade several units without compromising performance.
The Rondo 442 is designed to deliver dependable, pristine-quality image presentations in
commercial and residential applications. It includes Atlona’s award-winning 10 year limited
product warranty and customer support services, so that integrators can specify, purchase, and
install with condence.
Package Contents
1 x AT-RON-442
1 x 2-pin captive screw connector
2 x Mounting bracket
4 x Screws (MAS-MF02+04D for mounting bracket)
4 x Rubber feet
1 x Power supply 5V 4A
1 x AC cord
1 x Installation guide
IMPORTANT: Visit https://www.atlona.com/product/AT-RON-442 for the latest
rmware updates.
1
Page 2
Panel Descriptions
RONDO
Installation Guide
AT-RON-442
2 5 631 4
EDID
POWER
TM
SYNC
OUT 1
OUT 2
INT
LEARN
AT-RON-442
HDMI IN
7 8
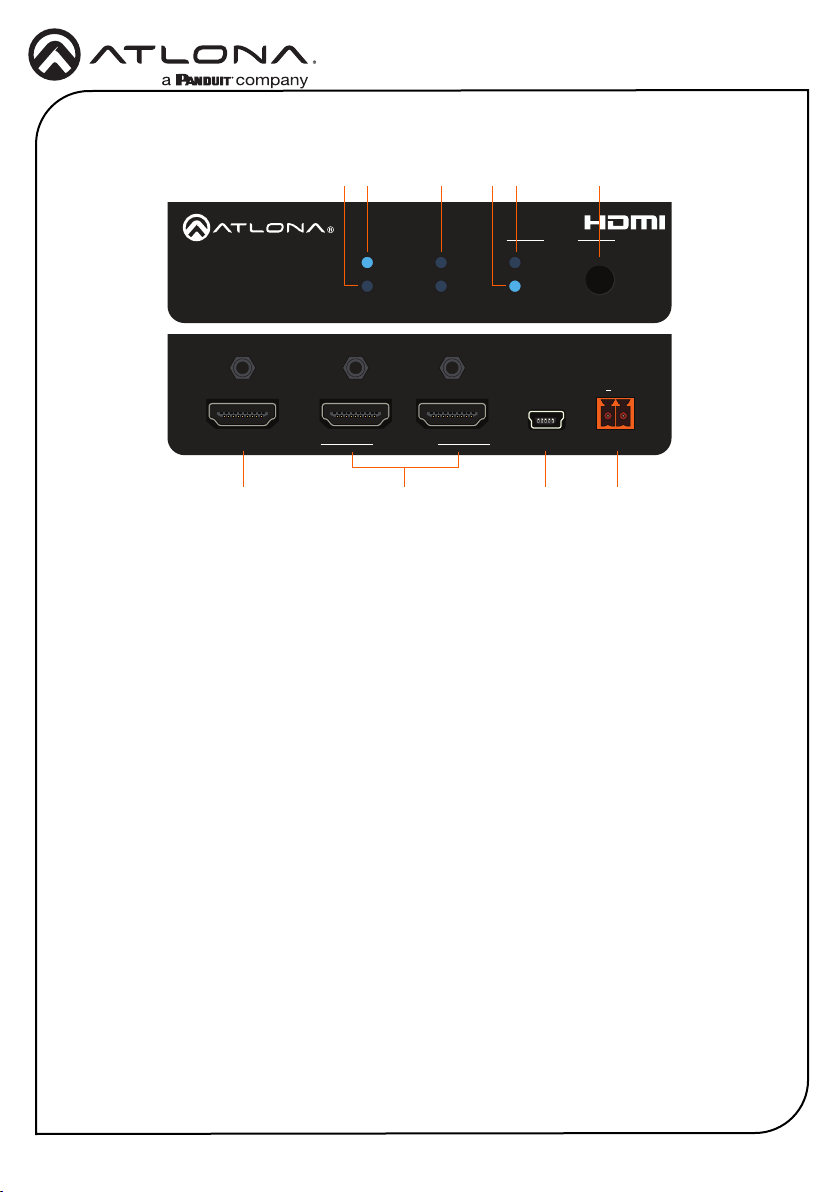
1 SYNC
This LED indicator will glow solid blue
when an active source is detected on the
HDMI IN port.
2 POWER
This LED indicator will glow solid blue
when the unit is powered.
3 OUT 1 / OUT 2
These LED indicators will glow solid blue
when a display or other sink device is
connected to the respective HDMI OUT
port.
4 LEARN
This LED indicator glows solid blue when
the unit is in LEARN mode.
5 INT
This LED indicator glows solid blue when
the unit is using the built-in EDID.
6 EDID button
Press this button to switch between INT
and LEARN modes.
1 2
HDMI OUT FW DC 5V
9 10
7 HDMI IN
Connect an HDMI cable from this port to a
UHD/HD source.
8 HDMI OUT 1/2
Connect an HDMI cable from each of
these ports to a display or other sink
device.
9 FW
Connect a mini USB cable to this port to
update the rmware.
10 DC 5V
Connect the included 5V DC power
supply to this port.
+
2
Page 3
Installation Guide
132
AT-RON-442
Power Connector
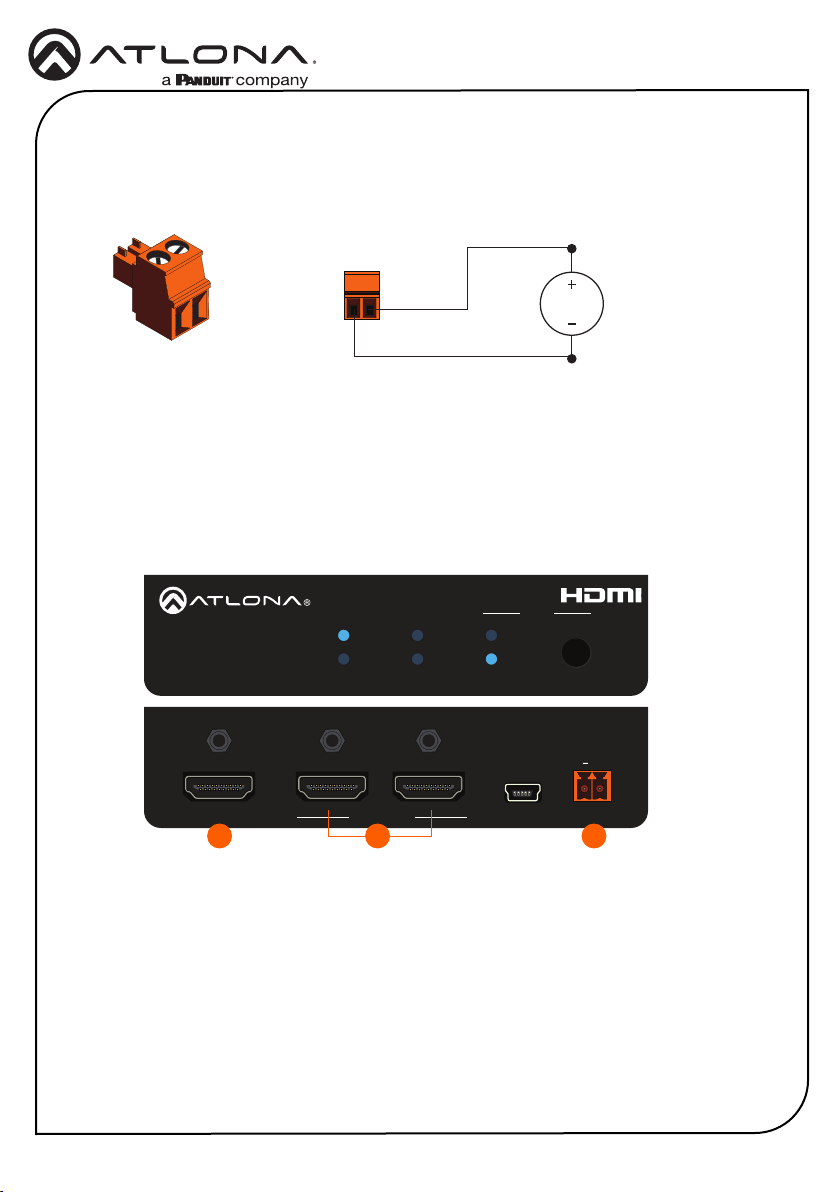
Locate the included orange Phoenix terminal block, and wire the included power supply to the
block as shown below. Do not use high-torque devices, when securing the wires, as this may
damage the screws and/or connector block.
White
5V DC
power supply
Black
Installation
1. Connect an HDMI cable from the UHD/HD source to the HDMI IN port on the AT-RON-442.
2. Connect display/sink devices to the AT-RON-442 to the HDMI OUT ports.
3. Connect the included power supply to the DC 5V Phoenix connector.
EDID
RONDO
POWER
TM
SYNC
OUT 1
OUT 2
INT
LEARN
AT-RON-442
+
HDMI IN
1 2
HDMI OUT FW DC 5V
3
Page 4
Installation Guide
2
FW DC 5V
AT-RON-442
+
1 2
HDMI OUT FW DC 5V
AT-RON-442
+
AT-RON-442
Mounting Instructions
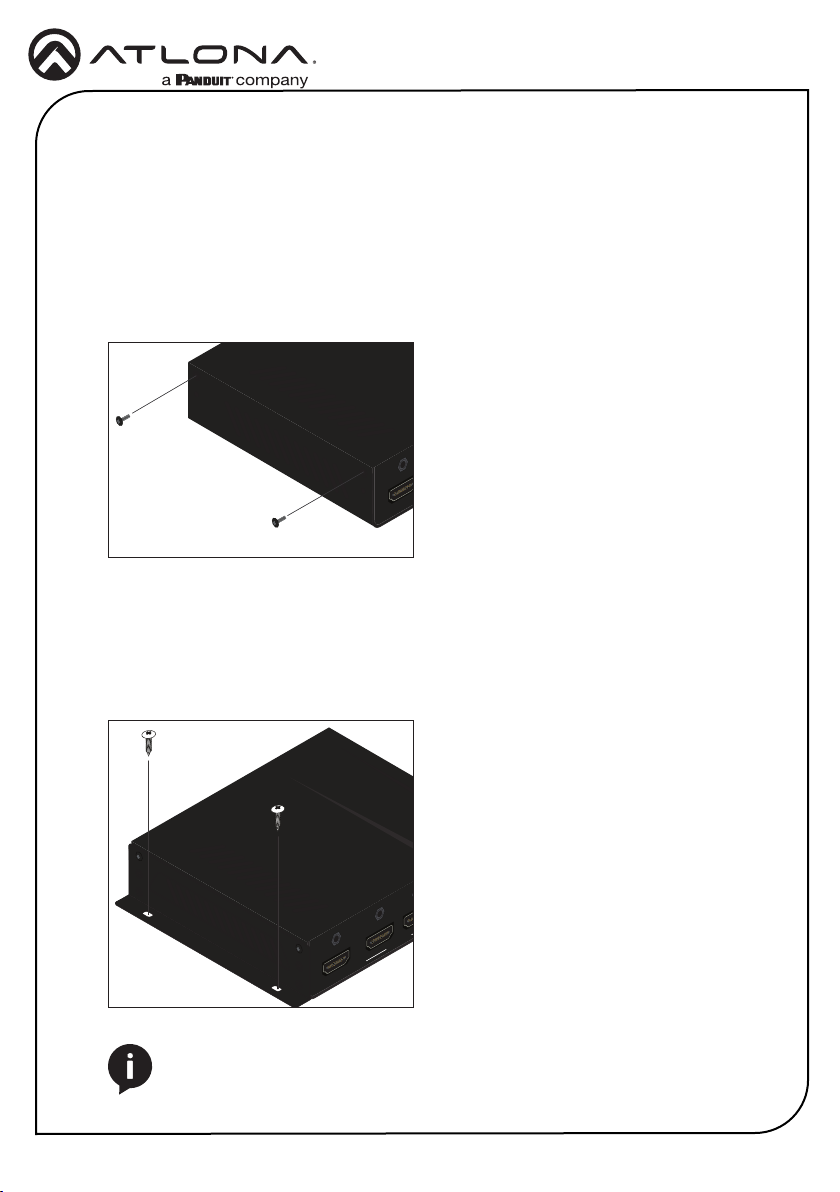
The AT-RON-442 includes two mounting brackets, which can be used to attach the unit to any
at surface.
1. Using a small Phillips screwdriver, remove the two screws from the left side of the
enclosure.
2. Position one of the mounting brackets, as shown below, aligning the holes on the side of the
enclosure with one set of holes on the mounting bracket.
3. Use the enclosure screws to secure the mounting bracket to the enclosure.
4. Repeat steps 1 through 3 to attach the second mounting bracket to the opposite side of the
unit.
5. Mount the unit using the oval-shaped holes, on each mounting bracket. If using a drywall
surface, a #6 drywall screw is recommended.
HDMI IN
1
HDMI OUT
HDMI IN
NOTE: Mounting brackets can also be inverted to mount the unit under a table
or other at surface.
4
Page 5
Installation Guide
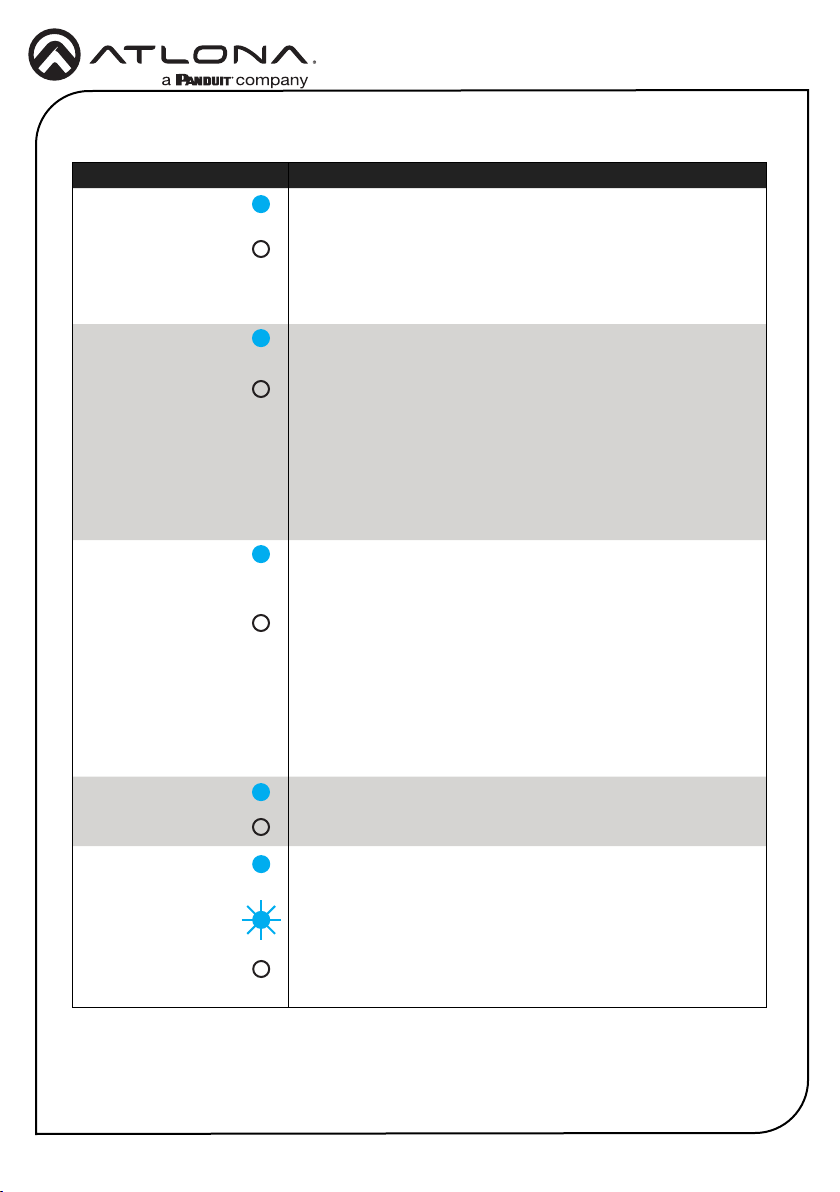
LED Indicators
LED Description
POWER The AT-RON-442 is powered.
The AT-RON-442 is not powered.
• Check that the power supply is connected to the ATRON-442 and that the electrical outlet is live.
SYNC The HDMI IN port is connected to an active source.
The AT-RON-442 is not detecting an active source.
• Check that the source is powered on and that the source is
connected to the HDMI IN port.
• Check that the HDMI cable, between the AT-RON-442 and
the source, is securely fastened.
• Try a dierent HDMI cable.
AT-RON-442
OUT 1 / OUT 2 The HDMI OUT port is connected to a display or other sink
INT The AT-RON-442 is using the built-in internal EDID.
LEARN The EDID learning process is complete and the AT-RON-442 is
device.
The AT-RON-442 is not detecting a sink device.
• Check that the sink device is connected to the proper
HDMI OUT port.
• Check that the HDMI cable, between the AT-RON-442 and
the sink device, is securely fastened.
• Try a dierent HDMI cable.
The internal EDID is not being used.
using a learned EDID from a sink device.
This LED will ash while the AT-RON-442 is learning the EDID.
The AT-RON-442 is not using a learned EDID.
5
Page 6
Installation Guide
EDID
The AT-RON-442 provides two EDID modes: INT (internal) and LEARN.
NOTE: 4K, 3D, and multichannel audio may not be available when using INT
(internal) EDID mode.
Internal (INT) Mode
When this mode is selected, the internal EDID stored in the AT-RON-442 is presented to the
HDMI source.
1. Power the AT-RON-442.
2. Press and release the EDID button to toggle to INT mode.
3. Connect an HDMI cable from the source to the HDMI IN port.
4. Connect up to two displays to the AT-RON-442, using the HDMI OUT 1 and HDMI OUT 2
ports.
LEARN Mode
AT-RON-442
LEARN mode is used to learn an EDID from another sink device. When learning an EDID, the
device must be connected to the HDMI OUT 1 port.
1. Power the AT-RON-442.
2. Connect an HDMI cable from the HDMI OUT 1 port on the AT-RON-442 to the HDMI input
on the sink device containing the EDID to be learned.
3. Press and hold the EDID button on the AT-RON-442. While the EDID is being learned,
the LEARN LED indicator will begin ashing.
4. When the LEARN LED indicator is solid blue, release the EDID button.
5. The EDID from the sink device is now stored in the AT-RON-442.
6
Page 7
Troubleshooting
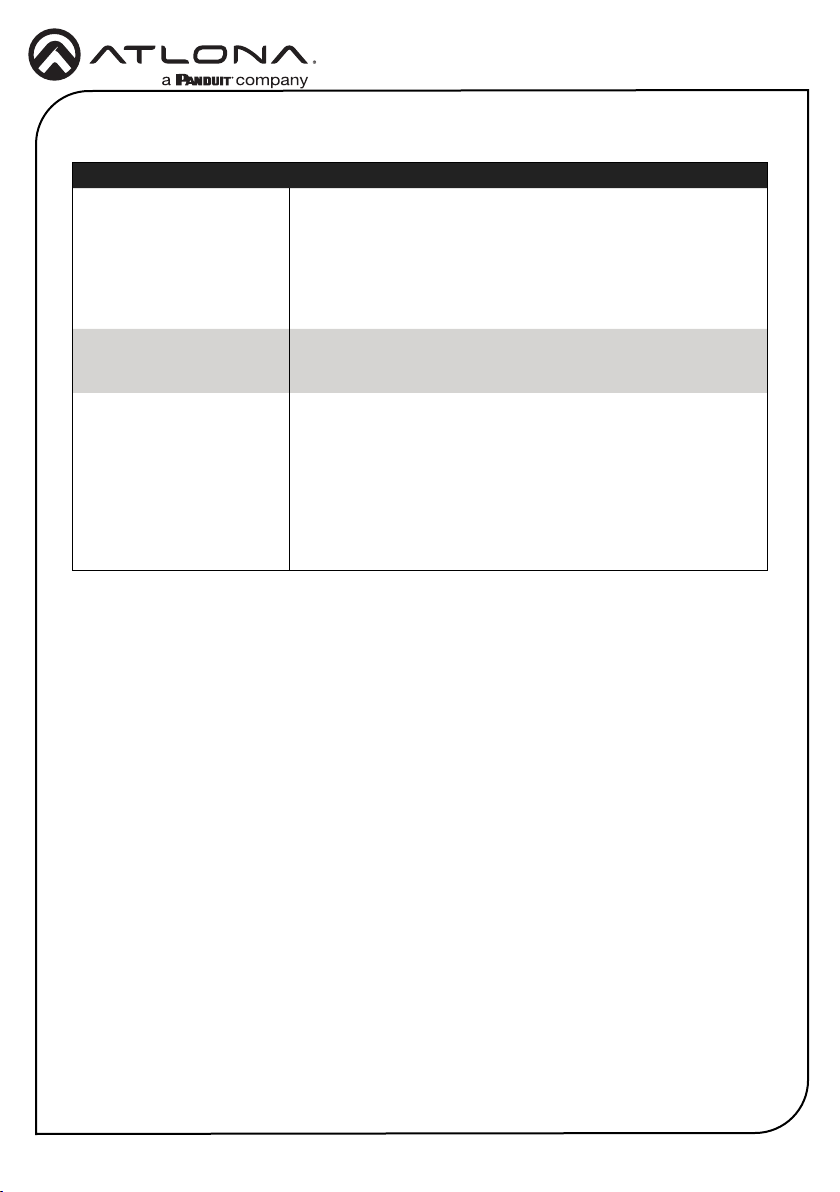
Problem Solution
How do I perform a
rmware update on the ATRON-442?
If updated rmware is available, both rmware and update
instructions can be found under the Firmware tab of each of the
following links. Note that if new rmware is not available, then
the Firmware tab will not be displayed.
http://www.atlona.com/product/AT-RON-442
Installation Guide
AT-RON-442
Does the Rondo series
provide external automation
control?
3D content is not being
displayed.
No.
• If using INT (internal) EDID mode, all connected displays
must be able to display 3D content. If only one of the
connected displays is not 3D-capable, then none of the
displays will show 3D content.
• To pass 3D content when not all displays support 3D,
connect a 3D display to Output 1, then use the “learn EDID”
procedure.
7
Page 8
Installation Guide
AT-RON-442
Warranty
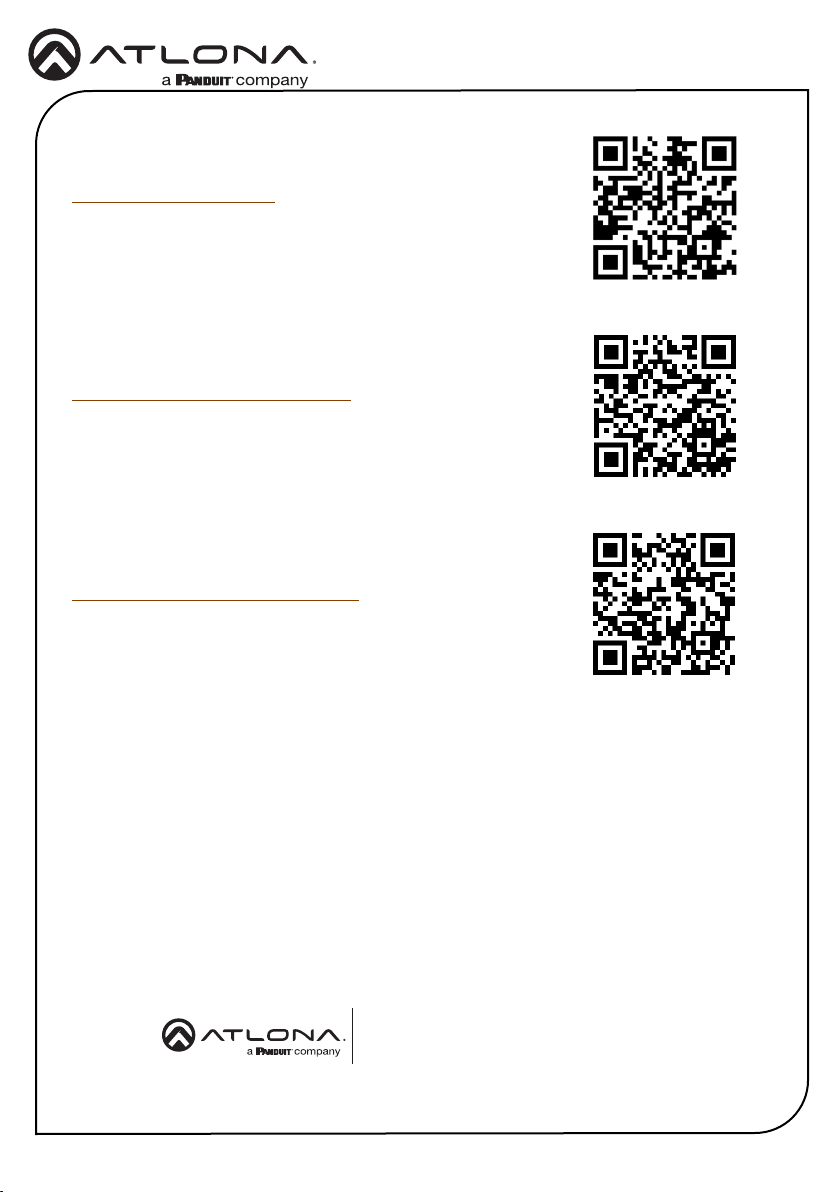
To view the product warranty, use the following link or QR code:
https://atlona.com/warranty/.
English Declaration of Conformity
The English version can be found under the resources tab at:
https://atlona.com/product/at-ron-442/.
Chinese Declaration of Conformity 中国RoHS合格声明
由SKU列出於:
https://atlona.com/about-us/china-rohs/.
Version 4
atlona.com • 408.962.0515 • 41.43.508.4321
US International
© 2022 Atlona Inc. All rights reserved. “Atlona” and the Atlona logo are registered trademarks of Atlona Inc. All other brand names and trademarks or registered
trademarks are the property of their respective owners. Pricing, specications and availability subject to change without notice. Actual products, product images,
and online product images may vary from images shown here.
8
25225-R4
 Loading...