

Atlas Copco RE Qualifier II User Manual


RE Qualifier System Manual i
TABLE OF CONTENTS
Quick Start Guide............................................................................1
Introduction .....................................................................................3
Main Screen ....................................................................................3
Passwords ........................................................................................5
AutoCal™ .......................................................................................6
V iewing A Run ................................................................................8
Resetting the Batch .......................................................................10
More Options ................................................................................11
Editing Parameter Sets ..................................................................12
Selecting a New Parameter ...........................................................15
Globalizing a Parameter ...............................................................16
Editing I/O Options .......................................................................17
Editing the Time and Date ............................................................19
Resetting the Total and/or Batch ..................................................20
Viewing Past Statuses ...................................................................21
Choosing a New Password ...........................................................22
Adjusting the Display ...................................................................23
I/O Structure .................................................................................24
RS-232 Connector
I/O Connector
Remote Transducer Connector
Dip-Switch Settings ......................................................................26
Dip-Switch
Test Modes
Part Numbers ................................................................................27
1 RE Qualifier System Manual
Step 1:
Power up the unit and wait for the
MAIN screen to appear. Once it
is in view, press the AUTO CAL
soft-key.
Step2:
Enter the password to access programming functions. All units
ship from the factory with a
default password of 0 1 0 4.
Step 3:
Be sure the transducer is plugged
into the RE Qualifier and that the
tool is connected to the transducer.
Then press the NEXT soft-key.
Step 4:
Run the tool on the target fastener
and then press the NEXT soft-key.
Be certain to run the fastener from
beginning to end, allowing the
tool to clutch out.
Step 5:
Check the screen and be sure the
calibration was successful. If not,
return to step 1. If the calibration
succeeded, proceed to step 6.
Press any key to continue.
Step 6:
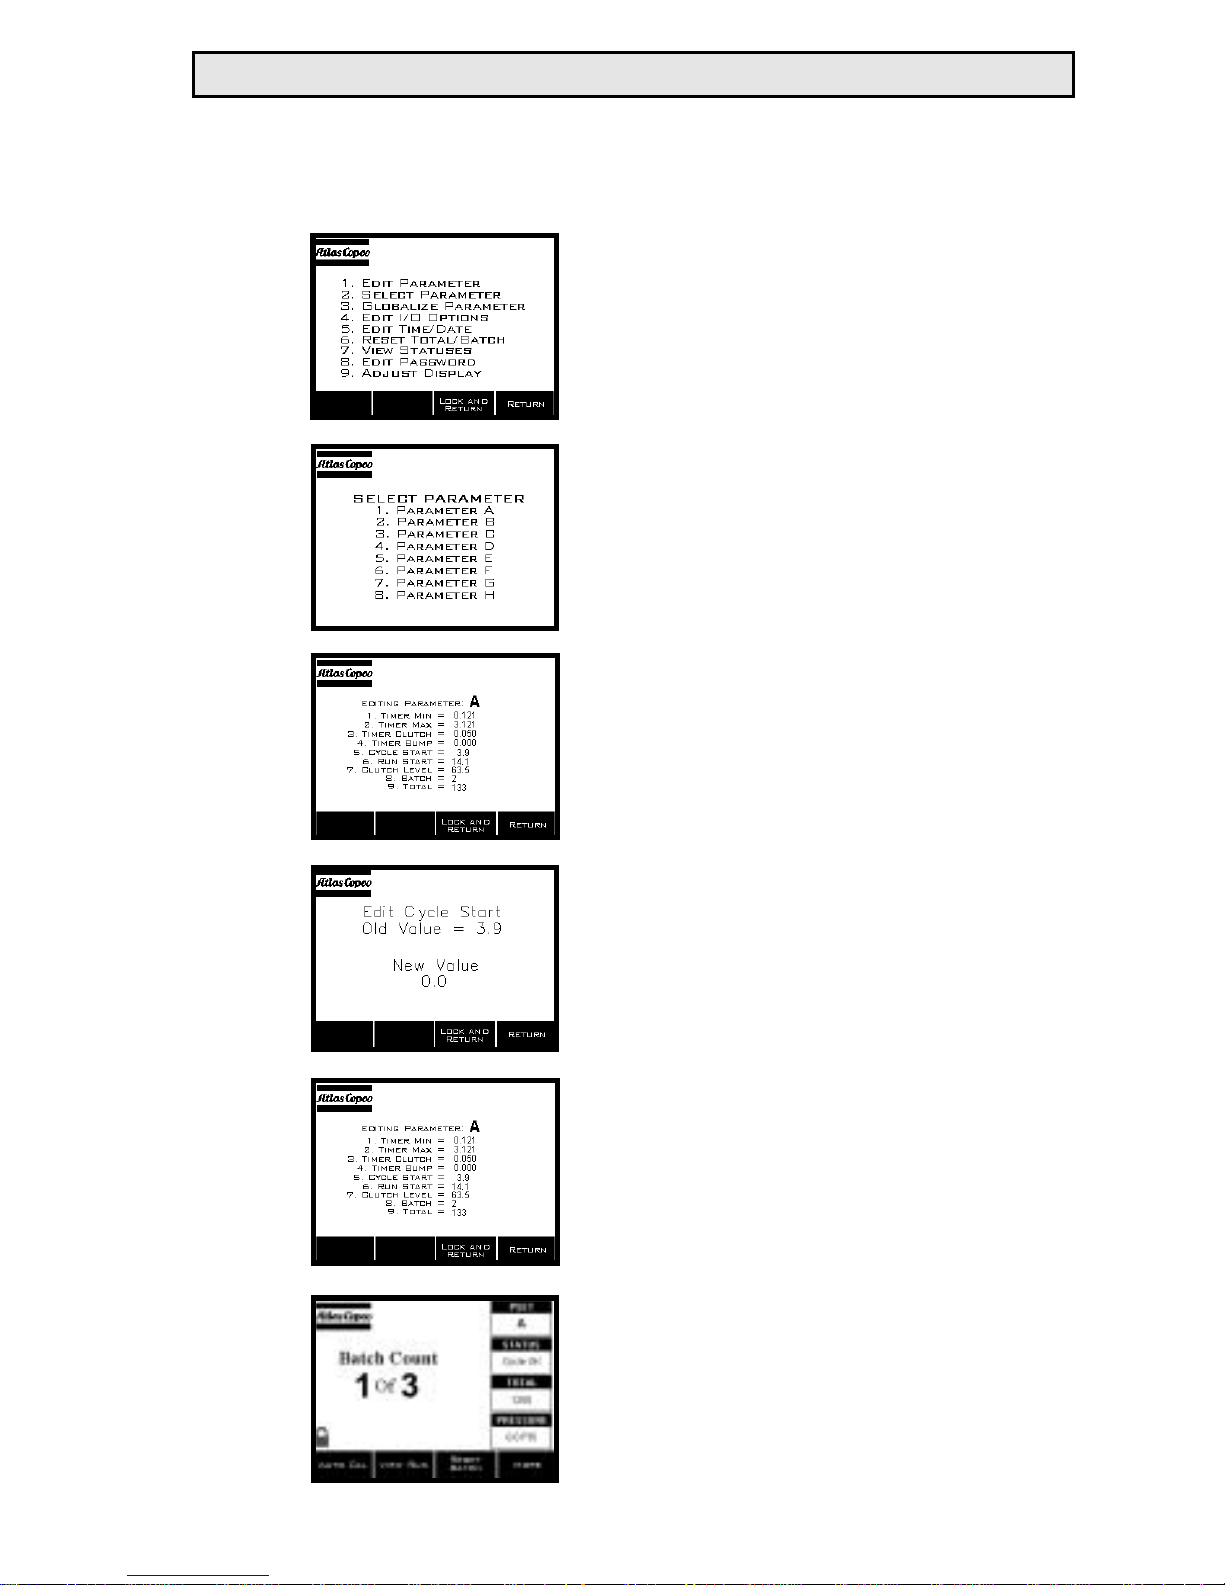
If the batch count needs programmed, press the MORE softkey.
Quick Start Guide
RE Qualifier System Manual 2
Step 7:
Once the MORE OPTIONS screen
is in view, press ‘1’ on the keypad
in order to EDIT THE PARAMETER.
Step 8:
Select the current parameter by
pressing the number on the keypad adjacent to the desired parameter.
Step 9:
Press the ‘8’ key in order to edit
the number of fasteners in a batch.
Step 10:
Enter the desired number for the
batch setting. When complete hit
ENT.
Step 11:
When the EDIT PARAMETER
screen re-appears, press the
LOCK AND RETURN soft-key.
Step 12:
The unit will return to the MAIN
screen and be locked. Run several
fasteners to ensure that the unit is
working properly.
Introduction
This document is an operations guide for the Atlas Copco RE
Qualifier II. The RE Qualifier monitors a pneumatic signal from
inside any Atlas Copco tool equipped with an RE port. By analyzing the pneumatic signal, the RE Qualifier can aid in the manufacturing process by determining if a fastener has been installed
properly and also by counting the number of fasteners that have
been installed.
Main Screen
To the left is an example of what the main screen looks like.
During normal operations, when the unit is monitoring fastening
processes, this is the screen that will be in use.
Along the right hand side of
the screen, four boxes appear
vertically and are labeled
PSET, STATUS, TOTAL, and
PRESSURE.
The box labeled PSET will
contain a letter corresponding
to the parameter set that is
currently in use. The RE
Qualifier has eight different parameter sets (A - H).
The STATUS box will be empty when the tool is in cycle. After
the completion of a cycle, this box will hold the status from the
last fastening process. Cycle OK, Batch OK, Rej Tmin, Rej
Tmax, and No Clutch are all statuses that may appear in this
area. Cycle OK indicates that the last fastener was installed properly. Batch OK means that the last group of fasteners that make
up the previous assembly have been installed properly. Rej Tmin
informs the operator that the minimum run timer was violated and
that the last fastener was not installed properly. Rej Tmax indi-
3 RE Qualifier System Manual

cates that the maximum run timer was violated. The status No
Clutch informs the user that the tool’s clutch did not complete the
fastening process.
The box labeled TOTAL displays the number of batches that have
been completed since the last reset. This number will start at 0
and count up to 65,535 before rolling back over to zero. This
value can be reset through the use of the keypad.
A live pressure indication will appear in the final box labeled
PRESSURE. This pressure value is given in PSI and it represents
the pressure inside the tool’s port.
In the center of the screen, a batch count and the number of fasteners in the batch appears. This information is represented as
COUNT of BATCH. The count is the number of fasteners that
have been completed towards the programmed batch setting. The
batch is a number that is programmed into the current parameter.
The batch should represent the number of fasteners in the assembly under construction.
Along the bottom of the screen are several “soft” key indications.
Below each of these soft key indicators is a button. The function
of the button will change as different screens are accessed. The
text in the soft key indicators will also change to inform the user
of the current function of the button below it.
Above the left most soft key on the main screen is an icon that
resembles a padlock. The padlock will be in one of two states,
either open or closed. If the padlock is closed, the unit is locked
and a password will have to be entered in order to access programming features. If the padlock is open, programming features
are readily available through the selections on the soft-keys.
RE Qualifier System Manual 4
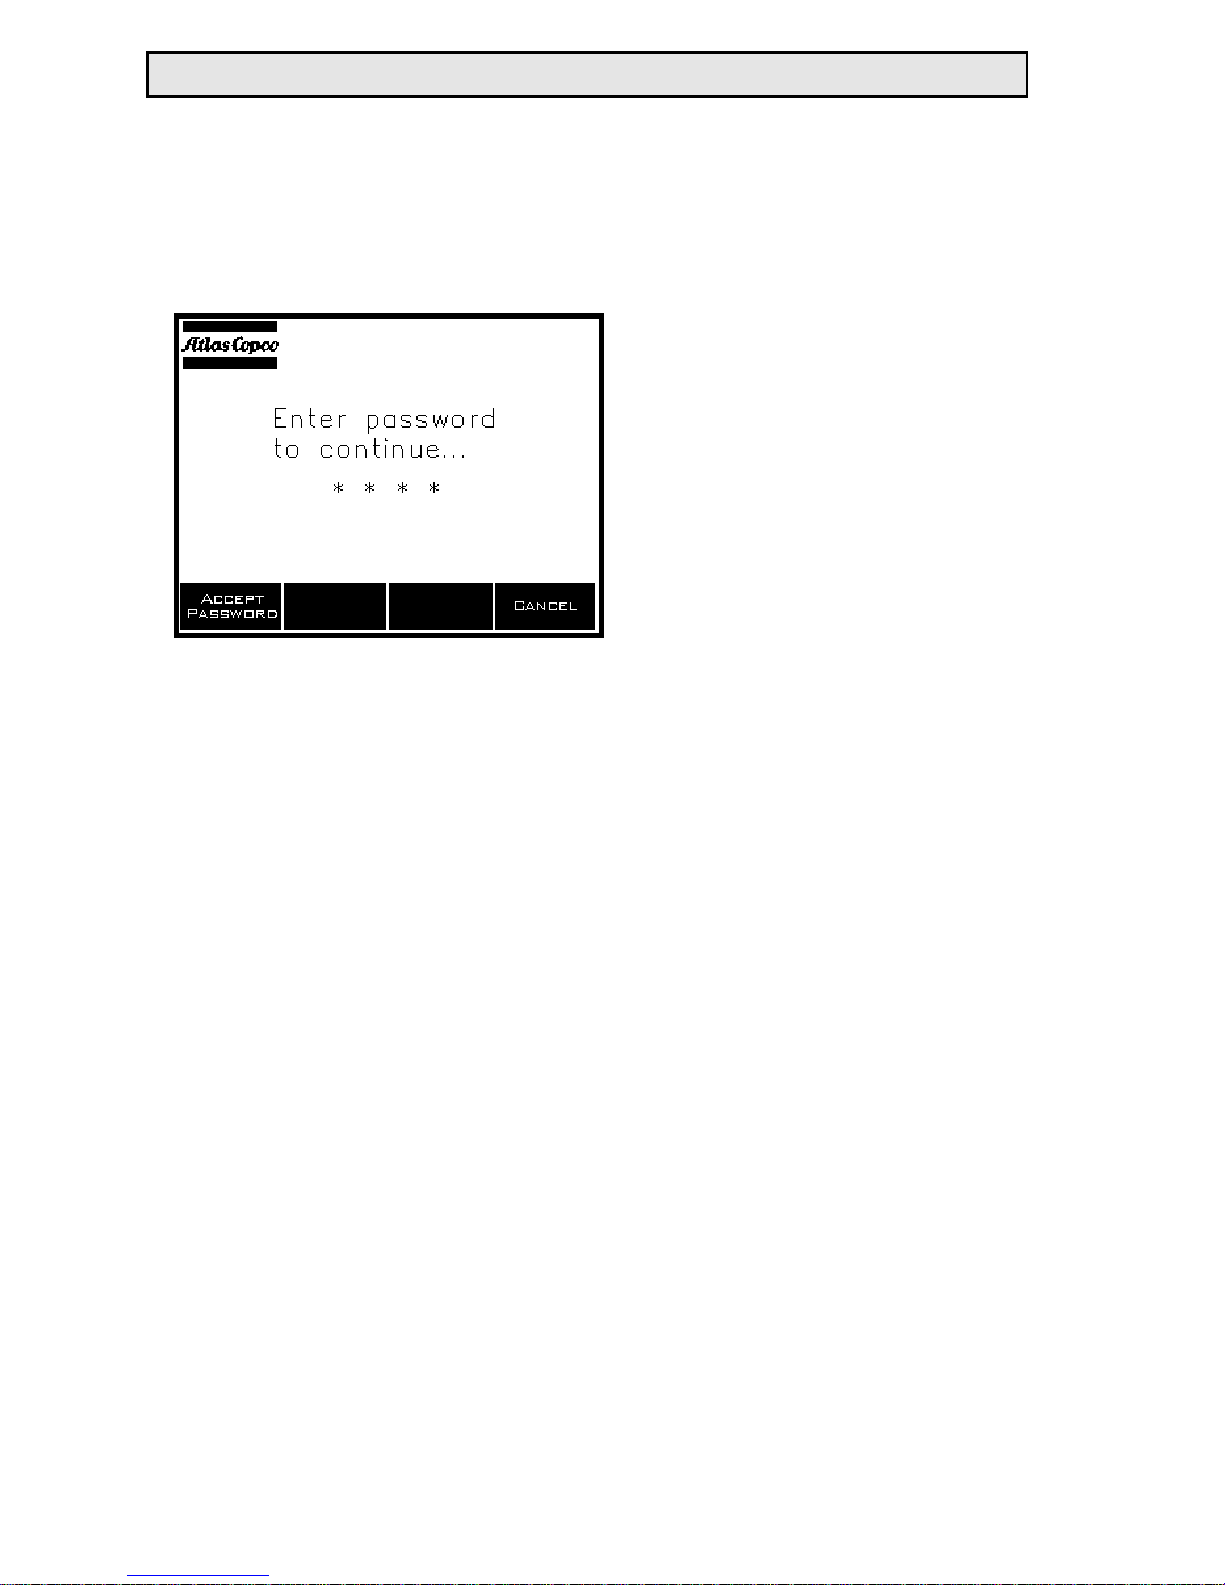
Passwords
Users will be prompted to enter a password any time the unit is
locked and a programming function is accessed. All units are
shipped with the initial password set to 0 1 0 4.
Once prompted to enter a
password, use the keypad to
enter the four digit code. If
any mistakes are made during
the entry process, the CLR
button can be used to remove
one digit at a time.
As each digit is entered, an asterisk (*) will appear indicating that
a number has been entered. Once all four numbers have been
entered in the proper sequence, the user can press either the
Accept Password soft-key or the ENT button.
If the user wishes to return to the main screen without entering
the password, either the Cancel soft-key or the ESC button may
be pressed.
If the password is entered properly, the user will be taken to the
function that was requested prior to the Enter Password screen
appearing. The password can be changed to any four digit code.
5 RE Qualifier System Manual
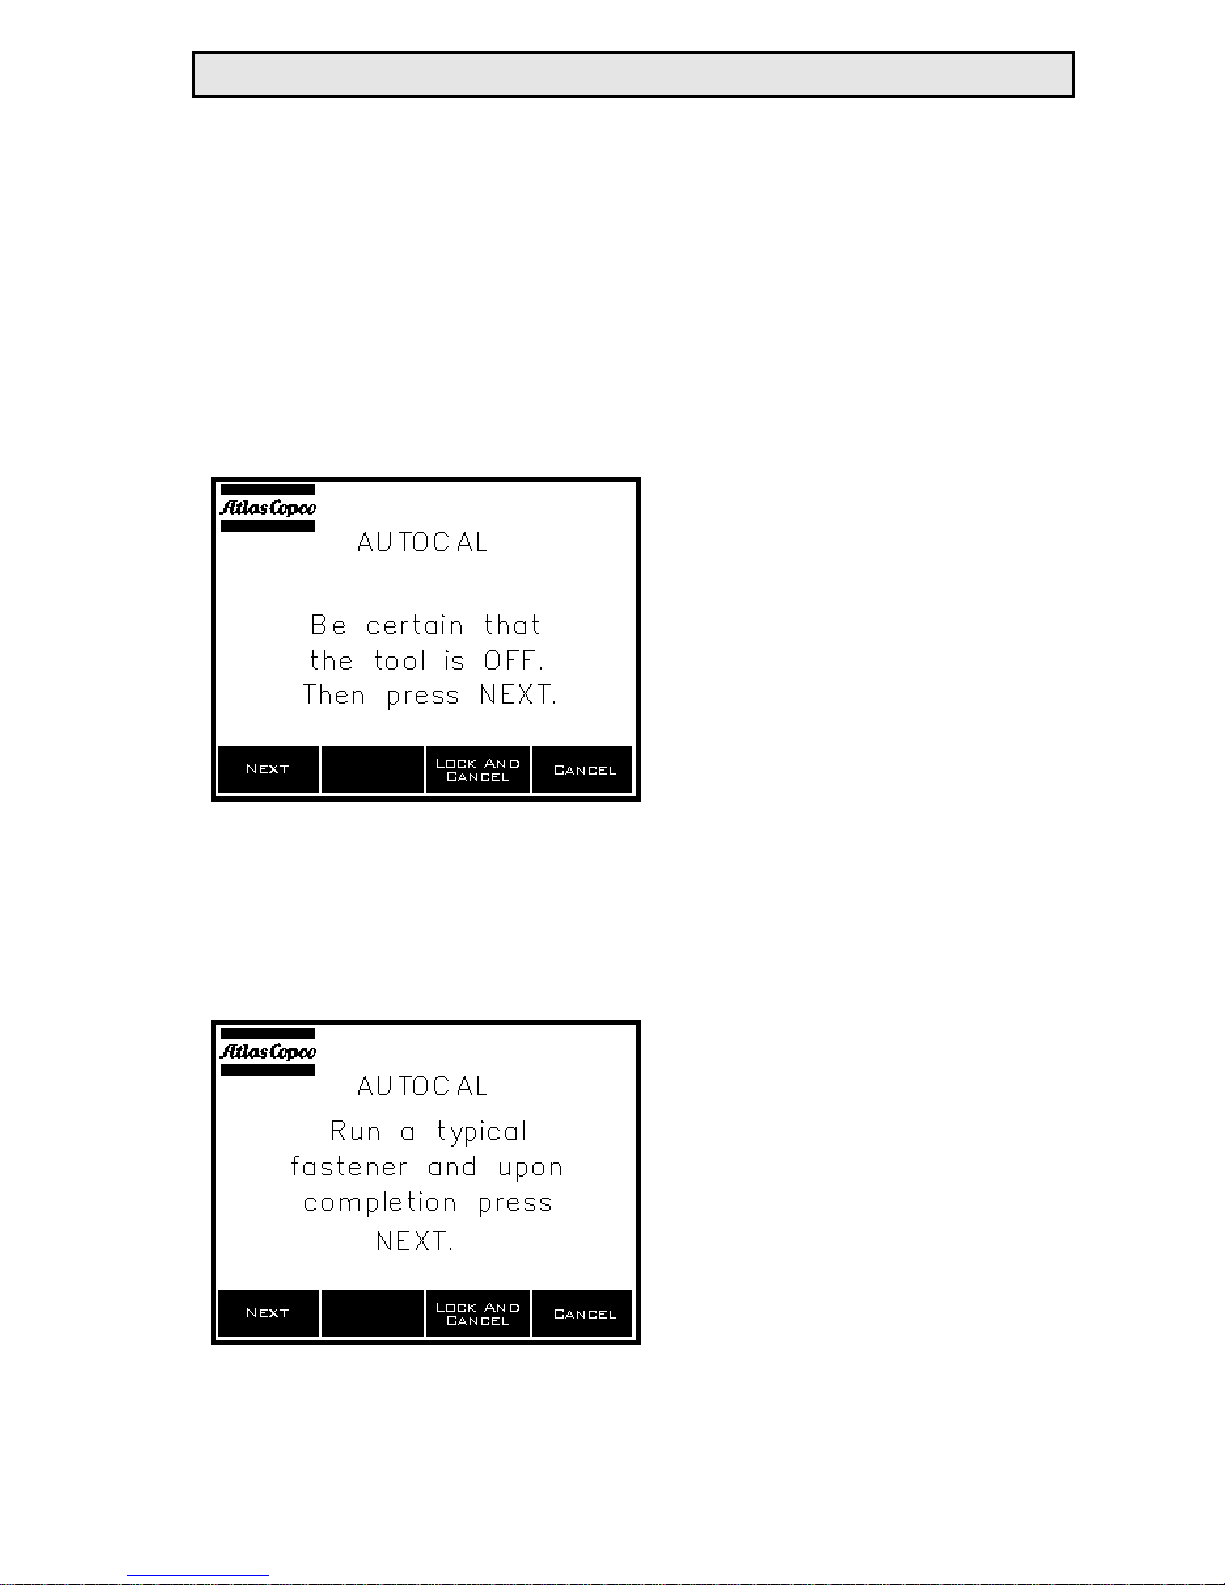
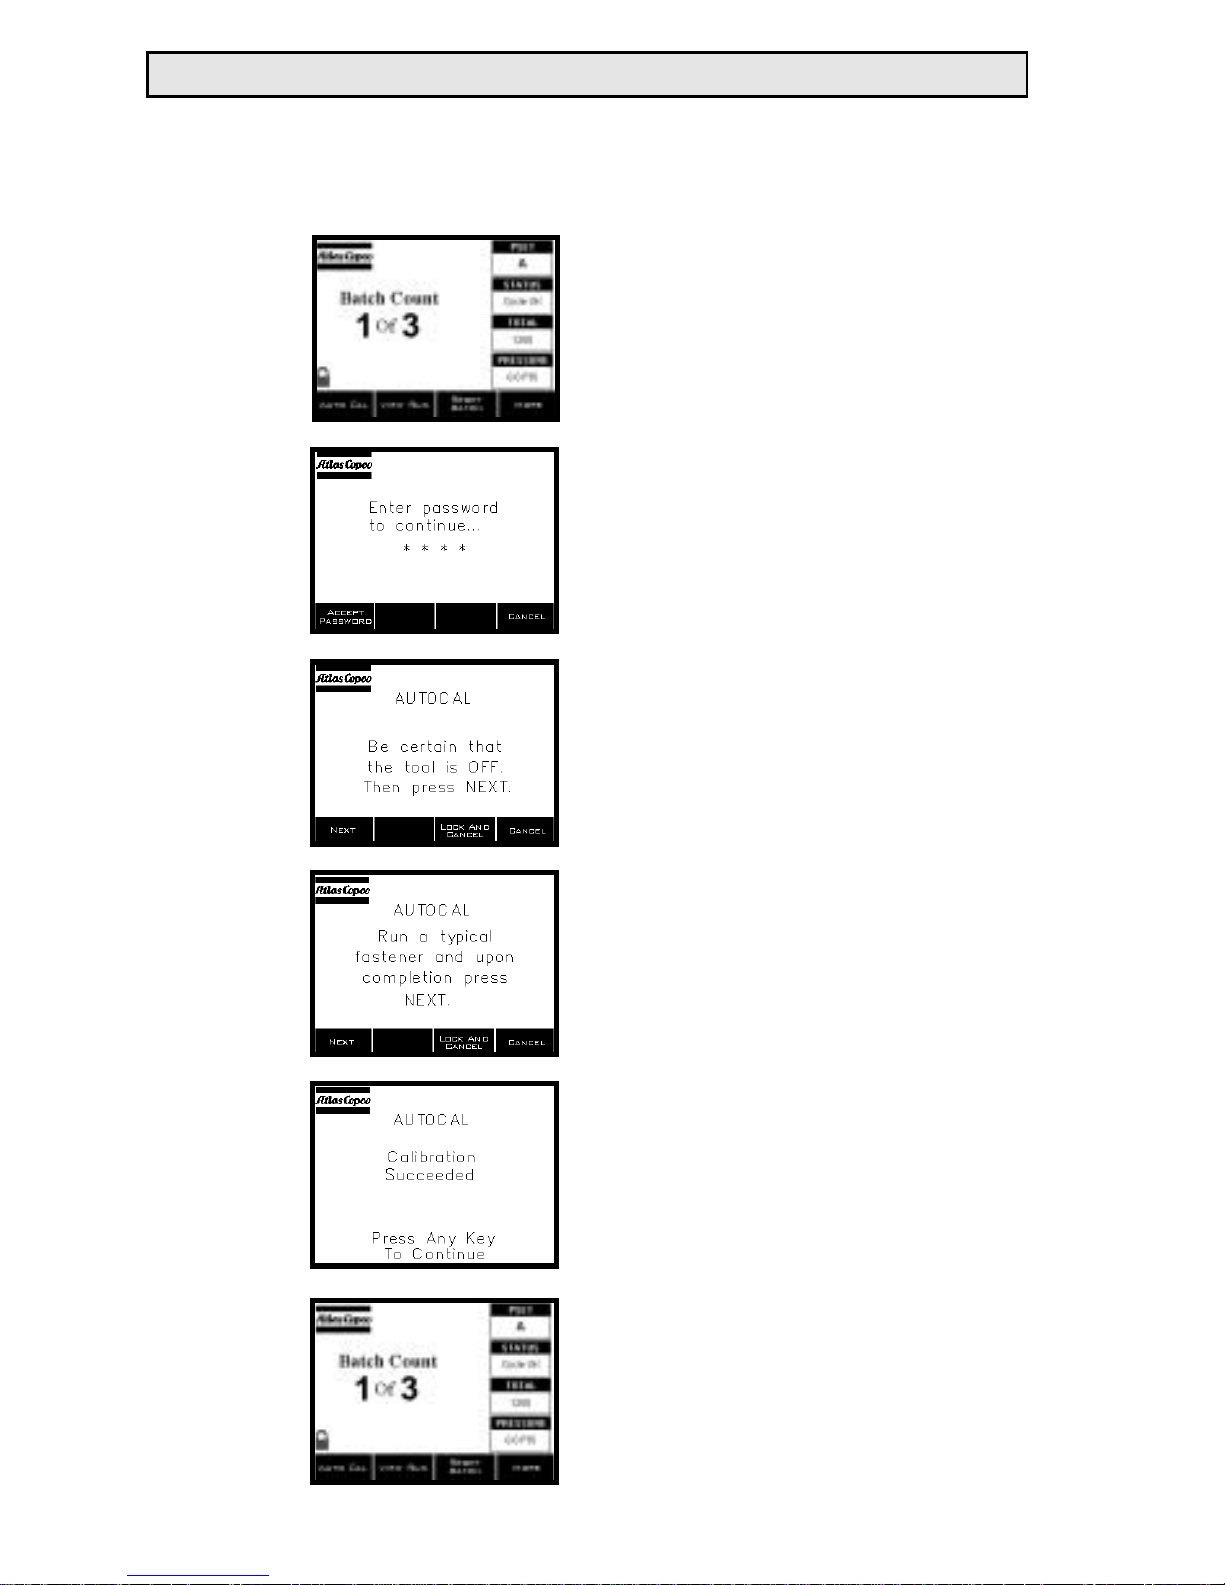
AutoCal™
The RE Qualifier has been programmed to automatically recognize the pneumatic signature from several different types of tools.
In order to calibrate the RE Qualifier using this feature, press the
AutoCal™ soft-key while the unit is showing the main screen.
If the unit is locked, enter the password when prompted for it.
The first screen in the
AutoCal™ process will say,
“AUTOCAL .. Be certain that
the tool is OFF. Then press
NEXT.”. At this point be
sure the pressure transducer is
connected to both the tool
and to the RE Qualifier and
push the soft-key labeled
NEXT.
After pressing NEXT, the screen will state, “AUTOCAL .. Run a
typical fastener and upon completion press NEXT.”. Tighten a
target fastener using the tool that the RE Qualifier is monitoring.
During this process, run the
fastener completely allowing
the tool’s clutch mechanism
to turn off the tool. If you
make a mistake during this
part of the process, run another fastener. The RE Qualifier
will use the very last fastening process it sees as the
basis for the calibration.
RE Qualifier System Manual 6
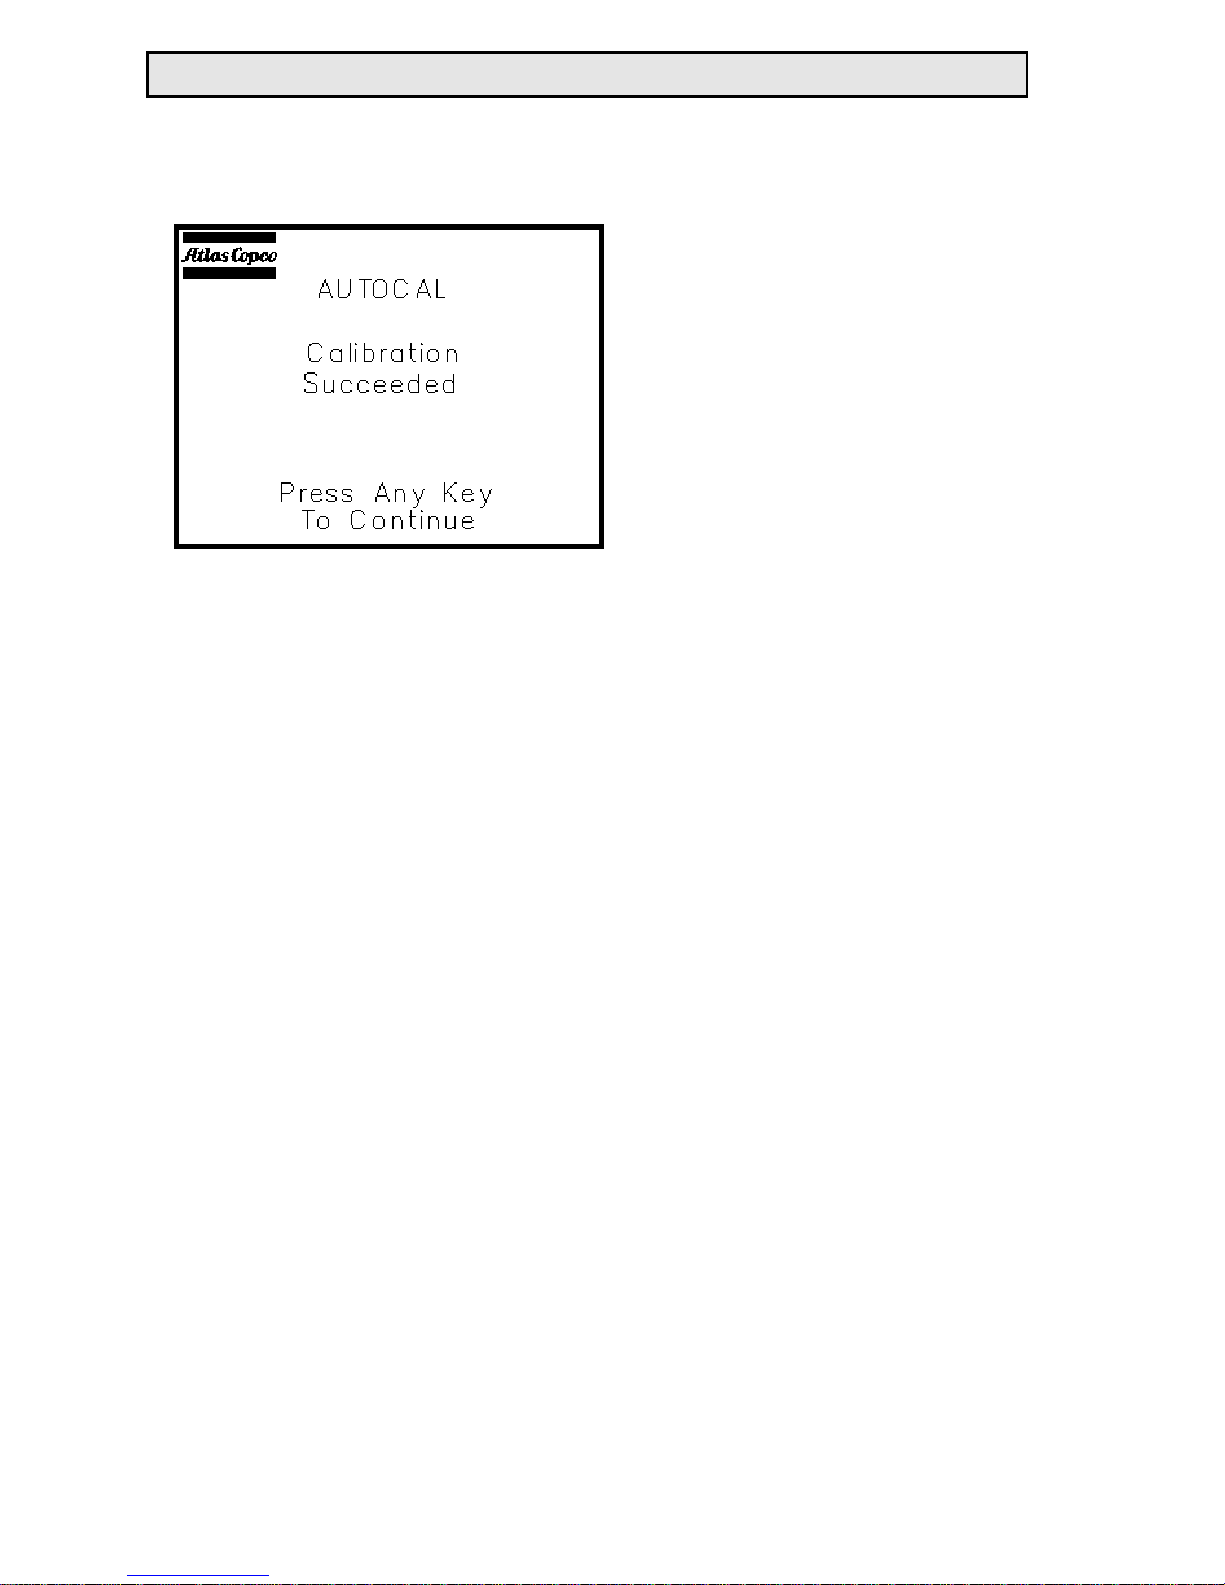
At the end of the fastening sequence, release the tool and press
the NEXT soft-key. The REQualifier will try to set-up it’s
calibration parameters using
the pneumatic signature from
the last run.
Once the calibration attempt
is complete, the RE Qualifier
will inform the user if the calibration was successful or
not. In either case, pressing
any key on the key-pad will return the user to the main screen.
7 RE Qualifier System Manual
 Loading...