

Page 1
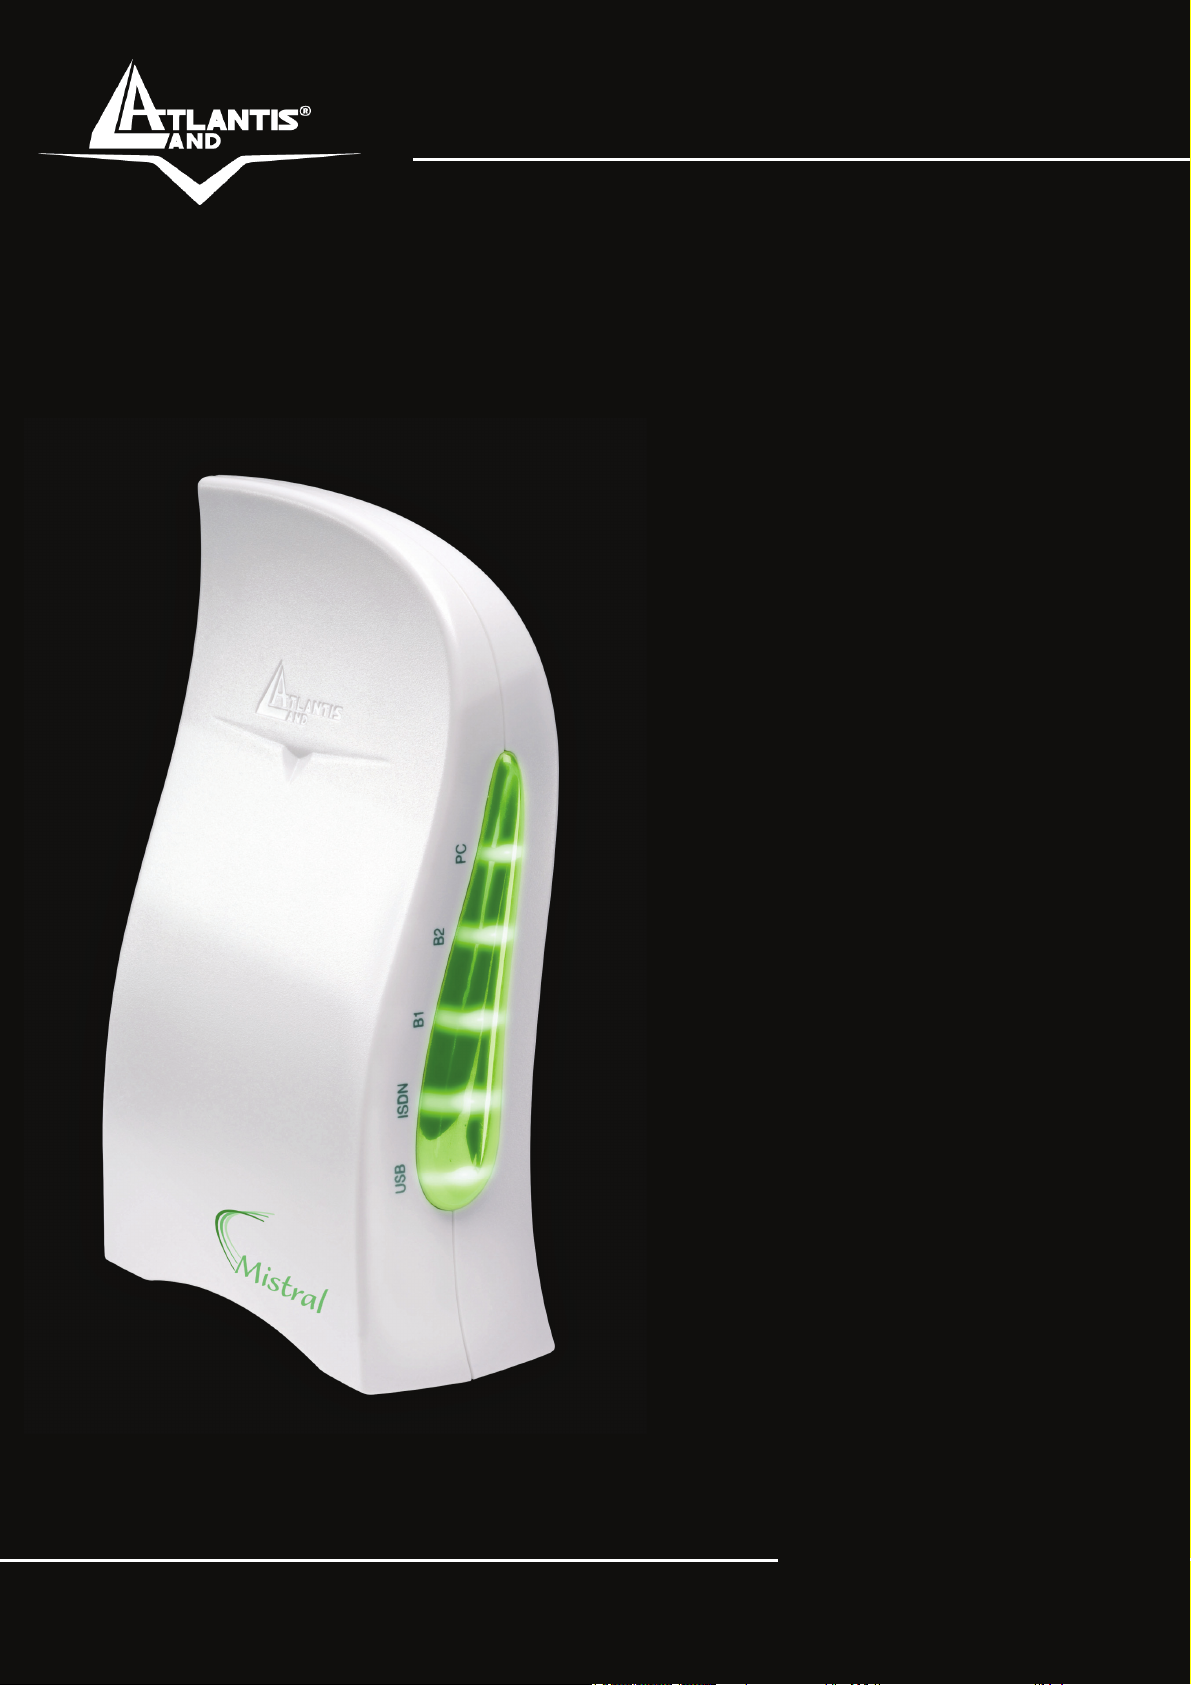
WebRunner Mistral
ISDN USB Terminal Adapter
A01-IU1
MULTILANGUAGE
MANUAL
Company certified ISO 9001:2000
A01-IU1_MX02
Where solutions begin
Page 2

Page 3

ITALIANO
Questo prodotto è coperto da garanzia Atlantis Land On-Site
della durata di 3 anni. Per maggiori dettagli in merito o per
accedere alla documentazione completa in Italiano fare
riferimento al sito www.atlantis-land.com.
ENGLISH
This product is covered by Atlantis Land 3 years On-Site
warranty. For more detailed informations please refer to the web
site www.atlantis-land.com.
For more detailed instructions on configuring and using this
device, please refer to the online manual.
FRANCAIS
Ce produit est couvert par une garantie Atlantis Land On-Site
3 ans. Pour des informations plus détaillées, référez-vous svp
au site Web www.atlantis-land.com.
DEUTSCH
Dieses Produkt ist durch die Atlantis Land 3 Jahre On-Site
Garantie gedeckt. Für weitere Informationen, beziehen Sie sich
bitte auf Web Site www.atlantis-land.com.
ESPAÑOL
Este producto està cubierto de garantía Atlantis Land On-Site
por 3 años. Para una información más detallada, se refiera por
favor al Web site www.atlantis-land.com
.
Company certified ISO 9001:2000
Where solutions begin
Page 4
The award of the information is facultative, but its lack will
prevent ATLANTIS LAND® from starting the Guarantee process
requested.
r
a
a
y
o
u
r
p
r
o
d
u
c
t
!
c
u
u
o
o
c
o
c
m
t
t
m
m
!
!
y
o
u
r
p
r
o
n
n
y
n
t
o
t
t
u
r
i
s
-
l
i
s
-
l
i
s
-
d
p
r
o
d
a
n
d
.
a
n
n
d
d
c
.
c
.
a
l
R
e
g
i
s
t
e
R
e
g
R
e
w
w
w
w
w
w
g
w
w
w
Registration on the web site
r
i
s
t
e
r
i
s
t
e
.
a
t
l
a
.
a
t
l
.
a
t
l
www.atlantis-land.com within 15 days
from the purchase of the product dismiss
the customer from showing a valid proof of
purchase (Sale Receipt or Invoice) in case
of the request of intervention. For further
information we invite you to look at our web
site at the section WARRANTY.
Copyright
The Atlantis Land logo is a registered trademark of Atlantis Land
SpA. All other names mentioned mat be trademarks or
registered trademarks of their respective owners. Subject to
change without notice. No liability for technical errors and/or
omissions.
Company certified ISO 9001:2000
Where solutions begin
Page 5

MULTILANGUAGE MANUAL
ITALIANO
1.1 Panoramica........................................................... 9
1.2 Contenuto della Confezione............................... 9
1.3 Caratteristiche Tecniche................................... 10
1.4 Requisiti di Sistema........................................... 10
1.5 I LED frontali....................................................... 11
1.6 Le porte posteriori.............................................. 12
1.7 Installazione del Mistral su Windows 2000/XP
..................................................................................... 12
1.8 Installazione del Mistral su Windows 98SE/ME
..................................................................................... 16
1.9 Installazione delle Utilità ISDN ........................ 20
1.10 Programma Diagnostico................................. 20
1.11 Disinstallazione................................................ 22
1.12 Risoluzione Problemi ...................................... 23
1.13 Supporto Offerto .............................................. 25
ENGLISH
1.1 Overview of the MISTRAL USB......................... 29
What is ISDN? .................................................. 29
What is USB?.................................................... 29
The MISTRAL USB.......................................... 30
1.2 Package Contents ............................................. 30
1.3 MISTRAL USB Features .................................. 31
1.4 Before Installing ................................................. 32
1.5 The Front Panel LEDs ...................................... 33
1.6 The Rear Ports................................................... 34
1.7 Windows 2000/XP ............................................. 34
1.8 Windows 98SE/ME............................................ 35
5
Page 6

MULTILANGUAGE MANUAL
1.9 Using Multilink PPP of Microsoft Dial-Up
Networking................................................................. 39
1.10 ISDN Utility Installation................................... 43
1.11 The Diagnostic Program................................. 44
1.12 Uninstalling the MISTRAL USB..................... 45
1.13 Troubleshooting ............................................... 46
1.14 Support.............................................................. 48
A01-IU1_MX02(V1.1 April 2006)
6
Page 7

ITALIANO
AVVERTENZE
Abbiamo fatto di tutto al fine di evitare che nel testo, nelle
immagini e nelle tabelle presenti in questo manuale, nel
software e nell'hardware fossero presenti degli errori.
Tuttavia, non possiamo garantire che non siano presenti
errori e/o omissioni. Infine, non possiamo essere ritenuti
responsabili per qualsiasi perdita, danno o incomprensione
compiuti direttamente o indirettamente, come risulta
dall'utilizzo del manuale, software e/o hardware.
Il contenuto di questo manuale è fornito esclusivamente per
uso informale, è soggetto a cambiamenti senza preavviso (a
tal fine si invita a consultare il sito www.atlantisland.it
www.atlantis-land.com
non deve essere interpretato come un impegno da parte di
Atlantis Land spa che non si assume responsabilità per
qualsiasi errore o inesattezza che possa apparire in questo
manuale. Nessuna parte di questa pubblicazione può essere
riprodotta o trasmessa in altra forma o con qualsiasi mezzo,
elettronicamente o meccanicamente, comprese fotocopie,
riproduzioni, o registrazioni in un sistema di salvataggio,
oppure tradotti in altra lingua e in altra forma senza un
espresso permesso scritto da parte di Atlantis Land spa.
Tutti i nomi di produttori e dei prodotti e qualsiasi marchio,
registrato o meno, menzionati in questo manuale sono usati
al solo scopo identificativo e rimangono proprietà esclusiva
dei loro rispettivi proprietari.
Approvazioni CE
per reperirne gli aggiornamenti) e
o
La Comunità Europea ha approvato che tutti i dispositivi
ISDN possano venire connessi all’Euro-ISDN in tutti i paesi
dell’Unione Europea.
Atlantis Land MISTRAL USB è stato approvato dalla
German TÜV, in accordo con le nuove procedure europee e
può quindi essere collegato all’Euro-ISDN in tutti i paesi
dell’EU. Questo ISDN TA è quindi conforme con:
• CTR-3 (Accesso base ISDN)
• Standard di compatibilità elettromagnetica
7
Page 8

ITALIANO
• Standard di sicurezza
Restrizioni di responsabilità CE/EMC
Il prodotto descritto in questa guida è stato progettato,
prodotto e approvato in conformità alle regole EMC ed è
stato certificato per non avere limitazioni EMC.
Se il prodotto fosse utilizzato con un PC non certificato, il
produttore non garantisce il rispetto dei limiti EMC. Il
prodotto descritto è stato costruito, prodotto e certificato in
modo che i valori misurati rientrino nelle limitazioni EMC. In
pratica, ed in particolari circostanze, potrebbe essere
possibile che detti limiti possano essere superati se utilizzato
con apparecchiature non prodotte nel rispetto della
certificazione EMC. Può anche essere possibile, in alcuni
casi, che i picchi di valore siano al di fuori delle tolleranze. In
questo caso l’utilizzatore è responsabile della “compliance”
con i limiti EMC. Il Produttore non è da ritenersi
responsabile nel caso il prodotto sia utilizzato al di fuori delle
limitazioni EMC.
8
Page 9

ITALIANO
1.1 Panoramica
Il Mistral USB è il prodotto ideale per accedere in maniera
semplice e funzionale alla rete ISDN (Integrated Services
Digital Network). Il Mistral USB è facile da installare e
semplice da configurare, grazie al supporto Plug and Play
per i sistemi operativi più diffusi.
E’ possibile utilizzare il Mistral USB come un telefono ISDN
o una segreteria telefonica, eseguire file transfer, videotext,
funzioni fax G3/G4 e accedere a Internet fino a 128Kbps.
USB è l’abbreviazione di Universal Serial Bus. E’ un bus che
utilizza un unico connettore per qualsiasi tipo di periferica ad
esso collegato, tanto per dispositivi a bassa velocità
(tastiera, mouse) tanto per dispositivi a media o alta velocità
(quali scanner, videocamera o un TA o modem ADSL). I PC
equipaggiati con tale tecnologia permettono la
configurazione automatica delle periferiche al momento del
loro collegamento, senza richiedere il riavvio del sistema. Il
bus USB inoltre permette di gestire sino a 127 dispositivi.
Mettendo a disposizione una banda di 12Mbps, USB è lo
standard di connessione adeguato per l’impiego di TA ISDN,
poiché evita le limitazioni di velocità della porta seriale.
1.2 Contenuto della Confezione
Una volta aperta la confezione in cartone dovrebbero essere
presenti i seguenti componenti:
• Mistral USB
• CDRom contente manuali, Driver ed Utility
• CD-Rom contenente il software completo RVS-Com
Lite
• Manuale multilingua
• Cavo USB
• Cavo ISDN
9
Page 10

ITALIANO
Qualora mancasse uno qualsiasi di questi componenti è
necessario rivolgersi immediatamente al rivenditore.
1.3 Caratteristiche Tecniche
• Alimentato tramite il bus USB
• Collegabile e staccabile a caldo dal PC (“Hot”
Plug’n’Play)
• Plug and Play 98/98SE/ME/2000/XP
• Supporto dei driver CAPI a 16 e a 32-bit
• Supporto dei driver TAPI e NDIS WAN miniport
• Supporto Multilink PPP (MP) per connessioni verso
Internet e trasferimento di dati a 128Kbps (due
canali B)
• Supporto dei protocolli: X.75, T.70NL, ISO8208,
T.90, HDLC transparent sul canale B per T-Online,
AOL, CompuServe, BTX, BBS, Eurofile transfer e
G4 per l’invio/ricezione Fax
• Supporto di un driver bit-transparent per segreteria e
fax G3
• Supporto V.110 e V.120
• Supporto di porte COM virtuali utilizzabili da
programmi applicativi che ne richiedono l’utilizzo
1.4 Requisiti di Sistema
Verificare di avere a disposizione tutto il necessario per
eseguire l’installazione di MISTRAL USB. E’ necessario
disporre di:
• Un PC con un connettore USB libero ed il controller
USB correttamente installato
• Microsoft Windows 98, ME,2000 o XP
• Almeno 10 MB di spazio libero sull’Hard Disk
• Una linea ISDN BRI attiva
10
Page 11
ITALIANO
• Almeno Intel® Pentium®III 600Mhz o superiore con
128MB RAM
Qualora il PC non disponesse dello slot USB è
possibile utilizzare adattatori USB-PCI .
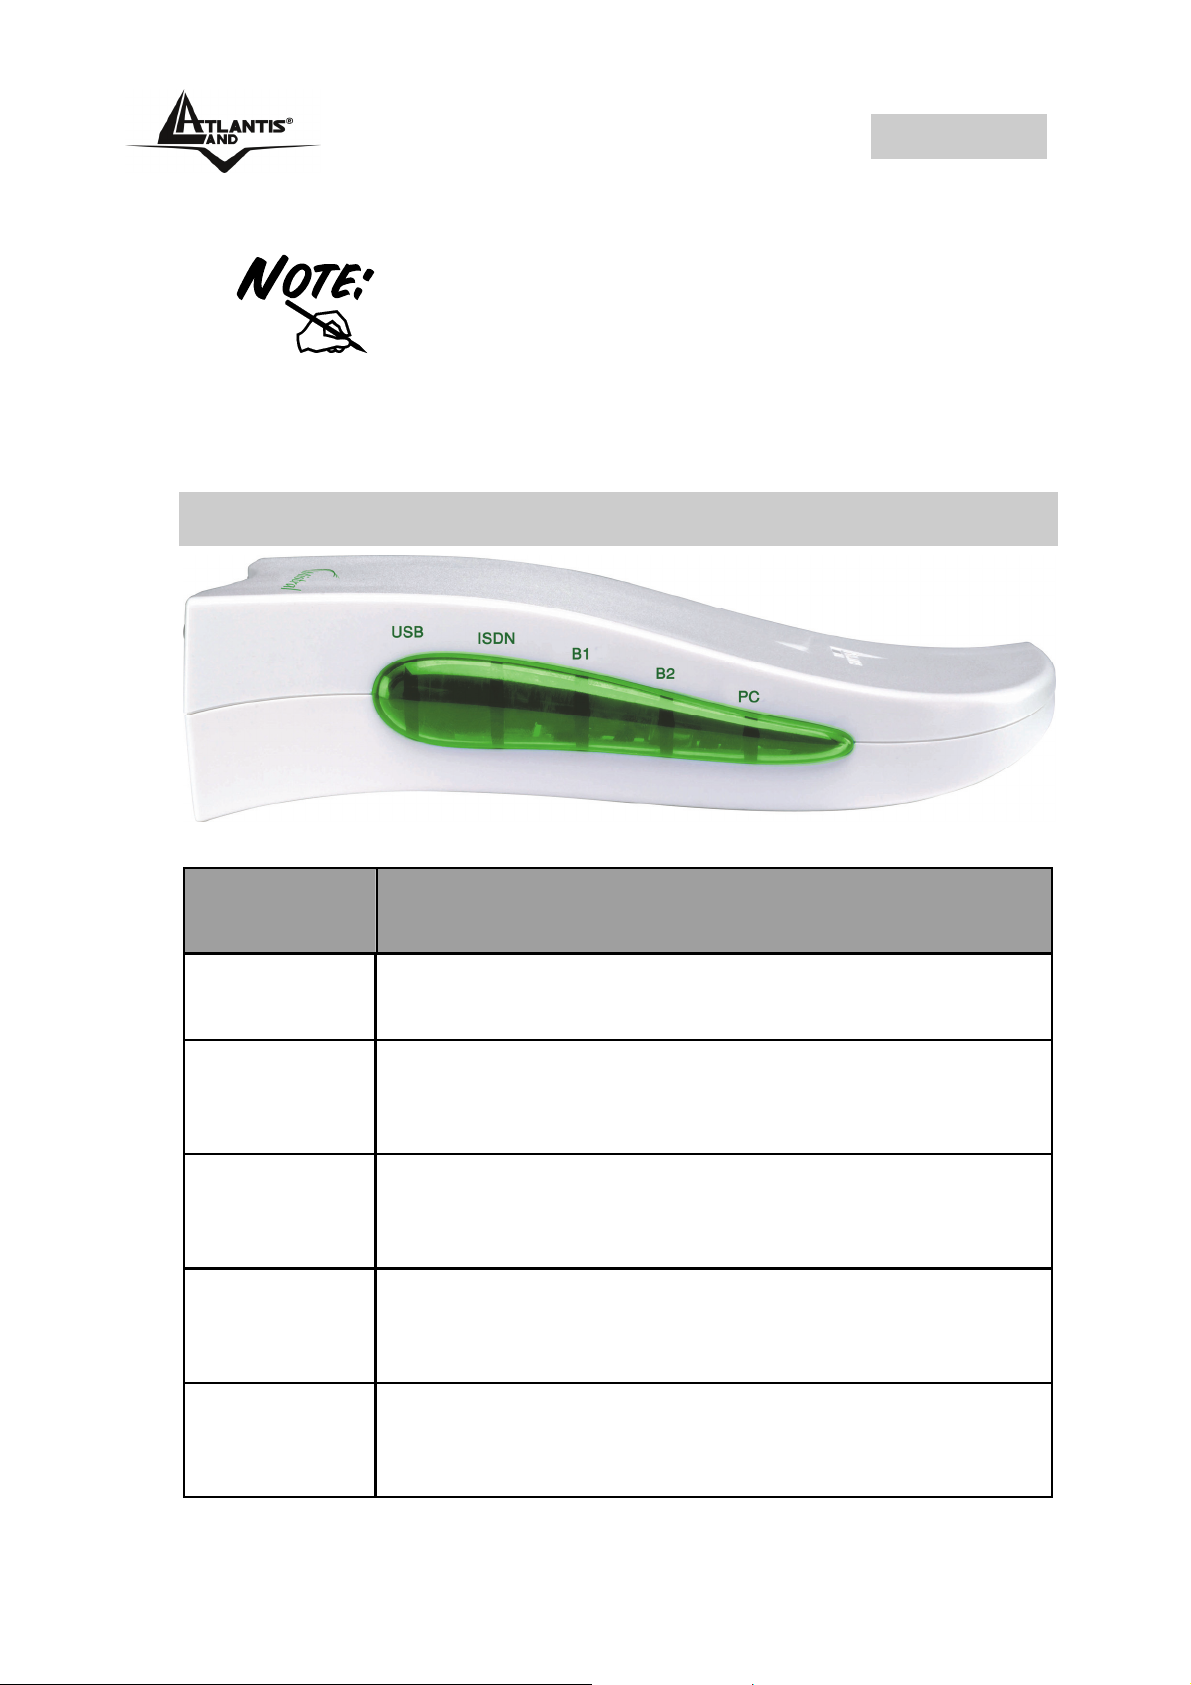
1.5 I LED frontali
LED INFORMAZIONE
Quando acceso indica che il TA è connesso
USB
ISDN
B1
B2
al PC e che sta funzionando propriamente
Se acceso indica che la linea ISDN è attiva.
Lampeggia quando sul canale D transitano
informazioni
Se acceso indica l’occupazione del canale
ISDN B1, se lampeggia indica trasferimento
dati sul canale
Se acceso indica l’occupazione del canale
ISDN B2, se lampeggia indica trasferimento
dati sul canale
Quando acceso indica che almeno una
PC
applicazione del PC sta usando il Mistral
USB TA
11
Page 12

ITALIANO
1.6 Le porte posteriori
PORTE UTILIZZO
Connettere il cavo USB a questa
USB
LINE
porta per connettere il Mistral al
PC.
Connettere il cavo ISDN a questa
porta per effettuare l’allacciamento
con la linea ISDN
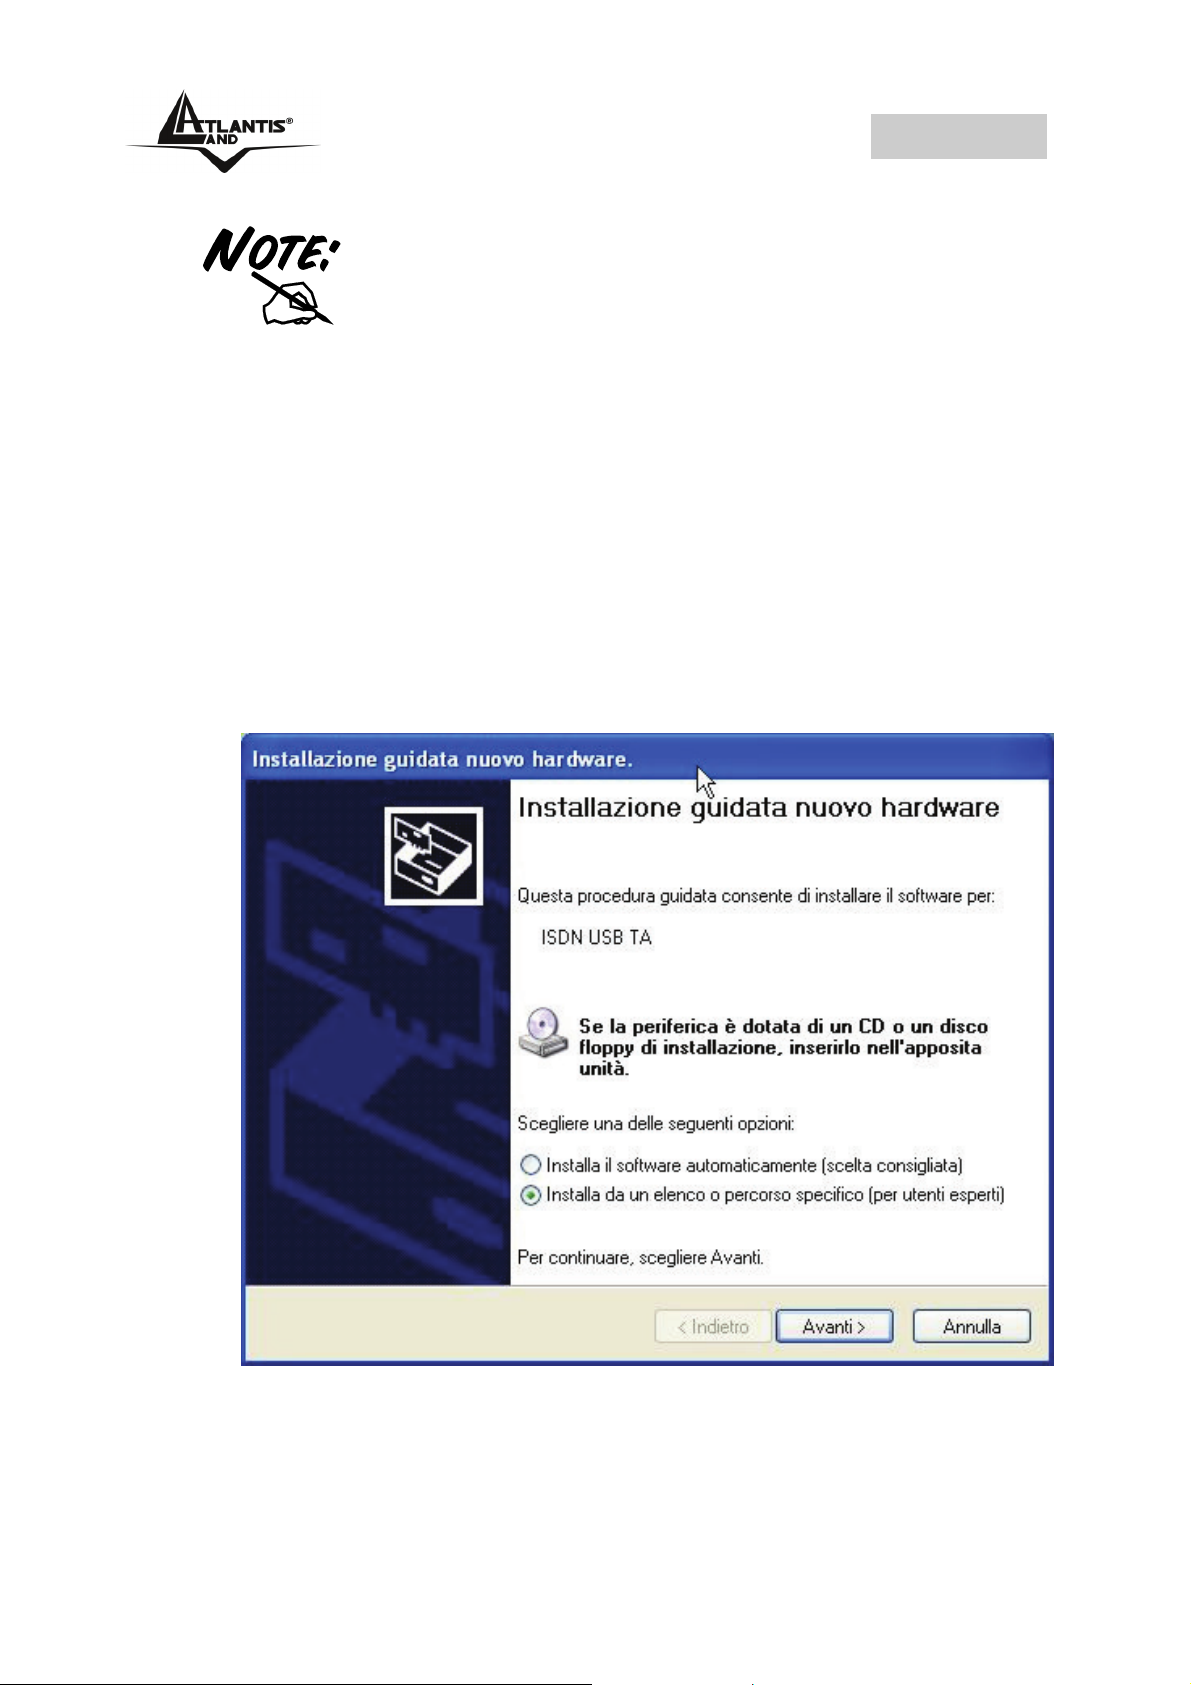
1.7 Installazione del Mistral su Windows
2000/XP
Per installare correttamente MISTRAL USB è opportuno
seguire le seguenti istruzioni:
• Connettere la linea ISDN al Mistral USB (nella porta
LINE) utilizzando il cavo RJ45 fornito.
• Connettere il cavo USB al jack USB del Mistral.
Connettere poi l’altro capo del cavo USB ad un
connettore USB libero (può essere quello del PC, un
monitor o altro).
12
Page 13
ITALIANO
Il Mistral USB viene alimentato dalla porta
USB pertanto non va collegato a
• Tutti i vari Led si accenderanno per un istante e si
spegneranno uno ad uno. Qualora questo non
accadesse (e la periferica non venga rilevata dal
Sistema Operativo) andare alla sezione Risoluzione
Problem alla fine di questo manuale.
• Il Sistema Operativo immediatamente mostrerà una
finestra in cui informa di aver rilevato una periferica.
dispositivi particolari (quali tastiere) che
non possano fornire una corretta
alimentazione.
13
Page 14

ITALIANO
• Scegliere Installa da un elenco i percorso
specifico (per utenti esperti) e premere su Avanti.
• Evidenziare i vari bottoni come in figura e premere
su sfoglia ed indicare il percorso dei driver
(CDRom:\Mistral USB\Driver\) e premere Avanti.
• Premere poi su Continua (all’apparire della finestra
del non superamento del Win Logo). Premere
nuovamente su Continua (all’apparire nuovamente
della finestra del non superamento del Win Logo).
• Premere su Fine per portare a termine
l’installazione.
• Non resta che creare la Connessione Remota verso
l’ISP.
• Andare in Pannello di Controllo(passa alla
visualizzazione classica), poi in Connessione di
Rete e cliccare su Crea una nuova connessione.
Cliccare su Avanti e scegliere connessione a
14
Page 15

ITALIANO
Internet, poi Imposta connessione manualmente
ed infine Connessione tramite modem remoto.
Apparirà la finestra in cui scegliere se utilizzare un
solo canale o entrambi (scegliere, in questo caso,
l’opzione linee isdn a connessione multipla).
E’ comunque possibile aggiungere un
secondo canale alle connessione fatta
inizialmente con uno soltanto. In
XP/2000 andare in pannello di
controllo (passa alla visualizzazione
classica) poi connessioni di rete ed
infine sulla connessione, premere il
tasto destro e poi il tab rete e spuntare
la voce relativa al secondo canale.
15
Page 16

ITALIANO
Per ottenere una connessione in
Multilink PPP è necessario che tale
servizio sia supportato dall’ISP (Internet
Service Provider).
In caso di problemi con l’installazione
su Windows 2000 Service Pack 4 è
consigliabile scaricare la patch al
seguente indirizzo:
http://www.microsoft.com/downloads/de
tails.aspx?displaylang=en&FamilyID=7c
896e82-4b50-44c8-a6343227c0e71293
Non interrompe per alcuna ragione
l’installazione dei driver. Qualora questo
accadesse è opportuno far ripartire
l’installazione con la seguente
procedura: Pannello di Controllo,
Sistema, Hardware, Gestione
Periferiche, evidenziare la periferica
non installata (punto escalamativo
giallo) ed aggiornarne i driver.
1.8 Installazione del Mistral su Windows
98SE/ME
Per installare correttamente MISTRAL USB è opportuno
seguire le seguenti istruzioni:
16
Page 17

ITALIANO
• Connettere la linea ISDN al Mistral USB (nella porta
LINE ) utilizzando il cavo RJ45 fornito.
• Connettere il cavo USB al jack USB del Mistral.
Connettere poi l’altro capo del cavo USB ad un
connettore USB libero (può essere quello del PC, un
monitor o altro).
Il Mistral USB viene alimentato dalla porta
USB pertanto non va collegato a
• Il Sistema Operativo immediatamente mostrerà una
finestra in cui informerà di aver rilevato una
periferica (foto sotto), premere su Avanti per
proseguire.
• Spuntare poi l’opzione cerca il miglior driver per la
periferica (scelta consigliata) e cliccare su Avanti.
dispositivi particolari (quali tastiere) che
non possano fornire una corretta
alimentazione.
17
Page 18

ITALIANO
• Scegliere: Specificare un percorso, premere su
sfoglia ed indicare la directory in cui sono contenuti i
driver (CDRom:\Mistral USB\Driver\). Premere poi
su Avanti.
• Se dovesse apparire la finestra di sotto premere su
Avanti.
• Potrebbe apparire la richiesta di inserire il CDRom
del SO (inserirlo ed indicarne il percorso).
18
Page 19

ITALIANO
• Premere Fine per terminare l’installazione e fare
riavviare poi il PC.
• Una volta riavviato il SO non resta altro che creare
la connessione remota col proprio ISP.
• Andare in Risorse del Computer, poi in Accesso
Remoto e cliccare su Crea una nuova
connessione, scegliere una periferica ISDN (ISDN
channel 0 oppure ISDN channel 1) ed introdurre
tutti i dati relativi alla connessione con l’ISP. E’
possibile aggiungere un secondo canale alle
connessione andando in pannello di controllo poi
connessioni di rete ed infine sulla connessione,
premere il tasto destro e poi il tab collegamento
19
Page 20

ITALIANO
multiplo e premere su utilizza periferiche
aggiuntive, poi aggiungi e scegliere l’altro canale
(mettendo lo stesso numero telefonico dell’ISP). In
Windows ME andare su pannello di controllo, poi
connessioni di rete ed infine sulla connessione
premere il tasto destro, evidenziare il tab
collegamento multiplo e poi utilizza periferiche
aggiuntive. Cliccare su aggiungi, scegliere l’altro
canale ed immettere lo stesso numero telefonico.
1.9 Installazione delle Utilità ISDN
L’ISDN Utility include programmi di supporto per il MISTRAL
USB, come il programma di diagnostica e il programma di
disinstallazione. Per installare l’ISDN Utility, seguire le
seguenti istruzioni:
• Inserire il il CDRom nell’apposito drive e lanciare il
setup contenuto nella cartella CDRom:\Mistral
USB\Utility\Setup.exe.
• A questo punto partirà il programma di installazione
dell’ISDN Utility.
• Premere Avanti per iniziare l’installazione dell’ISDN
Utility. Seguire le istruzioni proposte sulle schermo
per completare l’installazione.
L’installazione delle Utilità non è
necessaria. Tale software è stato pensato
per offrire un primo strumento di diagnosi
in caso si presentassero dei problemi.
1.10 Programma Diagnostico
Dopo avere installato il MISTRAL USB, è consigliato
utilizzare il programma di diagnostica per verificarne
l’efficienza i driver ed il collegamento alla linea ISDN. Per
20
Page 21

ITALIANO
avviare il programma di diagnostica seguire le seguenti
istruzioni:
• Cliccare sull’icona Programmi nel menù Start e,
successivamente, cliccare sull’icona ISDN Utility.
• Cliccare sull’icona relativa al programma di
diagnostica per avviare il programma stesso.
• Viene visualizzata la configurazione dell’interfaccia
USB.
• Inserire il numero telefonico della propria linea ISDN
nell’apposito campo.
• Cliccare su Loopback Test per avviare la
procedura di diagnostica. Sarà effettuata una
chiamata dal canale B1 verso il canale B2.
21
Page 22

ITALIANO
1.11 Disinstallazione
Per rimuovere completamente i driver e le utility relative
all’ISDN TA dal Sistema Operativo è opportuno lanciare il
programma di disinstallazione dalle ISDN Utility come
illustrato di seguito:
• Aprire la cartella Programmi dal menù Avvio e
cliccare sull’icona ISDN Utility.
• Cliccare su Uninstall DRV & UTL. La
disinstallazione sarà avviata automaticamente.
22
Page 23

ITALIANO
• Controllare che la disinstallazione sia stata eseguita
completamente e cliccare su OK.
1.12 Risoluzione Problemi
Problema Possibile causa Soluzione
Led USB Spento Il Mistral USB non è
pronto
Led B2 acceso
all’avvio
Led B1 acceso
all’avvio
Non si è in grado
di avviare il
Chip ISDN
malfunzionante
La Ram del
dispositivo è
malfunzionante
Il file CAPI2032.DLL
installato sul sistema
Verificare che il
cavo USB sia
correttamente
collegato alla porta
USB
Contattare il
Supporto Tecnico
Contattare il
Supporto Tecnico
Disinstallare e
reinstallare il
programma di
diagnostica
Il file
CAPI2032.DLL
non è stato
trovato
non è quello in
dotazione
Il file CAPI2032.DLL
è non presente
dispositivo ISDN
Disinstallare e
reinstallare il
dispositivo ISDN
23
Page 24

ITALIANO
Non sono stati
caricati
correttamente i
driver CAPI
Led ISDN
sempre spento
Impossibile
stabilire il LAP D
Connessione
Fallita
Il codice di
registrazione è
danneggiato
La linea ISDN non è
connessa
La linea ISDN
potrebbe essere
malfunzionante
Numero dell’ISP
errato
Disinstallare e
reinstallare il
dispositivo ISDN
Verificare che il
cavo RJ45 sia
connesso alla
linea ISDN e che
non sia
danneggiato
Verificare
l’efficienza della
propria linea ISDN
Verificarlo ed
introdurre quello
corretto
Connessione
Fallita
Per ulteriori dettagli sulla configurazione (sull’installazione
consultare il manualetto allegato) di RVSCom Lite (tale
programma va installato per utilizzare la funzionalità FAX del
Mistral USB), consultare il sito all’indirizzo
www.atlantis-land.com ed accedere alla sezione FAQ.
Altri dispositivi
collegati alla stessa
linea ISDN la stanno
occupando
Il Mistral è stato certificato per funzionare
con RVS-COM Lite (allegato al prodotto)
qualunque altro software potrebbe non
funzionare.
Verificare la
presenza di
dispositivi che
utilizzano i canali
ISDN
24
Page 25

ITALIANO
1.13 Supporto Offerto
Per ogni problema con il Mistral USB consultare questo
manuale alla sezione 1.12.
Per qualunque altro problema o dubbio (prima è
necessario conoscere tutti i parametri usati dall’ISP) è
possibile contattare l’help desk telefonico (02/93907634)
gratuito di Atlantis Land che fornirà assistenza da lunedì al
giovedì dalle 9:00 alle 13:00 e dalle 14:00 alle 18:00. Il
venerdì dalle 9 :00 alle 13 :00. E’ possibile anche utilizzare
il fax (02/93906161) la posta elettronica (info@atlantis-
land.com oppure tecnici@atlantis-land.com).
AtlantisLand spa
Viale De Gasperi 122
20017 Mazzo di Rho(MI)
Tel: 02/93907634(help desk)
Fax: 02/93906161
Email: info@atlantis-land.com
land.com (mettere nell’oggetto il codice del prodotto di
cui si chiede assistenza)
WWW: http://www.atlantisland.it
land.com
oppure tecnici@atlantis-
o www.atlantis-
25
Page 26

ITALIANO
26
Page 27

ENGLISH
Copyright Statement
No part of this publication may be reproduced, stored in a
retrieval system, or transmitted in any form or by any means,
whether electronic, mechanical, photocopying, recording or
otherwise without the prior writing of the publisher.
Windows™ 98SE/2000/ME/XP are trademarks of Microsoft®
Corp. Pentium is trademark of Intel. All copyright reserved.
The Atlantis Land logo is a registered trademark of Atlantis
Land SpA. All other names mentioned mat be trademarks or
registered trademarks of their respective owners. Subject to
change without notice. No liability for technical errors and/or
omissions.
This product is designed for the ISDN with Basic Rate
Interface.
CE Approval
All CE approved ISDN devices may be connected to the
Euro-ISDN in all countries of the EU.
The MISTRAL USB has been approved by the German TÜV
according to the new European procedure and may
therefore be connected to the Euro-ISDN in all EU countries.
This ISDN TA therefore complies with:
• CTR-3 (ISDN Basic Rate Access)
• Electromagnetic Compatibility Standards
• Safety Standards
The manufacturer refuses all liability claims and may not be
liable in any cases, which may occur in the practical use of
the product outside of the EMC limitation.
CE/EMC Restriction of Liability
The product described in this handbook was designed,
produced and approved according to the EMC-regulations
and is certified to be within EMC limitations.
If the product is used in an uncertified PC, the manufacturer
undertakes no warranty in respect to the EMC limits. The
27
Page 28

ENGLISH
described product in this handbook was constructed,
produced and certified so that the measured values are
within EMC limitations. In practice and under special
circumstances, it may be possible, that the product may be
outside of the given limits if it is used in a PC that is not
produced under EMC certification. It is also possible in
certain cases and under special circumstances, which the
given EMC peak values will become out of tolerance. In
these cases, the user himself is responsible for compliance
with the EMC limits.
28
Page 29

ENGLISH
1.1 Overview of the MISTRAL USB
What is ISDN?
ISDN is an abbreviation for Integrated Services Digital
Network. ISDN transfers information digitally and integrates
all telecommunication services (such as telephone, teletext,
videotex, etc.) into a single network. Using ISDN, you can
transfer text, voice, data files, images, and even video.
Before the use of ISDN, telecommunications operated using
analog devices, which limited the quality of
telecommunication transfers. With ISDN technology, the
telephone lines can transmit data digitally with much greater
speed and clarity of transmission than with analog
transmissions. The ISDN is capable of transmitting all kinds
of information at greatly accelerated rates. A typical modem
transmission has a rate of 33.6Kbps (kilobits per second or
thousand bits per second). ISDN digital technology allows
transfer rates of up to 128Kbps.
Because ISDN transmits data digitally, the data is virtually
error free, and the transmission is much clearer, with fewer
interruptions and slowdowns in facsimile transmissions.
With ISDN devices implemented throughout the world, a
truly digital network will emerge, allowing everyone fast and
easy access to the global information highway.
What is USB?
USB is an abbreviation for Universal Serial Bus. It is a new
peripheral bus employing a single connector type for all lowspeed and medium-speed devices, such as keyboard,
mouse, monitor, floppy drive, printer, scanner, digital
camera, modem and ISDN TA. It brings plug-and-play of
computer peripherals outside the box, eliminating the need
to install cards into dedicated computer slots and reconfigure
the system. PCs equipped with USB allow computer
peripherals to be automatically configured as soon as they
are hot attached, without the need to reboot. USB also
29
Page 30

ENGLISH
allows multiple devices, up to 127, to run simultaneously on
a computer; some peripherals, such as monitors and
keyboards, can act as additional plug-in hubs to make it
easy for users to manage peripherals on the desktop. USB
does offer unprecedented peripheral expandability and ease
of use for PC users.
With better throughput of 12Mbps (megabits per second or
million bits per second), USB is expected to rapidly become
the preferred means of connecting ISDN TAs, though it will
not replace the traditional PC ports (COM and LPT)
overnight.
The MISTRAL USB
The MISTRAL USB is ideally suited to give your PC access
to the world of the Integrated Services Digital Network. It is
easy to install, and easy to configure because it is fully plugand-play compatible. The Windows 98 or 2000 operating
system will automatically install and configure the MISTRAL
USB.
With the MISTRAL USB, you can have an ISDN telephone,
answering machine, file transfer, videotex, G3/G4 Fax
functions, and Internet access. This will bring you more
versatility and efficiency in the ISDN era.
1.2 Package Contents
• Mistral USB
• One CD-Rom containing the online manual, Driver
and Utility
• One CD-Rom containing RVS-COM Lite
• One Quick Start Guide
• One USB Cable
• One ISDN Cable
30
Page 31

ENGLISH
If any of the above items are missing, please contact
your reseller.
1.3 MISTRAL USB Features
The MISTRAL USB supports many standard and enhanced
features, including the following:
• Fully plug-and-play compatible
• Hot attach and detach without rebooting the PC
• Bus-powered, no extra power adapter
• Provides telephony functions with a headset
(optional)
• Supports both 16-bit and 32-bit CAPI drivers
• Supports TAPI and NDIS WAN miniport drivers
• Supports Multilink PPP (MP) for 128Kbps (two B
channels) internet access and data transfer
• Supports X.75, T.70NL, ISO8208, T.90, and HDLC
transparent protocols on the B channel for T-Online,
AOL, CompuServe, BTX, BBS, Eurofile transfer, and
G4 Fax.
• Has support for a bit-transparent driver on the B
channel for answering machine, G3 Fax and softmodem functions
• Supports both V.110 and V.120 rate adaptation
• Supports COM port simulation for modem-based
application programs
If you want to send and receive the
Group 3 (G3) fax at 14.4Kbps, you
should have a Pentium processor.
31
Page 32

ENGLISH
1.4 Before Installing
Make sure that you have all you need to install the MISTRAL
USB. You should have the following:
• A PC that has USB connector and its USB controller
is working properly as shown below
• Microsoft Windows 98, ME or 2000
• At least 10MB of free disk space for the driver and
software
• An ISDN basic rate S0 interface released by PTT
(Post, Telephone and Telegraph administration)
• Intel® Pentium®III 600Mhz or compatible processor
with 128MB RAM
For some PCs without USB connector, you
may have to connect an adapter to your
motherboard so that you can plug in your
USB peripherals.
32
Page 33

ENGLISH
1.5 The Front Panel LEDs
LED MEANING
When this LED is lit, it indicates that the
USB
ISDN
B1
B2
PC
USB port is connected to the PC and
working properly.
When lit it indicates that the ISDN S0 bus
is activated. It will flash when there is
message transfer in the D channel.
When lit it indicates that the ISDN B1
channel is being accessed. It will flash
when there is data transfer in the B1.
When lit it indicates that the ISDN B2
channel is being accessed. It will flash
when there is data transfer in the B2.
When this LED is lit, it indicates that there
is at least one application program using
the MISTRAL USB.
33
Page 34

ENGLISH
1.6 The Rear Ports
PORT MEANING
Connect the supplied USB cable to
USB
this port when connecting to the
Personal Computer.
Connect the supplied ISDN(RJ45)
LINE
cable to this port when connecting to
the ISDNnetwork.
1.7 Windows 2000/XP
Please refer to the following instructions and figures for
installation procedures:
• Connect your ISDN line to the RJ-45 jack labeled
LINE on the back of the Mistral USB.
• Connect the USB cable to the jack labeled USB on
the back of the Mistral. Connect the other end to the
PC or to a self-powered USB hub device, e.g.,
monitor.
34
Page 35

ENGLISH
You should not connect the MISTRAL USB
to a bus-powered USB hub device, such as
• All the LEDs will be lit and, then, extinguished one
by one.
• Windows will tell you that the new device has been
detected. You will then see the following screen.
Click Next >.
• Select Search for a suitable driver for my device
(In Windows XP select Install from a list or
specific location). Click Next>. In next window,
check Specify a location and click Next>.
keyboard, because there could be not
enough power for the ISDN TA.
• Click Browse… to specify the driver directory such
as CDRom:\Mistral USB\Driver for installing Mistral
USB Adapter . Click OK and then Next> to continue.
• When windows titled Digital Signature Not Found
appear, press Yes to continue the installation.
• When the installation is completed, click Finish
button.
1.8 Windows 98SE/ME
Please refer to the following instructions and figures for
installation procedures:
• Connect your ISDN line to the RJ-45 jack labeled
LINE on the back of the Mistral USB.
• Connect the USB cable to the jack labeled USB on
the back of the Mistral. Connect the other end to the
PC or to a self-powered USB hub device, e.g.,
monitor.
35
Page 36

ENGLISH
You should not connect the MISTRAL USB
to a bus-powered USB hub device, such as
• All the LEDs will be lit and, then, extinguished one
by one.
• After that, Windows will detect it and pop-up the
following screen after “Building driver information
database”.
keyboard, because there could be not
enough power for the ISDN TA.
• Press Next >, then select Search for the best
driver for your device and press Next > again.
• Insert the Driver Installation Diskette or CD into the
appropriate drive (A:, B:, or D:, etc.) and specify the
path of the driver (CDRom\Mistral USB\Driver).
• Press Next > twice. Windows will start copying the
CAPI driver files to Windows sub-directories.
• While Windows is installing the NDIS WAN miniport
driver, you might see the following screen.
36
Page 37

ENGLISH
• You can press Next > and Finish.
• After Windows finishes installing all the drivers, you
will be prompted to restart the computer.
• Press Yes to restart your computer.
• After PC restarts, you can check the Device
Manager to see if the MISTRAL USB has been
properly installed.
37
Page 38

ENGLISH
• In addition, we strongly recommend you to install the
ISDN Utility and run the Diagnostic Program to
make sure the MISTRAL USB, its drivers and the
ISDN line are all properly installed and connected.
You can refer to the following sections for details.
38
Page 39

ENGLISH
1.9 Using Multilink PPP of Microsoft
Dial-Up Networking
To have multilink PPP
connections, the answering
Internet Service Provider (ISP),
To configure the multilink support in Microsoft’s Dial-Up
Networking, please follow these steps.
• Double click on the “My Computer” icon on your
Windows Desktop, then double click on the “Dial-Up
online service or corporate LAN
must provide multilink capabilities.
Networking” (DUN) folder.
• The DUN folder displays an icon labeled “Make New
Connection”, plus icons for each of the connections
that you have already created. If you have not yet
created a connection, double click on “Make New
Connection” to define a connection to the dial up
service you wish to use.
39
Page 40

ENGLISH
• When you have created your connection, or if the
connection you wish to use for multilink access
already exists in the folder, use the mouse to right
click on the connection icon. Choose the
“Properties” option. This displays a dialog box with
several category tabs at the top.
• Select the “Multilink” tab and click on the “Use
additional devices” radio button.
• Press “Add…” to specify the device to be bundled
together to form the multilink connection.
40
Page 41

ENGLISH
• Use the “Add…”, “Remove”, and “Edit” buttons to
change the list of additional devices.
• You may enter a different phone number for each
device, and the phone numbers will be stored. If
you subsequently change the phone number for the
connection icon, the phone numbers associated with
additional devices on this page will not change.
After your additional devices are configured, you are ready
to dial the multilink connection. Once the connection is
established, you can view the status information by double
clicking on the “communicating computers” icon displayed in
the taskbar.
41
Page 42

ENGLISH
The status information includes the number of bytes sent
and received, the network protocols negotiated for use on
the connection and a list box showing each of the additional
devices. As you highlight a device in the list box, a
“S
uspend” or “Resume” button is displayed.
If a “S
now in use and bundled into the multilink connection.
Clicking on the “S
and removes the additional device from the bundled
connections.
If the “R
“R
additional device to the bundle. You may suspend and
resume individual additional device without dropping
uspend” button is displayed, the additional device is
uspend” button disconnects that device
esume” button is displayed, then click on
esume” to dial that connection and add that
the connection.
42
Page 43

ENGLISH
1.10 ISDN Utility Installation
The ISDN Utility includes helpful programs for the MISTRAL
USB, such as diagnostic program, uninstallation program,
and on-line manual. To install the ISDN Utility, please follow
the instructions listed below.
• Insert the Utility Installation Diskette or CD into drive
A: (B:, or D:, etc.).
• For diskette, press Start on the task bar and then
click Run. Type “CDRom:\Mistral
USB\Utility\Setup.exe” in the Run Dialog Box and
press OK.
• The InstallShield Wizard will load the ISDN utility
installation program.
• Press Next> to begin installing the ISDN Utility.
Follow the instructions on the screen to complete
the installation.
43
Page 44

ENGLISH
1.11 The Diagnostic Program
After you have installed your MISTRAL USB, you are highly
recommended to use the diagnostic program to make sure
the ISDN TA, its drivers and the ISDN line are all properly
installed and connected. To run the diagnostic program
please follow these instructions:
• Open the Programs folder on the Start menu and
click on the ISDN Utility program folder.
• Click on the Diagnostic Program item to start the
program.
• In the Own ISDN Number box, type in the
subscriber number of your own ISDN line.
• Press Loopback Test to begin the diagnostic
procedure. It will make a call from the B1 channel
that returns through the B2 channel. The D and B
channels will be tested for line integrity.
• Please Troubleshooting if you see any error or
warning message.
44
Page 45

ENGLISH
1.12 Uninstalling the MISTRAL USB
The setup information for the ISDN TA is saved by Windows.
If you decide to permanently remove the driver and utility of
the ISDN TA from your system, you must run the
uninstallation program from the ISDN Utility program group
as follows:
• Open the Programs folder on the Start menu and
click the ISDN Utility item.
• Click the Uninstall DRV & UTL item. The
uninstallation program will run.
• Check the items that you want to completely remove
from the Windows system and press OK.
45
Page 46

ENGLISH
1.13 Troubleshooting
If your MISTRAL USB does not work
properly, run the Diagnostic Program to help
you identify the problem.
Error
Indication
“USB” LED is
not lit or
“Fail” on USB
interface panel
or the
CAPI2032.DLL
file cannot
start.
The B1 LED is
lit upon start-
Possible
Cause
1. The
MISTRAL
USB is not
ready.
2. The PC is
not USBready.
The RAM is
out of order
Remedy
1. Make sure the USB
cable is securely
connected to PC or selfpowered USB hub device,
and the optional switch on
the back of the TA has
been turned on.
2. Examine your PC's
hardware and software for
USB capability.
Consult your dealer.
up.
The B2 LED is
lit upon startup.
You are not
allowed to run
this program.
The ISDN chip
is out of order
The
CAPI2032.DL
L is not from
the ISDN
package.
Consult your dealer.
Uninstall and then reinstall
the ISDN device.
46
Page 47

ENGLISH
A required .DLL
file,
CAPI2032.DLL,
was not found.
CAPI driver is
not loaded.
Please input
your own
number
The
CAPI2032.DL
L is missing.
The
Registration
key has been
destroyed.
The
subscriber
number of
your own
ISDN line has
not been
entered.
Uninstall and then reinstall
the ISDN device.
Uninstall and then reinstall
the ISDN device.
Key in the subscriber
number of your ISDN line
in the Own ISDN Number
box.
Cannot activate
S0 interface
(“ISDN” LED is
always OFF)
Cannot
establish LAPD
link
Connecting fail
(error code =
xxxx)
The ISDN line
is not
connected.
The ISDN line
may be
malfunctioning
.
1. Own ISDN
Number is
incorrect.
2. Other
devices on the
same S0 line
Ensure that the ISDN S0
line is securely connected
to the RJ-45 jack.
Ensure that the ISDN S0
line is in good condition.
1. Ensure that your ISDN
number is correct.
2. Be sure no other
device is on the same S0
line and occupying the B
are occupying
the B channel.
channel.
47
Page 48

ENGLISH
Data transfer
error
3. The ISDN
protocol is
wrong.
The ISDN line
is not in good
condition
3. Check to see if the
ISDN protocol
configuration is correct.
Check the ISDN line
1.14 Support
If you have any problems with the Mistral USB, please
consult this manual. If you continue to have problems you
should contact the dealer where you bought this device. If
you have any other questions you can contact the Atlantis
Land company directly at the following address:
Atlantis Land SpA
Viale De Gasperi, 122
20017 Mazzo di Rho(MI)
Tel: +39. 02.93906085, +39. 02.93907634(help desk)
Fax: +39. 02.93906161
Email: info@atlantis-land.com
WWW: http://www.atlantis-land.com
or tecnici@atlantis-land.com
48
Page 49

Where solutions begin
Company certified ISO 9001:2000
Atlantis Land S.p.A.
Viale De Gasperi, 122
Mazzo di Rho – MI – Italy
info@atlantis-land.com
sales@atlantis-land.com
www.atlantis-land.com
 Loading...