

Page 1

WebRunner
Ethernet ADSL2+ Modem
A01-AE1
MULTILANGUAGE
Quick Start Guide
A01-AE1_GX01
Where solutions begin
ISO 9001:2000 Certified Company
Page 2
ITALIANO
Questo prodotto è coperto da garanzia Atlantis Land
On-Site della durata di 3 anni. Per maggiori dettagli in
merito o per accedere alla documentazione completa in
Italiano fare riferimento al sito www.atlantis-land.com.
ENGLISH
This product is covered by Atlantis Land 3 years On-Site
warranty. For more detailed informations please refer to
the web site www.atlantis-land.com.
For more detailed instructions on configuring and using
this device, please refer to the online manual.
FRANCAIS
Ce produit est couvert par une garantie Atlantis Land
On-Site 3 ans. Pour des informations plus détaillées,
référez-vous svp au site Web www.atlantis-land.com.
DEUTSCH
Dieses Produkt ist durch die Atlantis Land 3 Jahre OnSite Garantie gedeckt. Für weitere Informationen,
beziehen Sie sich bitte auf Web Site www.atlantisland.com.
ESPAÑOL
Este producto està cubierto de garantía Atlantis Land OnSite por 3 años. Para una información más detallada, se
refiera por favor al Web site www.atlantis-land.com
.
Where solutions begin
ISO 9001:2000 Certified Company
Page 3
The award of the information is facultative, but its lack will
prevent ATLANTIS LAND® from starting the Guarantee
process requested.
R
R
Registration on the web site
www.atlantis-land.com
from the purchase of the product dismiss
the customer from showing a valid proof of
purchase (Sale Receipt or Invoice) in case
of the request of intervention. For further
information we invite you to look at our web
site at the section WARRANTY.
R
w
w
w
e
g
i
s
t
e
r
y
o
u
r
p
r
o
d
u
c
t
!
e
g
i
s
t
e
r
y
o
u
r
p
e
g
i
s
t
e
r
w
w
.
a
t
l
a
w
w
n
w
.
a
t
l
a
n
w
.
a
t
l
a
r
y
o
u
r
p
r
t
i
s
-
l
a
n
t
i
s
-
l
a
n
n
t
i
s
-
l
a
n
within 15 days
o
d
u
c
t
!
o
d
u
c
t
!
d
.
c
o
m
d
.
c
o
m
d
.
c
o
m
Copyright
The Atlantis Land logo is a registered trademark of
Atlantis Land SpA. All other names mentioned mat be
trademarks or registered trademarks of their respective
owners. Subject to change without notice. No liability for
technical errors and/or omissions.
Where solutions begin
ISO 9001:2000 Certified Company
Page 4

Where solutions begin
ISO 9001:2000 Certified Company
Page 5

MULTILANGUAGE Quick Start Guide
ITALIANO
1.1 Panoramica ............................................................... 9
1.2 Contenuto della Confezione ...................................... 9
1.3 Caratteristiche Tecniche............................................ 9
1.4 Requisiti di Sistema................................................. 10
1.5 Precauzioni nell’uso del WebRunner....................... 10
1.5 I LED frontali ........................................................... 12
1.6 Le porte posteriori ...................................................13
1.7 Informazioni da chiedere all’ISP.............................. 14
1.8 Installazione del WebRunner ..................................14
1.9 Creazione di una connessione a Internet ................15
1.10 Risoluzione Problemi............................................. 23
1.11 Supporto Offerto.................................................... 24
INGLESE
1.1 Overview of the WebRunner ................................... 26
1.2 Package Contents...................................................26
1.3 WebRunner Features ..............................................26
1.4 Before Installing....................................................... 27
1.5 The Front Panel LEDs............................................. 27
1.6 The Rear Ports........................................................ 28
1.7 Information from ISP ...............................................29
1.8 Cabling ....................................................................29
1.9 Configuring a Internet Connection........................... 30
1.10 Troubleshooting..................................................... 34
1.11 Support.................................................................. 35
A01-AE1_GX01(V1.0 March 2007)
6
Page 6

ITALIANO
AVVERTENZE Abbiamo fatto di tutto al fine di evitare che nel testo, nelle immagini e nelle tabelle presenti in questo manuale, nel software e nell'hardware fossero presenti degli errori. Tuttavia, non possiamo garantire che non siano presenti errori e/o omissioni. Infine, non possiamo essere ritenuti responsabili per qualsiasi perdita, danno o incomprensione compiuti direttamente o indirettamente, come risulta dall'utilizzo del manuale, software e/o hardware. Il contenuto di questo manuale è fornito esclusivamente per uso informale, è soggetto a cambiamenti senza preavviso (a tal fine si invita a consultare il sito www.atlantisland.it per reperirne gli aggiornamenti) e non deve essere interpretato come un impegno da parte di Atlantis Land spa che non si assume responsabilità per qualsiasi errore o inesattezza che possa apparire in questo manuale. Nessuna parte di questa pubblicazione può essere riprodotta o trasmessa in altra forma o con qualsiasi mezzo, elettronicamente o meccanicamente, comprese fotocopie, riproduzioni, o registrazioni in un sistema di salvataggio, oppure tradotti in altra lingua e in altra forma senza un espresso permesso scritto da parte di Atlantis Land spa. Tutti i nomi di produttori e dei prodotti e qualsiasi marchio, registrato o meno, menzionati in questo manuale sono usati al solo scopo identificativo e rimangono proprietà esclusiva dei loro rispettivi proprietari.
Restrizioni di responsabilità CE/EMC
Il prodotto descritto in questa guida è stato progettato, prodotto e
approvato in conformità alle regole EMC ed è stato certificato per
non avere limitazioni EMC.
Se il prodotto fosse utilizzato con un PC non certificato, il produttore
non garantisce il rispetto dei limiti EMC. Il prodotto descritto è stato
costruito, prodotto e certificato in modo che i valori misurati rientrino
nelle limitazioni EMC. In pratica, ed in particolari circostanze,
potrebbe essere possibile che detti limiti possano essere superati se
utilizzato con apparecchiature non prodotte nel rispetto della
certificazione EMC. Può anche essere possibile, in alcuni casi, che i
o www.atlantis-land.com
7
Page 7

ITALIANO
picchi di valore siano al di fuori delle tolleranze. In questo caso
l’utilizzatore è responsabile della “compliance” con i limiti EMC. Il
Produttore non è da ritenersi responsabile nel caso il prodotto sia
utilizzato al di fuori delle limitazioni EMC.
8
Page 8

ITALIANO
1.1 Panoramica
Navigare in Internet in modalità “always on” ad alte velocità e
contemporaneamente ricevere ed effettuare chiamate telefoniche
sulla stessa linea è oggi possibile.
La porta Fast Ethernet (con autonegoziazione 10/100Mbps)
consente la connessione diretta ad un PC senza l’installazione di
alcun driver aggiuntivo e rende il prodotto compatibile con qualsiasi
SO.
Navigare non è mai stato cosi semplice: grazie al supporto del RFC
1483 Bridged (LLC based), basterà configurare una connessione
PPPoE sul PC per iniziare a navigare con tutta la velocità dello
standard ADSL2+ (sino a 24 Mbps in downstream e 1 Mbps in
upstream).
Queste caratteristiche, unite ad un design elegante e compatto, lo
rendono il prodotto ideale per chiunque voglia entrare nel mondo
Internet nel modo più semplice e veloce.
1.2 Contenuto della Confezione
Una volta aperta la confezione in cartone dovrebbero essere
presenti i seguenti componenti:
• WebRunner
• CDRom contente Multilanguage QuickStart Guide
• Manuale multilingua
• Cavo LAN/CAT5
• Cavo ADSL (RJ11)
Qualora mancasse uno qualsiasi di questi componenti è
necessario rivolgersi immediatamente al rivenditore.
1.3 Caratteristiche Tecniche
Caratteristiche offerte dal WebRunner:
• Accesso rapido ad Internet: WebRunner è compatibile con
gli standard ADSL mondiali, supportando in downstream fino
a 24 Mbps (8 Mbps per ADSL, 12/24 per ADSL2/2+) e in
9
Page 9
ITALIANO
upstream fino a 1 Mbps. Sarà quindi possibile navigare e
utilizzare applicazioni multimediali (video-streaming, giochi
on line e flussi audio real-time) in modo facile e veloce.
• Facile installazione grazie al supporto Plug’n’ Play:
WebRunner supporta fino a 64 profili PVC predefiniti ed è in
grado di rilevare automaticamente i dati della linea non
appena la portante ADSL sarà sincronizzata.
1.4 Requisiti di Sistema
Verificare di avere a disposizione tutto il necessario per eseguire
l’installazione del WebRunner. E’ necessario disporre di:
• Un PC con interfaccia Ethernet e stack TCP/IP
correttamente installato
• SO con supporto TCP/IP
• Stack PPPoE integrato nel SO o di terzi
• Una linea ADSL attiva
• Almeno Intel® Pentium®III 600Mhz o superiore con 128MB
RAM con lettore CDRom
Grazie al supporto Ethernet, il prodotto è compatibile
con qualsiasi SO che supporti TCP/IP.
1.5 Precauzioni nell’uso del WebRunner
Non usare il WebRunner in un luogo in cui ci siano
condizioni di alte temperatura ed umidità, il Router
potrebbe funzionare in maniera impropria e
danneggiarsi.
Non usare la stessa presa di corrente per connettere altri
apparecchi al di fuori del WebRunner.
Non aprire mai il case del WebRunner né cercare di
ripararlo da soli.
Se il WebRunner dovesse essere troppo caldo,
spegnerlo immediatamente e rivolgersi a personale
10
Page 10

ITALIANO
qualificato.
Non appoggiare il dispositivo su superfici plastiche o in
legno che potrebbero non favorire lo smaltimento
termico.
Usare il dispositivo solo ed esclusivamente in ambienti
indoor.
Mettere il WebRunner su una superficie piana e stabile.
Usare esclusivamente l’alimentatore fornito nella
confezione, l’uso di altri alimentatori farà
automaticamente decadere la garanzia.
11
Page 11
ITALIANO
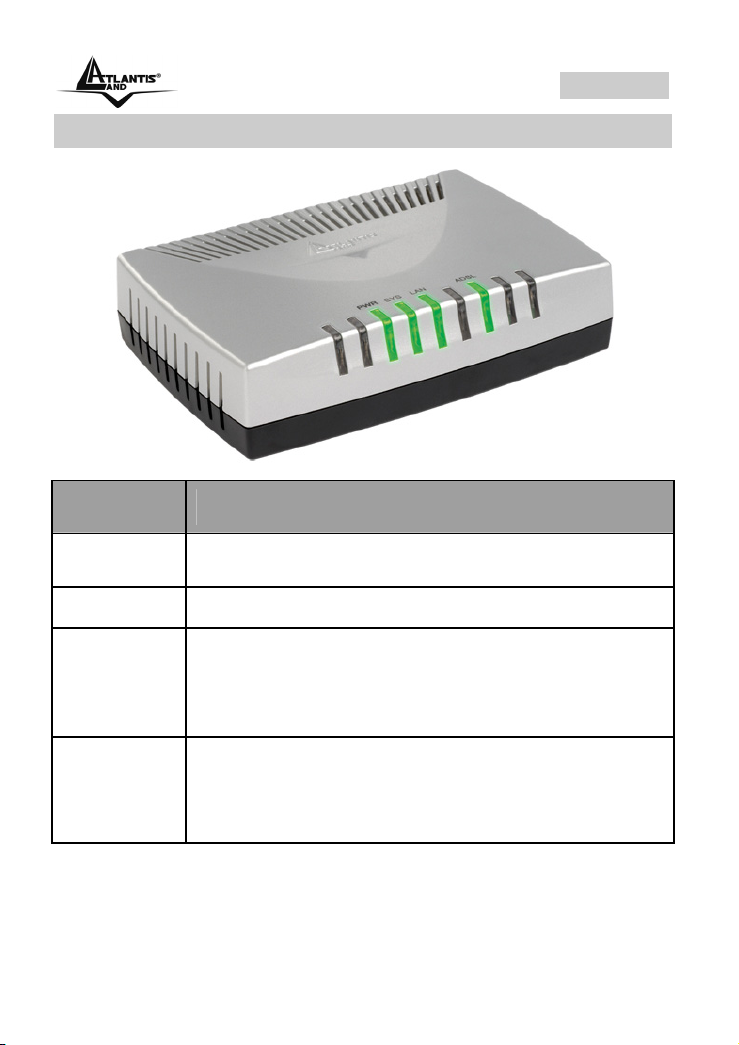
1.5 I LED frontali
LED INFORMAZIONE
POWER
SYS
LAN
ADSL
Acceso fisso quando connesso alla rete elettrica
Acceso fisso quando il sistema è pronto.
Acceso quando connesso ad un dispositivo Ethernet
• Verde= connessione a 100Mbps
• Arancio= connessione a 10Mbps
Lampeggiante quando vi è trasmissione/ricezione.
Acceso fisso quando connesso in modalità ADSL
DSLAM.
Lampeggiante durante la fase di allineamento o di
trasmissione dati.
12
Page 12

ITALIANO
1.6 Le porte posteriori
PORTE UTILIZZO
ADSL
LAN
RESET
POWER
Connettere il cavo RJ-11 a questa porta per effettuare
l’allacciamento all’ADSL.
Connettere con un cavo UTP
Dopo che il dispositivo è acceso, premere per
effettuare il reset.
0-3 secondi: per resettare il dispositivo.
6 secondi o più: effettua un ritorno alle condizioni di
default.
Connettere l’alimentatore a questo jack.
13
Page 13

ITALIANO
1.7 Informazioni da chiedere all’ISP
WebRunner effettuerà in maniera automatica la rilevazione dei dati
della linea non appena la portante ADSL sarà sincronizzata.
Per terminare la configurazione della connessione, sarà necessario
conoscere la Username e la Password di accesso dell’account
ADSL.
Nel caso in cui non si fosse in possesso di tali dati, sarà necessario
effettuare una richiesta all’ISP per ottenere tali informazioni.
E’ inoltre necessario verificare che l’abbonamento DSL sia di
tipo PPPoE con incapsulamento LLC.
1.8 Installazione del WebRunner
Fare riferimento ai seguenti punti:
• Connettere un capo del cavo telefonico RJ11 fornito alle
porta ADSL del WebRunner e l’altro capo alla linea
telefonica.
• Connettere il cavo Ethernet, fornito a corredo, al WebRunner
e l’altro capo alla scheda di rete del PC.
Al fine di facilitare l’installazione, i colori delle porte
fisiche del WebRunner sono associate al colore del
cavo che vi si andrà a collegare.
Poiché l’ADSL ed il normale servizio telefonico si dividono (spesso)
lo stesso filo per trasportare i rispettivi segnali è necessario, al fine di
evitare interferenze dannose, dividere tramite un apposito filtro i 2
segnali. Tale filtro passa basso permetterà di estrarre la porzione di
spettro utilizzata dal servizio telefonico impedendo così che la qualità
di questo sia compromessa dalle alte frequenze introdotte dal
segnale dell’ADSL. E’ necessario pertanto utilizzare un filtro per ogni
presa cui è collegato un telefono analogico. Esistono opportuni filtri
che dispongono di 2 uscite (una PSTN ed una ADSL) e consentono
14
Page 14

ITALIANO
di utilizzare sulla stessa presa sia un telefono analogico che il
modem ADSL. Tale filtro non è incluso nella confezione e va
acquistato separatamente. Atlantis Land raccomanda di utilizzare
apparati certificati per il tipo di linee e consiglia la scelta dei codice
A01-AF1 (filtro ADSL tripolare costruito rispettando le specifiche
Telecom Italia) o A01-AF2 (filtro ADSL RJ11).
1.9 Creazione di una connessione a Internet
Di seguito la procedura per la creazione di una connessione a banda
larga:
1.9.1 Windows Vista:
1. Accedere al Pannello di Controllo tramite Start-> Pannello di
Controllo e selezionare la voce Centro connessioni di rete e
condivisioni.
15
Page 15

ITALIANO
2. Selezionare la voce Configura connessione o rete.
3. Selezionare Connessione a Internet.
16
Page 16

ITALIANO
4. Selezionare Banda Larga (PPPoE).
5. Immettere il Nome Utente e la Password ,fornite dal proprio
ISP, e il nome della connessione.
17
Page 17

ITALIANO
6. Cliccare sul tasto Connetti per creare la nuova connessione ed
avviare il test della stessa.
18
Page 18

ITALIANO
1.9.2 Windows XP:
1. Cliccare su Start-> Pannello di Controllo e selezionare la voce
Connessioni di rete.
2. Selezionare la voce Crea una nuova connessione.
19
Page 19

ITALIANO
3. Selezionare Connessione a Internet.
4. Selezionare Imposta connessione manualmente.
20
Page 20

ITALIANO
5. Selezionare Connessione a banda larga con l’immissione di
nome utente e password.
.
6. Immettere il Nome Utente e la Password e cliccare su Avanti.
21
Page 21

ITALIANO
7. Cliccare sul tasto Fine.
A questo punto, la creazione della connessione guidata può dirsi
terminata.
Al termine della creazione guidata, verrà visualizzata la finestra
seguente e sarà quindi possibile effettuare la connessione tramite il
WebRunner ADSL2+ Ethernet Modem.
22
Page 22
ITALIANO
In caso di mancata creazione del collegamento sul
Desktop, tramite Start-> Pannello di Controllo->
Connessioni di rete sarà sempre possibile
effettuare la connessione ad Internet tramite
WebRunner ADSL2+ Ethernet Modem.
In caso di sistemi operativi differenti, sarà
necessaria l’installazione di uno stack PPPoE, come
ad esempio RasPPPoE, per la creazione di una
connessione tramite protocollo RFC 2516.
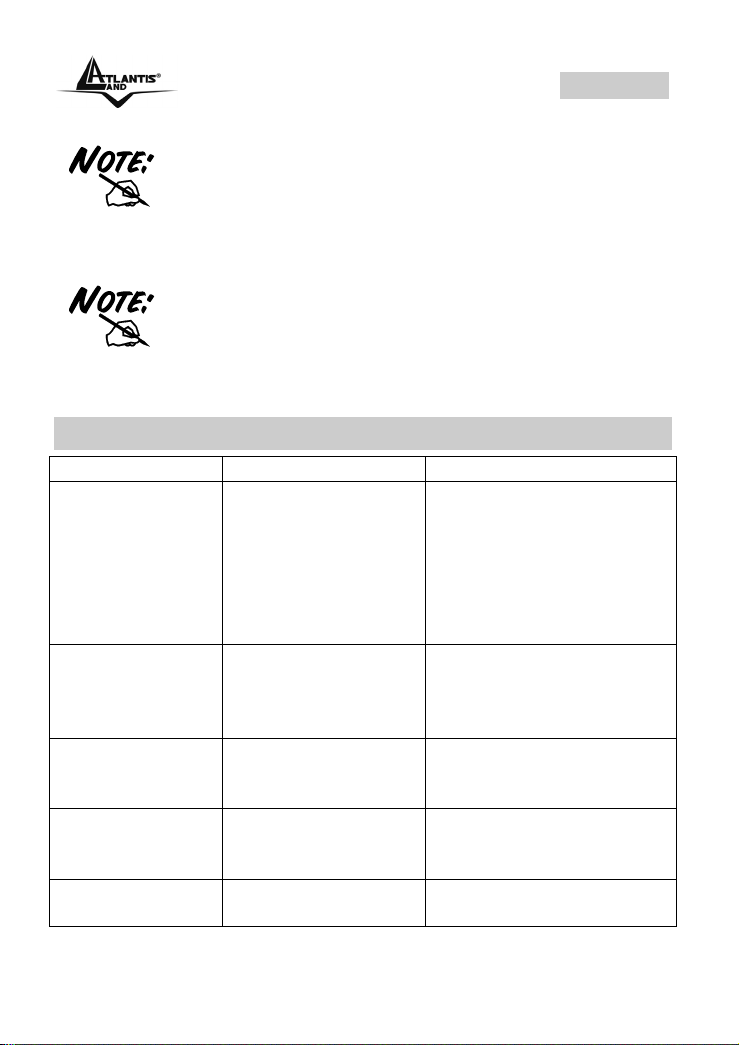
1.10 Risoluzione Problemi
Problema Possibile causa Soluzione
Led SYS Spento WebRunner non è
pronto
Led LAN Spento Errata connessione
al PC
Led ADSL
sempre
lampeggiante
Led ADSL
continua a
lampeggiare
Non riesco a
creare la
Errata connessione
alla linea PSTN
Servizio non attivo Contattare il Provider e
Assenza dello stack
PPPoE (per SO
Effettuare un reset del
prodotto tramite il tasto
presente sul retro.
Nel caso in cui il problema
persista, contattare
l’assistenza tecnica
Atlantis Land Spa.
Verificare la connessione
con il PC
Utilizzare il cavo fornito
nella confezione
Cambiare borchia
Usare il cavo fornito nella
confezione
chiedere lo stato di
attivazione del contratto.
Nel caso di SO precedenti
a Windows XP, sarà
23
Page 23

ITALIANO
connessione
guidata ad
Internet
Per la verifica del corretto funzionamento del WebRunner, verificare
tramite l’animazione fornita nel CD-Rom, la corretta sequenza di
accesione dei LED frontali.
precedenti a
Windows XP)
necessaria l’installazione
di uno stack PPPoE (es:
RASPPPoE) per poter
utilizzare la propria
connessione ADSL.
1.11 Supporto Offerto
Per ogni problema con il WebRunner consultare questo manuale alla
sezione 1.15.
Per qualunque altro problema o dubbio (prima è necessario
conoscere tutti i parametri usati dall’ISP) è possibile contattare
l’help desk telefonico (02/93907634) gratuito di Atlantis Land che
fornirà assistenza da lunedì al giovedì dalle 9:00 alle 13:00 e dalle
14:00 alle 19:00. Il venerdì dalle 9 :00 alle 13 :00. E’ possibile anche
utilizzare il fax (02/93906161) la posta elettronica (info@atlantis-
land.com oppure tecnici@atlantis-land.com).
AtlantisLand spa
Viale De Gasperi 122
20017 Mazzo di Rho(MI)
Tel: 02/93907634(help desk)
Fax: 02/93906161
Email: info@atlantis-land.com
land.com (mettere nell’oggetto il codice del prodotto di cui si
chiede assistenza)
WWW: http://www.atlantisland.it
oppure tecnici@atlantis-
o www.atlantis-land.com
24
Page 24

ENGLISH
Copyright Statement
No part of this publication may be reproduced, stored in a retrieval
system, or transmitted in any form or by any means, whether
electronic, mechanical, photocopying, recording or otherwise without
the prior writing of the publisher. Windows™ 98SE/2000/ME/XP are
trademarks of Microsoft® Corp. Pentium is trademark of Intel. All
copyright reserved.
The Atlantis Land logo is a registered trademark of Atlantis Land
SpA. All other names mentioned mat be trademarks or registered
trademarks of their respective owners. Subject to change without
notice. No liability for technical errors and/or omissions.
CE Mark Warning
This is a Class B product. In a domestic environment, this product
may cause radio interference, in which case the user may be
required to take adequate measures.
CE/EMC Restriction of Liability
The product described in this handbook was designed, produced and
approved according to the EMC-regulations and is certified to be
within EMC limitations.
If the product is used in an uncertified PC, the manufacturer
undertakes no warranty in respect to the EMC limits. The described
product in this handbook was constructed, produced and certified so
that the measured values are within EMC limitations. In practice and
under special circumstances, it may be possible, that the product
may be outside of the given limits if it is used in a PC that is not
produced under EMC certification. It is also possible in certain cases
and under special circumstances, which the given EMC peak values
will become out of tolerance. In these cases, the user himself is
responsible for compliance with the EMC limits.
25
Page 25

ENGLISH
1.1 Overview of the WebRunner
Surfing the Internet with an Always-on connection while, at the same
time, making telephone calls is now possible.
Its Fast Ethernet Port (autonegotiable 10/100Mbps) allows it to
connect it directly to your PC’s Ethernet card without the need to
install any additional drivers and making it compatible with any
operating system.
Thanks to its support for the RFC 1483 (LLC Based) protocol, all you
will have to do is configure your PC with a PPPoE connection to start
enjoying speeds of up to 24Mbps in downstream or 1Mbps in
upstream using the ADSL2+ standard (Check your provider).
All these characteristics and its compact and elegant design make it
the ideal product for anyone who is interested to start using the
internet quickly.
1.2 Package Contents
• WebRunner
• One CD-Rom containing Multilanguage QuickStart Guide
• One Quick Start Guide (Italian and English)
• One CAT5/LAN Cable
• One ADSL (RJ11) Cable
If any of the above items are missing, please contact your
reseller.
1.3 WebRunner Features
The WebRunner Ethernet ADSL2+ Modem supports many standard
and enhanced features, including the following:
• Express Internet Access: The WebRunner complies with
ADSL worldwide standards. It supports downstream rate
upto 12/24 Mbps with ADSL2/2+, 8Mbps with ADSL and
upstream rate up to 1 Mbps.Users enjoy not only high-speed
ADSL services but also broadband multimediaapplications
26
Page 26

ENGLISH
such as interactive gaming, video streaming and real-time
audio much easier and faster than ever.
• Plug’n’Play Installation: The WebRunner supports up to 64
pre-defined PVCs and can automaticallydetect and select
the active VPI/VCI from the pre-defined list after ADSL line is
synchronized. It is plug-and-play.
1.4 Before Installing
Make sure that you have all you need to install the WebRunner. You
should have the following:
• A PC that has a NIC and TCP/IP stack correctly installed
• An ADSL contract
• A PPPoE stack (integrated in Windows XP and VISTA)
• Intel® Pentium®III 600Mhz or compatible processor with
128MB RAM with CDRom drive
1.5 The Front Panel LEDs
27
Page 27

ENGLISH
LED MEANING
PWR
SYS
SYS
ADSL
Lit when power ON.
Lit when system is ready.
Lit when connected to Ethernet device
Green for 100Mbps; Orange for 10Mbps
Blinking when data transmit/received.
Lit when successfully connected to an ADSL DSLAM.
1.6 The Rear Ports
PORT MEANING
ADSL
Connect the supplied RJ-11 (“telephone”)
cable to this port when connecting to the
ADSL/telephone network.
28
Page 28

ENGLISH
LAN
RESET
POWER
Connect a UTP Ethernet cable (Cat-5 or Cat5e) to the LAN ports when connecting to a PC
or an office/home network of 10Mbps or
100Mbps.
After the device is powered on, press it to
reset the device or restore to factory default
settings.
0-3 seconds: reset the device
6 seconds above: restore to factory default
settings.
Connect the supplied power adapter to this
jack.
1.7 Information from ISP
WebRunnervwill scan automatically DSL Line for ADSL line
parameters and choose correct PVC’s profile from its pre-definited
profile. To configure your PPPoE connection, it is necessary to have
Username and Password for your DSL account and make sure that
it is configured in PPPoE with LLC encapsulation.
1.8 Cabling
Please refer to the following instructions for installation procedures:
• Connect your ADLS line to the RJ-11 jack labeled ADSL on
the back of the WebRunner.
• Connect the CAT5/LAN cable to the jack labeled LAN on the
back of the WebRunner. Connect the other end to the
Network card of your PC.
Ensure that all other devices connected to the same telephone line
as your Clipper (e.g. telephones, fax machines, analog modems)
have a line filter (A01-AF2) connected between them and the wall
socket (unless you are using a Central Splitter or Central Filter
29
Page 29

ENGLISH
installed by a qualified and licensed electrician), and ensure that all
line filters are correctly installed and the right way around.
1.9 Configuring a Internet Connection
We suggest to follow the instructions below to create an Internet
connection with WebRunner Ethernet:
1.9.1 For Windows Vista:
1. Click Start -> Control Panel -> Network and Sharing Center.
30
Page 30

ENGLISH
2. Click on Setup a connection or network.
3. Select Connect to the Internet.
31
Page 31

ENGLISH
4. Select Broadband (PPPoE).
5. Insert Username and Password for DSL account.
32
Page 32

ENGLISH
6. Click on Connect to complete connection and test it.
33
Page 33

ENGLISH
1.9.2 For Windows XP:
1. Click Start -> Control Panel -> Network and Internet
Connections, and then click Network Connections.
2. Under Network Tasks in the left pane, click Create a New
Connection, and then click Next.
3. Select Connect to the Internet and then click Next.
4. Select Set up my connection manually and then click Next.
5. Select Connect using a broadband connection that requires
a user name and password and then click Next.
6. Enter the service name that your Internet service provider (ISP)
provided ( and then click Next.
If your ISP did not give you a service name, or you
do not know it, you can leave this field blank, and
then click Next. After you complete the wizard,
attempt to connect using the new connection. If you
are unable to do so, contact your ISP for the
appropriate service name
7. Enter your user name and password as shown in Figure 1 below
and then click Next.
8. Click Finish to complete the wizard.
1.9.3 For Windows 2000/ME/98SE:
It is necessary to install and configure a PPPoE stack to use
correctly WebRunner with you DSL connection.
1.10 Troubleshooting
For any problem, we suggest to verify front Leds status to be sure
that your WebRunner works correctly. See the main interface of CdRom to check correct Led status.
34
Page 34

ENGLISH
1.11 Support
If you have any problems with the WebRunner Ethernet, please
consult this manual. If you continue to have problems you should
contact the dealer where you bought this device. If you have any
other questions you can contact the Atlantis Land company directly
at the following address:
Atlantis Land SpA
Viale De Gasperi, 122
20017 Mazzo di Rho(MI)
Tel: +39. 02.93906085, +39. 02.93907634(help desk)
Fax: +39. 02.93906161
Email: info@atlantis-land.com
WWW: http://www.atlantis-land.com
or tecnici@atlantis-land.com
35
Page 35

NOTE
36
Page 36

Atlantis Land S.p.A.
Viale De Gasperi, 122
Mazzo di Rho – MI – Italy
Where solutions begin
ISO 9001:2000 Certified Company
info@atlantis-land.com
sales@atlantis-land.com
www.atlantis-land.com
 Loading...