

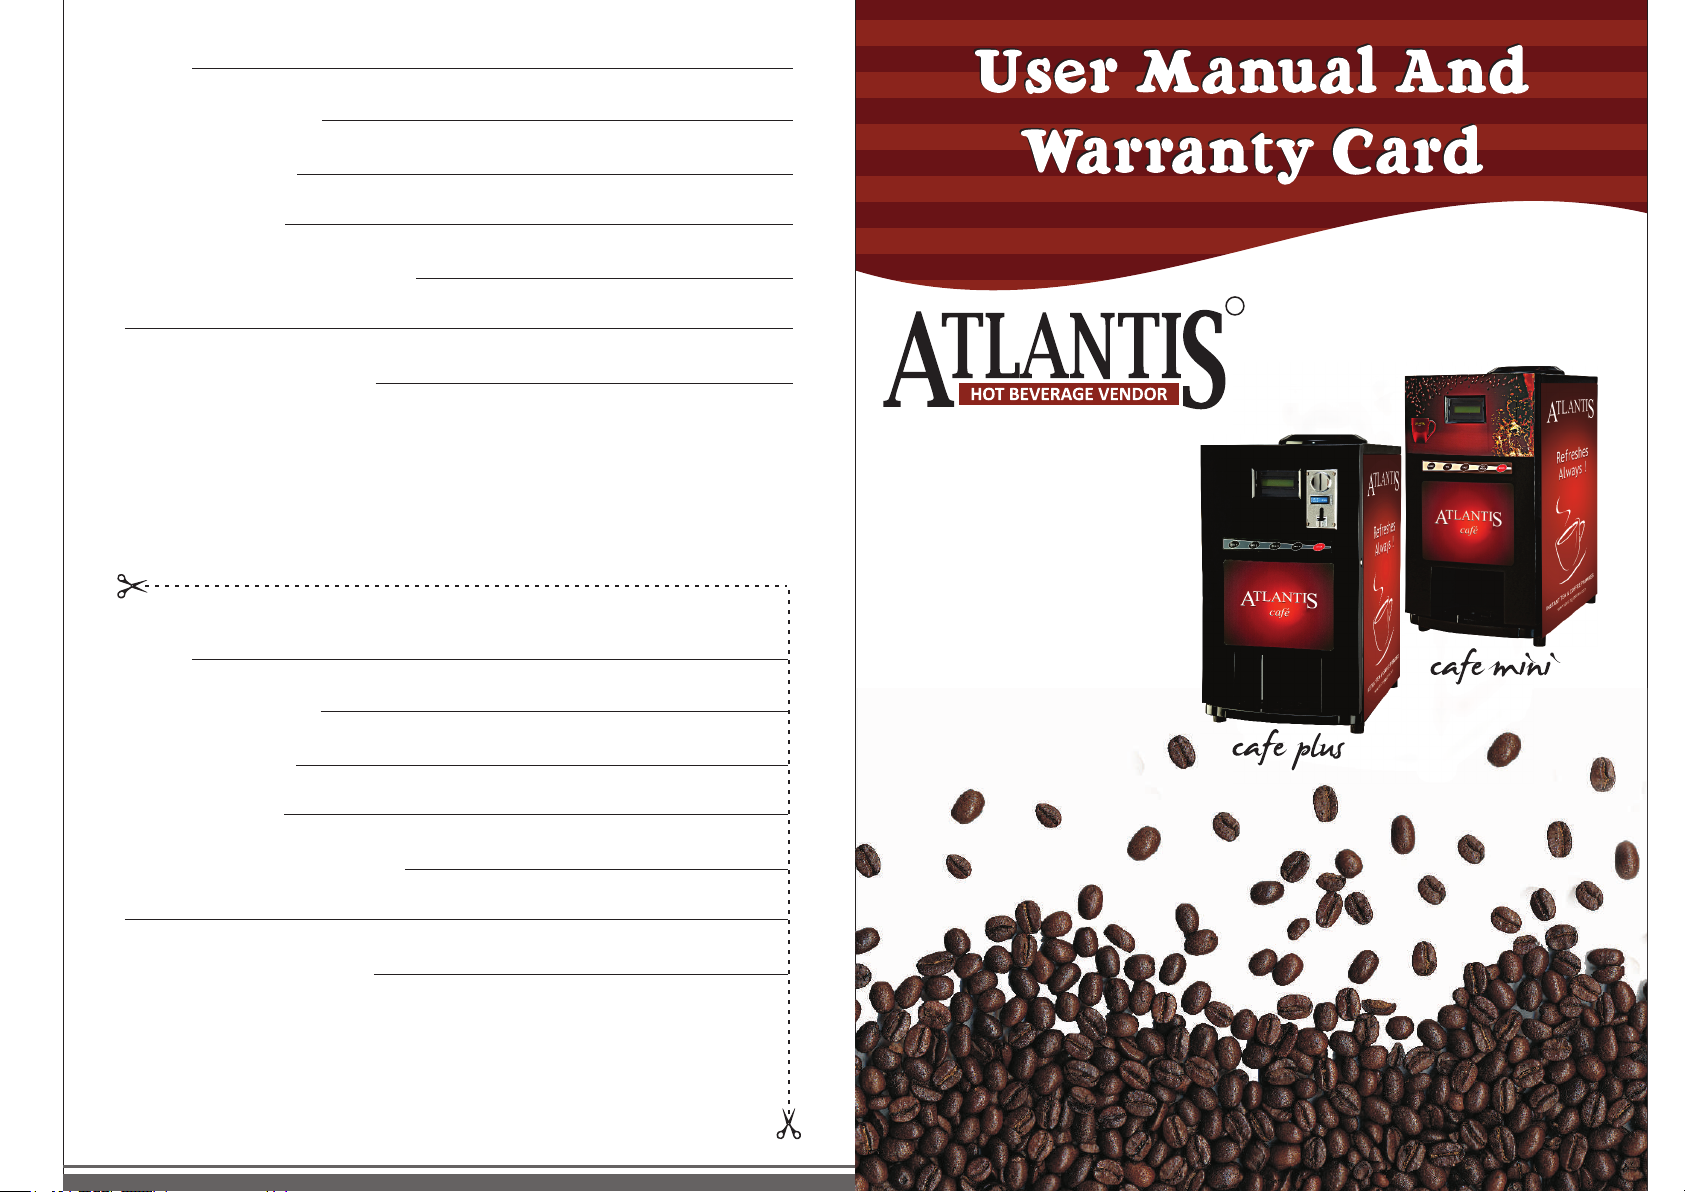
Atlantis Cafe Mini 2 Lane, Cafe Plus 4 Lane, Cafe Mini 3 Lane, Cafe Mini 4 Lane, Cafe Plus 2 Lane User Manual And Warranty Card
...Page 1
Model :
Name of Purchaser :
Date of Purchase :
Serial No. of Unit :
Name and Address of the Seller :
Seller’s Stamp & Signature :
Manufactured by:
THE VENDING COMPANY
PLOT NO - 28, SECTOR- 4,
IIE, SIDCUL, PANTNAGAR,
RUDRAPUR, UTTARAKHAND
INDIA - 263153
R
CUSTOMER COPY
Model :
Name of Purchaser :
Date of Purchase :
Serial No. of Unit :
Name and Address of the Seller :
Seller’s Stamp & Signature :
Manufactured by:
THE VENDING COMPANY
PLOT NO - 28, SECTOR- 4,
IIE, SIDCUL, PANTNAGAR,
RUDRAPUR, UTTARAKHAND
INDIA - 263153
MERCHANT COPY
Please read the instructions carefully prior to using the product.
Please read the instructions carefully prior to using the product.
Please read the instructions carefully prior to using the product.
Actual design and color may vary from the images shown.
Actual design and color may vary from the images shown.
Actual design and color may vary from the images shown.
The pictures are used for representation purposes only.
The pictures are used for representation purposes only.
The pictures are used for representation purposes only.
Note:- The machine specications are subject to change without notice.
Note:- The machine specications are subject to change without notice.
Note:- The machine specications are subject to change without notice.
Page 2
USER’S MANUAL
Dear Customer, .
Congratulations on your purchase of the new Atlantis Hot Beverage Vendor.
This Product is guaranteed to be free from facts in workmanship and material,
under normal use and service, for a period of 12 months from date of original
purchase.
SPECIAL FEATURES OF THE ATLANTIS HOT BEVERAGE VENDOR
24 Volts DC motor
Fully programmable
Password protected
Magnetic sealing door to ensure that cockroaches do not get into the machine
IN CUP TEMPERATURE AS HIGH AT 85 DEGREE CAN BE OBTAINED
Manually adjustable solenoid valves
SS heating element
Waste tray with optional drain facility
Membrane switches for easy accessibility
Float valve with buzzer for low water level indication
Adjustable temperature through controller card
Compact and easy to maintain.
Easy to service
GENERAL SAFETY INSTRUCTIONS
Before using this machine, this manual must be read carefully.
The machine should not be installed in place that may exposed to sprayed
water and they likewise should not be cleaned using sprayed water.
The user or person responsible for relling & cleaning the machine must follow
the instructions set forth in this manual.
Do not touch the product with your hands & prevent liquids from falling inside
the product canisters.
If any maintenance task needs to performed & the machine is going to be
disconnected for a long time period, the boiler and canisters must be empty.
Only trained service technician are authorised service/dismantle any component
of the m/c.
Appropriate ELCB is be provided by the outlet before installation of the m/c.
Proper earthing is must with 3 pin, 15A supply socket at the outlet.
Switch off the power supply and unplug the main supply cord before carrying
out any cleaning and maintenance operations.
Do not touch the machine with wet or humid hands.
Do not unplug the machine from the source by pulling the power supply cable.
Do not allow children or untrained people to play with machine.
HOT BEVERAGE DISPENSER
INSTALLATION
INSTALLATION
Installation Required at Site
Free space required
Power Supply
Quality of Water
Unpacking
Unpacking the m/c carefully at the installation site and securely place the
machine on a platform. Check contents of the packaging which consists of : -
a. Machine
b. Drip Tray Jali
c. User Manual with Warranty Card.
d. Machine Key
e. Main Lead 15Amp
Refer m/c dimensions given in technical
data. Apart from space covered by the
m/c, 6” free space required all around
the m/c. for maintenance purpose.
230V, 50Hz, 15Amps power socket with
proper earthing & within 1.5 mtrs. distance
from m/c.
Portable Drinking Water
1 Nos.
1 Set
1 Nos.
2 Nos.
1 Nos.
TECHNICAL SPECIFICATION
Descriptions
Weight (Kg.)
Dimensions (HxWxD) mm
Power (Watts)
Power Source
Operating Voltage
Start Up Time
Premix Canister /Capacity
Dispensing Rate
Front Door
Steam Dispersion
Hot Water Tank Material/Capacity
* Actual design, colour and specications may very from the images shown.
2 Lane 3 Lane
16
640x320x350
2000 Watts
220V/1p/50Hv
24 V DC
8 Minutes
2 Nos. of 1.2 Kg. each
4 cups per minutes
ABS Moulded
Exhaust Fan
SS 304 Stainless Steel
3.0 Ltr.
20
640x320x470
2000 Watts
220V/1p/50Hv
24 V DC
8 Minutes
3 Nos. of 1.2 Kg. each
4 cups per minutes
ABS Moulded
Exhaust Fan
SS 304 Stainless Steel
3.0 Ltr.
1
4 Lane
21
640x320x470
2000 Watts
220V/1p/50Hv
24 V DC
8 Minutes
4 Nos. of 1.2 Kg. each
4 cups per minutes
ABS Moulded
Exhaust Fan
SS 304 Stainless Steel
3.0 Ltr.
2
Page 3

USER’S MANUAL
HOT BEVERAGE DISPENSER
PARTS IDENTIFICATION
49
71 72
64 65 66 67 68 69 70
48
47
46
45
58
31
44
43
30
35
29
34
28
27
33
26
32
25
24
23
22
21
18 19 20
17
15 16
14
13
12
11
6 7 8 9 10
5
4
PART IDENTIFICATION
PART NAME
Flexible Pipe
49.
NO.
PART
PART NAME
Hot Tank Drain
25.
NO.
PART
Canister Outlet Cover
Canister Bush Front
Canister Front Nut
Canister Elbow
Whipper Cover
O Ring
Whipper Button
50.
51.
52.
53.
54.
55.
56.
Hot Tank - 2,3,4 Lane
Hot Tank Inlet
Thermostat 90
Steam Pipe
Sensor
EDP Foam
Main Lead Socket 15amp
26.
27.
28.
29.
30.
31.
32.
Canister Back Nut
Whipper Base
Whipper Washer
Canister Cap
Canister Gear
Canister Body
57.
58.
59.
60.
61.
NRV - Washer, Jali
Sensor Rubber
Silicon Pipe (6x8, 8x12, 7x13) mm
Front Door
Supply SMPS
33.
34.
35.
36.
37.
Fan Cover
Canister Worm
62.
63.
64.
Fiber Washer
Main Switch
Door Sheet
38.
39.
40.
Exhaust Fan
Float Valve
65.
66.
Gasket
Mixing Bowl-lower
41.
42.
Steam Elbow Box Nut
Steam Elbow Box
Steam Box Washer
67.
68.
69.
Mixing Bowl-upper
Water Inlet
Hinge Upper
43.
44.
45.
Fuse-15 amp
Clamp Strip
Storage Tank
70.
71.
72.
Funnel Black
Puncturing Tube Black
Back Plate
46.
47.
48.
59
60
62 63
61
57
56
55
54
50 51 52 53
41 42
37 38 39 40
36
3
2
PART NAME
Membrane Switch
Lock With Key
PCB 2,3,4 Lane
Drip Tray
Drip Tray Jali
Door Hinge Lower
Overflow Nozzle
Outlet Nozzle Cap
Outlet Nozzle 3, 4 Way
Door Supporter
Metal Body
Whipper Motor
Rubber Feet
Fuse Holder
Indicator
Gear Motor- 90 rpm
Main Lead 15 amp
Drain Set
Relay 24DC-40 amp
Steam Trap
1.2.3.4.5.6.7.8.9.
NO.
1
PART
10.
11.
12.
13.
14.
15.
16.
17.
18.
19.
20.
3
Impeller
Lock Patti -SS
21.
Hot Tank Stand
Solenoid Valve (DV)
22.
23.
24.
4
Page 4

USER’S MANUAL
HOT BEVERAGE DISPENSER
USAGE INSTRUCTIONS FOR THE CAFÉ MINI
Please read the instructions below prior to using the machine.
Remove the machine form its outer packing and place the machine on a flat even
surface. .
Overturn a bottle of water (2 ltrs to 25 ltrs) over the machine .
DO NOT TURN THE MACHINE ON TILL THE WATER HAS COMPLETELY
FILLED UP INSIDE THE MACHINE. THIS POSITION IS REACHED WHEN
THE BUBBLES STOP APPEARING INSIDE THE BOTTLE. .
Switch the machine on from the mains and then from the switch behind the
front door. .
The Display would indicate “Please wait – heating” .
The display would toggle between the above sign and the temperature on the front
display. .
The cup counter comes on the screen after you push the half cup button for
3 seconds. .
The machine would not dispense till such time as the set water temperature is reached
Fill us the canisters with the premix (coffee in the left canister and tea in the right one)
Once the desired temperature has been reached, the machine is ready for dispensing
Make the desired choice from the membrane panel at the base of the door.
Please note that the first cup of coffee and tea would have less powder as the
machine has not yet been “primed”. .
PLEASE NOTE THAT THE MACHINE ARRIVES WITH DEFAULT SETTINGS
OF 12.7 GMS OF PREMIX AND 90 ml OF WATER. YOU CAN CUSTOMIZE
T H E S A ME T O Y O U R TA S T E B Y F O LL O W I NG T HE S IM P LE
INSTRUCTIONS BELOW. .
For half cup, please press the HALF switch and then your choice of either
COFFEE or TEA. .
Similarly for just hot water, press HOT WATER followed by COFFEE or TEA.
This feature can also be used for flushing out the system at the beginning of the
day for cleaning purposes. .
The STOP switch is used when an incorrect choice has been made and we would
like to abort the operation midway .
In case the temperature of the water is less than 10 degree C, of set temperature
the machine would not dispense any premix or water .
In case the water level in the container is low, the display would show
WATER LEVEL LOW and the buzzer would sound. The machine would not
dispense in this mode.
PROGRAMMING INSTRUCTIONS – CAFÉ MINI
The Atlantis Café mini is a fully programmable machine which can be customized
to the customer's requirements. Please follow the simple instructions below to
program your machine. .
Press the STOP switch for 3 sec. and the machine enters the programming mode
Now we would be using the COFFEE TEA and HALF switches to program the
m a c h i n e . .
Immediately as we enter the programming mode, the display would show PREMIX1
3.75. This indicates the dispensing time in seconds for the powder from the coffee
canister. There would also be a cursor under the number before the decimal
(3 in the above case). The COFFEE and TEA switches can be used to increase or
decrease this number. Once done, press the HALF switch and the cursor would then
move to the digit after the decimal point. The HALF switch would henceforth play
the role of an ENTER/SAVE button .
The increase or decrease would change in direct proportion to the settings. So a
setting at 5.0 would mean that 10% more powder is dispensed than at 4.5 sec.
Press HALF (enter) again and the display would show WATER1 5.0. The cursor
would be under the number 5. Follow the procedure to change the quantity of water
in the coffee side as above. .
Press HALF and the display would show PREMIX2 3.75. This refers to the quantity
of tea powder dispensed. Changes can be made as above. .
Press HALF again for WATER 2 (water from the tea side). Make changes as above.
Note that the setting for WATER would always be 1.0 sec more than the respective
premix. This would ensure that the water would always flow more than powder and
not allow accumulation of powder in the mixing bowl. .
Press HALF button again and the display shows HOT WATER 5.0. This is the
quantity of water which is dispensed when we push the HOT WATER button .
The quantity can be adjusted by using the COFFEE and TEA buttons and saved by
pressing the HALF button as above. .
Press HALF again and the display shows TEMP 85. Again this can be adjusted (to a
maximum of 89 degree) by using the coffee and tea (up and down) switches.
THE DEFAULT PASSWORD IS CURRENTLY ENTERED BY PRESSING HALF 5
TIMES. NO NUMBER NEEDS TO BE ENTERED. .
Press HALF again and the display would show ENABLE COIN. Only applicable
to coin operated machine. Using the COFFEE and TEA we can enable – YES or
disable the coin mechanism - NO. .
5
6
Page 5

USER’S MANUAL
HOT BEVERAGE DISPENSER
Press Half again and we now enter the SET FLUSH mode. Here we have the following
options (all available using the COFFEE/TEA switches). If we want to flush the machine
at regular intervals, specially when not in use, then we should enable – YES, this option.
We recommend this as well, because it not only cleans the water pathways, but also keeps
them warm. If you choose YES, then you can set the flush time interval to 10/ 30/60/90 mins
depending upon usage of the machine. If the machine is used extensively, then a higher
interval is recommended. .
Next mode on pressing HALF is the SET DEFAULT option. In you enable the same
by imputing YES, then all settings of water, powder, temp etc would be restored to the
factory settings. .
Press HALF and the screen would show CNTR RESET. Pressing TEA would show
YES. Then you have to enter the password and the counters of coffee and tea would
be reset to 0. .
Press HALF again and we have the USER MESSAGE change option. Using the
COFFEE TEA and HALF buttons (for saving) you can actually change the name on the
display to your cho ice. A unique feature only on ATLANTIS machin es.
Lastly pressing HALF would show CHANGE PASSWORD. Press TEA and the YES
option appears. Press HALF again and ENTER the old password followed by the new
password twice. .
Press HALF again and the machine display shows “returns to the regular MAKE
YOUR CHOICE mode.
PROGRAMMING INSTRUCTIONS – CAFÉ PLUS
The 3 and 4 lane machines are programmed in a very similar manner to the Café mini.
The main differences have been highlighted .
The five buttons are named BEV 1, BEV 2, BEV 3, BEV 4, STOP. .
BEV 1 and BEV 2 buttons does the same function as the COFFEE button to
increase/decrease time and toggle to enable or disable functions. BEV 3 is the
equivalent of the HOT WATER button in the 2 lane Café mini and is primarily for
saving and moving on to next mode. .
IN the Café Plus, to get hot water or half cup, just press the STOP button once and
then the BEV button of your choice to get hot water/half cup of drink from that lane.
A longer press of the STOP button and you can enter the MENU mode and follow the
same instructions as the Café Mini programming. .
NOTE THAT THE ATLANTIS MACHINES HAVE A LOT OF OTHER FEATURES
LIKE LANGUAGE CHANGE AND CALIBRATION WHICH CAN BE ENABLED
UNDER SUPERVISION OF AN AUTHORISED ENGINEER FROM THE COMPANY.
TROUBLESHOOT
Specific fault message will be displayed when the m/c stops dispensing.
List of fault messages, their possible cause and remedial action are listed blow.
1. If display show “Heating....”
for more than 10 minutes
2. If display shows
“Water tank empty”
3. Overheating in boiler tank
4. Electric shock
5. As soon as machine is
switched on power supply
trips.
1. Check heater fuse. If fuse has blown off, replace it.
2. Check loose connections continuity at heater/
fuse/holder/relay/terminals
3. Check loose connections at main PCB connector
and rectify.
4. Check 230 volt AC supply across heater terminal,
if power supply not detected replace heater.
5. If power supply not detected, check DC signal
across relay terminals.
a.) If power supply not detected replace relay.
b.) If power supply not detected, then replace PCB.
1. Check water level in bottle top
2. Check continuity of sensor wire from PCB to tank
1. check loose connection of temperature sensor on
the boiler.
2. Check DC signal across heater relay terminal
a) If power supply not detected, replace repay.
b) if power supply not detected, replace
temperature sensor.
1. Check earthing / polarity in supply socket.
2. Check water leaking inside the machine and
rectify it.
3. Ch loose connection of earthing wire with
machine body.
4. check continuity between machine body & earth
pin on 15 Amp power plug. if continuity is not there
replace power cord
1. Check correct rating of MCB.
2. Remove 15 Amp fuse & switch on. If it is tripping
again, reconnect the same & if it not tripping,
replace heater.
7
8
Page 6

USER’S MANUAL
HOT BEVERAGE DISPENSER
6. Bubble top is full, no
dispensation of water while
pressing dispensing button
only premix is dispensing
7. Variation in end cup volume
8. Premix clotting in canister
elbow
9. Variation in end cup taste
3. Remove SMPS AC supply connector & switch on.
If it is tripping, reconnect the same & if it is not
tripping, replace SMPS.
4. Remove Exhaust fan wire & switch on. If it is not
tripping, replace exhaust fan.
1. Check loose connection & continuity between
main PCB & water level sensor.
2. Replace level sensor.
3. Replace main board
1. Check scaling in value & clean it.
2. replace dispense valve.
1. Check exhaust fan whether working or not.
2. If exhaust fan working, check exhaust pipe
connected properly between fan & duct. Connect
it properly. If it is not working, check loose
connections at exhaust fan.
3. Replace exhaust fan.
1. Check level of ingredient inside the canister.
Rell if it is below minimum level.
2. Check whipper motor whether working or not.
If it is not working, check the voltage across
motor terminal.
a) If power supply detected, replace whipper motor.
b) If power supply not detected, check loose connection.
c) Replace main board.
4. The warranty is void if : .
a) It is found that the unit has been subject of unauthorized installation or repair.
b) The voltage of the power supply is not within the specified limited .
(230 V 50Hz + 10%) .
_
c) The damage is caused during transit, due to accident, flood, fire, other natural
hazards, neglect of misuse.
5. Any liquid except water in the container.
6. machine is shipped (out side premises) without prior information.
WARRANTY INSTRUCTIONS FOR USER
1. This warranty card has 2 parts. kindly ensure that the Merchant fills all parts correctly
2. Part A is the customer’s copy. It should be retained by you for your record.
3. Part B must be torn and mailed to the company’s address (mentioned there itself.)
4. In the event of a defect developing in the product, contact the Merchant. .
of company for obtaining warranty service by informing defect, Model & Serial No.
5. On your loading a complaint, trained technician will call on your promptly. In the
unlikely event of the technician deciding that the product requires attention at
customer care center, kindly arrange to deliver the Machine to the customer care
center for further action.
WARRANTY CONDITIONS
This product is covered under a one year warranty to be free from defects is
workmanship and material under normal use and service for a period of 12 months
from the date of purchase.
1. The guarantee extended herein is limited to the repair and/or replacement of defective
part (s), and the manufacturer would not be responsible for any consequential liability/
damage/ loss arising due to such defects .
2. Warranty card duly filled in and stamped by the dealer, along with a copy of the invoice
should be produced for and warranty claims. All expenses incurred in sending and
collecting the unit or part thereof from the authorized service center will be payable
by the customer .
This
3.
switch, funnel and plastic parts. .
warranty dose not cover accessories such as main cord, relay, membrane
9 10
 Loading...