

Page 1
Wireless USB Adapter
A02-UP-W54
MULTI-LANGUAGE
USER MANUAL
A02-UP-W54_MX01
Page 2

Copyright Statement
No part of this publication may be reproduced, stored in a retrieval system, or
transmitted in any form or by any means, whether electronic, mechanical,
photocopying, recording or otherwise without the prior writing of the publisher.
Windows™ 98SE/2000/ME/XP are trademarks of Microsoft® Corp. Pentium is
trademark of Intel. All copyright reserved.
The Atlantis Land logo is a registered trademark of Atlantis Land SpA. All other
names mentioned mat be trademarks or registered trademarks of their respective
owners. Subject to change without notice. No liability for technical errors and/or
omissions.
Wireless LAN, Health and Authorization for use
Radio frequency electromagnetic energy is emitted from Wireless LAN devices.
The energy levels of these emissions however are far much less than the
electromagnetic energy emissions from wireless devices like for example mobile
phones. Wireless LAN devices are safe for use frequency safety standards and
recommendations. The use of Wireless LAN devices may be restricted in some
situations or environments for example:
·On board of airplanes, or
·In an explosive environment, or
·In case the interference risk to other devices or services is perceived or identified
as harmful
In case the policy regarding the use of Wireless LAN devices in specific
organizations or environments (e.g. airports, hospitals, chemical/oil/gas industrial
plants, private buildings etc.) is not clear, please ask for authorization to use these
devices prior to operating the equipment.
Regulatory Information/disclaimers
Installation and use of this Wireless LAN device must be in strict accordance with
the instructions included in the user documentation provided with the product. Any
changes or modifications made to this device that are not expressly approved by
the manufacturer may void the user’s authority to operate the equipment. The
Manufacturer is not responsible for any radio or television interference caused by
unauthorized modification of this device, of the substitution or attachment.
Manufacturer and its authorized resellers or distributors will assume no liability for
any damage or violation of government regulations arising from failing to comply
with these guidelines.
CE Mark Warning
This is a Class B product. In a domestic environment, this product may cause radio
interference, in which case the user may be required to take adequate measures.
Page 3

CE in which Countries where the product may be used freely:
Germany, UK, Italy, Spain, Belgium, Netherlands, Portugal, Greece, Ireland,
Denmark, Luxembourg, Austria, Finland, Sweden, Norway and Iceland.
France: except the channel 10 through 13, law prohibits the use of other channels.
Federal Communication Commission Interference Statement
This equipment has been tested and found to comply with the limits for a Class B
digital device, pursuant to Part 15 of the FCC Rules. These limits are designed to
provide reasonable protection against harmful interference in a residential
installation.
This equipment generates, uses and can radiate radio frequency energy and, if not
installed and used in accordance with the instructions, may cause harmful
interference to radio communications. However, there is no guarantee that
interference will not occur in a particular installation. If this equipment does cause
harmful interference to radio or television reception, which can be determined by
turning the equipment off and on, the user is encouraged to try to correct the
interference by one of the following measures:
Reorient or relocate the receiving antenna.
Increase the separation between the equipment and receiver.
Connect the equipment into an outlet on a circuit different from that to which
the
receiver is connected.
Consult the dealer or an experienced radio/TV technician for help.
FCC Caution: To assure continued compliance, (example - use only shielded
interface cables when connecting to computer or peripheral devices) any changes
or modifications not expressly approved by the party responsible for compliance
could void the user's authority to operate this equipment.
This device complies with Part 15 of the FCC Rules. Operation is subject to the
following two conditions:
1) This device may not cause harmful interference, and
2) This device must accept any interference received, including interference that
may cause undesired operation.
Page 4

Page 5

INDEX
ENGLISH 1
1. Introduction 1
1.1 IEEE 802.11g Wireless USB Adapter 1
1.2 How the Adapter works 1
1.3 System Requirements
1.4 Package Contents
1.5 Product View 2
2. Connecting the USB Extension Cable 3
2.1 Hardware Installation 4
3. Software Installation 5
3.1 Installing on Windows 98SE/ME
3.2 Installing on Windows 2000/XP 6
4. Wireless Network Utility 8
4.1 Introduction
4.2 Disable “Windows XP Wireless Zero Configuration 8
4.3 Using the Configuration Utility
4.3.1 Link Status
4.3.2 Configuration 11
4.3.3 Advanced 13
4.3.4 Profile 16
4.3.5 Network 17
4.3.6 Statistics 18
4.3.7 About 19
8
10
2
2
5
9
5. Troubleshooting
Common Problems and Solutions
Frequently Asked Questions 20
20
20
ITALIANO 23
1. Introduzione 23
1.1 IEEE 802.11g Wireless Adapter USB 23
1.2 Come funziona una scheda di rete Wireless
23
Page 6

1.3 Requisiti di sistema 25
1.4 Contenuto della confezione
1.5 Descrizione del prodotto
25
25
2. Installazione Hardware 26
2.1 Verifica Installazione 27
3. Installazione del software
3.1 Installazione su sistemi Windows 98SE/ME
3.2 Installazione su sistemi Windows 2000 e XP 29
4. Utility di configurazione della connessione Wireless 31
4.1 Introduzione
4.2 Disabilitare il gestore delle connessioni Wireless di Windows XP 31
4.3 Utilizzare l’utility di configurazione 32
4.3.1 Link Status
4.3.2 Configurazione 34
4.3.3 Advanced 36
4.3.4 Profile 38
4.3.5 Network 39
4.3.6 Statistics 41
4.3.7 About
31
33
42
28
28
5. Risoluzione dei problemi
Problemi comuni e soluzioni
Domande frequenti
43
43
43
FRANCAIS 45
1. Introduction 45
1.1 IEEE 802.11g Wireless Adapter USB 45
1.2 Comme la carte de réseau Wireless fonctionne 45
1.3 Requises de système
1.4 Contenu de la confection 47
1.5 Description du produit 47
2. Connexion du câble d'extension USB 48
2.1 Installation du matériel 49
3. Installation du logiciel 50
3.1 Installation en Windows 98 ou Me
3.2 Installation en Windows 2000 et XP 51
47
50
Page 7

4. Outil de configuration de la connexion Wireless 52
4.1 Introduction
4.2 Désactiver le contrôleur des connexions Wireless de Windows XP
4.3 Utiliser l’outil de configuration 54
4.3.1 Statut du lien
4.3.2 Configuration
4.3.3 Avancée 57
4.3.4 Profil
4.3.5 Réseau
4.3.6 Statistique 61
4.3.7 A propos 62
5. Résolution des problèmes 63
Problèmes communs et solutions
Questions fréquentes
52
52
54
55
59
60
63
63
Appendix A: Technical Specification 65
Appendix B: Regulatory Domains 67
A02-UP-W54_MX01(V1.0)
Page 8

ENGLISH
1. Introduction
Thank you for purchasing the IEEE 802.11g Wireless USB Adapter that provides
the easiest way to wireless networking. This User Manual contains detailed
instructions in the operation of this product. Please keep this manual for future
reference.
1.1 IEEE 802.11g Wireless USB Adapter
IEEE 802.11g Wireless USB Adapter (hereafter called the Adapter) is a highefficiency wireless LAN adapter for wireless networking at home, in office or in
public places. The data rate can be up to 54 Mbps and auto-negotiated to 48, 36,
24, 18, 12, 9, 6Mbps (IEEE 802.11g), or 11, 5.5, 2, 1Mbps (IEEE802.11b).
With the Adapter, you can roam between conference room and office without being
disconnected the LAN cables; in addition, sharing files and printers can be easy
tasks.
The wireless LAN adapter is available to Microsoft Windows operating systems
(Windows® XP/2000/ME/98SE) and can be integrated into networking with either
Ad-hoc mode (computer-to-computer, without an Access Point) or Infrastructure
mode (computer-to-access point, an Access Point is required).
ENGLISH
1.2 How the Adapter works
Ad-hoc Mode: An Ad-hoc network is a local area network or other small network,
especially one with wireless or temporary plug-in connections, in which some of
the network devices are part of the network only for the duration of a
communications session. Users in the network can share files, print to a shared
printer, and access the Internet with a shared modem. In this kind of network, new
devices can be quickly added; however, users can only communicate with other
wireless LAN computers that are in this wireless LAN workgroup, and are within
range.
Infrastructure Networking Mode:
and Ad-hoc network is that the former one includes an Access Point. In an
Infrastructure network, the Access Point can manage the bandwidth to maximize
bandwidth utilization. Additionally, the Access Point enables users on a wireless
LAN to access an existing wired network, allowing wireless users to take
advantage of the wired networks resources, such as Internet, email, file transfer,
and printer sharing. The scale and range of the Infrastructure networking are larger
and wider than that of the Ad-hoc networking.
The difference between Infrastructure network
Wireless USB Adapter 1
Page 9
1.3 System Requirements
Before installing the Adapter, your PC should meet the following:
PC with available USB V2.0/1.1* slot
Intel® Pentium®III 600Mhz or compatible processor with 64MB RAM
Windows 98SE/ME/2000/XP operating system
Minimum 15 Mbytes free disk space for installing the driver and utilities
CD-ROM drive
*When plug the device in the USB 1.1/1.0 port, the real throughput will be up to
6Mbps only when running 11Mbps or higher speed
1.4 Package Contents
Unpack the package and check all the items carefully. If any item contained is
damaged or missing, please contact your local dealer as soon as possible. Also,
keep the box and packing materials in case you need to ship the unit in the future.
The package should contain the following items:
One IEEE802.11g Wireless USB Adapter
One A-type USB male to female extension cable
One Quick Start Guide
ENGLISH
One CD with driver/utilities and user’s manual
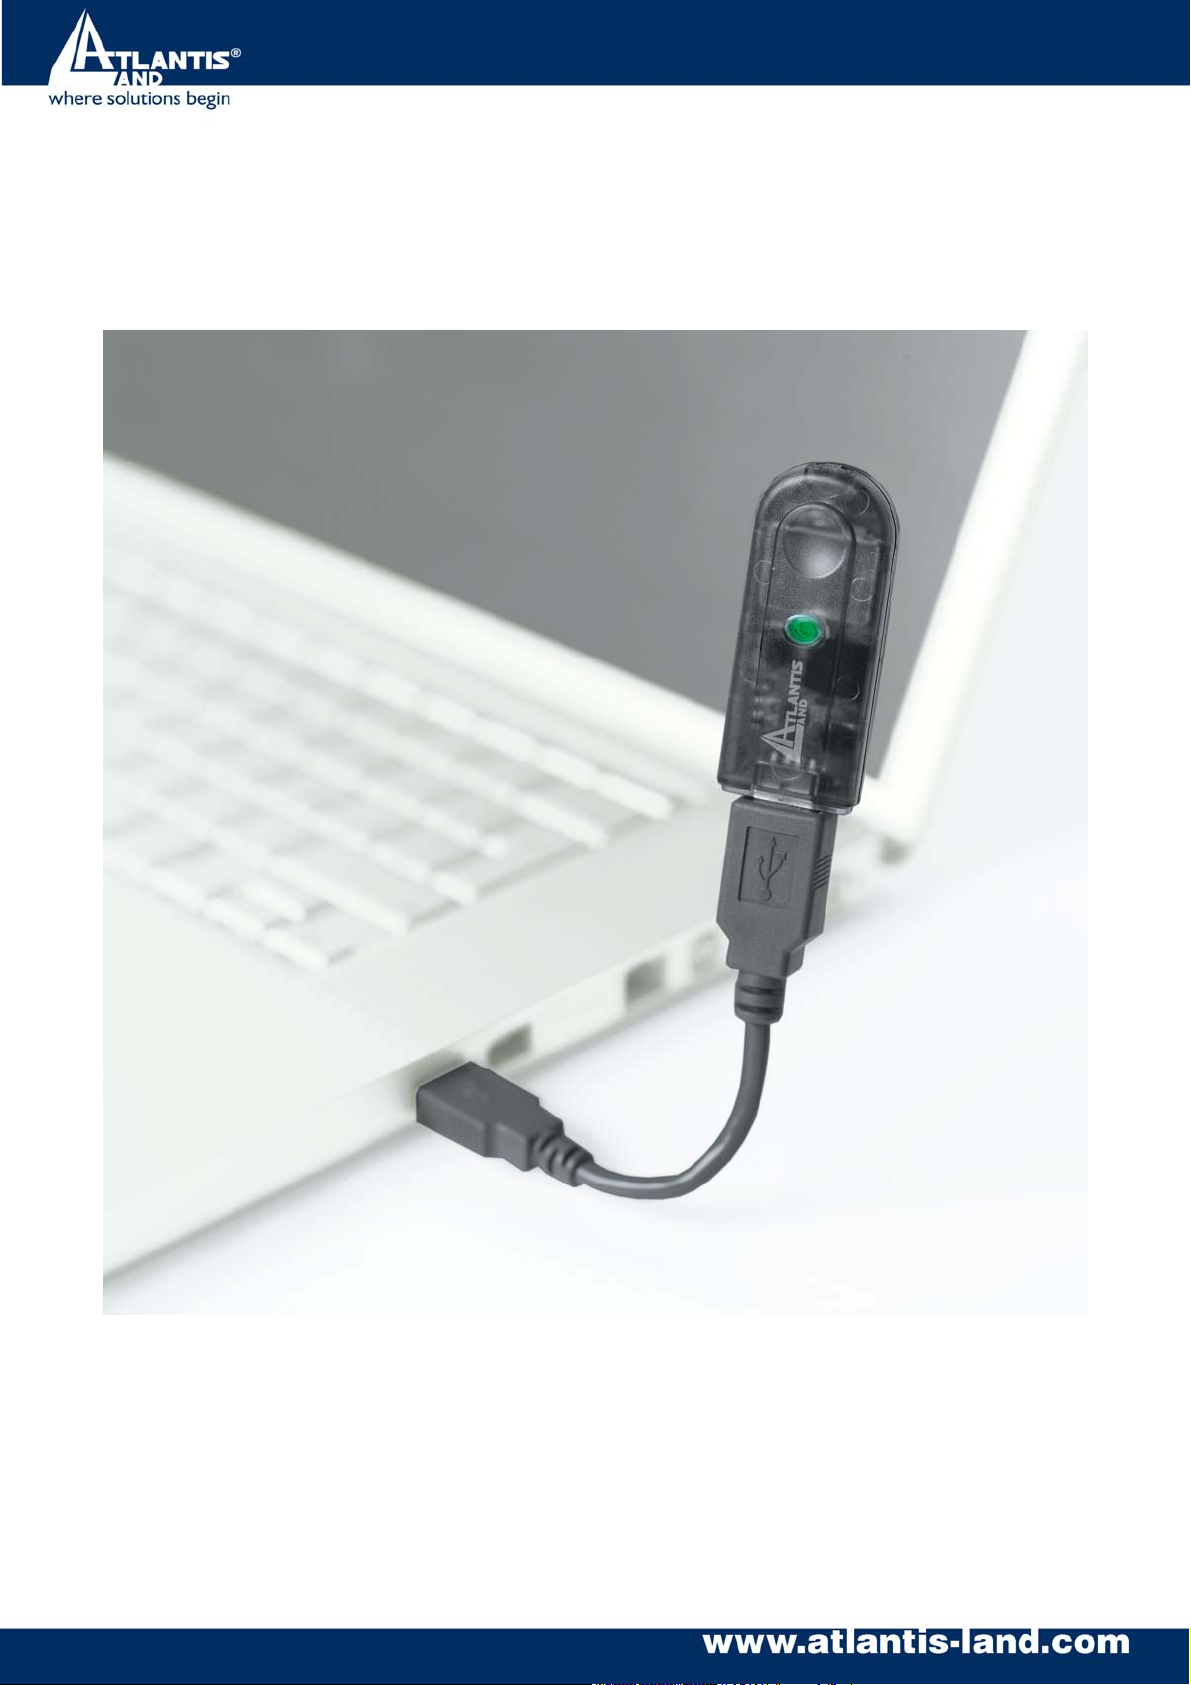
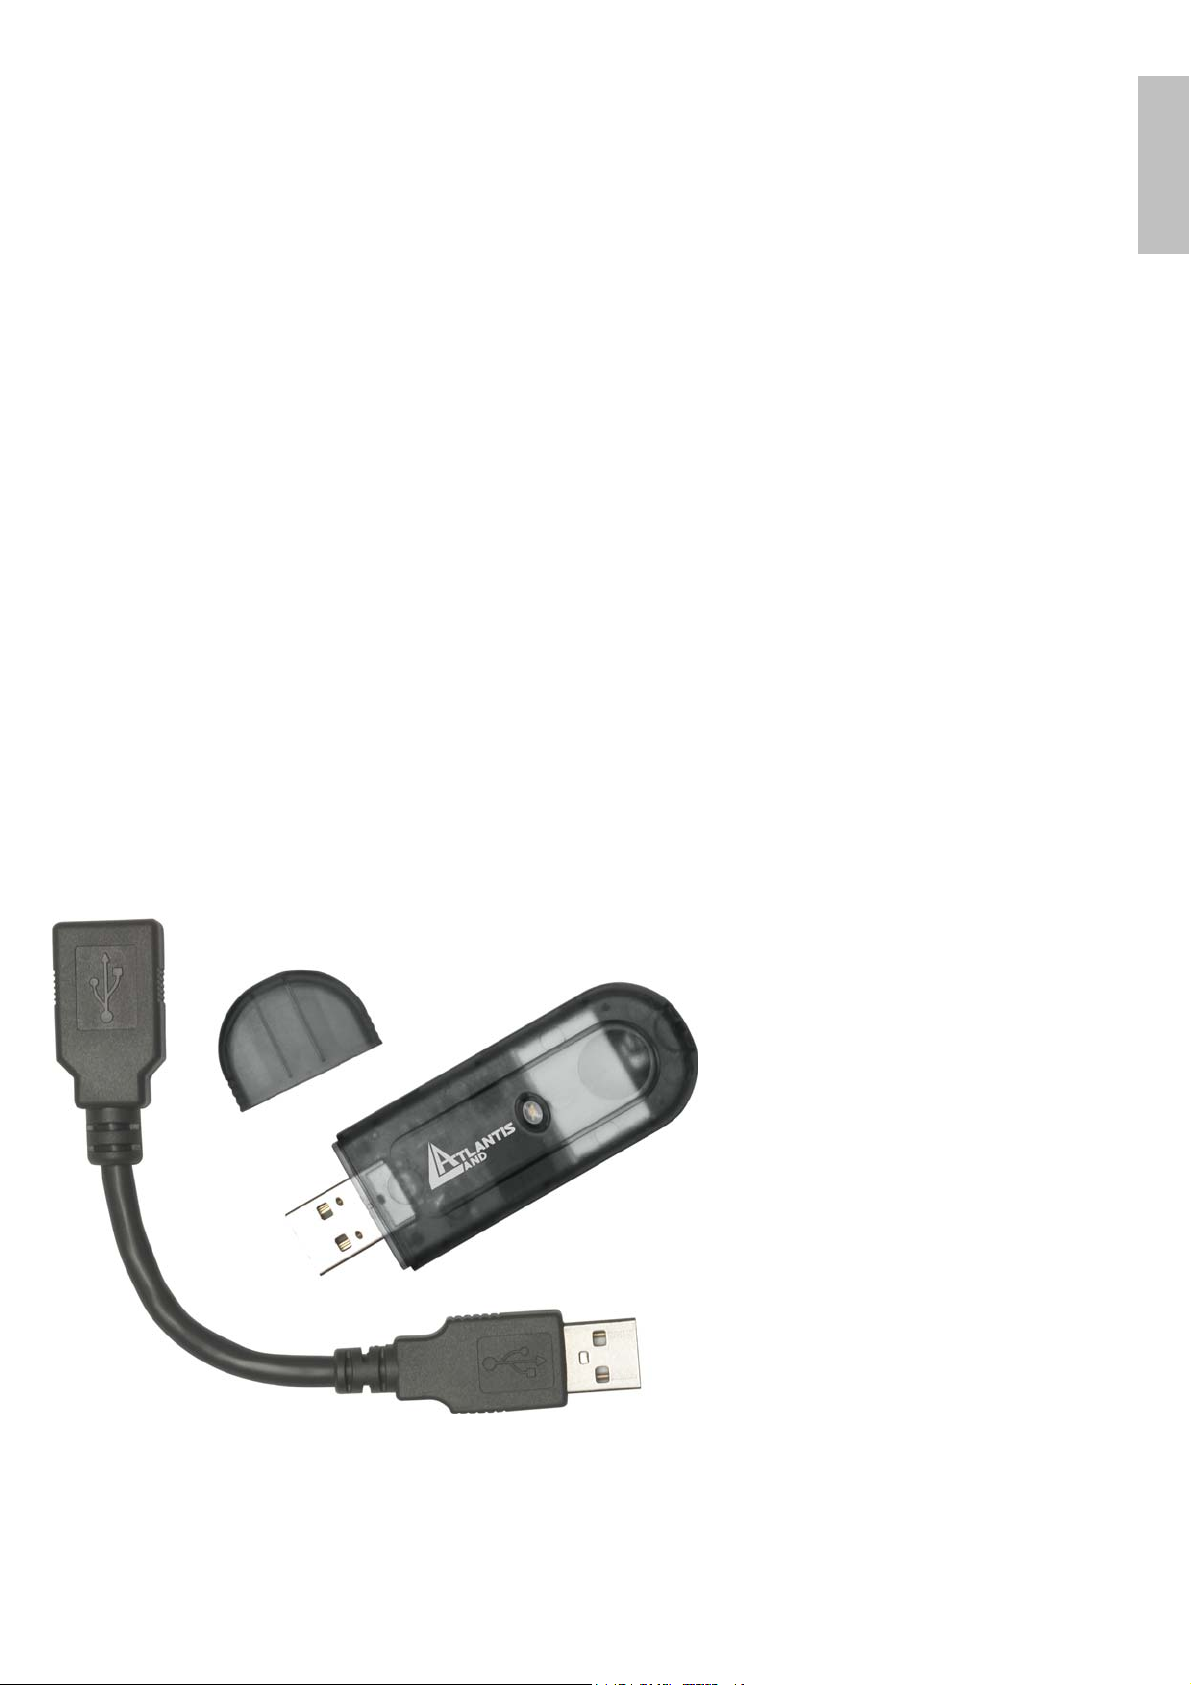
1.5 Product View
Wireless USB Adapter 2
Page 10
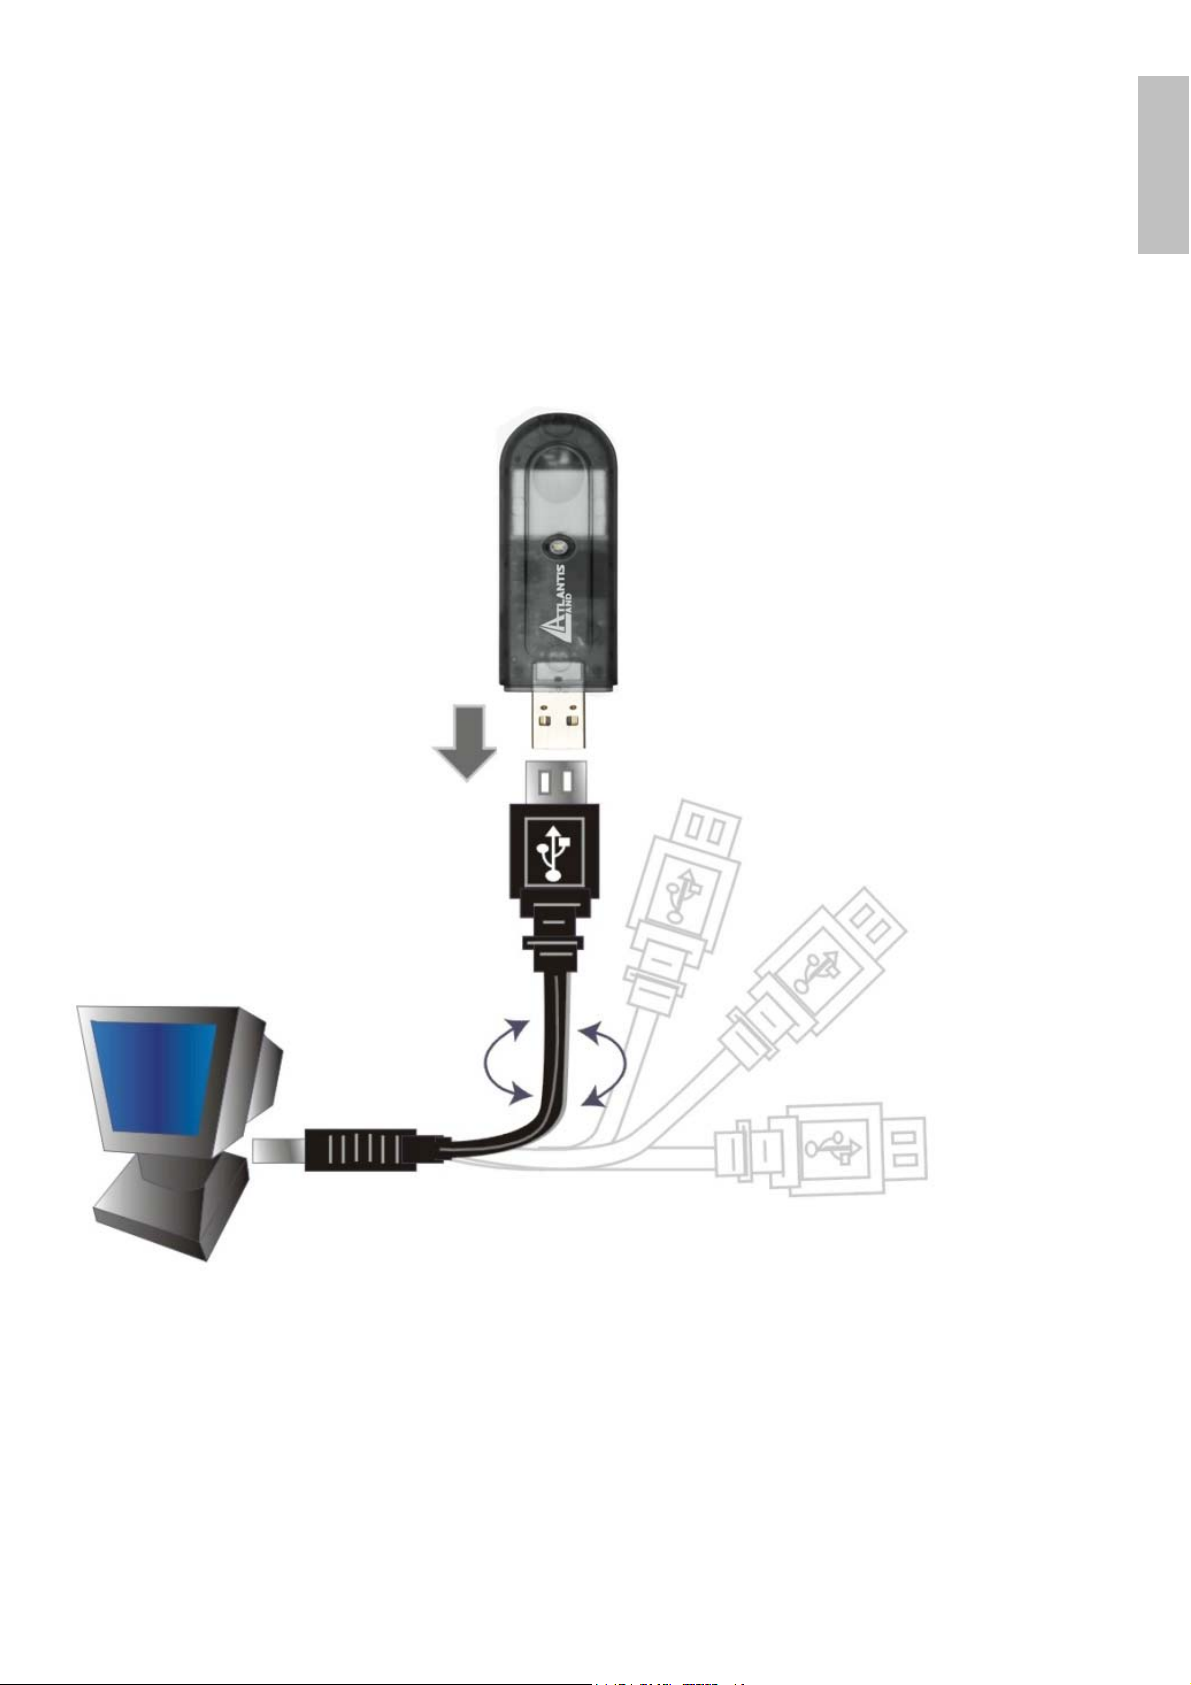
2. Connecting the USB Extension Cable
The USB extension cable that comes with the Adapter has Type A connectors on
both ends. One is a male Type A connector that plugs into the PC’s USB port, and
the other is a female Type A connector that plugs into the Adapter.
This USB extension cable have a special function, it can be twist to any direction to
have the best connection in the air. It is recommended that the Pen Size Wireless
USB Adapter was vertically plane with the ground.
ENGLISH
Wireless USB Adapter 3
Page 11

ENGLISH
2.1 Hardware Installation
LED Indicator
The LNK indicator lights green when the Wireless LAN is connected to a network
successfully. Otherwise the LNK indicator blinks green while the Wireless USB
Adapter is scanning the wireless device.
Check the installation
The LEDs of the Wireless USB 2.0 Adapter are clearly visible and the status of the
network link can be seen instantly:
When connected to the USB port and the driver was installed, the LNK LED will
start blinking, it means that the device is starting to scanning a 802.11g wireless
device near the Wireless USB 2.0 Adapter.
While the Wireless USB 2.0 Adapter linked up to the Access Point or to other
Wireless LAN station, the LNK LED will always light up.
Wireless USB Adapter 4
Page 12
3. Software Installation
This section describes the procedures of installing the driver and utility. Follow the
instruction step by step to finish the installation. If you use Windows® 98SE/ME,
please prepare the Windows® Setup CD at hand before installing the driver;
because the system will ask you to insert the Setup CD to copy files during the
installation.
3.1 Installing on Windows 98SE/ME
ENGLISH
Step 1
Step 2. In the next window, select “Search for the best driver for your device”
Step 3. Check “Specify a l
Step4. When the installation is completed, click Finish button.
Go to your Windows Start menu and choose Run, type
“CDRom:\USB\Utility\Setup.exe” in the dialog box and click OK.
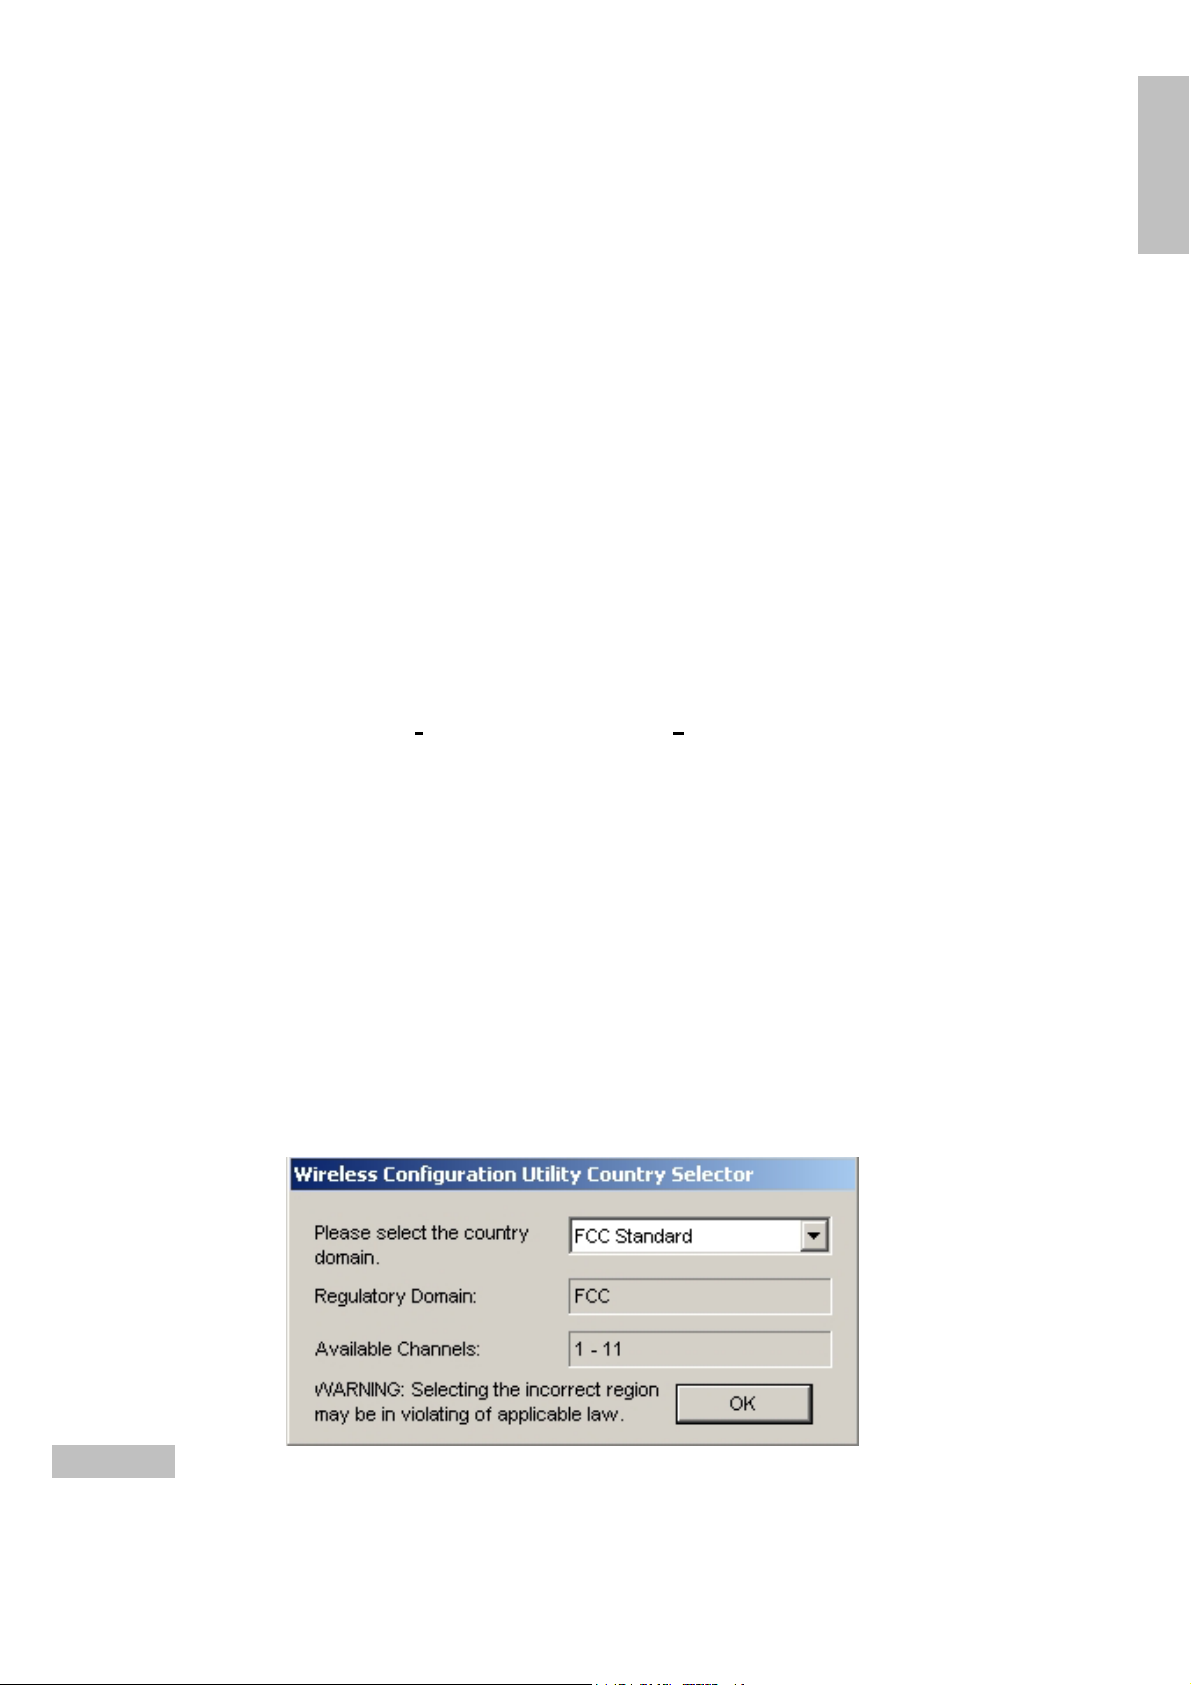
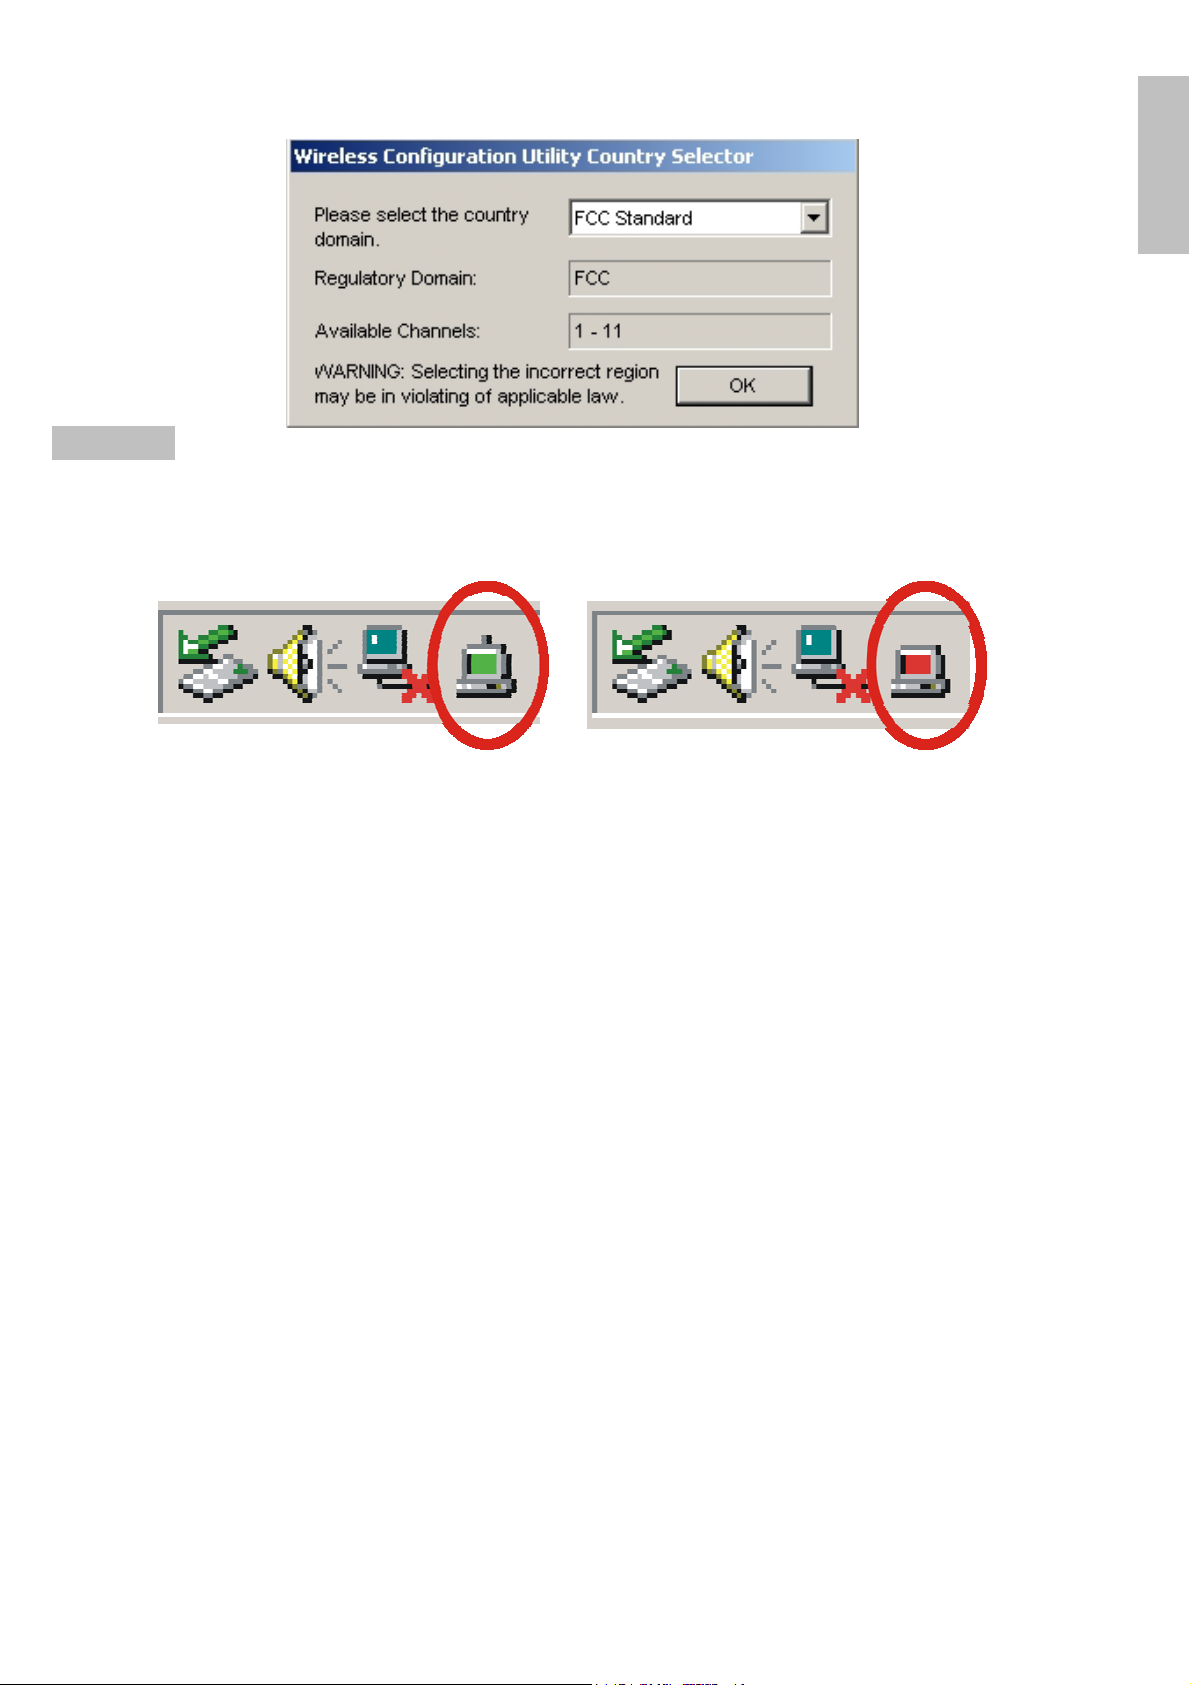
After finish the installation, plugged in the Wireless USB Adapter, you will see
Wireless Configuration Utility Country Selector, select the country where you are
using this Wireless device, users are responsible for ensuring that the channel set
configuration is in compliance with the regulatory standards of these countries.
. Start Windows. Insert the driver CD into your CD-ROM drive. After the
opening banner, Windows will tell you that the new device has been
detected. You will then see the following screen. Click
and click
directory such as
CDRom:\USB\Drivers\WindowsME)
. Click “OK” and then “Next>” to continue.
“Next >”.
ocation”. Click “Browse…” to specify the driver
CDRom:\USB\Drivers\Windows98\
for installing Wireless USB Adapter
“Next >”.
(or
Warning: Be noted that selecting the incorrect region may result in a
violation of applicable law; you will need to select the correct domain.
Wireless USB Adapter 5
Page 13
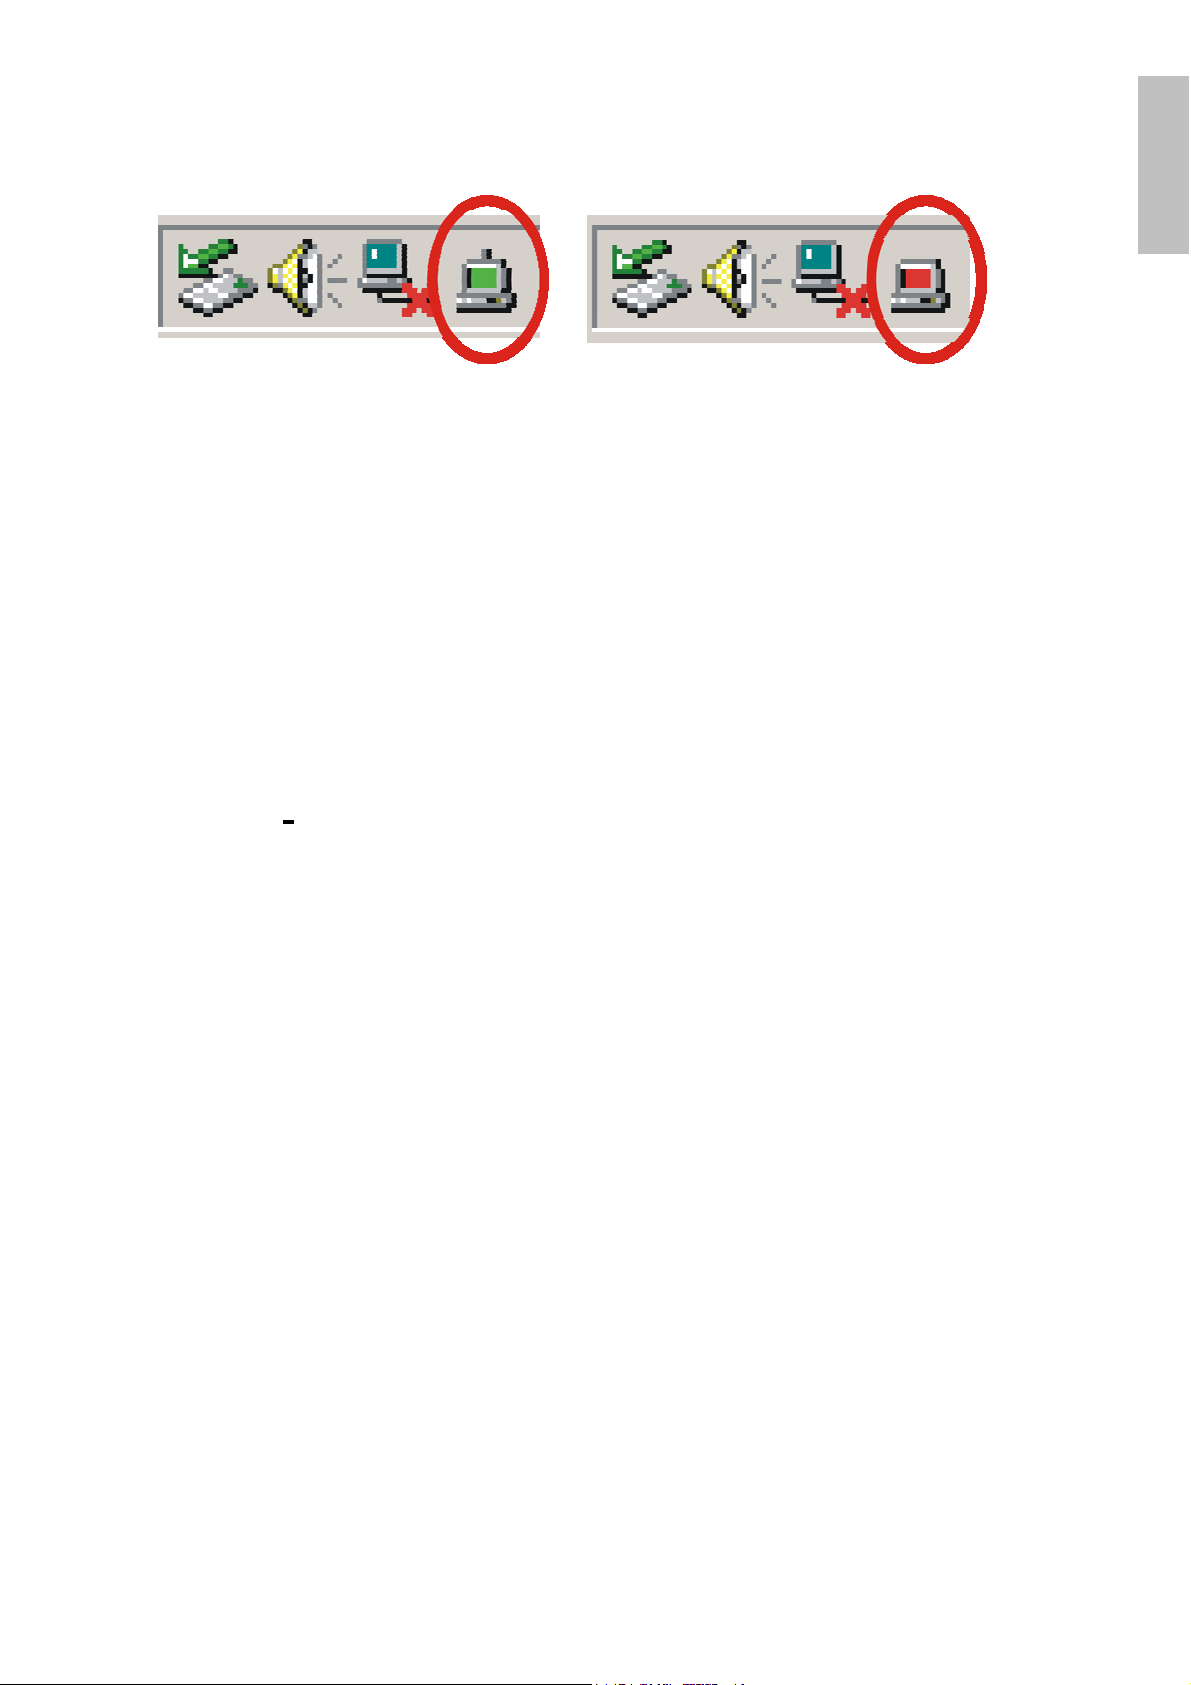
You will see the icon on the Windows task bar when you finish the installation.
When the icon in the toolbar represents in green color, it is properly connected to
the network and if it represents in red color, then it is not connected to the network.
3.2 Installing on Windows 2000/XP
Step 1. Start Windows. Insert the driver CD into your CD-ROM drive. After the
opening banner, Windows will tell you that the new device has been
detected. You will then see the following screen. Click “Next >”.
Step 2.
Step 3. Click “Br
Step 4. When windows titled “Digital Signature Not Found” appear, press “Yes”
Step 5. When the installation is completed, click Finish button.
Go to your Windows Start menu and choose Run, type
“CDRom:\USB\Utility\Setup.exe” in the dialog box and click OK.
After finish the installation, plugged in the Wireless USB Adapter, you will see
Wireless Configuration Utility Country Selector, select the country where you are
using this Wireless device, users are responsible for ensuring that the channel set
configuration is in compliance with the regulatory standards of these countries.
Select “
select “Install from a list or specific location”). Click “Next>”. In next
window, check “Specify a location” and click “Next>”.
CDRom:\USB\Drivers\Windows2000\ (or
CDRom:\USB\Drivers\WindowsXP) for installing Wireless USB Adapter .
Click
to continue the installation.
Search for a suitable driver for my device
owse…” to specify the driver directory such as
“OK”
and then
“Next>”
to continue.
” (In Windows XP
ENGLISH
Wireless USB Adapter 6
Page 14
Warning: Be noted that selecting the incorrect region may result in a
violation of applicable law; you will need to select the correct domain.
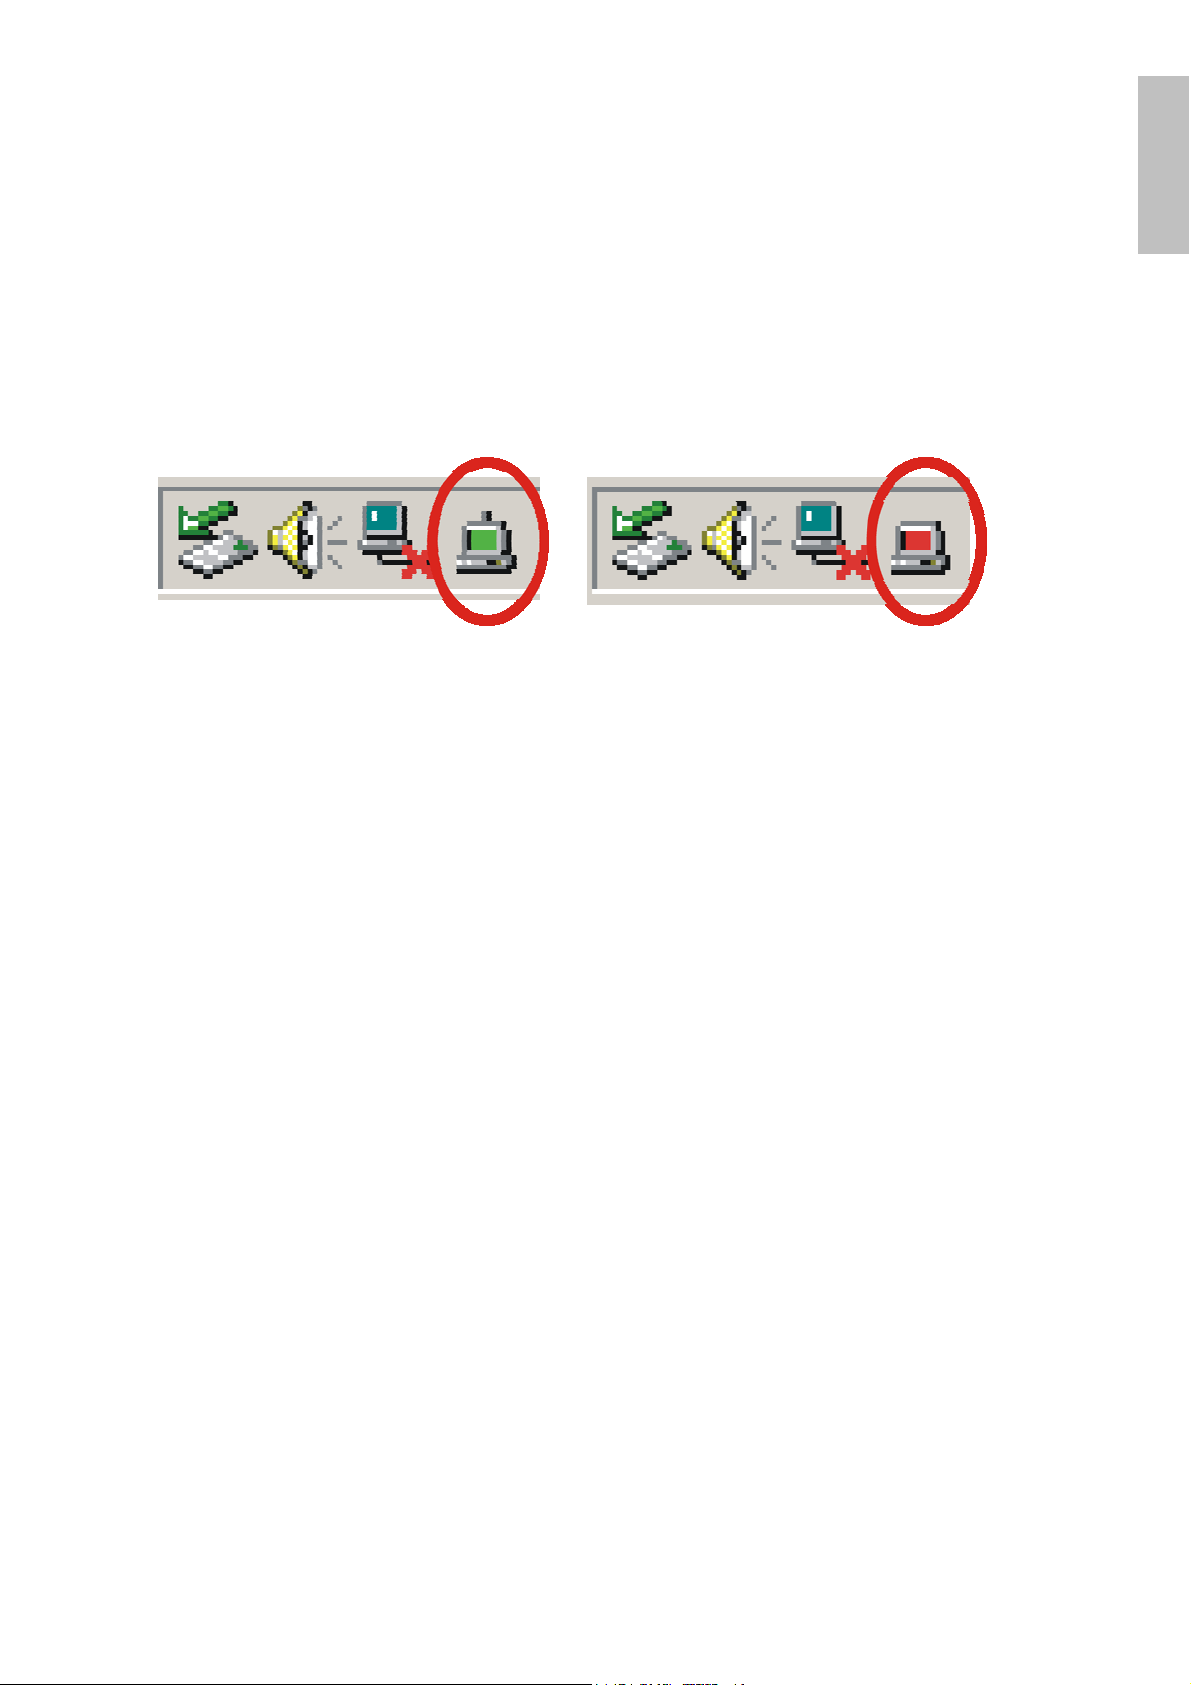
You will see the icon on the Windows task bar when you finish the installation.
ENGLISH
When the icon in the toolbar represents in green color, it is properly connected to
the network and if it represents in red color, then it is not connected to the network.
Wireless USB Adapter 7
Page 15
4. Wireless Network Utility
4.1 Introduction
After installing the driver, the Adapter provides a convenient and powerful utility
that allows you to set up, configure, and know your networking status easily and
clearly.
You will see the icon on the Windows task bar when you finish the installation.
When the icon in the toolbar represents in green color, it is properly connected to
the network and if it represents in red color, then it is not connected to the network.
ENGLISH
4.2 Disable “Windows XP Wireless Zero Configuration
In Windows XP, it is recommended that you use the WLAN 802.11g Utility. Right
after the installation, before opening the Utility, please follow the steps below to
disable the Windows XP Zero Configuration:
1 Go to “Control Panel” and double click “Network Connections”.
2 Right-click “Wireless Network Connection” of WLAN 802.11g USB2.0
Wireless LAN, and select “
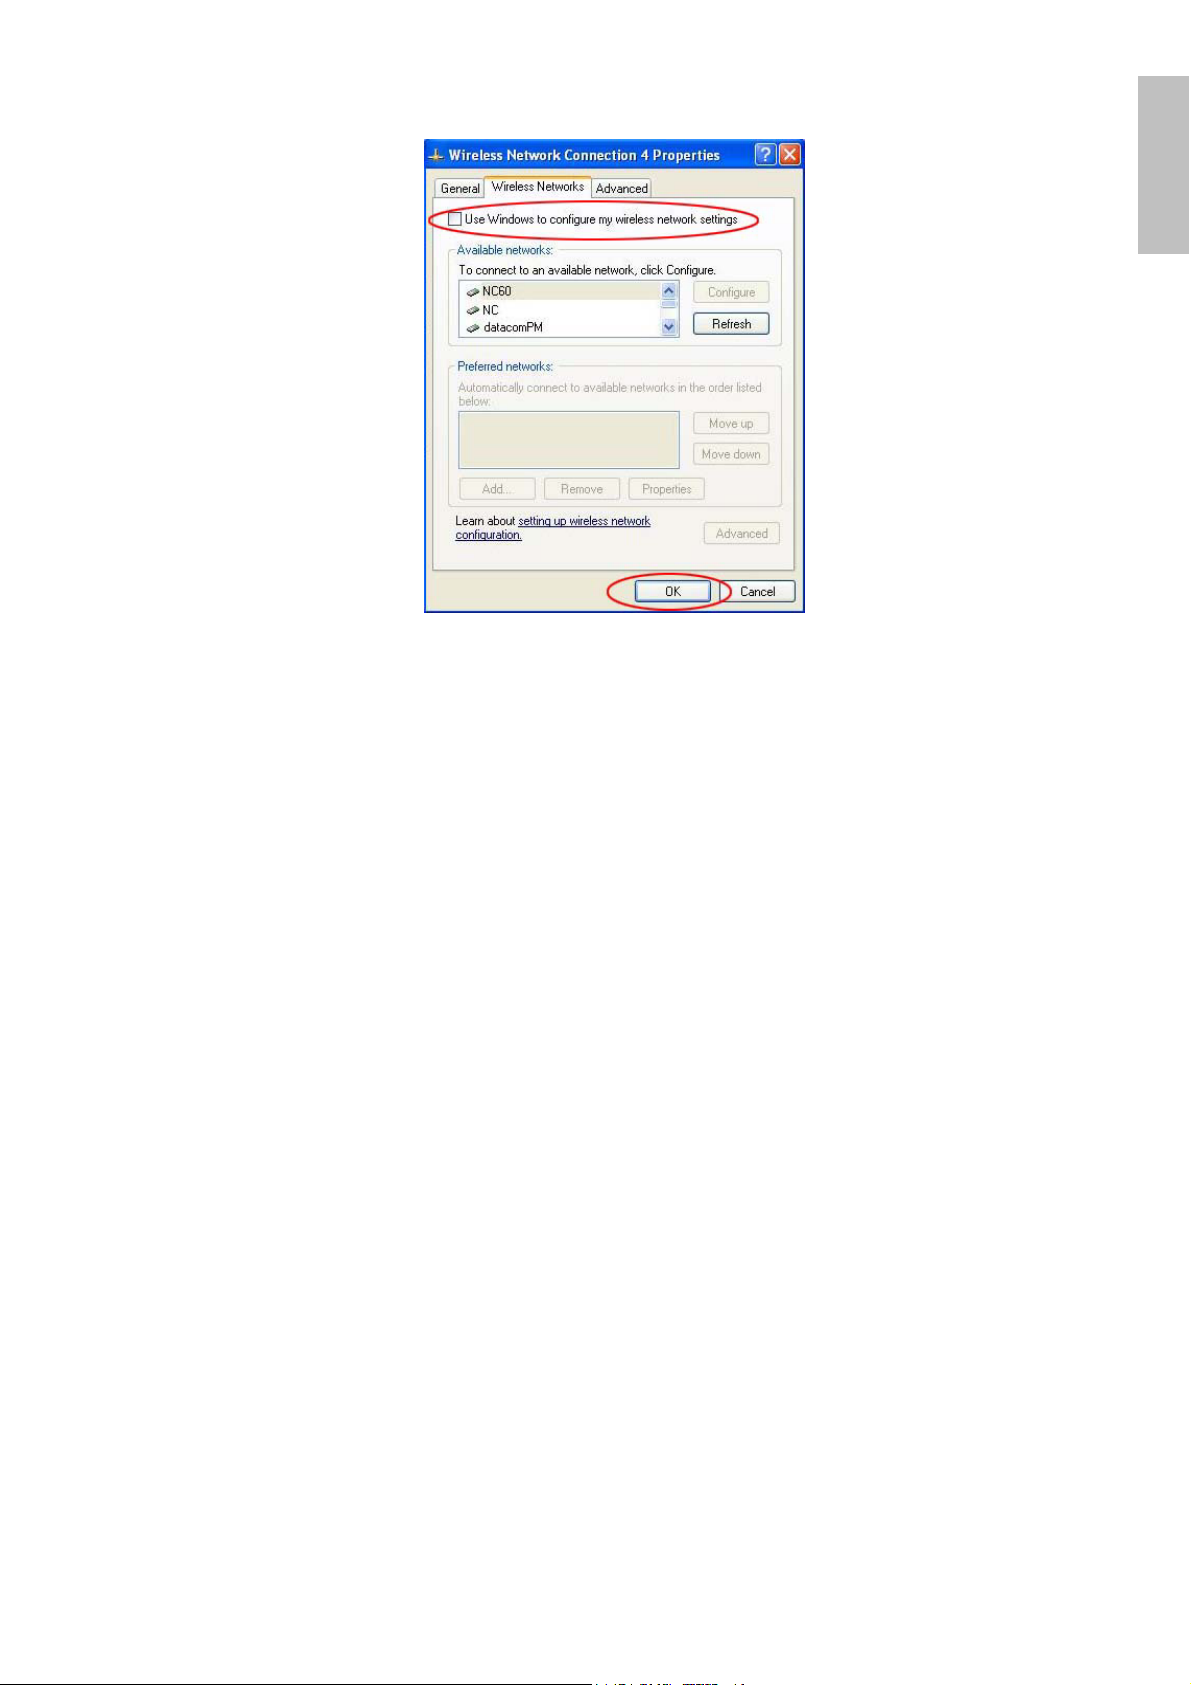
3 Select “Wireless Networks” tab, and uncheck the check box of “Use
Windows to configure my wireless network settings
Properties
”.
”, and then click “
OK
”.
Wireless USB Adapter 8
Page 16
ENGLISH
4.3 Using the Configuration Utility
Double-click the Wireless LAN icon (or right-click and then select Launch Config
Utilities) to launch the Configuration Utility.
With the Wireless USB Adapter utility, users can configure all the functions
provided by the Wireless Monitor Utility. Double-click the utility icon that appears in
the taskbar.
The Wireless Monitor Utility includes seven tabs: Status, Configuration, Advanced,
Profile, Network, Statistics and About.
Wireless USB Adapter 9
Page 17

4.3.1 Link Status
The Status screen shows you the status of the USB Adapter, it shows that where
the device is connected to, the Network mode, the Channel, the transmit rate and
the encryption mode.
ENGLISH
There is another dialog box showing the data transmitted and data received. The
two signal lines show the Signal Strength and the Link Quality of the device.
Wireless USB Adapter 10
Page 18
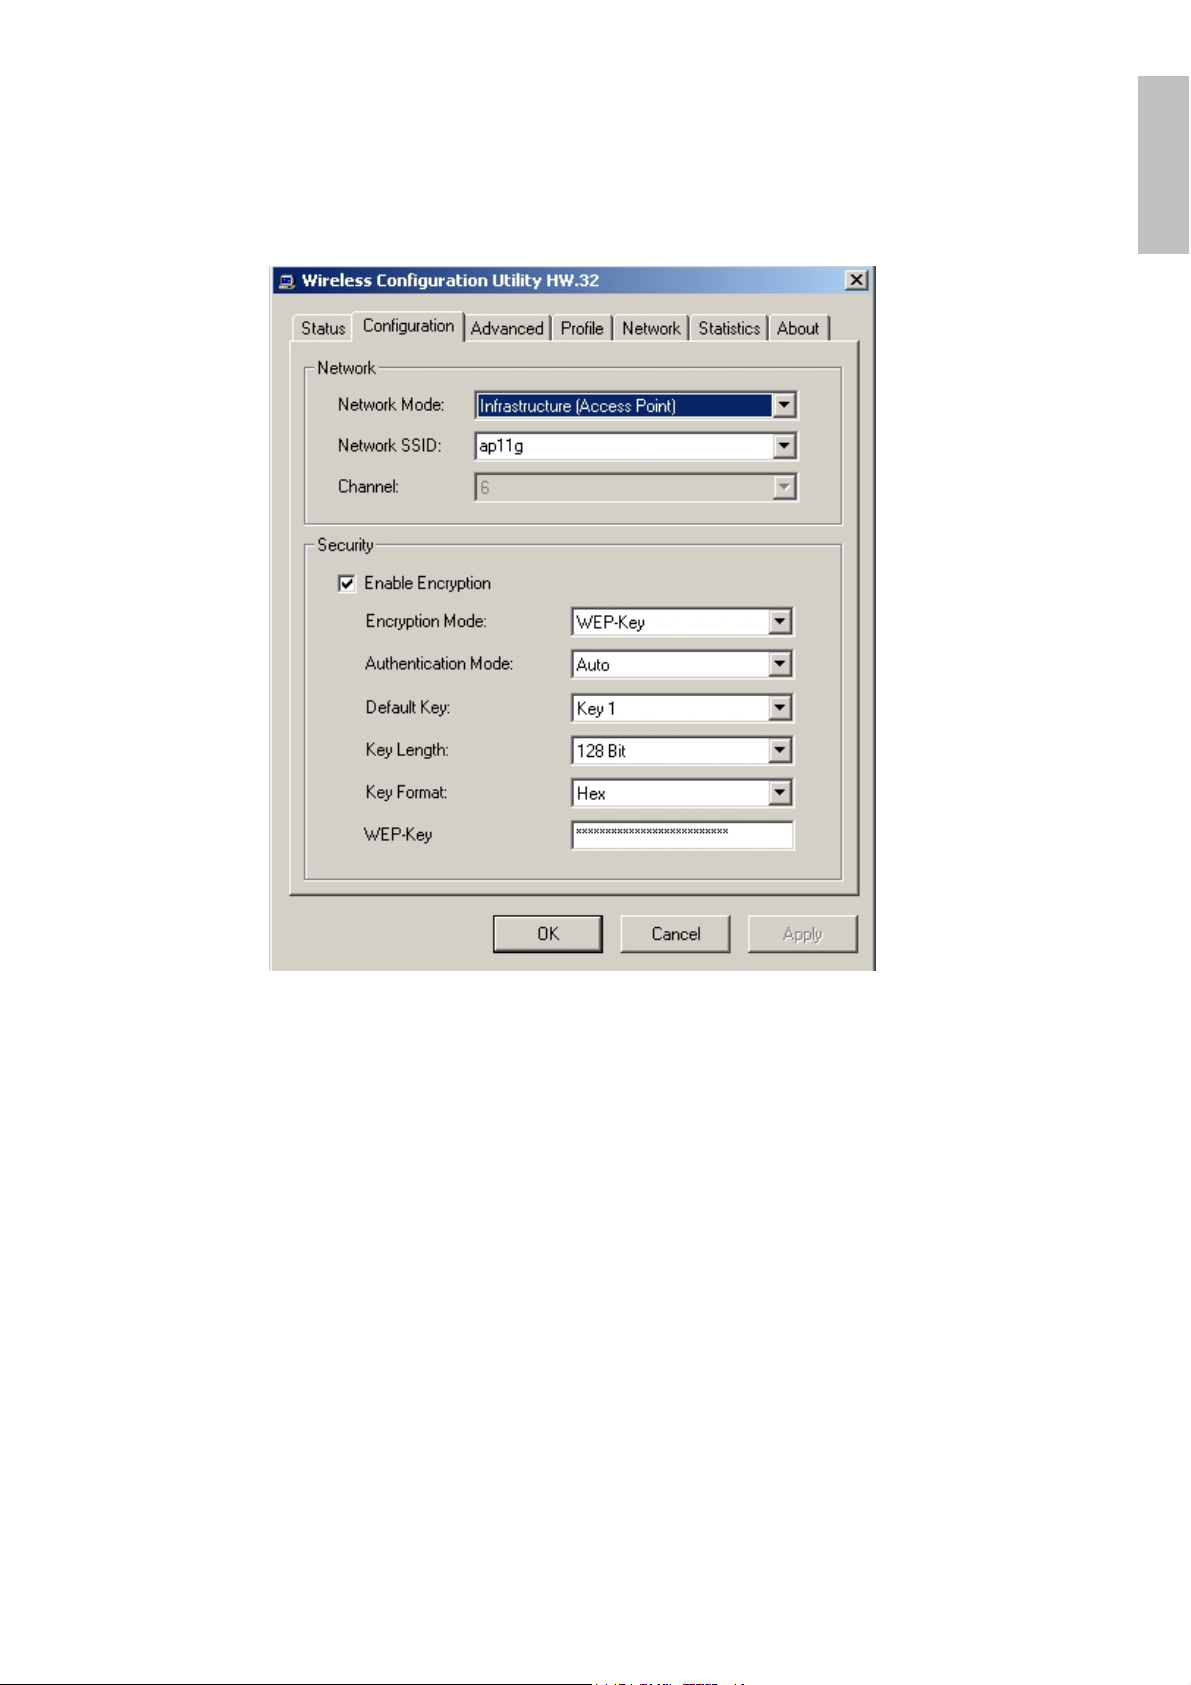
4.3.2 Configuration
The Configuration function helps you to configure the Network and the Security.
ENGLISH
Network: the setting of the Network mode, the SSID and the Channels.
Network Mode:
If you want to connect with an Access Point, please set to “Infrastructure” mode. If
you have more stations and just want to set them as local network, please set the
mode to “Ad-Hoc” mode.
Network SSID:
The SSID differentiates one Wireless LAN group name from another; so all access
points and all devices attempting to connect to a specific Wireless LAN group
name must use the same SSID. A device will not be permitted to join the BSS
unless it can provide the unique SSID.
If the SSID parameter is “ANY”, it will detect the strongest signal of the wireless
station.
It shows radio channel numbers that used for Wireless LAN networking.
Channel:
Wireless USB Adapter 11
Page 19

The channel number can be set only under the Ad-Hoc operation mode. In Ad-Hoc
mode stations, each station must have the same channel numbers and SSID.
In Infrastructure mode, the Wireless USB Adapter will automatically detect the
channel number of the Access Point.
Security: the setting of the Network Encryption.
This function is used to protect wireless communication from eavesdropping. A
secondary function of encryption is to prevent unauthorized access to a wireless
network, and it can be achieved by using the Encryption function.
Encryption Mode:
There are two kinds of encryption mode, WEP encryption and WPA-PSK.
Click the Enable Encryption to activate the security of the USB Adapter.
WEP-Key:
shared between a mobile station and a base station (Access Point).
WEP-Passphrase:
group of WEP key in the Key Setting.
Authentication Mode:
WEP (Wired Equivalent Privacy) relies on a secret key that is
the Passphrase in the dialog box helps you to create a
ENGLISH
Open System: with the same WEP key between the stations, the stations
don’t need to be authenticated, and this algorithm was set to default.
Shared Key: with the same WEP key between the stations in this
Authentication algorithm, this type will use packets with encryption by
transferring a challenge text which will be acknowledge by both side of the
stations. In order to choose which authentication algorithm will be used,
you must know which one the station supports this algorithm first.
It is recommended to select “
Default Key (Key 1 ~ Key 4):
You can type the key that you want to use from Key#1 to Key #4, and the key that
you type will be the encryption between the stations that you connected with.
Key Length, Key Format and WEP Key:
If you select 64bit in Hex format, you must type 10 values in the following range
(0~F, hexadecimal), or 64bit in ASCII format, you must type 5 values in the
following range (0~9, A~Z and a~z Alphanumeric).
If you select 128bit in Hex format, you must type 26 values (0~F, hexadecimal), or
128bit in ASCII format, you must type 13 values in the following range (0~9, A~Z
and a~z Alphanumeric).
Be sure that the USB Adapter and the wireless station were set in the same key.
Auto
” if you are not familiar with the setting.
Note: After all the settings are completed, click
Wireless USB Adapter 12
Apply
to save the setting.
Page 20
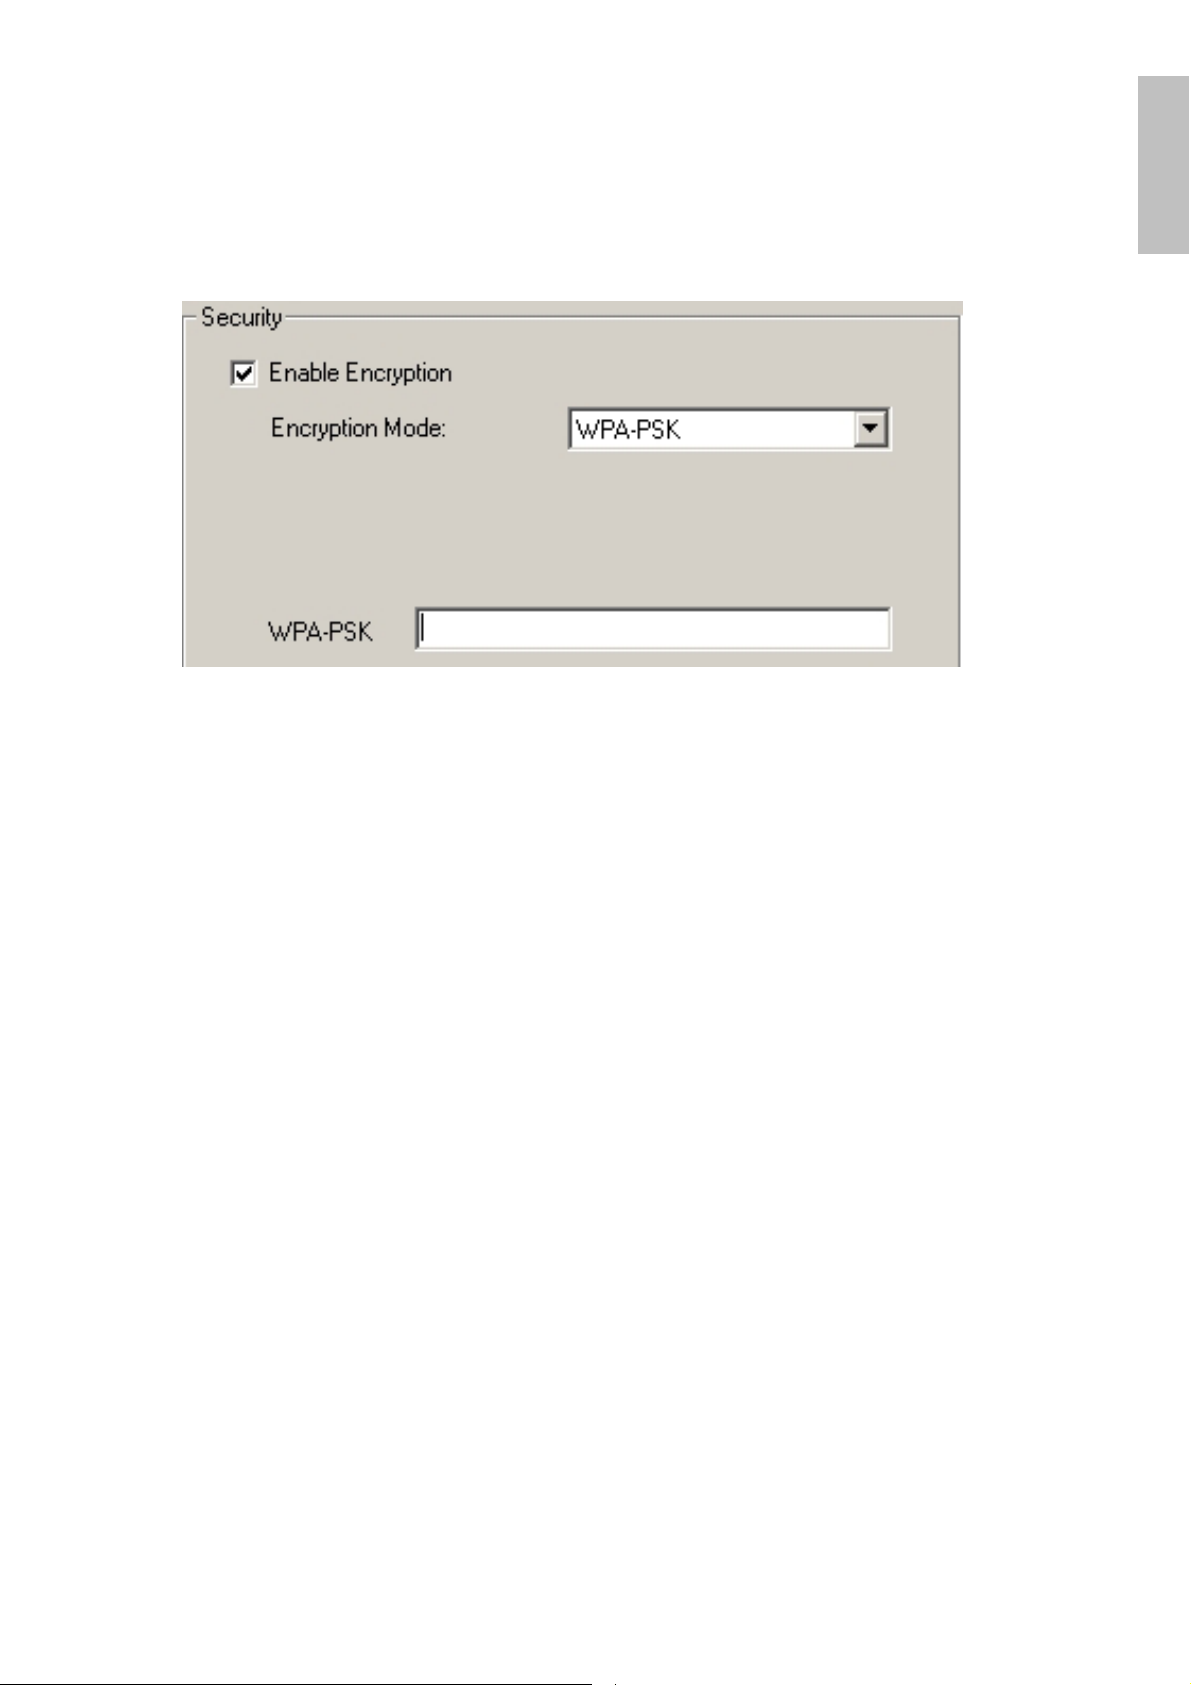
WPA-PSK:
version that does not support 802.1x and requires a separate RADIUS server for
mutual authentication.
Enter a Passphrase in the WPA-PSK dialog box. This passphrase must be the
same on each computer that is connected to the wireless network.
WPA-PSK (Wi-Fi Protected Access pre-shared key) is a simpler
ENGLISH
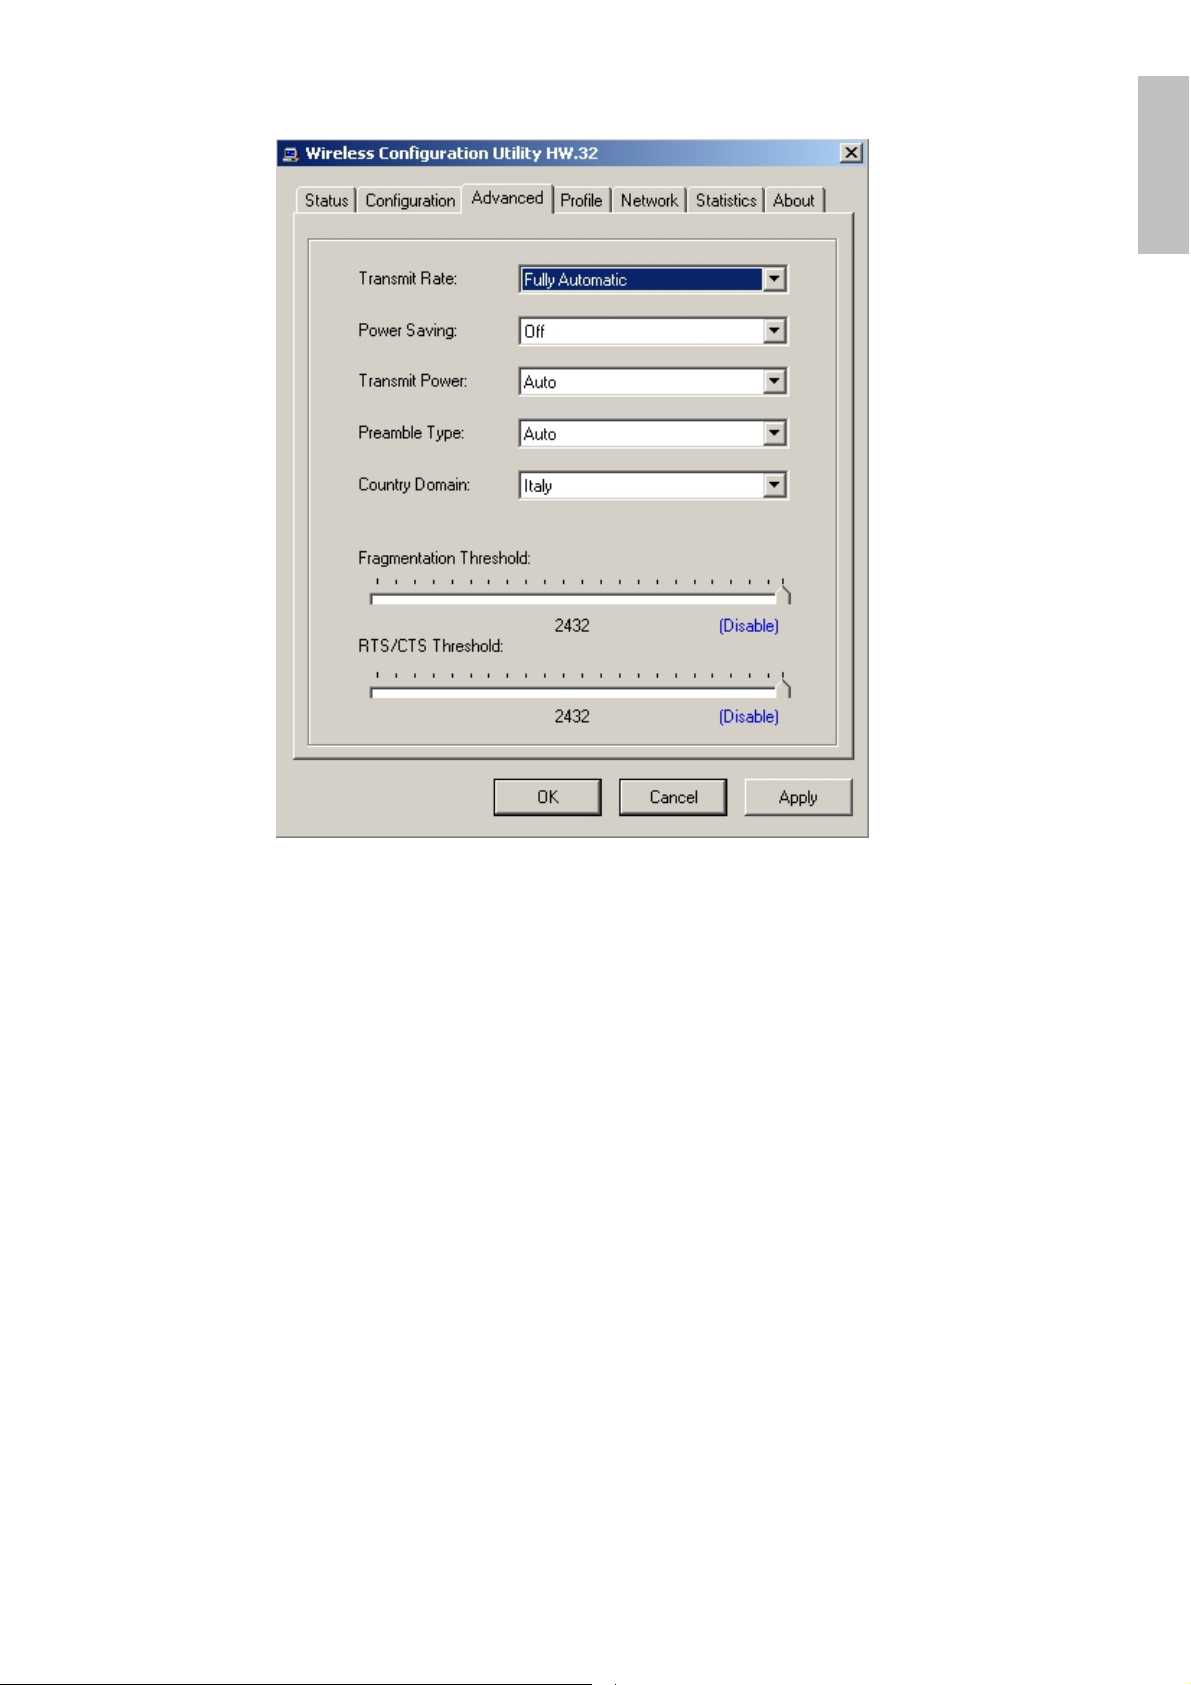
4.3.3 Advanced
The Advanced settings help you to control the USB Adapter to adjust with wireless
devices in certain environment.
Wireless USB Adapter 13
Page 21
ENGLISH
Transmit Rate:
You can choose a fixed Transmit Rate or Fully Automatic
Power Saving:
To set your Wireless USB Adapter as power saving mode, select “Off”, “Normal” or
“Maximum”.
Transmit Power:
By selecting the Transmit Power, you can select the Radio Frequency output
power from Minimum, 12.5%, 25%, 50%, 100% or Auto.
Preamble Type:
The usage of the preamble is to limit the packet size of the data to transmit. It is
recommended to choose the short preamble when the link quality is bad, it is to
prevent the wasting time of resending a long packet that is lost. The Default is Auto
which access short and long preamble.
Country Domain:
This is the channel selection of each country regulatory domain, select the country
where you are using this wireless device, users are responsible for ensuring that
the channel set configuration is in compliance with the regulatory standards of
these countries.
Fragment Threshold:
Fragmentation Threshold is a way of transmitting the packets that will be
fragmented. Choose a setting within a range of 256 to 2432. It is recommended to
Wireless USB Adapter 14
Page 22

fragment the packet when the link quality is bad, it is to prevent the wasting time of
resending a long packet that is lost.
RTS/CTS Threshold:
The RTS/CTS Threshold is a station initiates the process by sending a RTS frame,
the other ends receives the RTS and responds with a CTS frame, the station must
receive a CTS frame before sending the data frame. This is to prevent the
collisions by each station. Choose a setting within a range of 256 to 2432. It is
recommended limiting a long packet to prevent each station waiting too long to
transmit a data.
ENGLISH
Wireless USB Adapter 15
Page 23
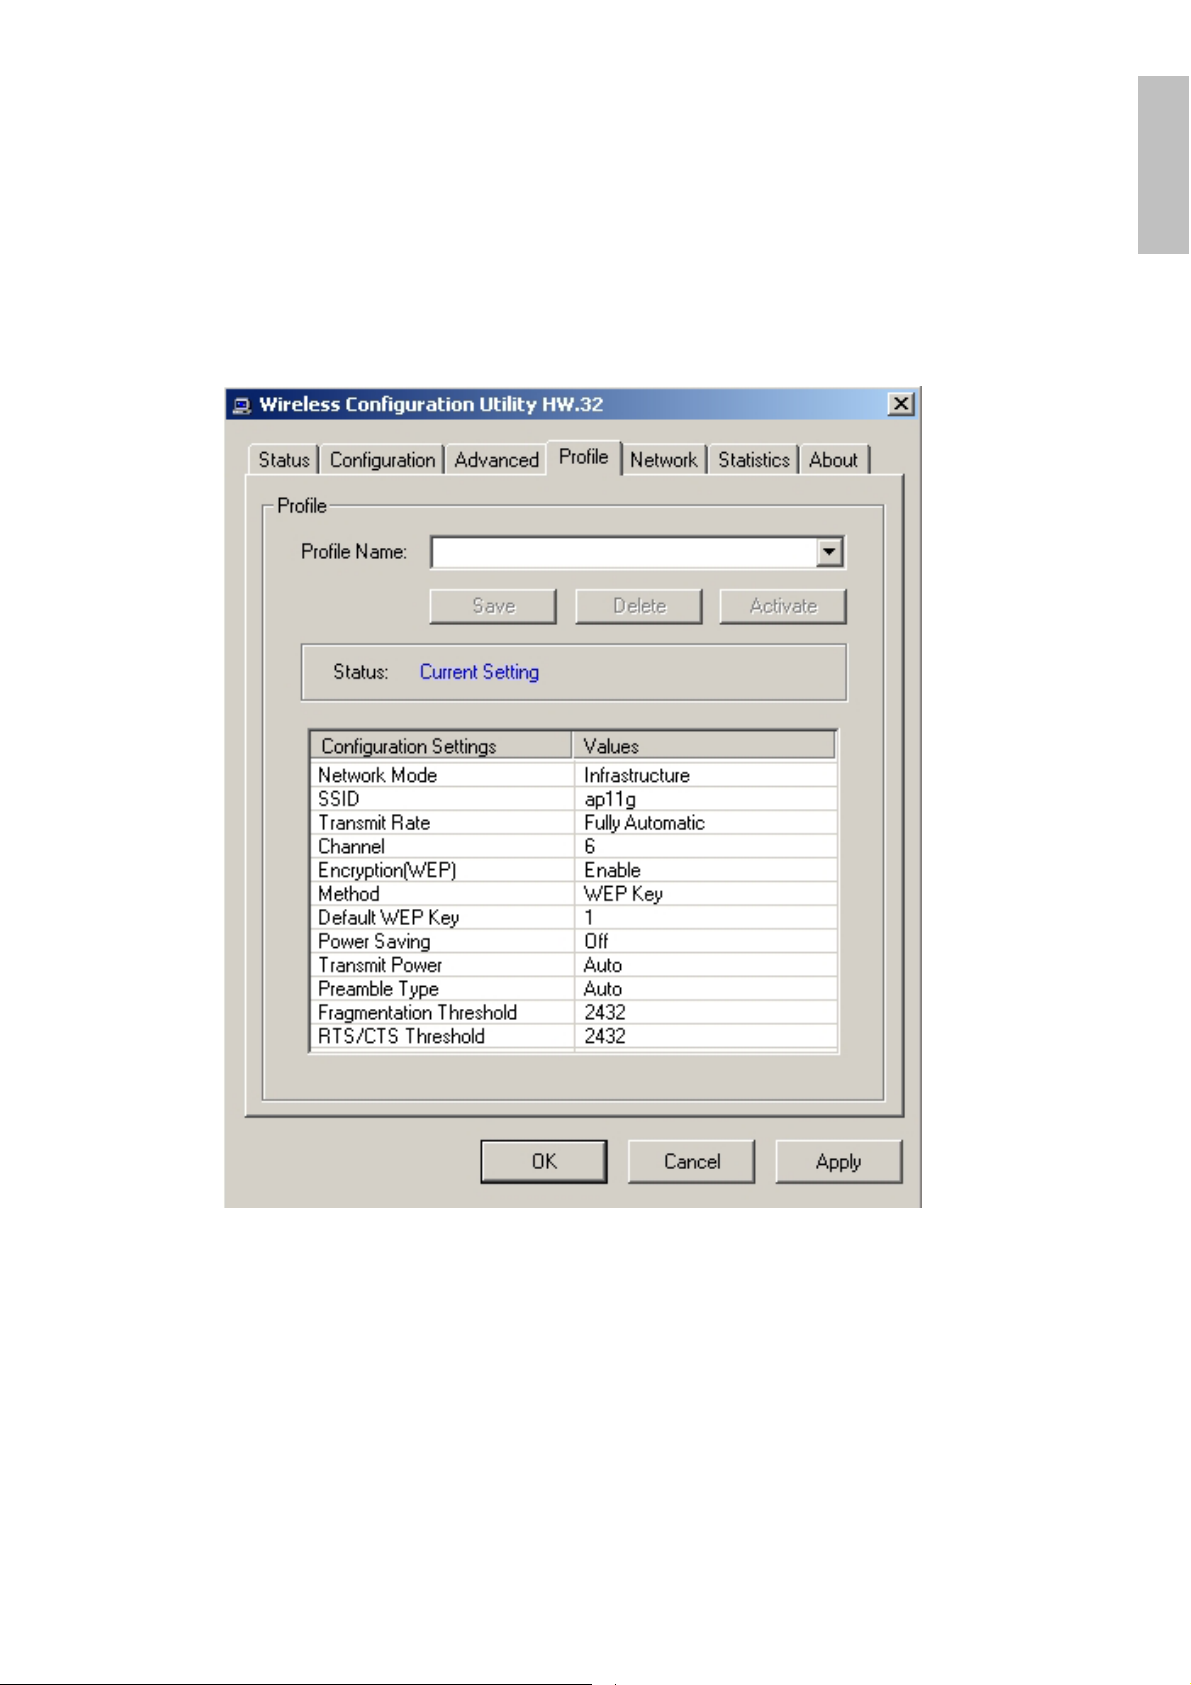
4.3.4 Profile
The Profile section allows you to set values for all parameters by selecting a
previously defined profile. Type a name in the Profile Name field to create a profile,
click “Save” and click “Apply” when a profile is done. You can click Delete if the
profile is no longer used, to activate other profile, choose a profile name in the
Profile Name field and click Activate.
ENGLISH
Wireless USB Adapter 16
Page 24

4.3.5 Network
The screen shows all the Wireless devices around your Wireless USB Adapter.
The information of the wireless devices includes the SSID, MAC Address,
Channels, Signal, the Security type and the Network mode.
You can click the Rescan button to find the new wireless devices, and double-click
the device to choose the wireless station that you want to connect with.
ENGLISH
Wireless USB Adapter 17
Page 25

4.3.6 Statistics
The Statistic section shows the real-time transmit and receive packets of the USB
Adapter.
ENGLISH
Wireless USB Adapter 18
Page 26

4.3.7 About
The About section shows the Device Name, Regulatory Domain, Driver Version,
Firmware Version, MAC Address and the Utility version.
ENGLISH
Wireless USB Adapter 19
Page 27

5. Troubleshooting
Common Problems and Solutions
This chapter provides solutions to problems that may occur during the installation
and operation of the WLAN 802.11g USB Adapter. Read the descriptions below to
solve your problems.
2. My computer cannot find the Adapter
Make sure the Adapter has no physical damage.
Make sure the Adapter is properly inserted in the USB slot.
Try the Adapter in other USB slots.
Try another Adapter in that particular USB slot.
2. Cannot access any network resources from the computer.Make sure that
the notebook PC is powered on.
Make sure that the notebook PC is powered on.
Make sure that the Cardbus is configured with the same SSID and security
options as the other computers in the infrastructure configuration.
ENGLISH
Frequently Asked Questions
1. Can I run an application from a remote computer over the wireless
network?
This will depend on whether or not the application is designed to be used over a
network. Consult the application’s user guide to determine if it supports operation
over a network.
2. Can I play computer games with other members of the wireless network?
Yes, as long as the game supports multiple players over a LAN (local area
network).
Refer to the game’s user guide for more information.
3. What is Spread Spectrum?
Spread Spectrum technology is a wideband radio frequency technique developed
by the military for use in reliable, secure, mission-critical communications systems.
It is designed to trade off bandwidth efficiency for reliability, integrity, and security.
In other words, more bandwidth is consumed than in the case of narrowband
Wireless USB Adapter 20
Page 28

transmission, but the trade-off produces a signal that is, in effect, louder and thus
easier to detect, provided that the receiver knows the parameters of the spreadspectrum signal being broadcast. If a receiver is not tuned to the right frequency, a
spread-spectrum signal looks like background noise. There are two main
alternatives, Direct Sequence Spread Spectrum (DSSS) and Frequency Hopping
Spread Spectrum (FHSS).
4. What is DSSS? What is FHSS? And what are their differences?
Frequency-Hopping Spread-Spectrum (FHSS) uses a narrowband carrier that
changes frequency in a pattern that is known to both transmitter and receiver.
Properly synchronized, the net effect is to maintain a single logical channel. To an
unintended receiver, FHSS appears to be short-duration impulse noise. DirectSequence Spread-Spectrum (DSSS) generates a redundant bit pattern for each bit
to be transmitted. This bit pattern is called a chip (or chipping code). The longer the
chip, the greater the probability that the original data can be recovered. Even if one
or more bits in the chip are damaged during transmission, statistical techniques
embedded in the radio can recover the original data without the need for
retransmission. To an unintended receiver, DSSS appears as low power wideband
noise and is rejected (ignored) by most narrowband receivers.
5. Would the information be intercepted while transmitting on air?
WLAN features two-fold protection in security. On the hardware side, as with Direct
Sequence Spread Spectrum technology, it has the inherent security feature of
scrambling. On the software side, WLAN offers the encryption function (WEP) to
enhance security and access control.
6. What is WEP?
WEP is Wired Equivalent Privacy, a data privacy mechanism based on a 64-bit or
128-bit shared key algorithm, as described in the IEEE 802.11 standard.
7. What is infrastructure mode?
When a wireless network is set to infrastructure mode, the wireless network is
configured to communicate with a wired network through a wireless access point.
8. What is roaming?
Roaming is the ability of a portable computer user to communicate continuously
while moving freely throughout an area greater than that covered by a single
access point. Before using the roaming function, the workstation must make sure
that it is the same channel number with the access point of dedicated coverage
area.
9. What is ISM band?
ENGLISH
Wireless USB Adapter 21
Page 29

ENGLISH
The FCC and their counterparts outside of the U.S. have set aside bandwidth for
unlicensed use in the ISM (Industrial, Scientific and Medical) band. Spectrum in the
vicinity of 2.4 GHz, in particular, is being made available worldwide. This presents
a truly revolutionary opportunity to place convenient high-speed wireless
capabilities in the hands of users around the globe.
10. What is the IEEE 802.11g standard?
Approved in June, 2003 as an IEEE
(WLAN
to 54 megabit
the 802.11b
range and is thus compatible with it.
s), 802.11g offers wireless transmission over relatively short distances at up
s per second (Mbps) compared with the 11 megabits per second of
(Wi-Fi) standard. Like 802.11b, 802.11g operates in the 2.4 GHz
standard for wireless local area networks
Wireless USB Adapter 22
Page 30

ITALIANO
1. Introduzione
La ringraziamo per aver scelto il Wireless Adapter USB IEEE 802.11g, la via più
semplice per il Wireless networking. Questo manuale contiene informazioni
dettagliate in merito all’installazione e all’utilizzo del prodotto, lo utilizzi come
riferimento per qualsiasi problema o informazione.
1.1 IEEE 802.11g Wireless Adapter USB
Il Wireless Adapter USB IEEE 802.11g (nel resto del manuale verrà chiamato
Adapter) è una scheda di rete ad alte prestazioni utilizzabile a casa, in ufficio o in
luoghi pubblici. Questo prodotto è in grado di raggiungere una velocità di
trasferimento dati pari a 54 Mbps, è in grado in oltre di auto-negoziare velocità di
48, 36, 24, 18, 12, 9, 6Mbps (IEEE 802.11g), o 11, 5.5, 2, 1Mbps (IEEE802.11b).
Con questo Adapter sarà possibile muoversi all’interno del proprio ufficio o da una
stanza all’altra della propria casa senza mai disconnettersi dalla rete. Questo
prodotto è compatibile con i sistemi Windows® XP/2000/ME/98SE ed è in grado di
funzionare in modalità Ad-Hoc (computer-computer) oppure in modalità in
Infrastructure (computer ad access point).
ITALIANO
1.2 Come funziona una scheda di rete Wireless
A differenza delle reti LAN le reti Wireless hanno due differenti modalità di
funzionamento: infrastructure ed ad-hoc. Nella configurazione Infrastructure una
rete WLAN e una rete WAN comunicano tra loro tramite un access point. In una
rete ad-hoc i client wireless comunicano tra loro direttamente. La scelta tra le due
configurazioni è quindi dettata dalla necessità o meno di mettere in comunicazione
una rete wireless con una cablata.
Se i computer collegati alla rete wireless devono accedere a risorse o periferiche
condivise sulla rete cablata sarà necessario utilizzare la modalità infrastructure
(Figura 2-1). L’ Access Point trasmetterà le informazioni ai client wireless che
potranno muoversi all’interno di un determinato raggio di azione. L’impiego
contemporaneo di più Access Point permetterà di estendere l’area di copertura del
segnale. I client wireless stabiliranno automaticamente il link con il dispositivo che
fornisce il segnale migliore grazie alla funzionalità roaming.
Wireless USB Adapter 23
Page 31

Figura 2-1
Se la rete wireless ha dimensioni relativamente ridotte e se le risorse condivise
sono dislocate sui personal computer che ne fanno parte, è possibile utilizzare la
modalità ad-hoc (Figura 2-2). Questa modalità permette di collegare i client
wireless tra loro direttamente senza la necessità di un access point. La
comunicazione tra i client è limitata direttamente dalla distanza e dalle interferenze
che intercorrono tra loro.
ITALIANO
Figura 2-2
Wireless USB Adapter 24
Page 32

1.3 Requisiti di sistema
Prima di procedere con l’installazione del prodotto verificare di disporre dei
seguenti requisiti:
PC con uno slot USB V2.0/1.1* libero
Processore Intel® Pentium®III 600Mhz o compatibile con 64 MB RAM
Sistema operativo Windows 98SE/ME/2000/XP
15MB di spazio libero su disco
Lettore CD-ROM
* Quando il dispositivo è collegato ad uno slot USB V1.1/1.0 il throughput
massimo è limitato a 6Mbps.
1.4 Contenuto della confezione
Prima di utilizzare il prodotto verificare che la confezione contenga i seguenti
oggetti:
Un Wireless USB Adapter IEEE 802.11g
Un cavo USB tipo A ad entrambi gli estremi
Una guida rapida multilingua
Un Cd-Rom che contiene driver, utility e manuale dell’utente
ITALIANO
1.5 Descrizione del prodotto
Wireless USB Adapter 25
Page 33

2. Installazione Hardware
Il Cavo fornito in dotazione è un cavo USB Tipo A maschio/Tipo A femmina.
L’estremo Tipi A maschio va inserito nella porta USB del PC mentre l’altro va
collegato all’adattatore wireless.
Il cavo USB fornito permette di orientare l’antenna integrata nel dispositivo al fine
di permettere una migliore ricezione del segnale radio (si raccomanda una
collocazione verticale).
ITALIANO
Wireless USB Adapter 26
Page 34

2.1 Verifica Installazione
LED LNK
Acceso verde quando connesso al network wireless. Lampeggiante quando il
dispositivo sta effettuando la scansione di una rete wireless cui collegarsi.
Controllo Installazione
Il LED può servire per avere immediatamente una lettura del funzionamento
dell’adattatore wireless usb.
Quando connesso alla porta USB ed installati I driver ed utility il LED lampeggia
per indicare la ricerca di una rete wireless.
Quando il dispositivo è associato ad una rete wireless il led è acceso verde fisso.
ITALIANO
Wireless USB Adapter 27
Page 35

3. Installazione del software
Questa sezione descrive la procedura di installazione di driver e utility del Wireless
USB Adapter. Seguire le istruzioni passo a passo per installare driver utility. Se si
utilizza un sistema Windows 98 o Me è necessario reperire il cd di installazione del
sistema operativo, potrebbe essere richiesto in fase di installazione.
3.1 Installazione su sistemi Windows 98SE/ME
Step 1. Una volta collegato l’adattatore alla porta USB il Sistema Operativo
rileverà una nuova periferica di tipo Ethernet. Apparirà una finestra di
Step 2.
Installazione guidata nuovo hardware
tasto Avanti per proseguire.
Nelle finestre successive selezionare
periferica (scegliere Specificare il percorso dei driver per ME) e
premere poi sul bottone
Avanti
.
su cui è necessario premere il
Cerca il miglior driver per la
ITALIANO
Step 3
Step4.
Lanciare a questo punto l’utility di configurazione (contenuta nella directory
CDRom:\USB\Utility\Setup.exe
“
Una schermata finale permetterà di scegliere la regione in cui il dispositivo wireless
verrà utilizzato. Questo, automaticamente, regolerà l’apparato nel rispetto delle
regole vigenti.
. Nella finestra scegliere
Sfoglia ed indicare il percorso in cui sono contenuti i driver
CDRom:\USB\Drivers\Windows98\ (oppure nel caso di ME scegliere
CDRom:\USB\Drivers\WindowsME
su Avanti per proseguire.
Continuare premendo
termina l’installazione dei driver. Nella schermata conclusiva premere su
Fine
.
Specificare un percorso
) e premere poi su
Avanti
”). Seguire le istruzioni a video.
nelle successive richieste sino a che non
e premere poi su
OK
. Cliccare poi
Wireless USB Adapter 28
Page 36

Attenzione: La selezione errata della regione (nel campo Country Domain)
potrebbe portare ad un utilizzo di frequenze vietate. E’ necessario scegliere
la regione corretta.
Una volta terminata l’installazione, è possibile vedere l’icona in figura nella taskbar.
ITALIANO
Qualora l’icona sia di colore:
Rosso:non è collegata ad un network Wireless
Verde:è correttamente collegata alla rete Wireless
3.2 Installazione su sistemi Windows 2000 e XP
Step 1. Avviare WindowsXP/2000. Una volta collegato l’adattatore alla porta USB
il Sistema Operativo rileverà una nuova periferica. Nella finestra di
Installazione guidata del nuovo hardware
elenco o percorso specifico (cerca un driver adatto alla periferica, nel
caso di Windows 2000) e premere poi su Avanti.
Step 2. Inserire a questo punto nel lettore CDRom il CD contenuto nella
confezione. Nella finestra scegliere Ricerca il miglior driver disponibile
in questi percorsi e poi spuntare il campo Includi il seguente percorso
nella ricerca
contenuti i driver
CDRom:\USB\Drivers\Windows2000) e premere poi su OK. Cliccare poi
Avanti
su
Step 3. Durante l’installazione verranno mostrate in successione una serie di
finestre riguardanti la firma digutale. Premere su
. Premere poi su
per proseguire.
CDRom:\USB\Drivers\WindowsXP\
Sfoglia
ed indicare il percorso in cui sono
spuntare
Continua
Installa da un
(oppure
.
Wireless USB Adapter 29
Page 37

Step 4.
Lanciare a questo punto l’utility di configurazione (contenuta nella directory
CDRom:\USB\Utility\Setup.exe
“
Una schermata finale permetterà di scegliere la regione in cui il dispositivo wireless
verrà utilizzato. Questo, automaticamente, regolerà l’apparato nel rispetto delle
regole vigenti.
Attenzione: La selezione errata della regione (nel campo Country Domain)
potrebbe portare ad un utilizzo di frequenze vietate. E’ necessario scegliere
la regione corretta.
Per finire, cliccare su
Fine
.
”). Seguire le istruzioni a video.
ITALIANO
Una volta terminata l’installazione, è possibile vedere l’icona in figura nella taskbar.
Qualora l’icona sia di colore:
Rosso:non è collegata ad un network Wireless
Verde:è correttamente collegata alla rete Wireless
Wireless USB Adapter 30
Page 38

4. Utility di configurazione della connessione Wireless
4.1 Introduzione
Con il driver è stato installato anche un applicativo che permette in modo facile,
chiaro e veloce di configurare le impostazioni della connessione Wireless.
Una volta terminata l’installazione, è possibile vedere l’icona in figura nella taskbar.
Qualora l’icona sia di colore:
•
Rosso: non è collegata ad un network Wireless
•
Verde: è correttamente collegata alla rete Wireless
ITALIANO
4.2 Disabilitare il gestore delle connessioni Wireless di
Windows XP
In Windows XP è raccomandato utilizzare il software di gestione delle connessioni
senza fili fornito a corredo del prodotto. Una volta conclusa l’installazione del driver
seguire i seguenti passi per disabilitare il gestore delle reti wireless integrato in
Windows XP
1 Aprire il “
2 Cliccare con il tasto destro sull’ icona “
alla scheda di rete USBV2.0 wirless, e selezionare “
3 Selezionare il tab “
per configurare le impostazioni della rete senza fili
“OK”.
Pannello di controllo
Reti senza fili
” e cliccare su “
Connessione di rete senza fili
”, e deselezionare la voce “
Connessioni di rete
Propertietà
”, cliccare quindi su
”.
Usa Windows
”.
” relativa
Wireless USB Adapter 31
Page 39

ITALIANO
4.3 Utilizzare l’utility di configurazione
Cliccare due volte sull’icona dell’utility di configurazione per avviarla, altrimenti
cliccare sull’ icona con il tasto destro e selezionare “Open”.
Grazie a questa utility è possibile configurare e monitorare nel dettaglio l’adattatore
USB Wireless.
L’Utility di configurazione include 7 tabs:
Profile, Network, Statistics ed About.
Status, Configuration, Advanced,
Wireless USB Adapter 32
Page 40

4.3.1 Link Status
Viene mostrato lo stato dell’adattatore Wireless. Nel dettaglio sono mostrati:
•
Connected To: SSID e MAC dell’AP cui il client è collegato (se in modalità
Infrastructure).
• Network Mode: modalità in cui opera la rete Wireless. Sono possibili 2
modalità: Infrastructure e AD-Hoc.
•
Channel: viene mostrato il canale utilizzato.
•
Trasmission Rate: viene mostrata la velocità di Link.
ITALIANO
• Encryption:
viene mostrata la tipologia di sicurezza utilizzata .
Nella parte bassa della finestra viene mostrato il numero di pacchetti inviati e
ricevuti ed infine 2 indicatori grafici mostrano la qualità del link e la potenza del
segnale.
Wireless USB Adapter 33
Page 41

4.3.2 Configurazione
E’ possibile configurare sia le impostazioni della rete wireless e della sicurezza.
ITALIANO
Network:
Network Mode:
In caso di connessione verso un Access Point scegliere la modalità Infrastructure.
In caso di connessione verso un altro client scegliere la modalità Ad Hoc.
Network SSID:
Tramite questo campo è possibile differenziare differenti gruppi WLAN. Affinché un
client possa associarsi ad un Access Point deve condividerne il campo SSID.
L’SSID deve essere identico in tutti i client wireless che dovranno essere connessi
all’AP.
Se il parametro SSID è impostato su ANY l’adattatore sceglierà il segnale più forte,
tra quelli disponibili, e cercherà di collegarvisi.
Channel:
Viene mostrato il canale wireless utilizzato dalla rete.
Wireless USB Adapter 34
Page 42

Tale canale può essere forzato solo in modalità AD Hoc. Si ricorda che in tale
modalità ogni client wireless deve avere lo stesso canale, SSID e modalità di
cifratura.
Nella modalità Infrastructure invece il client wireless utilizzerà il canale usato
dall’AP cui cerca di associarsi.
Security
Tramite l’utilizzo di questa funzione è possibile da un lato limitare l’accesso alla
rete da parte di utenti non autorizzati e dall’altro limitare l’intelleggibilità delle
informazioni trasmesse.
Encryption Mode:
Sono disponibili 2 differenti tipi di crittografia:WEP e WPA-PSK.
Authentication Mode:
:
WEP-Key: Il sistema di cifratura WEP (Wired Equivalent Privacy) si basa
su una chiave precondivisa tra tutti i client e l’Access Point.
WEP-Passphrase:
di chiavi.
può essere utilizzata per creare facilmente un gruppo
ITALIANO
Open System
il destinatario non condividono le chiavi segrete per la comunicazione. Le
parti generano loro stesse una coppia di chiavi e chiedono alla rispettiva
controparte di accettarle. Le chiavi vengono rigenerate ogni volta che la
connessione viene stabilita.
Shared Key: Mittente e destinatario condividono le stesse chiavi segrete,
utilizzandole fino a che l’utente non decide di modificarle.
Scegliere Auto in caso di dubbi sulla tipologia di autenticazione.
Default Key (Key 1 ~ Key 4):
Scegliere prima il numero identificativo della chiave. Introdurre a questo punto la
chiave associata. Ripetere l’operazione per le 4 chiavi. E’ possibile immettere
anche una sola chiave WEP.
Key Length, Key Format and WEP Key:
E’ possibile scegliere la lunghezza in bit [64,128] della chiave e la tipologia[ASCII,
HEX].
ASCII HEX
64 bit 5*X 10*Y
128 bit 13*X 26*Y
: Questo algoritmo è quello utilizzato di default. Il mittente e
X=[(0~9, A~Z, a~z Alphanumeric]
Y=[0~9, A~F Hexadecimal]
Ad esempio una chiave WEP da 128 bit in ASCII potrebbe essere “
[una stringa composta da 13 caratteri].
Una chiave HEX da 128 bit potrebbe essere usa stringa di 26 caratteri
[0,1,2,3,4,5,6,7,8,9,A,B,C,D,E,F]
Wireless USB Adapter 35
atlantisland1
”.
Page 43

Cliccare su
WPA-PSK: WPA-PSK (Wi-Fi Protected Access pre-shared key) è una versione
semplificata che richiede un server RADIUS per l’autenticazione mutua.
Introdurre una passhprase che deve essere la stessa in ogni computer connesso
alla rete wireless.
Apply
per attivare le impostazioni scelte.
ITALIANO
4.3.3 Advanced
E’ possibile configurare nel dettaglio l’adattatore USB.
Wireless USB Adapter 36
Page 44

ITALIANO
Transmit Rate:
E’ possibile scegliere se impostare tale campo in modalità Fully Automatic e quindi
permettere un tasso di trasmissione variabile a seconda delle condizioni al
contorno oppure forzare una ben determinata velocità.
Power Saving:
E‘ possibile impostare il livello di risparmio energetico dell’apparato. Scegliere OFF
per disabilitare tale funzionalità. Scegliere
risparmio energetico desiderato.
Transmit Power:
E’ possibile selezionare la potenza del segnale trasmesso. Sono disponibili le
seguenti scelte: 12.5%, 25%, 50%, 100% oppure Auto.
Preamble Type:
Selezionare il tipo di preambolo, le opzioni disponibili sono
preambolo è una sequenza delle bit trasmessa ai 1Mbps che permette ai circuiti
PHY di raggiungere la demodulazione e la sincronizzazione steady-state del bit di
clock e del frame di start. Sono definiti due differenti tipi di Preamble e Header: il
Long Preamble e Header, che opera con le specifiche DSSS 1Mbit/s e 2Mbit/s
(come specificato dallo standard IEEE 802.11) e lo Short Preamble e Header
(come specificato dallo standard IEEE 802.11b).
Questa seconda modalità potrebbe essere utilizzata per minimizzare l’overhead e
massimizzare il throughput. Lo short Preamble è supportato unicamente dallo
standard IEEE 802.11b (High-Rate) e non dallo standard originale IEEE 802.11.
Wireless USB Adapter 37
Maximum o Normal
Long, Short o Auto
per ottenere il
. Il
Page 45

Ciò significa che le stazioni che utilizzano lo Short Preamble non possono
comunicare con quelle che utilizzano la versione originale del protocollo.
Country Domain:
E’ possibile scegliere la regione in cui il dispositivo wireless verrà utilizzato.
Questo, automaticamente, regolerà l’apparato nel rispetto delle regole vigenti.
La selezione errata della regione (nel campo Country Domain) potrebbe portare ad
un utilizzo di frequenze vietate. E’ necessario scegliere la regione corretta.
Il Fragmentation Threshold è la dimensione massima di frammentazione dei dati
(tra 256 e 2432 bytes) che può essere trasmessa in una rete Wireless prima che il
dispositivo effettui un ulteriore divisione in frames più piccoli.
Un alto valore di Fragmentation Threshold è indicato per reti esenti da
interferenze, mentre per reti soggette ad interferenze e con un traffico molto
elevato è preferibile optare per un valore più basso.
Se viene impostato un valore più basso dell’RTS/CTS i dati verranno frammentati
prima della fase di handshake la quale non verrà effettuata.
RTS/CTS Threshold:
L’ RTS (Request To Send) threshold (espresso in numero di bytes) per
l’abilitazione dell’handshake RTS/CTS. Dati contenuti in frames più grandi di
questo valore vengono sottoposti alla fase di handshake dell’RTS/CTS.
Impostando questo valore più grande della dimensione massima dell’ MSDU (MAC
service data unit) la fase di handshake dell’ RTS/CTS non viene eseguita.
Settando questo valore a zero l’handshake dell’RTS/CTS viene disabilitato.
Inserire un valore compreso tra 256 e 2432.
Fragment Threshold:
ITALIANO
4.3.4 Profile
Questa sezione permette la creazione di profili personalizzati.
Inserire nel campo
poi su Save per salvarlo in maniera permanente.
Per attivare un profilo esistente è necessario scegliero tramite la combo box (nel
campo Profile Name) e cliccare poi su
Alla stessa maniera è possibile, premendo il tasto
inutilizzato.
Profile Name
il nome del profilo che si sta utilizzando, cliccare
Activate
.
Delete,
cancellare un profilo
Wireless USB Adapter 38
Page 46

ITALIANO
4.3.5 Network
Vengono mostrati tutti i dispositivi wireless rilevati dall’adattatore USB. Le
informazioni mostrate includono:SSID, MAC Address, Channels, Signal, Security e
Network mode.
Cliccando sul bottone Rescan è possibile aggiornare queste informazioni.
Evidenziare un SSID e cliccare su Connect. Si aprirà il menu Configuration in cui
impostare i parametri di sicurezza.
Wireless USB Adapter 39
Page 47

ITALIANO
Wireless USB Adapter 40
Page 48

4.3.6 Statistics
Questa schermata fornisce le statistiche di trasmissione/ricezione dati.
ITALIANO
Wireless USB Adapter 41
Page 49

4.3.7 About
Questa sezione riporta versione e data di driver e utility, viene visualizzato inoltre il
MAC address della scheda wireless.
ITALIANO
Wireless USB Adapter 42
Page 50

5. Risoluzione dei problemi
Problemi comuni e soluzioni
Questo capitolo fornisce alcune soluzioni in merito ai problemi nei quali si potrebbe
incorrere durante l’installazione e l’utilizzo del prodotto. Leggere le seguenti
indicazioni per risolvere eventuali problemi.
1. Il personal computer non rileva la periferica.
Accertarsi che l’adattatore non sia fisicamente danneggiato.
Accertarsi che l’adattatore sia correttamente inserito nello slot USB.
Provare uno slot USB differente.
2. Non è possibile accedere a nessuna risorsa Wireless
Assicurarsi che il PC sia acceso
Assicurarsi che le impostazioni di rete wireless siano corrette. Verificare
con l’amministratore di rete SSID, canale utilizzato, ecc.
ITALIANO
Domande frequenti
1. Posso avviare un’ applicazione da un computer remoto presente sulla
rete wireless?
Questo dipende direttamente dall’applicazione stessa, se è stata progettata per
lavorare in rete (non fa differenza che sia wireless o cablata) non ci sarà alcun
problema.
2. Posso giocare in rete con gli altri computer presenti sulla WLAN?
Si, se il gioco è dotato di funzionalità multiplayer in rete.
3. Cos’è lo Spread Spectrum?
La trasmissione Spread Spectrum si basa sulla dispersione dell’informazione su
una banda molto più ampia di quella necessaria alla modulazione del segnale
disponibile. Il vantaggio che si ottiene da questa tecnica di modulazione è infatti
una bassa sensibilità ai disturbi radioelettrici anche per trasmissioni a potenza
limitata. Questa caratteristica è ovviamente preziosa quando si devono trasmettere
dei dati.
4. Cosa sono DSSS e FHHS?
DSSS (Direct-Sequence Spread-Spectrum): E' una particolare tecnologia di
trasmissione per la banda larga che consente di trasmettere ogni bit in maniera
Wireless USB Adapter 43
Page 51

ridondante. E' adatta in particolare per la trasmissione e la ricezione di segnali
deboli.
FHHS (Frequency Hopping Spread Spectrum): è una tecnologia che permette la
condivisione tra più utenti di uno stesso insieme di frequenze. Per evitare
interferenze tra periferiche dello stesso tipo le frequenze di trasmissione cambiano
sino a 1.600 volte ogni secondo.
5. Le informazioni inviate via wireless possono essere intercettate?
L’adattatore USB offre funzionalità di crittografia WEP fino a 128 bit, ciò provvede
a rendere sicure le trasmissioni dati wireless. L’utilizzo del WPA rende ancora più
sicura la trasmissione wireless.
6. Cosa è il WEP?
WEP è la sigla di Wired Equivalent Privacy, un protocollo di sicurezza per le reti
locali senza fili (WLAN) definito dallo standard 802.11b.
7. Cosa è la modalità Infrastructure?
Nella configurazione Infrastructure una rete WLAN e una rete WAN comunicano
tra loro tramite un access point.
8. Cosa è il Roaming?
Il Roaming è la capacità di un utente che possiede un computer portatile di
comunicare senza interruzioni mentre si muove liberamente all’interno di una rete
wireless la cui estensione è stata incrementata grazie all’utilizzo di più access
point.
9. Cosa è la banda ISM?
Questa frequenza è stata messa a disposizione dalla FCC, su richiesta delle
aziende che intendevano sviluppare soluzioni wireless per l'uso civile quotidiano
ed è generalmente contraddistinta dalla sigla ISM band (Industrial, Scientific and
Medical). In questa frequenza operano solo dispositivi industriali, scientifici e
medici a basse potenze.
10. Cosa è lo standard IEEE 802.11g ?
Il nuovo standard 802.11g opera alla frequenza di 2,4 GHz e quindi è pienamente
compatibile con la più diffusa versione b. Il vantaggio è che consente una velocità
di trasferimento di 54 Mbps, cinque volte superiore allo standard 802.11b.
ITALIANO
Wireless USB Adapter 44
Page 52

FRANCAIS
1. Introduction
Nous vous remercions pour avoir choisi l’Adaptateur USB, la façon la plus simple
pour travailler en Wireless. Ce manuel contient des informations détaillées sur
l’installation et sur l’usage du produit, l’utilisez comme référence pour n’importe
quel problème ou information.
1.1 IEEE 802.11g Wireless Adapter USB
L’Adaptateur Wireless USB (dans le manuel on l’appellera Adaptateur) est une
carte de réseau pour grandes performances utilisable à la maison, dans le bureau
ou en lieux publics. Ce produit est capable d’une vitesse de transfert de 54 Mbps
et il est capable en plus d’auto-négocier vitesses de 48, 36, 24, 18, 12, 9, 6Mbps
(IEEE 802.11g), o 11, 5.5, 2, 1Mbps (IEEE802.11b).
Avec ce Adapter il sera possible de se bouger dans propre bureau ou d’une
chambre à l’autre de propre maison sans se déconnecter jamais du réseau. Ce
produit est compatible avec les systèmes Windows® XP/2000/ME/98SE et il est
capable de fonctionner en modalité Ad-Hoc (d’un ordinateur à un autre) ou en
modalité Infrastructure (d’un ordinateur à un access point).
FRANCAIS
1.2 Comme la carte de réseau Wireless fonctionne
Différemment des réseaux LAN, les réseaux Wireless ont deux différentes
modalités de fonctionnement : infrastructure e ad-hoc. En Infrastructure un
réseau WLAN et un réseau WAN communiquent entre eux à travers un access
point. Dans un réseau ad-hoc les clients wireless communiquent entre eux
directement. Le choix entre les deux configurations est donc guidé par la nécessité
ou pas de mettre en communication un réseau wireless avec un réseau câblé.
Si les ordinateurs connectés au réseau wireless doivent accéder à ressources ou
périphériques partagées, dans le réseau câblé il sera nécessaire utiliser la
modalité infrastructure (Figure 2-1). L’ Access Point transmettra les informations
aux clients wireless qui pourraient se bouger dedans un déterminé rayon d’action.
L’usage de plusieurs Access Point au même temps permettra d’étendre la zone de
couverture du signal. Les clients wireless établissent automatiquement la
connexion avec le dispositif qui fournit le signal le meilleur grâce à la fonctionnalité
roaming.
Wireless USB Adapter 45
Page 53

Figure 2-1
Si le réseau wireless a des dimensions réduites et si les ressources partagées
sont localisées dans des ordinateurs qui en font partie, c’est possible d’utiliser la
modalité ad-hoc (Figure 2-2). Cette modalité permet de connecter les clients
wireless entre eux directement sans le besoin d’un access point. La
communication entre clients est limitée directement de la distance et des
interférences qui se passent entre eux.
FRANCAIS
Figure 2-2
Wireless USB Adapter 46
Page 54

1.3 Requises de système
Avant de commencer l’installation vérifiez si vous disposez des suivants requis:
PC desktop avec un slot USB V2.0/1.1* libre
Processeur Intel® Pentium® III 600Mhz ou compatible et 64Mo de mémoire
vive ou plus
Système Windows 98SE/ME/2000/XP
15MB d’espace libre sur disque
Lecteur CD-ROM
*
1.4 Contenu de la confection
Avant d’utiliser le produit vérifiez que la confection aura les suivants objet:
Un Wireless USB Adapter
Un cable USB
Une guide rapide en Anglais
Un Cd-Rom qui contient logiciels, outil et manuel d’utilisateur
1.5 Description du produit
FRANCAIS
Wireless USB Adapter 47
Page 55

2. Connexion du câble d'extension USB
Ce câble possède deux connecteurs USB Type A, le male pour la liaison avec le
PC, le femelle pour l'adaptateur.
Il permet, grâce à ses capacités de torsion, de s'orienter dans toutes les directions,
l'idéal pour une meilleure couverture spatiale étant le montage vertical.
FRANCAIS
Wireless USB Adapter 48
Page 56

2.1 Installation du matériel
Indicateur LED
L'indicateur Led est allumé en vert fixe lorsque l'adaptateur est relié au réseau, il
clignote lorsqu'il en cherche un.
Vérification de l'installation
La LED de l'adaptateur USB Sans fil 2.0 permet à tout moment de vérifier
facilement le statut de la connexion au réseau sans fil.
Lorsque l'adaptateur est connecté au port USB et que le driver est installé, la LED
commence à clignoter, il cherche un appareil sans fil 802.11g suffisamment proche
pour se connecter.
Dès qu'il a initialisé la liaison avec un Point d'accès ou tout autre appareil sans fil,
la LED passe en éclairage continu.
FRANCAIS
Wireless USB Adapter 49
Page 57

3. Installation du logiciel
Cette section décrit la procédure d’installation du logiciel et outil du Wireless USB
Adapter. Suivez les instructions pas après pas. Si on utilise un système Windows
98 ou Me c’est nécessaire de trouver le cd d’installation du système, il pourrait être
demandé pendant l’installation.
3.1 Installation en Windows 98 ou Me
Step 1. Allumez l’ordinateur. Connectez l’Adaptateur USB. Introduisez le cd du
logiciel dans le lecteur Cd-rom. Une nouvelle fenêtre apparaîtra. Cliquez
sur Suivant .
Step 2. Dans la fenêtre suivante sélectionnez
(choisir Spécifier l’emplacement du pilote[avancé] avec ME) et cliquez
Suivant.
sur
meilleur pilote pour votre périphérique (Recommandé)
emplacement et (Sur Win98 choisir Spécifier un emplacement). Cliquez
sur
CDRom:\USB\Drivers\Windows98\
CDRom:\USB\Drivers\WindowsME pour WinME]. Cliquez enfin sur
Suivant.
Step 3. Cliquez sur
cliquez sur Terminer.
Step4. Quand l’installation est terminée cliquez sur “
Cliquez sur “Setup.exe ” pour exécuter l’installation du logiciel et outil
CDRom:\USB\Utility\Setup.exe
(“
Choisir le pays.
Parcourir
Sélectionnez (dans la prochaine fenêtre)
pour atteindre l’emplacement des pilotes.
Suivant
dans les fenêtres suivantes jusqu’au dernier écran,
”).
Rechercher le meilleur pilote
Rechercher le
Définir un
et
[ou
Terminer
”.
FRANCAIS
Wireless USB Adapter 50
Page 58

3.2 Installation en Windows 2000 et XP
Step 1. Connectez l’Adaptateur USB. Introduisez le cd du logiciel dans le lecteur
Cd-rom, le système exécutera automatiquement une fenêtre de
présentation du contenu du disque. Insérez le CD fourni et allumez
l’ordinateur. Une nouvelle fenêtre apparaîtra. Sélectionnez
partir d’une liste ou d’un emplacement spécifié (utilisateurs
expérimentés) et cliquez sur Suivant .
Step 2. Quand la fenêtre d’installation apparaît cliquez sur le bouton “Easy Install”
pour démarrer la procédure simplifiée.. Dans la fenêtre suivante
sélectionner
Inclure cet emplacements dans la recherche.
Parcourir pour atteindre l’emplacement des pilotes.
CDRom:\USB\Drivers\WinXP
Cliquez sur OK. Cliquez enfin sur Suivant.
Step 3. Répondez Continue aux questions éventuelles (Signature Numérique), et
après cliquez sur Suivant.
Step4. Cliquez enfin sur
Cliquez sur “Setup.exe ” pour exécuter l’installation du logiciel et outil
(“CDRom:\USB\Utility\Setup.exe”).
Choisir le pays.
Rechercher les meilleur pilote dans ces emplacements et
Cliquez après sur
CDRom:\USB\Drivers\Win2000
.
Terminer
[ou
pour finir l’installation
Installer à
].
FRANCAIS
Wireless USB Adapter 51
Page 59

4. Outil de configuration de la connexion Wireless
4.1 Introduction
Avec le pilote il a été installé même une application qui permet d’une façon facile
et rapide de configurer les positionnements de la connexion.
Les icônes d’état de la connexion
Quand on bouge le souris sur l’icône il sera visualisé l’état de la connexion.
Si on clique avec le bouton droit sur l’icône il sera visualisé un menu.
Open: Sélectionnez-le pour exécuter l’outil de configuration
About :Pour voir les info
Exit: Ferme le programme.
FRANCAIS
4.2 Désactiver le contrôleur des connexions Wireless de
Windows XP
En Windows XP c’est conseillé d’utiliser le logiciel de gestion des connexions sans
fils fourni avec le produit. Quand l’installation du pilote est terminée suivez les pas
suivants pour désactiver le contrôleur des réseaux wireless intégré en Windows
XP
1. Ouvriez le “Panneau d’administration” et cliquez sur “Connexions
de réseau”.
2. Cliquez avec le bouton droit sur l’icône “Connexion de réseau sans
fils” relative à l’adaptateur USB réseau wireless, et sélectionnez
Propriété
“
3. Sélectionnez le tab “Réseaux sans fils”, et désélectionnez “Utilises
Windows pour configurer les positionnements du réseau sans fils
”, cliquez donc sur “
”.
OK
”.
Wireless USB Adapter 52
Page 60

FRANCAIS
Wireless USB Adapter 53
Page 61

4.3 Utiliser l’outil de configuration
Double cliquez sur l’icône LAN Wireless (ou clic droit puis sélectionner « Open »)
pour lancer l’utilitaire de configuration.
Avec cet utilitaire, vous pouvez configurer toutes les fonctions de votre carte USB
Wireless grâce aux 7 sous menus: Statut(Status), Configuration,
Avancée(Advanced), Profil(Profile), Réseau(Network), Statistique(Statistics)
et A propos(About).
4.3.1 Statut du lien
L’écran de statut vous indique l’état de votre adaptateur USB , l’appareil auquel il
est connecté, le mode réseau, le canal utilisé, le taux de transfert et le mode de
cryptage.
FRANCAIS
Deux autres informations apparaissent sous forme de graphique, la force du signal
ainsi que la qualité du lien.
Wireless USB Adapter 54
Page 62

4.3.2 Configuration
Cette fonction vous permet de configurer le réseau et la sécurité.
FRANCAIS
Paramètres Réseau:
Mode:
Pour vous connecter à un Point d’Accès, utilisez le mode “Infrastructure”.
Pour vous connecter uniquement à un autre appareil, utilisez le mode “
SSID:
Le SSID permet d’identifier le Réseau Wireless (WLAN), il faut donc que tous les
appareils soient réglés avec le même SSID pour accéder à ce réseau. Si le SSID
est réglé sur “ANY”, il détectera le réseau WLAN le plus puissant rayonnant dans
le secteur.
Canal:
Pour afficher le canal utilisé par l’adaptateur USB.
Ce canal ne peut être modifié que dans le mode “Ad-Hoc”, chaque appareil devant
être réglé avec le même canal et le même SSID.
Wireless USB Adapter 55
Ad-Hoc
”.
Page 63

Dans le mode “
canal utilisé par le Point d’Accès.
Sécurité
Ces fonctions sont utilisées pour protéger les communications Wireless d’écoute
indésirable et le cryptage permet d’interdire l’accès au réseau WLAN.
Mode de cryptage:
Deux modes sont disponibles le WEP et le WPA-PSK.
Cliquez sur Mise en route du cryptage pour activer le mode sécurisé de
l’adaptateur USB.
Mode d’Authentification:
:
Clé WEP:
Phrase clé WEP: pour créer un groupe de clé WEP, sélectionnable dans
clé par défaut.
Infrastructure
clé secrète partagée entre l’adaptateur et le Point d’Accès.
”, l’adaptateur USB détecte automatiquement le
FRANCAIS
Système Ouvert
pas besoin d’être authentifiées (mode par défaut).
Clé partagée
s’authentifient par l’échange de paquets encryptés reconnus par
l’ensemble des stations Attention, pour choisir un mode d’Authentification,
il faut d’abord s’assurer que les différentes stations du réseau
implémentent bien le mode désiré.
Il est recommandé d’utiliser le mode "
Clé par défaut (Clé 1 à 4):
Pour sélectionner la clé que vous voulez utiliser.
Longueur, Format et Type de clé WEP:
Si vous sélectionnez 64bits
- en format Hexadécimal, vous devez choisir 10 caractères dans la plage
(0~9, A~F)
- en format ASCII format, vous devez choisir 5 caractères dans la plage
(0~9, A~Z et a~z)
Si vous sélectionnez 128bits
- en format Hexadécimal, vous devez choisir 26 caractères dans la plage
(0~9, A~F)
- en format ASCII format, vous devez choisir 13 caractères dans la plage
(0~9, A~Z et a~z)
Vérifiez que l’adaptateur USB et les autres appareils Wireless partagent bien la
même clé.
Note: Après l’entrée de tous les paramètres, cliquez sur Apply pour sauvegarder
les réglages.
: avec la même clé WEP entre les stations, elles n’ont
: avec la même clé WEP entre les stations, elles
Auto
" en cas de doute.
Wireless USB Adapter 56
Page 64

WPA-PSK:
simplifiée du WPA qui ne supporte pas la norme 802.1x et qui nécessite un
serveur RADIUS pour les contrôles d’authentification.
Entrez une Phrase Clé qui doit être la même dans tous les appareils connectés au
réseau WLAN.
Le WPA-PSK (Wi-Fi Protected Access pre-shared key) est une version
FRANCAIS
4.3.3 Avancée
Pour régler les paramètres d’environnement.
Taux de transfert:
Wireless USB Adapter 57
Page 65

Pour choisir un taux spécifique ou le mode automatique
Mise en veille:
Pour choisir entre Non, Normal ou Maximum.
Puissance d’émission:
Pour choisir entre Minimum, 12.5%, 25%, 50%, 100% ou Auto.
Limitation de la taille des paquets:
Pour limiter la taille des paquets transmis, choisir Court lorsque le lien est de
qualité médiocre.
Pays d’utilisation:
Pour régler sur le pays ou l’appareil est utilisé. L’Organisme de Régulation a
attribué à chaque pays une bande de fréquence utilisable, l’utilisateur est
responsable du bon respect de ces règles.
Fragmentation des paquets:
La fragmentation des paquets (256 à 2432) permet lorsque le lien est médiocre
d’améliorer les temps d’attente que sont les réexpéditions de paquets perdus.
RTS/CTS:
Pour éviter les collisions entre les stations (256 à 2432).
FRANCAIS
Wireless USB Adapter 58
Page 66

4.3.4 Profil
Afin de créer des profils contenant toutes les informations de réglages. Entrer un
nom dans Nom du Profil puis cliquez sur “
supprimer un profil avec la touche ”
dans le champ Nom du Profil puis cliquez sur ”Activate”.
Delete
Save
”, pour activer un profil, choisissez le
” puis “
Apply
”. Vous pouvez
FRANCAIS
Wireless USB Adapter 59
Page 67

4.3.5 Réseau
Cet écran vous montre les produits Wireless existants à proximité de votre
adaptateur USB, en précisant les paramètres avancés de ces produits (SSID,
adresse MAC, canal, signal, sécurité et mode réseau.
Vous pouvez cliquer sur "Rescan" pour actualiser cette liste et double cliquer sur la
ligne de l’appareil sur lequel vous souhaitez vous connecter.
FRANCAIS
Wireless USB Adapter 60
Page 68

4.3.6 Statistique
Cette section vous indique en temps réel, les paquets reçus et envoyés de votre
adaptateur USB.
FRANCAIS
Wireless USB Adapter 61
Page 69

4.3.7 A propos
Cette fonction vous permet de voir le nom de votre dispositif, le domaine de
régulation, la version du driver et du Firmware, l’adresse MAC et la version de
l’utilitaire de configuration.
FRANCAIS
Wireless USB Adapter 62
Page 70

5. Résolution des problèmes
Problèmes communs et solutions
Ce chapitre donne des solutions pour les problèmes qu’on pourrait rencontrer
pendant l’installation et l’usage du produit. Lisez les suivantes indications pour
résoudre les problèmes éventuels.
1. L’ordinateur ne trouve pas le périphérique.
Assurez-vous que l’adaptateur ne soit pas physiquement endommagée.
Assurez-vous que l’adaptateur soit introduite correctement dans le slot USB.
Essayez un slot USB différent.
2. Je ne peux pas accéder aucune ressource de réseau de mon ordinateur.
Assurez-vous que l’ordinateur soit allumé
Assurez-vous que les configurations de réseau wireless soient correctes.
Vérifiez avec l’administrateur de réseau SSID, canal utilisé, ecc.
FRANCAIS
Questions fréquentes
Est-ce que je peux démarrer une application d’un ordinateur satellite
1.
présent dans le réseau wireless?
Ça dépende directement de l’application même ; s’elle a été projetée pour travailler
en réseau(n’import si wireless ou câblée) il n’y aura aucun problème.
2. Est –ce que je peux jouer en réseau avec les autres ordinateurs présents
dans le WLAN?
Oui, si le jeu est doué de la fonctionnalité multi-joueur en réseau.
3. Qu’est-ce que c’est le Spread Spectrum?
La transmission Spread Spectrum est basée sur la dispersion de l’information sur
une bande beaucoup plus ample de celle nécessaire à la modulation du signal
disponible. L’avantage qu’on obtient avec cette technique de modulation est en fait
une basse sensibilité aux bruits radioélectriques même pour transmissions à
puissance limitée. Cette caractéristique est clairement précieuse quand on doit
transmettre des données.
4. Qu’est-ce que c'est DSSS et FHHS?
Wireless USB Adapter 63
Page 71

DSSS (Direct-Sequence Spread-Spectrum): C’est une particulière technologie de
transmission pour la large bande qui permet de transmettre chaque bit d’une façon
redondante. C’est adapte particulièrement ù la transmission et à la réception de
signaux faibles.
FHHS (Frequency Hopping Spread Spectrum): C’est une technologie qui permet le
partage entre plusieurs utilisateurs d’un même ensemble de fréquences. Pour
empêcher interférences entre périphériques du même type les fréquences de
transmission changent jusqu’à 1.600 fois chaque second.
5. Peuvent les informations envoyées par wireless être interceptées?
L’adaptateur USB offre la fonctionnalité de cryptage WEP jusqu’à 128 bits ; ce
permet des transmissions des données wireless plus sures.
6. Qu’est-ce que c’est WEP?
WEP est le sigle de Wired Equivalent Privacy, un protocole de sécurité pour les
réseaux locaux sans fils (WLAN) défini par le standard 802.11b.
7. Qu’est-ce que c’est infrastructure mode?
Dans la configuration Infrastructure un réseau WLAN et un réseau WAN
communiquent entre eux à travers un access point.
8. Qu’est ce que c’est roaming?
Le Roaming est la capacité d’un utilisateur qui a un ordinateur portable de
communiquer sans interruptions pendant qu’il se bouge à l’intérieur d’un réseau
wireless laquelle extension a été augmentée grâce à l’usage de plusieurs access
point.
9. Qu’est-ce que c’est ISM band?
Cette fréquence a été mise à disposition par la FCC, après la requête des
entreprises qui voulaient développer des solutions wireless pour l’usage civil de
chaque jour ; elle est généralement caractérisée par le sigle ISM band ( Industrial,
Scientific and Medical ). En cette fréquence ils travaillent seulement des dispositifs
industriels, scientifiques et médicales à une basse puissance.
10. Qu’est-ce que c’est le standard IEEE 802.11g?
Le nouveau standard 802.11g travaille à la fréquence de 2,4 Ghz et donc il est
totalement compatible avec la plus diffue b. L’avantage est qu’il permet une vitesse
de transfert de 54 Mbps, cinq fois supérieure au standard 802.11b.
FRANCAIS
Wireless USB Adapter 64
Page 72

Appendix A: Technical Specification
Physical interface:
-Host Interface: USB V2.0 (or USB V1.1)
-LEDs: Link status
Wireless Interface:
-Chipset: SIS® 163
-Antenna: printed antenna
-Security:
64-bit/128-bit WEP encryption
WPA-PSK (TKIP, AES)
Radio Specifications:
-Frequancy Range: 2.412 ~ 2.497Ghz
-Standard Compliance: 802.11b, 802.11g
-Modulation:
802.11g: OFDM
802.11b: CCK(11Mbps), DQPSK(2Mbps), DBPSK(1Mbps)
-Operating Channel: Europe: 13 (1~13)
-Transmission Rate:
802.11b: 1, 2, 5.5, 11Mbps
802.11g: 6, 9, 12, 18, 24, 36, 48, 54Mbps
-Operation Range: Indoor: < 25m / Outdoor: < 80m
-RF max. output power: 12dBm @ 802.11g mode, 15dBm @ 802.11b mode
-Receiver Sensivity(802.11g mode): -72 dBm (typically)**
-Receiver Sensivity(802.11b mode): -83 dBm (typically)***
-Access Mode: Ad-Hoc and Infrastructure mode
Physical and Environmental:
-Storage Temperature: -10~65°C
-Operating Temperature: 0~40°C
-Humidity: 10% - 95% RH, no condensation
-Dimensions: 77x26x12 mm
-Continuous Current Consumption: 230mA (Rx), 380mA (Tx)
System requirements:
-Intel® Pentium®III 600Mhz or compatible processor with
64MB RAM
-USB V2.0 or USB V1.1*
-CD-Rom drive and 15 MB on HD
Wireless USB Adapter 65
Page 73

*When plug the device in the USB 1.1/1.0 port, the real throughput will be up to
6Mbps only when running 11Mbps or higher speed
**10% PER(Packet Error Rate)
*** 8% PER(Packet Error Rate)
NOTE:
without notice.
The supplier reserves the rights to change any information in this manual
Wireless USB Adapter 66
Page 74

Appendix B: Regulatory Domains
This appendix lists the IEEE 802.11g channels supported by the world’s regulatory
domains.
Channel
Identifie
r
1 2412 X X X
2 2417
3 2422 X X X X
4 2427 X X X X
5 2432
802.11b
Frequency
FCC (North
America)
X X X
X X X X
Regulatory Domains
ETSI
(Europe)
France Israel MKK
(Japan)
6 2437 X X X X
7 2442 X X X X
8 2447
9 2452
10 2457 X X X X
11 2462
12 2467
13 2472 X X X
14 2484
For some European Country, it may have its own domain; users are responsible
for ensuring that the channel set configuration is in compliance with the regulatory
standards of these countries.
X X X X
X X X X
X X X X
X X X
X
Wireless USB Adapter 67
Page 75

Atlantis Land S.p.A.
Viale De Gasperi, 122
Mazzo di Rho – MI – Italy
info@atlantis-land.com
sales@atlantis-land.com
 Loading...