

Page 1
NetServer
USB 2.0 Print Server
A02-PSU
Company certified ISO 9001:2000
MANUAL
A02-PSU_ME01
Where solutions begin
Page 2

Page 3

ITALIANO
Questo prodotto è coperto da garanzia Atlantis Land
Fast-Swap della durata di 3 anni. Per maggiori dettagli in merito
o per accedere alla documentazione completa in Italiano fare
riferimento al sito www.atlantis-land.com.
ENGLISH
This product is covered by Atlantis Land 3 years Fast-Swap
warranty. For more detailed informations please refer to the web
site www.atlantis-land.com.
For more detailed instructions on configuring and using this
device, please refer to the online manual.
FRANCAIS
Ce produit est couvert par une garantie Atlantis Land
Fast-Swap 3 ans. Pour des informations plus détaillées,
référez-vous svp au site Web www.atlantis-land.com.
DEUTSCH
Dieses Produkt ist durch die Atlantis Land 3 Jahre Fast-Swap
Garantie gedeckt. Für weitere Informationen, beziehen Sie sich
bitte auf Web Site www.atlantis-land.com.
ESPAÑOL
Este producto està cubierto de garantía Atlantis Land
Fast-Swap por 3 años. Para una información más detallada, se
refiera por favor al Web site www.atlantis-land.com
.
Page 4

The award of the information is facultative, but its lack will
prevent ATLANTIS LAND® from starting the Guarantee process
requested.
r
a
a
y
o
u
r
p
r
o
d
u
c
t
!
c
u
u
o
o
o
c
c
t
m
m
m
!
t
!
y
o
u
r
p
r
o
n
n
y
n
t
o
t
t
u
r
i
s
-
l
i
s
-
l
i
s
-
d
p
r
o
d
a
n
d
.
a
n
n
d
d
c
.
c
.
a
l
R
e
g
i
s
t
e
R
e
g
R
e
w
w
w
w
w
w
g
w
w
w
Registration on the web site
r
i
s
t
e
r
i
s
t
e
.
a
t
l
a
.
a
t
l
.
a
t
l
www.atlantis-land.com
from the purchase of the product dismiss
the customer from showing a valid proof of
purchase (Sale Receipt or Invoice) in case
of the request of intervention. For further
information we invite you to look at our web
site at the section WARRANTY.
within 15 days
Copyright
The Atlantis Land logo is a registered trademark of Atlantis Land
SpA. All other names mentioned mat be trademarks or
registered trademarks of their respective owners. Subject to
change without notice. No liability for technical errors and/or
omissions.
Page 5

INDEX
INDEX
1.1 About this Guide ..................................................10
1.2 Package contents ................................................11
1.3 System Requirements.......................................... 11
1.4 General Features .................................................12
1.5 The Front Panel LEDs .........................................13
1.6 The Rear Ports..................................................... 14
1.7 Default Settings.................................................... 14
1.5 Cabling................................................................. 15
1.6 Using The Utilities ................................................17
1.6.1 Installing PS-Utility ........................................ 17
1.6.2 Launching PS-Utility......................................17
1.6.3 Setting Up Windows XP TCP/IP Printing ...... 19
1.7 Web Configuration ...............................................20
1.7.1 Web Configuration Utility...............................20
Home 21
Setup Wizard .........................................................22
Change IP Address................................................ 25
Printer Information .................................................26
Factory Reset.........................................................27
Firmware Upgrade ................................................. 28
About 29
1.8 Printing in Windows 98SE/ME ............................. 30
1.8.1 Installing the LPR for TCP/IP Printing Client.31
1.8.2 Adding LPR Printer Ports..............................34
1.8.3 Printing from Windows 98SE/Me ..................36
1.8.4 Setting TCP/IP Printing Settings ...................40
1.9 Printing in Windows 2000/XP............................... 42
1.9.1 Setting Up Windows 2000 TCP/IP Printing... 42
1.9.2 etting Up Windows XP TCP/IP Printing.........50
1.10 Printing in MAC OS............................................58
1.10.1 Rendezvous Uses in MAC OS 10.2............ 58
1.11 Technical Features ............................................61
5
Page 6

INDEX
1.12 Support ..............................................................63
A02-PSU_ME01(V1.0 May 2006)
6
Page 7

INDEX
7
Page 8

INDEX
8
Page 9

NetServer
Copyright Statement
No part of this publication may be reproduced, stored in a
retrieval system, or transmitted in any form or by any means,
whether electronic, mechanical, photocopying, recording or
otherwise without the prior writing of the publisher.
All copyright reserved.
The Atlantis Land logo is a registered trademark of Atlantis
Land SpA. All other names mentioned mat be trademarks or
registered trademarks of their respective owners. Subject to
change without notice. No liability for technical errors and/or
omissions.
9
Page 10

NetServer
Congratulations on purchasing your pocket-sized Print
Server, the easiest and fastest way to deploy printers on
your network.
This compact print server can connect your network through
a switch or hub between PC/Notebook and print server
anywhere you wish to locate printer services. It manages
the flow of print files from your workstation or file server to its
connected printers, delivering print jobs to high-performance
printers much faster than a file server or a PC acting as a
print server can.
The pocket-sized Print Server features a Web-based
Configuration Utility, which allows you to set up the print
server through the web browser easily and quickly. It also
includes a simple software utility PS-Utility, a user-friendly
program that allows you to complete settings for the print
server.
1.1 About this Guide
This manual provides instructions and illustrations on how to
use your pocket-sized Print Server, including:
• Hardware Installation, describes the hardware
installation procedure for the product.
• Using the Utilities, helps you to install and use the
software.
• Web Configuration, completes the configuration
using the web browser.
• Printing in Windows XP, lets you complete printing
task through your print server in Windows XP
environment.
• Printing in MAC OS, lets you complete printing task
through your print server in MAC OS environment.
10
Page 11

NetServer
Please note that the illustrations or setting values in this
manual are FOR YOUR REFERENCE ONLY. The actual
settings and values depend on your system and network. If
you are not sure about the respective information, please
ask your net work administrator or MIS staff for help.
1.2 Package contents
Unpack the package and check all the items carefully, and
be certain that you have:
Atlantis Land NetServer, CDRom with manual and PS-Utility,
Quick Start Guide, Power Adapter AC-DC (5V, 2.5A).
If any item contained is damaged or missing, please contact
your local dealer immediately. Also, keep the box and
packing materials in case you need to ship the unit in the
future.
1.3 System Requirements
Operating System:
• Microsoft Windows 98SE/ME/NT/2000/XP/2003.
• Apple Mac OS X or above
For Web Configuration:
• Java-enabled web browser, such as Microsoft®
Internet Explorer 5.0 and Netscape Navigator 6.0
.
11
Page 12

NetServer
1.4 General Features
• Compliant with USB 2.0 Hi-speed printing
• Equipped 10/100 auto-MDIX Fast Ethernet LAN port
• Multi protocol support is ideal for shared printing in
mixed-LAN environments
• Windows-based program makes it possible to set up
in a few minutes.
• Offer LPR program for Windows 98SE/Me TCP/IP
printing
• IP assignment support for DHCP
• Support Web configuration
• Provide Flash memory for easy firmware upgrade
• Support IPP for Windows 2000/XP
• Support second http port for remote web
configuration and IPP printing.
• Support Mac OS 10.2 “Rendezvous” zero-
configuration feature
12
Page 13
NetServer
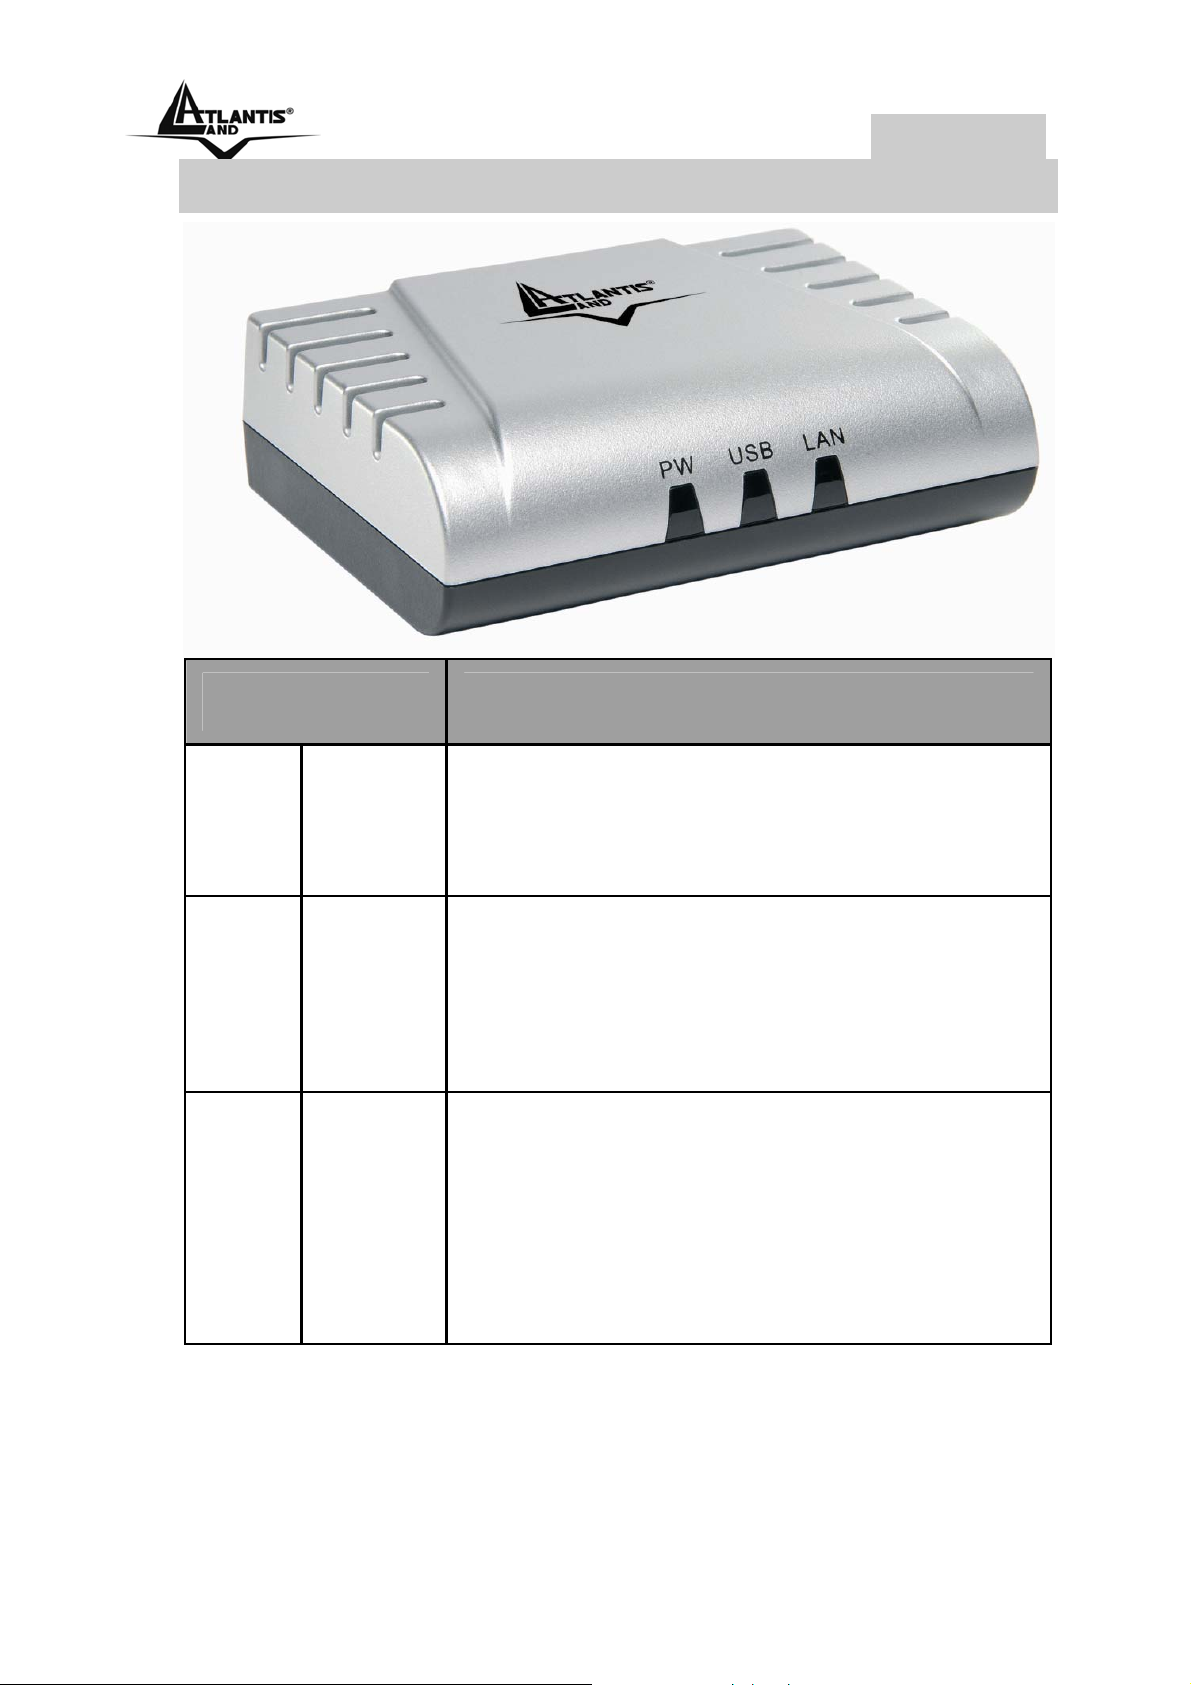
1.5 The Front Panel LEDs
LED Meaning
The Power LED is positioned on the
right side of the two LEDs. A steady
1 PW
2 USB
3 LAN
light confirms that the NetServer is
powered on.
Steady light confirms that the print
server has a good connection to a
printer.
When it blinks, the printer connected is
printing.
Steady light confirms that the print
server has a good connection to your
network.
When it blinks (briefly dark), the print
server is receiving/ transmitting data
from/to the network.
13
Page 14
NetServer
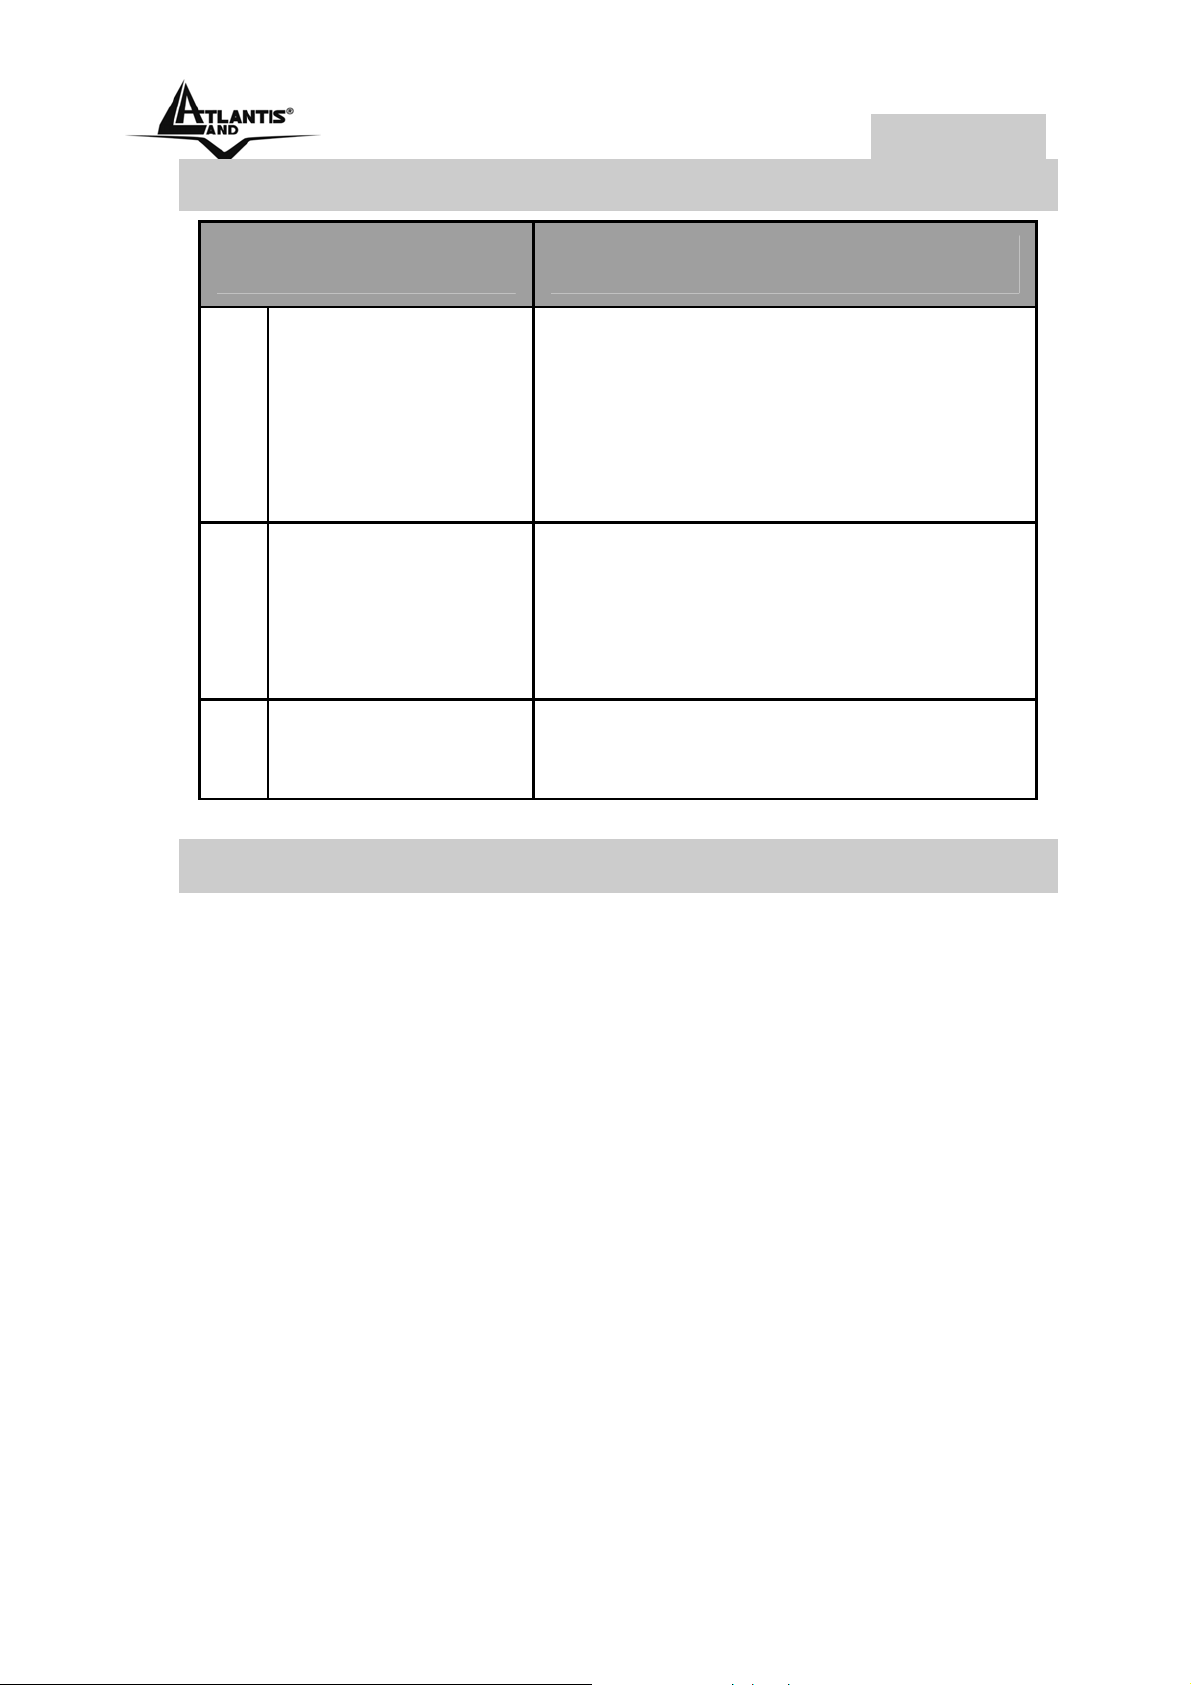
1.6 The Rear Ports
Port Meaning
1 LAN
2 USB
3 POWER (jack)
The NetServer’s rear panel
features an RJ-45 connector for
connections to 10Base-T
Ethernet cabling or 100Base-TX
Fast Ethernet cabling.
There is a fast USB connector
located on the rear panel of the
NetServer, providing connection
for one Printer.
Connect the supplied power
adapter to this jack
1.7 Default Settings
Before you configure the NetServer, you need to know the
following default settings:
• Password: admin
• Userneme: admin
• IP address : 192.168.0.1
14
Page 15

NetServer
1.5 Cabling
Follow these steps for a trouble-free start of the print server
operations with your print server.
1. Confirm proper operation of the printer to be connected
to the print server.
2. When you have confirmed proper operation of the printer,
turn off its power.
3. Confirm that your network is operating normally.
4. Connect the print server to the network (through the RJ-
45 connector of the print server).
Configuration problems may result if the
print server is powered up without first
establishing its network connection.
Please follow this procedure to avoid
complications at the configuration
stage.
5. While the printer is powered off, plug the print server to
the printer (parallel or USB interface).
6. Turn on the printer’s power.
7. Connect the DC end of the AC Power adapter to the DC
power input socket of the print server and the AC end to
the wall outlet. This will supply power to the print server
immediately.
Your print server is built with a default
IP Address. To prevent from any
conflict in your network, it is
recommended to use the PS-Utility
program to change the IP setting when
there is some other device’s IP Address
15
Page 16
NetServer
is the same as the print server’s default
IP Address.
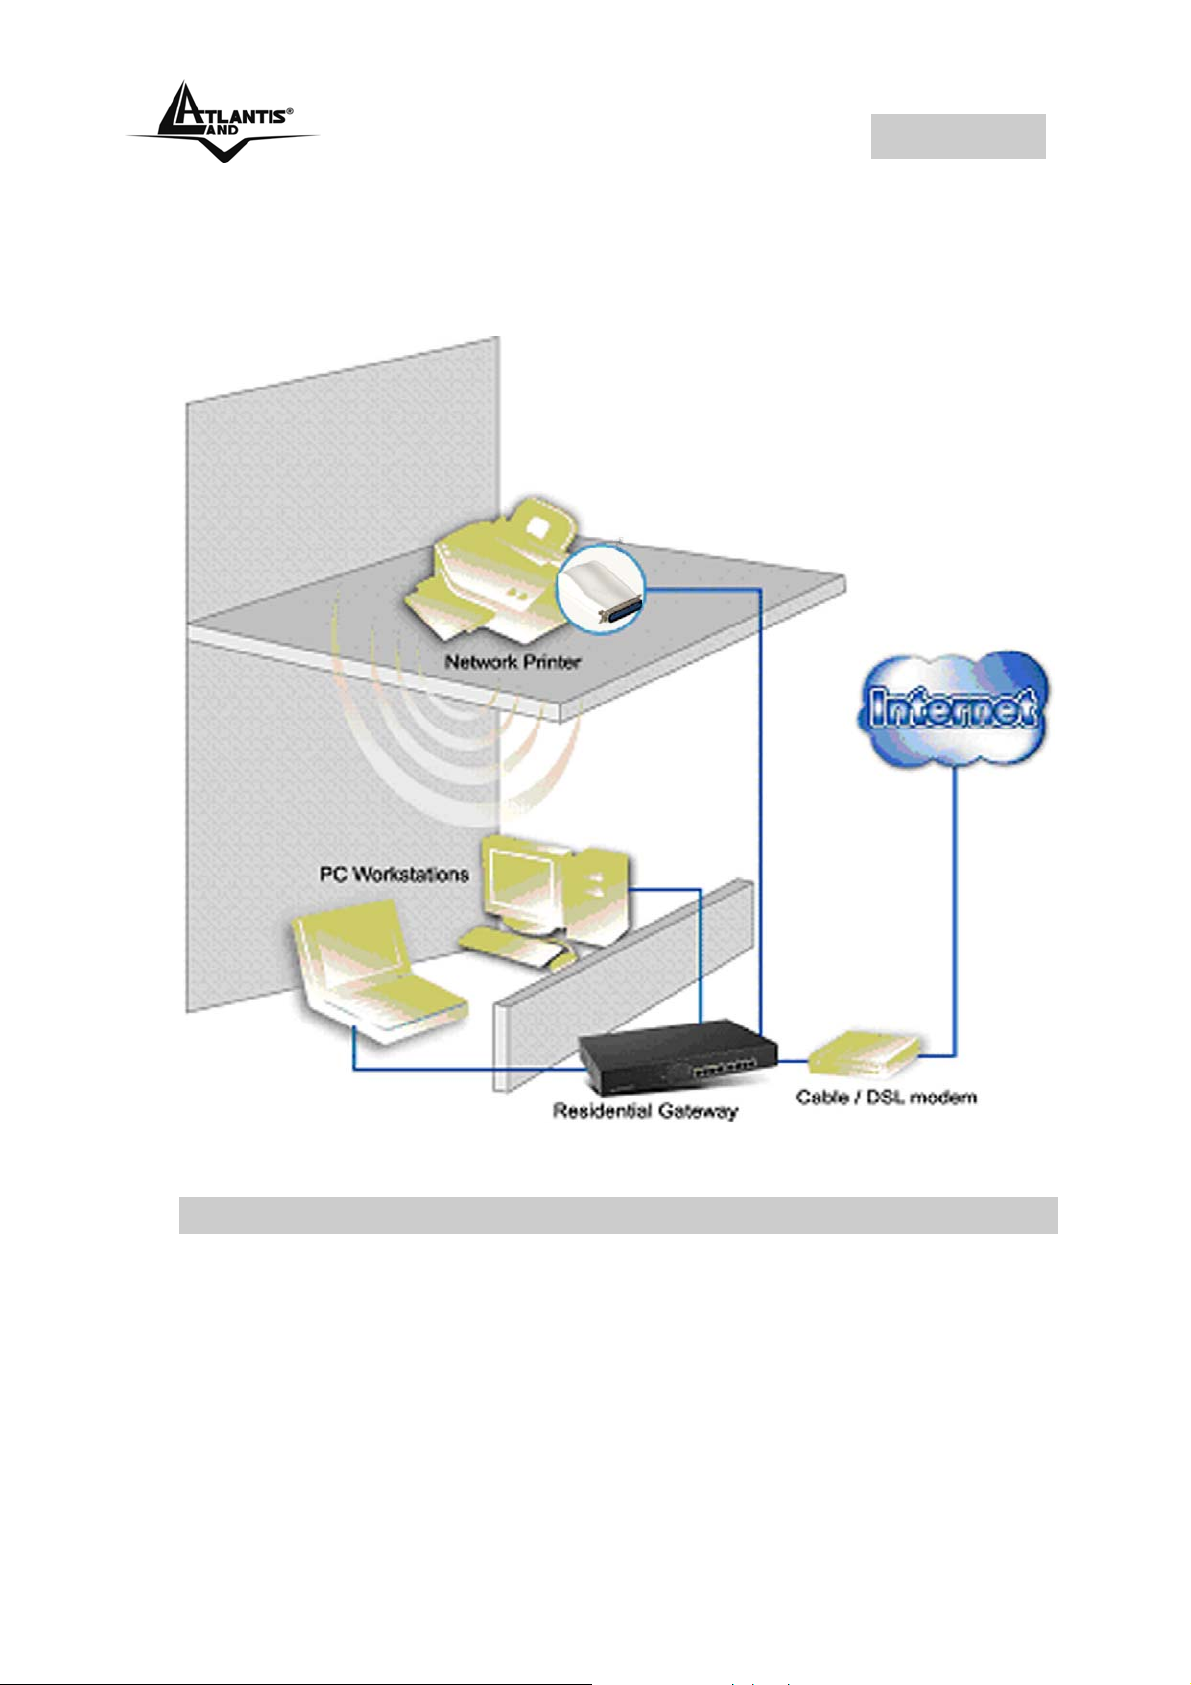
The following diagram explains the application of your print
server.
16
Page 17

NetServer
1.6 Using The Utilities
This section describes the software utilities for the print
server:
• PS-Utility
• PS Wizard
1.6.1 Installing PS-Utility
Follow the procedure outlined below to install PS Utility:
1. Insert the print server’s Installation CD into the CD-ROM
drive.
2. Click Install Utility from the Auto-Run menu screen.
3. Once executed, the Setup program will extract files to
launch the InstallShield Wizard; then, follow it step by
step to complete the installation process
After installing the utility, the application program for the print
server is automatically installed to your computer, and
creates a folder in Start\Programs\PS-Utility. Now, you
can begin using PS Utility.
To avoid the conflict in your network,
you can use PS-Utility to change the
related settings of your print server
(such as the IP address) after finishing
the installation.
1.6.2 Launching PS-Utility
To launch PS Utility:
1. Click Start -> Programs -> PS-Utility, and then click the
PS-Utility v3.11 item.
17
Page 18
NetServer
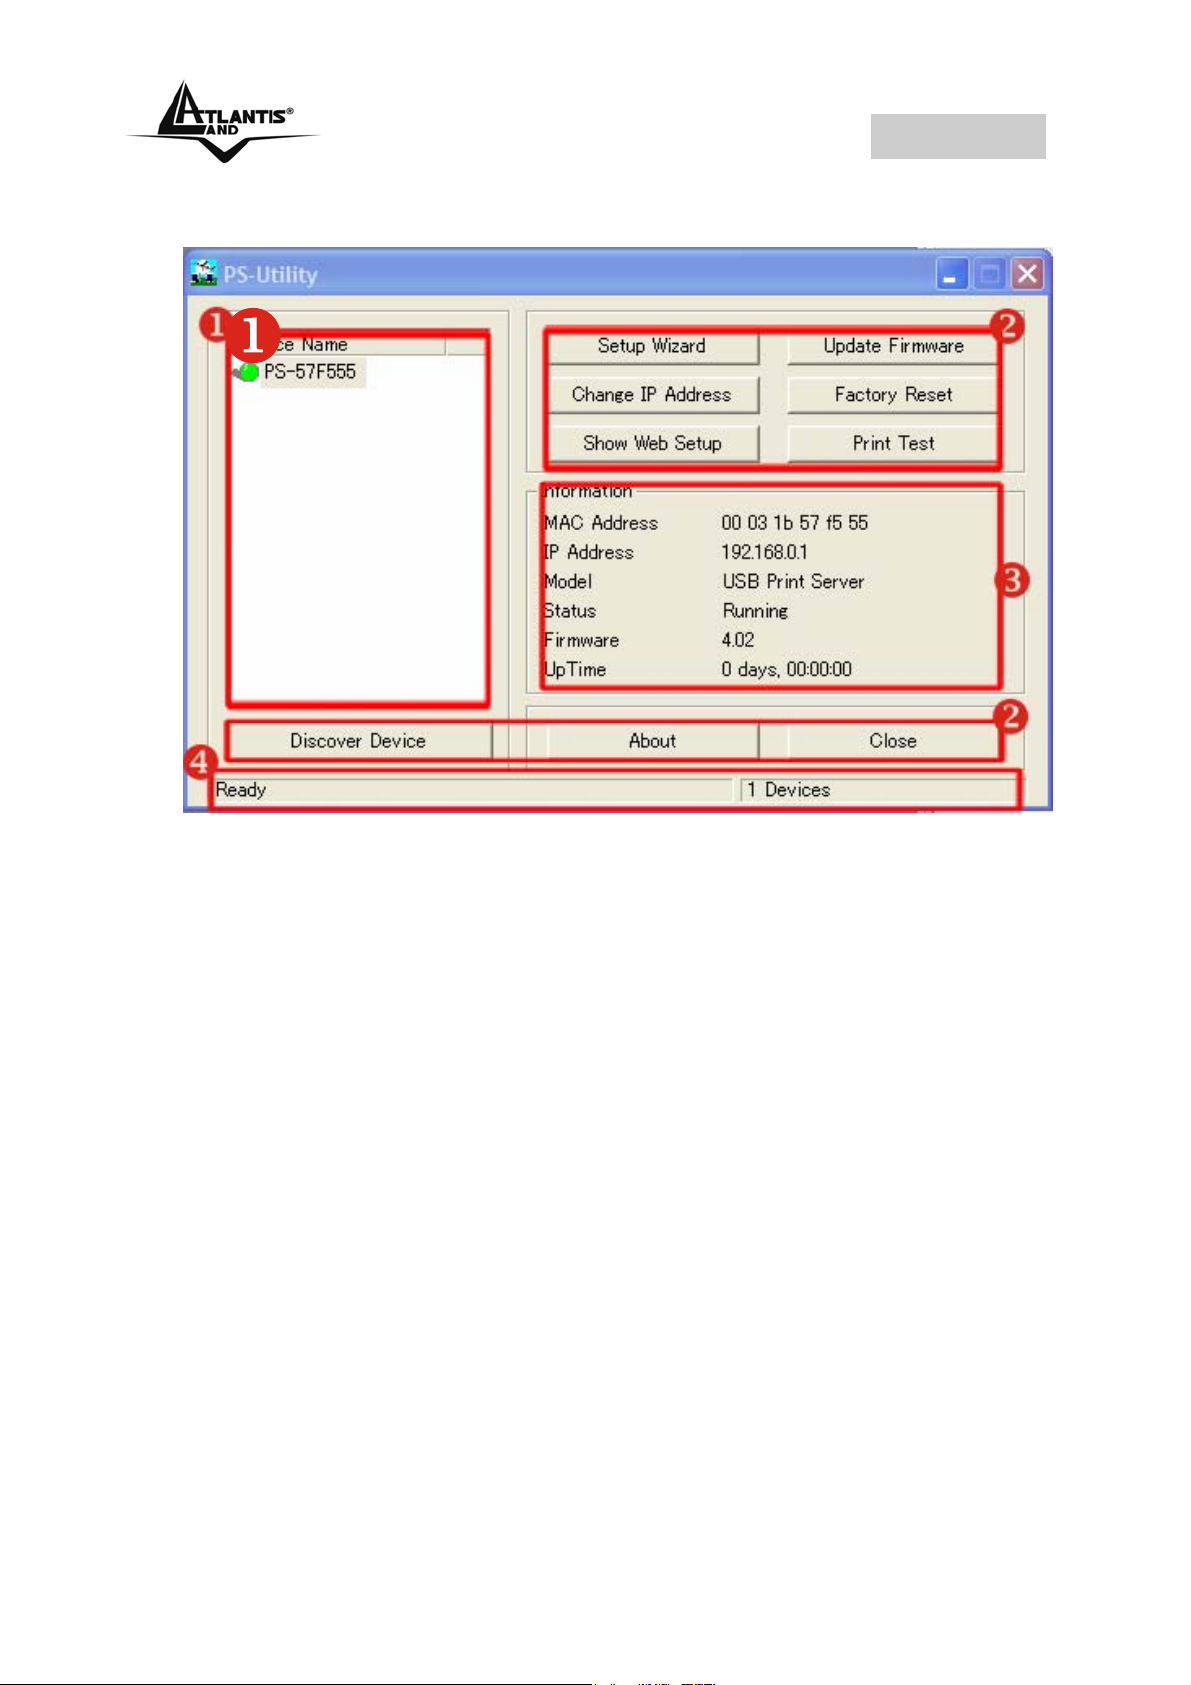
2. The main screen will appear as below, and it starts to
search the connected print server within the network.
1. Device List: Display the connected print server within
the network.
2. Control Buttons: Setup Wizard, Change IP Address,
Update Firmware, Show Web Setup, Factory Reset,
Print Test, Discover Device, About, and Close.
3. Information Field: Display the basic information of the
selected print server in the Device List.
4. Status Bar: Display the system status.
Before you can print over the network using your print
server, you may need to perform some basic setup tasks
through PS-Utility. These settings include:
• Change the print server’s IP Address: clicking the
Change IP Address button will bring up a dialog
box that allows you to change the IP Address of
selected print server.
18
Page 19

NetServer
• Perform web configuration: click the Show Web
Setup button to open your web browser and launch
the Configuration Utility; alternately, you can doubleclick the selected print server in the Device List to
launch the Configuration Utility.
• Search the available devices: click the Discover
Device button to re-search the connected print
server within the network.
• Resume the default settings: click the Factory
Reset button to reload the factory settings of the
print server.
• Update Firmware: click the Update Firmware
button to update the firmware of the print server.
1.6.3 Setting Up Windows XP TCP/IP Printing
Following is the correct procedure for setting up TCP/IP LPR
printing under Windows XP.
Click Start > Printer and Faxes. Double Click “Add a
Printer” then click “Next”. In the next windows select “Local
Printer”. Create a new “Standard TCP/IP Port” then click
“Next”. Input the IP Address of the Print Server, and the Port
name of the Port that will be printed to, then click “Next”.
In the next page Select “Custom”, and click “Settings”.
Select “LPR”, and put the Port name in the field labeled
“Queue Name”. Then Click “OK”. Click “Next”. Click
“Finish”
The Printer Install Wizard will now prompt for drivers. Select
the correct Make and Model, or click “Have Disk”, to provide
the Manufacturer’s Driver Disk.
19
Page 20

NetServer
1.7 Web Configuration
You can access and manage the Print Server through: 1) the
enclosed software PS-Utility, and 2) a web browser. This
chapter describes the second method – the Web
Configuration Utility, and explains how to set up your print
server with the web browser.
1.7.1 Web Configuration Utility
First, launch your web browser (such as the Internet
Explorer 6.0 used in this manual). Then, type
http://192.168.0.1 (the default IP address) in the Address
bar and press [Enter] to enter the Management screen of the
Configuration Utility.
The computer’s IP address must
correspond with the print server’s IP
address in the same segment for the
two devices to communicate. Extensive
knowledge of LAN will be helpful in
configuring the print server.
20
Page 21

NetServer
Home
The Home screen displays the basic information of the print
server. As shown above, the System displays the status of
your print server and network. Clicking Refresh will update
the information.
21
Page 22

NetServer
Setup Wizard
The “Setup Wizard” will lead you to change all the
configurations step by step. Please follow below steps to
finish it
System
In this field, you can configure the basic information of your
print server.
Server Name: Assign a name to the print server.
Port Name: Assign the Port Name for the print server
Password: Enter the Administrator password (3-8
characters).
22
Page 23

NetServer
IP Address
This option allows you to set the IP address manually or
automatically. When you choose Manually Assign, you
should enter the related information in the following boxes,
including IP Address, Subnet Mask, and Default Gateway.
23
Page 24

NetServer
Microsoft Network
Enter the name of the Workgroup that you want the print
server associated with in this field.
Second HTTP Port
This field allows settings to open a second port for the
remote printing and IPP printing function. This will permit
users to execute printing jobs through broadband IP router.
24
Page 25

NetServer
Save to Print Server
Please double check all the configurations and click “Yes” to
save the settings..
Change IP Address
If you only need to change the print server’s IP address
without any other configuration. Please click the “Change IP
Address” icon and change it to what you want.
25
Page 26

NetServer
Printer Information
The items in this field display the information of the printer,
such as the given name for the printer, printer status, and
status of your printing tasks, etc.
26
Page 27

NetServer
Factory Reset
Please click Yes to reload the factory settings of the print
server.
27
Page 28

NetServer
Firmware Upgrade
When a new version of firmware is available (e.g.
downloading from the manufacturer’s website), you can
upgrade the firmware of your print server. Click Browse to
point to the firmware file, and then click Upgrade.
Do NOT upgrade firmware on any
Atlantis Land product over a wireless
connection. Failure of the device may
result. Use only hard-wired network
connections.
After upgrading you must reset the
router to factory default settings, then
manually re-enter your settings.
Please pay attention. In case electrical
shutdown, during this procedure, this
product could be not usable.
When uploading software to the
NetServer, it is important not to interrupt
the Web browser by closing the window
28
Page 29

NetServer
or loading a new page. If the browser is
interrupted, it may corrupt the software
About
This screen displays the information of the print server.
29
Page 30

NetServer
1.8 Printing in Windows 98SE/ME
The Print Server can provide print services to TCP/IP
networks using the lpr/lpd network printing protocol. Most
NIX systems are capable of supporting lpd, as is Windows
U
NT/2000.
This LPR for TCP/IP Printing client gives Windows 98SE/Me
workstations the ability to print using the lpr/lpd printing
protocol. Though it is possible to print to Print Servers from
Windows 98SE/Me, this capability is useful if primarily
administer your network from U
print from workstations that are only accessible through IP
routing.
NIX systems, or if you want to
30
Page 31

NetServer
1.8.1 Installing the LPR for TCP/IP Printing Client
Before your Windows 98SE/Me workstation can print using
the lpr protocol, you will need to install the client program, as
follows:
1. Make sure that you have installed the TCP/IP protocol,
and have properly configured the Windows 98SE/Me
TCP/IP settings. You can install the protocol from the
Network control panel if necessary.
2. From the Start menu, choose the Settings submenu,
then the Control Panel item within it. Windows will
display the Control Panel folder.
3. Double-click on the Network icon in the Control Panel
folder.
4. Click on the Add... button on the Configuration tab.
5. Windows will ask for the type of component to add.
Select Client and click Add... to continue.
6. When Windows asks you to select a network client, click
the Have Disk... button.
31
Page 32

NetServer
7. Insert the Print Server installation CD in your computer’s
CD-ROM, enter the proper pathname (for example , D:\
lpr), and click OK.
8. Select the LPR for TCP/IP Printing client and click OK.
9. Windows will copy the necessary files, and return to the
Network dialog. Click OK to let Windows restart.
32
Page 33

NetServer
33
Page 34

NetServer
1.8.2 Adding LPR Printer Ports
Once you have installed the client, and have enabled
TCP/IP printing for the Print Servers, then you need to add a
printer port for each printer you will be printing to using the
lpr/lpd protocol. To add a printer port,
1. From the Start menu, choose the Settings submenu,
then the Control Panel item within it. Windows will
display the Control Panel folder.
2. Double-click on the Network icon in the Control Panel
folder.
3. Choose the LPR for TCP/IP Printing client and click the
Properties button.
34
Page 35

NetServer
4. Click the Add Port... button to add a new lpd-accessible
printer port.
5. Enter the IP address of the Print Server and the name of
the printer port that you will be printing to, then press OK.
Hint: You can get the Port name from the print server’s
system information through web browser. Please refer page
19.
6. Click OK to leave the LPR for TCP/IP Printing Properties
window.
35
Page 36

NetServer
1.8.3 Printing from Windows 98SE/Me
After you have added the necessary printer ports, you can
add a printer device for printing to the port. To enable
printing to an lpr-accessible printer port from Windows
98SE/Me,
1. From the Start menu, choose the Settings submenu, then
the Printers item within it. Windows will display the
Printers folder.
2. Double-click on the Add Printer icon in the Printers folder.
Windows will start the Add Printer Wizard.
Click the Next > button to continue to the next screen.
3. Choose the Network Printer selection and click the Next
> button to continue.
36
Page 37

NetServer
4. Enter the name of the port, as displayed in the LPR for
TCP/IP Printing Port List.
Alternatively, you can click Browse... and locate the
printer port. TCP/IP printing ports are located under the
Entire Network icon, within the Print Servers - TCP/IP
LPR icon.
37
Page 38

NetServer
Press OK when you have located the proper printer port.
Click Next > to continue to the next step.
5. At this point Windows will ask you to choose the correct
printer driver for the printer. Choose you printer’s make
and model from the list, or use the driver disk included
with the printer. When you have chosen the correct
printer, click Next > to continue.
6. Windows will then ask for a name for the new printer, and
ask whether or not you want to set the printer as the
Windows default printer. Click Finish (or Next >) to
continue.
38
Page 39

NetServer
7. Windows may ask you whether or not you wish to print a
test page to make sure that the printer will work correctly.
When the test page is done printing, you will be asked
whether or not the test page printed.
39
Page 40

NetServer
1.8.4 Setting TCP/IP Printing Settings
The lpr client’s Properties dialog allows you to change
several of the client’s settings. To change these settings,
1. From the Start menu, choose the Settings submenu,
then the Control Panel item within it. Windows will
display the Control Panel folder.
2. Double-click on the Network icon in the Control Panel
folder.
3. Choose the LPR for TCP/IP Printing client and click the
Properties button.
4. Click on the Settings tab to access the lpr client settings.
Change the settings as necessary, and press OK to let
the changes take effect.
40
Page 41

NetServer
The parameters are as follows:
♦ Communication Timeout Determines how long, in
seconds, the system will wait before determining that it
has lost connection with lpr/lpd print servers.
♦ Retry Interval Determines how long, in seconds, the
system will wait before retrying a lost connection.
♦ Retry Times Determines how many times the system
will retry a lost connection with an lpr/lpd print server. If
Infinite is checked, it will retry indefinitely.
♦ Spool Path Gives the directory path where the system
will temporarily store lpr/lpd print server job files.
41
Page 42

NetServer
1.9 Printing in Windows 2000/XP
1.9.1 Setting Up Windows 2000 TCP/IP Printing
Following is the correct procedure for setting up TCP/IP LPR
printing under Windows 2000.
Click Start > Settings > Printers.
Double Click “Add Printer”
Select “Local Printer”
42
Page 43

NetServer
Create a new “Standard TCP/IP Port”
Click “Next”
43
Page 44

NetServer
Input the IP Address of the Print Server, and the Port name
of the Port that will be printed to, then click “Next”.
Hint: You can get the Port name from the print server’s
system information through web browser. Please refer page
19.
Select “Custom”, and click “Settings”.
44
Page 45

NetServer
Select “LPR”, and put the Port name in the field labeled
“Queue Name”. Then Click “OK”.
Click “Next”.
45
Page 46

NetServer
Click “Finish”
The Printer Install Wizard will now prompt for drivers. Select
the correct Make and Model, or click “Have Disk”, to provide
the Manufacturer’s Driver Disk.
46
Page 47

NetServer
Click “Next”.
Select a “Printer Name”.
47
Page 48

NetServer
Sharing can be enabled here.
Also, a Test Page can be printed to confirm proper
configuration.
48
Page 49

NetServer
When the Test Page has been printed, click “Finish” to
complete the installation.
49
Page 50

NetServer
1.9.2 etting Up Windows XP TCP/IP Printing
Following is the correct procedure for setting up TCP/IP LPR
printing under Windows XP.
Click Start > Printer and Faxes
Double Click “Add a Printer”
Click “Next”
50
Page 51

NetServer
Select “Local Printer”
Create a new “Standard TCP/IP Port”
51
Page 52

NetServer
Click “Next”
Input the IP Address of the Print Server, and the Port name
of the Port that will be printed to, then click “Next”.
Hint: You can get the Port name from the print server’s
system information through web browser.
52
Page 53

NetServer
Select “Custom”, and click “Settings”.
Select “LPR”, and put the Port name in the field labeled
“Queue Name”. Then Click “OK”.
53
Page 54

NetServer
Click “Next”.
Click “Finish”
54
Page 55

NetServer
The Printer Install Wizard will now prompt for drivers. Select
the correct Make and Model, or click “Have Disk”, to provide
the Manufacturer’s Driver Disk.
Click “Next”.
Select a “Printer Name”.
55
Page 56

NetServer
A Test Page can be printed to confirm proper configuration.
When the test page has been printed, click “Finish” to
complete the installation.
56
Page 57

NetServer
57
Page 58

NetServer
7
1.10 Printing in MAC OS
1.10.1 Rendezvous Uses in MAC OS 10.2
The latest version of MAC OS provides a new feature that is
called Rendezvous. Rendezvous is a revolutionary
networking technology standard that lets you create an
instant network of computers and devices, which can be
used throughout Mac OS 10.2 to provide innovative ways to
share files and printers and even contact other people on the
network.
For the printer connection, the Mac OS 10.2 Print Center
application uses Rendezvous to discover Rendezvousenabled printers on the network. When you add your
computer to a network, Print Center automatically discovers
the available printers. All you have to do is selecting the one
you want to use and then start printing. You can add a new
printer to the network and all the users on the network will
see the new printer automatically appear in their Print
Center, without any configuration.
The following instructions provide a common procedure of
installing the printer:
58
Page 59

NetServer
• Launch Print Center. Press and hold the Option key,
click the Add button.
• Select Rendezvous from the pop-up menu.
• When clicking the Rendezvous item, the following
window appears to display the connected Rendezvousenabled printers.
59
Page 60

NetServer
• Select the desired printer, and the following pop-up
menu displays the printer’s manufacturer. Select
Generic.
• The printer is installed into the system successfully.
60
Page 61

NetServer
1.11 Technical Features
Advanced Features
• Compliant with USB 2.0 Hi-speed printing
• Equipped one 10/100 auto-MDIX Fast Ethernet LAN
port
• Multi protocol support is ideal for shared printing in
mixed-LAN environments
• Windows-based setup program makes it possible to
set up in a few minutes.
• Offer LPR program for Windows 98SE/Me TCP/IP
printing
• IP assignment support for DHCP
• Support Web configuration
• Provide Flash memory for easy firmware upgrade
• Support IPP for Windows 2000/XP
• Support second http port for remote web
configuration and IPP printing
System Hardware:
• CPU: RDC R2886 150MHz
• SDRAM: 2M Byte
• Flash ROM: 512K Byte
• 5V DC power adapter
• LED Indicator: Power, USB, Link/Act
System Software:
• Real-time OS
• Transport Protocols : TCP/IP, SMB over NBT
• TCP/IP Protocols Supported : DHCP, IPP, LPR,
HTTP
61
Page 62

NetServer
Support OS:
• Windows 98SE/Me, Windows NT, Windows
2000/XP/2003
• NetWare 5.x NDPS LPR Remote Printing (TCP/IP)
• Unix, Linux
• Mac O.S.X IP printing
Setup Utility: PS Utility
• Support OS: Windows® 98ME/98 SE, Windows
®2000/Me/XP/2003, Windows NT3.51 or later.
Operating environment
• Operating temperature: 5°C ~ 35°C
• Storage temperature: -25°C ~ 50°C
• Humidity: 5% ~ 90% non-condensing
Minimum System Requirements
• Operating System: Microsoft Windows®
98SE/ME/2000/XP
• For Web Configuration: Java-enabled web browser,
such as Microsoft® Internet Explorer 5.0 and
Netscape Navigator 6.0
62
Page 63

NetServer
1.12 Support
If you have any problems with this device, please consult the
full manual on CDRom. If you continue to have problems
you should contact the dealer where you bought this device.
If you have any other questions you can contact the Atlantis
Land company directly at the following address:
Atlantis Land SpA
Viale De Gasperi, 122
20017 Mazzo di Rho(MI)
Tel: +39. 02.93906085, +39. 02.93907634(help desk)
Fax: +39. 02.93906161
Email: info@atlantis-land.com
WWW: http://www.atlantis-land.com
or tecnici@atlantis-land.com
63
Page 64

NetServer
64
Page 65

NOTE
65
Page 66

Where solutions begin
Company certified ISO 9001:2000
Atlantis Land S.p.A.
Viale De Gasperi, 122
Mazzo di Rho – MI – Italy
info@atlantis-land.com
sales@atlantis-land.com
www.atlantis-land.com
 Loading...