

Page 1
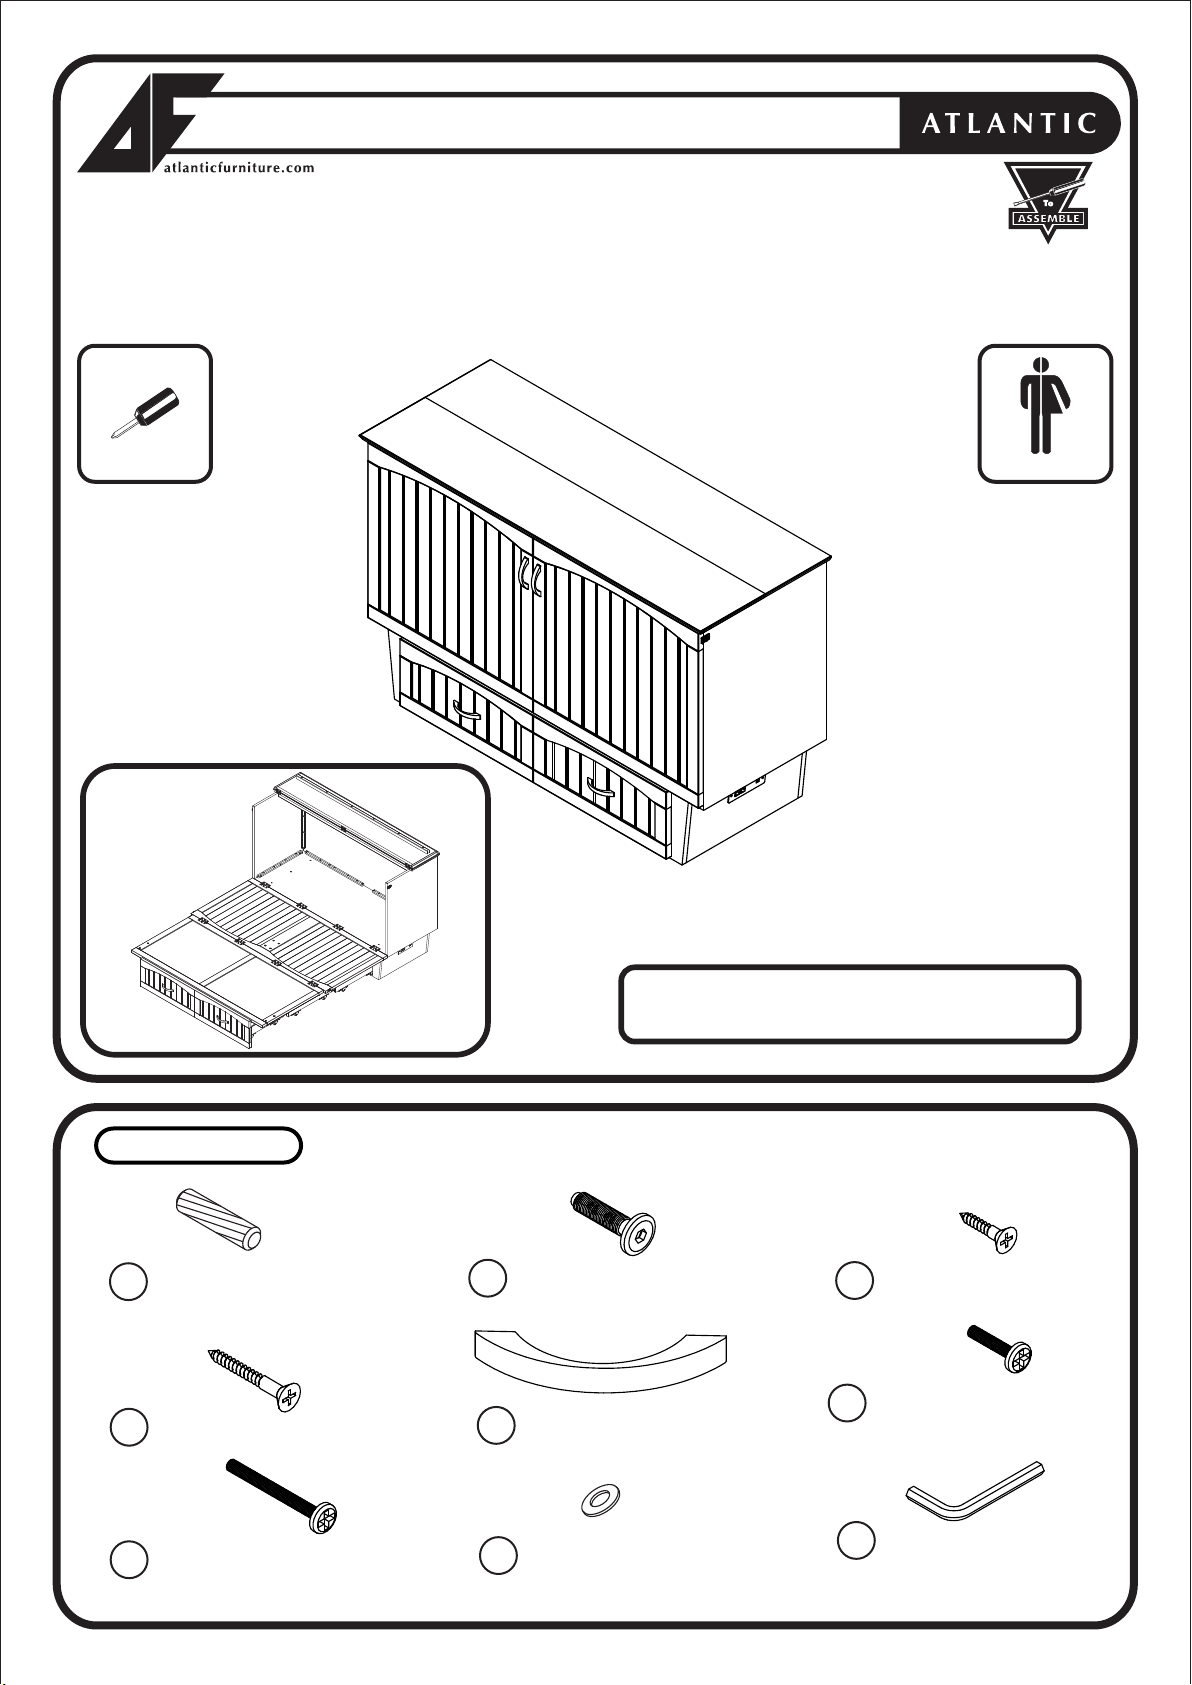
NANTUCKET MURPHY BED
WITH CHARGING STATION
please contact Atlantic Furniture at customerservice@atlanticfurniture.com or 1-800-955-3726
Phillips screwdriver
Customer supplied
QUEEN
ASSEMBLY INSTRUCTIONS
Before assembling your Murphy bed, please read through these
instructions carefully and familiarize yourself with the different parts.
ATTENTION! If you receive a damaged or defective item,
READY
Adult assembly
HARDWARE
Wood dowel - 10 pcs
A
D
G
Spare - 1 pc
Wood screw 1” - 18 pcs
Spare - 1 pc
Metal pull screw 40mm - 4 pcs
PO :
NOTE: WE INCLUDE SPARE HARDWARE IN CASE DAMAGE OCCURS DURING ASSEMBLY.
JCB M6 X 25mm - 10 pcs
Spare - 1 pc
B
Metal pull - 6 pcs
E
Washer - 24pcs
H
Adjust quantity as needed.
Spare - 1 pc
Spare - 1 pc
F
Wood screw 5/8” - 12 pcs
C
Metal pull screw 25mm - 8 pcs
Allen wrench - 1 pc
I
Spare - 1 pc
Spare - 1 pc
Spare - 1 pc
Page 1 of 7
Page 2
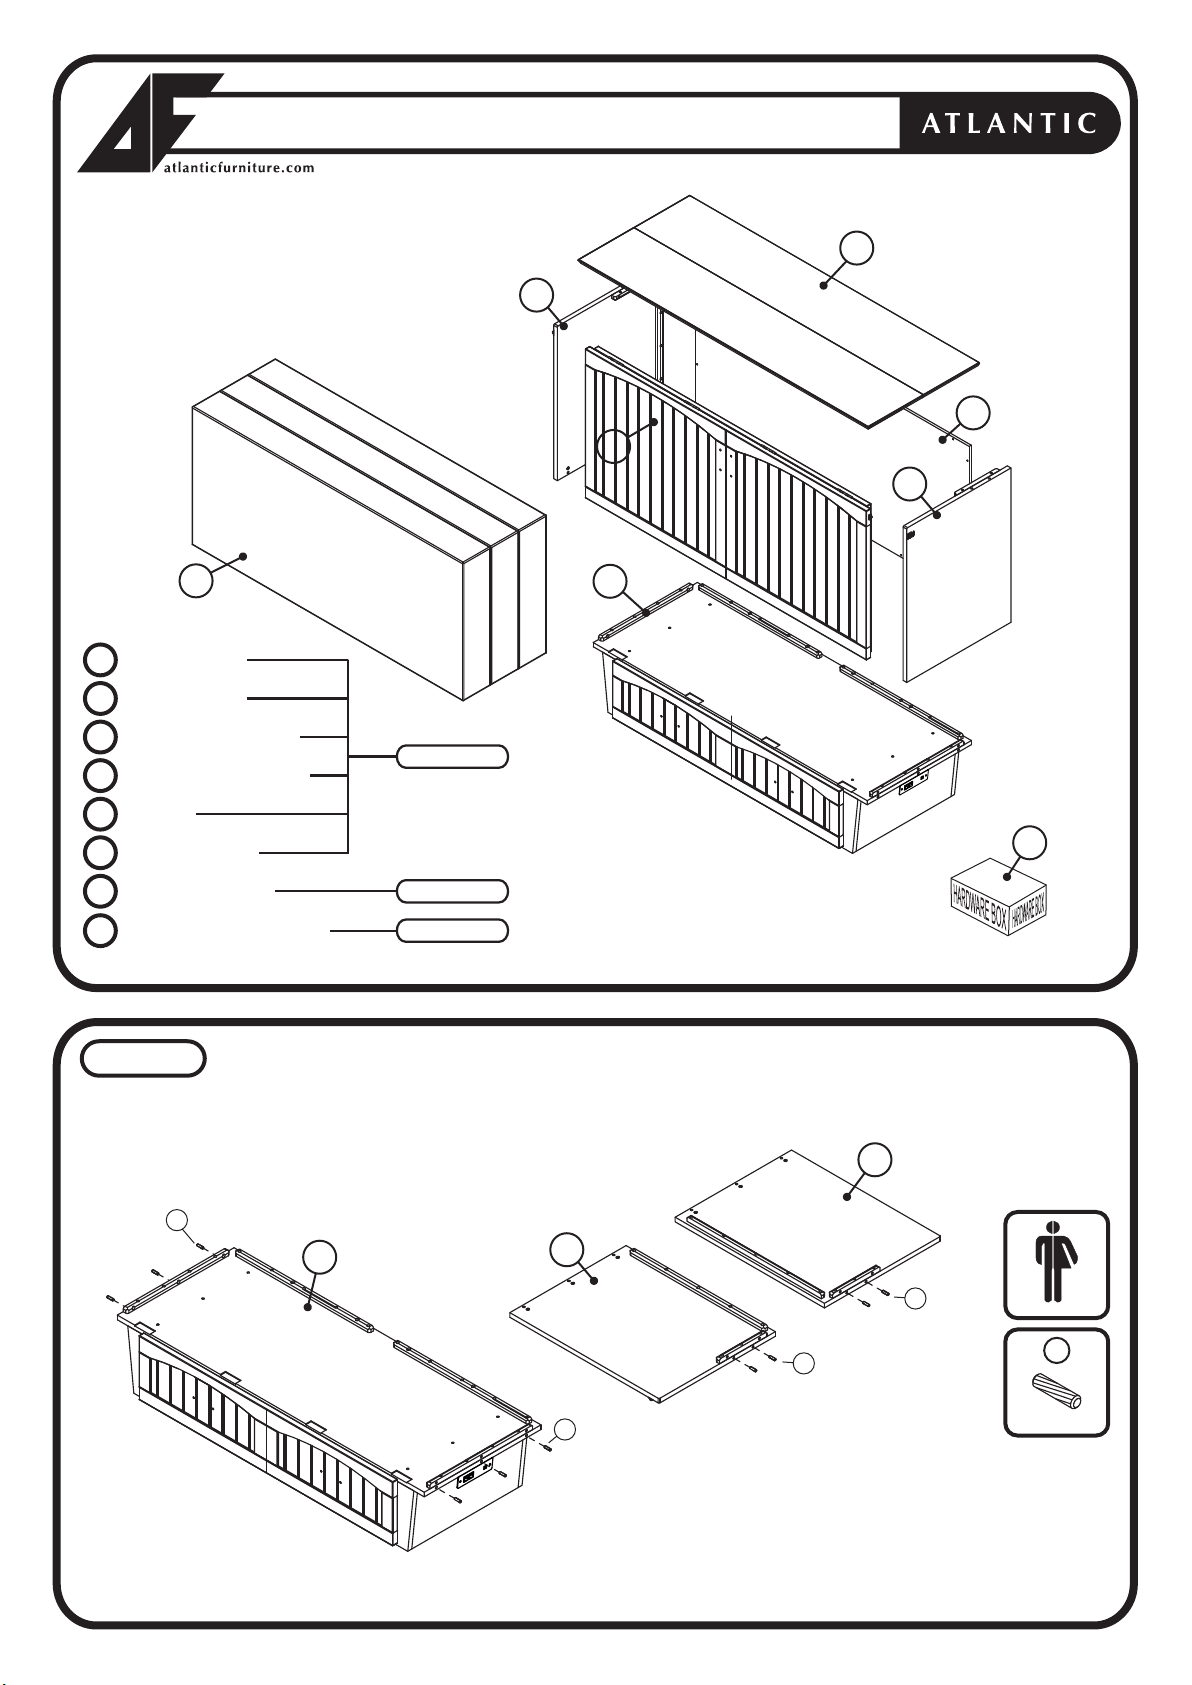
NANTUCKET MURPHY BED
WITH CHARGING STATION
PARTS LIST
03
05
02
06
04
08
01
HARDWARE
02
TOP PANEL
03
LEFT SIDE PANEL
04
RIGHT SIDE PANEL
05
DOOR
06
BACK PANEL
07
DRAWER BASE
08
FOLDING MATTRESS
STEP 1
07
1 BOX
01
1 BOX
1 BOX
Insert all wooden dowels (A) into the locator holes on (03)(04) and (07) as shown below.
03
A
07
04
A
A
A
Adult assembly
A
Wooden dowel
Page 2 of 7
Page 3
NANTUCKET MURPHY BED
WITH CHARGING STATION
STEP 2
Attach left and right side panels (03) and (04) to the drawer base (07) as shown below.
Using JCB (B) tighten with Allen wrench (I)
03
Adult assembly
B
JCB M6 X 25mm
B
B
B
07
B
04
I
Allen wrench
B
B
STEP 3
Attach top panel (02) to the side panels as shown below. Using JCB (B), tighten with
Allen wrench (I).
02
B
B
B
B
Adult assembly
JCB M6 X 25mm
B
I
Allen wrench
Page 3 of 7
Page 4

NANTUCKET MURPHY BED
WITH CHARGING STATION
STEP 4
Install metal pull (E) to the locator holes on (05) as shown below. Using metal
pull screw (F) and washers (H) tighten with Phillips screwdriver (customer supplied).
H
H
F
H
H
F
F
F
F
F
E
Adult assembly
05
Back view
E
E
E
E
Metal pull
F
Metal pull screw
H
Washer
Adjust quantity
as needed
Phillips screwdriver
Customer supplied
STEP 5
Back view
Pull out drawer base as shown below. Install metal pull (E) Using metal pull screw (G),
and washers (H). Tighten with Phillips screwdriver (customer supplied).
Adult assembly
E
H
H
G
G
G
G
Metal pull
G
Metal pull screw
H
Washer
Adjust quantity
as needed
Phillips screwdriver
G
G
E
Customer supplied
Page 4 of 7
Page 5

NANTUCKET MURPHY BED
WITH CHARGING STATION
STEP 6
Lay the door down flat as shown below. Attach door hinge to drawer base using wood
screw (C) and tighten with Phillips screwdriver (customer supplied ).
Note: Be sure to align door with
side panels in this step.
Adult assembly
C
C
C
C
C
Wood screw 5/8”
Phillips screwdriver
Customer supplied
STEP 7
1
Lift the door and fold as shown below.
2
Lift the door and latch to side panel as
shown below.
Page 5 of 7
Page 6

NANTUCKET MURPHY BED
WITH CHARGING STATION
STEP 8
Push the door closed and latch both sides as shown below.
Adult assembly
Lock
STEP 9
Attach back panel (06) to cabinet assembly as shown below. Using
wood screws (D), tighten with Phillips screwdriver (customer supplied ).
D
06
Adult assembly
D
Wood screw
Phillips screwdriver
Customer supplied
Page 6 of 7
Page 7

NANTUCKET MURPHY BED
WITH CHARGING STATION
STEP 10
Pull the drawer out fully. Unlatch the door and open, folding down as shown.
Open
Adult assembly
STEP 11
08
Install folding mattress (08) to the bed. Open top panel and push drawer base in as
shown below.
Adult assembly
08
Congratulations!
Your Murphy bed is now ready for use.
We recommend that you recheck that all screws are tight,
and that all parts are secure before use to ensure lasting Safety.
Page 7 of 7
 Loading...