

Atlantic FF4416, FF4016, FF6016, FF8016, FF4816 Product Manual
...
FF4416 / FF4616 / FF4816 / FF4016 / FF6016 / FF8016
Product Manual | Manuel du Produit | Manual del Producto
1.330.274.8317
www.ATLANTICWATERGARDENS.com
F
Introduction
Thank you for purchasing the Atlantic Flexible Fountain Basin. Before using this basin
please take a moment to review this manual. Flexible Fountain Basins create a wrinkle-free,
easily plumbed reservoir for use with engineered stone basins.
Installation
Preparing the Surround
Begin by constructing the wall stone surround for the basin as per manufacturer
instructions. Atlantic’s Flexible Basins are designed to work with 12” x 8” x 4” wall stones. The
basin dimensions minimize the number of cuts needed for installation with that size block.
However, they can be used with any brand of wall stone.
The finished space should match the dimensions of the Flexible Basin and measure 15¾”
– 16” in height. Before installing the basin, preparation of the base underneath is essential.
Rake the surface to remove any sharp objects that could puncture the basin, then tamp
to avoid future settling and possible damage. Base must be compacted and level. Sand
or stone screenings can be added to raise or level the base. Underlayment fabric can be
installed below the basin for added protection.
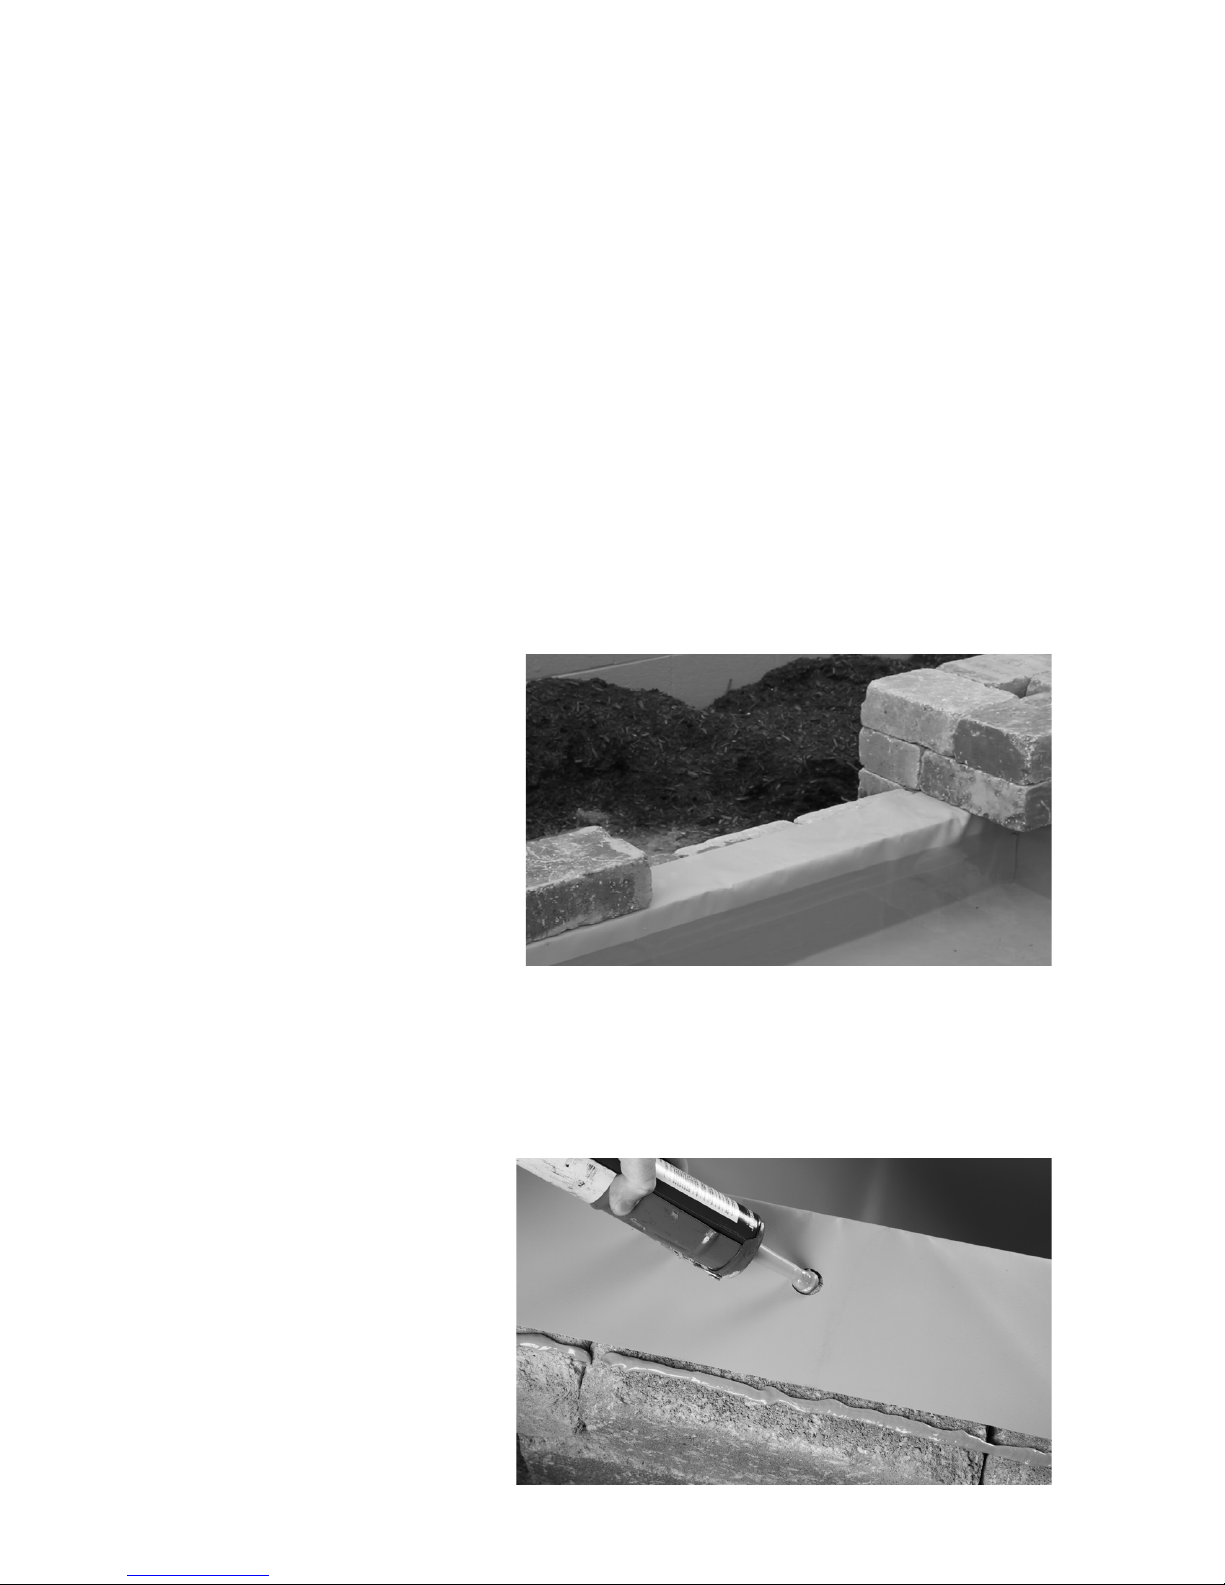
Installing the Flexible Basin
Place the Flexible Basin within the
stone surround, being careful not
to disturb the level base at the
bottom. Starting at the center,
use your hands to smooth out the
basin, working any excess slack
towards the outside edges. Ensure
that the basin is tucked tightly
into all corners, and place some
stones around the top edges of
the Basin to temporarily hold the
basin in place. Begin filling the
basin with water.
As you are filling the basin with
water, continue smoothing out the wrinkles from Basin as you go, making sure
to tuck the basin corners tightly into place. (Figure 1)
Securing the Flexible Basin
To secure the basin, place a
solid bead of masonry adhesive
along the top course of the basin
surround, with a generous dab
also placed in the pre-punched
glue points in the basin flaps
(Figure 2). Then carefully place
the next course of stone, ensuring
that the flaps are pulled tight and
there is no slack in the basin.
2
Figure 1
Figure 2
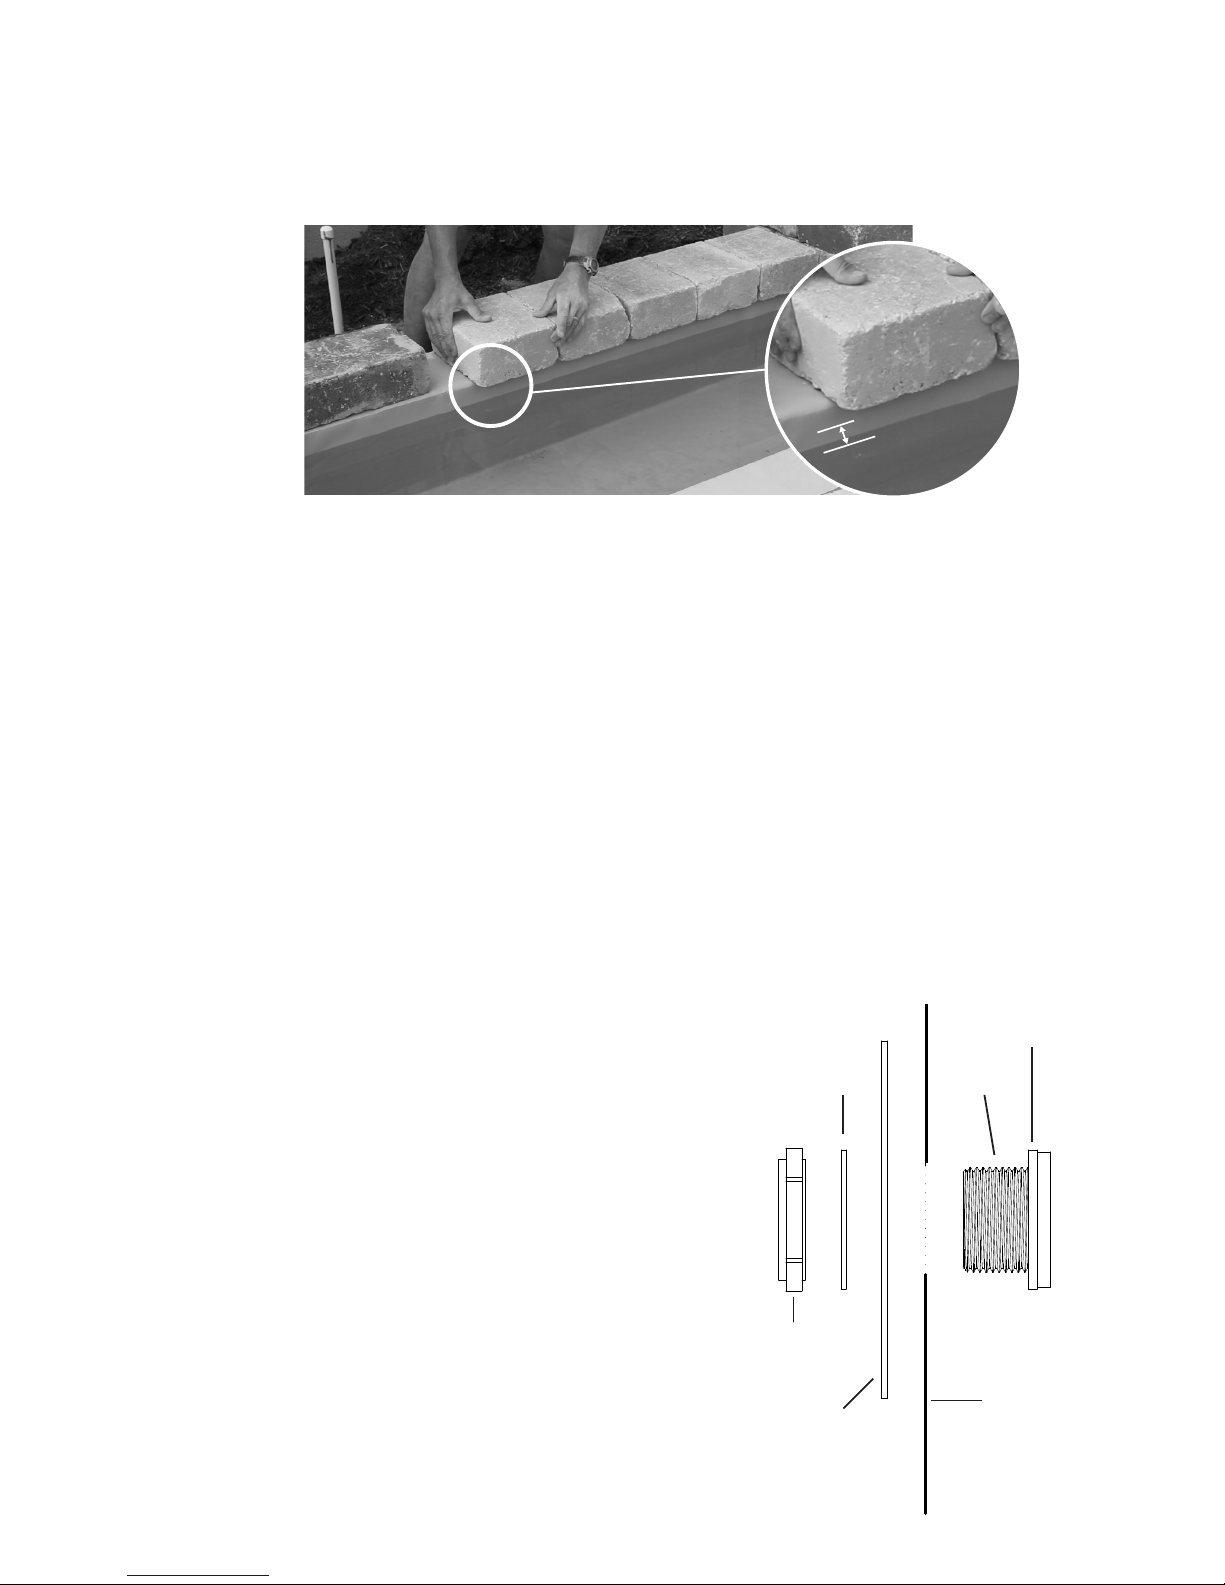
It is recommended that this course of stone overhang into the basin 1½” in order to
disguise the top edge of the basin (Figure 3). This also shades the PVC of the basin above
the waterline from sunlight and UV exposure. Allow the adhesive the fully cure (as per
manufacturer’s instructions) before proceeding with additional wall construction.
Installing the Submersible Pump
Typical installation locates the pump at the center of the Flexible Basin. Run the cord
through the cord chase and up to the top of the wall of the Basin. The cord may be set
between two cap stones, chiseling corners as necessary so the caps will sit flat. Alternately,
cut a groove in the bottom of a cap stone to accommodate the cord. The cap stones
should be made removable with caulk instead of permanent adhesive or cement to allow
the pump to be removed periodically for servicing, winterizing or replacement.
Plumbing the Basin for External Pump (Optional)
Flexible Basins can be plumbed using submersible or external pumps. If an external pump
is to be used, begin by installing the bulkhead fitting by following the directions below. The
bulkhead will allow the external pump to draw water from the Basin.
Installing Bulkhead Fittings (Optional)
If the installation requires passing plumbing or power cords through the wall of the basin,
holes for bulkhead fittings (not included) should be cut out before installing the basin in
the wall stone enclosure. Leave a 4”-6” space in the wall at 8”-12” above the bottom of the
basin. With 4” block, the space would be in the third course
of wall stone from the bottom. Using the space as a guide,
carefully cut out a circle of the basin material the same
diameter as the external threads of the bulkhead fitting. The
cutout should be centered 10” above the bottom of the block.
Install the bulkhead fitting(s) before setting the basin.
Remove the retaining nut and plastic friction washer,
leaving the rubber gasket on the body of the bulkhead
fitting(s). The retaining nut has reverse threads. Turn
clockwise to loosen.
From the inside of the flexible basin, insert the threaded
end of the bulkhead into the cutout in the flexible basin.
This will sandwich the rubber gasket between the flange
of the bulkhead and the inside wall of the flexiblebasin
(Figure 4). Slip the friction washer over the threaded end
of the bulkhead on the outside of the flexible basin, followed
by the retaining nut. Tighten the retaining nut by hand and
then finish o with a half turn from a wrench. Note that the
retaining nut has reverse threads. Turn counterclockwise to tighten.
3
1½”
Figure 3
Flexible
Basin
Bulkhead
Rubber
Gasket
Backing
Plate
Friction
Washer
Retaining
Nut
Figure 4

4
Using Cord Seal Fitting (Optional)
If you would rather pass the pump cord
through the wall of the basin rather than
over the top under the cap stones, you may
wish to install a bulkhead fitting and Cord
Seal Fitting. Install a bulkhead fitting
following the directions above. Install a 1⁄”
male adapter in the bulkhead fitting. Run
the cord directly through the bulkhead
fitting and 1½” male adapter. Follow the
Cord Seal Fitting directions to seal the cord
in the bulkhead. (Figure 5)
Winterizing
In areas where freezing is a concern, the pump(s) must be removed from the basin before
winter and stored in a dry place. Ensure any water has been removed from plumbing lines
and they are plugged. This will keep the lines from refilling and freezing over the winter.
Fountain toppers or decorative features should be winterized according to best practice.
Warranty
This product carries a one-year warranty. This warranty is extended solely to the
original purchaser commencing from the date of original purchase receipt. A misused or
abused product voids this warranty.
Warranty Claims
In case of warranty claims, the complete Basin should be returned to the place of purchase
accompanied by original receipt.
Figure 5
 Loading...