

Page 1
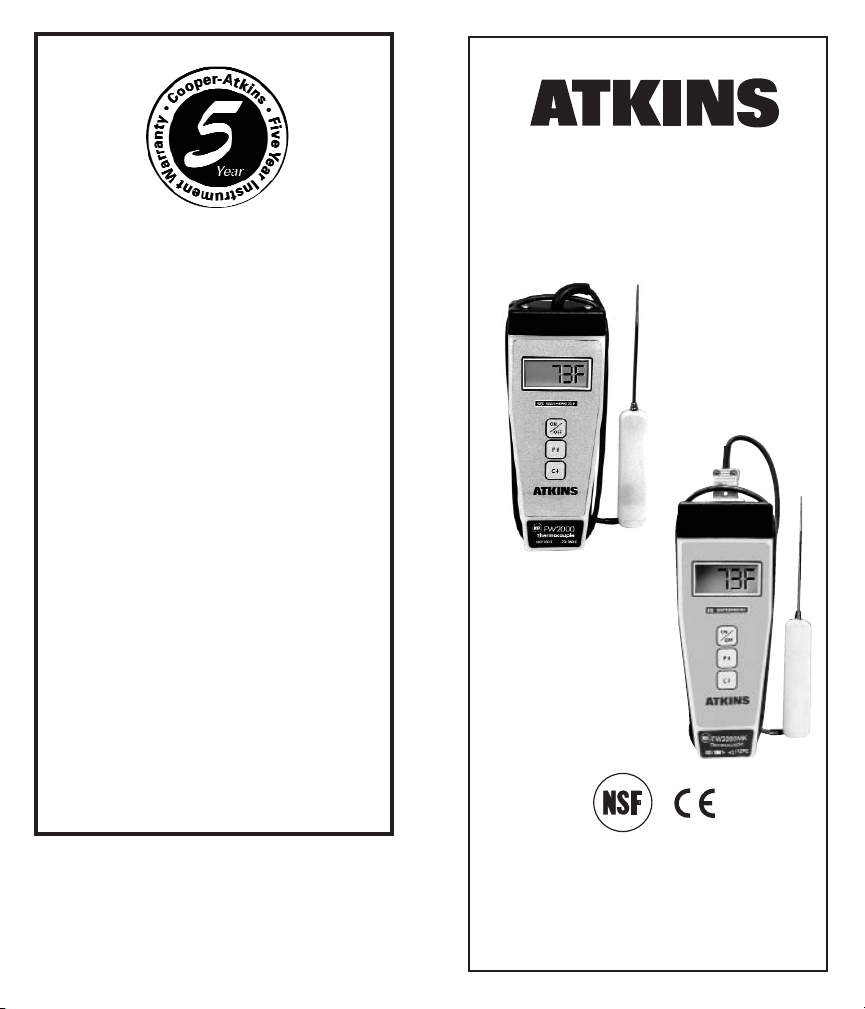
AquaTuff™
FW2000MK
Digital Thermocouple
Thermometer
Warranty
Cooper - Atkins Corporation
33 Reeds Gap Road
Middlefield, CT 06455 USA
Telephone: 800-835-5011
Fax: 860-347-5135
www.cooper-atkins.com
AquaTuff™
FW2000
5 YEAR
WARRANTY
Any instrument which proves
to be defective in material or
workmanship within five years
of original purchase will be
repaired or replaced without
charge upon receipt of the
unit prepaid with proof of
purchase. This Limited
Warranty does not cover
damage in shipment or failure
caused by tampering, obvious
carelessness, or abuse, and
is the purchaser’s sole
remedy.
MMaannuuffaaccttuurreedd iinn tthhee UUSSAA bbyy CCOOOOPPEERR -- AATTKKIINNSS CCOORRPPOORRAATTIIOONN
AAnn IISSOO 99000011 RReeggiisstteerreedd FFaacc ii ll ii ttyy
33 Reeds Gap Road
Middlefield, CT 06455
CUSTOMER SERVICE (800) 835-5011 FAX (860) 347-5135
Website: www.cooper-atkins.com
27-958489E
®
Page 2
32
Table of ContentsNotes
English . . . . . . . . . . . . . . . . . . . . . . . . .4-5
Español . . . . . . . . . . . . . . . . . . . . . . . .6-7
Français . . . . . . . . . . . . . . . . . . . . . . . .8-9
Deutsch . . . . . . . . . . . . . . . . . . . . . .10-11
. . . . . . . . . . . . . . . . . . . . .12-13
. . . . . . . . . . . . . . . . . . . . . . .14-15
Manufactured in the USA by Cooper-Atkins Corporation
An ISO 9001 Registered Facility
33 Reeds Gap Road
Middlefield, CT 06455
Customer Service: 800-835-5011 • 860-347-2256
www.cooper-atkins.com
FW2000 Series USA Patent Number 6,058,356
Page 3
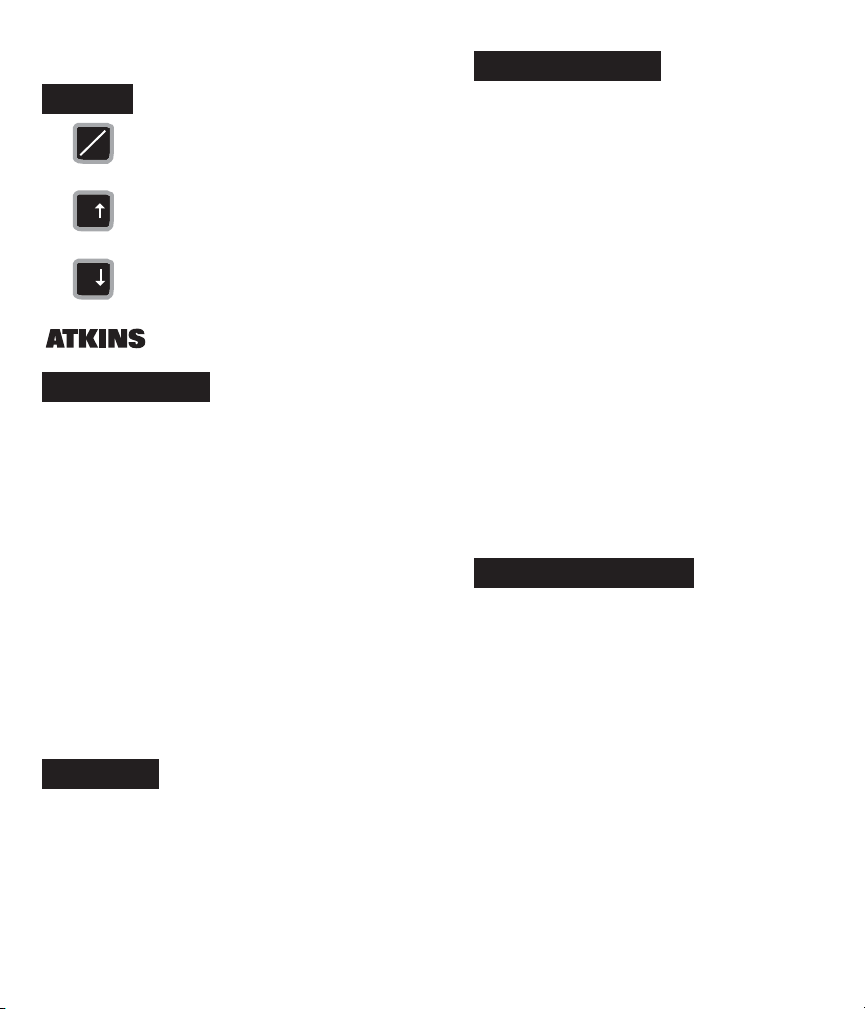
Press to activate / deactivate the unit.
Note: Unit will automatically shut off after
1-1/2 minutes of inactivity.
Press to select Fahrenheit scale.
During Calibration, press to increase the
temperature displayed.
Press to select Celsius scale.
During Calibration, press to decrease the
temperature displayed.
Atkins Key. Used as a “Hold” button
during calibration only.
1. Press the ON/OFF Key to turn on the unit.
(No other button will activate the FW2000 / FW2000MK.)
2. Select the temperature scale you wish to have the unit
display.
-- Press the F Key to display Fahrenheit readings or
-- Press the C Key to display Celsius readings.
3. Insert probe into item to be tested.
Special notes:
• If the measured temperature is stable (doesn’t change by
more than 3°F (2°C)) for 1-1/2 minutes, the unit will shut off
automatically.
• If the battery needs to be replaced, three blinking decimal points
( . . . ) appear on the LCD display. This means that 8 hours of
battery life remain. As battery voltage becomes less, “b.A.t.”
will appear along with 3 blinking decimal points.
• If the unit gets a reading that is outside of its range
(-100° to 999°F )(-73° to 537°C), it will display either “HI” or “LO”,
as appropriate.
• The unit has a “continuous on” feature. To activate, the unit
must be on. Hold down the Atkins Key and press and release
the ON/OFF Key. To deactivate, press the ON/OFF Key and
the unit will turn off.
To calibrate the unit, the temperature of the test solution you are
using must be 32°F (0°C) ± 5°F (±2°C)
or
must be greater than
60°F (16°C). For best results, use an ice bath which consists
almost entirely of crushed ice, with only a little water. Proceed as
follows:
1. Turn unit on.
2. Place the probe into the test solution.
3. Hold down both the F and C keys until “CAL” is displayed.
This takes approximately 3 seconds. You are now in
calibration mode.
OPERATING
INSTRUCTIONS
4. Release both keys. “CAL” will be replaced by “Hold” on
the display.
5. Press and hold down the Atkins Key. “Hold” will be replaced
by three decimal points ( . . . ) with the current temperature
reading.
6. While holding the Atkins Key down, press the up or down
arrow keys (F or C) as appropriate. For example, if you are
using the ice bath method, and your reading is 35°F, press and
release the down arrow key as many times as needed until
“32F” displays on the LCD.
7. When you are done making adjustments, or if no
calibration is necessary, simply keep the Atkins Key
pressed until “End” displays on the LCD (approximately 7
seconds) and the unit returns to NORMAL mode. Release
the Atkins Key.
Special notes:
• Failure to keep the Atkins Key pressed down at all times during
calibration will take you out of the mode and read “Abrt”. To
correct this simply restart the calibration process from
Calibration step 1.
• If the unit cannot be recalibrated by using the ice bath
method you can reset the unit to factory settings. To do so,
while in the CAL mode, still holding the Atkins Key, press both
the F and C keys for 3 seconds to select the factory defaults.
“FAC” will be displayed on the LCD for 2 seconds.
HOLD MODE
If “Hold” is displayed on the LCD when the unit is turned on, it
means an error has occurred. To correct this error, press the Atkins
Key. This will reset the unit to its previous calibration.
THE KEYS
NORMAL OPERATION
CALIBRATION
CALIBRATION - Continued
ON
OFF
F
C
SPÉCIFICATIONS / FONCTIONS
FW2000 Temperature Range:
FW2000MK Temperature Range:
Probe Temperature Range:
Ambient Operating Range:
Accuracy from -35° to 350°F (-37° to 177°C)
in Ambient 60° to 80°F (16° to 27°C):
Accuracy from All Other Ranges:
Temperature Display Resolution:
Battery:
Battery Life:
Low Battery:
Automatic Shut Off:
LCD:
-100° to 500°F (-73° to 260°C)
-100° to 999°F (-73° to 537°C)
-100° to 500°F (-73° to 260°C)
0° to 115°F (-18° to 46°C)
±1F° (±0.5C°)
±2F° (±1C°)
1°F or 1°C
9 volt alkaline NEDA 1604
Minimum of 500 hours ON time
LCD displays 3 blinking decimal
points when 8 hours of battery
life remain
After 1-1/2 minutes of non-use
Liquid crystal display, with
0.5” (1.27 cm) high
digits; viewing area
1.5” x 0.7” (3.81 x 1.77 cm)
45
Page 4

ON
OFF
F
C
Presione para activar o desactivar
la unidad.
Nota: La unidad se apagará automáticamente
después de 1-1/2 minutos de inactividad.
Presione para seleccionar la escala
en grados Fahrenheit.
Durante la Calibración, presione para
incrementar la temperatura visualizada.
Presione para seleccionar la escala
en grados Celsius.
Durante la Calibración, presione para
disminuir la temperatura visualizada.
INSTRUCCIONES
DE FUNCIONAMIENTO
LAS TECLAS
FUNCIONAMIENTO NORMAL
Tecla Atkins. Se utiliza como un botón "Hold"
únicamente durante la calibración.
1. Presione la tecla ON/OFF para encender la unidad.
(Ningún otro botón activará la FW2000 / FW2000MK.)
2. Seleccione la escala de temperatura que desea tener
en el visor de la unidad. - Presione la tecla F para visualizar
las lecturas en grados Fahrenheit ó - Presiona la tecla C para
visualizar las lecturas en grados Celsius.
3. Inserte la sonda en el artículo a probar.
Notas especiales:
• Si la temperatura medida se mantiene estable (no cambia más
de 2°C (3°F)) durante 1-1/2 minutos, la unidad se apagará
automáticamente.
• Cuando se requiera reemplazar la batería, aparecerán tres
puntos decimales (…) intermitentes en el visor LCD. Esto
significa que a la batería le restan 8 horas de vida. A medida
que disminuye el voltaje de la baterÌa, aparecer· “b.A.t.” junto
con 3 puntos decimales que parpadean.
• Si la unidad recibe una lectura que se encuentra fuera
de su rango (-73° à 537°C) (-100° à 999°F), visualizará "HI"
(Alta) ó "LO" (Baja) según corresponda.
• La unidad tiene una función de encendido “continuo.” Para
activarla, la unidad debe estar encendida. Mantenga apretada
la tecla Atkins y presione y suelte la tecla ON/OFF
(ENCENDIDO/APAGADO). Para desactivarla, presione la tecla
ON/OFF, y la unidad se apagará.
Para calibrar la unidad, la temperatura de la solución de prueba
que esté utilizando debe estar a 0°C (32°F) ± 2°C (±5°F) ó debe
ser superior a 16°C (60°F). Para obtener los mejores resultados,
utilice un baño de hielo que consista casi exclusivamente de hielo
molido, con sólo un poco de agua. Proceda de la siguiente manera:
1. Encienda la unidad.
2. Coloque la sonda dentro de la solución de prueba.
CALIBRACIÓN
CALIBRACIÓN
3. Mantenga presionadas las teclas F y C hasta
que se visualice "CAL".
Esto demora aproximadamente 3 segundos. Se encontrará ahora
en el modo de Calibración.
4. Suelte ambas teclas. "CAL" será reemplazado por "Hold"
en el visor.
5. Mantenga presionada la tecla Atkins.
En vez de “Hold” (Mantener) aparecerán tres puntos decimales
(...) junto con la lectura de la temperatura corriente.
6. Mientras mantiene presionada la tecla Atkins, presione las
teclas de flecha arriba o abajo (F ó C) según corresponda.
Por ejemplo, si está utilizando el método del baño de hielo y su
lectura es de 35°F, presione y suelte la tecla de flecha abajo
tantas veces como sea necesario hasta que se visualice "32F"
en el visor LCD.
7. Cuando haya terminado de hacer los ajustes, o si no se
requiere calibración, simplemente mantenga presionada
la tecla Atkins hasta que se visualice "End" en el visor LCD
(aproximadamente 10 segundos) y la unidad retorne al
modo NORMAL. Suelte la tecla Atkins.
Notas especiales:
• Si no mantiene presionada la tecla Atkins en todo momento
durante la calibración, saldrá del modo y aparecerá “Abrt”
(Abortar). Para corregir esto, simplemente reinicie el
proceso de calibración desde el primer paso.
• Si la unidad no se puede recalibrar utilizando el método del
baño de hielo, se pueden reestablecer las configuraciones de
fábrica. Para hacerlo, mientras se encuentre en el modo CAL,
manteniendo presionada la tecla Atkins, presione las teclas
F y C durante 3 segundos para seleccionar las configuraciones
preestablecidas de fábrica. Se visualizará "FAC" durante
2 segundos en el visor LCD.
MODO "HOLD"
Si se visualiza "Hold" en el visor LCD cuando se enciende la
unidad, significa que ha ocurrido un error. Para corregir este error,
presione la tecla Atkins. Esto reestablecerá la calibración previa de
la unidad.
ESPECIFICACIONES / CARACTERÍSTICAS
FW2000 Termopar - Rango de temperatura:
FW2000MK Termopar - Rango de temperatura:
Sonda - Rango de temperatura:
Rango de ambiente de operación:
Precisión de -37° a 177°C (-35° a 350°F)
en Ambiente 16°C a 27°C (60°F a 80°F):
Precisión de todos los otros rangos:
Resolución de la muestra de temperatura:
Batería:
Vida de la batería:
Batería baja:
Apagado automático:
LCD:
De -73° a 260°C (de -100° a 500°F)
De -73° a 537°C (de -100° a 999°F)
De -73° a 260°C
(de -100° a 500°F)
De -18° a 46°C
(de 0° a 115°F)
±0.5C° (1F°)
±1C° (2F°)
1°C o 1°F
Alcalina de 9 Volts NEDA 1604
Mínimo 500 horas de tiempo
en funcionamiento
La pantalla de cristal líquido
(LCD) muestra una serie de tres
puntos decimales cuando le
queda 8 horas de vida a la batería
Después de dos minutos sin uso
Pantalla de cristal líquido, con
dígitos de 1,27 cm de altura
(0.5"); área de visible de
3,81 x 1,77 cm (1.5" x 0.7")
6
7
Page 5

1. Appuyez sur la touche ON/OFF (MARCHE/ARRÊT)
pour lancer l’appareil.
(Aucune autre touche ne peut activer le FW2000 / FW2000MK.)
2. Choisissez l ’échelle de température voulue pour
l’affichage de l’appareil.
– Appuyez sur la touche F pour afficher les relevés Fahrenheit ou
– Appuyez sur la touche C pour afficher les relevés Celsius.
3. Insérez la sonde dans l’article à tester.
Notes spéciales :
• Si la température mesurée est stable (ne change pas par
2°C (3°F)) pendant 1-1/2 minutes, l’appareil s’éteint
automatiquement.
• Lorsque la pile doit être remplacée, trois points décimaux
clignotants (...) apparaissent sur l’affichage ACL. Ceci signifie
qu’il ne reste que 8 heures d’utilisation de pile. Lorsque la
tension de la pile diminue, « b.A.t. » apparaîtra en plus de
3 signes décimaux clignotants.
• Si l’appareil présente un relevé à l’extérieur de sa plage
(-73° à 537°C)(-100° à 999°F), il y aura alors un affichage soit
“HI” (“Élevé”) ou “LO” (“Bas”), selon le cas.
• L’appareil a une fonction de marche « continue ». Pour activer,
l’appareil doit être en marche. Gardez la touche Atkins enfoncée
et appuyez et dégagez la touche ON/OFF (MARCHE/ARRÊT).
Pour désactiver, appuyez sur la touche ON/OFF et l’appareil
s’éteindra.
Pour calibrer l’appareil, la température de la solution de test utilisée doit être à 0°C (32°F) ±2°C (±5°F) ou doit dépasser 16°C
(60°F). Pour de meilleurs résultats, utilisez un bain glacé presque
entièrement composé de glace concassée avec un peu d’eau
seulement. Procédez comme suit :
1. Mettez l’appareil en marche.
2. Placez la sonde dans la solution de test.
ON
OFF
F
C
Appuyez sur les touches pour
activer / désactiver l’appareil.
Nota: L’appareil s’arrêtera automatiquement
après 1-1/2 minutes d’inactivité.
Appuyez sur les touches pour choisir
l’échelle Fahrenheit.
Durant la calibration, appuyez pour augmenter
la température affichée.
Appuyez sur les touches pour choisir
l’échelle Celsius.
Durant la calibration, appuyez pour diminuer
la température affichée.
Touche Atkins. Utilisée comme bouton de
“Hold” (“Maintien”) durant la calibration seulement.
INSTRUCTIONS
D’OPÉRATION
LES TOUCHES
OPÉRATION NORMALE
CALIBRATION
CALIBRATION
3. Enfoncez et gardez les touches F et C enfoncées
jusqu’à ce que “CAL” soit affiché. Ceci prend environ
3 secondes. Vous êtes maintenant en mode de calibration.
4. Laissez aller les deux touches. “CAL” sera alors remplacé
par “Hold” (“Maintien”).
5. Appuyez sur la touche Atkins et gardez–la enfoncée.
« Hold » (tenir) sera remplacé par trois signes décimaux (…) avec le
relevé de température actuelle.
6. Tout en tenant la touche Atkins enfoncée, appuyez sur les
flèches vers le haut et vers le bas (F ou C), suivant le cas.
Par exemple, si vous utilisez la méthode du bain de glace et si
votre relevé est à 35°F, appuyez et relâchez la flèche vers le
bas autant de fois que nécessaire pour atteindre un affichage
de “32F” sur l’ACL.
7. Lorsque les réglages sont terminés ou s’il n’y a aucune
calibration nécessaire, vous n’avez qu’à tenir la touche
Atkins enfoncée jusqu’à ce que vous voyiez “End” (“Fin”)
affiché sur l’ACL (environ 7 secondes), puis l’appareil
reviendra au mode NORMAL. Laissez aller la touche
Cooper.
Notes spéciales :
• Si vous ne gardez pas la touche Aktins enfoncée en tous
temps durant la calibration, vous sortirez du mode et vous lirez
« Abrt » (abandonner). Pour corriger ce problème, relancez tout
simplement le processus de calibration à l’étape 1 de la section
de Calibration.
• Si l’appareil ne peut être recalibré avec la méthode du bain glacé,
vous pouvez régler l’appareil aux configurations de l’usine. Pour
ce faire, en mode CAL et en tenant toujours la touche Atkins
enfoncée, appuyez sur les touches F et C pendant 3 secondes
pour choisir les réglages par défaut de l’usine. “FAC” apparaîtra à
l’affichage ACL pendant 2 secondes.
MODE DE MAINTIEN
Si “Hold” (“Maintien”) est affiché à l’ACL tandis que l’appareil est
en marche, cela signifie qu’une erreur s’est produite. Pour la
corriger, appuyez sur la touche Atkins et ceci ramènera l’appareil
à la calibration précédente.
ESPECIFICACIONES / CARACTERÍSTICAS
FW2000 Thermocouple Gamme de températures :
FW2000MK Thermocouple Gamme de températures :
Sonde - Gamme de températures :
Plage de fonctionnement ambiant :
Exactitude de -37° à 177°C (-35° à 350°F)
dans ambiant 16° à 27°C (60° à 80°F) :
Exactitude de toutes autres gammes :
Résolution d’affichage de température :
Pile :
Durée de vie de la pile :
Pile faible :
Arrêt automatique :
ACL :
-73° à 260 °C (-100° à 500 °F)
-73° à 537 °C (-100° à 999 °F)
-73° à 260 °C (-100° à 500 °F)
-18° à 46 °C (0° à 115 °F)
±0.5 C° (1 F°)
±1 C° (2 F°)
1 °C ou 1 °F
9 volts alcaline NEDA 1604
Minimum de 500 heures de
temps en fonction
ACL affiche une série de trois
points décimaux clignotants
lorsqu’il reste 8 heures de vie de
pile
Après 1-1/2 minutes de non–
utilisation
Affichage à cristaux liquides avec
chiffres de 1,27 cm (0.5") de hauteur; secteur de visionnement 3,81
x 1,77 cm (1.5" x –0.7")
89
Page 6

ON
OFF
F
C
DEUTSCH
DDIIEE TTAASSTTEENN
Taste zum Aktivieren/Deaktivieren der
Einheit drücken. Hinweis: Die Einheit schal-
tet automatisch aus, wenn sie 1-1/2 Minuten
lang nicht aktiv ist.
Taste drücken, um Grad Fahrenheit zu
wählen. Taste während des Kalibrierens
drücken, um die angezeigte Temperatur zu
erhöhen.
Taste drücken, um Grad Celsius zu
wählen. Taste während des Kalibrierens
drücken, um die angezeigte Temperatur zu
verringern.
Atkins-Taste. Wird nur während des
Kalibrierens als „Halte" Taste verwendet.
NNOORRMMAALLBBEETTRRIIEEBB
1. Einheit durch Drücken der ON/OFF Taste einschalten.
(Die FW2000 / FW2000MK werden durch keine andere Taste aktiviert.)
2. Temperatureinheit für das Display wählen.
-- zum Ablesen in Grad Fahrenheit die F Taste drücken, oder
-- zum Ablesen in Grad Celsius die C Taste drücken.
3. Fühler in das zu prüfende Material eintauchen.
Besondere Hinweise:
• Wenn die gemessene Temperatur stabil ist (verändert sich innerhalb
1-_ Minuten um nicht mehr als 2°C (3°F)), dann schaltet die Einheit
automatisch aus.
• Wenn die Batterie ersetzt werden muss, erscheinen drei blinkende
Dezimalpunkte ( . . . ) auf der LCD-Anzeige. Dies bedeutet, dass die
Batterie noch 8 Stunden Reserve hat. Wenn die Batteriespannung weiter absinkt, erscheint „b.A.t." mit drei blinkenden Dezimalpunkten.
• Wenn eine Messung den Bereich über-/unterschreitet (-73° bis 537°C)
(-100° bis 999°F), erscheint „HI" oder „LO" in der Anzeige.
• Die Einheit hat eine „laufende" Funktion. Diese kann im eingeschalteten
Zustand des Geräts aktiviert werden. Während die Atkins Taste gedrückt
wird, muss dazu die ON/OFF Taste gedrückt und losgelassen werden.
Zum Deaktivieren und Ausschalten der Einheit wieder die ON/OFF Taste
drücken.
KKAALLIIBBRRIIEERREENN
Zum Kalibrieren der Einheit muss die Temperatur der dazu verwendete
Prüflösung 0°C (32°F) ±2°C (± 5°F) oder höher als 16°C (60°F) sein. Die
besten Resultate werden mit einem Eisbad erzielt, das größtenteils aus
Brucheis und nur einer geringen Menge an Wasser besteht. Wie folgt
vorgehen:
1. Gerät einschalten.
2. Fühler in die Prüflösung eintauchen.
3. Fund C Tasten drücken bis „CAL" angezeigt wird.
Dies erfolgt nach ca. 3 Sekunden. Sie sind dann im Kalibrier-Modus.
KKAALLIIBBRRIIEERREENN -- FFoorrttsseettzzuunngg
4. Beide Tasten freigeben. „CAL" wird auf der Anzeige durch „Hold" erset-
zt.
5. Atkins Taste drücken und gedrückt halten. „Hold" wird durch drei
Dezimalpunkte ( . . . ) mit der aktuellen Temperaturanzeige ersetzt.
6. Während die Atkins Taste gedrückt wird, nach Bedarf die Auf oder Ab
Taste (F oder C) drücken. Zum Beispiel, wenn ein Eisbad verwendet
wird und 35°F angezeigt werden, muss die Ab Taste so oft gedrückt
und losgelassen werden, bis „32F" auf der LCD-Anzeige erscheint.
7. Nach Beenden der Anpassung, oder wenn kein Kalibrieren notwendig
ist, einfach die Atkins Taste gedrückt halten, bis „End" auf der LCDAnzeige erscheint (nach ca. 7 Sekunden) und die Einheit in den NORMAL-Modus zurückkehrt. Atkins Taste wieder frei geben.
Besondere Hinweise:
• Der Modus wird verlassen und „Abrt" angezeigt, wenn die Atkins Taste
während des Kalibrierens nicht die ganze Zeit gedrückt bleibt. Einfach
das Kalibrieren von neuem bei Schritt 1 beginnen.
• Wenn das Gerät nicht mit der Eisbad-Methode neu kalibriert werden,
kann es auf die Werkseinstellungen rückgesetzt werden. Dies erfolgt im
CAL Modus während die Atkins Taste noch gedrückt bleibt, durch 3
Sekunden langes Drücken der F und C Tasten. Auf der LCD-Anzeige
erscheint 2 Sekunden lang „FAC".
HALTE-MODUS
Wenn beim Einschalten „Hold" auf der LCD-Anzeige erscheint, ist ein
Fehler aufgetreten. Durch Drücken der Atkins Taste wird der Fehler
gelöscht und die Einheit auf die vorangegangene Kalibrierung rückgestellt.
SSPPEEZZIIFFIIKKAATTIIOONNEENN // MMEERRKKMMAALLEE
FW2000 Temperaturbereich: -73° bis 260°C
(-100° bis 500°F)
FW2000MK Temperaturbereich: -73° bis 537°C
(-100° bis 999°F)
Fühler-Temperaturbereich: -73° bis 260°C
(-100° bis 500°F)
Umgebungstemperaturbereich
während des Betriebs: -18° bis 46°C (0° bis 115°F)
Genauigkeit von -37° to 177°C (-35° to 350°F)
bei Temperaturen von 16° to 27°C (60° to 80°F): ±0,5C° (±1F°)
Genauigkeit in allen
anderen Temperaturbereichen: ±1C° (±2F°)
Auflösung der Temperaturanzeige: 1°C oder 1°F
Batterie: 9 Volt Alkali NEDA 1604
Batterie-Lebensdauer: Mindestens 500 Stunden
EIN Zeit
Batterie niedrig: 3 blinkende Dezimalpunkte
werden angezeigt, wenn die
Batterie nur mehr 8
Stunden Reserve hat.
Automatisches Abschalten: Nach 1-_ Minuten ohne
Aktivität
LCD: Flüssigkristallanzeige,
mit 0,5" (1,27 cm)
hohen Digits; Sichtbereich
1,5" x 0,7" (3,81 x 1,77 cm)
BEDIENUNGSANLEITUNG
DDEEUUTTSSCCHH
10
Page 7

1312
Page 8

1514
 Loading...