

Page 1
080806-6OD
Page 2

Table of Contents
Thank you for your purchase. The Auto Feeder Paper Shredder series is a powerful confetti-cut
s
hredder designed to shred high quantities of paper sheets automatically. With its contemporary
design, this shredder also suits any office decor. Equipped with a powerful thermally protected
motor, these models shred up to 550 pages of 8.5” x 11” standard paper or 250 pages of 8.5”
x 14” legal size paper, sheet by sheet, into 2 mm x 15 mm confetti particles. Durable, hardenedsteel cutters accept staples and small paper clips.
The Auto Feeder Paper Shredder also features an electronic auto start/stop function for quick,
easy shredder operation and is designed to shut off automatically and alert operator with
troubleshooting LCD when a jam occurs, wastebasket is full, open door, overheated motor or
any maintenance information.
Cabinet door offers convenient holder for oil and manual while the 80 Liter waste basket
pulls out for easy waste disposal.
1.0 Safety Instructions
2.0 Parts Identification
3.0 Technical Specifications
4.0 Installation
5.0 Caution
6.0 Operation
6.1 Install waste box for shredded material
6.2 Switching equipment “ON”
6.3 Forward / Reverse operation to clear paper jam
6.4 Door Locking
6.4.1 Locking
6.4.2 Unlocking
6.4.3 Cancel Password
6.4.4 Switching equipment “OFF”
7.0 LCD Operation
8.0 Warranty and Product Registration
2
Page 3

1.0 Safety Instructions
1. Read all instructions before use.
2. Save these instructions for later use.
3
. Follow all warnings and instructions marked on the product.
4. Unplug this product from wall outlet before cleaning. Clean with a damp cloth using a mild
soap and water solution. Do not use abrasives or petroleum-based cleaners.
5. Place this product as close as possible to power source for quick and easy unplugging.
6. The device is equipped with a power switch. Always turn off the power switch before
removing it from the cabinet. For higher safety unplug the power cord. Always disconnect
the power cord before opening the case.
7. Do not use this product near water.
8. This product should never be placed near a radiator or heat source.
9. Operate from the type of power source indicated on the marking label. If you are not sure
of the type of power available, consult your dealer or local electricity board.
10. Do not allow anything to rest on the power cord. Do not place this product where people
may walk on the cord.
11. If an extension cord is used with this product, make sure that the total of the ampere
ratings on the products plugged into the extension cord do not exceed the extension cord
ampere rating.
12. Do not attempt to service this product yourself as opening or removing covers may
expose you to dangerous live parts or other risks.
13. Unplug this product and refer servicing to qualified technician:
• When the power cord or plug is damaged or frayed.
• If liquid has been spilled on the product.
• If the product has been exposed to rain.
• If the product does not operate normally when the operating instructions are followed.
• If the product has been dropped or casing has been damaged.
14. Keep out of the reach of children.
15. This shredder should be operated only with an operator in attendance.
16. Do not use flammable synthetic oil, petroleum-based products or aerosol of any kind on
or near shredder at any time.
17. Keep the receptacle empty so that the shredder output is not impeded.
18. The machine should only be fed with paper. Shredding other types of materials can cause
injuries or may damage the shredder.
19. Do not place fingers too close to the feed slot as serious injury may occur.
20. Keep all loose articles of clothing, ties, jewelry, long hair or other loose objects away from
opening, injury may result.
Warning: Danger due to moving parts! Keep away fingers and other body parts from openings.
For more information about ID theft protection and to
r
egister your product, please go to www.ShredCare.com
.
3
Page 4
4
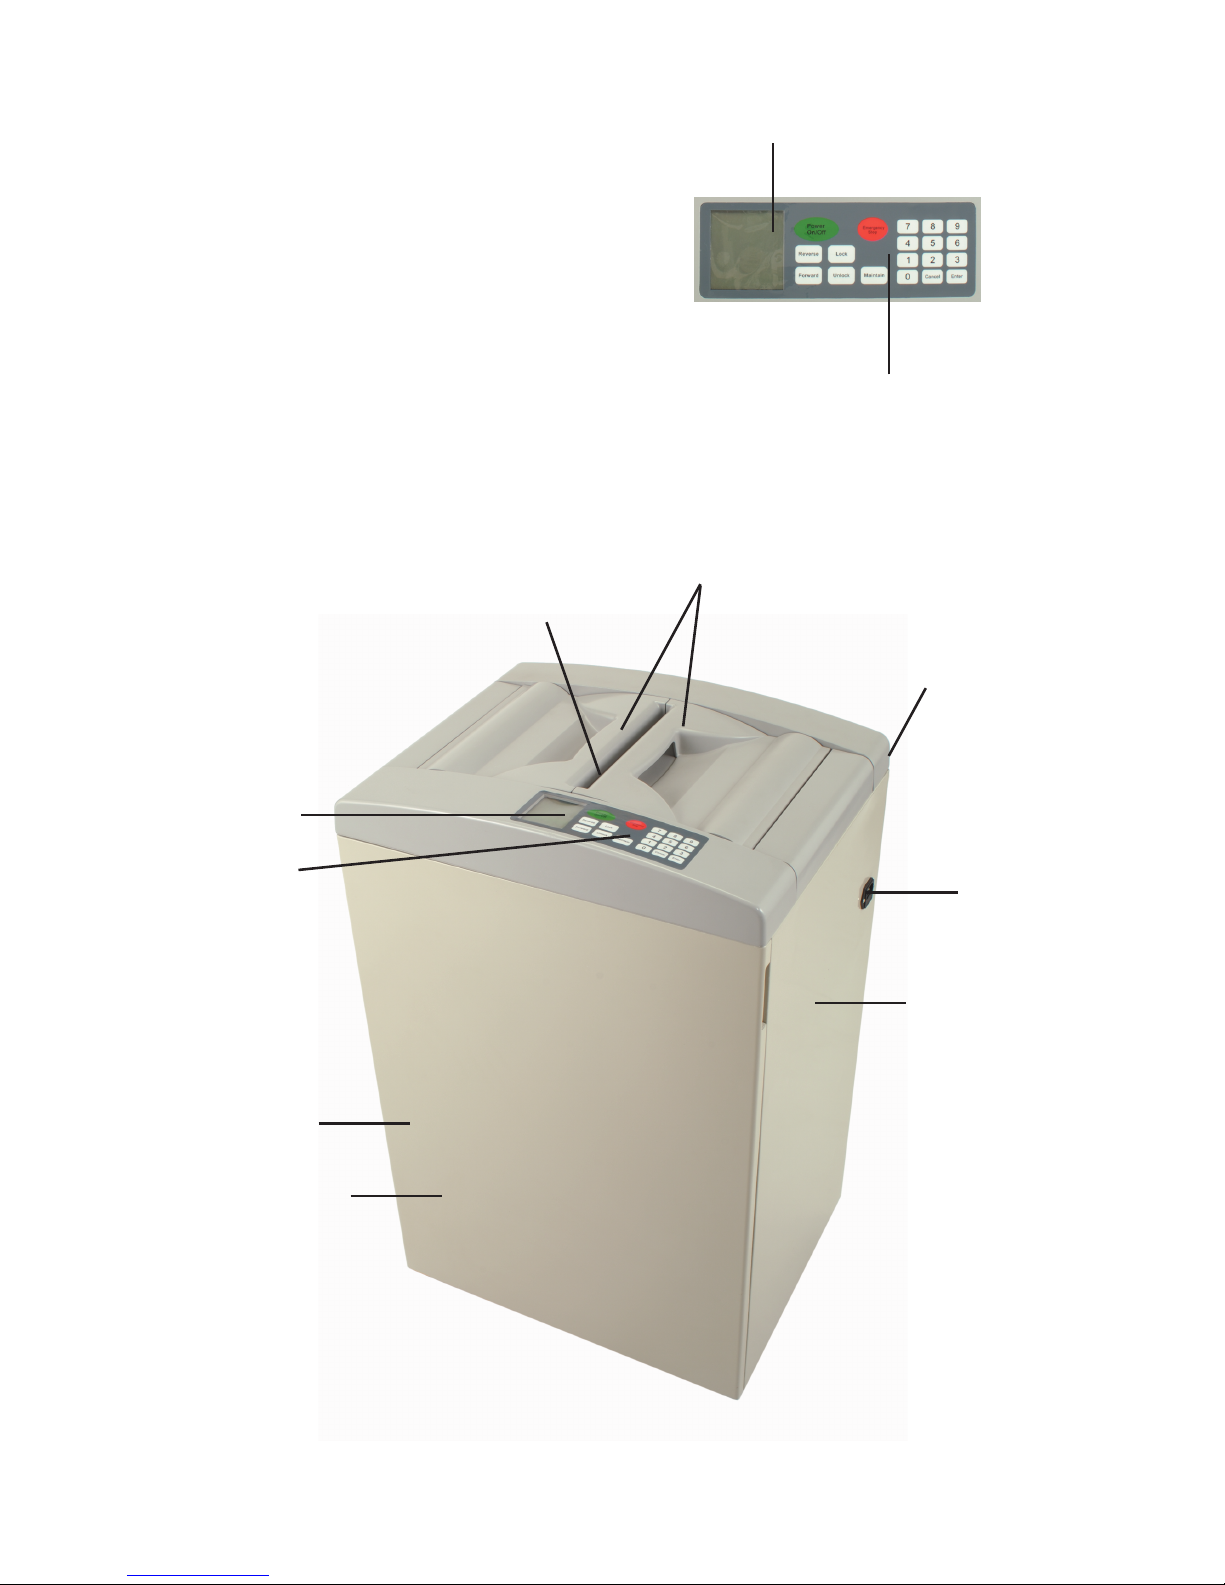
2.0 Parts Identification
1-LCD Panel (Figure 1)
2-Soft push button control panel
• Start
• Stop
• Reverse
• Forward
• Maintain
• Lock
• Unlock
• Security key no. with Enter and Cancel
3-Doors for paper tray
4-Rating plate
5-Power ON/OFF switch
6-Power socket
7-Cabinet
8-Cabinet access door
9-Paper feeding opening
10-Waste basket
Figure 2
Figure 1
L
CD Panel
3
1
2
4
5, 6
7
8
10
9
S
oft push button
control panel
Page 5

5
3.0 Technical Specifications
4.0 Installation
• Refer to set-up instructions printed on carton box for proper assembly.
• Operate this product only from the type of power source indicated on the marking label.
• Install the paper shredder so that the plug is easily accessible.
• Shredder must be operated only in upright position.
• Set up paper shredder so that the ventilation slots are unobstructed. To ensure
sufficient ventilation of the shredder a minimum distance of 5cm to the wall or to
furniture must be maintained.
5.0 Caution
Never insert hand, fingers or any foreign objects into the feed opening. Serious injury
may result.
Keep all loose articles of clothing, ties, jewelry, long hair or other loose objects away
from feed opening. Injury may result.
Always turn off and unplug the machine before moving, servicing, cleaning or any
other conduct other than normal operation. Serious injury may result.
Model DMC- 5000C
Cutting style Confetti Particle Cut
Shred Size 2 mm x 15mm
Sheet capacity 500-sheet autofeed
6-sheet manual feed
Speed 64 mm/s
Intake throat width 240 mm
Motor power 0.4 hp
Voltage 120V / 60Hz
Dimension (L x W x H) 545 x 430 x 910 mm
Weight 52 kg
Receptacle volume 83 liters
Noise level In idle < 60dB(A)
Page 6
6
6.0 Operation
Read operating instructions before putting shredder into operation
Connect power cord to the power socket at the backside of the machine.
Connect the power cord to any standard 120V AC, 60Hz outlet.
6.1 Install wastebasket for shredded material
• Open cabinet door and pull the wastebasket completely out of the cabinet.
• Put plastic waste bag in basket (3 sample bags provided). Allow bag edges to overhang.
• Slide the wastebasket into the cabinet and shut the cabinet door
• Store this operation manual in slot inside cabinet door
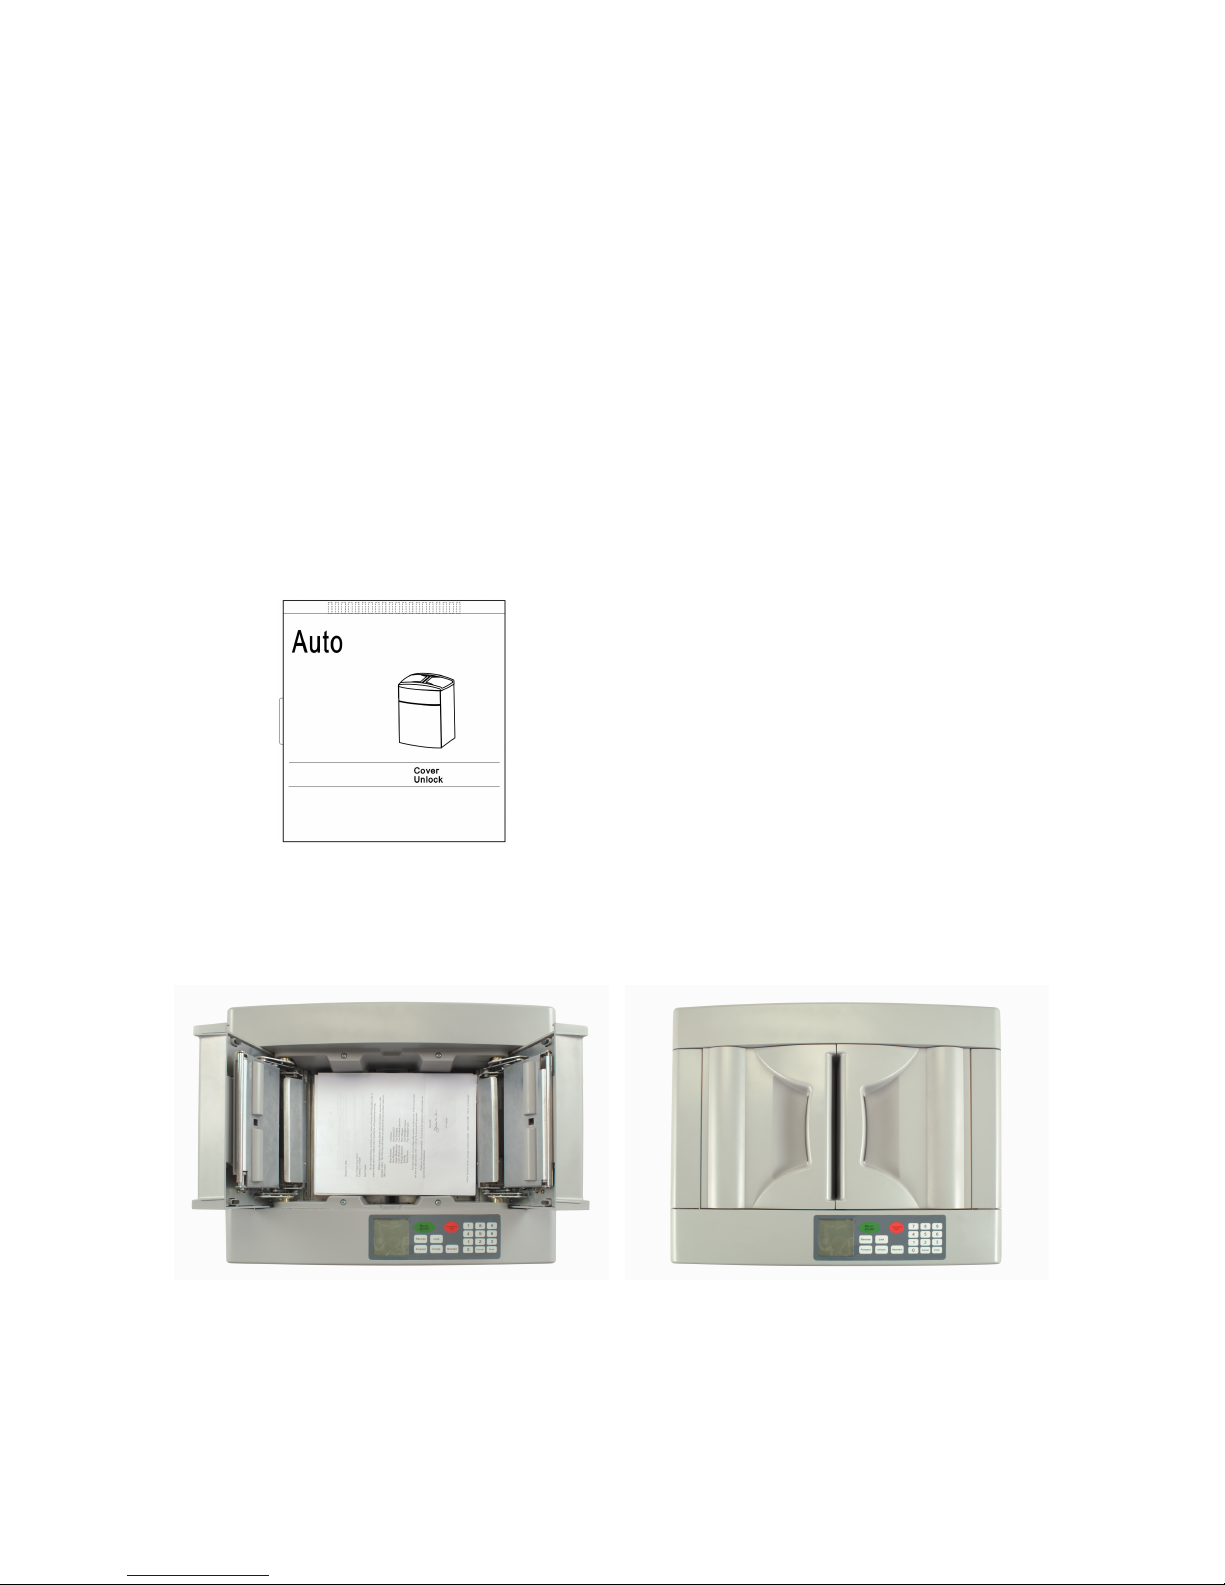
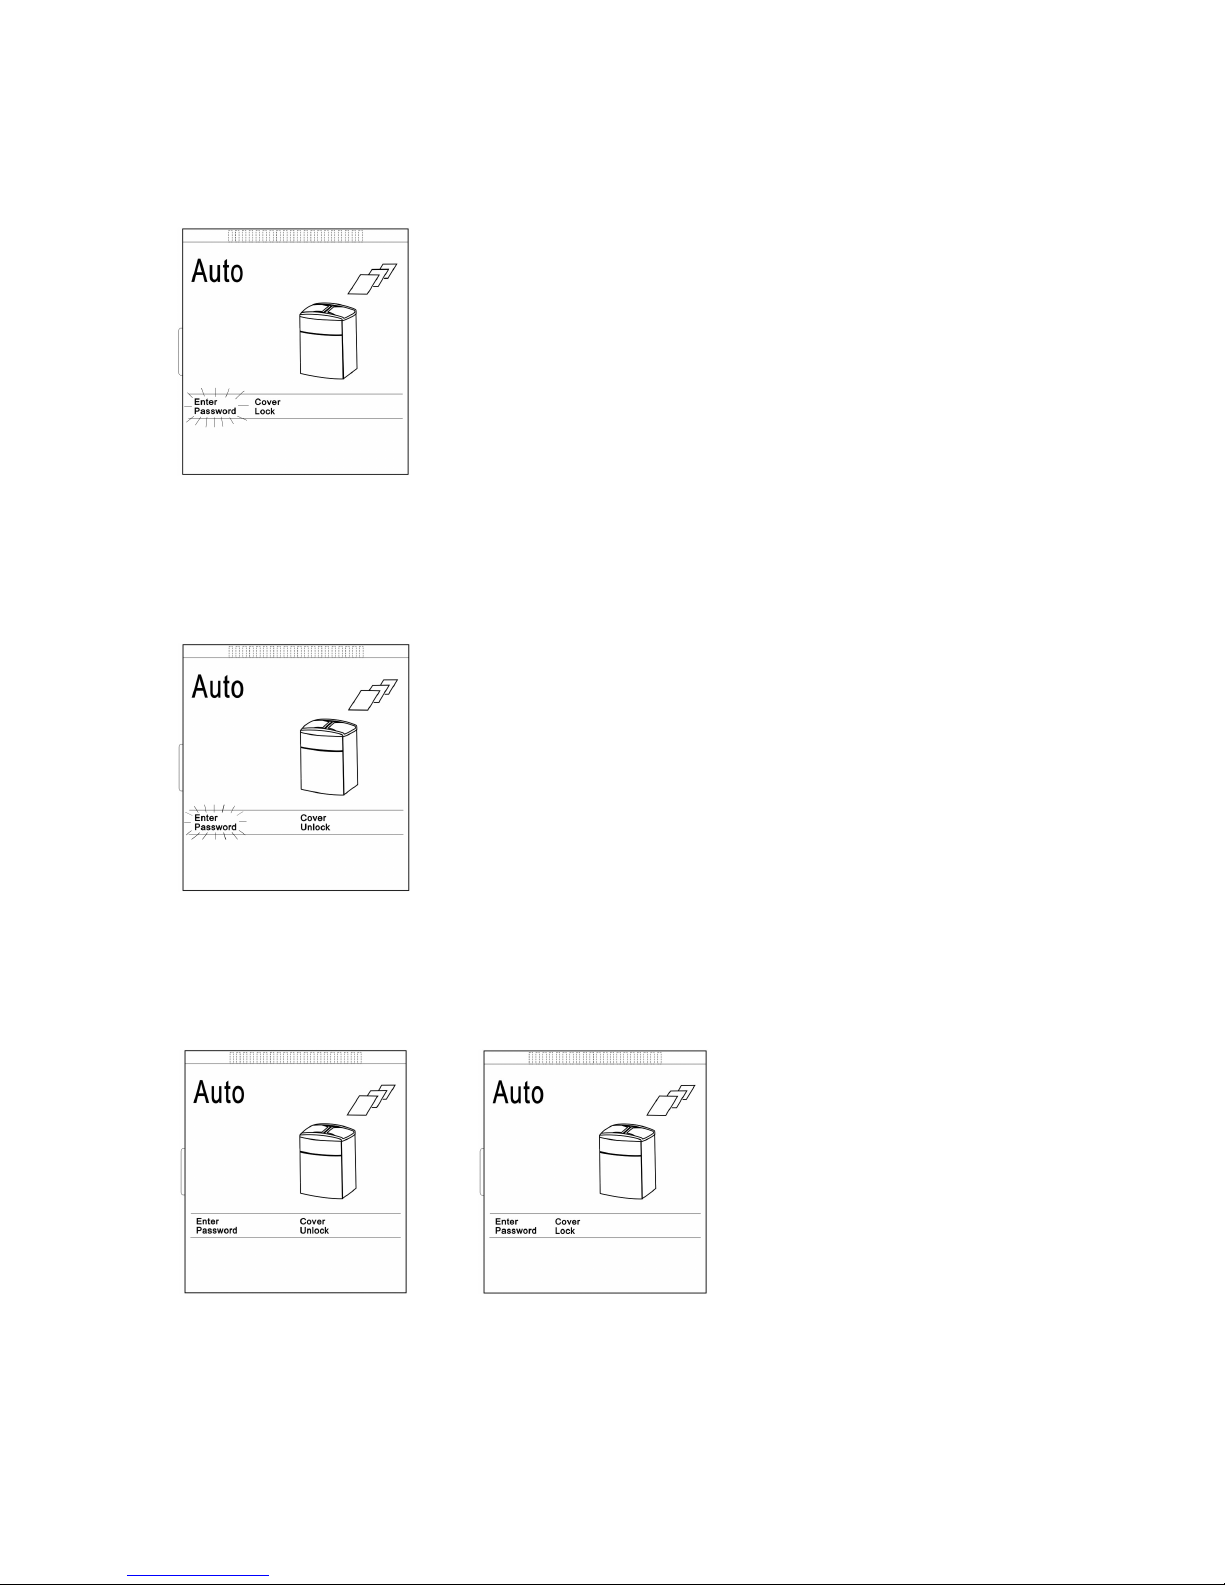
6.2 Switching equipment “ON”
• Turn on the power switch at right side of the machine. The unit is powered.
• The LCD panel indicates machine is ready for shredding operation. (Figure 3)
Note: The display indication is always
shown for unlocked paper tray doors.
Open doors
Place maximum of 500 sheets of
paper into the paper tray
.
Close doors
Pr
ess “START” button. The machine
star
ts shredding sheet by sheet.
Figure 3
When the shredding of all paper sheets inside the tray has been completed,
the machine automatically stops.
Depending on the quantity of paper the shredding operation can be performed
either by auto or manual feeding:
1. Auto feed at high quantity of paper (max 500 sheets)
Page 7
7
2. Manual feed at low quantity of paper (max 6 sheets)
The shredding process is started by photocells in the paper feed opening. Insert a
maximum of 6 sheets of paper into the paper feed opening; shredding begins
automatically. When shredding is complete, the cutting system automatically stops
after approximately 3 seconds.
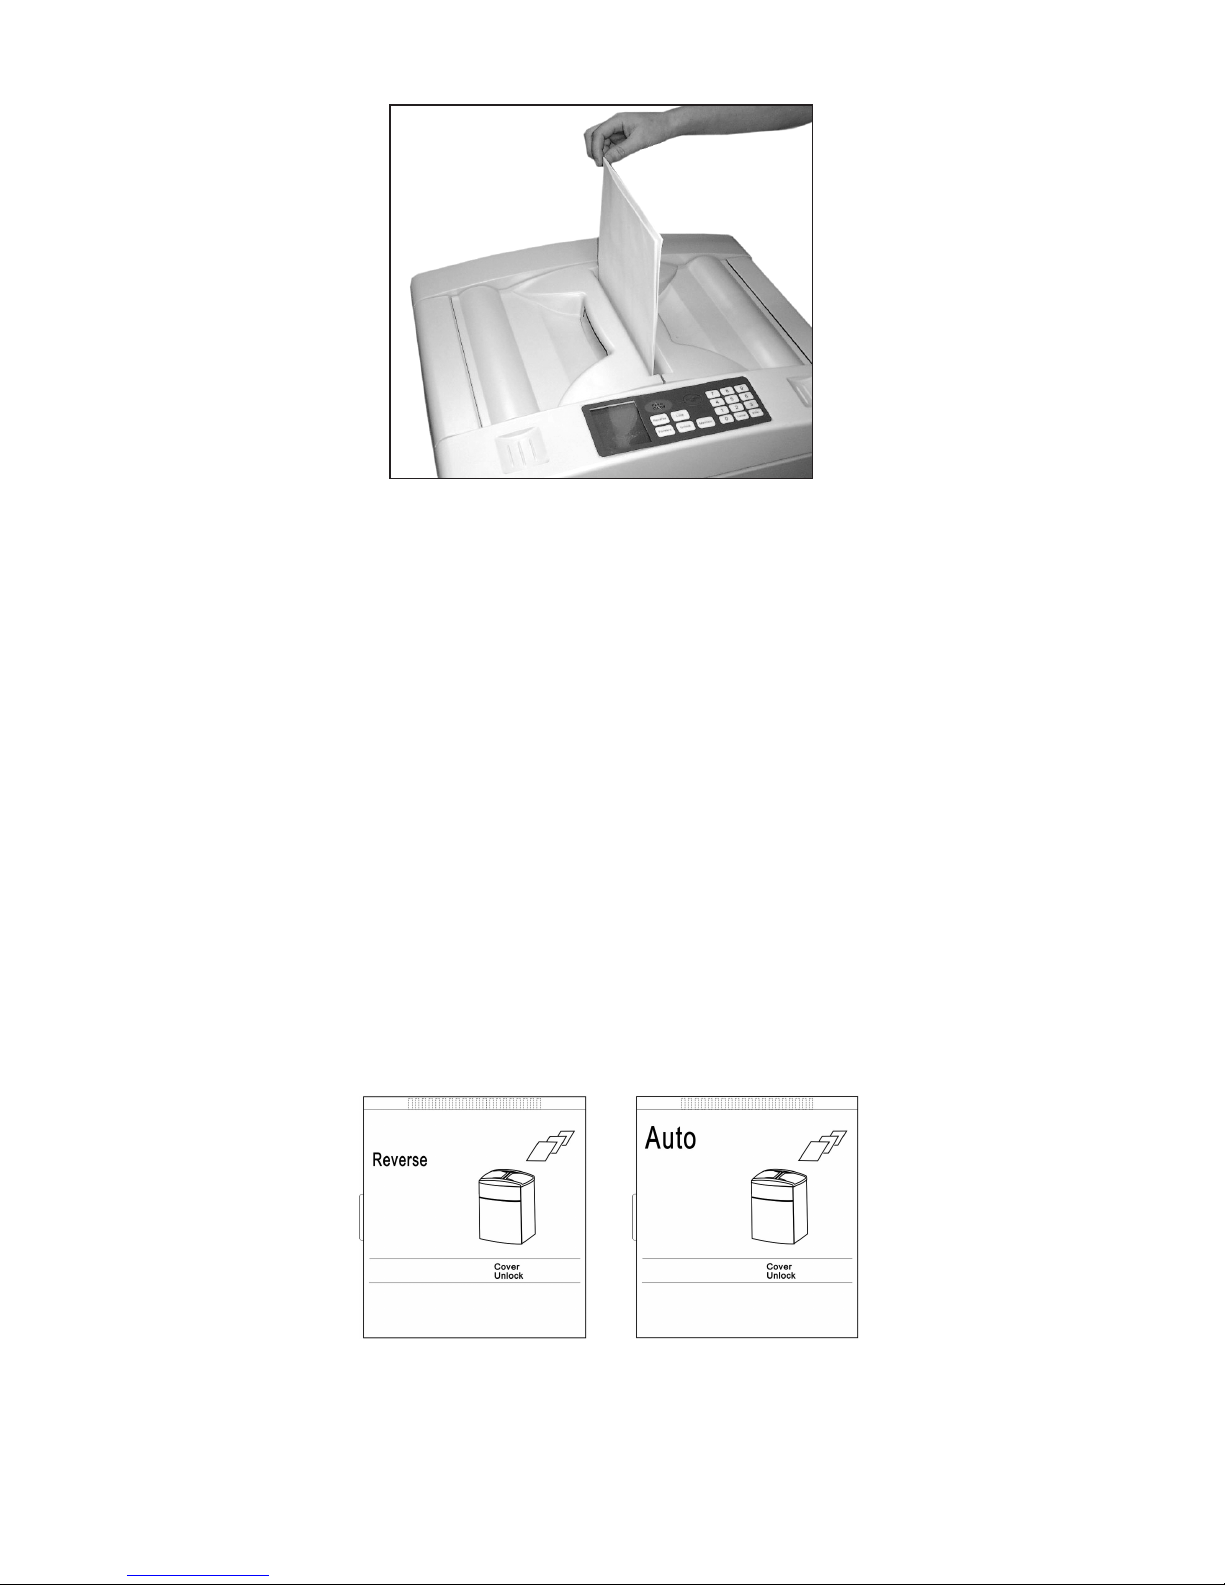
6.3 Forward/Reverse operation to clear paper jam
If paper jam occurs press and hold the “Reverse” button to back paper out of the
paper entry. Try pulling gently on the paper to remove it from the shredder. Alternate
between forward and reverse, as needed, until the jam clears.
Caution: The shredder may be damaged if you alternate too rapidly between
forward and reverse.
Unplug shredder, open cabinet door and remove wastebasket. Carefully clear any paper
shreds that have collected on underside of paper entry. Use care when removing paper
shreds.
Caution: The machine has exposed blades on underside of paper entry.
Use care when removing shredded paper.
LCD at reverse operation LCD at forward operation
Page 8
8
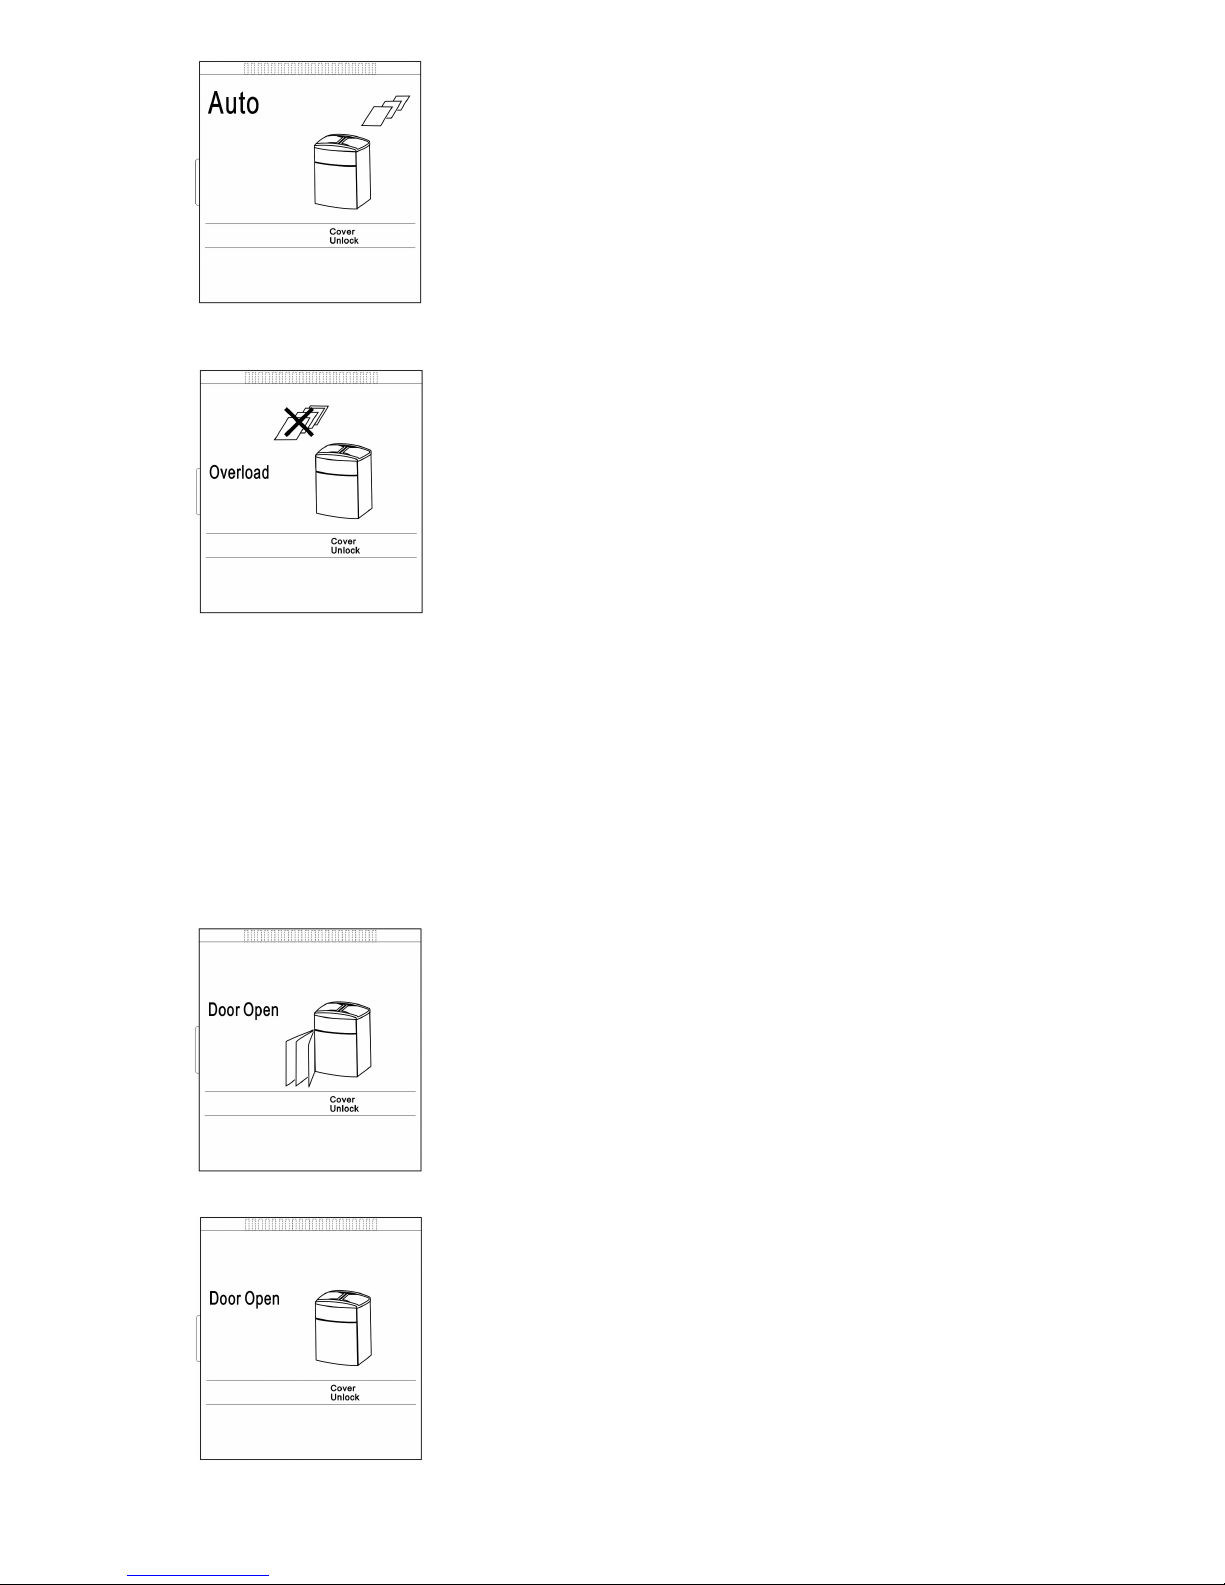
6.4 Door Locking
The doors can be locked to avoid confidential papers from being taken out of the
paper tray by other people.
6.4.1. Locking
When “Lock” button is pressed, the following appears on LCD:
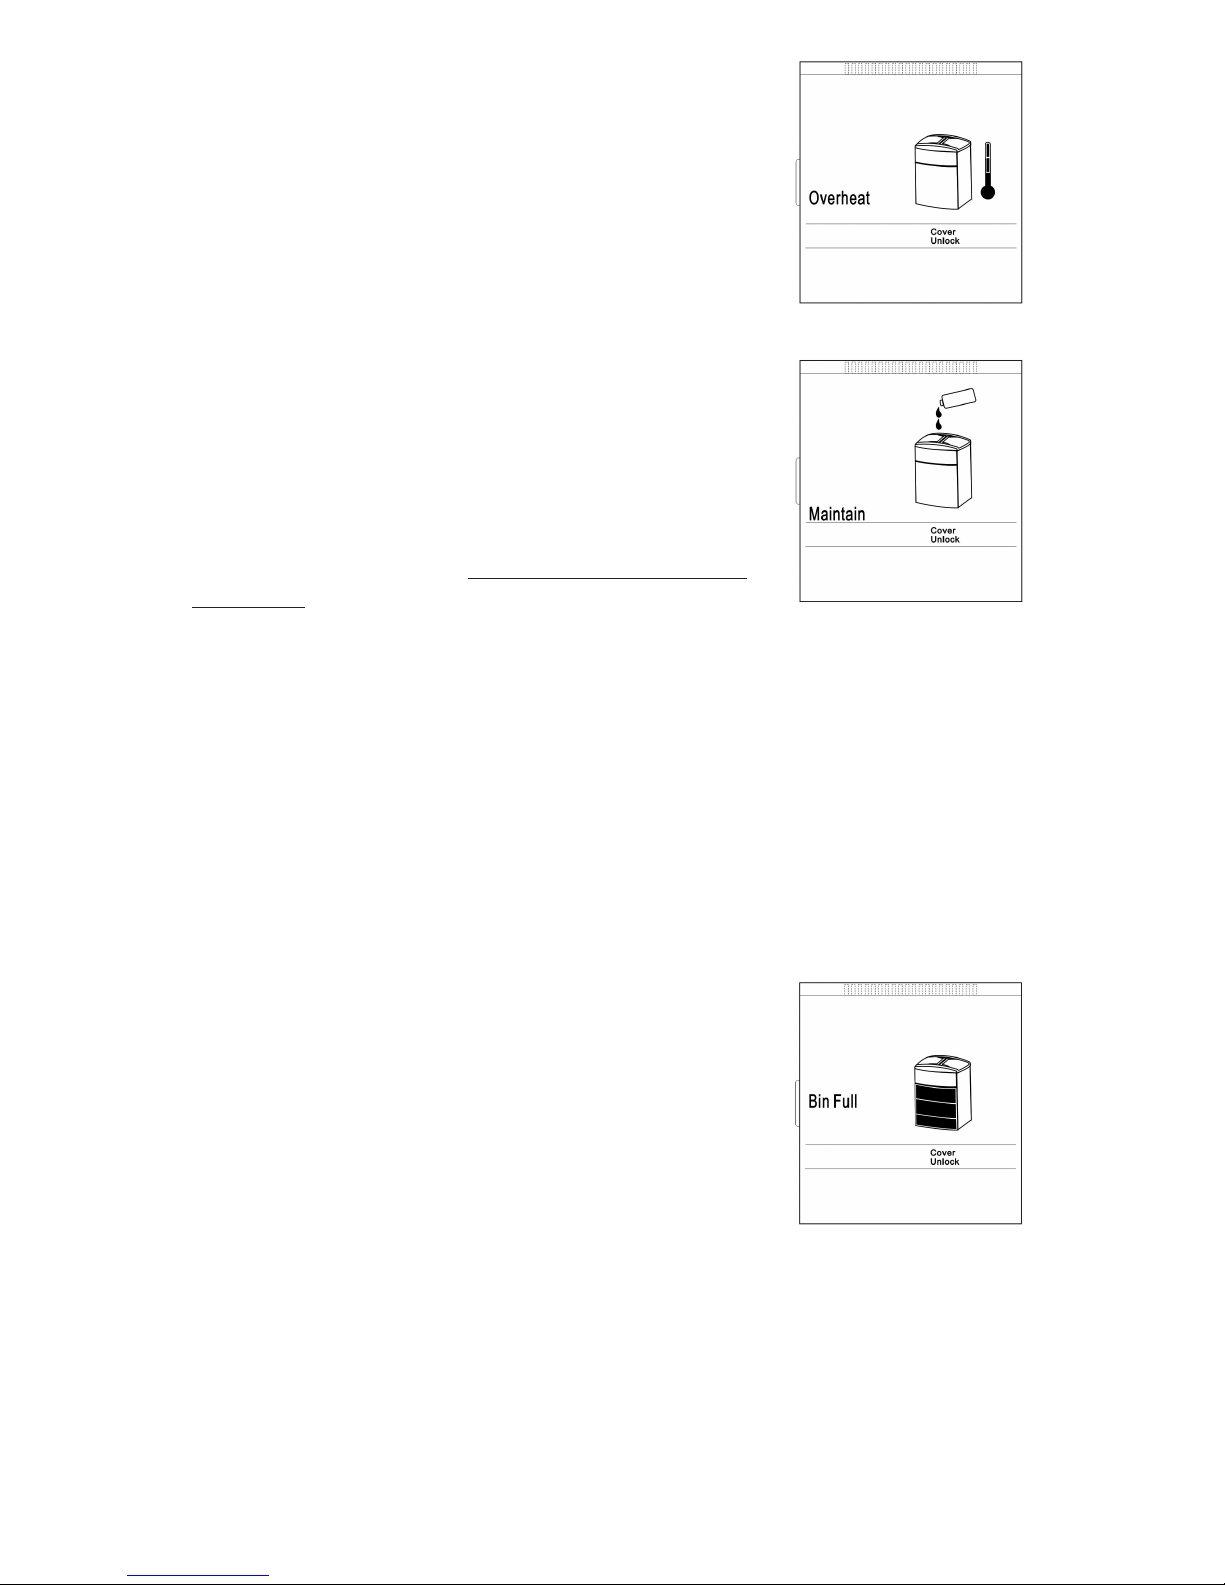
6.4.2. Unlocking
When “Unlock” button is pressed, the following appears on LCD:
6.4.3. Cancel Password
If the locking or unlocking process needs to be interrupted, press the “Cancel”
button. The locking or unlocking process will be cancelled.
6.4.4. Switching equipment “OFF”
Press “STOP” button. The machine stops shredding, however, it is still
power
ed. T
urn off the power switch at right side of the equipment.
The machine is power
ed of
f.
On display, “Enter Password” is flashing. Enter 4-digit password.
Be sure to remember the password. The code is displayed. Press
“Enter” button.
On display the indication “Cover Unlock” changes to “Cover Lock”.
During the locking process “Cover Lock” in the display is flashing.
Both doors will be locked mechanically. The locking process takes
approximately 3 seconds. After the locking process is completed,
the flashing of “Cover Lock” on display changes into steady.
If the locking process cannot be completed within 7 seconds
the entire locking process is cancelled.
On display, “Enter Password” is flashing. Enter the 4-digit
password. The code is displayed. Press “Enter” button.
On display the indication “Cover Lock” changes to
“Cover Unlock”.
During the unlocking process “Cover Unlock” flashes in the
display. Both doors will be unlocked mechanically. The
unlocking process takes approximately 3 seconds. After the
unlocking process is completed, the flashing of “Cover
Unlock” on display changes into steady.
If the input of any
password digits is wrong
during the Locking or
Unlocking process, press
“Lock” or “Unlock”
button. The password is
reset again.
Page 9

9
7.0 LCD Operation
Powering ON
The master power switch is located on the right side of
the cabinet. When the switch is turned on, the LCD
shows AUTO and the machine enters into AUTO mode.
In the Auto mode, the shredder stands ready to shred
paper either by auto or manual feed.
START Mode
When pressing the Start button, the machine starts and
paper is fed automatically sheet by sheet into the
shredder. The LCD shows AUTO with paper feeding.
STOP Mode
When pressing the Stop button, the machine stops.
The LCD displays flashing STOP character.
REVERSE Mode (In Auto Mode)
When pressing the Reverse button during Auto Mode
operation, the LCD shows Reverse and the motor enters
the Reverse mode. Press and hold the Reverse button in
order to keep the motor running in reverse. When the
Reverse button is released, the machine returns to Auto
mode and the display will show Auto.
REVERSE Mode (In Stop Mode)
When pressing the Reverse button during Stop Mode,
the LCD shows Reverse and the motor enters the
Reverse mode. Press and hold the Reverse button in
order to keep the motor running in reverse. When the
Reverse button is released, the machine returns to Stop
Mode and the LCD displays flashing Stop character.
Page 10
10
FORWARD Mode
When pressing the Forward button during Stop mode,
the LCD displays Auto and the motor enters the
Forward mode. Press and hold the Forward button in
order to keep the motor running in forward. When the
Forward button is released, the machine returns to Stop
mode and the LCD displays flashing Stop character.
OVERLOAD Mode
When the shredder overloads during shredding, the
motor will stop running and sound alert. The LCD will
show Overload and will flash the Overload icon.
Pressing the Reverse button will start the motor
reversing and the LCD will show Reverse. When the
overloaded paper is removed from the throat, the
motor will start running for three seconds to clear any
remaining paper particles. After the motor stops, the
LCD will show Auto.
If user cannot remove the paper from the throat by
pressing the Reverse button, tear off the remaining
paper and press Forward button to start shredding
again and clean out the paper. Repeat the above
process until the paper is completely removed and the
LCD displays Auto.
DOOR OPEN Mode
When the cabinet access door (#8 in Figure 2) is opened
while shredding, the motor will stop immediately. The
LCD shows Door Open and will flash cabinet access
door open symbol and sound alert. To resume normal
function, the door must be closed. The LCD will show
Auto again. The machine must restart again.
PAPER TRAY DOOR OPEN Mode
When the paper tray doors (#3 in Figure 2) are opened
while shredding, the motor will stop immediately. The
LCD shows Door Open and will flash paper tray door
open symbol and sound alert. To resume normal
function, the doors must be closed. The LCD will show
AUTO again.
Page 11
11
OVERHEAT Mode
If the shredder overheats, the LCD shows Overheat and
will flash Overheat symbol. All functions will stop. When
the shredder overheats, user may press Stop button to
place the shredder in Stand by mode. The shredder will
not resume normal functioning until the temperature of
the motor cools down to a safe temperature and LCD
shows Auto.
MAINTAINENCE
After approximately shredding of 500 sheets of paper,
the LCD will show the character Maintain and flash
maintain symbol. This indicates that the shredding
blades need to be lubricated using an approved
shredder lubricant. Only shredder lubricant sheets or
bottled lubricant designed specifically for shredders
should be used. Follow the instructions provided with
the shredder lubricant. NEVER USE AN AEROSOL
LUBRICANT, or any lubricant that is flammable. Refer to
the warnings provided in your shredder manual.
The shredder will continue to operate in a normal
manner while the Maintain icon is flashing. After
applying lubricant to the cutting blades, the Maintain
icon can be deactivated by pressing and holding the
maintain button for approximately 7 seconds. The LCD
will clear the word Maintain, and the internal counter
on the shredder will be reset to zero.
BIN FULL Mode
If the bin is full, the motor will stop and sound alert.
LCD shows the character Bin Full and flash bin full
symbol. All shredder functions will stop. If the cabinet
door is open, the LCD will show the character Door
Open and flash door open symbol. After the bin is
emptied, placed back into cabinet and the door is
closed, the LCD will show AUTO and resume normal
functioning. The machine must restart again.
Page 12

12
8.0 Warranty and Product Registration
The manufacturer warrants the machine for a limited time to be free from
defects in material and workmanship. If any part is found to be defective
during the warrant period, your sole and exclusive remedy will be repair or
replacement, at the manufacturer’s option and expense, of the defective part
except
for the postage that is the responsibility of the consumer to return the
machine to the manufacturer.
This warranty is valid for the original consumer only with original proof of
purchase and is not transferable. This warranty does not apply in cases of
abuse, mishandling or unauthorized repair. ANY IMPLIED WARRANTY,
INCLUDING THAT OF MERCHANTABILITY OR FITNESS FOR A PARTICULAR
PURPOSE, IS HEREBY LIMITED IN DURATION TO THE APPROPRIATE WARRANTY
PERIOD SET FORTH ABOVE. In no event shall the manufacturer be liable for
any consequential or incidental damages attributable to this product.
This warranty gives you specific legal rights. You may have other legal rights
that vary.
Repairs must be performed by the manufacturer’s authorized technician.
For more details or to obtain service under this warranty, please contact us
at 866-707-9502.
Please retain original proof of purchase and to ensure that your product is
recorded and warranty information received, register your product at
www.ShredCare.com today.
Return Instructions
1. Call 866-707-9502 for a Return Authorization Number (RA#).
2. Pack the product in its original carton, or equivalent, and clearly mark
the box with the RA#.
3. Enclose a copy of the proof of purchase showing original purchase date.
4. Enclose a note describing the difficulty you have had with product.
Be sure to include your complete name, address and phone number.
5. Mail the above prepaid to the address provided by the manufacturer
with the RA #.
Call first for approval.
Note: Consumers must call 866-707-9502 to obtain a RA# in order to return
a defective product.
Page 13

13
Page 14

14
Table des matières
Nous vous remercions pour votre achat. Cette robuste déchiqueteuse à coupe confetti de la
g
amme alimentation automatique est conçue pour déchiqueter automatiquement de grandes
quantités de feuilles de papier. Dotée de lignes contemporaines, elle s’agence à tout décor de
bureau. Équipés d’un puissant moteur protégé thermiquement, ces modèles déchiquettent
jusqu’à 550 feuilles de taille standard de 8 _ x 11 po ou 250 feuilles grand format de 8 _ x
14 po, feuille par feuille, en particules de 2 mm x 15 mm. Ses couteaux durables en acier
t
rempé peuvent déchiqueter agrafes et petits trombones.
La déchiqueteuse de documents à alimentation automatique comprend également une
fonction de marche/arrêt automatique électronique pour un fonctionnement facile et rapide;
elle est conçue pour s’arrêter automatiquement et aviser l’utilisateur, par son afficheur ACL,
s’il se produit un entassement du papier, si la corbeille est pleine, la porte est ouverte, le
moteur surchauffe et lui communiquer tout autre renseignement au sujet de l’entretien.
La porte du boîtier comprend un rangement pratique pour le lubrifiant et le manuel tandis
que la corbeille de 80 litres se retire pour être vidée facilement.
1.0 Consignes de sécurité
2.0 Identification des pièces
3.0 Spécifications techniques
4.0 Installation
5.0 Avertissement
6.0 Fonctionnement
6.1 Installation de la corbeille pour le papier déchiqueté
6.2 Mise en marche de l’appareil
6.3 Fonction de marche avant/arrière pour dégager le papier coincé
6.4 Verrouillage de la porte
6.4.1 Verrouillage
6.4.2 Déverrouillage
6.4.3 Annulation du mot de passe
6.4.4 Mise hors tension de l’appareil
7.0 Fonctionnement de l’afficheur ACL
8.0 Garantie et enregistrement du produit
Page 15

15
1.0 Consignes de sécurité
1. Lisez toutes les instructions avant l’utilisation.
2. Conservez ces instructions pour référence future.
3. Respectez tous les avertissements et toutes les instructions inscrits sur cet appareil.
4
. Débranchez cet appareil de la prise murale avant de le nettoyer. Nettoyez avec un chiffon
et une solution d’eau et de savon doux. N’utilisez pas de nettoyants abrasifs ou à base
de pétrole.
5. Placez cet appareil aussi près que possible de la source d’alimentation pour pouvoir
le débrancher rapidement et facilement.
6. Cet appareil est muni d’un interrupteur d’alimentation. Mettez toujours l’appareil hors
tension avant de la retirer du boîtier. Pour encore plus de sécurité, débranchez le cordon
d’alimentation. Débranchez toujours le cordon d’alimentation avant d’ouvrir le boîtier.
7. N’utilisez pas cet appareil à proximité de l'eau.
8. Cet appareil ne devrait jamais être placé à proximité d’un radiateur ou d’une source
de chaleur.
9. Faites-le fonctionner selon le type de source d’alimentation indiquée sur l’étiquette. Si vous
n’êtes pas certain du type d’alimentation disponible, consultez votre distributeur ou
la régie de l’électricité de votre localité.
10. Ne laissez aucun objet appuyer sur le cordon d’alimentation. Ne placez pas cet appareil
dans un endroit où les gens pourraient marcher sur le cordon.
11. Si une rallonge électrique est utilisée avec cet appareil, assurez-vous que l’intensité
nominale totale des appareils branchés dans la rallonge n’excède pas l’intensité nominale
de la rallonge électrique.
12. Ne tentez pas de réparer vous-même cet appareil, car si vous ouvrez ou retirez
les couvercles, vous pourriez être exposé à des parties sous tension ou à d’autres risques.
13. Débranchez cet appareil et confiez les réparations à un technicien qualifié :
• Lorsque le cordon d’alimentation ou la fiche sont endommagés ou effilochés.
• Si un liquide a été renversé sur l’appareil.
• Si l’appareil a été exposé à la pluie.
• Si l’appareil ne fonctionne pas normalement en suivant le mode d’emploi.
• Si l’appareil a été échappé ou si le boîtier est endommagé.
14. Tenez hors de la portée des enfants.
15. Cette déchiqueteuse devrait être utilisée seulement sous la supervision de l’utilisateur.
16. N’utilisez pas, en aucun temps, d’huile synthétique inflammable, de produits à base de
pétr
ole ou n’impor
te quels types d’aérosols sur ou à proximité de la déchiqueteuse.
17. Videz la corbeille pour ne pas nuire à la sortie du papier déchiqueté.
18. Cet appareil ne devrait être alimenté qu’avec du papier. Le déchiquetage d’autres types
de matériaux pourrait entraîner des blessures ou endommager la déchiqueteuse.
19. Ne placez pas les doigts trop près de la fente d’alimentation, car ceci pourrait causer des
blessures graves.
20. Tenez éloigné de l’ouverture tous vêtements amples, cravates, bijoux, cheveux longs ou
autres objets non attachés, car ceci pourrait causer des blessures.
Avertissement: Danger causé par des pièces mobiles! Tenez les doigts et les autres parties
du corps éloignés des ouvertures.
Pour obtenir de plus amples renseignements concernant
la protection contre l’usurpation d’identité et pour
enregistrer votre appareil, veuillez vous rendre sur le
site www.ShredCare.com.
Page 16

16
2.0 Identification des pièces
1- Panneau à afficheur ACL (le schéma 1)
2- Panneau de contrôle avec boutons
de commande souples
• Marche (Start)
• Arrêt (Stop)
• Marche arrière (Reverse)
• Marche avant (Forward)
• Entretien (Maintain)
• Verrouillage (Lock)
• Déverrouillage (Unlock)
• Code de sécurité avec Entrée (Enter) et Annulation (Cancel)
3- Portes pour plateau d’alimentation
4- Plaque signalétique
5-.interrupteur de marche/arrêt (On/Off)
6- Connecteur du cordon
7- Boîtier
8- Porte d’accès du boîtier
9- Ouverture pour l’alimentation
du papier
10- Corbeille
Le schéma 2
Le schéma 1
P
anneau à afficheur ACL
3
1
2
4
5, 6
7
8
10
9
P
anneau de contrôle
avec boutons de
commande souples
Page 17

17
3.0 Spécifications Techniques
4.0 Installation
• Référez-vous aux instructions d'installation imprimées sur la boîte de carton pour
l'assemblée appropriée.
• Faites fonctionner cet appareil seulement selon le type de source d’alimentation indiqué
sur l’étiquette.
• Installez la déchiqueteuse de façon à ce que la fiche soit facilement accessible.
• La déchiqueteuse doit être utilisée en position verticale.
• Installez la déchiqueteuse de façon à ce que les fentes d’aération ne soient pas
obstruées. Pour assurer une aération adéquate de la déchiqueteuse, une distance
minimale de 5 cm entre le mur ou les meubles et celle-ci doit être conservée.
5.0 Avertissement
N’insérez jamais la main, les doigts ou tout autre corps étranger dans l’ouverture
d’alimentation. Vous pourriez subir des blessures graves.
Tenez éloignés de l’ouverture d’alimentation tous les vêtements amples, les cravates,
les bijoux, les cheveux longs ou autres objets non attachés. Vous pourriez subir des
blessures.
Mettez toujours l’appareil hors tension et débranchez-le avant de le déplacer,
d’effectuer l’entretien, de le nettoyer ou d’effectuer toute autre action que le
fonctionnement normal. Vous pourriez subir des blessures graves.
Modèle DMC- 5000C
Type de coupe Coupe en particules confetti
Dimension du papier déchiqueté 2 mm x 15 mm
Capacité de feuilles de papier Alimentation automatique de 500 feuilles
Alimentation manuelle de 6 feuilles
Vitesse 64 mm/s
Largeur de l’ouverture d’alimentation 240 mm
Puissance du moteur 0,4 ch
Tension 120 V / 60 Hz
Dimension (longueur x largeur x hauteur) 545 x 430 x 910 mm
Poids 52 kg
Volume du contenant 83 litres
Niveau sonore en mode inactif < 60 dB(A)
Page 18

18
6.0 Fonctionnement
Lisez le mode d’emploi avant de faire fonctionner la déchiqueteuse.
Branchez le cordon d’alimentation dans le connecteur situé à l’arrière de l’appareil.
Branchez le cordon d’alimentation dans n’importe quelle prise de courant alternatif
standard de 120 volts, 60 Hz.
6.1 Installation de la corbeille pour le papier déchiqueté
• Ouvrez la porte du boîtier et retirez complètement la corbeille du boîtier.
• Placez un sac en plastique dans la corbeille (3 échantillons de sac compris).
Laissez les bords du sac dépasser de la corbeille.
• Glissez la corbeille dans le boîtier et fermez la porte du boîtier.
• Rangez ce mode d’emploi à l’intérieur de la porte du boîtier.
6.2 Mise en marche de l’appareil
• Placez l'interrupteur, situé sur le côté droit de l’appareil, en position marche (On).
L’appareil est sous tension.
• Le panneau à afficheur ACL indique que l’appareil est prêt à déchiqueter. (Le schéma 3)
Remarque: L’affichage indique toujours lorsque
les portes du plateau d’alimentation déverrouillées.
Ouvr
ez les por
tes.
Placez un maximum de 500 feuilles de
papier dans le plateau d’alimentation.
Fer
mez les por
tes.
Appuyez sur le bouton Démarrer (Start).
L’appareil commence à déchiqueter les
feuilles, une à la fois.
Le schéma 3
Lorsque le déchiquetage de tout le papier contenu dans le plateau est terminé, l’appareil
s’arrête automatiquement.
Selon la quantité de papier à déchiqueter, le déchiquetage peut être effectué en mode
d’alimentation manuelle ou automatique.
1. Utilisez le mode d’alimentation automatique pour une grande quantité de papier.
Page 19

19
2. Utilisez le mode d’alimentation manuel pour une petite quantité
de papier (maximum de 6 feuilles).
Le processus de déchiquetage est démarré par les cellules photoélectriques dans
l’ouverture de l’alimentation. Insérez un maximum de 6 feuilles de papier dans
l’ouverture d’alimentation et le déchiquetage commence automatiquement.
Lorsque le déchiquetage est terminé, le système de coupe s’arrête
automatiquement après 3 secondes.
6.3 Fonction de marche avant/arrière
(Forward/Reverse) pour dégager le papier coincé
S’il se produit un blocage du papier, appuyez sans relâcher sur le bouton de marche
arrière (Reverse) pour retirer le papier de la fente d’alimentation. Essayez de tirer
doucement sur le papier pour le retirer de la déchiqueteuse. Alternez entre la marche
avant et arrière, au besoin, jusqu’à ce que le papier soit dégagé.
Attention : La déchiqueteuse peut être endommagée si vous alternez trop
rapidement entre la marche avant et arrière.
Débranchez la déchiqueteuse, ouvrez la porte du boîtier et retirez la corbeille. Nettoyez
prudemment tout morceau de papier qui pourrait être resté sous l’ouverture
d’alimentation. Faites preuve de prudence lorsque vous retirez les morceaux de papier.
Attention : L’appareil a des lames exposées sous l’ouverture d’alimentation.
Faites preuve de prudence lorsque vous retirez le papier déchiqueté.
Af
ficheur ACL en mode de
marche arrière (Reverse)
Af
ficheur ACL en mode de
marche avant (Forward)
Page 20

20
6.4 Verrouillage de la porte
Les portes peuvent être verrouillées pour éviter que des personnes prennent les
documents confidentiels dans le plateau d’alimentation.
6.4.1. Verrouillage
Lorsque vous appuyez sur le bouton de verrouillage (Lock), voici ce qui
apparaît sur l’afficheur ACL :
6.4.2. Déverrouillage
Lorsque vous appuyez sur le bouton de déverrouillage (Unlock), voici ce qui
apparaît sur l’afficheur ACL :
6.4.3. Annulation du mot de passe
S’il est nécessaire d’interrompre le processus de verrouillage ou de
déverrouillage, appuyez sur le bouton Annuler (Cancel). Le processus de
verrouillage ou de déverrouillage sera lors annulé.
6.4.4. Mise hors tension de l’appareil (OFF)
Appuyez sur le bouton Arrêt (Stop). L’appareil arrête le déchiquetage, mais il
est toutefois toujours sous tension. Placez l'interrupteur, situé sur le côté droit
de l’appareil, en position Arrêt (Off).
L’appareil est hors tension.
S
ur l’afficheur, Entrez votre mot de passe (Enter password) clignotent.
E
ntrez votre mot de passe de 4 chiffres. Assurez-vous de ne pas
oublier votre mot de passe. Le code est affiché. Appuyez sur le bouton
Entrée (Enter).
S
ur l’afficheur, l’indication Couvercle déverrouillé (Cover Unlock)
c
hange pour afficher Couvercle verrouillé (Cover Lock)
Au cours du processus de verrouillage, Couvercle verrouillé (Cover
L
ock) clignote sur l’afficheur. Les deux portes seront mécaniquement
verrouillées. Le processus de verrouillage prend environ 3 secondes.
Lorsque le processus de verrouillage est terminé, l’indication Couvercle
verrouillé (Cover Lock) clignotante est affichée en continu.
Si le processus de verrouillage ne peut être complété à l’intérieur d’un
délai de 7 secondes, le processus de verrouillage est annulé en entier.
Sur l’afficheur, Entrez votre mot de passe (Enter password) clignotent.
Entrez le mot de passe de 4 chiffres. Le code est affiché. Appuyez sur
le bouton Entrée (Enter).
Sur l’afficheur, l’indication Couvercle verrouillé (Cover Lock) change
pour afficher Couvercle déverrouillé (Cover Unlock).
Au cours du processus de déverrouillage, Couvercle déverrouillé
(Cover Unlock) clignote sur l’afficheur. Les deux portes seront
mécaniquement déverrouillées. Le processus de déverrouillage prend
environ 3 secondes. Lorsque le processus de déverrouillage est
terminé, l’indication Couvercle déverrouillé (Cover Unlock) clignotante
est affichée en continu.
Si l'entrée de n'importe quels
chiffres de mot de passe est
erronée pendant le
processus de fermeture ou
ouvrant, la pression
« serrure » ou « ouvrent »
le bouton. Le mot de passe
est remis à zéro encore.
Page 21

21
7.0 Fonctionnement de l’afficheur ACL
Mise sous tension
Le commutateur de puissance principal est situé du bon
côté du coffret. Quand le commutateur est mis en
marche, l'affichage à cristaux liquides montre que
l'AUTOMOBILE et la machine entre dans le mode
AUTOMATIQUE.
En mode automatique, le défibreur se tient prêt à
déchiqueter de papier par l'alimentation automatique
ou manuelle.
COMMENCEZ le mode
En serrant le bouton marche, la machine démarre et le
papier est alimenté automatiquement couvrent par la
feuille dans le défibreur. L'affichage à cristaux liquides
montre l'AUTOMOBILE avec l'alimentation-papier.
ARRÊTEZ le mode
En appuyant sur la touche "ARRÊT", la machine s'arrête.
Le caractère de clignotant d'ARRÊT d'affichages
d'affichage à cristaux liquides.
Mode RENVERSÉ (en mode automatique)
En appuyant sur le bouton renversé pendant l'opération
automatique de mode, l'affichage à cristaux liquides
montre l'inverse et le moteur entre le mode renversé.
Appuyez sur et tenez le bouton renversé afin de
maintenir le moteur courir dans l'inverse. Quand le
bouton renversé est libéré, la machine revient au mode
automatique et l'affichage montrera l'automobile.
Mode RENVERSÉ (en mode d'arrêt)
En appuyant sur le bouton renversé pendant le mode
d'arrêt, l'affichage à cristaux liquides montre l'inverse
et le moteur entre le mode renversé. Appuyez sur et
tenez le bouton renversé afin de maintenir le moteur
courir dans l'inverse. Quand le bouton renversé est
libéré, la machine revient au mode d'arrêt et au
caractère de clignotant d'arrêt d'affichages d'affichage à
cristaux liquides.
Page 22

22
Mode MARCHE AVANT (FORWARD)
Lorsque le bouton de MARCHE AVANT (FORWARD) est
pressé, l’ACL affiche AUTO et le moteur entre en mode
MARCHE AVANT. Appuyez sans relâcher sur le bouton
de MARCHE AVANT (FORWARD) pour que le moteur
continue de fonctionner en marche avant. Quand le
bouton vers l'avant est libéré, la machine revient au
mode d'arrêt et au caractère de clignotant d'arrêt
d'affichages d'affichage à cristaux liquides.
Mode de SURCHARGE (OVERLOAD)
Quand les surcharges de défibreur pendant le
déchiquetage, le moteur cesseront de fonctionner et
sembleront alertes. L'affichage à cristaux liquides
montrera la surcharge et clignotera l'icône de
surcharge. Appuyer sur le bouton renversé mettra en
marche le moteur s'inverser et l'affichage à cristaux
liquides montrera l'inverse. Quand le papier surchargé
est enlevé de la gorge, le moteur démarrera courir
pendant trois secondes à l'espace libre toutes
particules de papier restantes. Après que le moteur
s'arrête, l'affichage à cristaux liquides montrera
l'automobile.
Si l'utilisateur ne peut pas enlever le papier de la gorge
en appuyant sur le bouton renversé, déchirez au loin le
papier restant et appuyez sur le bouton vers l'avant
pour commencer à déchiqueter encore et pour nettoyer
le papier. Répétez le processus ci-dessus jusqu'à ce que
le papier soit complètement enlevé et les affichages
d'affichage à cristaux liquides automatiques.
Mode OUVERT de PORTE (DOOR OPEN)
Quand la porte d'accès de coffret (#8 sur le schéma 2)
est ouverte tout en déchiquetant, le moteur s'arrêtera
immédiatement. La porte d'expositions d'affichage à
cristaux liquides ouverte et clignotera symbole ouvert
de porte d'accès de coffret et retentira alerte. Pour
reprendre la fonction normale, la porte doit être
fermée. L'affichage à cristaux liquides montrera
l'automobile encore. La machine doit se remettre en
marche encore.
Mode OUVERT de PORTE de MAGASIN
Quand les portes de magasin (#3 sur le schéma 2)
sont ouvertes tout en déchiquetant, le moteur
s'arrêtera immédiatement. La porte d'expositions
d'affichage à cristaux liquides ouverte et clignotera
symbole ouvert de porte de magasin et retentira alerte.
Pour reprendre la fonction normale, les portes doivent
être fermées. L'affichage à cristaux liquides montrera
l'AUTOMOBILE encore.
Page 23

23
Mode de SURCHAUFFE (OVERHEAT)
Si le défibreur surchauffe, les expositions d'affichage à
cristaux liquides surchauffent et clignoteront symbole
de surchauffe. Toutes les fonctions s'arrêteront. Quand
le défibreur surchauffe, l'utilisateur peut appuyer sur la
touche "ARRÊT" pour placer le défibreur se tiennent
prêt dedans le mode. Le défibreur ne reprendra pas le
fonctionnement normal jusqu'à ce que la température
du moteur refroidisse à une température sûre et
l'affichage à cristaux liquides montre l'automobile.
ENTRETIEN (MAINTAIN)
Après avoir approximativement déchiqueté de 500
feuilles de papier, l'affichage à cristaux liquides
montrera que le caractère maintiennent et le flash
maintiennent le symbole. Ceci indique que les lames de
déchiquetage doivent être lubrifiées en utilisant un
lubrifiant approuvé de défibreur. Seulement des feuilles
de lubrifiant de défibreur ou le lubrifiant mis en
bouteille conçu spécifiquement pour des défibreurs
devraient être employés. Suivez les instructions
équipées de lubrifiant de défibreur. N'EMPLOYEZ JAMAIS
UN LUBRIFIANT d'AÉROSOL, ou n'importe quel lubrifiant
qui est inflammable. Référez-vous aux avertissements
fournis en votre manuel de défibreur.
Le défibreur continuera à fonctionner d'une façon
normale tandis que l'icône de maintien clignote. Après
avoir appliqué le lubrifiant aux lames de découpage,
l'icône de maintien peut être mise hors tension en
appuyant sur et en tenant le bouton de maintien
pendant approximativement 7 secondes. L'affichage à
cristaux liquides dégagera le mot maintiennent, et le
compteur interne sur le défibreur sera remis à zéro.
PLEIN mode de CASIER (BIN FULL)
Si le casier est plein, le moteur s'arrêtera et retentira
alerte. L'affichage à cristaux liquides montre le casier
de caractère complètement et le casier instantané plein
symbole. Toutes les fonctions de défibreur s'arrêteront.
Si la porte de coffret est ouverte, l'affichage à cristaux
liquides montrera la porte de caractère ouverte et la
porte instantanée symbole ouvert. Après que le casier
soit vidé, placé de nouveau dans le coffret et la porte
est fermé, l'affichage à cristaux liquides montrera
l'AUTOMOBILE et reprendra le fonctionnement normal.
La machine doit se remettre en marche encore.
Page 24

24
8.0 Garantie et enregistrement du produit
Le fabricant garantit pour un temps limité que l’appareil est exempt de défaut de
matériel et de main-d'oeuvre. Si une pièce est défectueuse au cours de la période de
garantie, votre seul et unique recours est la réparation ou le remplacement, au choix
du fabricant qui en assumera les coûts, de la pièce défectueuse, sauf pour les frais
d’affranchissement qui sont la responsabilité du consommateur pour retourner
l’appareil au fabricant.
Cette garantie est valide seulement pour le consommateur initial avec la preuve
d’achat originale et elle n’est pas transférable. Cette garantie ne s’applique pas en
cas d’usage abusif, de manipulation inadéquate ou de réparations non autorisées.
TOUTE GARANTIE IMPLICITE, INCLUANT CELLE DE COMMERCIABILITÉ OU D’APTITUDE
À L’USAGE POUR DES FINS PARTICULIÈRES, EST PAR LA PRÉSENTE LIMITÉE DANS SA
DURÉE À LA PÉRIODE APPROPRIÉE DE LA GARANTIE INVOQUÉE CI-DESSUS. Le
fabricant ne sera pas tenu responsable dans aucune éventualité des dommages ou
des pertes indirects attribuables à cet article.
Cette garantie vous confère des droits légaux spécifiques. Vous pouvez avoir
d’autres droits légaux qui varient.
Les déchiqueteuses à coupe sécuritaire, à coupe croisée, à coupe de supports
informatiques et à coupe en lisière requièrent d’être lubrifiées comme indiqué dans
le manuel de l’utilisateur. Le défaut de lubrifier ces systèmes annulera la garantie. Les
réparations doivent être effectuées par un technicien autorisé par le fabricant. Pour
plus de détails ou pour obtenir des réparations couvertes par cette garantie, veuillez
communiquer avec nous en composant le 866-707-9502
Veuillez conserver votre preuve d’achat originale et, pour assurer que votre appareil
est enregistré et que les renseignements concernant la garantie sont reçus, veuillez
enregistrer aujourd’hui votre appareil sur le site
www.ShredCare.com.
Instructions de retour
1. Appel 866-707-9502 pour un nombre de retour d'autorisation (RA #).
2. Emballez le produit dans son carton initial, ou l'équivalent, et
marquez clairement le cadre avec du RA #.
3. Joignez une copie de la preuve de l'achat montrant la date initiale
d'achat.
4. Joignez une note décrivant la difficulté que vous avez eue avec
le produit. Soyez sûr d'inclure votre nom, adresse et numéro de
téléphone complets.
5. Expédiez ci-dessus payé par anticipation l'adresse fournie par le
constructeur en du RA #.
Nécessitez d'abord l'approbation.
Note : Les consommateurs doivent appeler 866-707-9502 pour obtenir un RA # afin
de r
envoyer un pr
oduit défectueux.
Page 25

25
Page 26

26
Tabla de contenidos
Gracias por su compra. La serie de trituradoras de papel con alimentador automático es una
t
rituradora de corte confetti (papel picado) diseñada para triturar automáticamente grandes
cantidades de hojas de papel. Con su diseño contemporáneo, esta trituradora es compatible
con cualquier decoración de oficina. Equipada con un potente motor con protección térmica,
estos modelos trituran hasta 550 páginas de papel estándar de 8.5 x 11 pulg. (22 x 28 cm)
o 250 páginas de papel tamaño oficio de 8.5 x 14 pulg. (22 x 35.5 cm), hoja por hoja, en
p
artículas de confetti de 2 x 15 mm. Cuchillas de corte durables, de acero templado, que
aceptan grapas y pequeños sujetapapeles.
La trituradora de papel con alimentador automático también se destaca por su función
electrónica automática de inicio/ apagado para triturar fácil y rápidamente; está diseñada
para apagarse de manera automática y para indicar en la pantalla LCD distintos mensajes:
papel atascado, canasta llena, puerta abierta, motor recalentado, o cualquier información de
mantenimiento.
La puerta del compartimiento es práctica para guardar el aceite y el manual; además, la
canasta para residuos con capacidad de 80 litros se saca para facilitar su limpieza.
1.0 Instrucciones de seguridad
2.0 Identificación de las partes
3.0 Especificaciones técnicas
4.0 Instalación
5.0 Precaución
6.0 Funcionamiento
6.1 Instalación del compartimiento para residuos triturados.
6.2 Encendido del equipo. (botón “ON”)
6.3 Funciones de Avance/ Retroceso para liberar papel atascado
6.4 Bloqueo de puerta
6.4.1 Bloqueo
6.4.2 Desbloqueo
6.4.3 Cancelación de clave
6.4.4 Apagado del equipo. (botón “OFF”)
7.0 Funcionamiento de la pantalla LCD
8.0 Garantía y Registro del producto
Page 27

27
1.0 Instrucciones de seguridad
1. Lea todas las instrucciones antes de utilizar la trituradora.
2
. Guarde las instrucciones para cuando la utilice.
3. Contemple todas las advertencias e instrucciones señaladas en el producto.
4. Desenchufe el producto antes de limpiarlo. Límpiela con un paño suave húmedo, con agua
y jabón suave. No utilice abrasivos ni ningún otro limpiador a base de petróleo.
5
. Coloque el producto lo más cerca posible del tomacorriente, así será más rápido y fácil
desenchufarlo.
6. Este producto cuenta con un botón de encendido/ apagado. Siempre apague la trituradora
antes de sacarla de la cabina. Para mayor seguridad, desenchufe el cable.
Siempre desenchufe el cable antes de abrir el compartimiento.
7. No utilice este producto cerca del agua.
8. Nunca acerque este producto a un radiador o fuente de calor.
9. Utilícelo en la potencia indicada. Si no está seguro de la potencia, consulte con el
distribuidor o electricista más cercano.
10. No apoye nada sobre el cable. No coloque este producto en el paso de la gente,
donde pueda tropezarse con el cable.
11. Si se utiliza una extensión, asegúrese de que la suma de los valores de electricidad de
los productos enchufados a la extensión, no exceda los valores de la capacidad eléctrica.
12. No intente reparar este producto usted mismo, ya que puede lastimarse al abrir o
desmontar las cubiertas, o exponerse a otros riesgos.
13. Desenchufe el producto y recurra a un técnico competente en las siguientes situaciones:
• Cuando el cable o enchufe esté dañado o pelado.
• Si se ha derramado algún líquido sobre el producto.
• Si se expuso a lluvia.
• Si el producto no funciona con normalidad, aún siguiendo las instrucciones
de funcionamiento.
• Si el producto se cayó o dañó.
14. Manténgalo alejado de los niños.
15. Esta trituradora sólo debe funcionar en presencia de alguien atento a su funcionamiento.
16. En ningún momento, acerque a la trituradora, productos a base de petróleo o aceite
sintético inflamable, o aerosoles de ningún tipo.
17. Mantenga vacío el receptáculo, así no bloquea la 'salida' de la trituradora.
18. La máquina sólo tritura papel. Triturar otro tipo de material puede provocar lesiones al
usuario o daños a la máquina.
19. No apoye los dedos demasiado cerca de la ranura, puede ocasionar lesiones graves.
20. Por el mismo motivo, aleje de la abertura todo tipo de elemento suelto o colgando,
como por ejemplo: cabello largo, corbatas, collares, etc.
Advertencia: ¡Cuidado con las partes móviles! Aleje de las aberturas los dedos y otras partes
del cuerpo.
Para más infor
mación acerca de protección contra robo,
y para r
egistr
o del pr
oducto, por favor
, visite
www.ShredCare.com.
Page 28

28
2.0 Identificación de las partes
1-Pantalla LCD (Figura 1)
2-Panel de control con botones suaves.
• De inicio
• De detención
• De retroceso
• De avance
• De mantenimiento
• De bloqueo
• De desbloqueo
• Número de clave de seguridad con 'Entrar' y 'Cancelar'
3-Puertas de la bandeja para papel
4-Indicador de valores de electricidad
5-Botón de Encendido/ Apagado (ON/OFF)
6-Tomacorriente
7-Compartimiento
8-Puerta del compartimiento
9-Abertura para insertar el papel
10-Canasta para residuos
Figura 2
Figura 1
P
antalla LCD
3
1
2
4
5, 6
7
8
10
9
P
anel de control
con botones suaves
Page 29

29
3.0 Especificaciones técnicas
4.0 Instalación
• Para una instalación apropiada, consulte la sección de instrucciones de instalación.
• Utilice este producto sólo en la potencia indicada.
• Instale la trituradora de papel de modo tal que el enchufe quede al alcance.
• Se debe utilizar la trituradora únicamente en posición vertical.
• Coloque la trituradora de manera tal que no se bloqueen las ventilaciones. Para asegurar
una ventilación suficiente, coloque la trituradora, por lo menos, a 5 cm de la pared o de
cualquier mueble.
5.0 Precaución
Nunca inserte la mano, dedos u objeto en la abertura para el papel. De lo contrario,
esto puede ocasionar lesiones graves.
Por el mismo motivo, aleje de la abertura todo tipo de elemento suelto o colgando,
como por ejemplo: cabello largo, corbatas, collares, etc.
Siempre apague y desenchufe la máquina antes de moverla, repararla, limpiarla, o
antes de cualquier otra actividad que no sea su normal funcionamiento. De lo
contrario, esto puede ocasionar lesiones graves.
Modelo DMC- 5000C
Tipo de corte Partículas tipo confeti
Tamaño de la partícula 2 mm x 15 mm
Capacidad de hojas Trituración automática de 500 hojas
Trituración manual de 6 hojas
Velocidad 64 mm/ seg
Ancho de entrada 240 mm
Potencia del motor 0,4 caballos de fuerza
Voltios 120v / 60hz
Dimensión (Largo x Ancho x Altura) 545 x 430 x 910 mm
Peso 52 kg
Volumen del receptáculo 83 litros
Nivel de ruido mínimo funcionamiento < 60dB(A)
Page 30

30
6.0 Funcionamiento
Lea las instrucciones de funcionamiento antes de utilizar la trituradora.
Conecte el cable a la parte posterior de la máquina.
Conecte el cable a cualquier toma de 120V AC, 60Hz.
6.1 Instalación de la canasta para residuos de papel triturado
• Abra el compartimiento y saque la canasta de la misma.
• Coloque en la canasta una bolsa de plástico para residuos (se proporcionan 3 bolsas
de muestra). Pliegue hacia afuera los bordes de la bolsa que sobresalgan de la misma.
• Vuelva a colocar la canasta dentro del compartimiento y cierre la puerta.
• Guarde este manual de funcionamiento en la ranura ubicada dentro de la puerta
del compartimiento.
6.2 Encendido del equipo. (botón “ON”)
• Presione el botón de encendido/ apagado ubicado a la derecha de la máquina.
La unidad está encendida.
• La pantalla LCD indica que la máquina está lista para triturar. (Figura 1)
Nota: Los indicadores se pueden observar siempre
que las puertas de las bandejas no estén bloqueadas.
Puer
tas abier
tas
Coloque en la bandeja para papel
500 hojas como máximo.
Puer
tas cer
radas
Pr
esione el botón “de inicio” La máquina
comienza a triturar hoja por hoja.
Figure 1
Una vez que las hojas hayan sido trituradas por completo en la bandeja,
la máquina se detiene automáticamente.
Según el volumen de hojas, el triturado puede ser automático o manual.
1. Gran volumen de hojas: triturado automático.
Page 31

31
2. Poco volumen de hojas: triturado manual (6 hojas máximo)
El proceso de triturado comienza con fotocélulas en la abertura. Inserte 6 hojas como
máximo en la abertura, el triturado comienza automáticamente. Una vez que las hojas
hayan sido trituradas por completo, el sistema de corte se detiene automáticamente
después de alrededor de 3 segundos.
6.3 Funciones de avance/ retroceso para liberar papel atascado
Si se atasca papel, presione y mantenga presionado el botón de "retroceso" para
expulsar el papel de la entrada. Intente tirar con suavidad del papel para retirarlo de
la trituradora. Alterne entre las funciones de "avance/ retroceso", según sea necesario,
hasta liberar el papel atascado.
Precaución: Si se alterna demasiado rápido entre las funciones de
"avance/ retroceso", se puede dañar la trituradora.
Desenchufe la trituradora, abra el compartimiento y retire la canasta. Con cuidado,
retire cualquier partícula de papel que haya quedado debajo de la entrada. Retire las
partículas de papel con sumo cuidado.
Precaución: La máquina tiene hojas filosas y visibles debajo de la entrada.
Retire las partículas de papel con sumo cuidado.
LCD en función
"de retroceso"
LCD en función
"de avance"
Page 32

32
6.4 Bloqueo de puerta
Las puertas se pueden bloquear para impedir que otras personas retiren información
confidencial de la bandeja.
6.4.1. Bloqueo
Al presionar el botón de “Bloqueo”, aparecerá lo siguiente en la pantalla LCD:
6.4.2. Desbloqueo
Al presionar el botón de “Desbloqueo”,aparecerá lo siguiente en la pantalla LCD:
6.4.3. Cancelación de clave
Si cualquiera de los procesos -de bloqueo o desbloqueo- tuviera que ser
interrumpido, presione el botón de “Cancelación” Así se cancelará cualquiera
de los procesos.
6.4.4. Apagado del equipo. (botón “OFF”)
Presione el botón de “DETENCION”. La máquina dejará de triturar, pero
permanecerá encendida. Presione el botón de encendido/apagado ubicado a
la derecha de la máquina.
La máquina se apaga.
En la pantalla aparecerá de manera intermitente “Ingrese clave”,
I
ngrese una clave de 4 dígitos. Asegúrese de recordar la clave.
Aparecerá el código. Presione el botón “Entrar”
En la pantalla, la indicación “Ingreso desbloqueado” cambiará a
“Ingreso Bloqueado”.
Durante el proceso de bloqueo, la pantalla indicara de manera
intermitente “Ingreso Bloqueado”. Ambas puertas se bloquearán
m
ecánicamente. El proceso de bloqueo lleva alrededor de 3 segundos.
Una vez que haya finalizado el proceso de bloqueo, la indicación
“Ingreso Bloqueado” dejará de ser intermitente y quedará permanente.
Si el proceso de bloqueo no se completa en 7 segundos, se cancela
todo el proceso.
En la pantalla aparecerá de manera intermitente “Ingrese clave”.
Ingrese la clave de 4 dígitos. Aparecerá el código. Presione el botón
“Entrar”
En la pantalla, la indicación “Ingreso Bloqueado”cambiará a "Ingreso
desbloqueado”
Durante el proceso de desbloqueo, aparecerá de manera intermitente
en la pantalla la indicación “Ingreso desbloqueado”. Ambas puertas se
desbloquearán mecánicamente. El proceso de desbloqueo lleva
alrededor de 3 segundos. Una vez que haya finalizado el proceso de
desbloqueo, la indicación “Ingreso desbloqueado” dejará de ser
intermitente y quedará permanente.
Si, durante alguno de
estos procesos, el
ingreso de alguno de los
dígitos fuera incorrecto,
presione el botón de
"Bloqueo", y luego,
"Desbloqueo". Así se
reestablece la clave.
Page 33

33
7.0 Funcionamiento de la pantalla LCD
El accionar ENCENDIDO
El interruptor principal está situado en el derecho del
gabinete. Cuando se gira el interruptor, el LCD demuestra
que el AUTOMÓVIL y la máquina entra en modo AUTO.
En el modo auto, la desfibradora está parada lista
destrozar de papel por la alimentación auto o manual.
COMIENCE el modo
Al presionar la tecla de partida, la máquina comienza y el
papel se alimenta automáticamente cubre por la hoja en
la desfibradora. El LCD demuestra el AUTOMÓVIL con la
alimentación de papel.
PARE el modo
Al presionar el botón de paro, la máquina para. El carácter
de la PARADA de las exhibiciones del LCD que destella.
Modo REVERSO (en modo auto)
Al presionar el botón reverso durante la operación auto
del modo, el LCD demuestra el revés y el motor entra en
el modo reverso. Presione y sostenga el botón reverso
para mantener el motor el funcionar revés. Cuando se
lanza el botón reverso, la máquina vuelve al modo auto y
la exhibición demostrará el automóvil.
Modo REVERSO (en modo de la parada)
Al presionar el botón reverso durante modo de la parada,
el LCD demuestra el revés y el motor entra en el modo
reverso. Presione y sostenga el botón reverso para
mantener el motor el funcionar revés. Cuando se lanza el
botón reverso, la máquina vuelve al modo de la parada y
al carácter de la parada de las exhibiciones del LCD que
destella.
Page 34

34
Modo AVANCE
Al presionar el botón de AVANCE, se leerá AUTO en la
pantalla LCD, y es así como el motor ingresa en modo
de avance. Mantenga presionado el botón de AVANCE
para que el motor continúe en este modo. Al soltar el
botón de AVANCE, el motor se detiene.
Modo SOBRECARGADO
Cuando la máquina se sobrecarga durante el proceso
de triturado, el motor se detiene y en la pantalla LCD
titilará SOBRECARGADO. Al presionar el botón de
RETROCESO, el motor ingresa en este modo, y en la
pantalla LCD se leerá RETROCESO. Cuando se retire el
papel sobrecargado, en la pantalla LCD se leerá
SOBRECARGADO. El motor comenzará a funcionar
durante tres segundos para eliminar cualquier resto de
papel o partículas. Una vez que se haya detenido el
motor, la pantalla LCD indicará la función AUTO.
Si el usuario no puede retirar el papel de la entrada
presionando el botón de RETROCESO, entonces, tendrá
que tirar del resto de papel y presionar el botón de
Encendido/ Apagado para apagar la trituradora. Vuelva
a presionar el botón de Encendido/ Apagado para
comenzar a triturar y eliminar todo el papel. Si no se
pudiera eliminar todo el papel en una sola acción,
repita el proceso arriba detallado, hasta que se elimine
todo el papel, y se lea AUTO en la pantalla LCD.
Modo PUERTA ABIERTA
Si durante el proceso de triturado se saca el receptáculo
o la puerta está abierta, el motor se detiene de
inmediato y suena la alarma. En la pantalla LCD
aparecerá el mensaje intermitente PUERTA ABIERTA.
Para reanudar el normal funcionamiento, el receptáculo
o puerta deben volver a la ubicación o posición
original. La pantalla LCD indicará AUTO.
Page 35

35
Modo RECALENTADO
Si la trituradora se recalienta, en la pantalla LCD titilará
RECALENTADO. Tanto la función AUTO como la función
de RETROCESO se detendrán. Cuando la trituradora se
recaliente, el usuario puede presionar el botón de
Encendido/ Apagado para que la máquina ingrese en
modo de espera. La trituradora no reasumirá el normal
funcionamiento hasta que la temperatura del motor no
descienda a un nivel seguro, que será recién cuando se
lea AUTO en la pantalla LCD.
MANTENIMIENTO
Después de 500 ciclos de triturado, en la pantalla LCD
titilará MANTENIMIENTO. Esto indica que las hojas
filosas necesitan ser lubricadas con un lubricante
aprobado para trituradoras. Sólo se deben utilizar hojas
lubricantes u otros lubricantes en botella, diseñados
específicamente para trituradoras. Siga las
instrucciones indicadas en el lubricante para
trituradoras. NUNCA UTILICE LUBRICANTES EN
AEROSOL, o cualquier otro lubricante inflamable.
Recurra a las advertencias proporcionadas en el manual
de la trituradora.
MANTENIMIENTO MANUAL
Mientras aparezca el mensaje intermitente
MANTENIMIENTO, la trituradora continuará
funcionando con normalidad. Una vez que se haya
aplicado el lubricante a las hojas que trituran, se
desactiva la indicación de MANTENIMIENTO
manteniendo presionado el botón de MANTENIMIENTO
durante 7 segundos. La trituradora regresa al modo
AUTO, desaparece la indicación de MANTENIMIENTO en
la pantalla LCD y el contador interno de la máquina se
pone en cero.
MANTENIMIENTO AUTOMÁTICO
(característica opcional, no presente en todas las
trituradoras)
En el caso de haber hojas lubricantes en la canasta, la
trituradora lubricará las hojas de manera automática.
Aparecerá en la pantalla LCD el dibujo de una hoja
lubricante. Después de que el motor se detiene, el
contador interno se pone en cero.
Modo RECEPTÁCULO LLENO
El motor se detendrá y emitirá un sonido de alerta
cuando el receptáculo esté lleno. En la pantalla LCD
titilará RECEPTACULO LLENO. Todas las funciones de la
trituradora se detendrán. Si el receptáculo o la puerta
están abiertos, en la pantalla LCD indicará el mensaje
intermitente PUERTA ABIERTA. Una vez que se vacíe el
receptáculo y se lo coloque en la posición original, en
la pantalla se leerá AUTO, y la trituradora reasumirá el
normal funcionamiento.
Page 36

36
8.0 Garantía y Registro del producto
Durante cierto período el fabricante garantiza que la máquina no posee
defectos ni en el material ni en la mano de obra. En caso se encontrara alguna
parte defectuosa durante el período de garantía, la única y exclusiva solución
será la reparación o reemplazo de dicha parte, a costa del fabricante. No se
contemplarán los gastos de correspondencia, los que corresponderán al
consumidor, quien se encargará de regresarle la máquina al fabricante.
La garantía es válida sólo para el comprador original con comprobante
original de compra y no es transferible. Esta garantía no será válida en casos
de mal uso, mal trato o reparación no autorizada. TODA GARANTÍA IMPLÍCITA,
INCLUSO EN RELACIÓN CON LA COMERCIABILIDAD O ADECUACIÓN PARA UN
FIN ESPECÍFICO, QUEDA POR ESTE MEDIO LIMITADA A LA DURACIÓN DEL
TÉRMINO DE LA GARANTÍA PERTINENTE ESTABLECIDA ANTERIORMENTE. En
ningún caso el fabricante se responsabilizará por daños, imprevistos o
resultantes de algún accidente, que se le atribuyan a este producto.
Esta garantía le otorga derechos específicos. Podrá contener otros derechos
que pueden variar.
Toda la línea de trituradoras -corte seguro, corte transversal, del centro, corte
en tiras -requiere de lubricación, tal como se lo indica en el Manual del
Usuario. No realizar la adecuada lubricación de estas trituradoras anulará la
validez de la garantía. Las reparaciones deben llevarse a cabo por técnicos
autorizados por el fabricante. Para mayor información o para prestación de
servicios bajo esta garantía, por favor, comuníquese al 866-707-9502.
Por favor, conserve el comprobante original de compra; y a fin de asegurarse
de que su producto se ha registrado y de que la información de garantía se
ha recibido, registre el producto hoy mismo en
www.ShredCare.com.
Instrucciones De vuelta
1. Llamada 866-707-9502 para un número de vuelta de la autorización (RA #).
2. Pila de discos el producto en su cartón original, o el equivalente, y marque
claramente el rectángulo con el RA #.
3. Incluya una copia de la prueba de la compra que muestra la fecha
original de la compra.
4. Incluya una nota que describe la dificultad que usted ha tenido con
el producto. Sea seguro incluir su nombre, direccionamiento y número
de teléfono completos.
5. Envíe arriba pagado por adelantado el direccionamiento
proporcionado por el fabricante del RA #.
Llame primero para la aprobación.
Nota: Los consumidores deben llamar 866-707-9502 para obtener un RA #
para volver un pr
oducto defectuoso.
 Loading...