

Ativa Wireless-G Notebook Network Card, AWGNA54 Quick Install Manual

P75232
Wireless G Notebook Card
Carte G sans fil pour
ordinateur de bureau
Tarjeta Wireless G para
computadora de escritorio
Ativa Tech Support
US: 1-866-91-ATIVA (1-866-912-8482)
© 2006 Ativa. All rights reserved. All trade names are registered trademarks of respective manufacturers listed.
Windows is either a registered trademark or trademark of Microsoft Corporation in the United States and/or
other countries.
© 2006 Ativa. Toutes les marques de commerce sont des marques déposées des fabricants respectifs énumérés.
Windows est soit une marque de commerce, soit une marque déposée de Microsoft Corporation aux États-Unis
et/ou dans d’autres pays.
© 2006 Ativa. Todos los nombres comerciales son marcas comerciales registradas de los respectivos fabricantes
enumerados. Windows es ya sea una marca comercial registrada o una marca comercial de Microsoft Corporation
en EE.UU. y/u otros países.
www.ativasupport.com

AWGNA54
Quick Installation
Guide
Wireless G
Notebook Card
Start Here
If installing numerous networking devices at
the same time, always install your Router fi rst
before installing other network components,
such as notebook cards and desktop cards.

Make sure you have the following 1
Make sure you have
the following:
Installation
Software CD
System Requirements
PC-compatible laptop computer with one
available CardBus slot CD-ROM drive
Windows® 98SE, 2000, Me, XP
Wireless G
Notebook Card
User Manual
on CD
Quick Setup
Install 2
1. Install
Important Note: Install the software before inserting
the Card.
NOTE for Windows Users:
If the Ativa Wireless Networking Utility setup screen
does not appear within 20 seconds, access your
CD-ROM drive: double-click on the “My Computer” icon
and then double-click on the CD-ROM drive into which
you have placed the installation CD. Double-click on
the folder named “Files”, then double-click on the icon
named “setup.exe”.
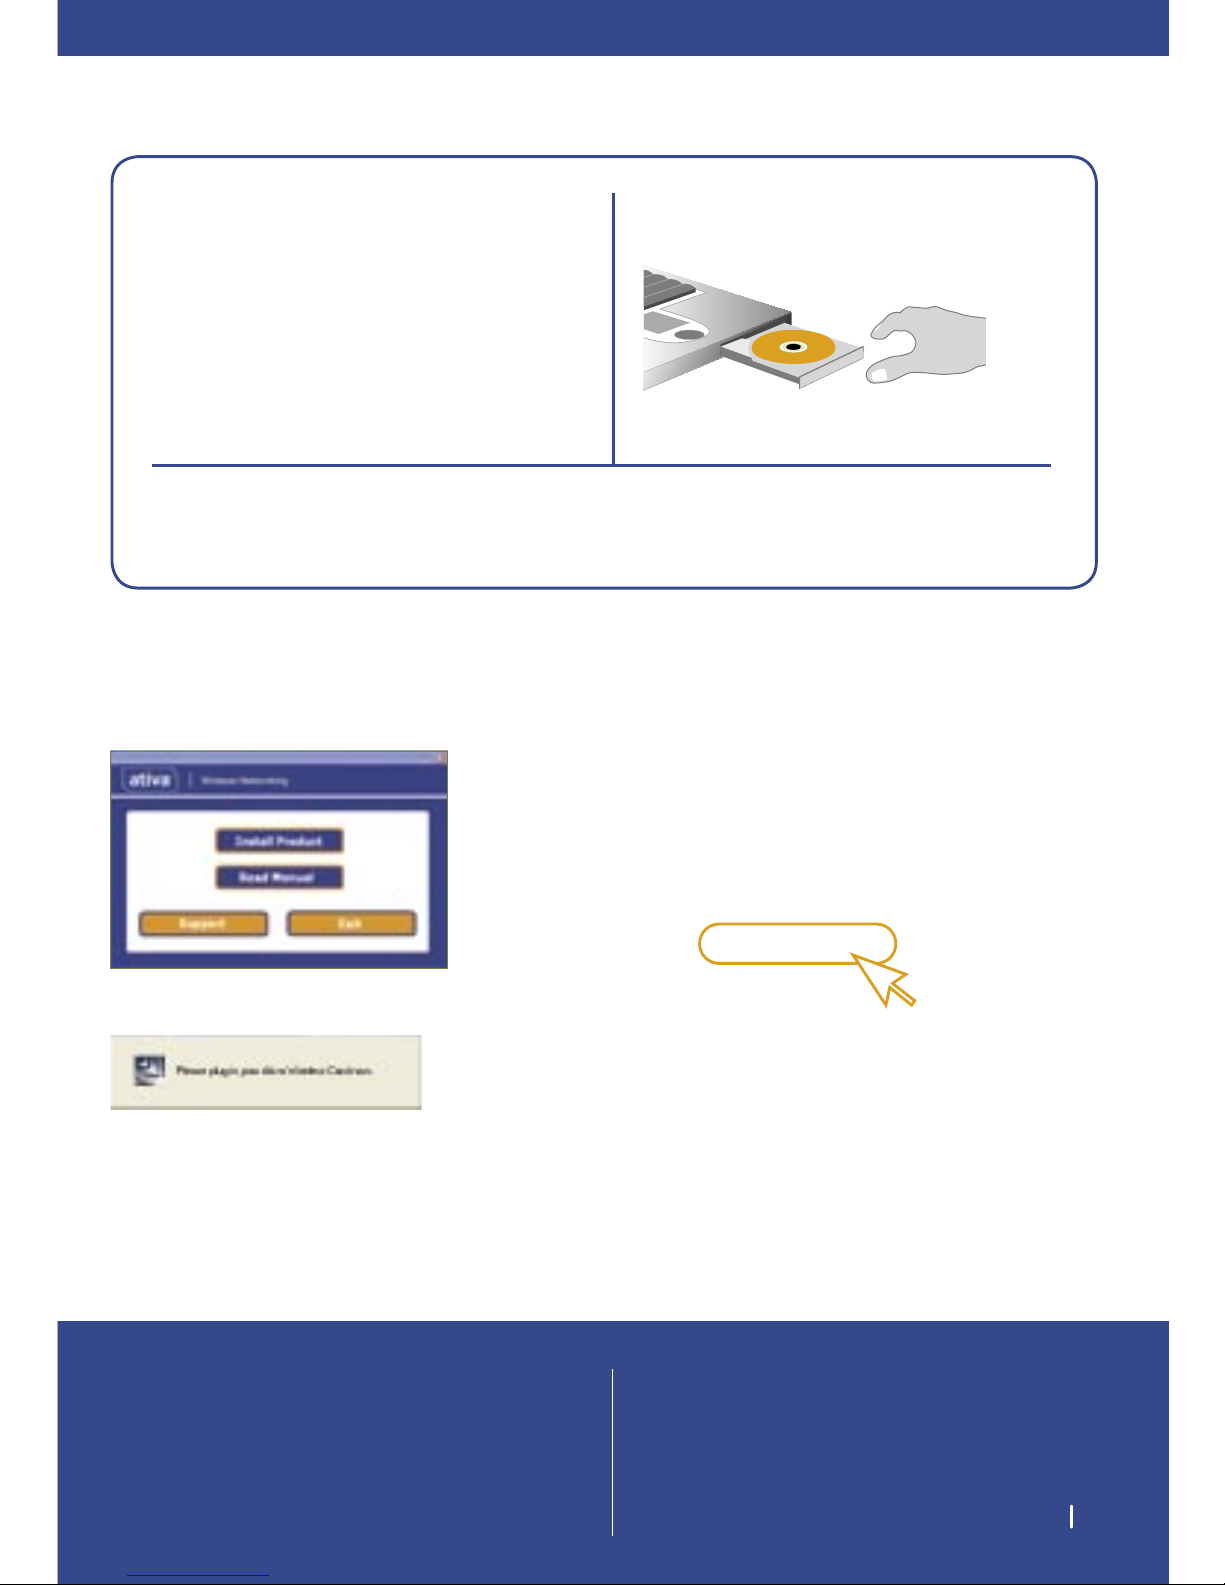
1.1
Insert the Installation Software CD into your
CD-ROM drive.
1.2
The Ativa Wireless Networking Utility setup
screen will automatically appear (may take
15–20 seconds to appear).
1.3
Click “install” from the menu.
install
(click)
1.4 The installer will now start. The wizard
will then prompt you to plug in your Ativa
Wireless Card.
Connect 3
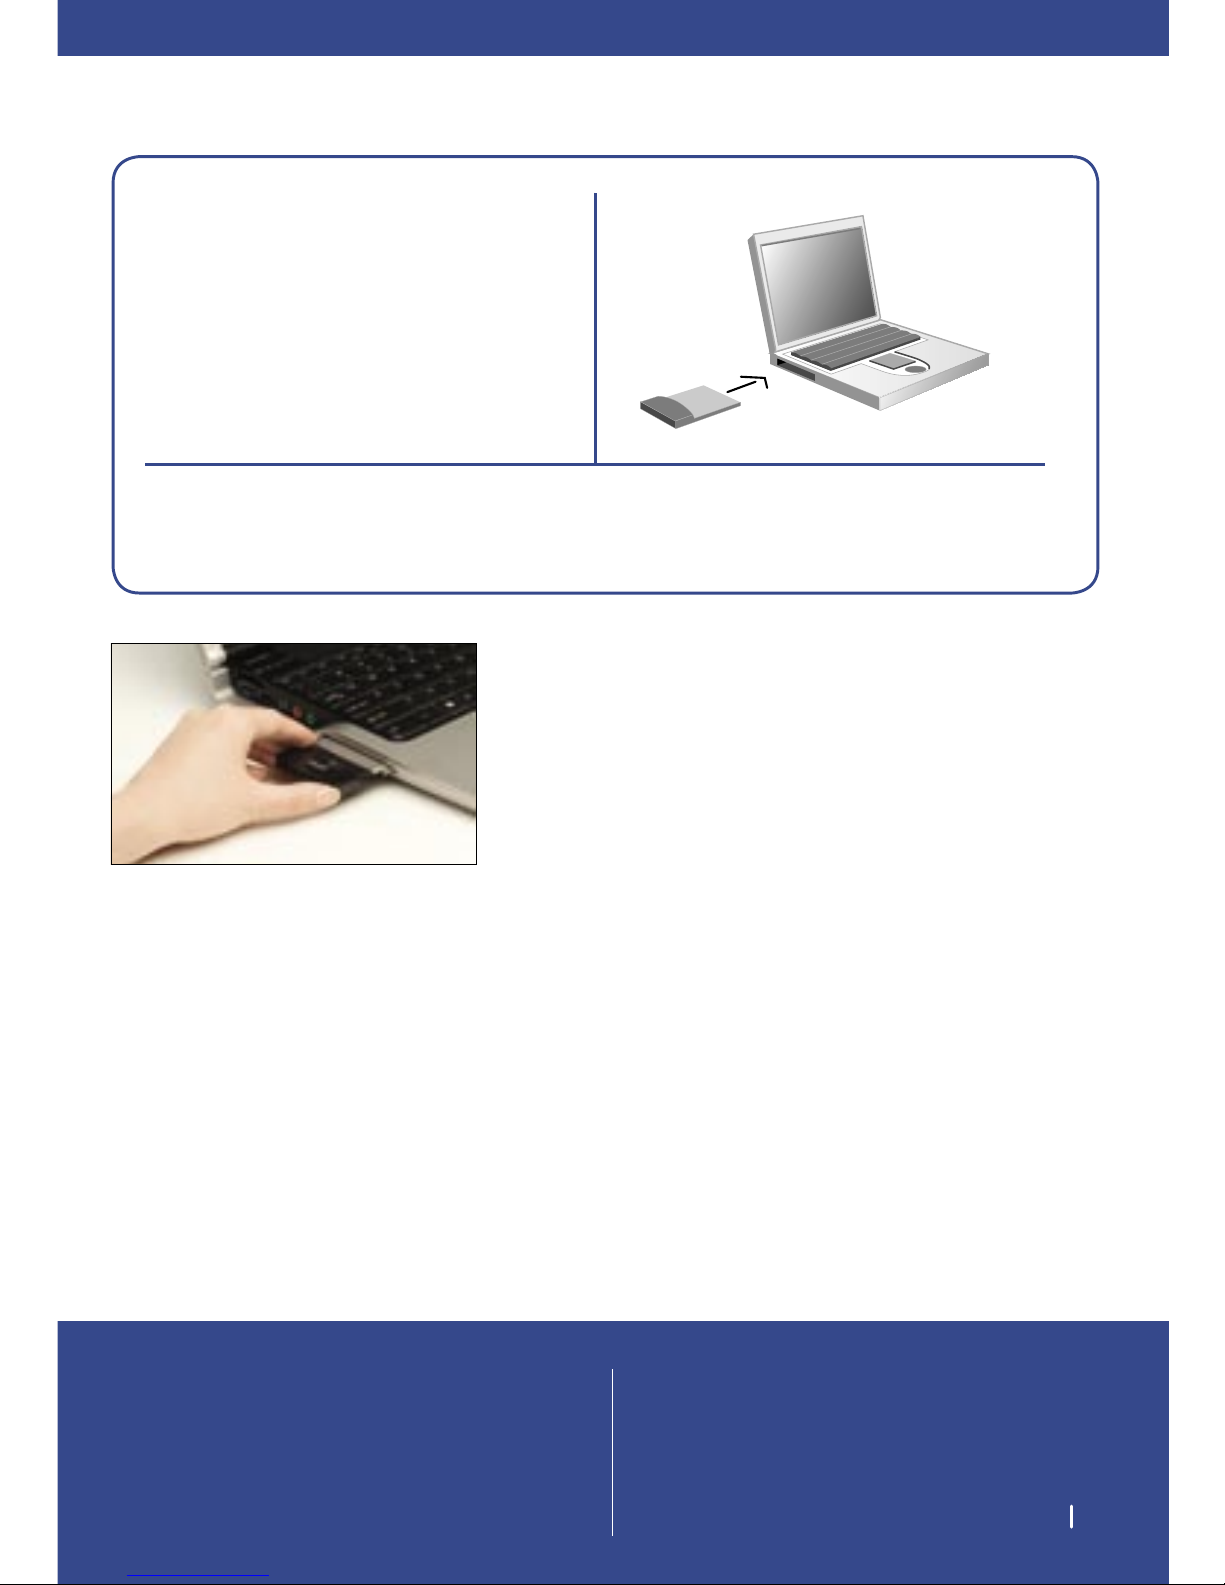
2. Connect
Plug the Card into an available CardBus slot on your
notebook computer
2.1 During the install process, you will be
prompted to insert your Card. Firmly insert
the Card, label side UP, into your computer’s
CardBus slot until it stops. Click “OK”. The
power light on the top of the Card will light
when the Card is inserted properly.
Note: If your system did not prompt you
to insert your Card after the installation is
completed, please do so now.
NOTE:
If you are using the Windows XP operating
system, you will not be prompted to reboot
until after the drivers are installed.
Connect 4
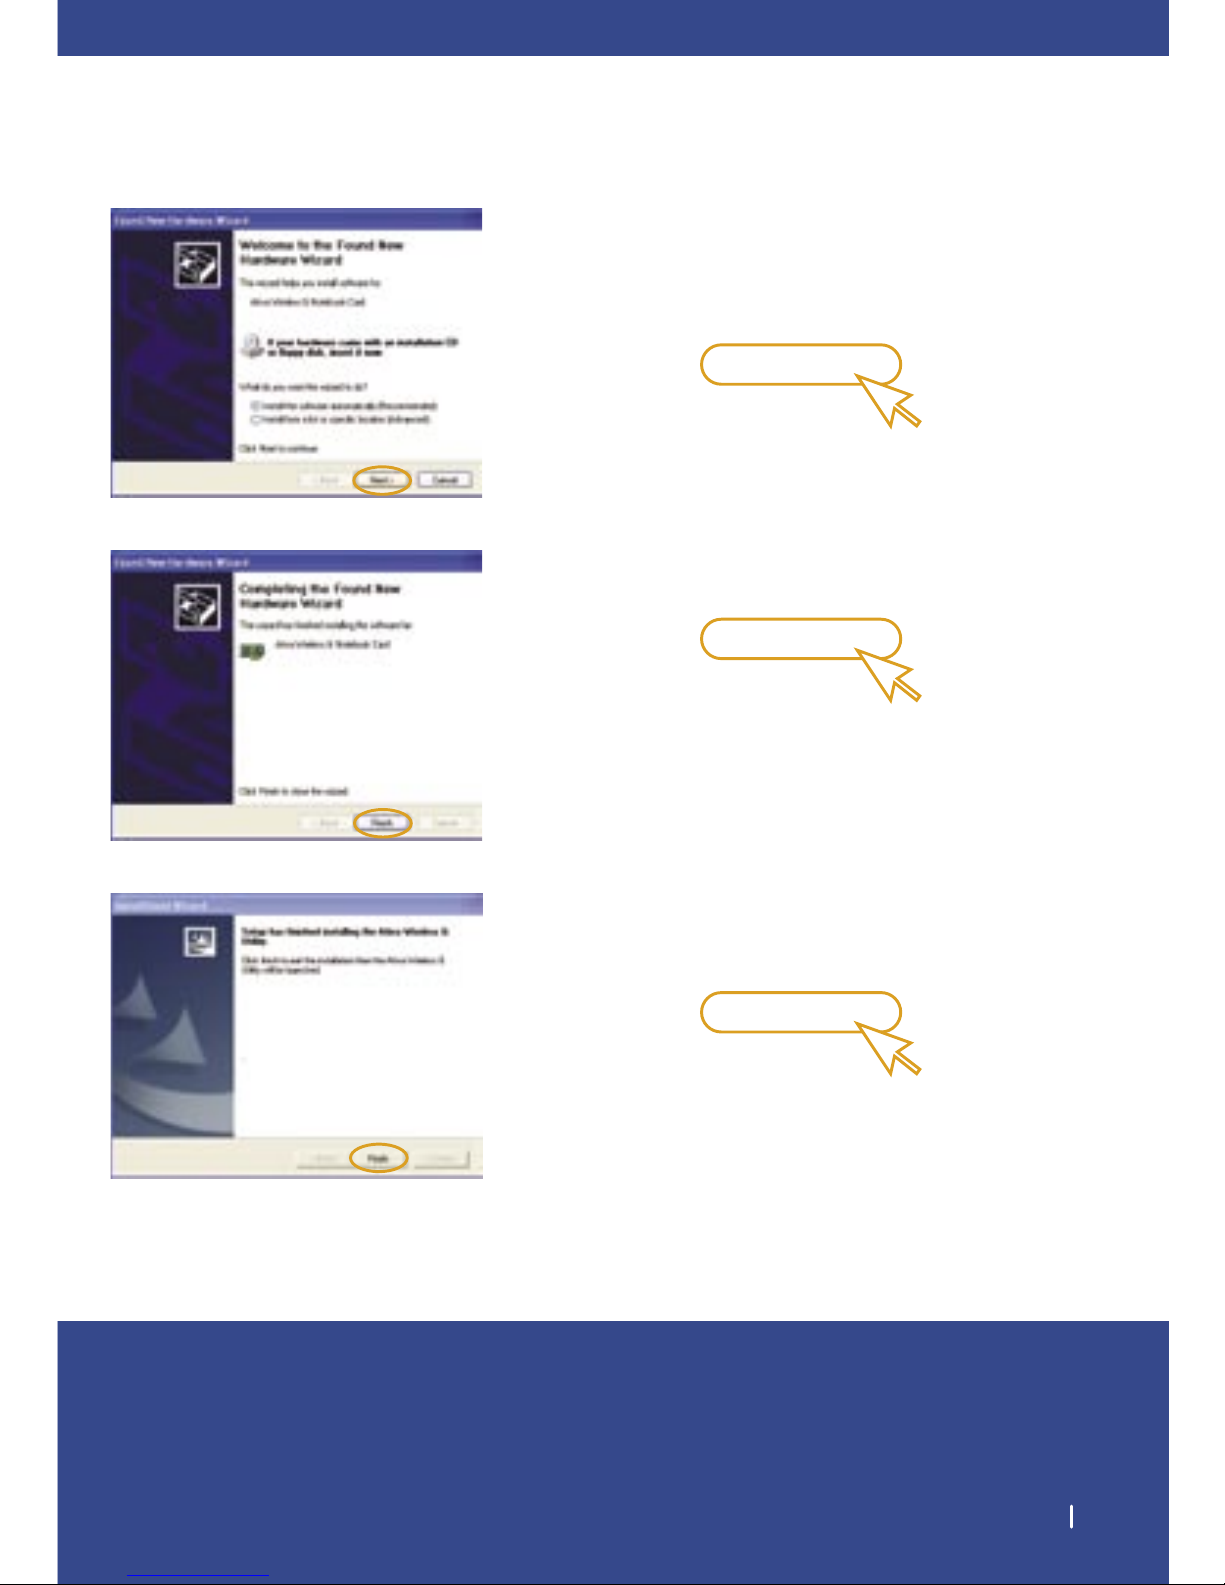
2.2 The wizard will prompt you to install
software for the Ativa Wireless G Notebook
Card. Select the “Install the software
automatically (Recommended)” option.
Next
(click)
2.3 Hardware installation is now complete. Click
“Finish” to close the wizard.
Finish
(click)
2.4 Ativa Wireless Networking Utility installation
is now complete. Click “Finish” to close the
wizard and restart your computer.
Finish
(click)
Configure 5
3. Confi gure
Use the Ativa Wireless Networking Utility
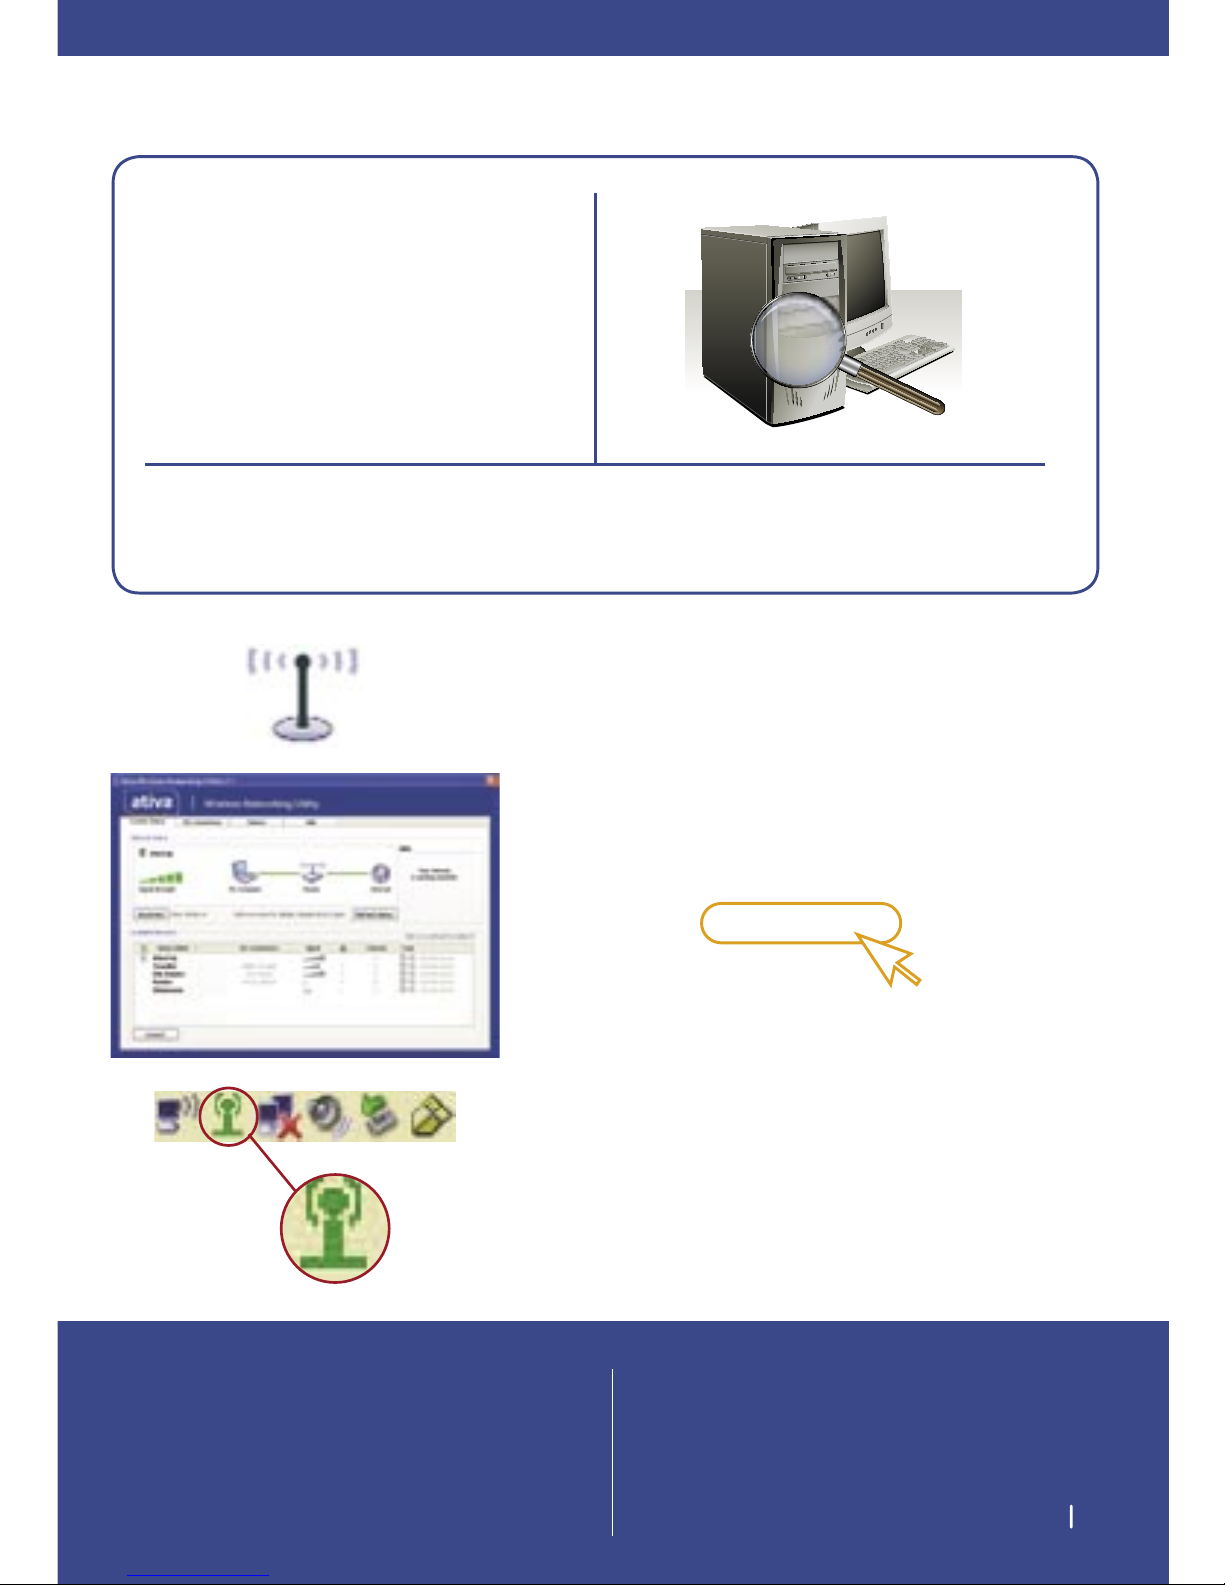
3.1 After restarting your computer, double-click
the Ativa Wireless Networking Utility icon on
the desktop screen.
3.2 The Ativa Wireless Networking Utility screen
will appear. Select a network to connect
to from the “Available Networks” list and
click “Connect”.
Connect
(click)
3.3 The Ativa Wireless Networking Utility icon
can also be found on the system tray.
NOTE:
In order to see your available networks, you
must be near a working wireless router or
access point.
NOTE:
Double-clicking on the Ativa Wireless
Networking Utility icon on the system
tray will bring up the “Utility” screen.

For further information regarding the installation
of this product, please check your User Manual,
visit www.ativasupport.com or call our free
technical-support line.
Ativa Tech Support
US: 1-866-91-ATIVA (1-866-912-8482)
 Loading...