

Page 1
140 mm
"
24
Series Widescreen LCD Monitor User Manual
Manual del usuario del monitor LCD
de pantalla ancha de serie 24"
Manuel de l'utilisateur écran géant
LCD série 24"
216 mm
Model
AT24OHP
Modelo
AT24OHP
Modèle no
AT24OHP
Call for technical support 1-877-777-4357
Llame para asistencia técnica 1-877-777-4357
Appelez le soutien technique 1-877-777-4357
Before operating this unit, please read all instructions.
Lea atentamente las instrucciones antes de usar este producto.
Veuillez lire toutes les instructions avant d'utiliser ce produit
.
OUTPUT AT 100 % OF ACTUAL SIZE
20286_LCD Monitor Jean Co
20286_s2_416907_LCD_man_cvr.ai
MR
xx
BLACK
Greg Smith
Jean Co
FPO Callout
FPO Dieline
07.10.09
round 2
140mm x 216 mm
Page 2

English
Operation Instructions
Thank you for purchasing this high-resolution multi-scan color monitor.
Please read this guide thoroughly before installation.
FCC RADIO FREQUENCY INTERFERENCE STATEMENT
WARNING: (FOR FCC CERTIFIED MODELS)
This monitor has been tested and found compliant with the limits for a
Class B digital device, pursuant to part 15 of the FCC Rules. These limits
are designed to provide proper protection against harmful interference to
a residential installation. This monitor generates, uses, and can radiate
radio frequency energy. Harmful interference to radio communication may
be led as a result if it‘s not properly installed and used. However, there is
no guarantee that interference will not occur in a particular installation. If
this monitor does cause serious interference to radio or television reception,
resetting the monitor may determine it. Moreover, users are encouraged to
correct interference by doing one or more of the following:
Reorient or relocate the receiving antenna.
Move the monitor and the receiver further away from each other.
Connect the monitor into an outlet on a circuit different from that to
which the receiver is connected.
Consult your local dealer or an qualied technician
.
FCC Warning:
To assure a continued FCC compliance, a user must use a grounded power
supply cord and the provided shielded video interface cable with bonded
ferrite cores. Also, any unauthorized changes or modications to this monitor
would void the user‘s authority to operate this device.
Note: If necessary, shielded interface cables and AC power cord must be
used to meet the emission level limits.
Page 3

English
Contents
Safety Precautions ............................................................................. 1
First Setup ..........................................................................................2
Quick Installation ................................................................................2
Front View of the Product ...................................................................3
Rear View of the Product .................................................................... 3
Using On Screen Display (OSD) Functions........................................ 4
Supporting Timing Modes .................................................................. 8
Technical Information..........................................................................9
Care and Maintenance .....................................................................10
Troubleshooting ................................................................................10
Warranty Information ........................................................................ 11
Page 4

English
1
Safety Precautions
This monitor is manufactured and tested on a ground principle that a
user’s safety comes rst. However, improper use or installation may result
danger to the monitor as well as to the user. Carefully go over the following
WARNINGS before installation and keep this guide handy.
WARNINGS:
This monitor should be operated only at the correct power sources
indicated on the label on the rear end of the monitor. If you’re unsure of
the power supply in your residence, consult your local dealer or power
company.
The power cord plug must be connected to a properly wired and
grounded power outlet.
Do not try to repair the monitor yourself as it contains no user-
serviceable parts. The monitor should only be repaired by a qualied
technician.
Do not remove the monitor cabinet. There are high-voltage parts inside
that may cause electric shock to human bodies, even when the power
cord is disconnected .
Stop using the monitor if the cabinet is damaged. Have it checked by a
service technician.
Put your monitor only in a clean, dry environment. Unplug the monitor
immediately if it gets wet and consult your service technician.
Always unplug the monitor before cleaning it. Clean the cabinet with a
clean, dry cloth. Apply non-ammonia based cleaner onto the cloth, not
directly onto the glass screen.
Keep the monitor away from magnetic objects, motors, TV sets, and
transformer.
Do not place heavy objects on the cable or power cord.
For PLUG CABLE EQUIPMENT, the socket-outlet shall be installed
near the equipment and shall be easily accessible.
Due to safety concerns, if the VESA mounting kit is purchased separately
please make sure the mounting kit is UL-Listed, and replaced only by
service personnel.
Page 5
English
2
First Setup
Thank you for purchasing this high performance monitor!
This monitor comes with the following accessories :
Power cable Audio cable
D-Sub cable (15 pin) User’s guide
DVI cable (Optional)
Quick Installation
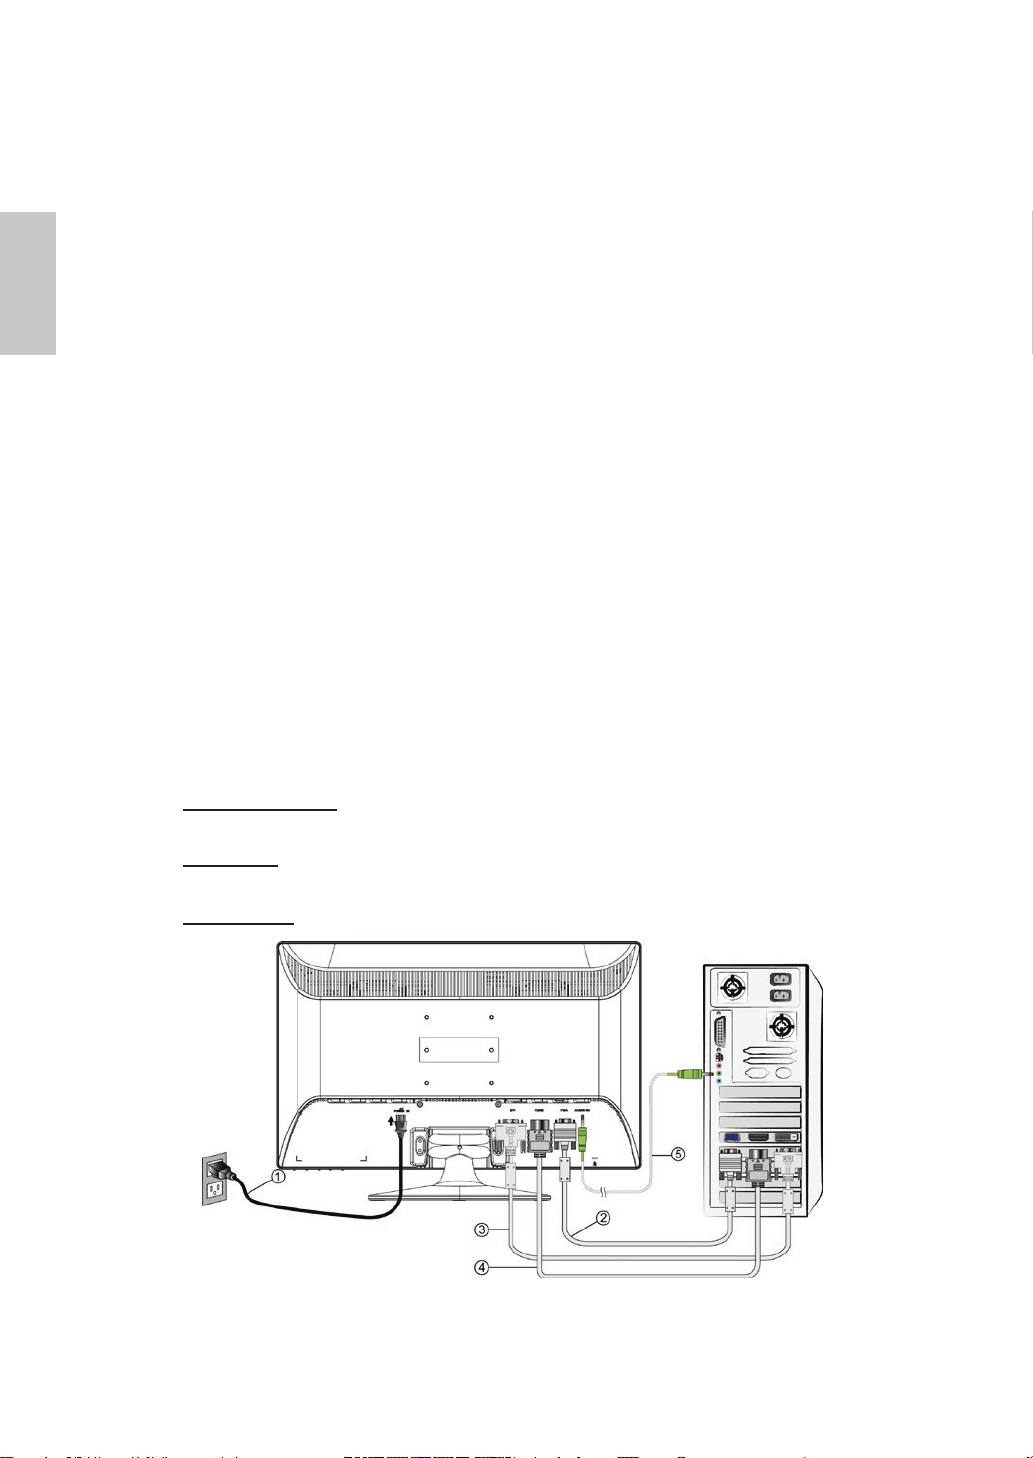
1. Connect power cord
Connect the power cord to a properly grounded AC outlet, then to the monitor.
2. Connect analog video cable (D-Sub cable)
Make sure both monitor and computer are powered OFF. Connect the video
cable (D-Sub cable) to the computer, then to the monitor.
3. Connect DVI cable (Optional)
Connect the DVI cable from DVI output of computer to the DVI input of the monitor.
4. Connect HDMI cable (Not supplied)
Connect the HDMI cable from HDMI output of computer to the HDMI input of the
monitor.
5. Connect audio cable
Connect the audio cable from audio output of computer to the audio input of
the monitor.
6. Power-ON computer and monitor
Power-ON the computer, then Power-ON the monitor.
7. Windows users: Setting the Timing Mode (Resolution and Refresh Rate)
Example: 1920 x 1080 @ 60 Hz
Resolution Right-click on the Windows desktop > Properties > Settings >
“Desktop Area”. Set the resolution.
Refresh Rate (vertical frequency) See your graphic card’s user guide for instructions.
Page 6
English
3
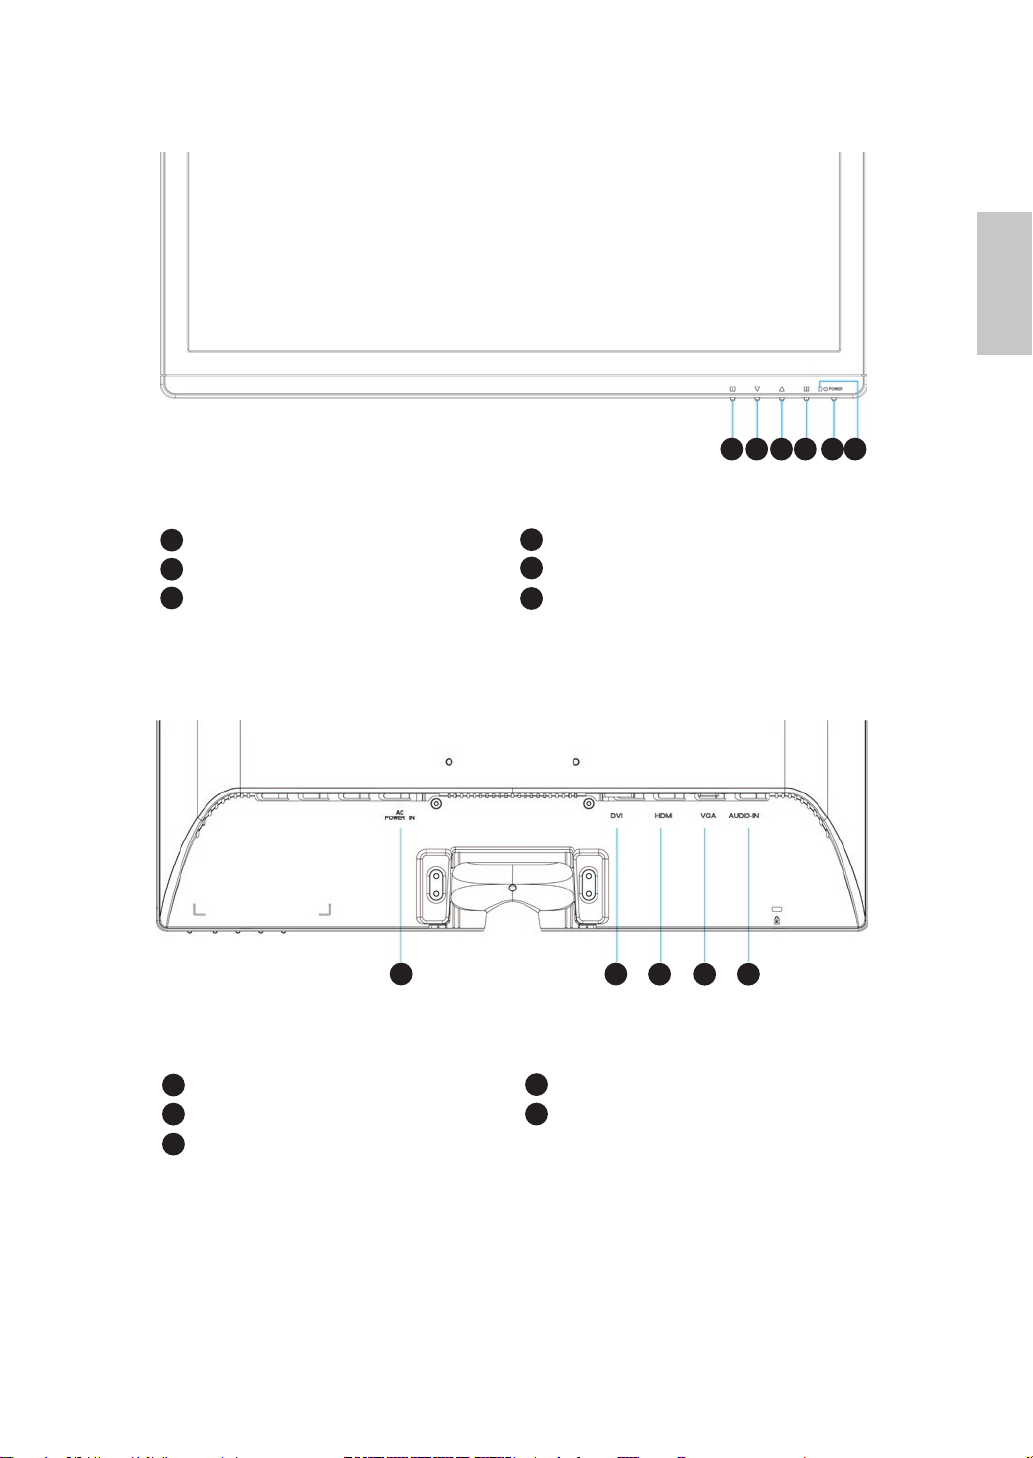
Front View of the Product
OSD TURN ON/OFF CONFIRM SELECTION
SCROLL DOWN/DECREASE POWER ON/OFF
SCROLL UP/INCREASE LED INDICATOR
Rear View of the Product
POWER INPUT VGA INPUT (D-SUB 15 PIN)
DVI INPUT (DVI 24 PIN) AUDIO INPUT
HDMI INPUT (HDMI 19 PIN)
1
2
3
1 2 3 4 5 6
4
5
6
7
8
9
11
10
7 8
9 10 11
Page 7
English
4
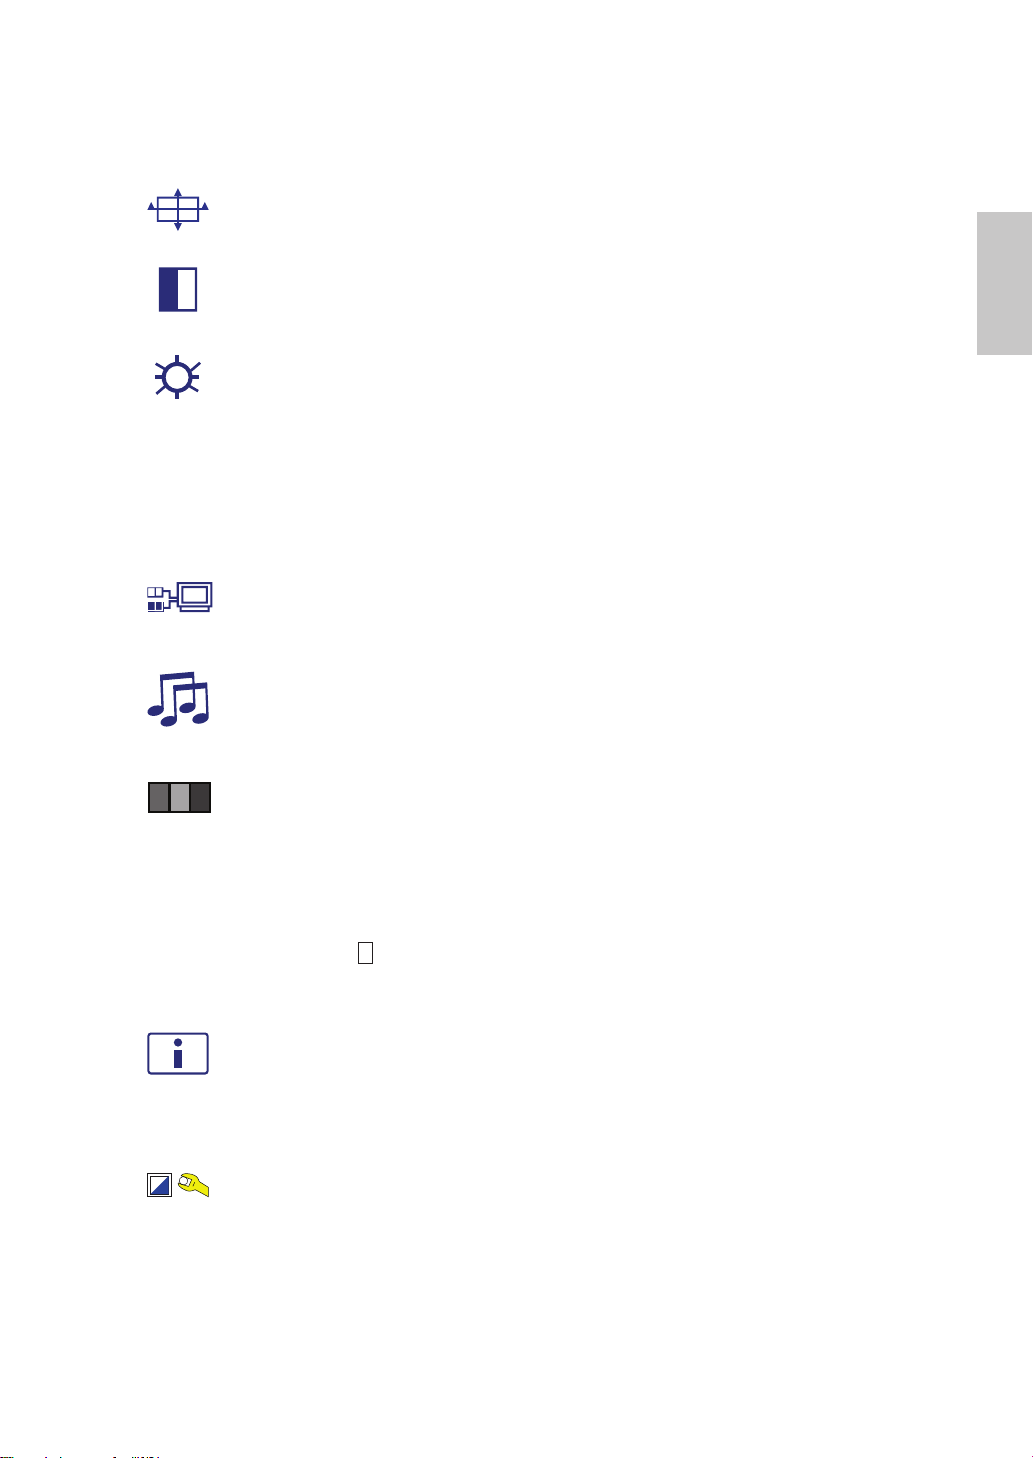
Using On Screen Display (OSD) Functions
Display main menu.
Exit from OSD menu.
Shortcut to display input select source adjustment when not in OSD
menu.
Conrm the selection.
▼
Select the desired item when in OSD menu.
When not in OSD menu, it is shortcut to display the Contrast/
Brightness/DCR/ECO Mode adjustment control screen.
▲
Select the desired item when in OSD menu.
When not in OSD menu, it is shortcut to display Opticolor Mode
adjustment control screen.
▼ + ▲ Recall both of Contrast and Brightness.
+ ▼ Power Lock (when not in OSD menu)
+ ▲ OSD Lock (when not in OSD menu)
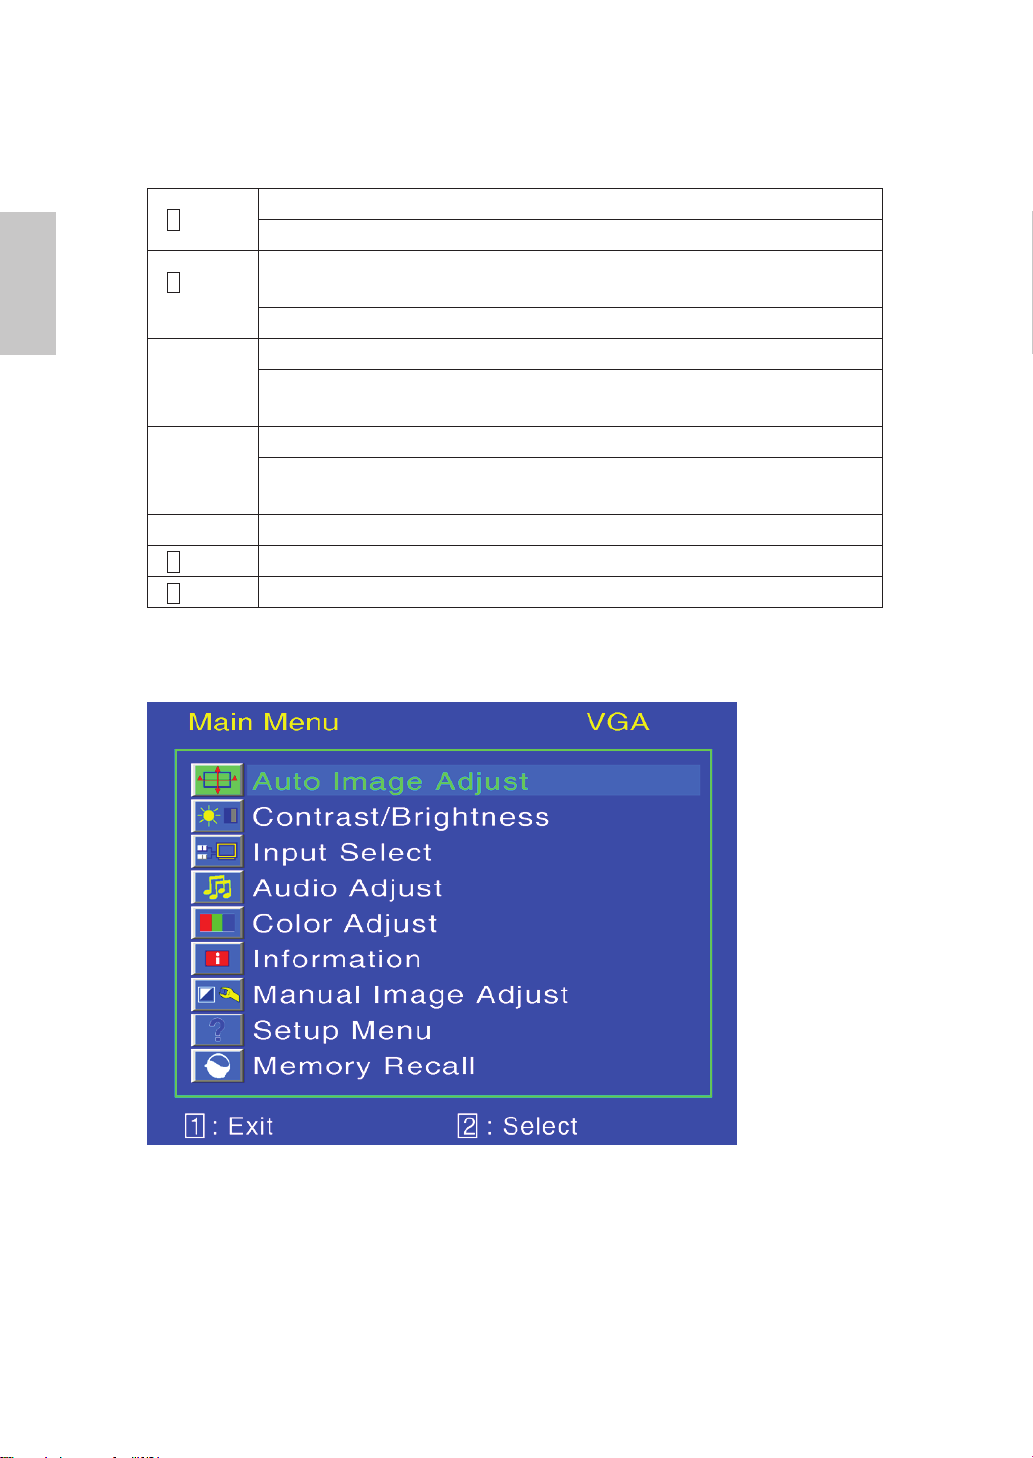
Main Menu
1
2
1
1
Page 8
English
5
ShortCuts Function
Auto Image Adjust : To auto adjust Horizontal Position, Vertical Position,
Phase (Fine Tune) and Clock (H. Size) of the screen.
Contrast : To adjust the foreground white level of screen image.
▲ : increase contrast, ▼: decrease contrast.
Brightness : To adjust the luminance of the video.
▲: increase brightness, ▼ : decrease brightness.
DCR : Allows the user to turn the DCR On or Off.
ECO Mode : Allows the user to turn the ECO On or Off. Contrast and
Brightness adjustment disabled when ECO is active.
Input Select : When press Input Select change Input signal to Analog,
HDMI or DVI.
Audio Adjust : To adjust the audio functions.
Volume : To adjust the volume of speaker output.
Mute : To turn the Mute on/off.
Color Adjust : To select the color for improving brightness and color
saturation between 9300K, 6500K, 5400K, and User Color.
9300K : Adds blue to screen image for cooler white.
6500K : Adds red to screen image for warmer white and richer red.
5400K : Adds green to screen image for a darker color.
User Color : Individual adjustments for red (R), green (G), blue (B).
1. Press button 2 to select the desired color.
2. Press
▼ or ▲ button to adjust selected color.
Information : To display the information, regarding the current input signal
coming from the graphic card in your computer.
Note: See your graphic card user guide for more information about
changing the resolution and refresh rate.
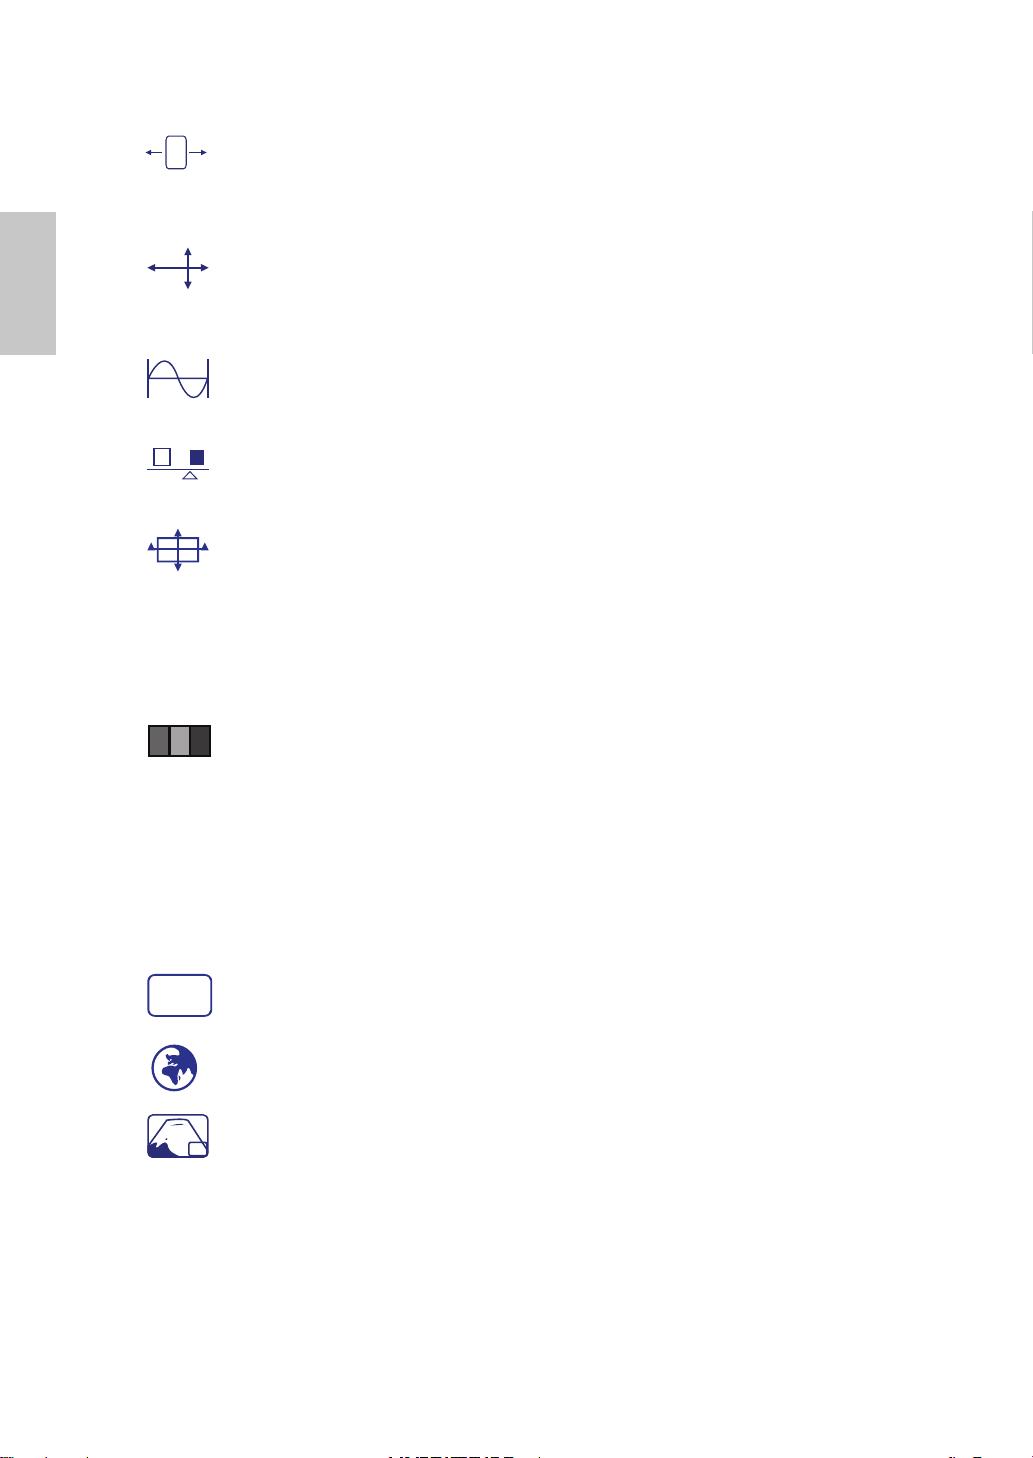
Manual Image Adjust : To manually adjust the Horizontal Size, H./V.
position, Fine Tune, Sharpness, Video Mode Adjust and OptiColor Mode.
Page 9
English
6
Horizontal Size : To adjust the width of the screen image.
▼: decrease the width of screen image, ▲: increase the width of screen
image.
H./V. Position : To adjust the horizontal and vertical position of the video.
H. Position: ▲ : move screen to the right, ▼ : move screen to the left.
V. Position: ▲ : move screen up, ▼ : move screen down.
Fine Tune : To adjust the delay time of data and clock.
Press ▲ or ▼ to adjust to your preference.
Sharpness : To adjust the clarity of a non-Full HD (1920x1080) signal
with ▼ or ▲ button.
Video Mode Adjust : To select the video mode from Full Screen, Over
Screen or Aspect Ratio.
Full Screen : To select full-screen size image.
Over Screen : To select over-screen size image.
Aspect Ratio : Restore the resolution (Non-16:9) for the full screen.So
that images can be displayed.
OptiColor Mode : Provides an optimum display environment depending
on the contents displayed. It contains 5 user-selectable presets.
Standard is for general windows environment and monitor default setting.
Game optimized for PC game environment.
Cinema optimized for movie and video environment.
Scenery optimized for displaying outdoor scenery images.
Text optimized for text editing and viewing in a word processing
environment.
Setup Menu : To set up Language Select, OSD Position, OSD Time Out
and OSD Background.
Language Select : To allow users to choose from available languages.
OSD Position : Press ▲ or ▼ button to select between horizontal and
vertical OSD Position adjustment.
H. Position : To horizontally adjust the OSD position.
▲ : move OSD to the right, ▼ : move OSD to the left.
V. Position : To vertically adjust the OSD position.
▲ : move OSD up, ▼ : move OSD down.
?
Page 10

English
7
OSD Time Out : To automatically turn off On Screen Display(OSD)after a
preset period of time.
OSD Background : Allows the user to turn the OSD background On or Off.
Memory Recall : To recall factory settings for video & audio controls.
Press button 2 to select the Memory Recall menu option.
Page 11
English
8
Supporting Timing Modes
Supporting Timing when in HDMI Mode
Warning : Do not set the graphic card in your computer to exceed these maximum
refresh rates. Doing so may result in permanent damage to your monitor.
VGA 720 x 400 @ 70Hz
VGA 640 x 480 @ 60Hz
VESA 640 x 480 @ 75Hz
VESA 800 x 600 @ 60Hz
VESA 800 x 600 @ 72Hz
VESA 800 x 600 @ 75Hz
VESA 1024 x 768 @ 60Hz
VESA 1024 x 768 @ 70Hz
VESA 1024 x 768 @ 75Hz
VESA 1280 x 960 @ 60Hz
VESA 1280 x 1024 @ 60Hz
VESA 1280 x 1024 @ 75Hz
VESA 1440 x 900 @ 60Hz
VESA 1440 x 900 @ 75Hz
VESA 1600 x 1200 @ 60Hz
VESA 1680 x 1050 @ 60Hz
VESA 1920 x 1080 @ 60Hz
480i
480p
576i
576p
720p
1080i
1080p
Page 12

English
9
Technical Information
Technical Specication
LCD Display 23.6” TFT
Power Management
Energy Star compliant VESA
DPMS compatible
< 1 W
Supported Resolution Full HD 1920 x 1080 max. Vertical Frequency 60Hz max.
Pixel size 0.2715 x 0.2715 mm
Display Colors 16.7M
Tilt 0°~20°
Active Display Area 521.3 mm x 293.2 mm
Temperature
Operating: 0°C ~ +40°C
Storage: -20°C ~ + 60°C
Compliance UL, CE, FCC-B, Energy Star,
Input voltage Input Voltage AC100-240 V
Speaker Output 2W x 2
Signal Input VGA, DVI, HDMI
Page 13

English
10
Care and Maintenance
Care
Avoid exposing your monitor directly to sunlight or other heat source. Place your
monitor away from the sun to reduce glare.
Put your monitor in a well ventilated area.
Do not place any heavy items on top of your monitor.
Make certain your monitor is installed in a clean and moisture-free area.
Keep your monitor away from magnets, motors, transformers, speakers, and TV
sets.
Safety Tips
If smoke, abnormal noise, or odor appears to arise from your monitor, remove
the power cord immediately and call your service center.
Never remove the rear cover of your monitor cabinet. The display unit inside
contains high-voltage parts and may cause electric shock to human bodies.
Never try to repair your monitor yourself. Always call your service center or a
qualied technician to x it.
Troubleshooting
No power (Power indicator is not lit and there is no image)
Make sure A/C power cord is securely inserted to both the AC-INLET socket on
the monitor and wall outlet.
Plug another electrical device into the power outlet to verify that the outlet is
supplying proper voltage.
Make sure all signal cables are installed.
Power indicator is green but there is no screen image
Make sure the video cable supplied with the monitor is tightly secured to the
video output port on back of the computer. If not, tightly secure it.
Adjust brightness.
Wrong or abnormal colors
If any colors (red, green, blue) are missing, check the video cable to make sure
it is securely connected. Loose or broken pins in the cable connector could
cause an improper connection.
Connect the monitor to another computer.
“No signal” message appears on the screen
Make sure the computer is turned on and that the monitor cable is properly
connected and/or has no bent pins.
Page 14

English
11
Warranty Information
Swinton Avenue Trading, Inc.
Limited One Year Product Warranty
This limited warranty covers the original purchase of new product used for normal
commercial, personal or household use. Swinton Avenue Trading, Inc. (SAT) warrants
its products will be free from defects in materials and workmanship (normal wear and
tear excepted), for one (1) year from the date of purchase, except as provided below.
SAT, at its option, will replace with a comparable product, free of charge, any product
which fails under normal use as a result of such defect. This warranty does not apply
to damage caused by re, accident, negligence, misuse, improper cleaning or other
circumstances not directly attributable to manufacturing defects.
Proof of purchase is required in the form of a receipt (copy or original) to validate
warranty. If you do not have a copy of your store receipt and paid using a check or
a major credit card, a copy can be obtained from Ofce Depot’s receipt retrieval
department at 1-800-721-6592.
If SAT chooses to provide a refund for such product, it will be fullled in the form of
an Ofce Depot Merchandise card. Claims fullled in this manner take approximately
90 days to process.
SAT PROVIDES THIS LIMITED WARRANTY IN LIEU OF ALL OTHER WARRANTIES
EITHER EXPRESS OR IMPLIED. EXPRESSLY EXCLUDED ARE ALL WARRANTIES
OF FITNESS FOR A PARTICULAR PURPOSE OR MERCHANTABILITY. SAT’S
SOLE OBLIGATION AND THE USER’S EXCLUSIVE REMEDY UNDER THIS
WARRANTY SHALL BE LIMITED TO THE REPAIR OR REPLACEMENT AT SAT’S
SOLE DISCRETION AND COST, OF PRODUCT OR COMPONENTS.
IN NO EVENT SHALL SAT, ITS AFFILIATES, SUBSIDIARIES OR PARENT
COMPANIES BE RESPONSIBLE FOR CONSEQUENTIAL, SPECIAL, OR
INCIDENTAL DAMAGES ARISING OUT OF A CLAIM OF DEFECTIVE PRODUCT
EVEN IF ODP HAS BEEN ADVISED OF THE POSSIBILITY OF SUCH DAMAGES.
SOME STATES OR PROVINCES DO NOT ALLOW THE EXCLUSION OF IMPLIED
WARRANTIES OR LIMITATIONS ON HOW LONG AN IMPLIED WARRANTY LASTS
OR THE EXCLUSION OR LIMITATION OF INCIDENTIAL OR CONSEQUENTIAL
DAMAGES SO THE ABOVE LIMITATIONS MAY NOT APPLY TO YOU. THIS
WARRANTY GIVES YOU SPECIFIC LEGAL RIGHTS, AND YOU MAY ALSO HAVE
OTHER RIGHTS WHICH MAY VARY BY STATE OR PROVINCE.
THIS WARRANTY APPLIES ONLY TO THE U.S. AND CANADA.
For service, please call 1-877-777-HELP (1-877-777-4357)
Page 15

Français
Instructions d’Utilisation
Merci d’acheter ceci qu’un à haute résolution multi-balaye le contrôle de
couleur.
Veuillez lire attentivement ce guide avant l’installation.
COMMUNIQUE D’AVERTISSEMENT DE LA FCC CONCERNANT LES
INTERFERENCE DE FREQUENCE RADIO: (SEULEMENT POUR
MODELES CERTIFIE PAR LA FCC)
Ce moniteur a été testé et à été trouvé conforme aux limites pour un appareil
numérique de Classe B, suivant la partie 15 des règlements de la FCC. Ces
limites ont été développées pour offrir une protection satisfaisante contre
les interférences nuisibles dans une installation résidentielle. Ce moniteur
génère, utilise et peut radier de l’énergie de fréquence radio. Ceci peut causer
des interférences nuisibles à des communication radio si l’appareil n’est pas
convenablement installé et utilisé. Il n’y à néanmoins aucune garantie que
des interférences n’apparaîtront pas dans une installation particulière. Si ce
moniteur cause de sérieuses interférences à la réception de signaux radios
ou télévisées, une possibilité est de réinitialiser le moniteur. Les usagers sont
aussi encouragés à corriger les interférences en appliquant une ou plusieurs
des démarches suivantes:
Réorientez ou déplacez l’antenne de réception.
Placez le moniteur et le récepteur plus loin l’un de l’autre.
Connectez le moniteur à une prise différente de celle à laquelle le
récepteur est connecté.
Consultez votre revendeur local ou un technicien qualié.
Avertissement de la FCC:
Pour assurez une conformité continue au règlements de la FCC, l’utilisateur
doit utiliser un cordon d’alimentation mis à terre et le câble d’interface vidéo
protégé avec noyaux en ferrite, fourni avec l’appareil. Chaque modication
ou changement non-autorisé appliqué à ce moniteur peut faire perdre à
l’utilisateur sont droit d’opération de cet appareil.
Note: Si nécessaire, des câbles d’interface protégés et un cordon
d’alimentation alternante doivent être utilisé pour être conforme aux limites
d’émission.
Page 16

Français
Français
Contenu
Précautions de Sécurité ..................................................................... 1
Première Installation ...........................................................................2
Installation Rapide ..............................................................................2
Vue avant du produit ......................................................................... 3
Produit vu de dos................................................................................3
Utiliser les fonctions d’afchage d’écran (OSD) .................................4
Support des modes minutage.............................................................8
Informations Technique ......................................................................9
Soins et Maintien ..............................................................................10
En Cas de Problème ....................................................................... 10
L’information de garantie .................................................................. 11
Page 17

Français
1
Précautions de Sécurité
Ce moniteur à été fabriqué et testé à partir du principe que la sécurité de
l’utilisateur est primordiale. Néanmoins, l’utilisation ou l’installation
incorrecte peut causer un danger à l’appareil aussi bien que à l’utilisateur.
Lisez attentivement les AVERTISSEMENTS suivants avant de commencer
l’installation et gardez ce guide à portée de main.
AVERTISSEMENTS:
Ce moniteur ne doit être utilisé que en connexion avec les sources
d’alimentation correctes, indiquées sur l’étiquette à l’arrière du
moniteur. Si vous n’êtes pas sur de l’alimentation dans votre résidence,
consultez votre revendeur locale ou la compagnie d’électricité.
La prise de cordon de secteur doit être reliée à une sortie correctement
de câble et au sol de puissance
N’essayez pas de réparer le moniteur vous même, car il ne contient
pas de composants réparables par l’utilisateur. Le moniteur ne peut
être réparé que par un technicien qualié.
N’enlevez pas la cache du moniteur. Il y à des composants sous haute
tension à l’intérieur qui peuvent causer des choques électriques, même
quand le cordon d’alimentation est déconnecté.
N’utilisez plus le moniteur si la caisse est endommagée. Appelez un
technicien d’entretien pour la contrôler.
Placez votre moniteur dans un endroit propre et sec. Si le moniteur se
mouille déconnectez le immédiatement et consultez votre technicien
d’entretien.
Déconnectez toujours votre moniteur avant de le nettoyer. Nettoyez
la caisse avec un chiffon sec et propre. Appliqué un nettoyant non-
ammonisé sur le chiffon, jamais directement sur l’écran.
Gardez le moniteur éloigné d’objets magnétiques, de moteurs, de sets
de télévision et de transformateurs.
Ne placez pas d’objets lourd sur le câble ou le cordon d’alimentation.
Pour des EQUIPMENTS à FICHE, la che de sortie doit être installé
près de l’arrière de l’équipement et à un endroit facilement accessible.
Pour des raisons de sécurité, si le kit de xation VESA est acheté
séparément, assurez-vous que le kit de xation est certié UL, et
remplaçable uniquement par un technicien qualié.
Page 18

2
Français
Première Installation
Félicitations avec votre achat de ce moniteur de haute performance!
Ce moniteur est fourni avec les accessoires suivants:
Cordon d’Alimentation Câble Audio
Câble D-Sub (15 broches) Guide de l’utilisateur
Câble DVI (Facultatif)
Installation Rapide
1. Connectez le cordon d’alimentation
Connectez le cordon d’alimentation au dos du moniteur. Branchez le cordon
d’alimentation dans une prise de courant proche.
2. Connecter le câble analogique vidéo (Câble D-Sub)
Assurez-vous qu’à la fois le moniteur et l’ordinateur sont bien SOUS tension. Connectez
le câble vidéo de la sortie D-Sub sur l’ordinateur sur l’entrée D-Sub sur le moniteur.
3. Connectez le câble DVI (Facultatif)
Connectez le câble DVI de la sortie DVI de l’ordinateur sur l’entrée DVI du moniteur.
4. Connectez le câble de HDMI (non fourni)
HDMI du rendement de HDMI de l’ordinateur à l’entrée de HDMI du moniteur.
5. Connecter le câble audio
Connectez une extremite du cable audio au dos du moniteur et connectez
l’autre extremite au port de sortie audio de l’ordinateur.
6. Allumez l’ordinateur et le moniteur
Allumez l’ordinateur et ensuite allumez le moniteur.
7. Utilisateurs de Windows : Paramétrer le mode de synchronisation
(résolution et vitesse de rafraîchissement)
Exemple: 1920 x 1080 @ 60 Hz
Résolution Faites un clic droit de la souris sur le bureau de Windows >
Propriétés >Paramètres > “Espace du bureau”. Paramétrer la résolution
:Vitesse de rafraîchissement (fréquence verticale) Voir le guide utilisateur de
votre carte graphique pour les instructions.
Page 19

Français
3
Vue avant du produit
ACTIVER/QUITTER OSD CONFIRMER LA SÉLECTION
DEFILER VERS LE BAS/
DIMINUER
SOUS TENSION/ HORS TENSION
DEFILER VERS LE HAUT/
AUGMENTER
INDICATEUR DEL
Produit vu de dos
ENTREE DU CA ENTREE VGA (D-SUB 15 BROCHES)
ENTREE DVI (DVI 24 BROCHES) ENTREE AUDIO
ENTREE HDMI
1
2
3
4
5
6
7
8
9
11
10
1 2 3 4 5 6
7 8
9 10 11
Page 20

4
Français
Utiliser les fonctions d’affichage d’écran (OSD)
Afcher le menu principal.
Quitter le menu OSD.
Raccourci pour montrer l’ajustement choisi de source d’entrée
quand pas dans le menu d’OSD.
Conrmer la sélection.
▼
Sélectionnez l’élément désiré quand vous êtes dans le menu OSD.
Quand pas dans le menu d’OSD, il est raccourci écran de commande
pour montrer de contraste/Luminosité/DCR/ECO Mode ajustement.
▲
Sélectionnez l’élément désiré quand vous êtes dans le menu OSD.
Quand pas dans le menu d’OSD, il est raccourci pour montrer
l’écran de commande d’ajustement de mode d’Opticolor.
▼ + ▲ Rétablir à la fois le Contraste et la Luminosité.
+ ▼ Verrouillage de l’alimentation (quand vous n’êtes pas dans le menu OSD)
+ ▲ Verrouillage de l’OSD (quand vous n’êtes pas dans le menu OSD)
Menu principal (Main Menu)
1
2
1
1
Page 21

Français
5
Fonction de raccourcis
Réglage automatique (Auto Image Adjust) : Ajuste automatiquement la
position horizontale, la position verticale, la phase(accord n) et l’horloge
(taille H).
Contraste (Contrast) : Pour ajuster le niveau blanc du premier plan de
l’image de l’écran.
▲ : augmenter le contraste, ▼: diminuer le contraste.
Luminosité (Brightness) : Pour régler la luminance de la vidéo.
▲: increase brightness, ▼ : decrease brightness.
DCR : Permet à l’utilisateur d’activer ou de désactiver DCR.
ECO Mode : Permet à l’utilisateur d’activer ou de désactiver ECO. Les
réglages de Contraste et Luminosité sont désactivés quand ECO est actif.
Entrée (Input Select) : Permet à l’utilisateur de changer le signal d’entrée
en analogue, HDMI ou DVI.
Réglage audio (Audio Adjust) : Pour régler les fonctions audio.
Volume: Pour ajuster la sortie du haut-parleur.
Muet: Pour sélectionner Silence Allumé/Eteint.
Couleur réglage (Color Adjust) : Pour sélectionner la couleur pour
améliorer la luminosité et la saturation de la couleur entre 9300K, 6500K,
5400K, et Couleur utilisateur.
9300K : Ajoute du bleu à l’image de l’écran an d’obtenir un blanc plus froid.
6500K : Ajoute du rouge à l’image de l’écran pour obtenir un blanc plus
chaud et un rouge plus riche.
5400K : Ajoute du vert à l’image de l’écran pour obtenir une image plus sombre.
Couleur utilisateur (User Color) : Réglage individuel pour le rouge(R),
vert (V), bleu (B).
1. Appuyez sur le bouton 2 pour ajuster et sélectionner la couleur. suivante
à ajuster.
2. Appuyez sur le bouton
▼ ou ▲ pour ajuster la couleur sélectionnée.
Informations (Information) : Afche les informations relatives au signal
d’entrée du courant de la carte graphique de votre ordinateur.
Remarque: Reportez-vous au guide de l’utilisateur de votre carte
graphique pour avoir des informations supplémentaires concernant les
modications de la résolution et le taux de rafraîchissement.
Page 22

6
Français
Réglage manuel de I’image (Manual Image Adjust) : Ajustez la Taille
horizontale, Position H./V., Réglage image, Finesse, Réglage du mode
Vidéo et Mode OptiColor.
Taille horizontale(Horizontal Size) : Ajuste la largeur de l’image de l’écran.
▼ : diminue la largeur de l’image de l’écran, ▲ : augmente la largeur de
l’image de l’écran.
Position H./V. (H./V. Position) : Pour ajuster la position horizontale et
verticale de la vidéo.
Position H. : ▲ : Déplace l’écran vers la droite, ▼ : déplace l’écran vers
la gauche.
Position V. : ▲ : déplace l’écran vers le haut, ▼ : déplace l’écran vers le bas.
Réglage image (Fine Tune) : Pour ajuster le temps de retard.
Appuyez sur ▲ ou ▼ pour ajuster à la préférence de l’utilisateur.
Finesse (Sharpness) : Pour ajuster la clarté d’un signal non-Full HD
(1920x1080) avec le bouton ▼ ou ▲.
Video Mode Adjust : Pour sélectionner le mode vidéo parmi Full Screen,
Over screen ou Format d’image(Aspect Ratio).
Full Screen : Pour sélectionner l’image en taille plein écran.
Over screen : Pour sélectionner l’image en taille sur écran.
Format de l’image(Aspect Ratio) : Reconstituez la résolution (Non-16:9)
pour le pleine page. De sorte que des images puissent être montrées.
Mode OptiColor (OptiColor Mode) : Offre un environnement d’afchage
optimal selon le contenu afché. Il contient 5 préréglages sélectionnables
par l’utilisateur.
Standard est destiné à l’environnement de Windows général et le
paramétrage du moniteur par défaut.
seux (Game) optimisé pour l’environnement de jeu PC.
Cinéma (Cinema) optimisé pour l’environnement de lm et vidéo.
Paysage (Scenery) optimisé pour afcher des images de paysages.
Texte(Text) optimisé pour l’édition et la visualisation de texte en
environnement de traitement de texte.
Conguration (Setup Menu) : Pour régler langue, Position OSD,
Interruption OSD et Arrière plan OSD.
Langue (Language Select) : Permet à l’utilisateur pour choisir parmi les
langues disponibles.
?
Page 23

Français
7
Position OSD (OSD Position) : Appuyez sur le bouton ▼ ou ▲ pour
choisir entre les réglages de position OSD horizontale et verticale.
Position H. : Pour régler horizontalement la position de l’OSD.
▲ : déplacer l’OSD à droite, ▼ : déplacer l’OSD à gauche.
Position V. : Pour régler verticalement la position de l’OSD.
▲ : déplacer l’OSD vers le haut, ▼ : déplacer l’OSD vers le bas.
Interruption OSD (OSD Time Out) : Pour désactiver automatiquement
l’afchage d’écran (OSD) après une durée prédénie.
Arrière plan OSD (OSD Background) : Vous permet d’activer ou de
désactiver l’arrière plan à l’écran.
Rappel de mémoire (Memory Recall) : Pour rétablir les paramètres
d’usine pour les contrôles vidéo & audio. Appuyez sur le bouton 2 pour
sélectionner l’option de menu de Rappel Mémoire.
Page 24

8
Français
Support des modes minutage
Synchronisation de soutien quand en mode de HDMI
Avertissement : Ne réglez pas la carte graphique de votre ordinateur en
dépassant ces taux de rafraîchissement maximaux. Si vous le faites, cela va
irrémédiablement détériorer votre moniteur.
VGA 720 x 400 @ 70Hz
VGA 640 x 480 @ 60Hz
VESA 640 x 480 @ 75Hz
VESA 800 x 600 @ 60Hz
VESA 800 x 600 @ 72Hz
VESA 800 x 600 @ 75Hz
VESA 1024 x 768 @ 60Hz
VESA 1024 x 768 @ 70Hz
VESA 1024 x 768 @ 75Hz
VESA 1280 x 960 @ 60Hz
VESA 1280 x 1024 @ 60Hz
VESA 1280 x 1024 @ 75Hz
VESA 1440 x 900 @ 60Hz
VESA 1440 x 900 @ 75Hz
VESA 1600 x 1200 @ 60Hz
VESA 1680 x 1050 @ 60Hz
VESA 1920 x 1080 @ 60Hz
480i
480p
576i
576p
720p
1080i
1080p
Page 25

Français
9
Informations Technique
Spécications Techniques
Afchage LCD 23.6” TFT
Gestion de l’alimentation
électrique
Energy Star conforme à VESA
compatible avec DPMS
< 1 W
Résolution prise en
charge
Full HD 1920 x 1080 max. Fréquence Verticale
maximale de 60Hz
Taille des pixels 0.2715 x 0.2715 mm
Couleurs d’afchage 16.7M
Inclinaison 0°~20°
Zone d’écran active 521.3 mm x 293.2mm
Température
Operating: 0°C ~ +40°C
Storage: -20°C ~ + 60°C
Conformité UL, FCC-B, Energy Star,
Tension d’entrée Voltage d’Entrée 100-240 V CA
Rendement de hautparleur
2W x 2
Entrée du signal VGA, DVI, HDMI
Page 26

10
Français
Soins et Maintien
Soins
Evitez d”exposer le moniteur directement à la lumière du soleil ou à une autre
source de chaleur. Placez votre moniteur détourné du soleil pour éviter des
reets.
Placez votre moniteur dans un emplacement bien ventilé.
Ne mettez pas d’objet lourd sur le moniteur.
Veillez à ce que votre moniteur soit installé dans un endroit sec et propre.
Gardez votre moniteur loin d’aimants, moteurs, transformateurs, haut parleurs
et de set de télévision.
Conseils de Sécurité
Si de la fumée, un bruit anormal ou une odeur sort de votre moniteur, éteignez
immédiatement le courant et appelez votre centre d’entretien.
N’enlevez jamais le panneau arrière de la caisse du moniteur. L’unité
d’afchage à l’intérieur contient des parties sous haut voltage qui peuvent
causer des chocs électriques à des corps humains.
N’essayez jamais de réparer le moniteur vous même. Appelez toujours votre
centre d’entretien ou un technicien spécialisé pour faire les réparations.
En Cas de Problème
Pas d’Alimentation (L’indicateur de puissance n’est pas allumé et il n’y a
aucune image)
Contrôlez que le courant alternatif soit bien connecter à l’adaptateur de courant
et que le cordon alimentaire soit bien connecter au moniteur.
Connectez un autre appareil électrique à la prise murale pour vérier qu’elle
émets bien le voltage souhaité.
Vériez que tous les câbles soient bien installés.
L’indicateur de puissance est vert mais il n’y a aucune image d’écran
Vériez que le câble vidéo, fourni avec le moniteur soit bien solidement xé
au port de sortie du signal vidéo, situé à l’arrière de l’ordinateur. Sinon, xé le
convenablement.
Ajustez la clarté.
Couleurs incorrectes ou anormales
Si une des couleurs manque (rouge, vert, bleu), contrôlez le câble vidéo pour
vous assurez qu’il soit bien correctement connecté. Des broches desserrées ou
cassées peuvent créer une connexion incorrecte.
Connectez le moniteur à un autre ordinateur.
Le message de “Aucun signal” apparaît sur l’écran
Assurez-vous que l’ordinateur est mis en marche et que le câble de moniteur
est correctement relié et/ou n’a aucune goupille coudée.
Page 27

Français
11
L’information de garantie
Swinton Avenue Trading, Inc.
Garantie limitée de un an
Cette garantie limitée couvre les produits neufs utilisés dans le cadre d’applications
commerciales ou domestiques normales. Swinton Avenue Trading, Inc. (SAT)
garantit ses produits contre les défauts de matériel et de main-d’œuvre (à l’exception
de l’usure normale) durant un (1) an à compter de la date d’achat, à l’exception
des conditions ci-dessous. SAT, à son gré, remplacera sans frais tout produit
défectueux dans des conditions d’usure normale par un produit comparable. La
présente garantie ne s’applique pas aux dommages causés par le feu, un accident, la
négligence, l’usage abusif, le non-respect des instructions, un nettoyage inapproprié
ou autre circonstance non directement attribuable à des défauts de matériel et de
main-d’œuvre.
Le reçu d’origine ou une copie est nécessaire pour valider la garantie. Si vous avez
payé par chèque ou carte de crédit, vous pouvez obtenir une copie de reçu auprès
de Ofce Depot en composant le 1-800-721-6592.
Si Swinton Avenue Trading décide de rembourser le prix d’achat d’un tel produit,
le remboursement sera offert sous forme de carte d’achat Ofce Depot. Veuillez
allouer 90 jours pour le traitement des réclamations.
CETTE GARANTIE EST FOURNIE EN LIEU ET PLACE DE TOUTE AUTRE
GARANTIE. SONT EXCLUES TOUTES LES GARANTIES D’ADÉQUATION À UN
USAGE SPÉCIFIQUE ET DE QUALITÉ SATISFAISANTE. LA SEULE OBLIGATION
D’SAT ET VOTRE SEUL RECOURS EN VERTU DE CETTE GARANTIE SONT
LIMITÉS À LA RÉPARATION DU PRODUIT, AU REMBOURSEMENT SOUS FORME
DE CARTE D’ACHAT OFFICE DEPOT OU AU REMPLACEMENT DU PRODUIT
OU DE COMPOSANTS À SES FRAIS.
SAT, SES FILIALES, SES COMPAGNIES ASSOCIÉES ET SES SOCIÉTÉS MÈRES
NE PEUVENT ÊTRE TENUES RESPONSABLES DES DOMMAGES INDIRECTS
OU PARTICULIERS INHÉRENTS À UNE RÉCLAMATION POUR PRODUIT
DÉFECTUEUX MÊME SI LA POSSIBILITÉ D’UN TEL DOMMAGE A ÉTÉ DÉJÀ
ÉTÉ PORTÉE À LA CONNAISSANCE D’SAT.
CERTAINS ÉTATS ET CERTAINES PROVINCES INTERDISANT L’EXCLUSION OU
LES RESTRICTIONS DE DURÉE DES GARANTIES IMPLICITES OU L’EXCLUSION
DES DOMMAGES INDIRECTS, LES RESTRICTIONS CI-DESSUS PEUVENT NE
PAS S’APPLIQUER À VOUS. LA PRÉSENTE GARANTIE VOUS CONFÈRE DES
DROITS JURIDIQUES SPÉCIFIQUES ET VOUS POUVEZ DISPOSER D’AUTRES
DROITS, LESQUELS PEUVENT VARIER SELON L’ÉTAT OU LA PROVINCE.
CETTE GARANTIE S’APPLIQUE UNIQUEMENT AU CANADA ET AUX ÉTATS-UNIS.
Pour le service, appelez svp 1-877-777-HELP (1-877-777-4357).
Page 28

Español
Instrucciones de operación
Gracias por comprar este de alta resolución multi-exploran el monitor de
color.
Por favor lea esta guía minuciosamente antes de hacer la instalación.
ACUERDO DE INTERFERENCIA DE RADIO FRECUENCIA PARA FCC
ADVERTENCIA: (PARA MODELOS CERTIFICADOS COMO FCC)
Este monitor ha sido probado y encontrado en regla con los límites para
la clase B de mecanismos digitales, en conformidad con la parte 15 de las
Reglas FCC. Estos límites están designados para proveer una adecuada
protección contra interferencias dañinas de una instalación residencial.
Este monitor genera, usa y puede irradiar energía de radio frecuencia.
Interferencias dañinas de la radio comunicación pueden seguirse como
resultado si este monitor no es instalado y usado propiamente. Sin embargo,
no hay garantías de que no ocurrirán interferencias en una particular
instalación. Si este monitor causa serias interferencias en la recepción de
radio o televisión, reajustar el monitor puede detenerlas. Sin embargo, los
usuarios son alentados a corregir las interferencias haciendo una o más de
las siguientes cosas:
Reorientar o reposicionar la antena receptora.
Mover el monitor y el receptor lejos el uno del otro.
Conectar el monitor a una toma de corriente en un circuito diferente de
aquel al que está conectado el receptor.
Consultar al vendedor local o a un técnico calicado.
FCC Advertencia:
Para asegurar una continua FCC conformidad, el usuario debe usar un
cable enterrado de suministro de la corriente y el cable de interfaz de
video provisto con el producto. Además, cualquier cambio no autorizado
o modicaciones a este monitor harán vana la autoridad del usuario para
operar este mecanismo.
Nota: Si es necesario, cables de interfaz recubiertos y el cable de la corriente
deben ser usados cumpliendo con los límites de niveles de emisión.
Page 29

Español
Contenido
Precauciones de Seguridad ............................................................... 1
Instalación Rápida ..............................................................................2
Vista Frontal del Producto ..................................................................3
Vista Trasera del Producto ................................................................. 3
Usando las funciones"On Screen Display(OSD)" ..............................4
Tiempos soportados ..........................................................................8
Información Técnica ...........................................................................9
Mantenimiento y Cuidado .................................................................10
Solución de Problemas.....................................................................10
Información de la garantía ................................................................ 11
Page 30

1
Español
Precauciones de Seguridad
Este monitor ha sido manufacturado y probado bajo el principio de que la
seguridad del usuario es lo primero. Sin embargo, el uso o la instalación
impropia puede resultar de peligro para el monitor tanto como para el usuario.
Lea cuidadosamente las siguientes ADVERTENCIAS antes de la instalación
y conserve a mano esta guía.
ADVERTENCIAS:
u Este monitor debe ser operado solamente según las fuentes de
energía indicadas en la etiqueta en la parte trasera del monitor. Si
usted no está seguro del suministro de energía en su residencia,
consulte a su vendedor local o a la compañía de energía eléctrica.
u La clavija del cable eléctrico se debe conectar con un enchufe de
energía correctamente atado con alambre y puesto a tierra.
u No trate de reparar el monitor por usted mismo cuando esto concierne
a partes no ajustables por el usuario. El monitor debe ser reparado
solamente por técnicos calicados.
u No abra el monitor. Hay partes de alto voltaje adentro que pueden
causar un golpe de corriente sobre el cuerpo humano, incluso cuando
el cable de la corriente esté desconectado.
u Deje de usar el monitor si se ha dañado la estructura externa del
mismo. Hágalo revisar primero por el servicio técnico.
u Ponga su monitor solamente en un ambiente seco y limpio.
Desenchufe el monitor inmediatamente si este se moja y consulte a su
servicio técnico.
u Siempre desenchufe el monitor antes de limpiarlo. Limpie la cobertura
con un tela seca y limpia. Aplique limpiadores que no contengan
amoníacos sobre la tela que usará para limpiar el monitor, nunca
directamente sobre el vidrio de la pantalla.
u Conserve el monitor lejos de objetos magnéticos, motores, televisores,
y transformadores de corriente.
u No coloque objetos pesados sobre los cables del monitor.
u Para EQUIPOS AÑADIBLES, el enchufe del toma corriente debe estar
cerca del equipo y debe ser de fácil acceso.
u Debido a las precauciones de seguridad, si el kit de montaje VESA fue
adquirido por separado, asegurese de que el kit está en UL-Listed,
Aprovado port y reemplazado solamente por el personal de servicio.
Page 31

Español
2
Primera Configuración
Gracias por comprar este monitor de alto rendimiento!
Este monitor viene con los siguientes accesorios:
Cable toma de corriente Cable Audio
Cable VGA (15 pin D-Sub) Guía de usuario
Cable DVI (Opcional)
Instalación Rápida
1. Conecte el cable de toma de corriente
Enchufe el cable que toma la corriente a un toma corriente y después al monitor
2. Conectar el cable de vídeo (cable D-Sub)
Asegúrese de que tanto el monitor como el equipo están APAGADOS.
Conecte el cable de vídeo (cable D-Sub) entre la salida D-Sub del equipo y la
entrada D-Sub del monitor.
3. Conecte el cable DVI (Opcional)
Conecte el cable DVI entre la salida DVI del equipo y la entrada DVI del monitor.
4. Conecte el cable de HDMI (no suministrado)
Conecte el cable HDMI entre la salida HDMI del equipo y la entrada HDMI del monitor.
5. Conectar cable de audio
Conecte un extremo del cable de audio al dorso del monitor y conecte el otro al
puerto de salida de audio del ordenador.
6. Encienda la computadora y después el monitor
Encienda la computadora, después,encienda el monitor.
7. Usuarios de Windows: Congurar el Modo Cronometraje (Resolución e
Índice de Renovación)
Ejemplo: 1920 x 1080 @ 60 Hz (Resolución Recomendada)
Resolución haga el clic derecho en el Escritorio de Windows > Propiedades >
Conguraciones > “Área de Escritorio”. Congure la resolución.
Índice de Renovación (frecuencia vertical) vea la guía de usuario de su tarjeta
de grácas para las instrucciones.
Page 32

3
Español
Vista Frontal del Producto
ACTIVAR/SALIR OSD CONFIRMAR/AUTOCONFIGURAR
DESPLAZAR ABAJO/DISMINUIR ENCENDER/APAGAR
DESPLAZAR ARRIBA/AUMENTAR INDICADOR LED
Vista Trasera del Producto
ENTRADA AC ENTRADA VGA (15 PIN D-SUB)
ENTRADA DVI (24 PIN DVI) ENTRADA DE SONIDO
ENTRADA HDMI
1
2
3
4
5
6
7
8
9
9
10
1 2 3 4 5 6
7 8
9 10 11
Page 33

Español
4
Usando las funciones "On Screen Display(OSD)"
Muestra el menú principal.
Sale del menú OSD.
Atajo para exhibir el ajuste selecto de la fuente de la entrada
cuando no en menú de OSD.
Conrma la selección.
▼
Seleccione el artículo deseado cuando en menú de OSD.
Cuando no en menú de OSD, se direcciona para exhibir la pantalla
del control del ajuste del brillo/contraste/DCR/ECO Mode.
▲
Seleccione el artículo deseado cuando en menú de OSD.
Cuando no en menú de OSD, se direcciona para exhibir la pantalla
del control del ajuste del modo de Opticolor.
▼ + ▲ Vuelve a llamar el Contraste y Brillo.
+ ▼ Bloquea suministro (cuando no se encuentra en el menú OSD).
+ ▲ Bloquea OSD (cuando no se encuentra en el menú OSD ).
Menú principal (Main Menu)
1
2
1
1
Page 34

5
Español
Función de los atajos
Ajuste automático (Auto Image Adjust) : Ajuste automático de posición
horizontal, posición vertical, fase (ajuste no) y reloj (Tamaño-H).
Contraste (Contrast) : Ra ajustar el nivel de blanco de la imagen en pantalla.
▲ : aumentar contraste, ▼: disminuir contraste.
Brillo (Brightness) : Para ajustar la luminancia del vídeo.
▲: aumenta el brillo, ▼ : reduce el brillo.
DCR : Permite el usuario Encender o Apagar el DCR.
ECO Mode : Permite el usuario Encender o Apagar el ECO. El ajuste de
Contraste y Brillo está desactivado cuando ECO está activo.
Seleccionar entrada(Input Select) : Permite que el usuario cambie la
señal de entrada al análogo, a HDMI o a DVI.
Ajuste de sonido (Audio Adjust) : Para ajustar las funciones de audio.
Volumen : Para ajustar el volumen de los altavoces.
Silencio : Para activar y Encendido el Desactivado.
Ajuste de color (Color Adjust) : Para seleccionar el color para mejorar el brillo
y la saturación de color entre 9300K, 6500K, 5400K, y Color de Usuario.
9300K : Añade azul a la imagen para hacer el blanco más frío.
6500K : Añade rojo a la imagen para hacer el blanco más cálido y el rojo más intenso.
5400K : Añade cerde a la imagen para hacer los colores más oscuros.
Color de usuario (User Color) : Ajustes individuales para rojo (R), verde
(V), azul (A).
1. Pulse el botón 2 para jar el ajuste y seleccione el siguiente color a ajustar.
2. Pulse
▼ o ▲ para ajustar el color seleccionado..
Información (Information) : Muestra información acerca de la entrada
actual desde la tarjeta gráca de su ordenador.
Nota: Consulte el manual de su tarjeta gráca para más información
acerca del cambio de resolución y velocidad de fotograma.
Ajuste manual de la imagen (Manual Image Adjust) : Ajusta la Tamaño
horizaontal, posición H./V., Sintonizar, Nitidez, Video Mode adjust y Tono
Opticolor.
Page 35

Español
6
Tamaño horizontal (Horizontal Size) : Ajusta la anchura.
▼ : disminuye la anchura de la imagen en pantalla, ▲ : aumenta la
anchura de la imagen en panalla.
Posición H./V. (H./V. Position) : Para ajustar la posición horizontal y
vertical del video.
Posición H. : ▲ : mueve la pantalla a la derecha, ▼ : mueve la pantalla
a la izquierda.
Posición V. : ▲ : mueve la pantalla hacia arriba, ▼ : mueve la pantalla
hacia abajo.
Sintonizar (Fine Tune) : Para ajustar el retardo temporal.
Pulse ▲ o ▼ para ajustar a la preferencia del usuario.
Nitidez (Sharpness) : Para ajustar la claridad de una señal no Full HD
(1920x1080) con el botón ▼ o ▲.
Video Mode Adjust : Para seleccionar el modo vídeo de "Full Screen",
"Over Screen" o "Proporción de Aspecto".
Full Screen: Para seleccionar la imagen de tamaño de la pantalla entera.
Over Screen: Para seleccionar la imagen de tamaño superior de la
pantalla.
Proporción de Aspecto (Aspect Ratio) : Restaure la resolución
(Non-16:9) para el de plena pantalla. Para poder exhibir imágenes.
Tono OptiColor (OptiColor Mode): provee un ambiente de muestra
óptimo dependiendo de los contenidos mostrados. Contiene 5
preconguraciones elegibles por usuario.
Estándar (Standard) es para el ambiente Windows en general y la
conguración predenida del monitor.
Juego (Game) optimizado para el ambiente de juego de PC.
Cine (Cinema) optimizado para el ambiente de película y vídeo.
Paisaje (Scenery) optimizado para mostrar imágenes de escenas al aire libre.
Texto (Text) optimizado para editar y visualizar texto en un ambiente de
precesamiento de texto.
Menú de conguración (Setup Menu) : Para selección de Idioma,
Visualización en pantalla, Interruptor de OSD y Visulización de OSD.
Selección de idioma (Language Select) : Permite al usuario escojer
entre los idiomas disponibles.
?
Page 36

7
Español
Visualización en pantalla (OSD Position) : Oprima el botón ▲ o ▼
para seleccionar entre el ajuste de Posición OSD horizontal y vertical.
Posición H. : Para ajustar horizontalmente la posición OSD.
▲ : mueve el OSD a la derecha, ▼ : mueve el OSD a la izquierda.
Posición V. : Para ajustar verticalmente la posición OSD.
▲ : sube el OSD, ▼ : baja el OSD.
Interruptor de OSD (OSD Time Out) : Para apagar automáticamente la
Muestra En Pantalla (OSD) después de un período de tiempo prejo.
Visualización de OSD (OSD Background) : Activar o desactivar el fondo
de la presentación en pantalla.
Restituir memoria (Memory Recall) : Para llamar las conguraciones
de fábrica de vuelta para los controles Vídeo & Audio. Oprima el botón 2 .
para seleccionar la opción de menú Memoria.
Page 37

Español
8
Tiempos soportados
Sincronización favorable cuando en modo de HDMI
Aviso : No congure la tarjeta gráca de su ordenador de forma que exceda estas
frecuencias máximas de refresco. Si lo hace podría dañar permanentemente su
monitor.
VGA 720 x 400 @ 70Hz
VGA 640 x 480 @ 60Hz
VESA 640 x 480 @ 75Hz
VESA 800 x 600 @ 60Hz
VESA 800 x 600 @ 72Hz
VESA 800 x 600 @ 75Hz
VESA 1024 x 768 @ 60Hz
VESA 1024 x 768 @ 70Hz
VESA 1024 x 768 @ 75Hz
VESA 1280 x 960 @ 60Hz
VESA 1280 x 1024 @ 60Hz
VESA 1280 x 1024 @ 75Hz
VESA 1440 x 900 @ 60Hz
VESA 1440 x 900 @ 75Hz
VESA 1600 x 1200 @ 60Hz
VESA 1680 x 1050 @ 60Hz
VESA 1920 x 1080 @ 60Hz
480i
480p
576i
576p
720p
1080i
1080p
Page 38

9
Español
Información Técnica
Especicaciones Técnicas
Pantalla LCD 23.6” TFT
Administración de
energía
En conformidad con Energy Star Compatible con
VESA DPMS compatible
< 1 W
Resolución admitida
Full HD máximo 1920 x 1080. Frecuencia Vertical
máxima 60Hz.
Tamaño de píxeles 0.2715 x 0.2715 mm
Colores 16.7M (6bits + Hi FRC)
Inclinación 0°~20°
Área activa de la pantalla 521.3 mm x 293.2 mm
Temperatura
Funcionando: 0°C ~ +40°C
Almacenado: -20°C ~ + 60°C
Conformidad UL, FCC-B, Energy Star,
Tensión de entrada Input Voltage AC100-240 V
Salida del altavoz 2W x 2
Entrada de señal VGA, DVI, HDMI
Page 39

Español
10
Mantenimiento y Cuidado
Cuidado
Evite exponer el monitor directamente a la luz del sol o otra fuente de calor.
Coloque su monitor lejos del sol para reducir el deslumbramiento.
Coloque su monitor en un área bien ventilada. No ponga nada pesado sobre el
monitor.
Asegúrese de que el monitor esté instalado en un área limpia y libre de
humedad.
Mantenga el monitor lejos de imánes, objetos magnéticos, motores,
transformadores, parlantes y televisores.
Sugerencias de Seguridad
Si humo, o algún olor o ruido anormal sale de su monitor, desenchúfelo
inmediatamente y llame al servicio técnico.
Nunca quite la cubierta trasera o delantera del monitor. La unidad de
visualización de adentro contiene partes de alto voltaje que podrían causar
golpes eléctricos sobre el cuerpo humano.
Nunca trate de reparar su monitor usted mismo. Llame siempre a su servicio
técnico o a un técnico cualicado para arreglarlo.
Solución de Problemas
No enciende (El indicador de energía no se enciende y no hay imagen)
Asegúrese que el cable del monitor esté bien conectado al transformador o
adaptador de corriente y este al enchufe de la corriente.
Enchufe otro electrodoméstico en el mismo enchufe para vericar que el mismo
está suministrando un voltaje correcto.
Asegúrese que todos los cables cortos estén bien instalados.
El indicador de energía es verde pero no hay imagen de pantalla
Asegúrese que el cable de video suministrado con el monitor esté bien
conectado al puerto de salida de video en la parte de atrás de su computadora.
Si no está rmemente conectado, conéctelo nuevamente.
Ajuste el brillo.
Colores extraños o anormales
Si algún color (rojo, verde, azul) están faltando, revise el cable de video para
asegurarse que este está bien conectado. Pins sueltos o quebrados en el cable
conector podrían causar una conexión impropia o deciente.
Conecte el monitor a otra computadora.
“Sin señal” el mensaje aparece en la pantalla
Cerciórese de que la computadora esté girada y que el cable del monitor está
conectado y/o no tiene correctamente ningun perno doblado.
Page 40

11
Español
Información de la garantía
Swinton Avenue Trading, Inc.
Garantía limitada de un año para el producto
Esta garantía limitada cubre la adquisición original de un producto nuevo utilizado
con nes comerciales, personales o domésticos normales. Swinton Avenue Trading,
Inc. (SAT) garantiza que sus productos estarán exentos de defectos materiales y de
fabricación (a excepción de los derivados de un uso y desgaste normal) durante un
(1) año a partir de la fecha de compra del producto, con la salvedad de lo dispuesto
a continuación. SAT, a su discreción, sustituirá de forma gratuita por un producto
de características similares cualquier producto adquirido que no soporte unas
condiciones de uso normales como consecuencia de dicho defecto. Esta garantía
no se aplica a daños causados por incendio, accidente, negligencia, uso incorrecto
o cualquier otro uso no especicado en las instrucciones del producto, así como a
daños causados por una limpieza incorrecta o por otras circunstancias no atribuibles
de forma directa a defectos en los materiales y la fabricación.
Es necesario presentar el recibo (copia u original) como prueba de compra para validar
la garantía. Si no tiene una copia del recibo de la tienda y realizó el pago mediante
cheque o tarjeta de crédito, puede conseguir una copia a través del departamento
de recuperación de recibos de Ofce Depot en el teléfono 1-800-721-6592.
En el caso de que Swinton Avenue Trading decida reembolsar dicho producto,
este reembolso se realizará mediante una tarjeta comercial de Ofce Depot. Las
reclamaciones realizadas a través de este método se procesarán en aproximadamente
90 días.
ESTA GARANTÍA LIMITADA DE SAT SUSTITUYE A TODAS LAS DEMÁS GARANTÍAS,
YA SEAN EXPLÍCITAS O IMPLÍCITAS. QUEDAN EXPRESAMENTE EXCLUIDAS
TODAS LAS GARANTÍAS DE ADECUACIÓN PARA UN DETERMINADO FIN O
COMERCIABILIDAD. LA ÚNICA OBLIGACIÓN DE SAT Y EL ÚNICO RECURSO DEL
USUARIO EN VIRTUD DE ESTA GARANTÍA CONSISTIRÁ EN LA REPARACIÓN,
REEMBOLSO (MEDIANTE UNA TARJETA COMERCIAL DE OFFICE DEPOT) O
SUSTITUCIÓN, SEGÚN ESTIME OPORTUNO SAT Y ASUMIENDO TODOS LOS
COSTES, DEL PRODUCTO O SUS COMPONENTES.
EN NINGÚN CASO SAT, SUS AFILIADOS, SUBSIDIARIOS O EMPRESAS
MATRICES SERÁN RESPONSABLES DE DAÑOS DERIVADOS, ESPECIALES
O NO INTENCIONADOS PROCEDENTES DE UNA RECLAMACIÓN POR UN
PRODUCTO DEFECTUOSO, AUNQUE SE HAYA ADVERTIDO A SAT DE LA
POSIBILIDAD DE TALES DAÑOS.
ALGUNAS ESTADOS O PROVINCIAS NO PERMITEN LA EXCLUSIÓN DE
GARANTÍAS IMPLÍCITAS, LAS LIMITACIONES SOBRE LA DURACIÓN DE UNA
GARANTÍA IMPLÍCITA O LA EXCLUSIÓN O LIMITACIÓN DE DAÑOS DERIVADOS
O NO INTENCIONADOS, POR LO QUE ES POSIBLE QUE LAS LIMITACIONES
MENCIONADAS NO SE APLIQUEN EN SU CASO. ESTA GARANTÍA OTORGA
AL USUARIO DERECHOS LEGALES ESPECÍFICOS; ADEMÁS, ES POSIBLE
QUE GOCE DE OTROS DERECHOS QUE VARÍAN SEGÚN EL ESTADO O LA
PROVINCIA.
ESTA GARANTÍA SE APLICA SÓLO EN EE. UU. Y CANADÁ.
Para el servicio, llame por favor 1-877-777-HELP (1-877-777-4357)
 Loading...