

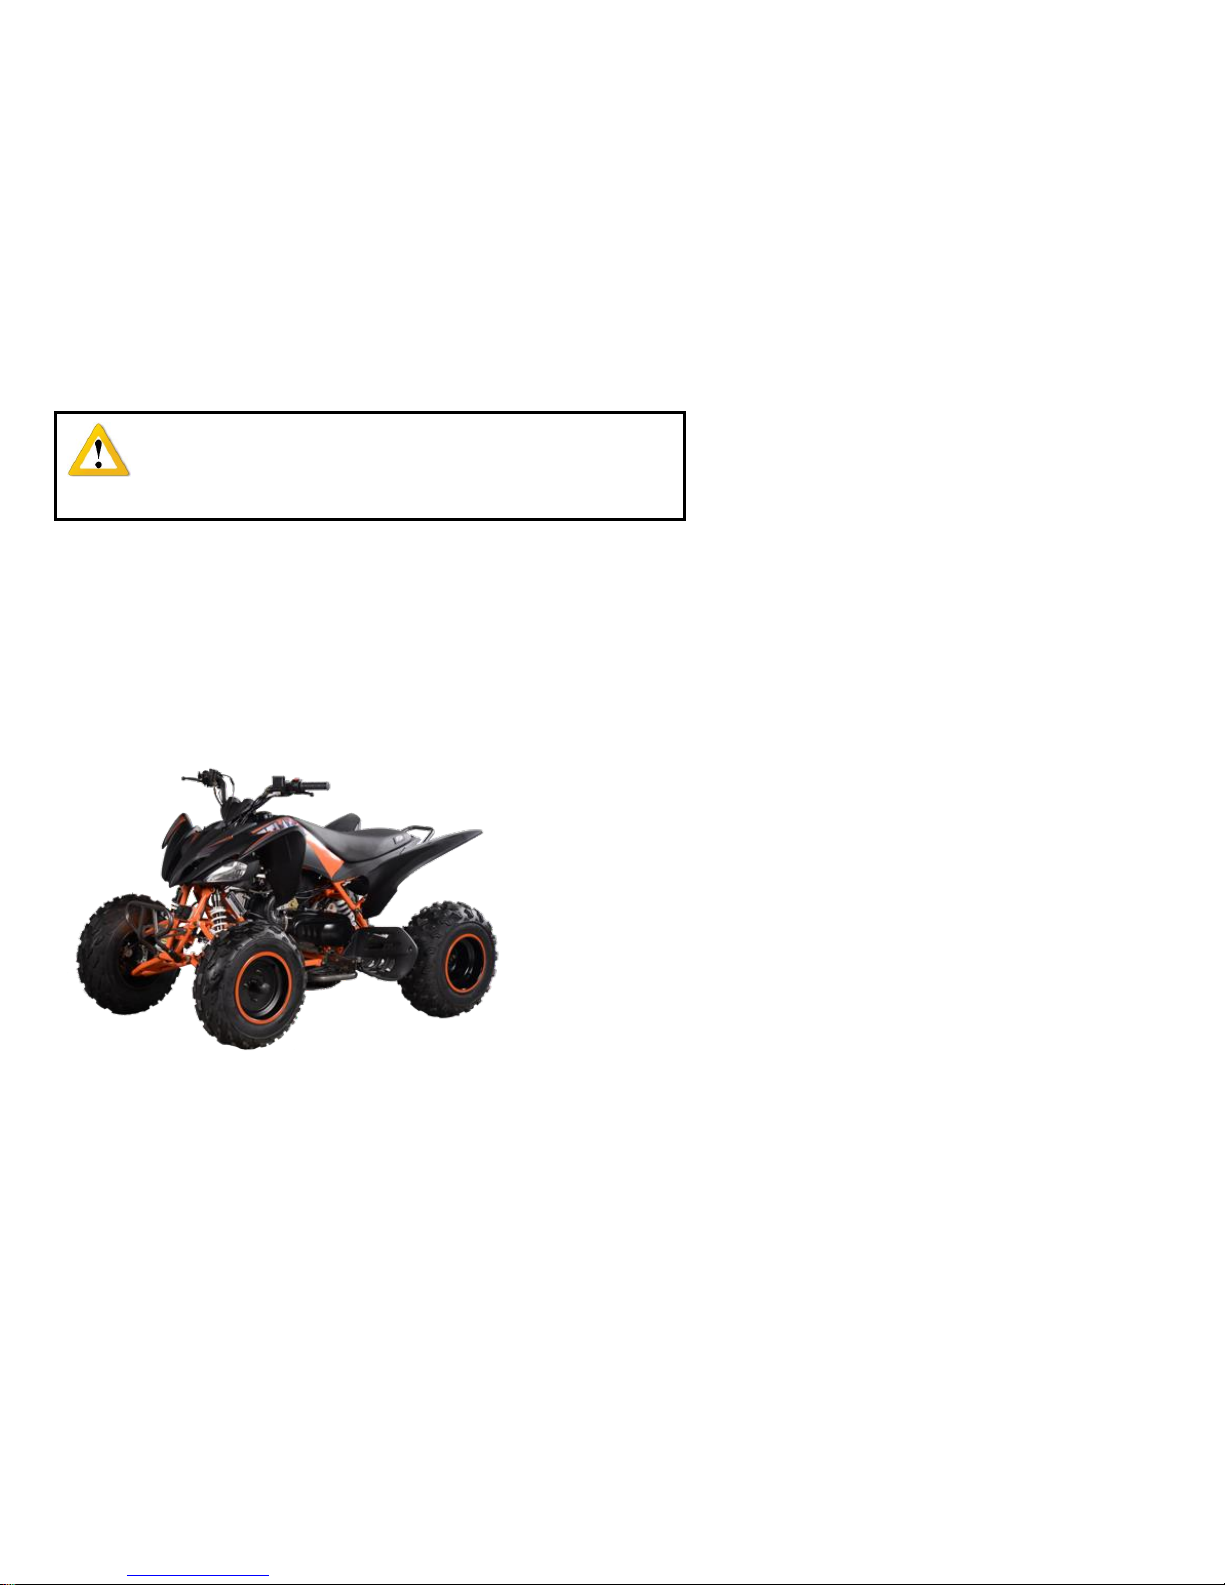
ATI Technologies THRASHER LZ170-3A Owner's Manual
READ THIS MANUAL CAREFULLY!
OWNERS MANUAL
THRASHER LZ170-3A

LOCATION OF THE WARNING AND
SPECIFICATION OF LABLES...................................1-1
SAFETY INFORMATION.......................................................2-1
DESCRIPTION.....................................................................3-1
Left view............................................................................3-1
Right view..........................................................................3-1
Control and instruments....................................................3-2
INSTRUMENT AND CONTROL
FUNCTIONS......................................................................4-1
Main switch.......................................................................4-1
Indicator light.....................................................................4-1
Handlebar switches...........................................................4-2
Throttle lever......................................................................4-3
Speed limiter......................................................................4-3
Front brake lever...........................................................4-4
Rear brake lever...................................................4-4
Hand shift lever..................................................................4-5
Fuel tank cap.......................................................................4-5
Fuel.....................................................................................4-5
Fuel cock..........................................................................4-6
Seat..................................................................................4-8
PRE-OPERATION CHECKS.............................................5-1
Fuel....................................................................................5-3
Engine oil............................................................................5-3
Front and rear brakes..........................................................5-3
Throttle lever....................................................................5-3
Drive chain.......................................................................5-3
Tires...................................................................................5-3
Chassis fasteners................................................................5-5
Instrument, lights and switches.....................................5-5
OPERATION.......................................................................6-1
Starting a cold engine............................................6-1
Starting a warm engine.....................................................6-1
Shifting............................................................................6-2
Engine break-in................................................................6-3
Parking on a slope...............................................................6-3
Accessories and loading................................................6-4
RIDING YOUR ATV...........................................................7-1
GETTING TO KNOW YOUR ATV....................................7-2
RIDE WITH CARE AND GOOD
JUDGMENT..................................................................7-2
BE CAREFUL WHERE YOU RIDE....................................7-8
TURNING YOUR ATV......................................................7-11
CLIMBING UPHILL......................................................... 7-12
RIDING DOWNHILL......................................................7-14
CROSSING A SLOPE.......................................................7-15
CROSSING THROUGH SHALLOW
WATER.......................................................................7-16
RIDING OVER ROUGH TERRAIN.................................7-18
SLIDING AND SKIDDING.............................................7-18
TABLE OF CONTENTS

WHAT TO DO IF................................................................7-19
WHAT TO DO................................ ......... ..... ....... ......... ... .7 -19
PERIODIC MAINTENANCE AND
ADJUSTMENT..................................................................8-1
Owner’s manual and tool kit.............................................8-2
Periodic maintenance chart for
the emission control system..............................................8-3
General maintenance and
lubrication chart.................................................................8-4
Checking the spark plug......................................................8-7
Engine oil ......................................................................8-9
Cleaning the air filter element...........................................8-11
A d j u s t i n g t h e
carburetor.....................................................8-12
Adjusting the engine idling speed.....................................8-12
Adjusting the engine throttle lever free play.......................8-13
Valve clearance................................................................8-13
Brakes.............................................................................8-13
Checking the front and rear brake pads......................8-13
Checking the brake fluid level..................................8-14
Changing the brake fluid...............................................8-15
Checking the brake lever free
play ……………………..………………………..................8-15
Drive chain slack...............................................................8-15
Lubricating the drive chain..............................................8-17
Checking and lubricating the cables.............................8-17
Checking and lubricating the brake lever ........................8-17
Checking the hand shift lever........................................8-18
Checking the wheel hub bearings....................................8-18
Lubricating the swingarm pivots.......................................8-19
Lubricating the upper and lower arm
pivots.....................................................................8-19
Lubricating the steering shaft................................................8-20
Battery................................................................................8-20
Replacing the fuse...............................................................8-22
Replacing a headlight bulb...................................................8-23
Adjusting a headlight beam.............................................8-24
Relacing the tail/brake light bulb...........................................8-25
Removing a wheel............................................................8-25
Troubleshooting...............................................................8-26
Troubleshooting chart..........................................................8-27
CLEANING AND STORAGE.................................................9-1
Cleaning........................................................................9-1
Storage..........................................................................9-2
SPECIFICATIONS............................................................10-1
1-
1
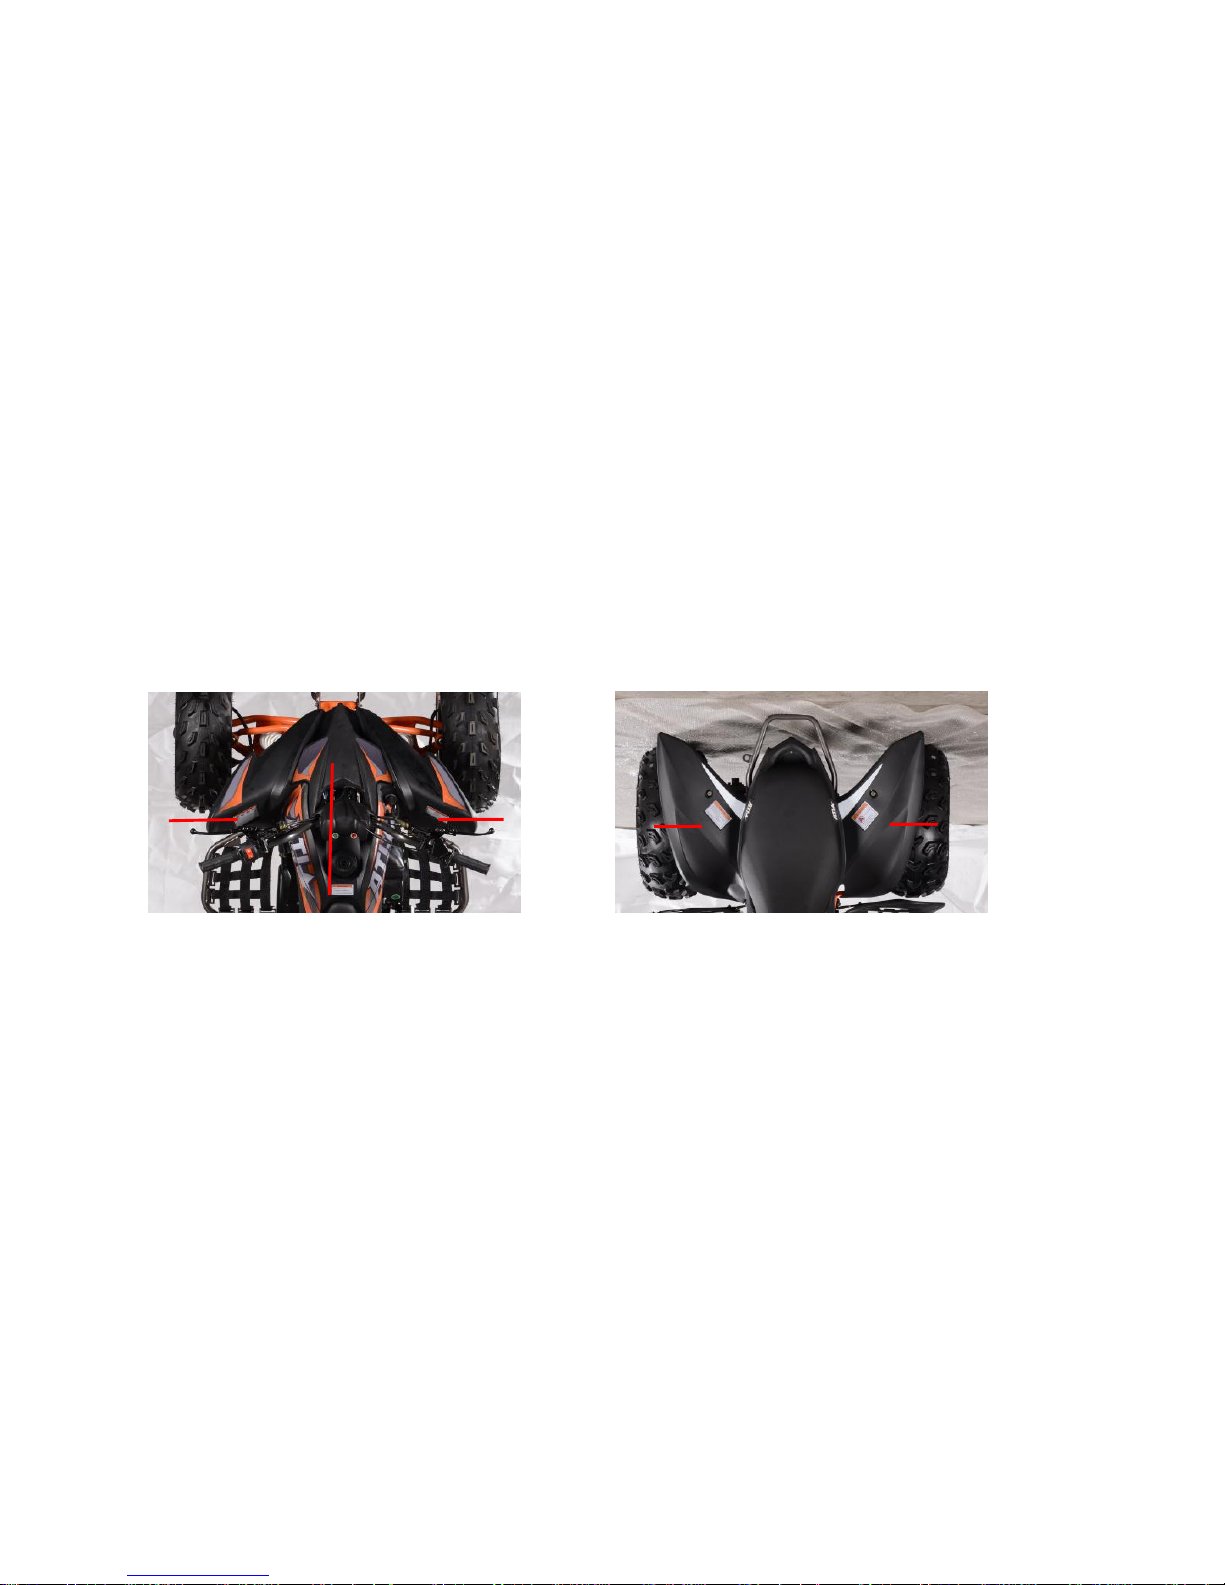
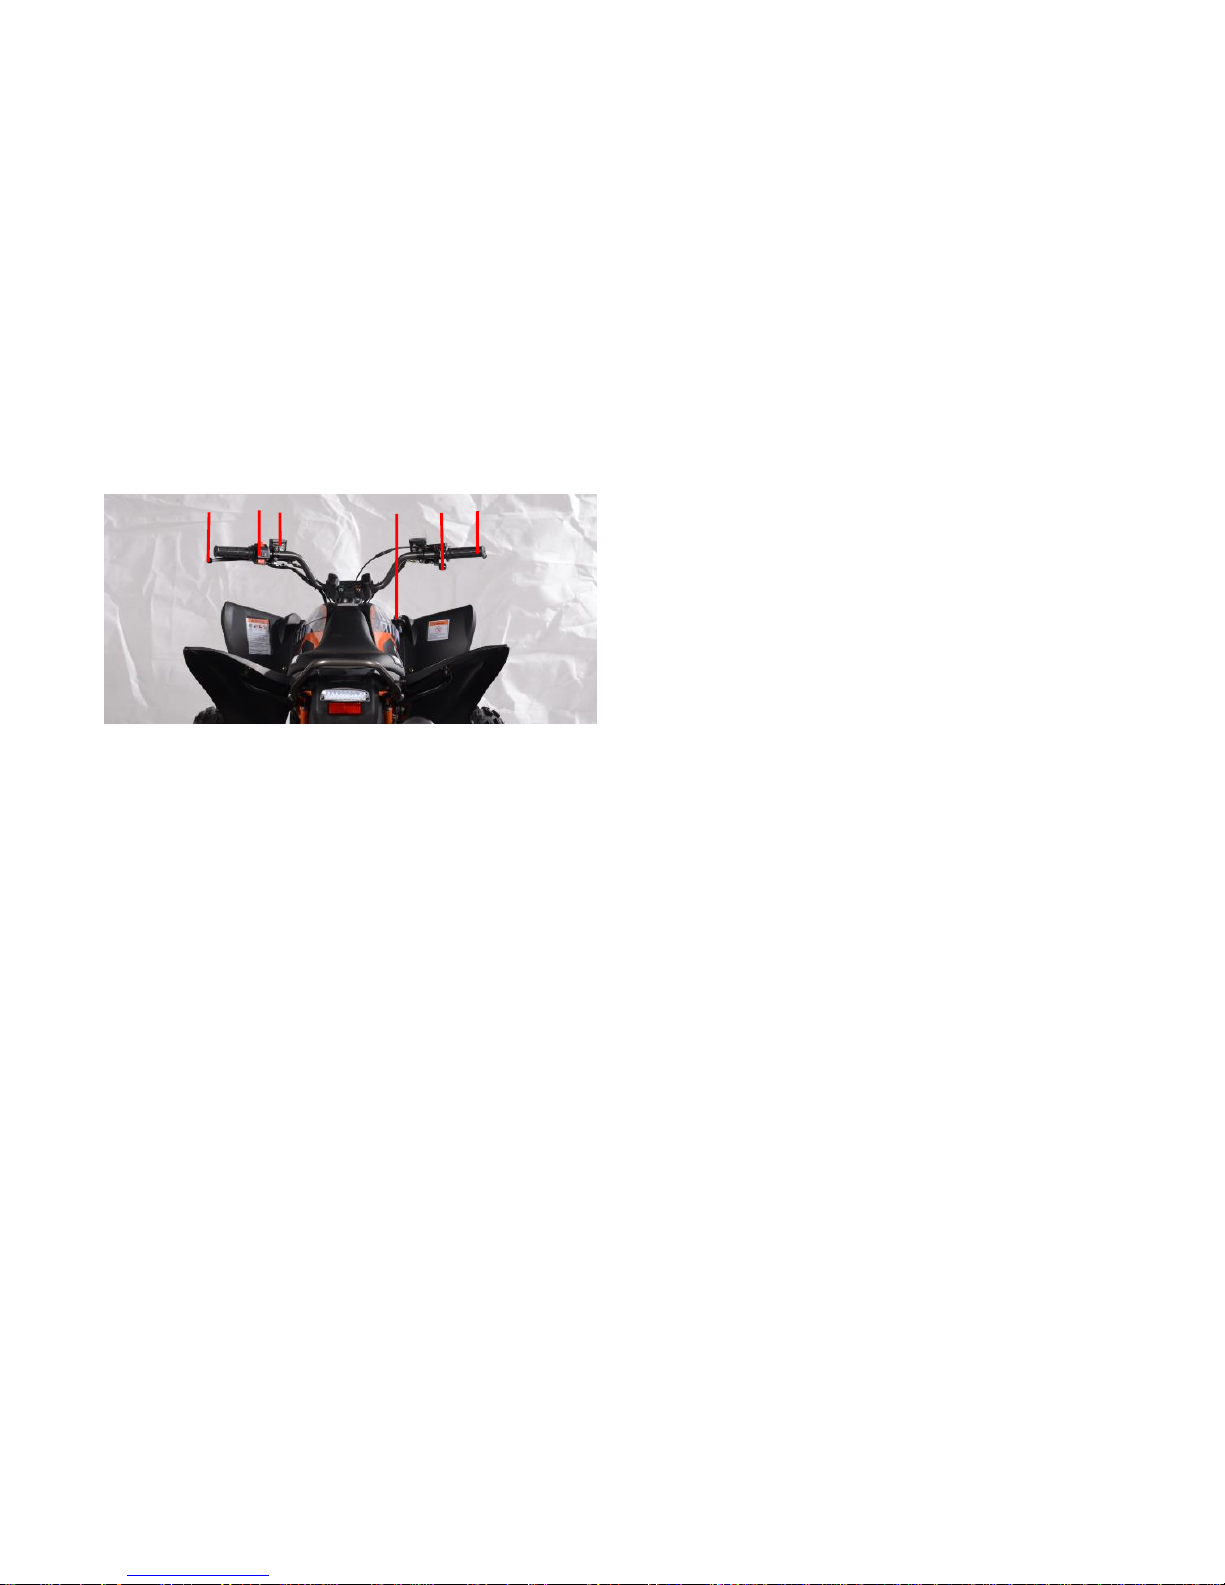
LOCATION OF THE WARNING AND SPECIFICATION LABLES
Read and understand all of the labels on your ATV. These labels contain important information for safe and proper operation.
Never remove any labels from your ATV. If a label become difficult to read or comes off, request a replacement label from
your dealer.
1 2 4
5
3
1-
2
2
3
4
5.
Familiarize yourself with the following pictograms and read the
explanatory text, then make sure to check the pictograms that apply to
your model.
1

1-
3
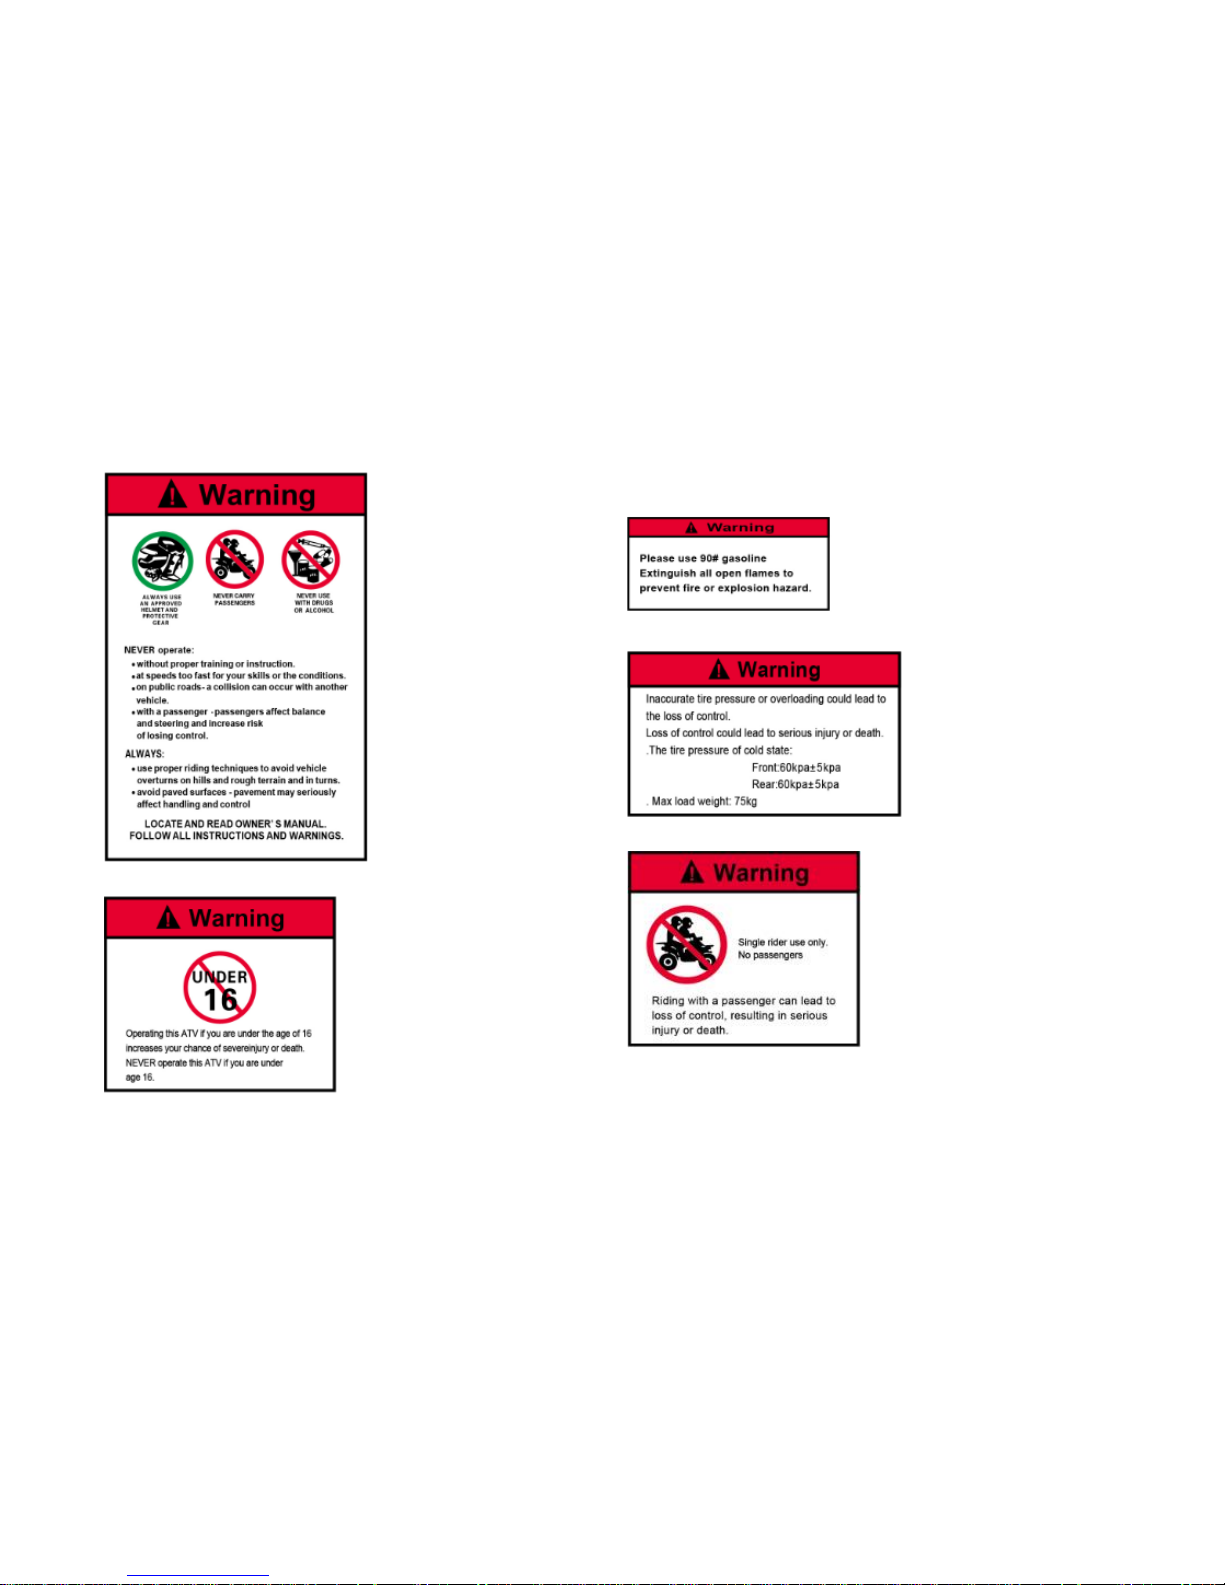
ALWAYS use an approved helmet and
Protective gear
NEVER use on paved roads.
NEVER carry passengers.
NEVER use with drugs or alcohol.
NEVER operate this ATV if you are under age of
16.
Operating this ATV if you are under the age of 16
increases your chance of severe injury or death.

2-
1
AN ATV IS NOT A TOY AND CAN BE HAZARDOUS TO OPERATE.
An ATV handles differently from other vehicles, including
motorcycles and cars. A collision or roll-over can occur quickly,
even during routine maneuvers such as turning and riding on
hills or over obstacles, if you fail to take proper precautions.
SEVERE INJURY OR DEATH can result if you do not follow
these instructions:
● Read this manual and all labels carefully and follow the op erating procedures described.
● Never operate an ATV without proper training or instruction.
● Always follow the age recommendation:
─A child under 16 years old should never operate an ATV
with engine size greater than 90 cc.
● Never allow a child under age 16 to operate an ATV without
adult supervision, and never allow continued use of an ATV
by a child if he or she does not have the abilities to operate it
safety.
● Never carry a passenger on an ATV.
● Always avoid operating an ATV on any paved surfaces,
including sidewalks, driveways, parking lots and paved
streets.
● Never operate an ATV on any paved street, paved road or
motorway.
● Watch carefully for other vehicles when operating on un paved public streets or roads. Make sure you know your
country’s laws and regulations before you ride on un paved public streets or roads.
● Never operate an ATV without wearing an approved motor-
cycle helmet that fits properly. You should also wear eye
protection(goggles or face shield), gloves, boots, a long sleeved shirt or a jacket, and long pants.
● Never consume alcohol or drugs before or while operating
this ATV.
● Never operate at speeds too fast for your skills or the riding
conditions. Always go at a speed that is proper for the
terrain, visibility, operating conditions, and your experience.
● Never attempt wheelies, jumps, or other stunts.
● Always inspect your ATV each time you use it to make sure
it is in safe operating condition. Always follow the inspections
and maintenance procedures and schedules described in
this manual.
● Always keep both hands on the handlebars and both feet on
the footrest of the ATV during operation.
● Always go slowly and be extra careful when operating on
un familiar terrain. Always be alert to changing terrain con ditions when operating the ATV.
● Never operate on excessively rough, slippery or loose
terrain until you have learned and practiced the skills
necessary to control the ATV on such terrain. Always be
especially cautious on these kinds of terrain.
● Always follow proper procedures for turning as described in
this manual. Practice turning at low speeds before
attempting to turn at faster speeds and never turn at
excessive speeds.
● Never operate the ATV on hills too steep for the ATV or for
your abilities. Practice on smaller hills before attempting
SAFETY INFORMATION

2-
2
larger hills.
● Always follow proper procedures for climbing hills as
described in this manual. Check the terrain carefully before
you start up any hill. Never climb hills with excessively
slippery or loose surfaces. Shift your weight forward.
Never open the throttle suddenly or make sudden gear
changes.
Never go over the top of a hill at a high speed.
● Always follow proper procedures for going down hills and
for braking on hills as described in this manual. Check the
terrain carefully before you start down any hill. Shift your
weight backward. Never go down a hill at high speed. Avoid
going down a hill at an angle that would cause the vehicle
to lean sharply to one side. Go straight down the hill where
possible.
● Always follow proper procedures for crossing the side of a
hill as described in this manual.
Avoid hills with excessively slippery or loose surfaces. Shift
your weight to the uphill side of the ATV. Never attempt to
turn the ATV around on any hill until you have mastered the
turning technique described in this manual on level ground.
Avoid crossing the side of a steep hill if possible.
● Always use proper procedures if you stall or roll backwards
when climbing a hill. To avoid stalling, use the proper gear
and maintain a steady speed when climbing a hill. If you stall
or roll backwards, follow the special procedure for braking
described in this manual. Dismount on the uphill side of to a
side if pointed straight uphill. Turn the ATV around and
remount, following the procedure described in this manual.
● Always check for obstacles before operating in a new area.
● Never attempt to operate over large obstacles, such as large
rocks or fallen trees. Always follow proper procedures when
operating over obstacles as described in this manual.
● Always be careful when skidding or sliding.Learn to safety
control skidding or sliding by practicing at low speeds and on
level, smooth terrain. On extremely slippery surfaces, such
as ice, go slowly and be very cautious in order to reduce the
change of skidding or sliding out of control.
● Never operate an ATV in fast flowing water or in water
deeper than that recommended in this manual. Remember
that wet brakes may have reduced stopping ability. Test your
brakes after leaving water. If necessary, apply them several
times to let friction dry out the linings.
● Always use the size and type of tires specified in this
manual.
● Always maintain proper tire pressure as described in this
manual.
● Never modify an ATV through improper installation or use of
accessories.
● Never exceed the stated load capacity for an ATV.
Cargo should be properly distributed and securely attached.
Reduce speed and follow instructions in this manual for
carrying cargo or pulling a trailer. Allow greater distance for
braking.

2-
3
WARNING
Avoid Carbon Monoxide Poisoning
All engine exhaust contains carbon monoxide, a deadly gas.
Breathing carbon monoxide can cause headaches,
dizziness, drowsiness, nausea, confusion, and eventually
death. Carbon Monoxide is a colorless, odorless, tasteless
gas which may be present even if you do not see or smell
any engine exhaust. Deadly levels of carbon monoxide can
collect rapidly and you can quickly be overcome and
unable to save yourself. Also, deadly levels of carbon monoxide can linger for hours or days in enclosed or poorly
ventilated areas. If you experience any symptoms of carbon
monoxide poisoning, leave the area immediately, get fresh
air, and SEEK MEDICAL TREATMENT.
● Do not run engine indoors. Even if you try to ventilate
engine exhaust with fans or open windows and doors,
carbon monoxide can rapidly reach dangerous levels.
● Do not run engine in poorly ventilated or partially en closed areas such as barns, garages, or carports.
● Do not run engine outdoors where engine exhaust can
be drawn into a building through openings such as wi ndows and Doors.
WARNING
When transporting the ATV in another vehicle, be sure it
is kept upright and that the fuel cock is in the “OFF”
position. Otherwise, fuel may leak out of the carburetor or
fuel tank.
3-
1
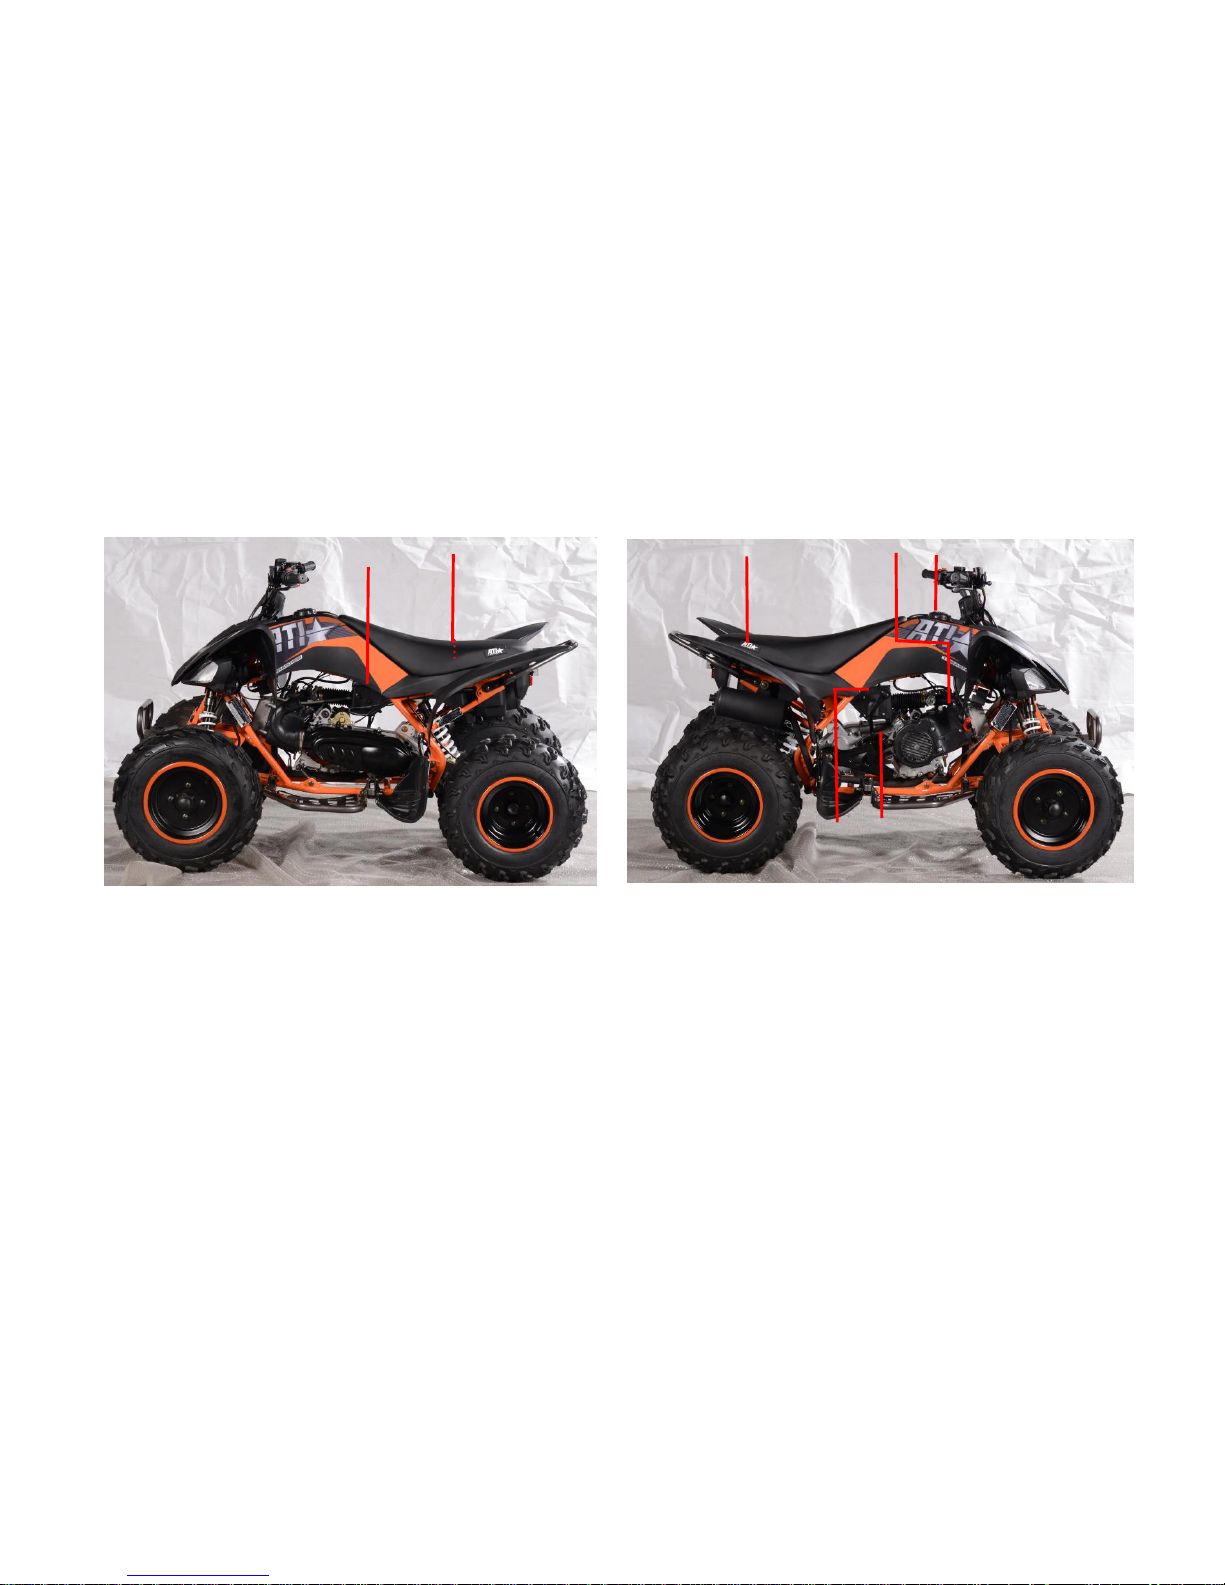
DESCRIPTION
Left view
1. Owner’s tool kit
2. Air filter
Right view
1. Spark plug
2. Fuse
3. Battery
4. Fuel tank cap
5. Engine oil filter cap
6. Hand shift lever
1 2 1
2,3 4 5
6
3-
2
Controls and instruments
1. Rear brake lever
2. Handlebar switches
3. Rear brake fluid reservoir
4. Main switch
5. Throttle lever
6. Front brake lever
TIP
The ATV you have purchased may differ slightly from the figures shown
in this manual.
1
2 3 4
5
6
4-
1
INSTRUMENT AND CONTROL FUNCTIONS
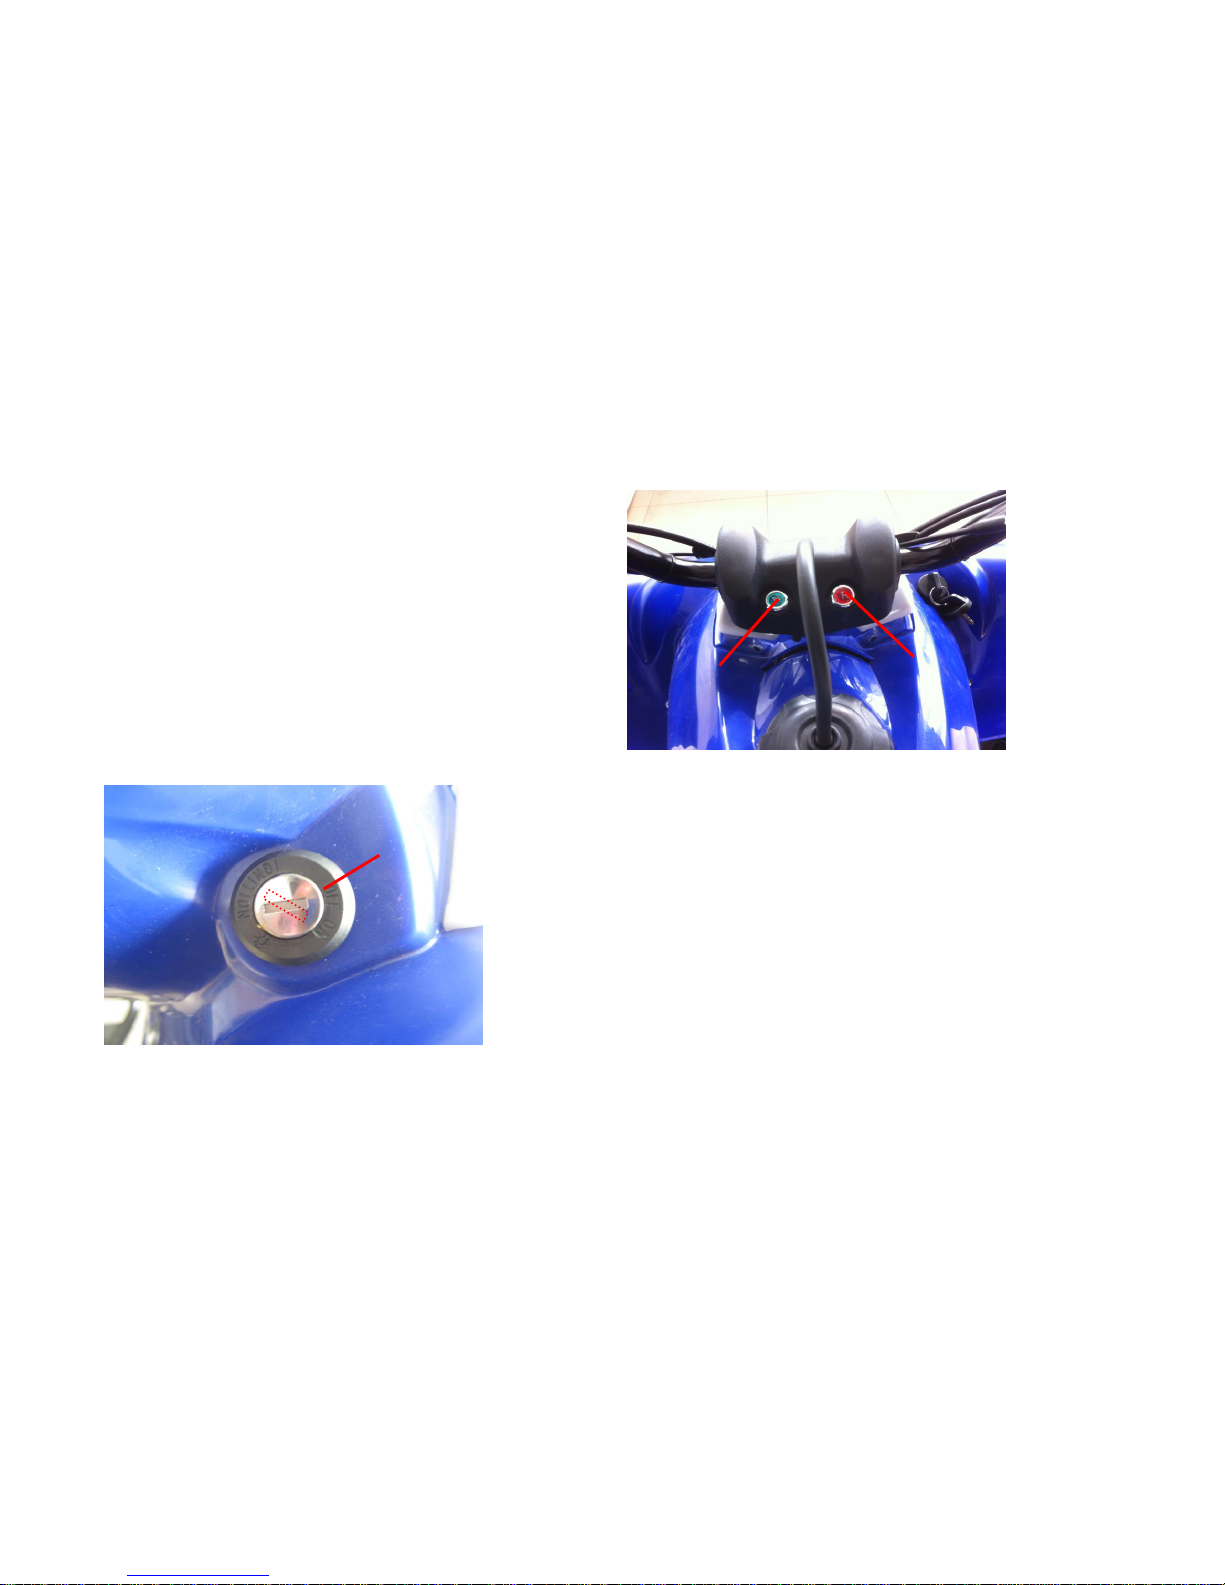
MAIN SWITCH
The positions of the main switch are as follows:
ON
All electrical systems are supplied with power. The
headlights and taillight come on when the light switch is on,
and the engine can be started. The key cannot be removed.
OFF
All electrical systems are off. The key can be removed.
1. Main switch
Indicator light
1. Neutral indicator light “N”
2. Reverse indicator light “R”
Neutral indicator light “N”
This indicator light comes on when the transmission
is in the neutral position.
Reverse indicator light “R”
This indicator light comes on when the transmission
is in the reverse position.
1
2
1
4-
2
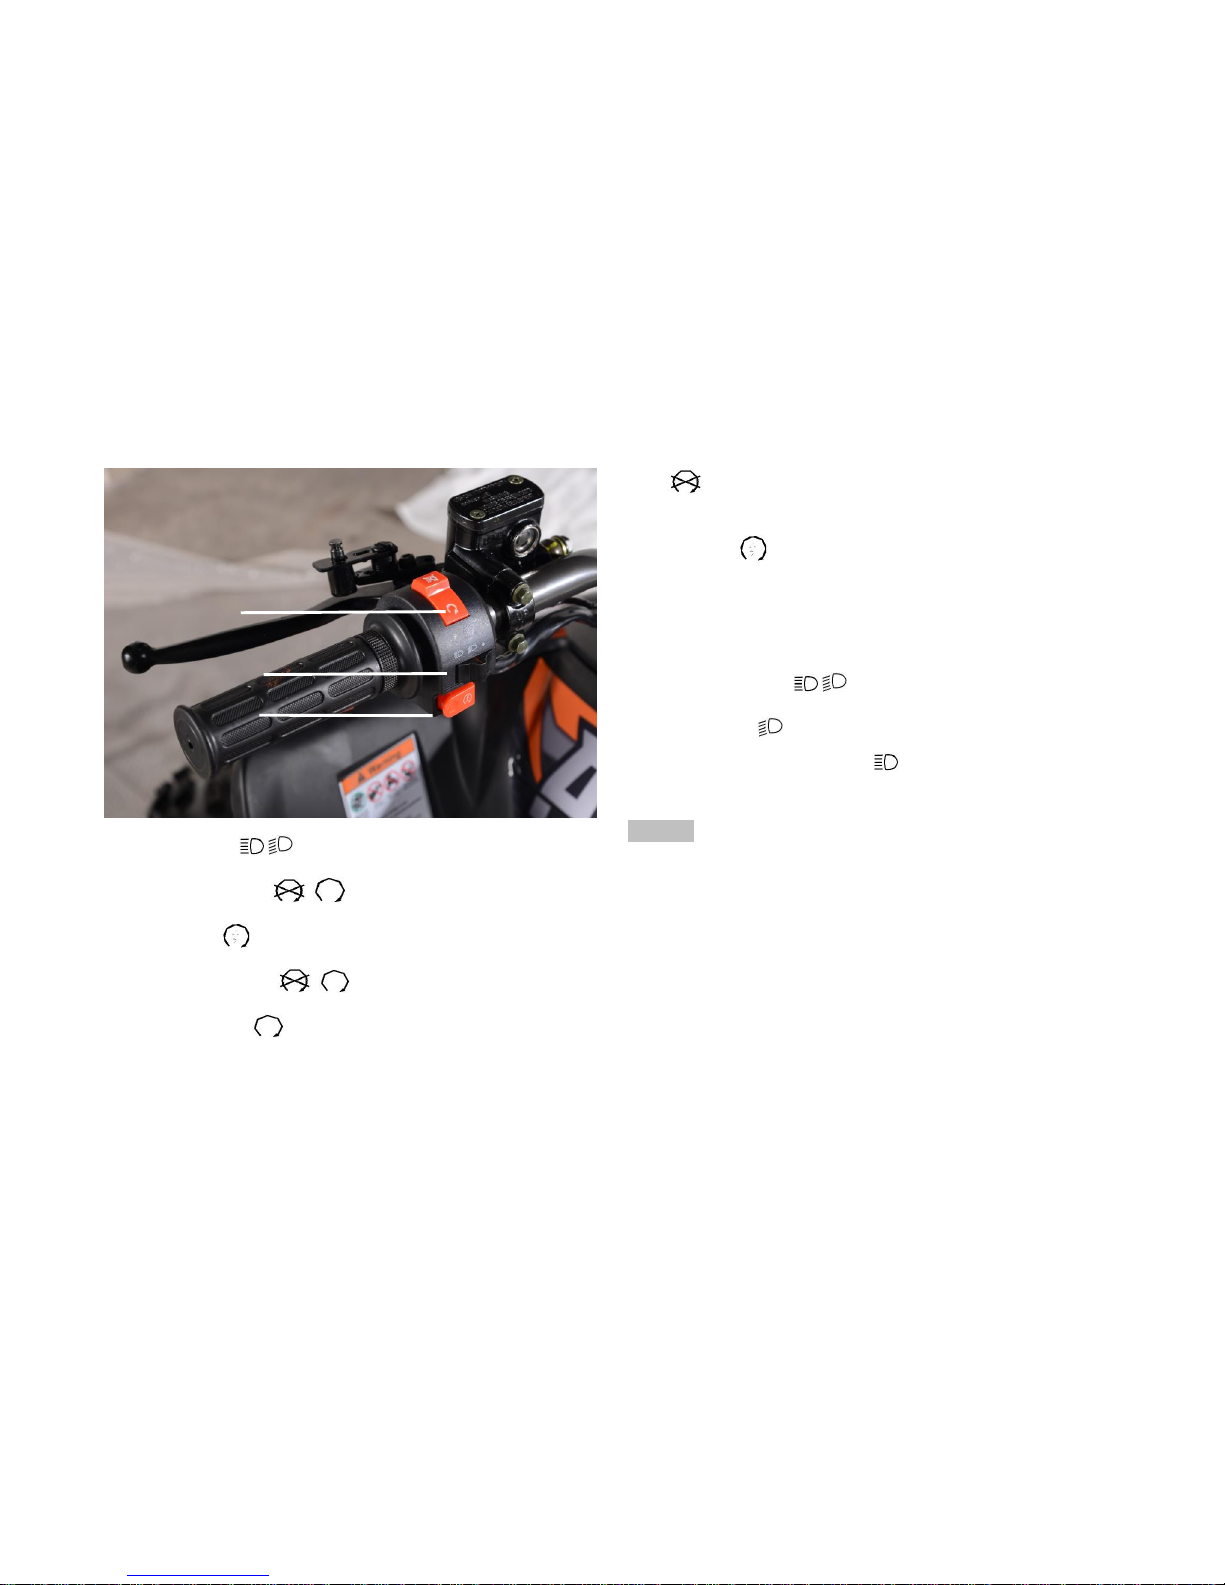
Handlebar switches
1. Lights switch “ / ”
2. Engine stop switch “ / ”
3. Start switch “ ”
Engine stop switch “ / ”
Set this switch to“ ”before starting the engine.
The engine stop switch controls the ignition and
stops the engine when it is running. Use this switch
to stop the engine in an emergency situation. The
engine will not start or run when this switch is set
to “ ”.
Start switch “ ”
Push this switch to crank the engine with the starter.
See the starting instructions prior to starting the engine.
Light beam switch “ / ”
Set this switch to“ ”to turn on the low beams
and the taillight. Set the switch to “ ”to turn on
the high beams and the taillight.
NOTICE
Do not use the headlights with the engine turned off for
an extended period of time, otherwise the battery
may discharge to the point that the starter motor will
not operate properly. If this should happen, remove
the battery and recharge it.
1
2
3
4-
3
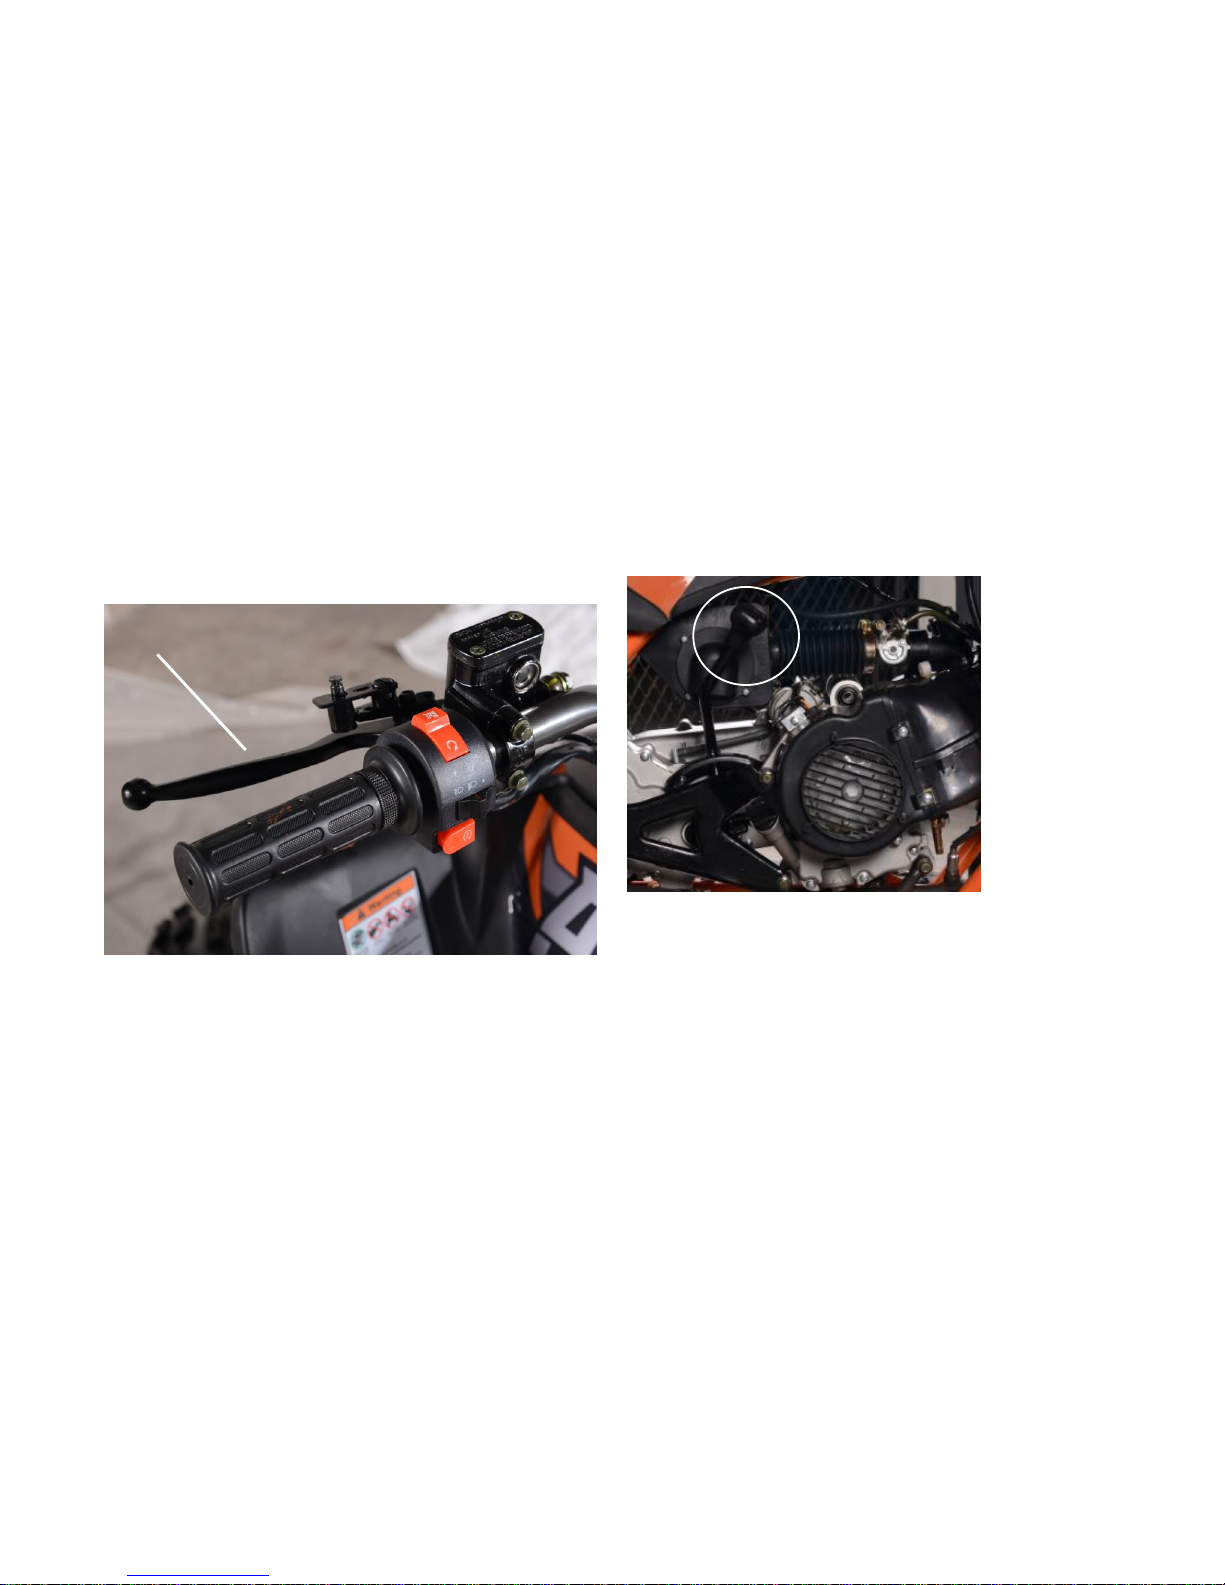
Throttle lever
Once the engine is running, pushing the throttle lever
will increase the engine speed.
Regulated the speed of the ATV by varying the throttle position.
Because the throttle is spring loaded, the ATV will decelerate,
and the engine will return to an idle any time the throttle lever is
released.
1. Throttle lever
Before starting the engine, check the throttle to be
sure it is operating smoothly. Make sure it returns
to the idle position as soon as the lever is released.
Speed limiter
Your ATV is equipped with an adjustable speed limiter.
The speed limiter keeps the throttle from fully opening,
even when the throttle lever is pushed to maximum.
1. Loosen the locknut.
2. To increase the maximum engine power available and the
maximum speed of the ATV, turn the adjusting screw
counter-clockwise .To decrease the maximum engine power
available and the maximum speed of the ATV, turn the adjusting
screw clockwise. Do not turn the adjusting screw out more than
12 mm (0.47 in) or the throttle cable could damaged.always
make sure the throttle lever free play is adjusted to 2.0-4.0 mm
(0.08-0.16 in).
3.Tighten the locknut.
WARNING! Improper adjustment of the speed
limiter and throttle could cause throttle cable damage
or improper throttle operation. You could lose control,
resulting in an accident.
1
4-
4
1. Locknut
2. Adjusting screw
3. No more than 12 mm(0.47 in)
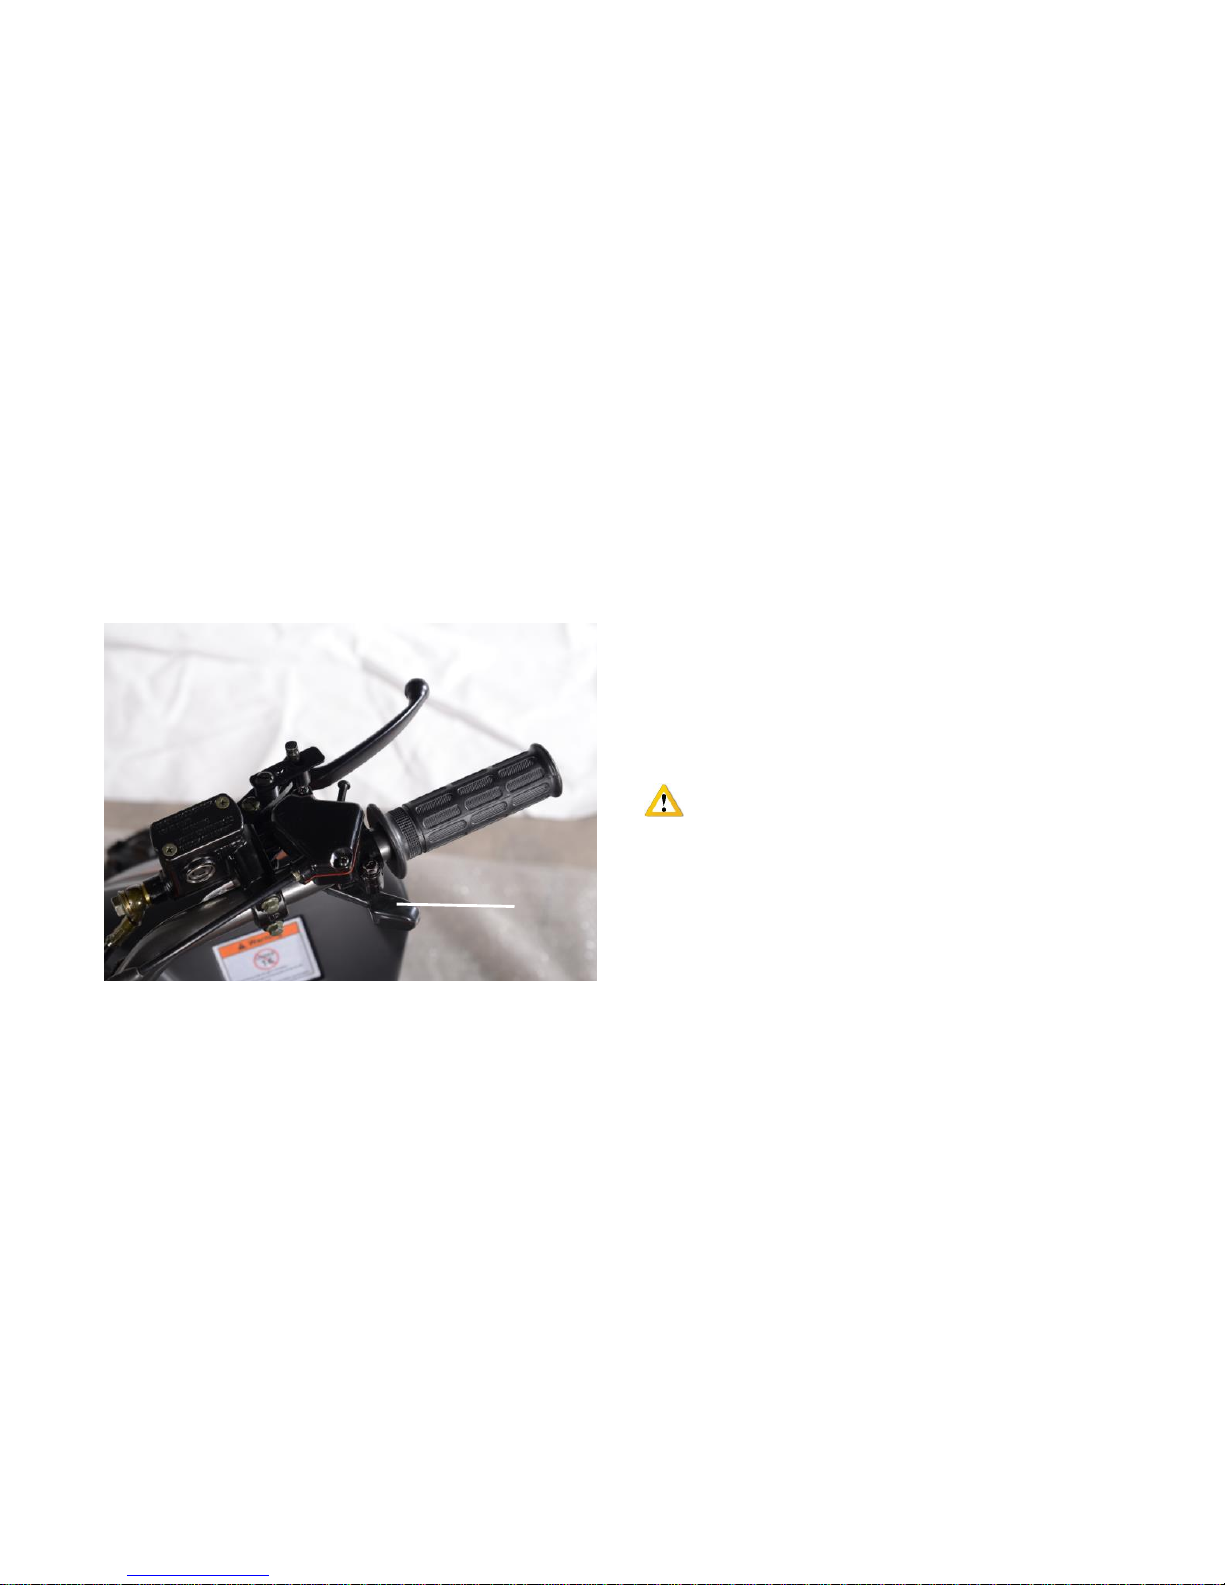
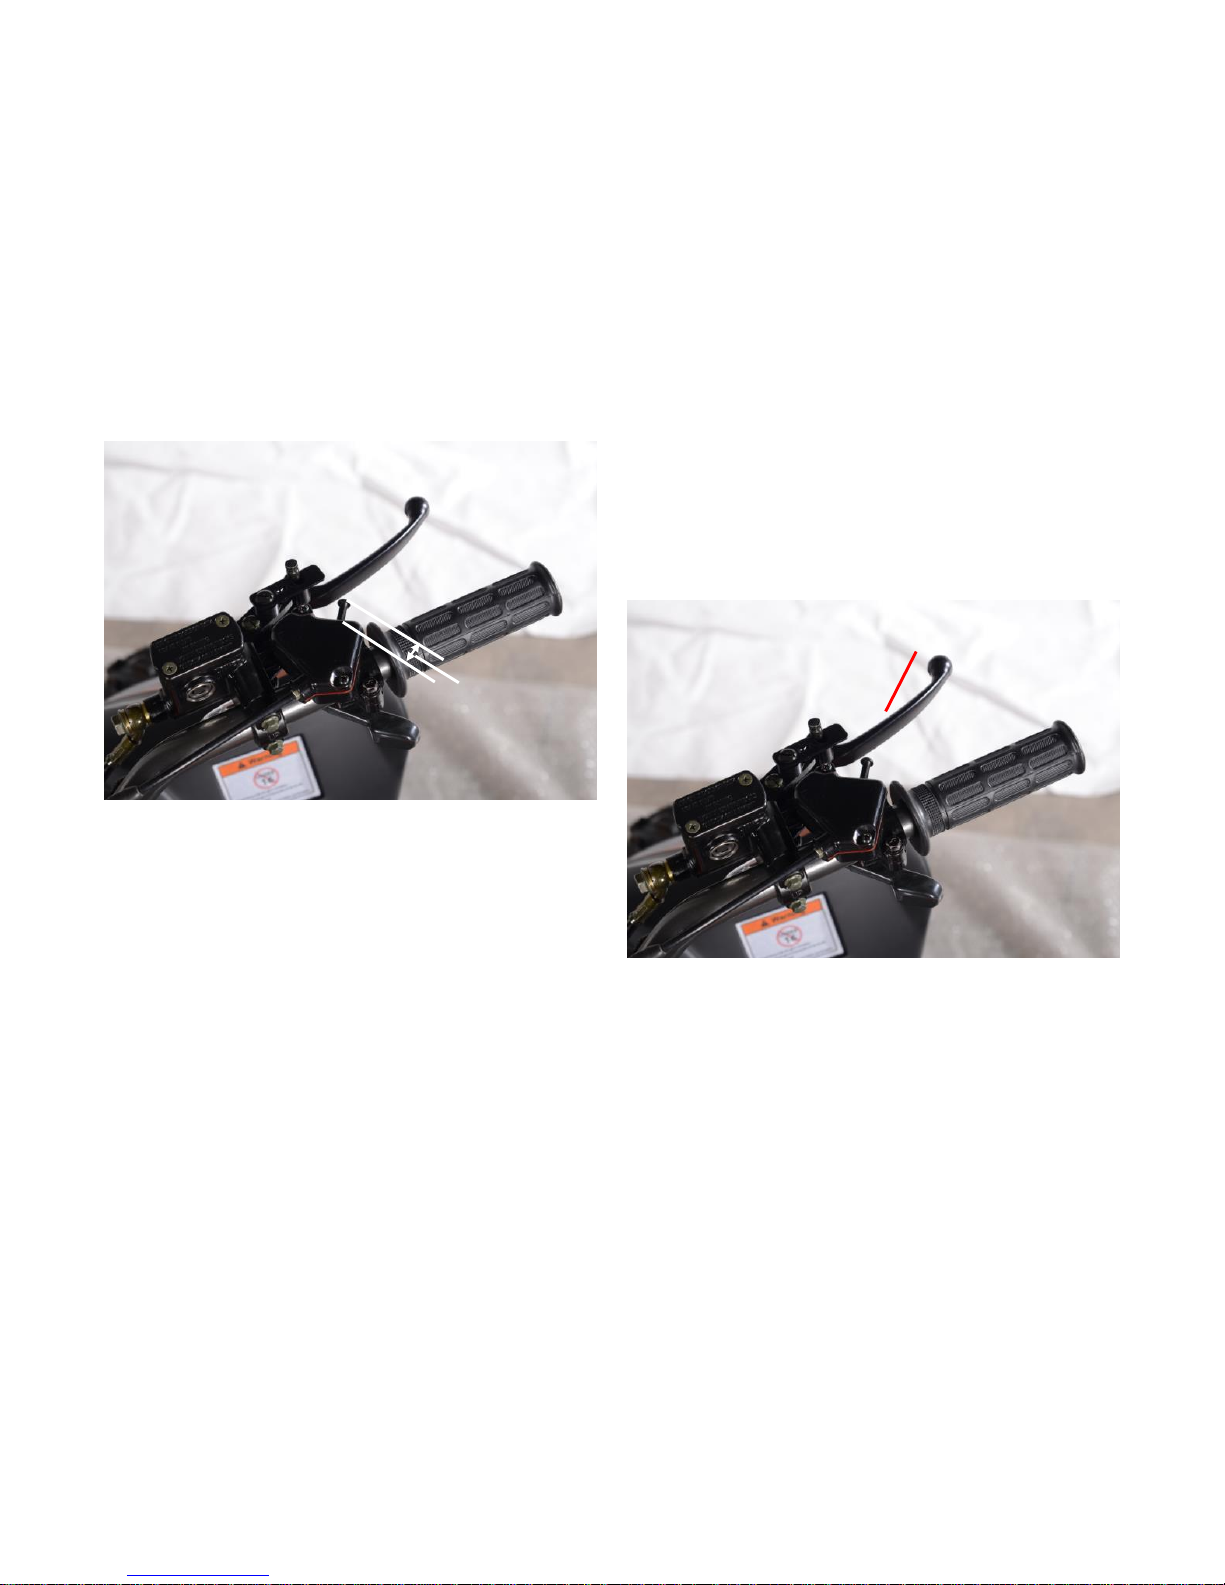
Front brake lever
The front brake lever is located at the right handlebar grip. To
apply the front brake, pull the brake lever toward the handle
grip.
1. Front brake lever
1
2
3
1
1
4-
5
Rear brake lever
The rear brake lever is located at the left handlebar grip. To
apply the rear brake, pull the brake lever toward the handle grip.
1. Rear brake lever
Hand Shift lever
The ATV equipped with only 1 forward speed. You can use
the hand shift pedal to apply forward or reverse gear.
1. Hand shift lever
1
1
1

4-
6
Fuel tank cap
Remove the fuel tank cap by turning it counter-clockwise.
1. Fuel tank cap
Fuel
Make sure there is sufficient gasoline in the tank.
WARNING
Gasoline and gasoline vapors are extremely flammable.
To avoid fires and explosions and to reduce the risk of
injury when refueling, follow these instructions.
1. Before refueling, turn off the engine and be sure that
no one is sitting on the vehicle. Never refuel while
smoking, or while in the vicinity of sparks, open flames,
or other sources of ignition such as the pilot lights of
water heaters and clothes dryers.
2. Do not overfill the fuel tank. When refueling, be sure to
insert the pump nozzle into the fuel tank filler hole.
Stop filling when the fuel reaches the bottom of the filter
tube. Because fuel expands when it heats up, heat from
the engine or the sun can cause fuel to spill out of the
fuel tank.
3. Wipe up any spilled fuel immediately.
NOTICE: Immediately wipe off spilled fuel with a
clean, dry, soft cloth, since fuel may deteriorate
painted surfaces or plastic parts.
4. Turn the fuel tank cap fully clockwise to make sure it is
securely closed.
WARNING
Gasoline is poisonous and then cause injury or
death. Handle gasoline with care. Never siphon gasoline
by mouth. If you should swallow some gasoline or inhale
a lot of gasoline vapor, or get some gasoline in your
eyes, see your doctor immediately. If gasoline spills
on your skin, wash with soap and water. If gasoline
spills on your clothing, change your clothes.
NOTICE
Use only unleaded gasoline. The use of leaded
gasoline will cause severe damage to internal
engine parts, such as the valves and piston
1

4-
7
rings, as well as to the exhaust system.
Seat
To remove the seat
Insert your hand between the rear of the seat and
the rear fender, pull the seat lock lever upward and
pull up the seat at the rear.
1. Seat lock lever
To install the seat
Insert the projections on the front of the seat into
the seat holders and push down on the seat at the
rear. Make sure that the seat is securely fitted.
1. Projection
2. Seat holder
1
2
1

5-
1
PRE-OPERATION CHECKS
Inspect your vehicle each time you use it to make sure the vehicle is in safe operating condition. Always follow the inspection and
maintenance procedures and schedules described in the owner’s Manual.
WARNING
Failure to inspect or maintain the vehicle properly increases the possibility of an accident or equipment damage. Do
not operate the vehicle if you find any problem.
If a problem cannot be corrected by the procedures provided in this manual, have the vehicle inspected by your dealer.
Before using this vehicle, check the following points:
ITEM
ROUTINE
Fuel
● Check fuel level in fuel tank, and add recommended fuel if necessary.
● Check fuel line for leakage. Correct if necessary.
Engine oil
● Check oil level in engine, and add recommended oil to specified level if
necessary.
● Check ATV for oil leakage. Correct if necessary.
Front brake
● Check operation. If soft or spongy, have a dealer bleed hydraulic system.
● Check brake pads for wear,and replace if necessary.
● Check brake fluid level in reservoir, and add specified brake fluid to
specified level if necessary.
● Check hydraulic system for leakage. Correct if necessary.

5-
2
ITEM
ROUTINE
Rear brake
● Check operation. If soft or spongy, have a dealer bleed hydraulic system.
● Check brake pads for water, and replace if necessary.
● Check brake fluid level in reservoir, and add specified brake fluid to
specified level if necessary.
● Check hydraulic system for leakage. Correct if necessary.
Throttle lever
● Make sure that operation is smooth. Lubricate cable and lever housing if
necessary.
● Check lever free play, and adjust if necessary.
Control cables
● Make sure that operation is smooth. Lubricate if necessary.
Drive chain
● Check chain slack, and adjust if necessary.
● Check chain condition. Lubricate if necessary.
Wheels and tires
● Check wheel condition, and replace if damaged.
● Check tire condition and tread depth. Replace if necessary.
● Check air pressure. Correct if necessary.
Hand Shift lever
● Make sure that operation is smooth.
● Correct if necessary
Brake levers
● Make sure that operation is smooth. Lubricate lever pivoting points if
necessary.
Chassis fasteners
● Make sure that all nuts, bolts and screw are properly tightened.
Instruments, lights
and switches
● Check operation, and correct if necessary.

5-
3
FUEL
Make sure that there is sufficient fuel in the tank.
Engine oil
Make sure that the engine oil is at the specified level.
add oil as necessary.
Front and rear brakes
Brake lever
● Check that there is no free play in the brake lever.
If there is free play, have a dealer check the brake
system.
● Check the operation of the lever. They should
move smoothly and there should be a firm feeling when
the brakes are applied. If not, have a dealer check the
brake system.
Brake fluid level
Check the brake fluid level. Add fluid if necessary.
Brake fluid leakage
Check to see if any brake fluid is leaking out of the
pipe joints or brake fluid reservoirs. Apply the brakes
firmly for one minute. If there is any leakage, have
a dealer check the brake system.
Brake operation
Test the brakes at slow speed after starting out to
make sure they are working properly. If the brakes
do not provide proper braking performance, check
the brake pads for wear.
Throttle lever
Check the operation of the throttle lever. It must
open smoothly and spring back to idle position
when released. Have a dealer correct if necessary.
Drive chain
Check the condition of the drive chain and check
the drive chain slack. Lubricate and adjust the
drive chain as necessary.
Tires
Check tire pressure tire gauge to check and adjust tire
pressure when the tires are cold. Tire pressures must
be equal on both sides.
WARNING! Operation of this vehicle with improper
tire pressure may cause severe injury or death from loss of
control or rollover. Tire pressure below the minimum
specified could also cause the tire to dislodge from the rim
under severe riding conditions.
5-
4
Set tire Pressures to the following specifications:
The lower-pressure the gauge is included as standard
equipment. Make two measurements of the tire pressure
and use the second reading. Dust or dirt in the gauge
could cause the first reading to be incorrect.
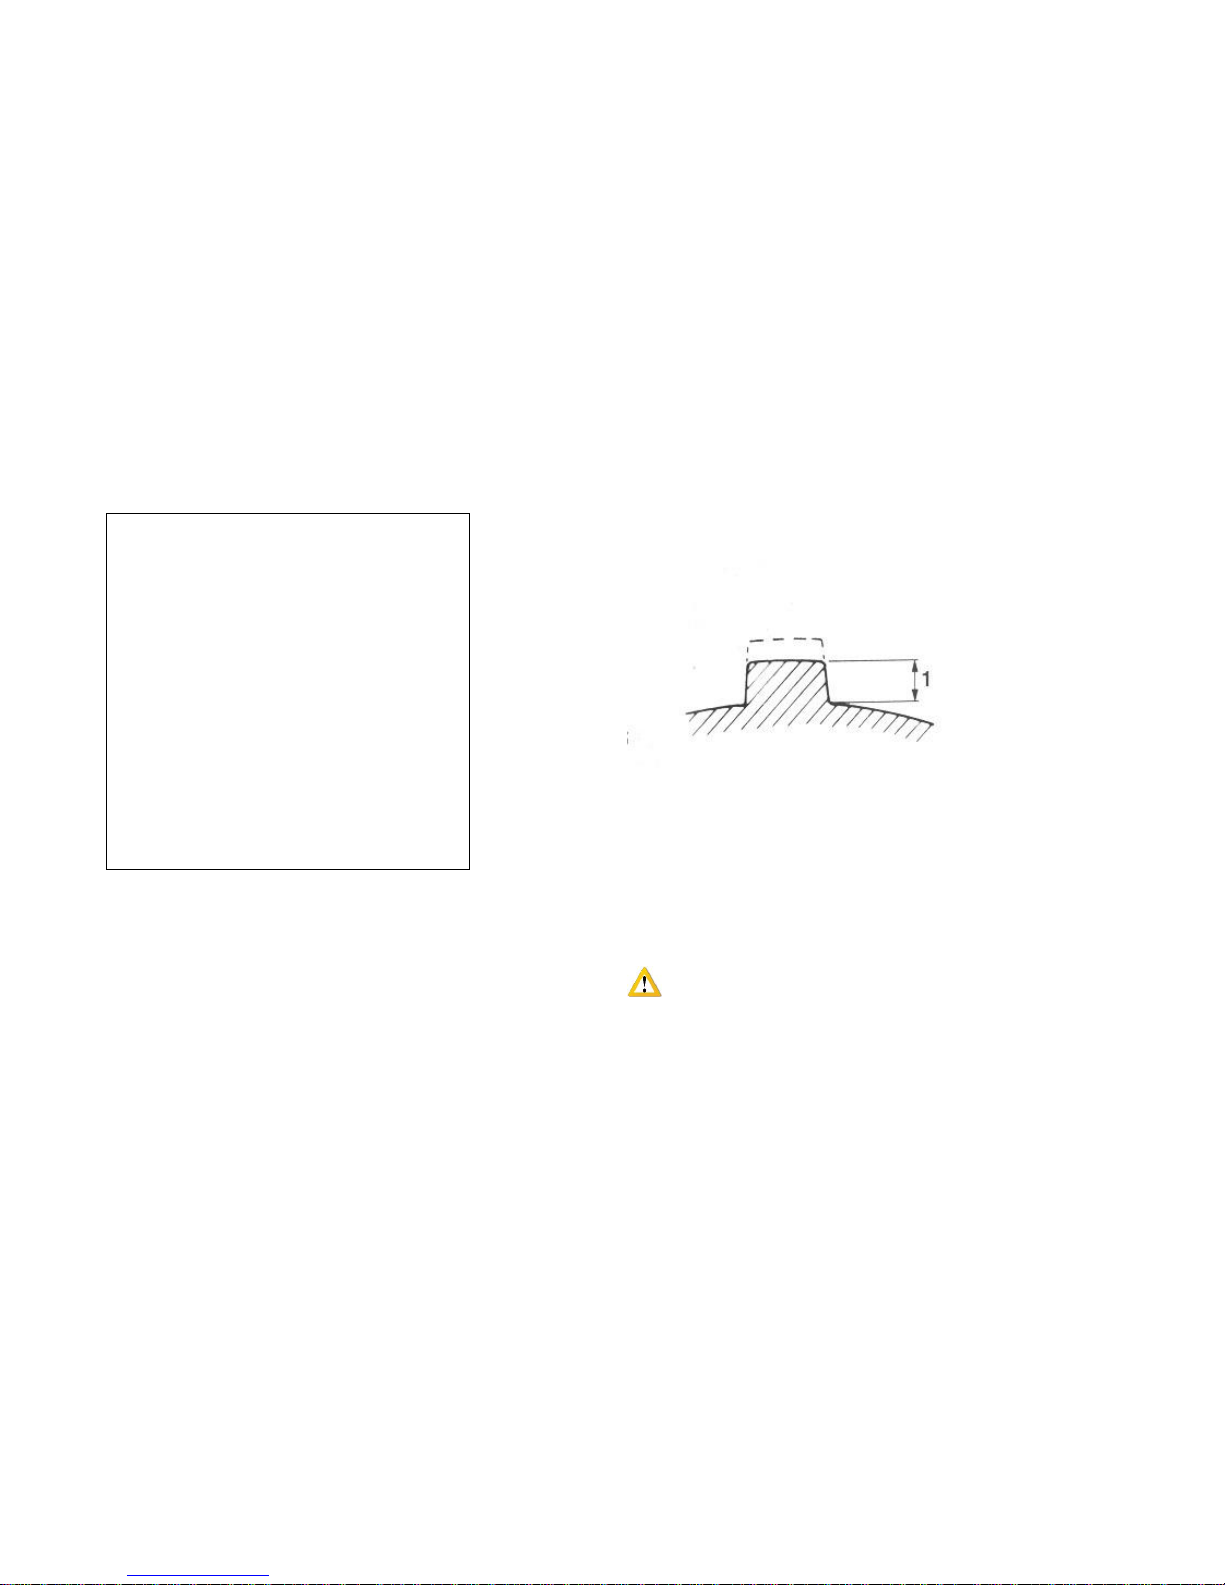
Tire wear limit
When the tire groove decreases to 3 mm (0.12 in)
due to wear, replace the tire.
1. Tire wear limit
Tire information
This ATV is equipped with tubeless tires with valves.
WARNING
Use of improper tires on this ATV may cause loss of
control, increasing your risk of an accident.
Recommended tire pressure:
Front
27.5 kPa (0.275 kgf/cm², 4.0 psi)
Rear
27.5 kPa (0.275 kgf/cm², 4.0 psi)
Minimum tire pressure:
Front
24.5 kPa (0.245 kgf/cm², 3.6 psi)
Rear
24.5 kPa (0.245 kgf/cm², 3.6 psi)
Maximum tire seating pressure:
Front
250 kPa (2.5 kgf/cm², 36 psi)
Rear
250 kPa (2.5 kgf/cm², 36 psi)

5-
5
After extensive tests, only the tires listed below have
been approved for this model.
Aftermarket tires and rims
The tires and rims that came with your ATV were
designed to match the performance capabilities
and to provide the best combination of handling,
braking, and comfort. Other tires, rims, sizes, and
combinations may not be appropriate.
Chassis fasteners
Make sure that all nuts, bolts and screw are properly tightened.
Instruments, lights and switches
Check that all instruments, lights and switches are working
properly. Correct if necessary.
Front:
Size:
20*7.0-10
Type:
Tubeless
Rear:
Size:
19*10-9
Type:
Tubeless

6-
1
OPERATION
Read the owner’s Manual carefully before riding the ATV.
If there is a control or function you do not understand,
ask your dealer.
WARNING
Read the Owner’s Manual carefully to become
familiar with all controls in order to help prevent any
loss of control, which could cause an accident or injury.
Starting a cold engine
NOTICE
See the “ Engine break-in” section prior to operating
the engine for the first time.
1. Set the parking brake.
2. Turn the fuel cock to“ON”.
3. Turn the key to “ON” and the engine stop
Switch to “ ”.
4. Shift the transmission into neutral. The neutral Indicator
light should come on. If the indicator lights does not
come on, have a dealer check the electrical circuit.
TIP
This model is equipped with an ignition circuit cut off system.
The engine can be started under the following conditions.
● The transmission is in neutral
5. Completely close the throttle lever and start the engine
by pushing the start switch.
TIP
If the engine fails to start, release the start switch, then push
it again. Pause a few seconds before the next attempt.
Each cranking should be as short as possible to preserve
battery energy. Do not crank the engine more than 10 seconds
on each attempt.
NOTICE
For maximum engine life, never accelerate hard when the
engine is cold!
Starting a warm engine
Follow the same procedures as for starting a cold engine.
Instead, start the engine with the throttle slightly open.
 Loading...