

ATI Technologies Nexus GA User Manual

Nexus™ GA
User’s Guide
Version 1.0 - September 1997
P/N: 107-40084-10 Rev. A
Copyright © 1997, ATI Technologies Inc.
ATI and Nexus are trademarks and/or registered trademarks of ATI
Technologies Inc. All other company and/or product names are trademarks and/
or registered trademarks of their respective manufacturers. Pricing, availability,
features, performance and specifications are subject to change without notice.
Product may not be exactly as shown in the diagrams.
All rights reserved, including those to reproduce this manual or parts thereof, in
any form without the express written permission of ATI Technologies Inc.

Disclaimer
While every precaution has been taken in the preparation of this document, ATI
Technologies Inc. assumes no liability to any party for errors or omissions
contained in the Software or related documentation, any interruption of service,
loss or interruption of business or anticipatory profits or for incidental or
consequential damages in connection with the furnishing, performance, or use
of the Software and related documentation.
ATI T echnologies Inc. reserv es the right to mak e changes without further notice
to a product or system described herein to improve reliability, function or
design.
Page ii

Table of Contents
1. Getting Started................................................ 1
Introduction.....................................................................1
What You'll Need ...........................................................2
Related Documentation.................................................2
2. Installing Your Hardware.............................. 3
Installing your Nexus GA .............................................4
About Monitor Sensing .................................................9
3. Installing Your Software.............................. 11
About ATI Software .....................................................11
Installing Software .......................................................11
4. Using Nexus GA 3D Features....................... 13
Viewing 3D Graphics...................................................14
ATI Displays Control Panel ........................................15
A. Troubleshooting Tips.................................... 25
Before Contacting Customer Support .......................25
Solutions to Common Problems.................................25
B. Specifications ................................................. 29
Video Mode Table ........................................................29
Memory Upgrade .........................................................32
Specifications.................................................................33
C. Compliance Information .............................. 35
D. Glossary.......................................................... 39
Page iii

Page iv

1
NOTE
Getting Started
Introduction
Nexus GA represents the next generation in 2D and 3D
rendering and graphic acceleration for your PCI-based
Mac OS computer. Equipped with all the 3D hardware
drawing capabilities in demand by designers, your new
graphics accelerator provides:
¥ QuickDraw 3D acceleratation providing superior 3D
rendering performance and advanced imaging and
Þltering techniques
¥ QuickDraw acceleratation supporting 2D resolutions
up to 1920x1080 in millions of colors.
The ATI Displays control panel provides quick access to
all of Nexus GAÕs easy-to-use features, and you have
instant access to help using ATI Guide, the ATI Apple
Guide.
A glossary of the bold terms used throughout this manual
is available in the ÒGlossaryÓ on page 39 of this user guide
and also in the ATI Guide.
Page 1
NOTE
What Y ou'll Need
The Nexus GA card runs with the following minimum
system requirements:
¥ Power Macintosh or Mac OS compatible computer,
with a PCI expansion slot
¥ Mac OS 7.5.5 or later software
¥ Apple monitor or VGA-style monitor
¥ QuickDraw 3D 1.5.1 or later (included)
¥ Minimum 16MB of system memory (QuickDraw 3D
requires 16MB of system memory)
Nexus GA and ATI Multimedia components are Mac OS 8
compatible.
Related Documentation
The README Þle summarizes the latest product
revisions. Double-click the README icon on the
installation disk to open this Þle.
The Nexus GA card comes with ATI Guide, which
provides online help for making the best use of your
cardÕs features. Access the ATI Guide by clicking on the
Apple Guide icon on the ATI Displays control panel.
Page 2

2
Installing Y our Hardware
Nexus GA fits into connectors called expansion slots, inside
your computer.
Your Mac OS computer has one or more slots, each designed to
accept Peripheral Component Interconnect (PCI) cards.
!
NOTE
WARNING
• The manufacturer assumes no liability for any damage,
caused directly or indirectly, by improper installation of
components by unauthorized service personnel.
do not feel comfortable performing the installation,
consult a qualified technician.
• Make sure power is off during installation; otherwise,
damage to system components, the graphics accelerator
card, and injury to yourself may result.
The following procedure details the installation of a card in a
typical Mac OS PCI-based tower computer. If your computer
does not match this configuration, please refer to the expansion
card installation instructions that came with your computer.
If you
Page 3
!
• If your computer stops responding (hangs) after
installing the Nexus GA card, you may have an
incompatible graphics accelerator extension.
• Restart your computer and hold down the SHIFT key
during startup. This disables all extensions from loading.
After disabling extensions, you can update the graphics
accelerator extension by installing the software included
with your card. For more information about installing
the software, see “Installing Software” on page 11.
IMPORTANT
Installing your Nexus GA
Turn off your computer, and disconnect the monitor cable.
1
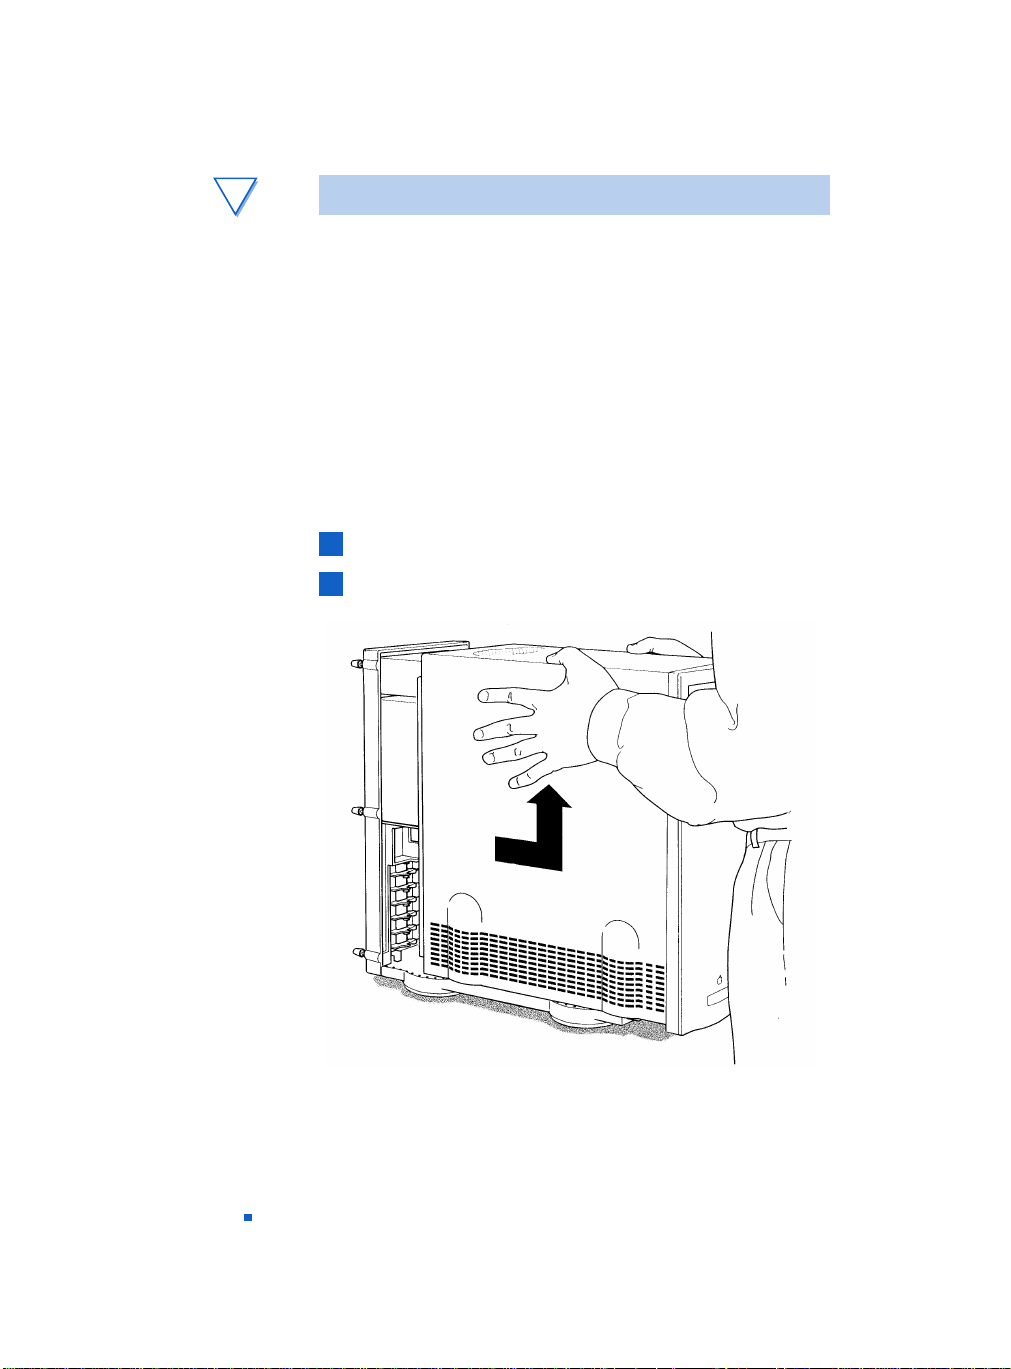
Remove the computer cover. If necessary, consult your
2
computer system manual for removal instructions.
Page 4
Choose the PCI expansion slot you wish to use.
3
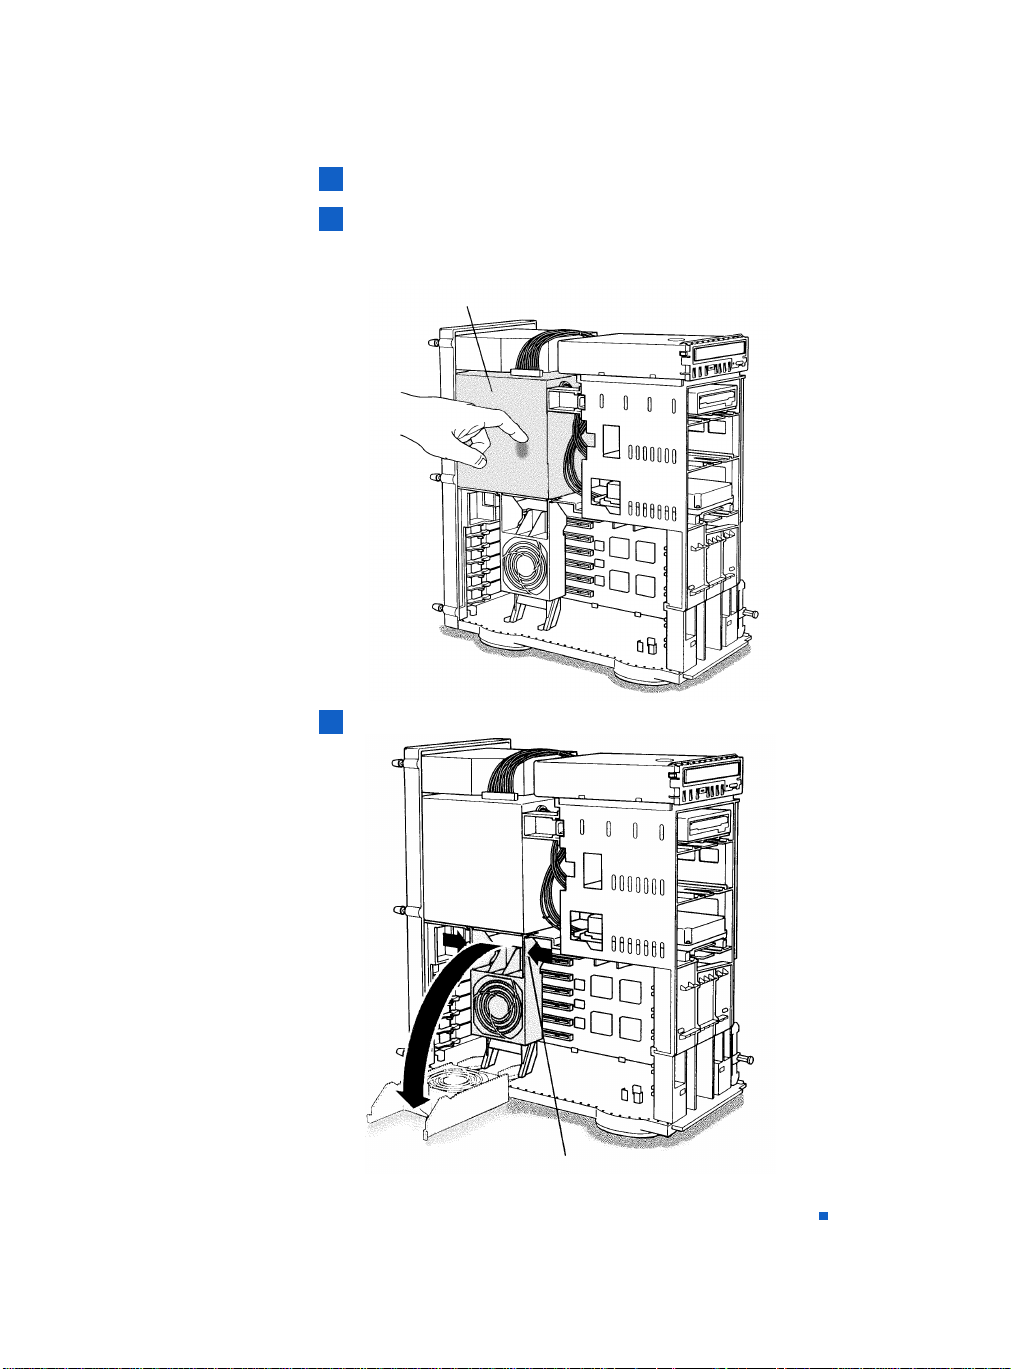
Touch the metal part of the power supply case.
4
Touching the grounded portion of the power supply case
discharges your body’s static electricity.
Power Supply
Lower the auxiliary fan.
5
To lower the fan, squeeze the sides to unlatch it.
Page 5
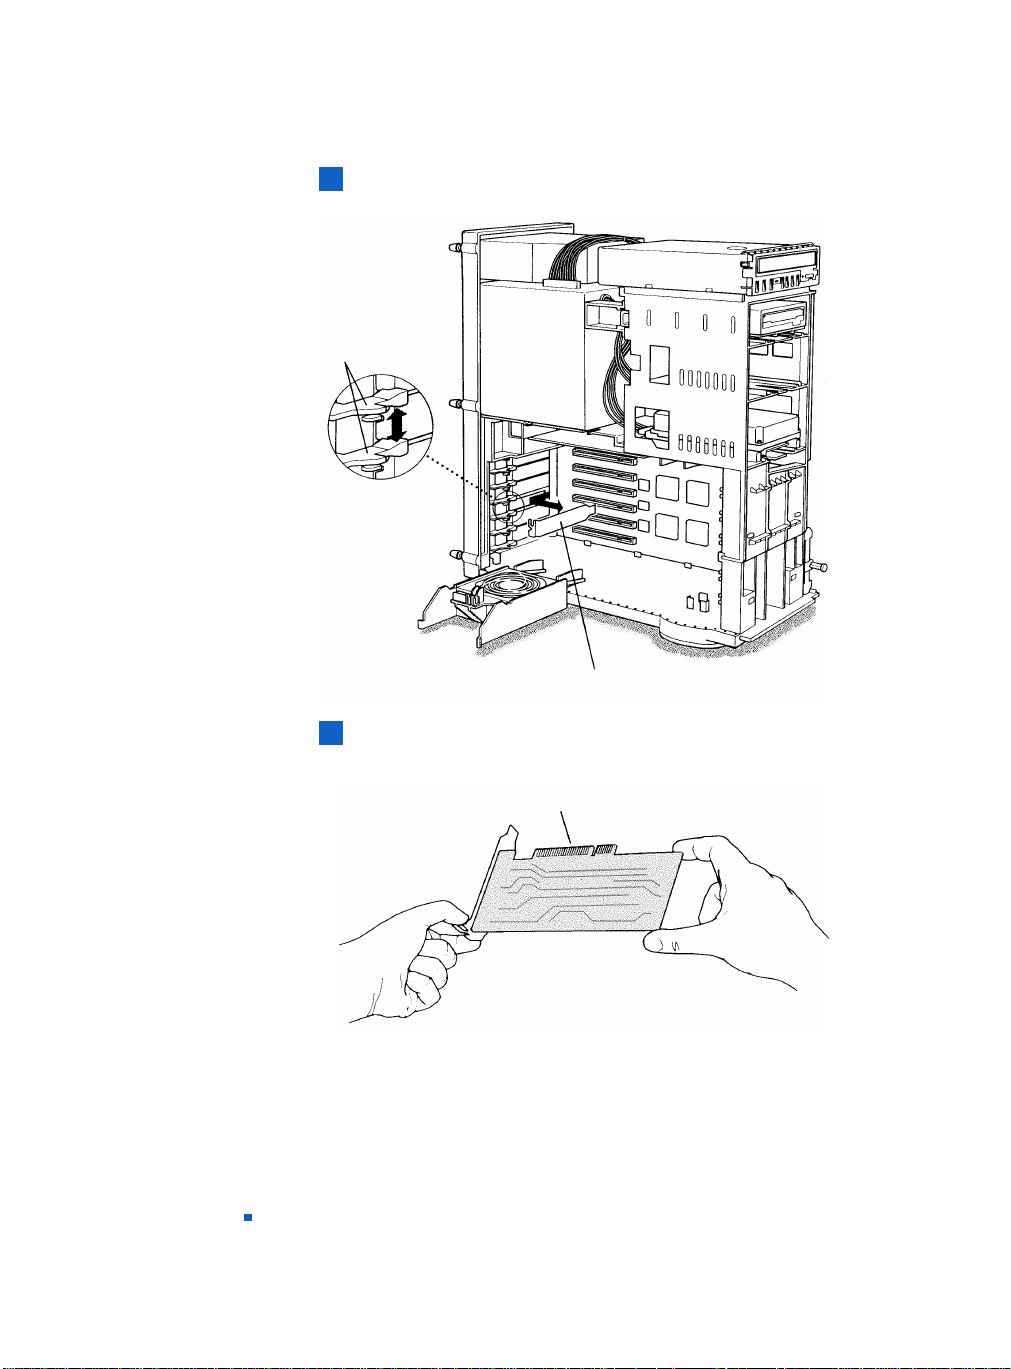
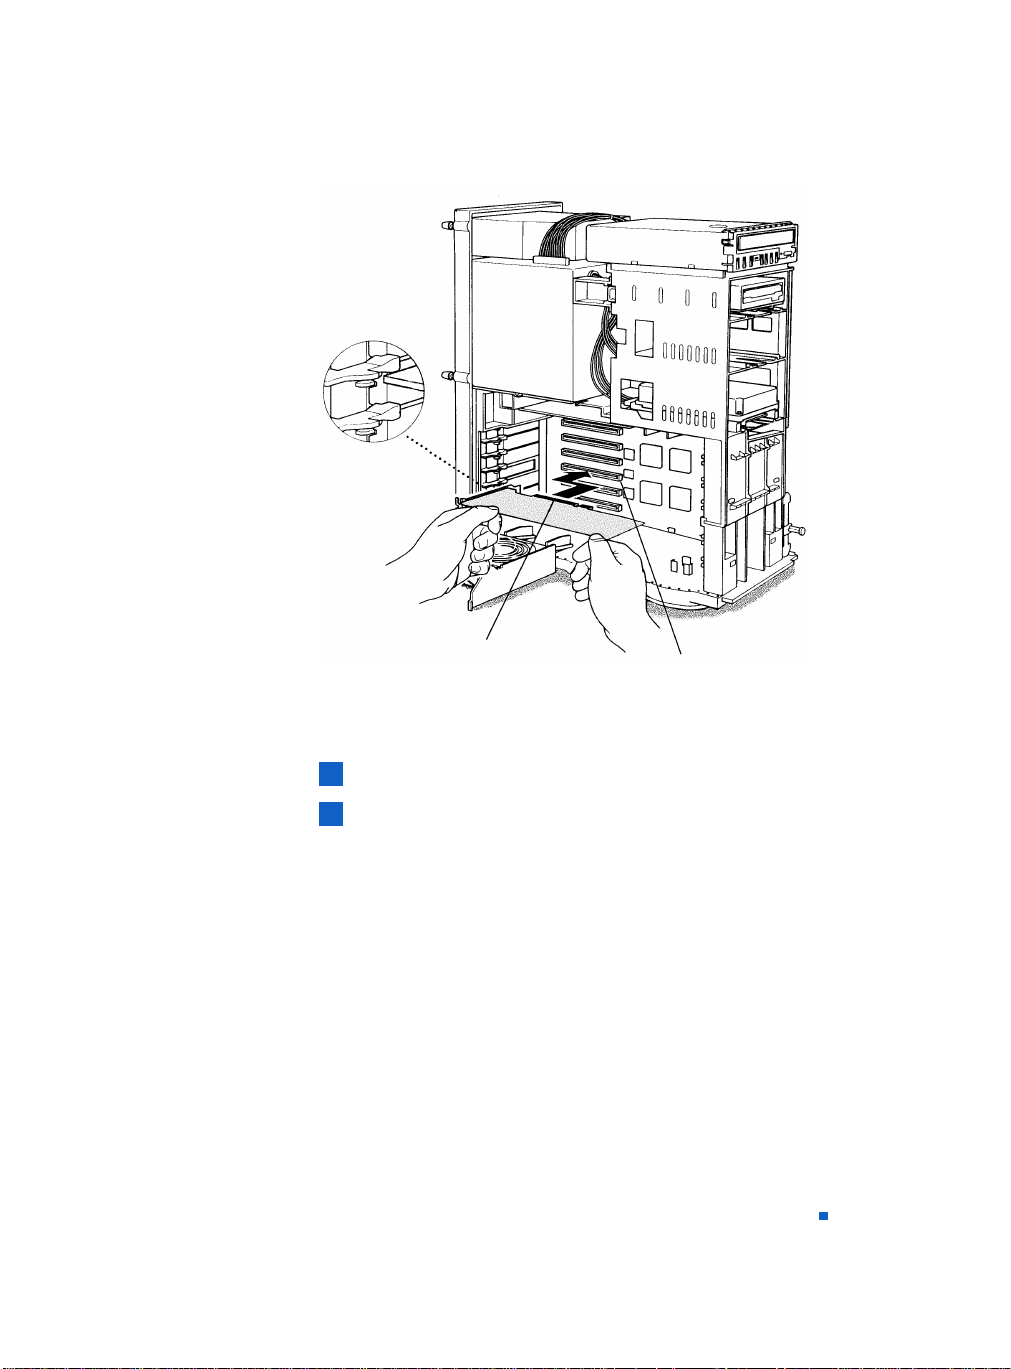
Remove the metal access cover from the e xpansion slot you
6
want to use.
1. To release the
access port cover,
pull the two levers
next to the access
port apart.
2. Slide the access port cover out and away from the access port.
Align the connector on the card with the PCI expansion slot
7
and press firmly until fully seated.
Page 6
Connector
Do not force the card. The card should fit snugly into the
expansion slot.
Connector
If you plan to use multiple displays, you must install a card for
each monitor. Repeat steps 6 and 7 for each card.
Replace the auxiliary fan.
8
Replace the computer cover.
9
PCI Expansion Slot
Page 7
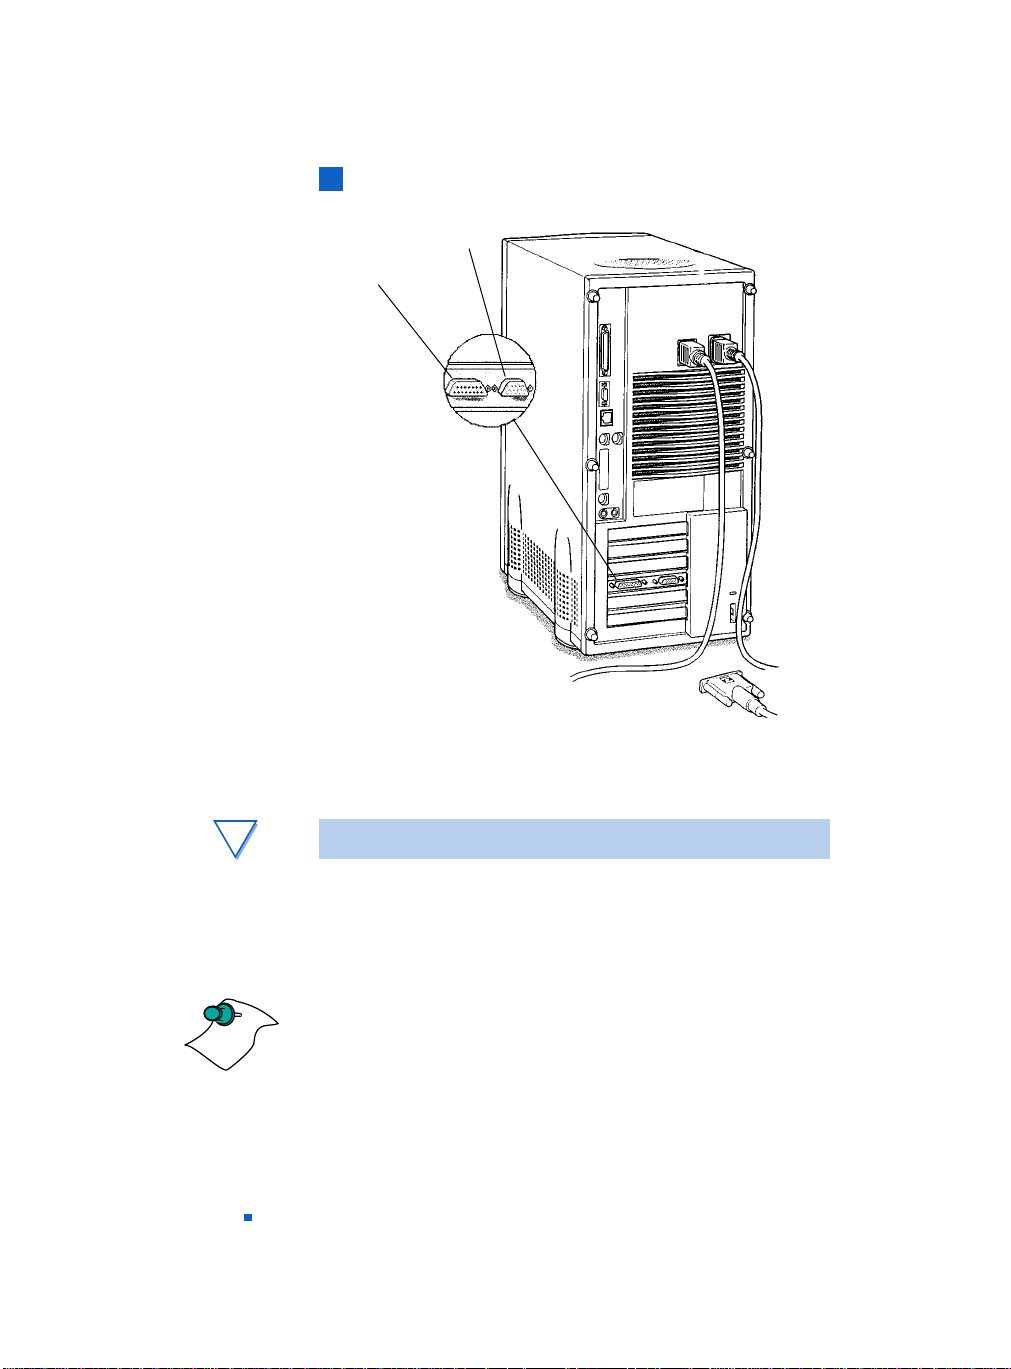
Connect the monitor cable to the card.
10
VGA monitor port
Apple monitor port
If you have an Apple monitor, connect it to the Apple monitor port.
If you have a VGA monitor, connect it to the VGA monitor port.
Only connect one monitor to the card.
NOTE
Page 8
!
WARNING
• Serious damage to your system may occur if you
connect more than one monitor to the card. If you have
more than one monitor, you
must
connect it to another
graphics card.
If your monitor is connected to the Apple monitor port, it must
support Apple’s Monitor Sense protocol, either directly or
through an appropriate adapter. For more information, see
“About Monitor Sensing” on page 9.
Installation of your Nexus GA card is now complete and you
are ready to install the software. See “Installing Software” on
page 11.

About Monitor Sensing
Apple’s Monitor Sensing specification allows video display
cards to identify the attached monitor. During startup,
Nexus GA checks the status of three of the fifteen pins on the
Apple monitor port. It then auto-configures itself according to
the monitor sense code detected and enables all resolutions
supported by the monitor. Since Nexus GA relies on this sense
code to correctly auto-configure during startup, the monitor
must supply the appropriate sense code.
In a case where your monitor does not supply the sense code
information, a display adapter can be used to set the appropriate
sense code for your monitor. Typically, a display adapter is used
to connect a VGA monitor to the Apple monitor port, or to
supply the correct monitor sense code information.
If the display adapter supplies the sense code information for
only one resolution, then only one resolution will be available,
even if the monitor supports multiple resolutions. A resolution
of 640 x 480 is usually the default resolution. Therefore, when
using an adapter to supply the sense code, it must be designed to
supply the proper code for the monitor you are using it with;
otherwise, the Nexus GA card cannot correctly auto-configure
itself for the attached monitor.
Although the Nexus GA card does not output Sync-on-Green
(SOG) signals, adapters are available to overlay the Composite
Synchronization Signal and send it through the Green video
signal line so that you can use an SOG monitor. Monitors
requiring an SOG signal usually have only three BNC
connectors (RGB).
For more information about obtaining a sense code or
synchronization signal adapter, contact ATI Customer Support
or a computer retailer. F or information about how to contact ATI
Customer Support, select the Support button on the ATI
Displays control panel.
Page 9

Page 10
3
Installing Y our Software
About ATI Software
Nexus GA requires that several components be added to your
System folder. The Nexus GA Installer does this for you,
installing the following components:
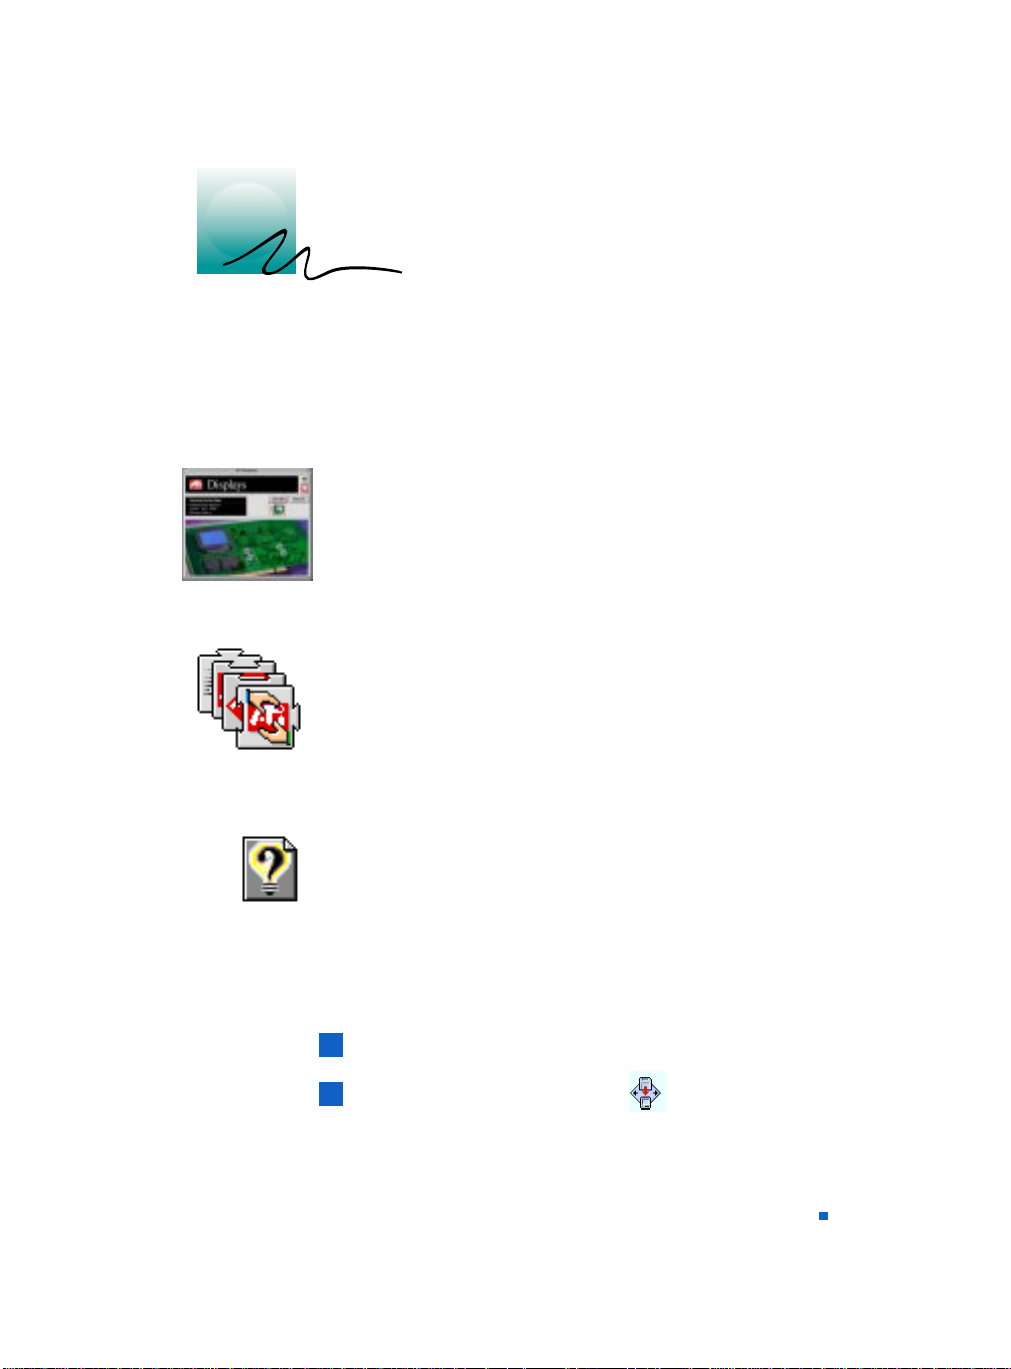
ATI Displays Control Panel
The ATI Displays control panel lets you configure your card and
access software and hardware features. These features are
described in the section “ATI Displays Control Panel” on
page 15.
ATI Multimedia Components
ATI’s Multimedia Components are placed in the Extensions
folder, located within the System folder. They enable all of the
advanced features of your card, including 3D and 2D
acceleration.
ATI Guide File
The ATI Guide file is the online help for the ATI Displays
control panel. It is placed in the Extensions folder within the
System folder. F or more information about using the ATI Guide,
see “ATI Guide” on page 24.
Installing Software
Insert the ATI Installation disk.
1
Double-click on the Nexus GA Installer icon.
2
The ATI splash and legal notice screens appears.
Page 11
 Loading...