

Page 1
Bluetooth Headset
H900
Made in China
Page 2
Contents
,
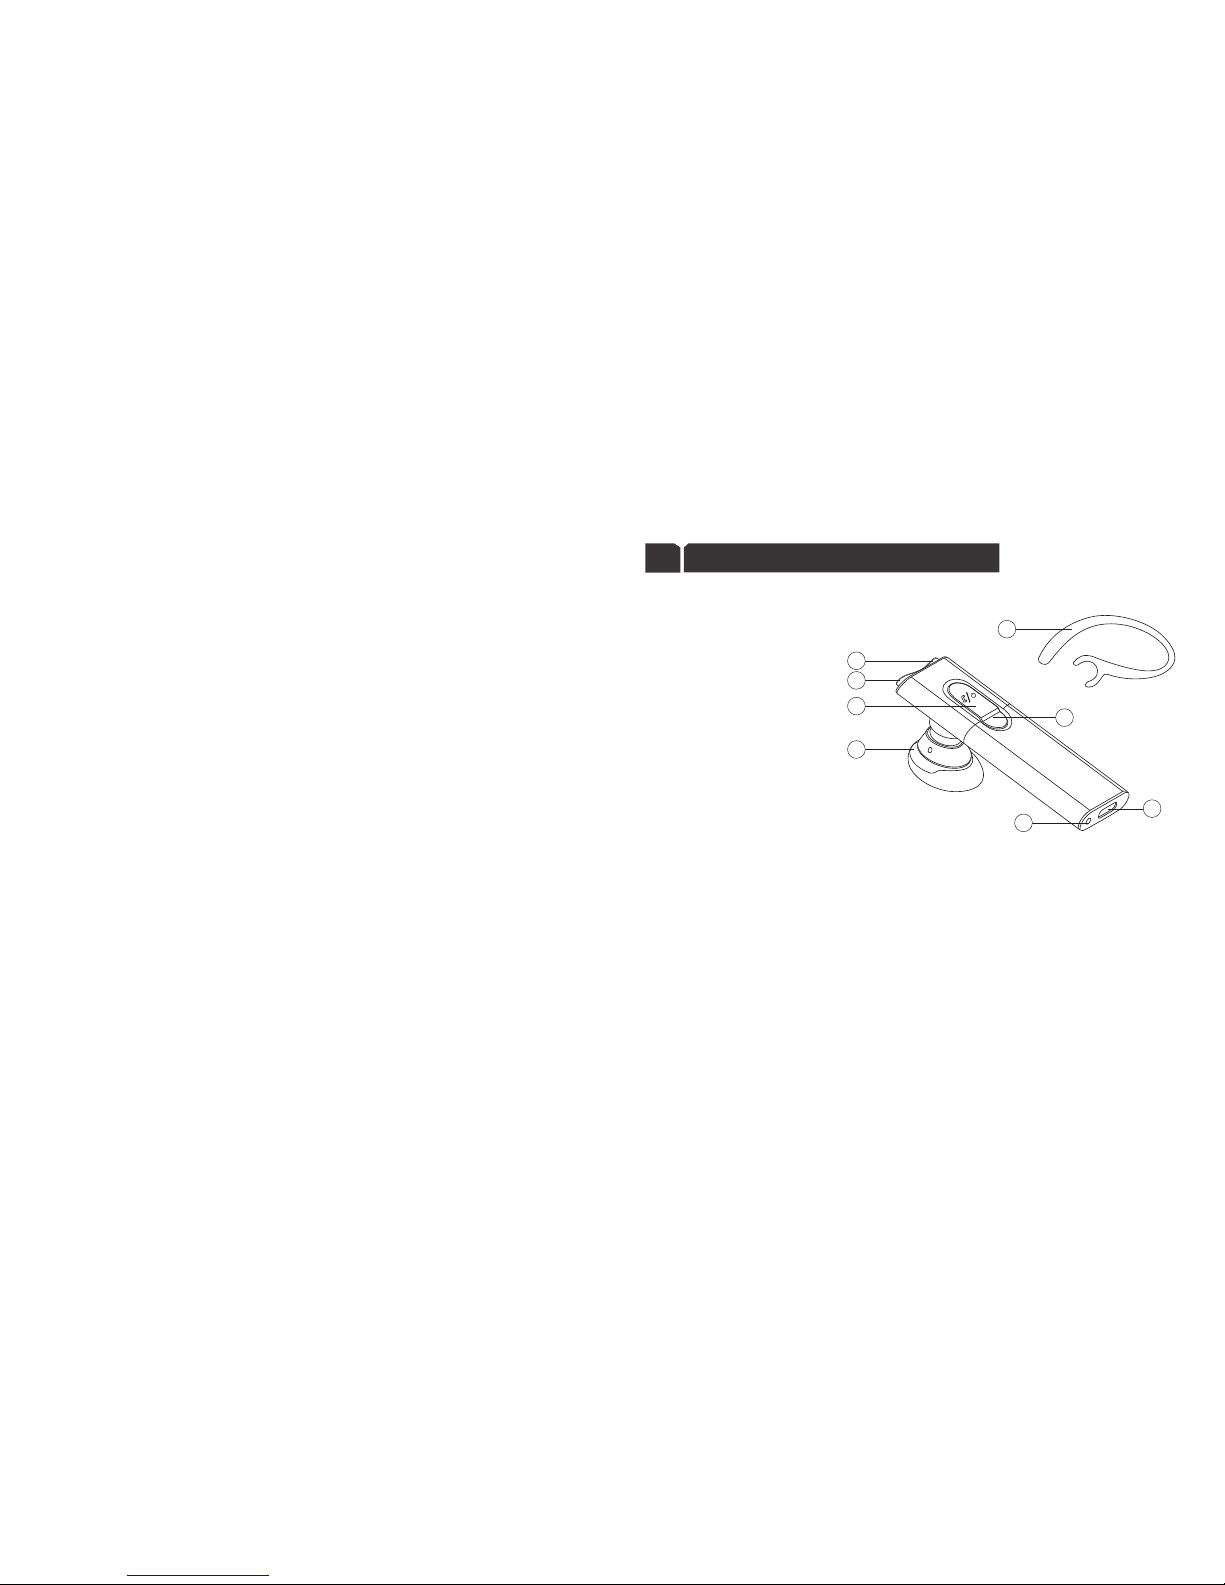
What s in the box
The headset co ntains th e following parts:
1.E ar Hook
2. Volume Down Button
3.Volume Up Button
4.M ulti- function Button
5.S peake r
6.M icrophone
7.I ndicator Li ght
8.C harging Soc ket
1
1
Package Contents List
A. H9 00 Blue tooth h eadse t
B. Trave l Charg er
C. US B Cable
D. Use r's Gui de
1
2
3
5
4
6
8
7
,
Wha t s in the box ... ..... ..... ..... ..... ..... ..... ..... ..... ..... ..... ..... ..... ..... ..... ..... ..... ..... ..
Cha rge the b atter y ..... ..... ..... ..... ..... ..... ..... ..... ..... ..... ..... ..... ..... ..... ..... ..... ..... ..
Bat tery information . ..... ..... ..... ..... ..... ..... ..... ..... ..... ..... ..... ..... ..... ..... ..... ..... ....
Pair to your Blueto oth pho ne .... ..... ..... ..... ..... ..... ..... ..... ..... ..... ..... ..... ..... .....
Turn ing hea dset on / off ... ..... ..... ..... ..... ..... ..... ..... ..... ..... ..... ..... ..... ..... ..... ..... .
Wear ing you r heads et .... ..... ..... ..... ..... ..... ..... ..... ..... ..... ..... ..... ..... ..... ..... ..... ...
Mak ing a call .... ..... ..... ..... ..... ..... ..... ..... ..... ..... ..... ..... ..... ..... ..... ..... ..... ..... ..... ...
End ing a cal l ..... ..... ..... ..... ..... ..... ..... ..... ..... ..... ..... ..... ..... ..... ..... ..... ..... ..... ..... ..
Rej ect an incomi ng call . ..... ..... ..... ..... ..... ..... ..... ..... ..... ..... ..... ..... ..... ..... ..... ...
Ans werin g a call .. ..... ..... ..... ..... ..... ..... ..... ..... ..... ..... ..... ..... ..... ..... ..... ..... ..... ....
Tran sferring a call .... ..... ..... ..... ..... ..... ..... ..... ..... ..... ..... ..... ..... ..... ..... ..... ..... ....
Cal l-waiting ( Three -Way Cal ling) . ..... ..... ..... ..... ..... ..... ..... ..... ..... ..... ..... ..... ..
Volu me cont rol....... ..... ..... ..... ..... ..... ..... ..... ..... ..... ..... ..... ..... ..... ..... ..... ..... ..... ..
Mut e......... ..... ..... ..... ..... ..... ..... ..... ..... ..... ..... ..... ..... ..... ..... ..... ..... ..... ..... ..... ..... ...
Safety and gener al information.. ..... ..... ..... ..... ..... ..... ..... ..... ..... ..... ..... ..... ...
FCC & IC State ment ........... ..... ..... ..... ..... ..... ..... ..... ..... ..... ..... ..... ..... ..... ..... ..... .
EU...... ..... ..... ..... ..... ..... ..... ..... ..... ..... ..... ..... ..... ..... ..... ..... ..... ..... ..... ..... ..... ..... ..... .
Warranty. ..... ..... ..... ..... ..... ..... ..... ..... ..... ..... ..... ..... ..... ..... ..... ..... ..... ..... ..... ..... ....
1
2
13
12
12
11
10
10
9
9
9
9
8
8
7
6
4
3
Page 3
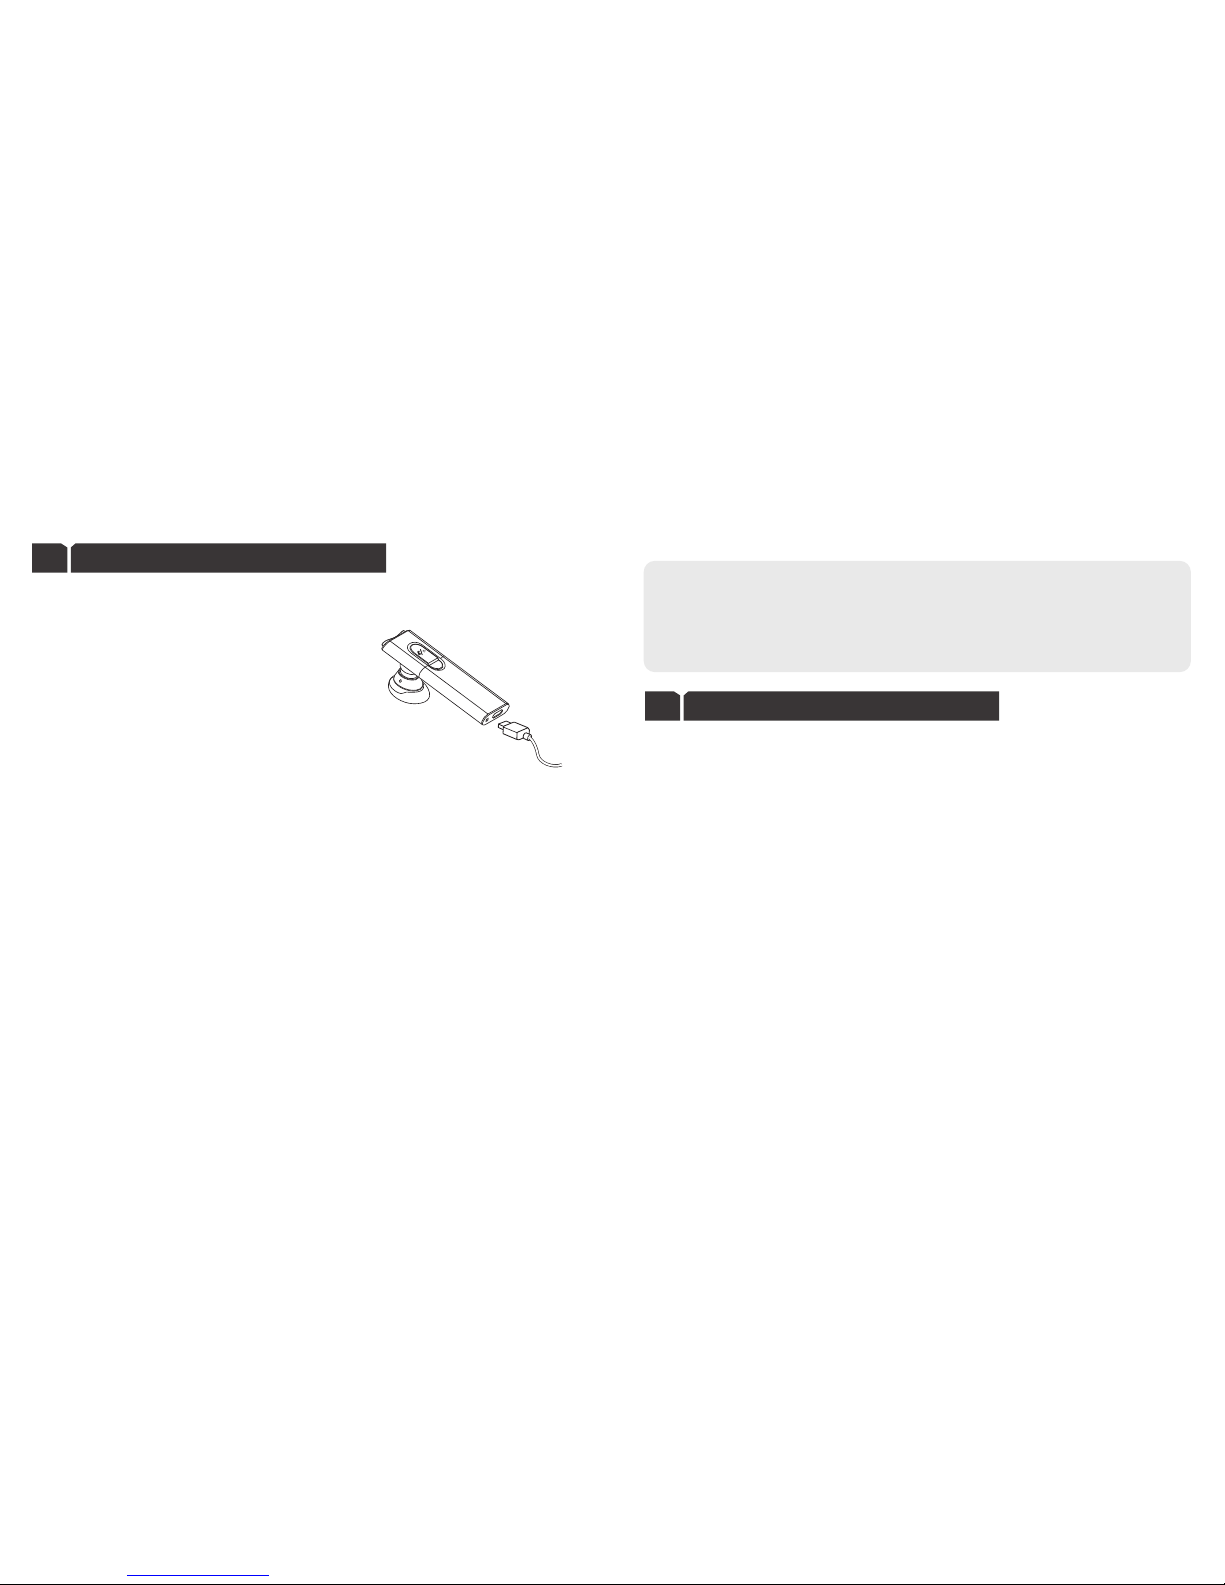
Charge the battery
1. Connect the charger t o the correct outle t.
2. Whi le the ch arger i s connected, the red i ndicator
lig ht disp laying during charging. If char ging do es
not s tart, disco nnect the cha rger, plug it in again,
and retry. C hargi ng the batter y fully may tak e up
to 2 ho urs.
3. Whe n the bat tery is fully c harge d, the red indic ator li ght tur n blue.
Dis conne ct the ch arger f rom the headset and th e wall ou tlet.
The f ully ch arged batter y has power for up to 3 hours of tal k-time or up to 80 hours
of st andby t ime. However, the talk a nd stan dby tim es may vary whe n used wi th
dif ferent mobil e phone s or othe r compa tible Bluetooth devices, usage settings ,
usa ge styles, and envir onments.
Whe n battery power is low, t he head set wil l remin d you by beeps eve ry 20 seconds ,
and t he red indicator lig ht star ts to flash.
2
2
1. For first t ime use, please char ge the he adset f ully. If you cannot see the ind icato r
lig ht when c harging, ple ase leave the he adset o n the cha rging for a while
(Approx 15 -35 Min utes) , then th e indic ator light will be on.
2. If after a f ull cha rge, you canno t turn th e heads et on, pl ease re -plug the headset
to th e charger for a few second to act ivate i t.
IMPORTANT NOTIC E!
Battery information
3
3
Thi s device has a built-i n rechargeable bat tery. Do not att empt to remove t he battery
from the device as y ou may damage t he devi ce.
l Your d evice i s powered by a built-in charg eable b atter y. The full performance o f a
new b atter y is achieved o nly after two or three complete ch arge and discharge
cycles. The batte ry can be charg ed and di schar ged hun dreds of times.
l Unplug the ch arger f rom the vehicle and the devi ce when n ot in use.
Do no t leave a fully charge d battery connected to a charger, since overcha rging
may s hort en its li fetime. If left unused, a fully charged b atter y will lose its c harge
over time. I f the headset w ill go un used for a long time, please charge f ully an d
tur n off the h eadse t.
l To pre vent ove r disch arge en dange ring th e batte ry, you a re recommend ed to
cha rge the h eadset fully each m onth.
Page 4

4
Pair to your Bluetooth phone
Bef ore you u se your headset for th e first t ime, ensure th at it is pa ired to use it with
dev ices su ch as your Bluetooth p hone.
Blue tooth d evice s
H900
Scan r esult s
Ente r Bluet ooth
Pass key
****
Onc e you pair the headset w ith a dev ice, the Headset wil l be auto matically connec ted
to th e device where ver you turn the headset on.
Ente r PIN cod e"000 0"
(4 ze ros) and c onfir m to
com plete pa irin g.
Pres s and hol d the
Mul ti-Fun ction u ntil yo u see
the L ED ligh t flash b lue and
red al terna tely in dicat ing
the u nit is in p airin g mode.
(App roxim ately 6 s econd s)
Foll owing y our pho ne's in struc tion
gui de, set your Blu etoot h enabl ed
pho ne into s earch mode
Ins ure the
hea dset is o ff.
Your ph one wil l find th e
hea dset an d show th e
dev ice nam e on the
scre en, sel ect th e devic e
nam e to confi rm pai ring.
4
5
IMPORTANT!
Whe n the hea dset pa ired with
mob ile pho ne, the b lue ind icator
wil l have two flash es very 5
sec onds. I f faile d, the blue
ind icato r will have one fl ash
eve ry 3 seco nds
NOTE:
l If the pairing is suc cessful, the h eadse t will co nnect to your phone automa tically,
you may need to confirm the enqui ry on your phone.
l While t he head set is pa ired wi th the ph one and connected, t he indi catio n light
wil l flash 2 t imes every 5 se conds. If failed or didn't conne ct to the p hone, t he blue
ind icator light will fl ash 1 tim e every 3 secon ds.
l Once yo u paired the headset w ith one d evice o r more, the Head set wil l
aut omatically conne ct to the p hone yo u last co nnec ted wherever you tur n the
hea dset on , but mak e sure your phone's Bl uetooth function is active.
l The hea dset is s uppor ts Bluetooth v2.1 +EDR sp ecifi catio n, the si mplif ied pairing
process will mak e parin g your de vices easily, if your m obile p hone su pports
Blu etoot h v2.1+ EDR spe cific ation, you just need t urn on bo th of the m, and ad d
new B lueto oth dev ice on your phon e, the he adset a nd your phone will fin d each
oth er and co nnect a utoma tical ly.
l The hea dset su pports multi-po int tec hnolo gy. If you n eed connect the headset to
nd
the 2 Blu etoot h phone, please repeat the pairin g opera tion steps above. When
fin ish the p airin g, turn o ff the he adset and turn on aga in, the h eadse t will co nnect
to th e both 2 ph ones au tomatically.
Page 5

Turning headset on /off
5
Wearing your headset
6
The h eads et can b e worn on either the Left or Right ear. If you want to c arry the
hea dset on t he othe r ear, please change the direction of the ear clamp follow
the f igures below.
Ple ase wear the headset follow the below.
Lef t
Right
21
6
7
*Turn on the he adset
If the head set is tu rned of f, press a nd hold M FB for 2 seconds until you hear a melod y
from low to hi gh, the h eadse t turns on, the B lue ind icator light will fl ash 3 tim es at the
sam e time.
*Connects to the p hone
1. If your headset has fin ished t he pair ing ope ratio n successfully, whe n the hea dset
is tu rned on , it will c onnec t to the ph one(s ) you las t connected automa tical ly, but
mak e sure your phone's Bl uetooth function is active.
2. The h eadse t suppo rts multi-p oint an d conne cts to 2 ph ones at t he same t ime. In
som e opera tions, you need to disting uish th e conne ctio n sequence, so we appoint
the p hone fi rst con necte d as phon e 1, the se cond on e as phon e 2.
*Tur n off the headse t
At any working sta te, press and ho ld MFB for 4 seconds, you will hear a mel ody from
hig h to low, and the Red indicator light will fla sh 3 time s at the sa me time, the headset
tur ns off.
Not e
l For saving the p ower, while the h eadse t didn' t connect to any device over 1 hour,
the h eadse t will tu rn off au tomat icall y.
Page 6

Making a call
Ending a call
Reject an incoming call
7
8
9
Answering a call
Transferring a call
Call-waiting ( Three-Way Calling)
10
11
12
* By ph one's keypad
At the stand-by st ate, dial the nu mber on y our pho ne directly to make a call.
* Use Voi ce-Di aling
At the stand-by st ate, press the M FB shor tly, you will he ar a shor t tone from the
hea dset, a nd the ph one wil l prompt you say t he voice tag like your f riend's name. If th e
voice tag is ident ified by the phone, th e related numb er will b e dial- out later.
Mak e sure wh ether your mobile ph one sup ports voice d ialin g function, a nd you need
to se t up voice tags on y our mob ile pho ne firs t. If the h eadse t has con necte d to 2
pho nes, double press th e MFB wil l start Voic e-Dialing of phon e 2.
* Las t numbe r re-d ialin g
Press and ho ld Volume Down bu tton for 2 secon ds, you will hear 2 shor t tones, the la st
num ber you dialed will be r e-di al out. I f the headset h as connected to 2 phones, press
and h old Volume Up but ton for 2 second s will st art last number re-dialing of phone 2 .
NOTE
l If the headset has connec ted to 2 phones, when one phon e has active a ca ll, the
hea dset wi ll disc onnec t to othe r phone t emperately, when you end the call th e
hea dset wi ll re- connect it automat icall y, please make s ure your phone 's Blue tooth
fun ction would not be inactive duri ng the ca lling.
Whe n you receive an incoming cal l, press and hold MFB for 2 secon ds will r eject the
inc oming c all.
Whe n you receive an incoming cal l, press the MFB shortly can p ick up th e incom ing
cal l; also you can pick up th e call on y our mob ile.
Whe n in the ca lling, press a nd hold Volume Up b utton for 2 seco nds can t ransfer the
cal l from headset to phon e. Repe at the operat ion can t ransfer the ca ll between th e
pho ne and he adset e ach oth er.
Bef ore using Cal l-waiting f unction on your headset, p lease e nsure t hat your phone
sup ports the Hands-f ree profile, a nd you have been p rovide the service by the ne t
provider.
* If there is another inco ming ca ll whil e you are in the cal ling, p ress MFB shor tly can
accept the waiti ng call a nd end cu rrent calling.
* If there is another inco ming ca ll whil e you are in the cal ling, p ress and hold M FB for
2 sec onds ca n accept the wai ting ca ll and ho ld on cur rent ca lling.
* Whil e you are in the calling a nd anot her cal l was hol ding on , press MFB shortly can
end c urrent call and resu me the ho lding o n calli ng.
Whe n in the ca lling, press t he MFB sh ortly will end the ca ll, also you can e nd call o n
your mobile.
8
9
Page 7

* Whil e you are in the calling a nd anot her cal l was hol ding on , press and hold MFB for
2 sec onds ca n shift t he current calling to the ho lding on calling.
* Whil e you are in the calling a nd anot her cal l was hol ding on , press Vol ume Up bu tton
sho rtly can add the hold ing on ca ll to the c urrent conversat ion to make a multipar ty
cal l.
* Whil e you are in the calling a nd anot her cal l was hol ding on , or you are in a mult iparty
cal ling, double press M FB can end the callin g or remove yourself from the m ultip arty
cal ling.
Volume Control
13
Whi le you are in the ca lling, you can adjus t the volume by pressing volu me up and
volume down butt on or you can adjust the v olume on your m obile.
Mute
14
Whi le you are in the ca lling, Press a nd hold t he Volum e Down Bu tton fo r 2 secon ds,
you will hear a melo dy from l ow to high, then the hea dset' s MIC wil l be mute d, and
you will hear remi ndful m elody e very 10 secon ds. Repeat th e operation your wil l hear
the m elody f rom high to low, the mute f unct ion is cancel led.
15
Safety and general information
CAU TIONS: ELE CTRIC SHO CK HAZARD
The b atter y used in t his dev ice may p resent a risk o f fire or chemical bur n
if mi s-treated.
!
10
11
1. Pl ease read this guide book ca reful ly and fo llow th e instr uction.
2. To avoi d any damage or malfun ction of the un it do not d rop unit .
3. Ke ep the un it away from hum idity, water and any ot her liq uid. And if the unit is
,
exp osed by water, mo isture and other liq uid dir ectly t hen don t operate i t to avoi d
any electrical shock , explosion and dam age of th e unit.
4. Do n ot plac e or keep t he unit n ear the h eat sou rces such as dir ect sun light ,
rad iators, stoves or other app aratus which produ ce heat. It may cause explos ion,
deg rade of perfo rmanc e and reduce batter y life.
5. Do n ot modi fy, repa ir & disa ssemb le unit ( Espec ially b atter y: It may cause an
exp losio n)
6. Do n ot plac e the heavy objects on the unit.
7. Us e only su pplie d and app roved charger.
8. Re place ment or s ervice must b e done by q ualified service center or manufac ture.
9. Un plug th is unit w hen unu sed for long periods o f time or d uring lightening storm s.
Page 8

FCC & IC Statement
Ope ratio n is subject to the following two conditions:
16
(1) Th is dev ice may not cause harmful interference, a nd
(2) Th is dev ice must accept any inter feren ce received, i nclu ding i nter feren ce
tha t may cause undesired operation.
Note: The man ufa ctu rer i s not r esp ons ibl e for ANY interference, for exa mple
RADIO or TV inter feren ce, caused by unauthorized modifications to th is
equ ipmen t.
Suc h modif icati ons could void the user’saut hority to operate t he equipment.
EU
17
Thi s product is Ce marked according to the p rovision of the R&T TE Directive
(99 /5/EC ).
Declare s that this product is in compliance with the essential requi rements
and o ther relevant provisions of Directive 19 99/5 /EC.
Ple ase no te that this product uses radio frequency bands not harmonized
wit hin EU.
Within the EU this product is intended to be used in Austr ia, Belgium , Denm ark,
Finland, France, Germany, Greece, Ireland, Italy, Luxembourg,
The N ethe rlan ds, Por tugal, Spain, Swe den, U nited King dom an d with in EFTA
in Ic elan d, Nor way and Switzerland.
Blu etoot h is a trademark owned by the Bluetooth SIG, Inc.
The condition of t his war ranty a nd our re spons ibili ties un der thi s warranty are as
follows: Warrant y is non-tran sferable and i s limit ed to the o riginal pur chase r only.
* Mod ifica tion an d repai r of the unit should be d one by authorized an d quali fied
ser vice center or returned to t he manu factu rer
* You must b e able to p rove the date of o riginal pur chase o f the uni t with a da ted
receipt.
* The warranty is not appli cable i f the product has been subje ct to phy sical a buse,
imp roper installati on, mod ifica tion or repair by unau thori zed thi rd party.
* The responsibil ity of suppli er's products shall be lim ited to t he repair or replacement
of th e product at it's sole discr etion .
* Spe cific ally exempt from any warran ty are li mited -life consumable compo nents
sub ject to n ormal wear and tear such as ba tteri es, decorates and other acc essor ies.
* Sup plier w ill not t ake any respon sibil ity if the fail ure of th e unit has resu lted from
acc ident, abuse, misu se, or any unaut horiz ed repair, modi ficat ion or di sasse mble.
* This warranty giv es you specific lega l right s, and you may als o have other rights
whi ch vary under local l aws.
Warranty
18
12
13
Page 9

This device complies with part 15 of the FCC rules. Operation is subject to the
following two conditions: (1) this device may not cause harmful interference,
and (2) this device must accept any interference received, including
interference that may cause undesired operation.
NOTE: The manufacturer is not responsible for any radio or TV interference
caused by unauthorized modifications to this equipment. Such modifications
could void the user’s authority to operate the equipment.
NOTE: This equipment has been tested and found to comply with the limits for
a Class B digital device, pursuant to part 15 of the FCC Rules. These limits
are designed to provide reasonable protection against harmful interference in
a residential installation. This equipment generates uses and can radiate
radio frequency energy and, if not installed and used in accordance with the
instructions, may cause harmful interference to radio communications.
However, there is no guarantee that interference will not occur in a particular
installation.
If this equipment does cause harmful interference to radio or television
reception, which can be determined by turning the equipment off and on, the
user is encouraged to try to correct the interference by one or more of the
following measures:
- Reorient or relocate the receiving antenna.
- Increase the separation between the equipment and receiver.
-Connect the equipment into an outlet on a circuit different from that to which
the receiver is connected.
-Consult the dealer or an experienced radio/TV technician for help.
 Loading...