

ATIK Cameras 428EX User Manual

Quickstart Guide
v 2.1

From Wikipedia: “The Orion Nebula (also known as
Messier 42, M42, or NGC 1976) is a diffuse nebula
situated south of Orion’s Belt. It is one of the brightest
nebulae, and is visible to the naked eye in the night sky.
M42 is located at a distance of 1,344±20 light years
and is the closest region of massive star formation to
Earth. The M42 nebula is estimated to be 24 light years
across.”
Image by Rui Tripa (Atik 4000)

Page 1
Introduction
Thank you very much for your purchase of an Atik camera.
Atik cameras represent the most affordable way to capture highquality astronomical images, whilst delivering superior performance and unparalleled ease-of-use. Your Atik camera is the
result of extensive research and development, and it has been
designed and built with the requirements of the most demanding
astrophotographer in mind. A wide range of accessories is also
available in order to answer the needs of even the most ambitious
astro-imaging applications.
Your Atik camera incorporates state-of-the-art design and materials, and it will be your trusted astrophotography companion for
a long time to come. However, modications to the camera and/
or accessories which are undertaken without the manufacturer’s
written permission will void the warranty. Repairs, servicing and
upgrades are available through your local dealer or at www.atikcameras.com.
This guide will help you to get your Atik camera up and running in
just a few minutes: please take the time to read it thoroughly, and
you will be ready to discover new worlds...
Page 2
Setting up your camera
Installation of the camera is very straightforward, and by following
this guide you will be up and running with a minimum of effort.
Your camera is supplied with a 3 metre USB cable and a 1.8 metre
power cable with a car lighter plug. The car lighter plug will allow
you to connect the camera to most power tanks and emergency
battery packs available on the market today for eld use.
An optional universal mains adaptor is also available, allowing you
to run the camera from a 110/220V mains supply. We recommend
that you purchase the approved mains adaptor if you intend to
power the camera this way.
If you wish to supply your own adaptor, make sure it’s of good
quality, with a 2.1mm type plug, center positive, and capable of
supplying a minimum of 1.5 amp (Atik Titan/314/320), or 2.5 amp
(Atik 383/4000/11000).
WARNING: Mains power adaptors are intended for indoor or
observatory use only. There is a risk of electric shock if the adaptor
is used in damp environments or outside. If in doubt do not use the
adaptor and consult a trained electrician.

Page 3
Installing the camera in 3 steps:
1 - Power the camera on. The fan should start rotating immediately.
The Titan is USB powered, so no need to have external power unless you need to turn on the cooler.
2 - Plug the USB cable into the camera, then into your computer. A
“New hardware found” message should immediately be visible.
3 - When asked for the drivers, point to the \Drivers\<camera model>
on your CD-ROM drive.
That’s it! The camera is now installed and ready to use.
Installing the Capture application
Your camera comes with a simple and easy-to-use application called
“Artemis Capture”, which provides functions for image capture and
display; camera conguration; telescope focusing; autoguiding;
and image sequencing with an optional lter wheel. Images can be
saved in several popular formats for further processing with your
favorite image processing application.
To install Artemis Capture, simply run the installation le in the “Artemis” folder of your CD and follow the prompts. During installation,
you will be asked if you want to install optional plug-ins for popular
image capture applications. Plug-ins are supplied for Maxim DL™,
AstroArt, and CCDSoft™.
Page 4
Using the camera and software for the rst time
Full instructions for using the software are given in the user manual
which is provided on the installation folder in PDF format. However,
the following information will help you get your rst image with a
minimum of effort.
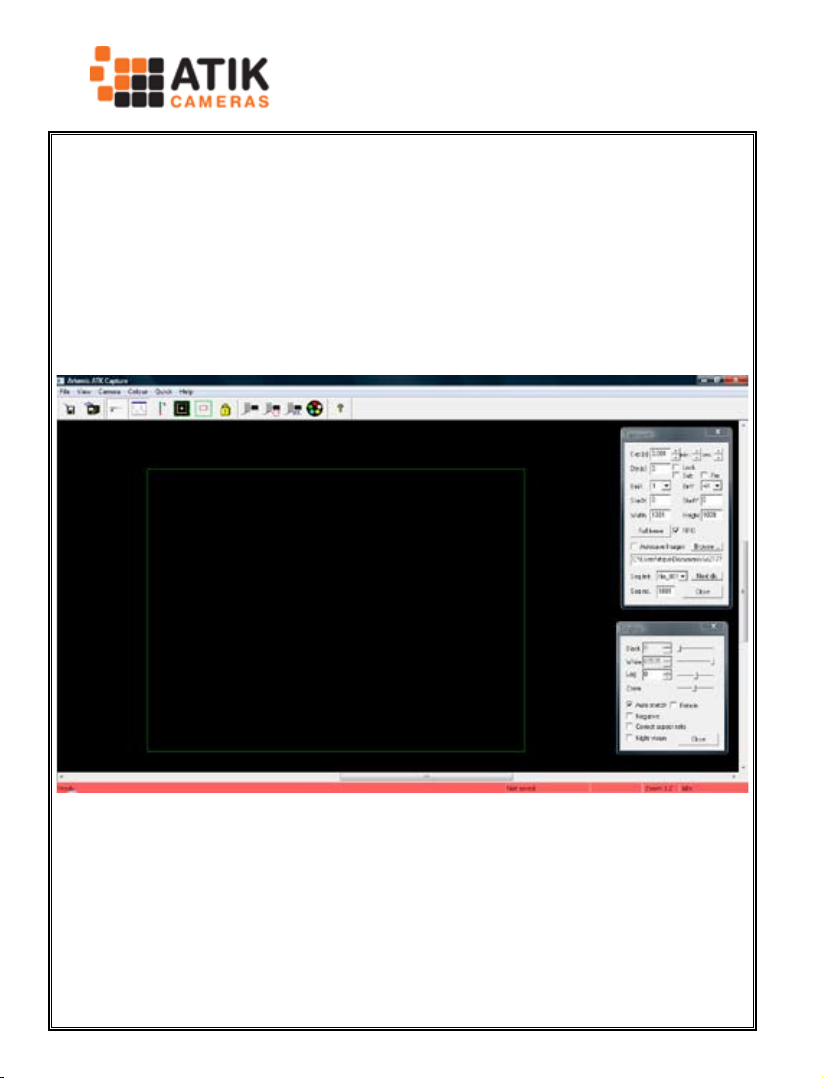
After loading Artemis Capture, you will see this screen:
Operation is very simple. The top window controls exposure duration, binning and other camera options. You can leave most of the
settings at their default settings.
The bottom window controls the way the image is displayed. Keep
in mind that the settings here only affect the display, not the data
in the image itself.
 Loading...