

Page 1

ATD-7021
LOCKING DRAWER FOR ATD7020
ASSEMBLY INSTRUCTIONS
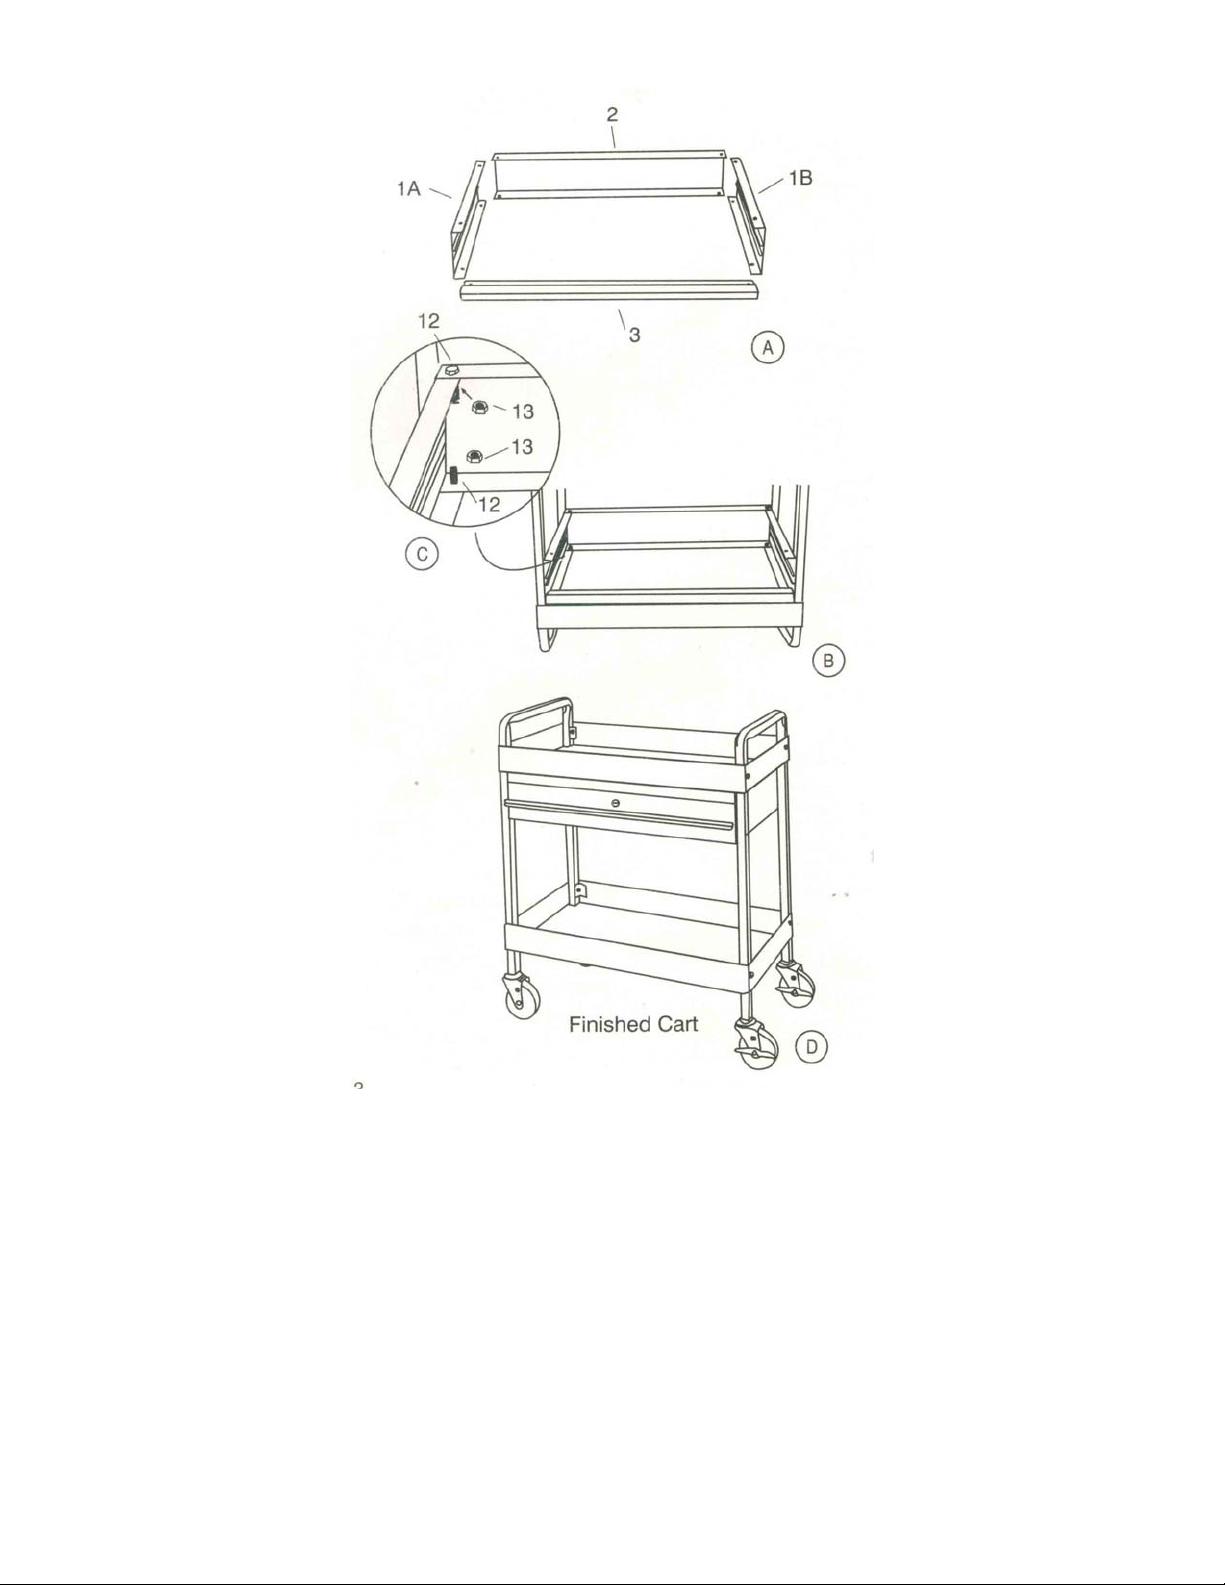
1. Turn the cart on its handles as shown in drawing B. There are 4 pre-punched holes
already, you just need to tip out the punched parts when you install the drawer.
2. Line up the holes on the back of the shelf with part#1A,, the left side of the drawer
cabinet as shown in drawing B. Part# 1A and #2 overlap and connect as shown in drawing
C. Insert bolt and washer from underneath the shelf and tighten with nut. Using the bolts
provided, attach part#1A and #2 together at the top and tighten with a nut as shown in
drawing C.
3. Line up the holes on the back of the shelf with part#1B, the right side of the drawer
cabinet and the other end of part#2, the back plate of the drawer cabinet. Insert bolt and
washer from underneath the shelf and tighten with nut. Using the bolt provided attach
parts#1B and #2, together at the top and tighten with a nut.
4. Line up the holes on part#3, the front panel of the drawer cabinet, with the other end of
#1A, #1B and the front end of the shelf. Place part#3 under #1AB, and attach to the
shelf. Insert bolts and washer from underneath the shelf and tighten on each side with
nuts provided.
5. Turn the cart back on it s casters.
6. Attach the handle to the front of the drawer with the 4 screws provided. Please consult
step one.
7. Insert the drawer into the service cart cabinet.
Page 2
 Loading...