

Page 1
TH-TVCB
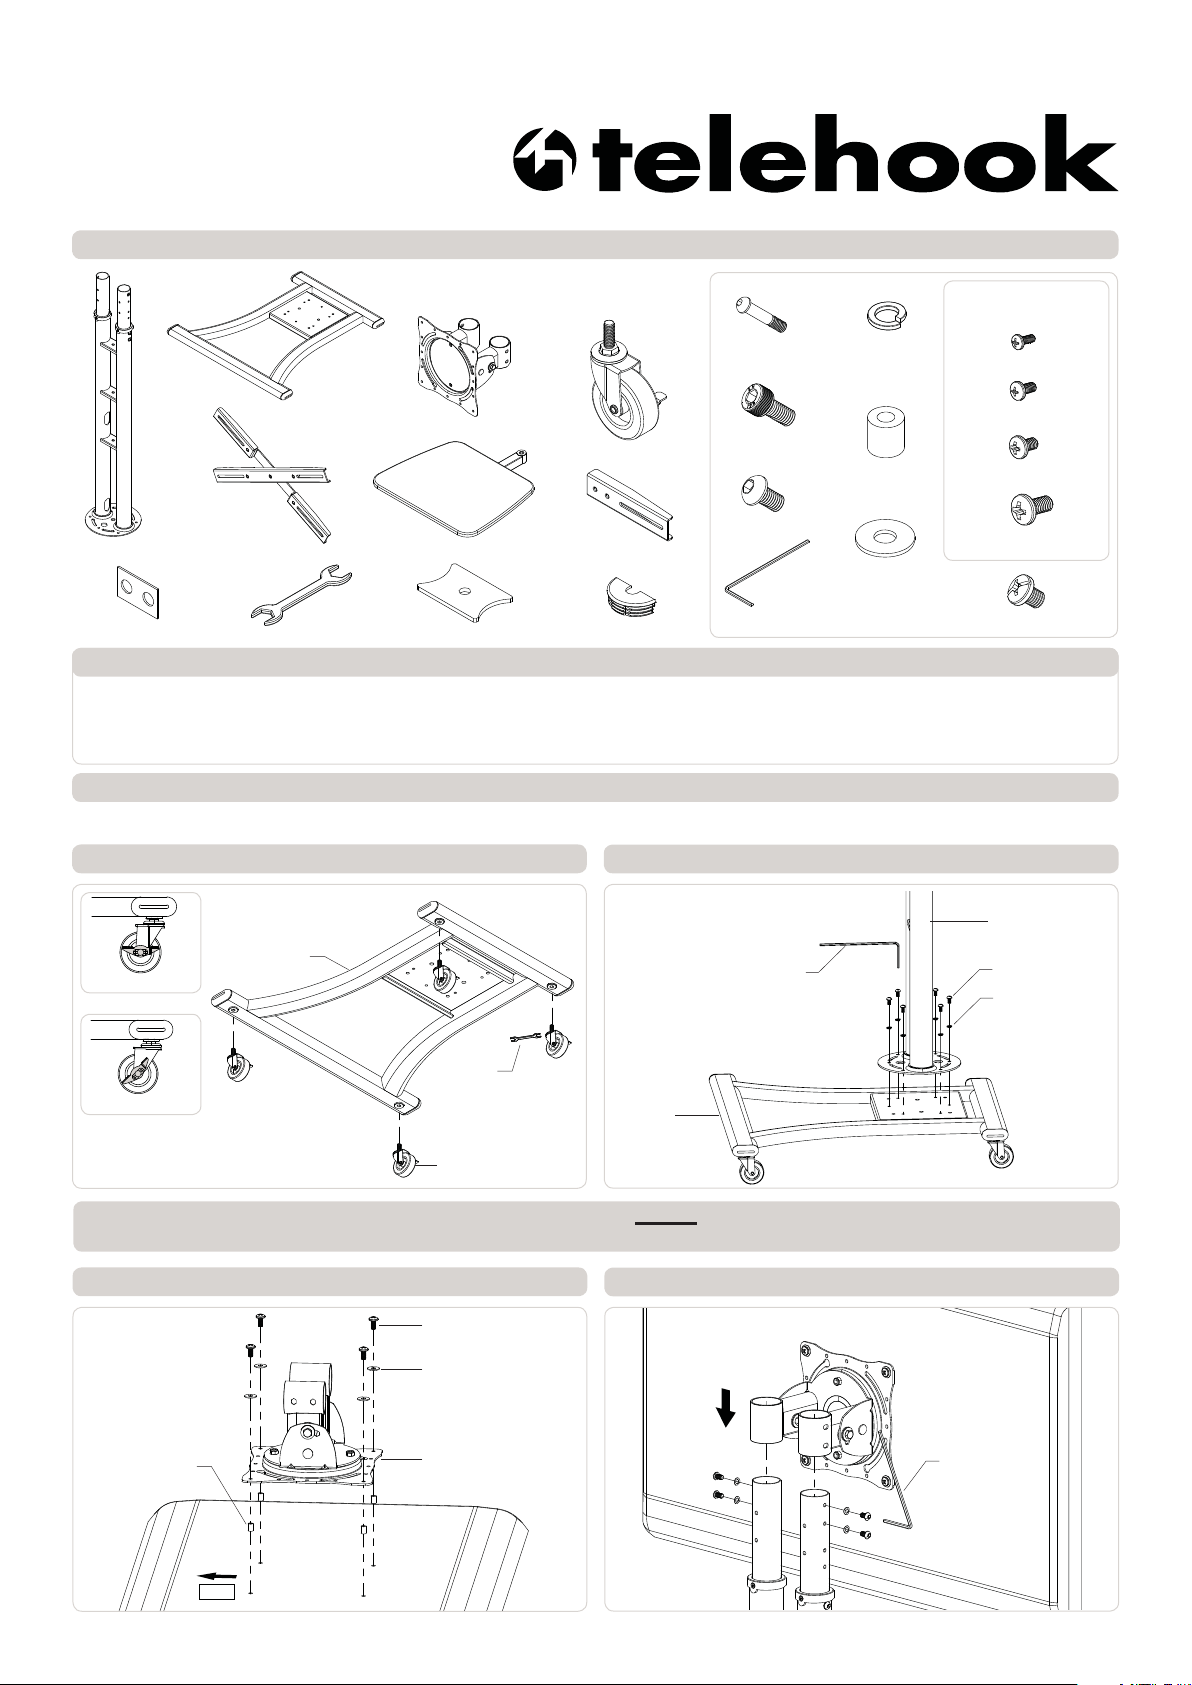
Component Checklist
Installation Instructions
Mobile TV Cart
Column
Extension Washer (x4)
Frame
Spanner (x2)
Tools Required:
• Phillips head screw driver
Tilt Mechanism
ShelfMounting Bracket
Shelf Mounting Plate
Caster (x4)
Extension Bracket (x4)
Top Cap (x4)
HARDWARE
Shelf Mounting
Screw
M8x16 Screw
(x4)
M8 Screw (x6)
Allen Key
M8 Spring
Washer (x6)
Spacer (x6)
M5 Washer (x6)
M8 Washer (x10)
1/4” Washer (x6)
IMPORTANT INFORMATION:
! IMPORTANT - Install Telehook TV Cart as per installation instruction.
! This product supports a maximum load of 50kg (110lbs.).
! This product supports VESA mounting hole configurations: From 200 x 200mm to 800 x 600mm.
! The manufacturer accepts no responsibility for incorrect installation.
Step 1. Check Components
Check you have received against the component checklist and hardware above.
Step 2. Assemble Base Step 3. Fasten Column to Base
Display Mounting
Screws (x6 each)
M4x16/35mm
M5x16/35mm
M6x16/35mm
M8x16/35mm
M8x10 Screw (x8)
Column
UNLOCKED
LOCKED
Frame
Supplied Allen Key
OR
Supplied
Spanner
Base
Caster
M8 Screws
Spring Washer
For a VESA Hole Configuration of 200x200mm ONLY go to Step 4 and skip Step 5 & 6.
For a VESA Hole Configuration of over 200x200mm skip Step 4 and go to Step 5.
Step 4A. Attach Tilt Mechanism to Display Step 4B. Insert Tilt Mechanism to Column
Display Mounting
Screw
Washer
INSERT
Spacer
(optional, use
only for recessed
mounting holes.)
Tilt Mechanism
Supplied Allen
Key
TOP
Page 2
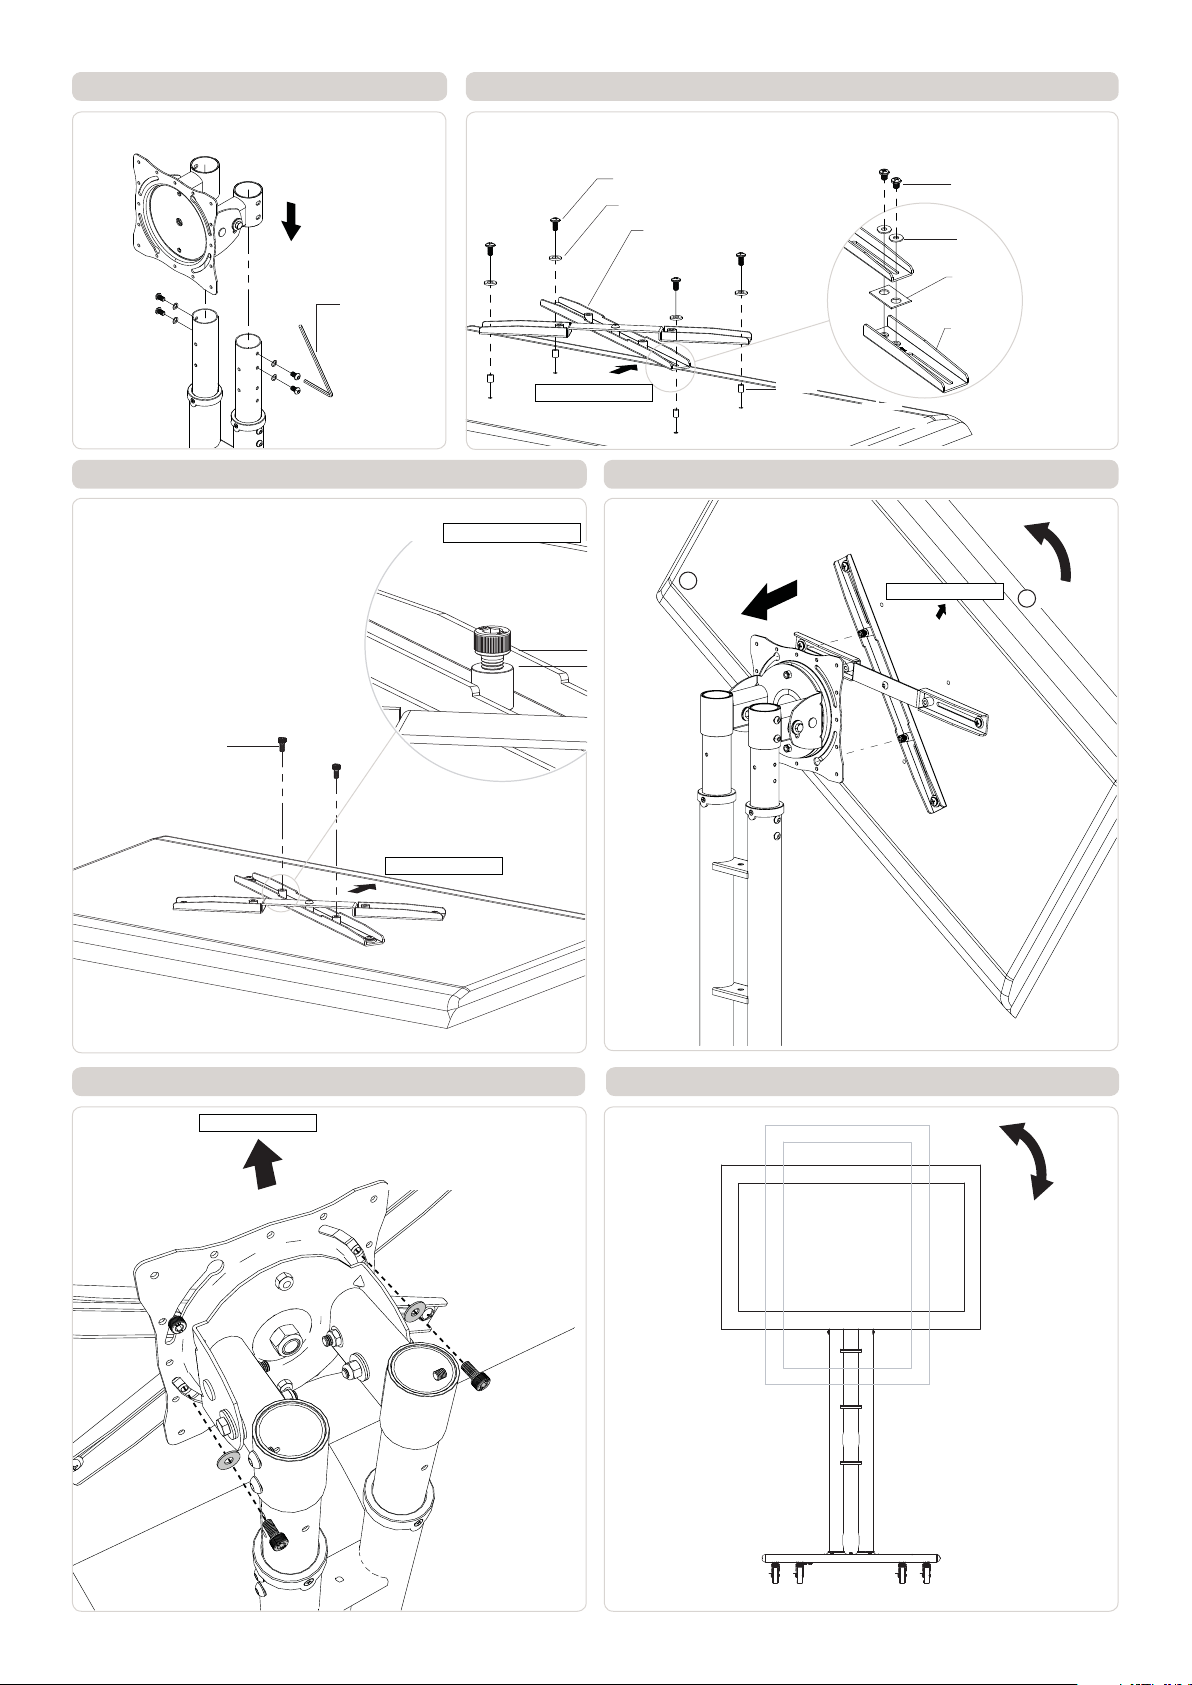
Step 5A. Insert Tilt Mechanism to Column Step 5B. Attach Mounting Bracket to Display
The mounting bracket supports 250 x 250mm up to 600 x 400mm VESA hole configurations.
To accomodate up to 800 x 600mm attach the supplied extension bracket as shown.
INSERT
Supplied Allen
Key
Display Mounting Screw
Washer
Mounting Bracket
M8x10mm Screw
M8 Washer
Extension Washer
Extension Bracket
Top of Display
Spacer
(optional, use only for
recessed mounting holes.)
Step 6. Insert two M8x16 Screws Step 7. Attach Mounting Bracket to Tilt Mechanism
Leave 3-5mm gap
1 INSERT
M8x16 Screw
Top of Display
Top of Display
2 ROTATE
Step 8. Secure Display
Top of Display
Insert two M8x16mm screws
with M8 washers. Use
the supplied Allen Key to
tighten.
Step 9. Set to Landscape or Portrait
±90°
You can adjust
the display either
to Landscape or
portrait view.
Page 3

Step 10. Tilt Adjustment Step 11. Adjust Height
Loosen
HOLD
Tighten
HOLD
Loosen
NOTE: Use the two
supplied spanner to
adjust tension and
tilt if necessary.
+10°
FORWARD TILT
Height
Range
1120mm
1820mm
Tighten
Step 12. Cable Management Step 13. Attach Shelf
Top Cap
Supplied Allen key
Shelf Mounting Screw
Shelf Mounting Plate
Shelf
Option 2
Shelf
Mounting
Options
Option 1
Installation Complete
No portion of this document or any artwork contained herein should be reproduced in any way without the express written consent of Atdec Pty Ltd.
Due to continuing product development, the manufacturer reserves the right to alter specifications without notice. Published 31.10.12 ©
 Loading...