

Page 1
Installation Instructions
FLAT SCREEN WALL MOUNT | FIXEDTH-40100-UF
Important Notes
Supports a maximum load of 150kgs (330lbs).
Suits displays with mounting hole patterns from 200mm to 800mm wide (8”-31.5”) by 200mm to 600mm
high (8”-23.5
The manufacturer does not accept responsibility for incorrect installation.
Component Checklist
”).
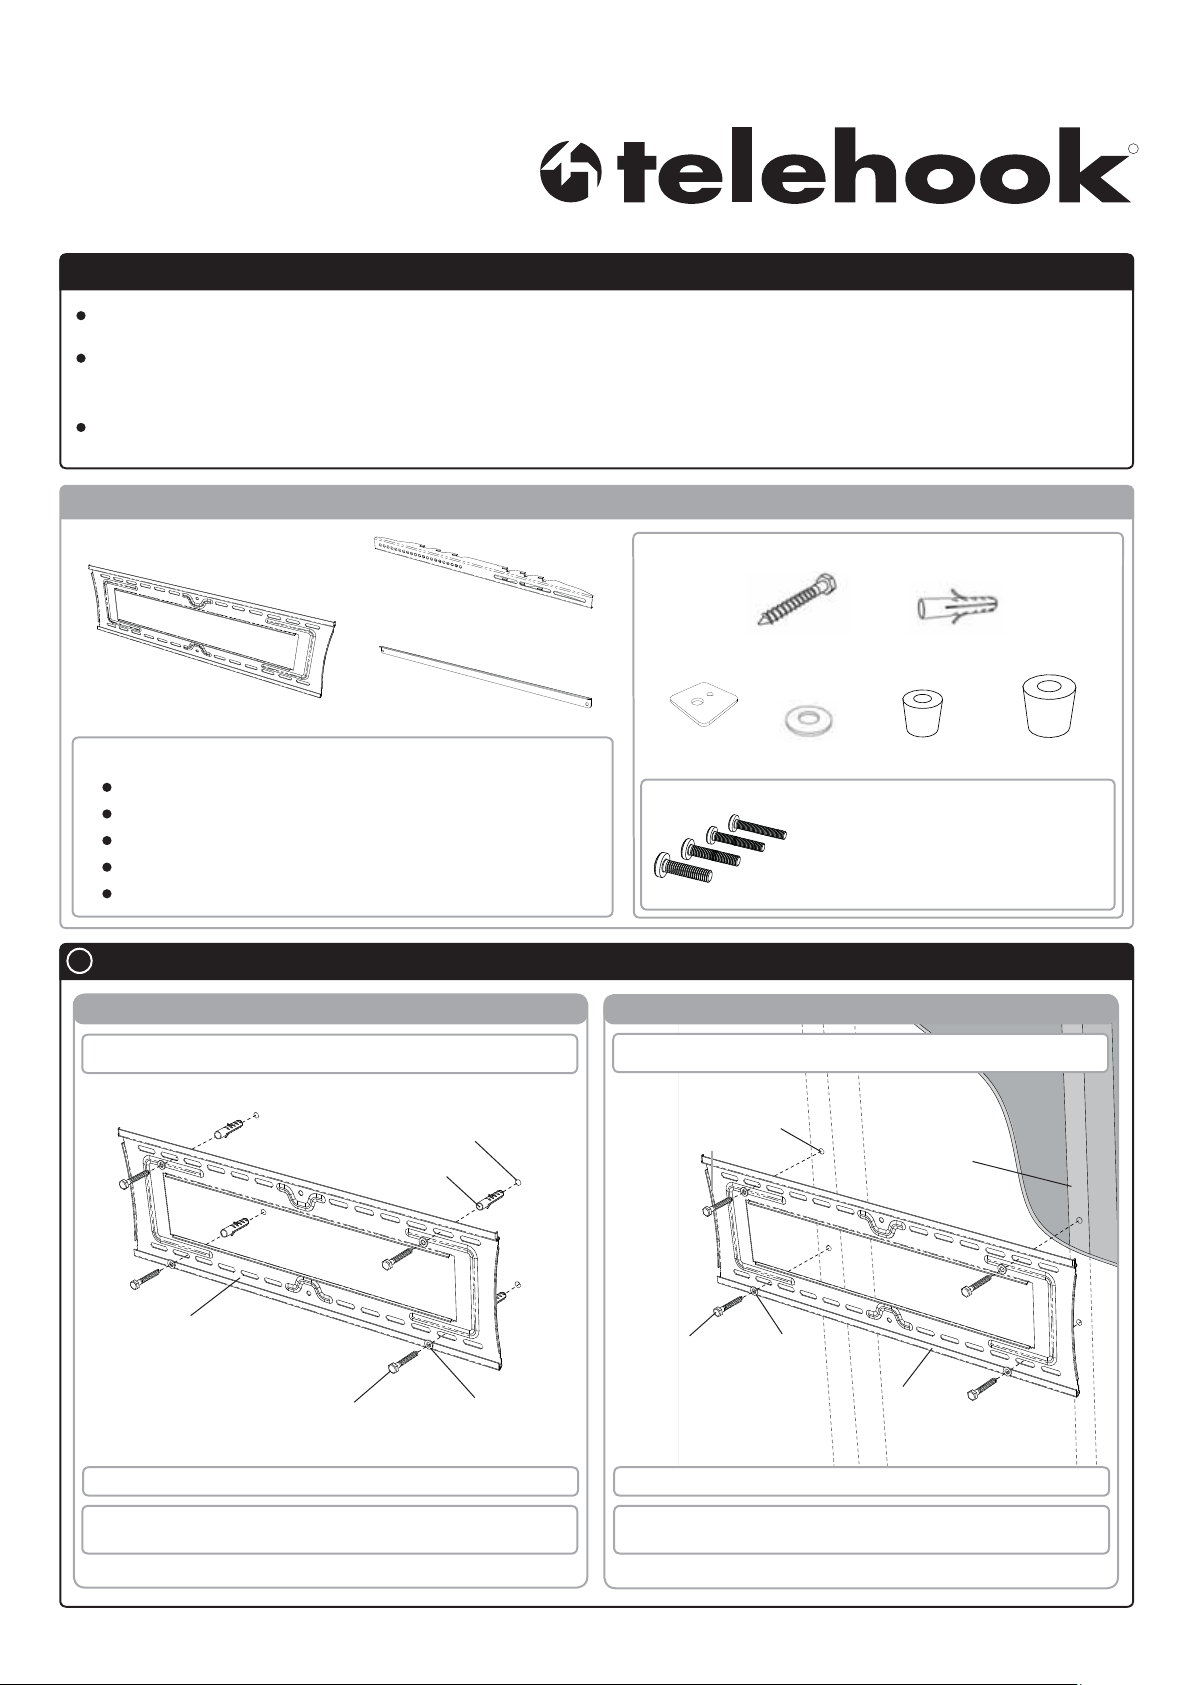
Bits Bag
™
Display Bracket (x2)
Coach
Screw (x4)
Wall Plate
TOOLS REQUIRED:
Power Drill
12mm (1/2”), 10mm (3/8”) or 7mm (1/4”) Drill Bit
Phillips Head Screw Driver
Spirit Level
17m m (11/16”) Socket Wrench or Shifter
A
Mounting the Wall Plate
Security Bracket
Multi
Washer (x4)
Washer (x4)
Mounting Screws
Cross Recessed Screws
Masonry Wall Timber Stud Wall
Note: Ensure the Wall Plate is mounted with the folded tabs point
upwards
12mm (0.5”) hole
Masonry Wall Plug
Note: Ensure the Wall Plate is mounted with the folded tabs point
upwards
7mm (0.25”) hole
Masonry Wall
Plug (x4)
13mm Spacer
Bush (x4)
M8x15mm / M8x35mm / M8x45mm (x4 each)
M6x15mm / M6x35mm / M6x45mm (x4 each)
M5x15mm / M5x35mm / M5x45mm (x4 each)
M4x15mm / M4x35mm / M4x45mm (x4 each)
Timber stud
20mm Spacer
Bush (x4)
Wall Plate
Coach Screw Washer
Coach Screw Washer
TIP: Use a spirit level to ensure the wall plate is horizontal TIP: Use a spirit level to ensure the wall plate is horizontal
It is recommended when mounting directly into masonry wall, that the
mounting holes are positioned as far apart as possible.
Use a stud finder to precisely locate the timber stud and ensure that the
mounting holes are located in the centre of the stud
Wall Plate
Page 2
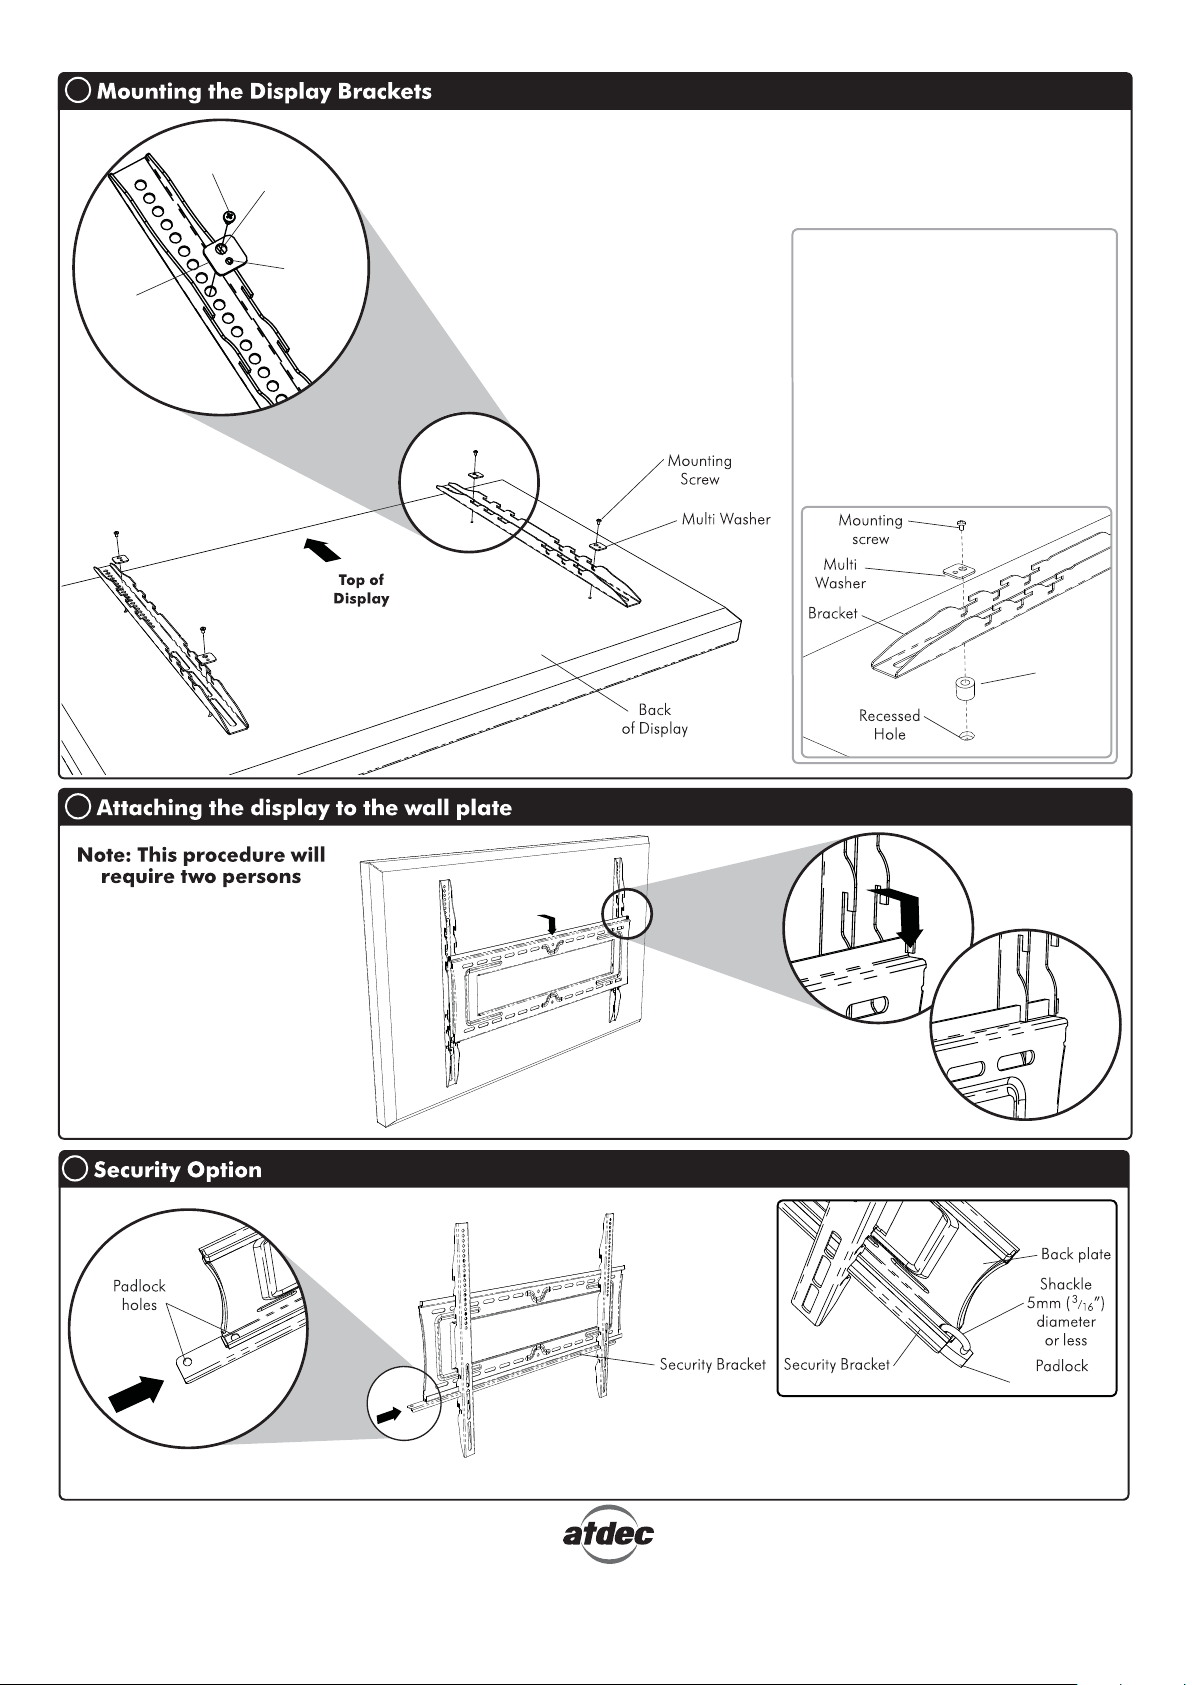
B
Multi
Washer
Mounting
screw
M6 & M8
Screw Hole
M4 & M5
Screw Hole
When attaching the Brackets ensure
that both are vertically aligned.
Ensure that the tightest fitting hole
in the multi washer is used when
attaching the mounting screw.
Recessed Mounting Holes
If the mounting holes are recessed
into the back of the display, use
the appropriate Spacer Bushes
provided to pack the recessed hole.
Please note the 13mm Spacer
Bushes can only be used with M4,
M5, and M6 Mounting screws.
Ensure the brackets are securely
fixed to the display.
Spacer
Bush
C
With the Brackets attached
to the display, lift the display
and hook the brackets onto
the Wall Plate as shown.
There are three height
positions to choose from in
50mm (2”) increments.
E
E.1.
E.2.
(not supplied)
For additional security, it is suggested that a Padlock is
attached through the Security Bracket and the Wall Plate
on either side as shown. The Padlock (not supplied) should
have a shackle diameter no larger than 5mm (
No por tion of this document or any artwork contained herein should be reproduced in any way without the express written consent of Atdec Pty Ltd.
Due to continuing product development, the manufacture reserves the right to alter specifications without notice. Published: 12.12.13 ©
3
/16”).
 Loading...