

Page 1
TH-2250-VF
Installation Instructions
Flat Screen Wall Mount | Fixed
Important Notes
The Telehook 2250 Wall Mount supports Flat Panel Displays from 20” (50cm) to 37” (94cm)
and supports a maximum load of 50kgs (110lbs).
This product only supports VESA compliant displays with 100mm x 100mm (4”x4”), 100mm x 200mm (4”x8”)
and 200mm x 200mm (8”x8”) mounting hole patterns.
The manufacturer does not accept responsibility for incorrect installation.
Component Checklist
TM
Wall Plate
Display Plate
A
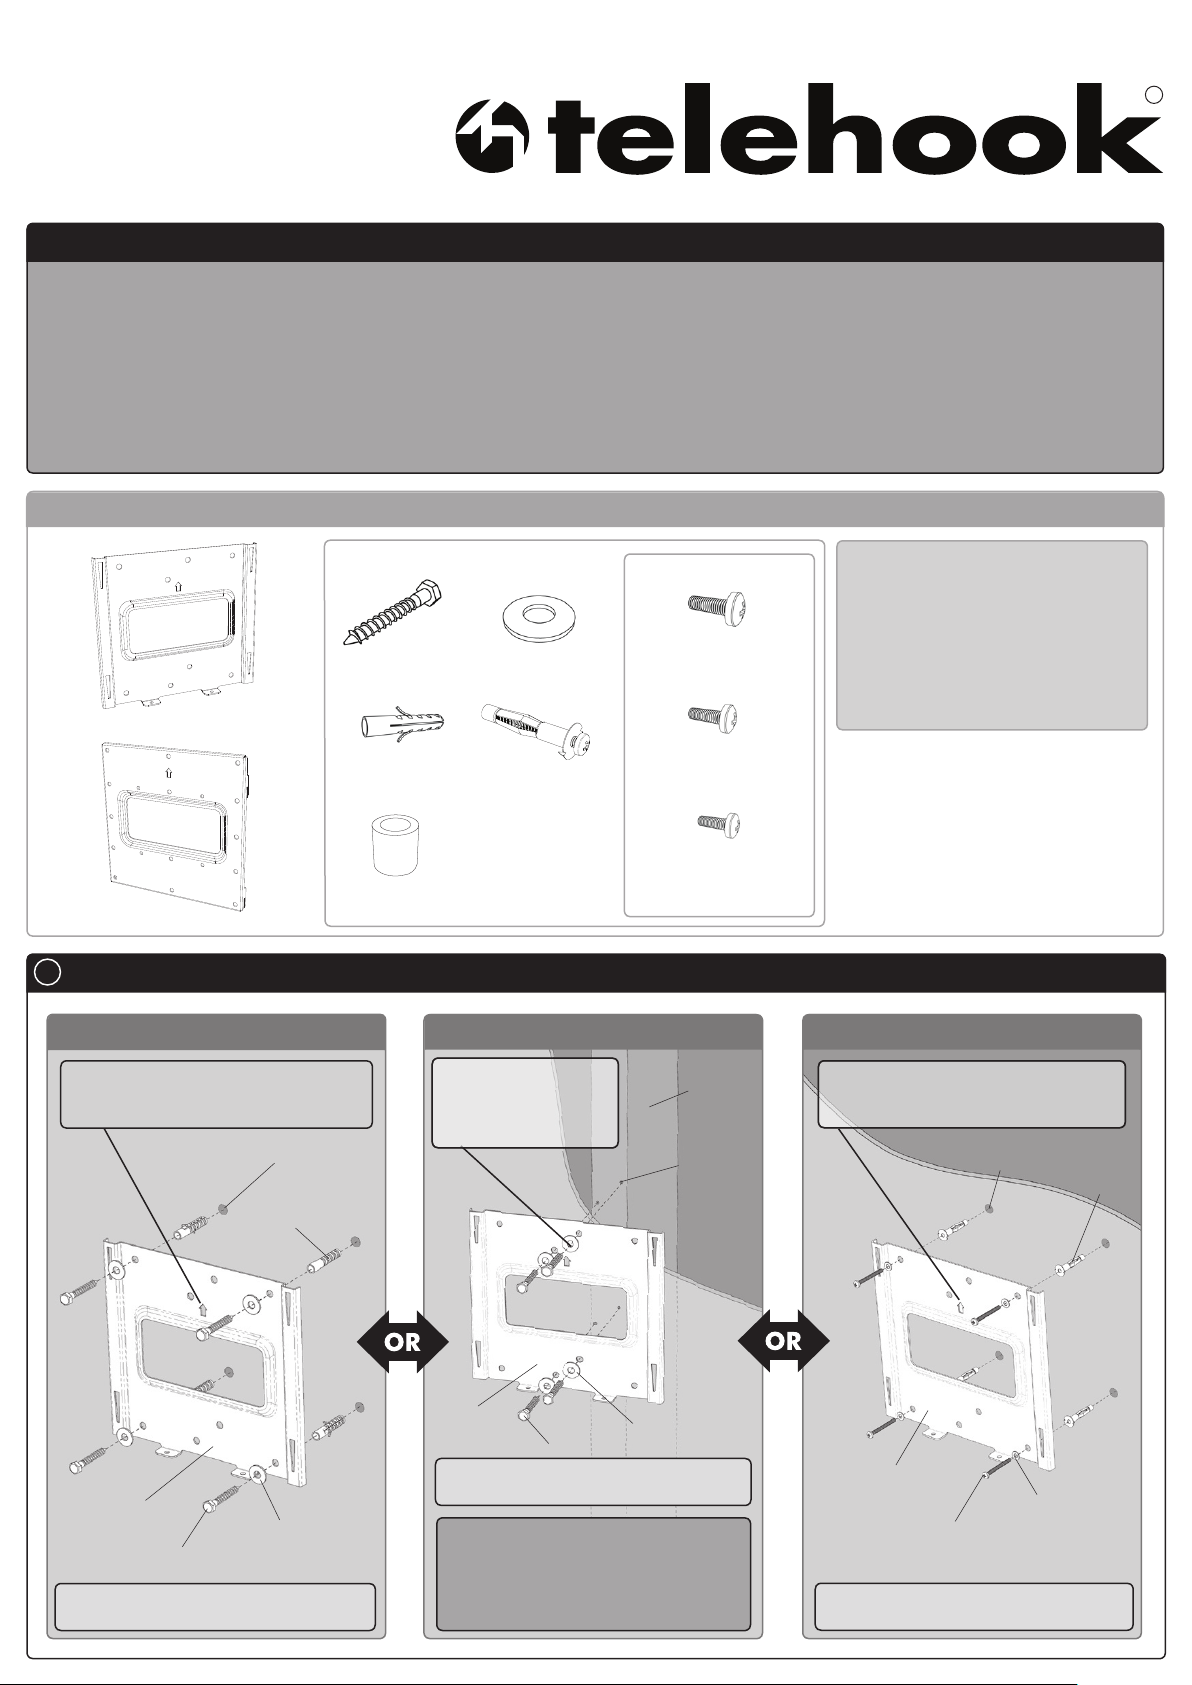
Mounting the Wall Plate
Masonry Wall
Note: Ensure the Wall Plate is
mounted with the arrow cut out
pointing upwards.
10mm (3/8”)
Bits Bag
Hole
Coach
Screw (x4)
Masonry Wall
Plug (x4)
Spacer
Bush (x6)
TOOLS REQUIRED:
Power Drill
10mm or 6mm Drill Bit
Phillips Head Screw Driver
Spirit Level
Socket Wrench or Shifter
Large
Washer (x4)
Dry Wall
Anchor (x4)
Mounting Screws
M6x12mm & M6x20mm
Phillips Head Screw
(x6 each)
M5x12mm & M5x20mm
Phillips Head Screw
(x6 each)
M4x12mm & M4x20mm
Phillips Head Screw
(x6 each)
Timber Stud Wall Dry Wall
Note: Ensure the Wall
Plate is mounted with
the arrow cut out
pointing upwards.
Timber
Stud
6mm (1/4”)
Hole
Note: Ensure the Wall Plate is
mounted with the arrow cut out
pointing upwards.
10mm (3/8”)
Hole
Dry Wall
Anchor
Masonry
Wall Plug
Wall Plate
Washer
Coach Screw
TIP: Use a spirit level to ensure the
wall plate is horizontal
Wall
Plate
Coach Screw
TIP: Use a spirit level to ensure the
wall plate is horizontal
Use a stud finder to accurately
Washer
locate the centre of the stud.
Ensure that all four screws fix
securely into the stud
Wall Plate
Dry Wall
Dry Wall
Anchor Screw
TIP: Use a spirit level to ensure the
wall plate is horizontal
Anchor Washer
Page 2

B
Mounting the Display Plate
Note: When attaching the Display Plate
to the back of the display, ensure that
the arrow cut out in the Display Plate is
pointing towards the top of the display
Mounting Screw
1
(12mm (
/2”) Length)
Display
Plate
of Display
Top of
Display
Back
Mounting Screw
13
(20mm (
of Display
/16”) Length)
Back
Spacer Bush
Recessed
Mounting Hole
Recessed Mounting Holes
Display
Plate
If the mounting holes are recessed into the back
of the display, use the supplied Spacer Bushes
to pack the recessed holes. Ensure that the
correct 20mm length mounting screws are used
to securely fix the plate to the display.
C
Attaching the Display to the Wall Plate
With the Display
Plate attached
to the display, lift
the display and
hook the plate
through the four
corresponding
mounting holes in
the Wall Plate as
shown.
D
Security Option
Mounting
Hole
Hook
Note: For demonstration purposes, the wall
has been omitted from the above image.
To properly secure the display to the
wall it is recommended to use two of
the supplied M4 mounting screws to
Locking
Tabs
securely attach the two plates together.
Mounting
Hole
Hook
M4 Mouning
Screw
Note: For demonstration purposes, the wall
has been omitted from the above image.
Due to continuing product development, the manufacturer reserves the right to alter specificationswithout notice. Published: 06.05.09 ©
 Loading...