

Page 1
TH-1026-VF
Components Checklist
Installation Instructions
Flat Screen Wall Mount | Fixed
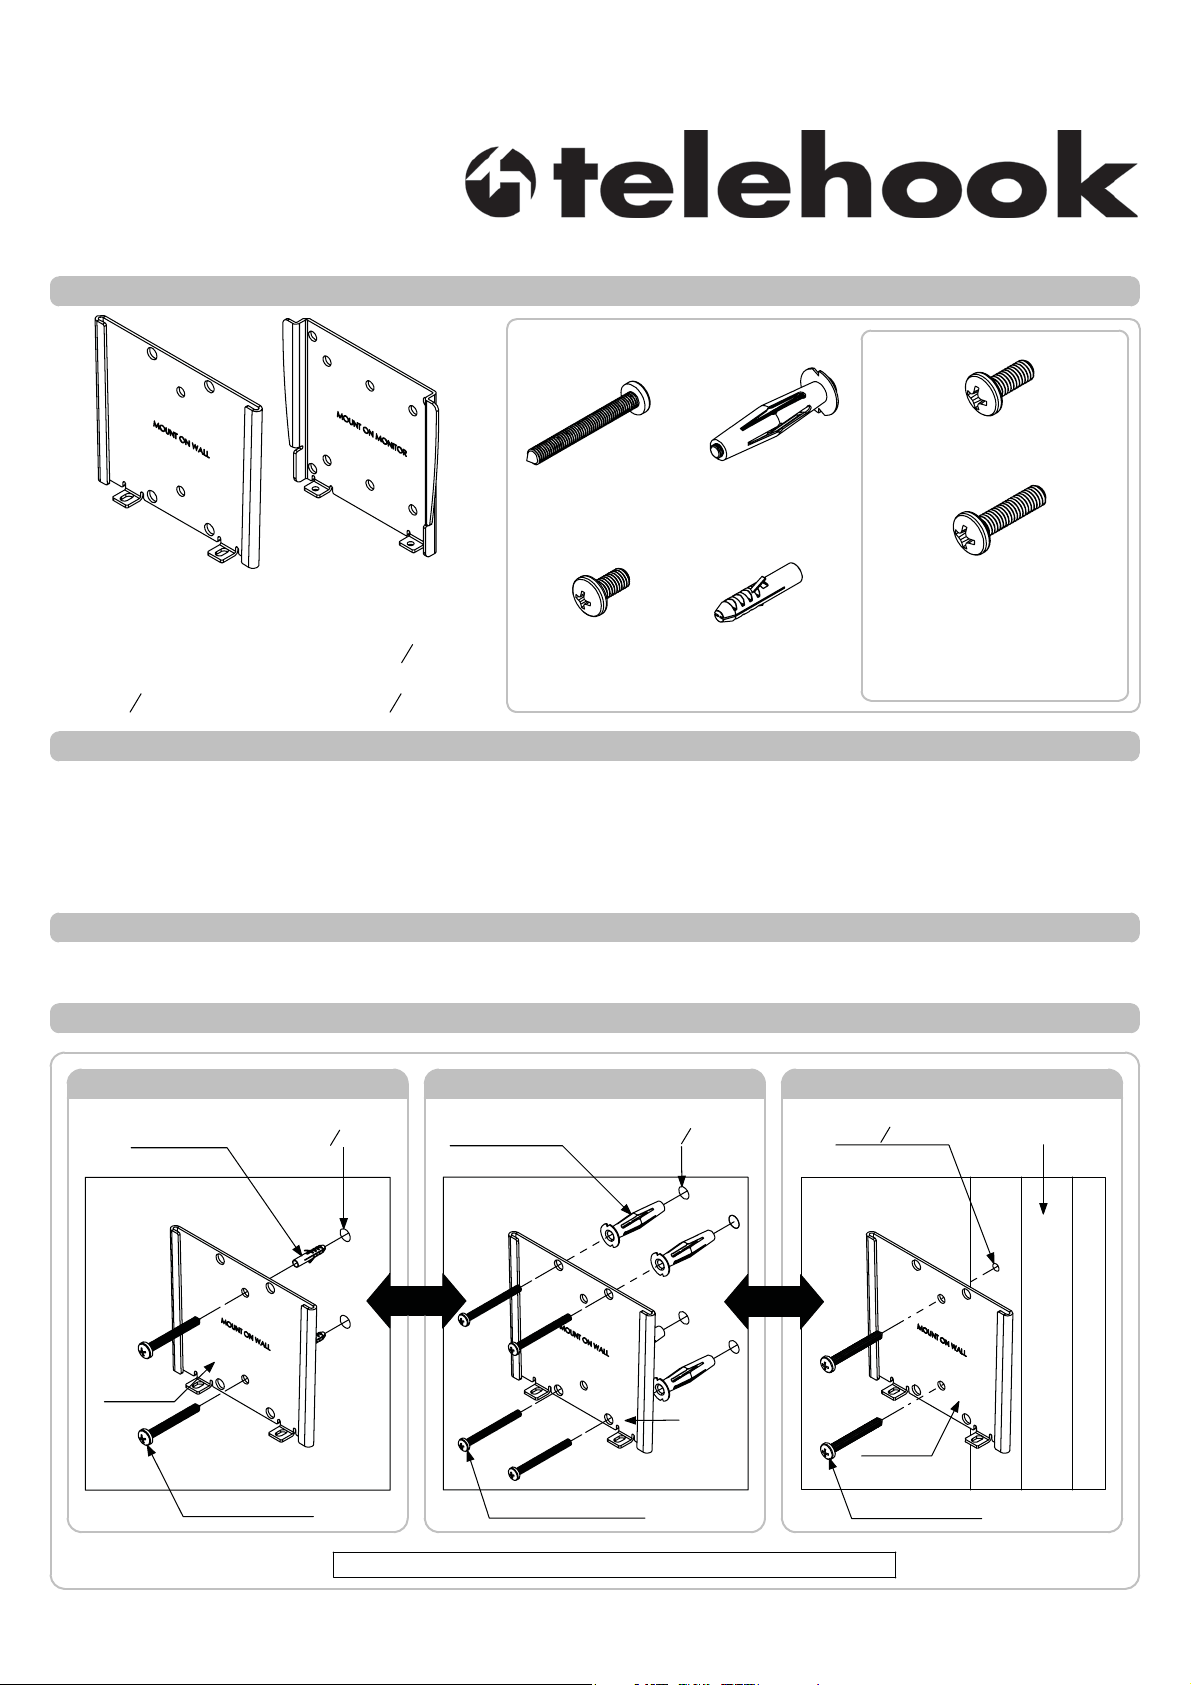
Hardware
M4x10mm (x4)
Self-Tapping
Dry Wall Anchor (x4)
Screw (x2)
Wall Plate
Display Plate
Tools Required:
Power Drill
Phillips Head screwdriver
5
8mm (
") masonry drill bit
16
10mm (
Spirit Level
4mm (
3
")
drill bit
8
3
") drill bit
16
M5x10mm
Security Screw (x2)
Plastic Anchor (x2)
Display Mounting
IMPORTANT INFORMATION
! IMPORTANT - Install Telehok 1026 Wall Mount as per Installation Instructions.
! This product supports a maximum load of 30kg (66lbs).
! This product only supports VESA compliant displays with 75mmx75mm (3"x3") and 100mmx100mm (4"x4")
mounting hole patterns.
! The manufacturer does not accept responsibility for incorrect installation.
Step 1. Check Components
Check you have received all parts against the component checklist and Hardware above.
Step 2. Mounting the Wall Plate
M4x16mm (x4)
Screws
Masonry Wall
Plastic Anchor
Wall Plate
8mm (
Self-Tapping Screw
Dry Wall
5
16
") Hole
Dry Wall Anchor
OR
Dry Wall Anchor Screw
10mm (
3
") Hole
8
Wall
Plate
4mm (
OR
Self-Tapping Screw
Tip: Use a spirit level to ensure wall plate is horizontal
Timber Stud
3
") Hole
16
Wall Plate
Timber Stud
Page 2
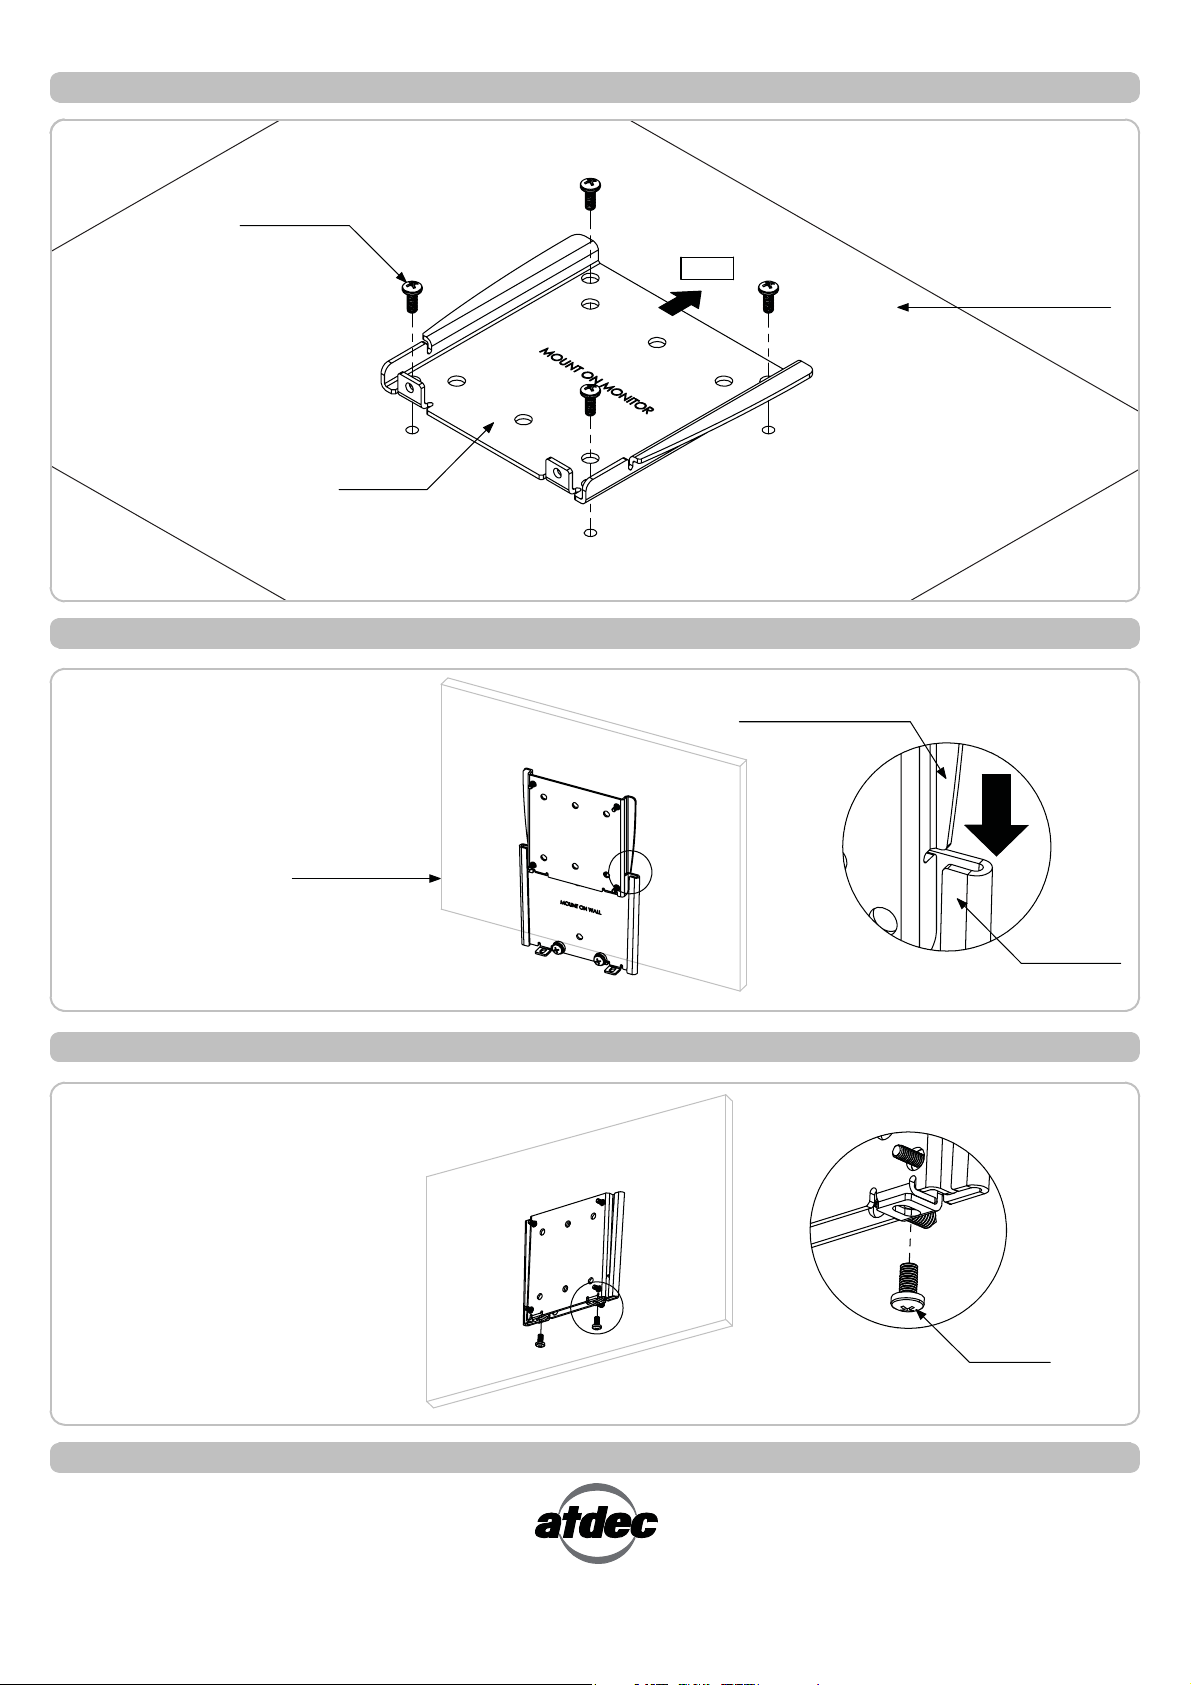
Step 3. Mounting the Display Plate
Mounting Screw
Display Plate
Step 4. Attaching Display to Wall Plate
TOP
Back of Display
With the Display Plate attached
to the Display, lift the Display,
slide into the Wall plate. Ensuring
that the side flanges engage into
wall plate slots.
Display
Step 5. Security Option
To properly secure the display
to the wall it is recommended
to used the two M5 security
screws to securely attach the
two plates together.
Display Plate Side Flange
Wall Plate Slot
M5 Security
Screw
Installation Complete
No portion of this document or any artwork contained herein should be reproduced in anyway without the express written consent Atdec Pty Ltd.
Due to continuing product development, the manufacturer reserves the right to alter specifications without noticed. Published 01.03.10 ©
 Loading...