

Page 1
AF-WD Page 1 of 2
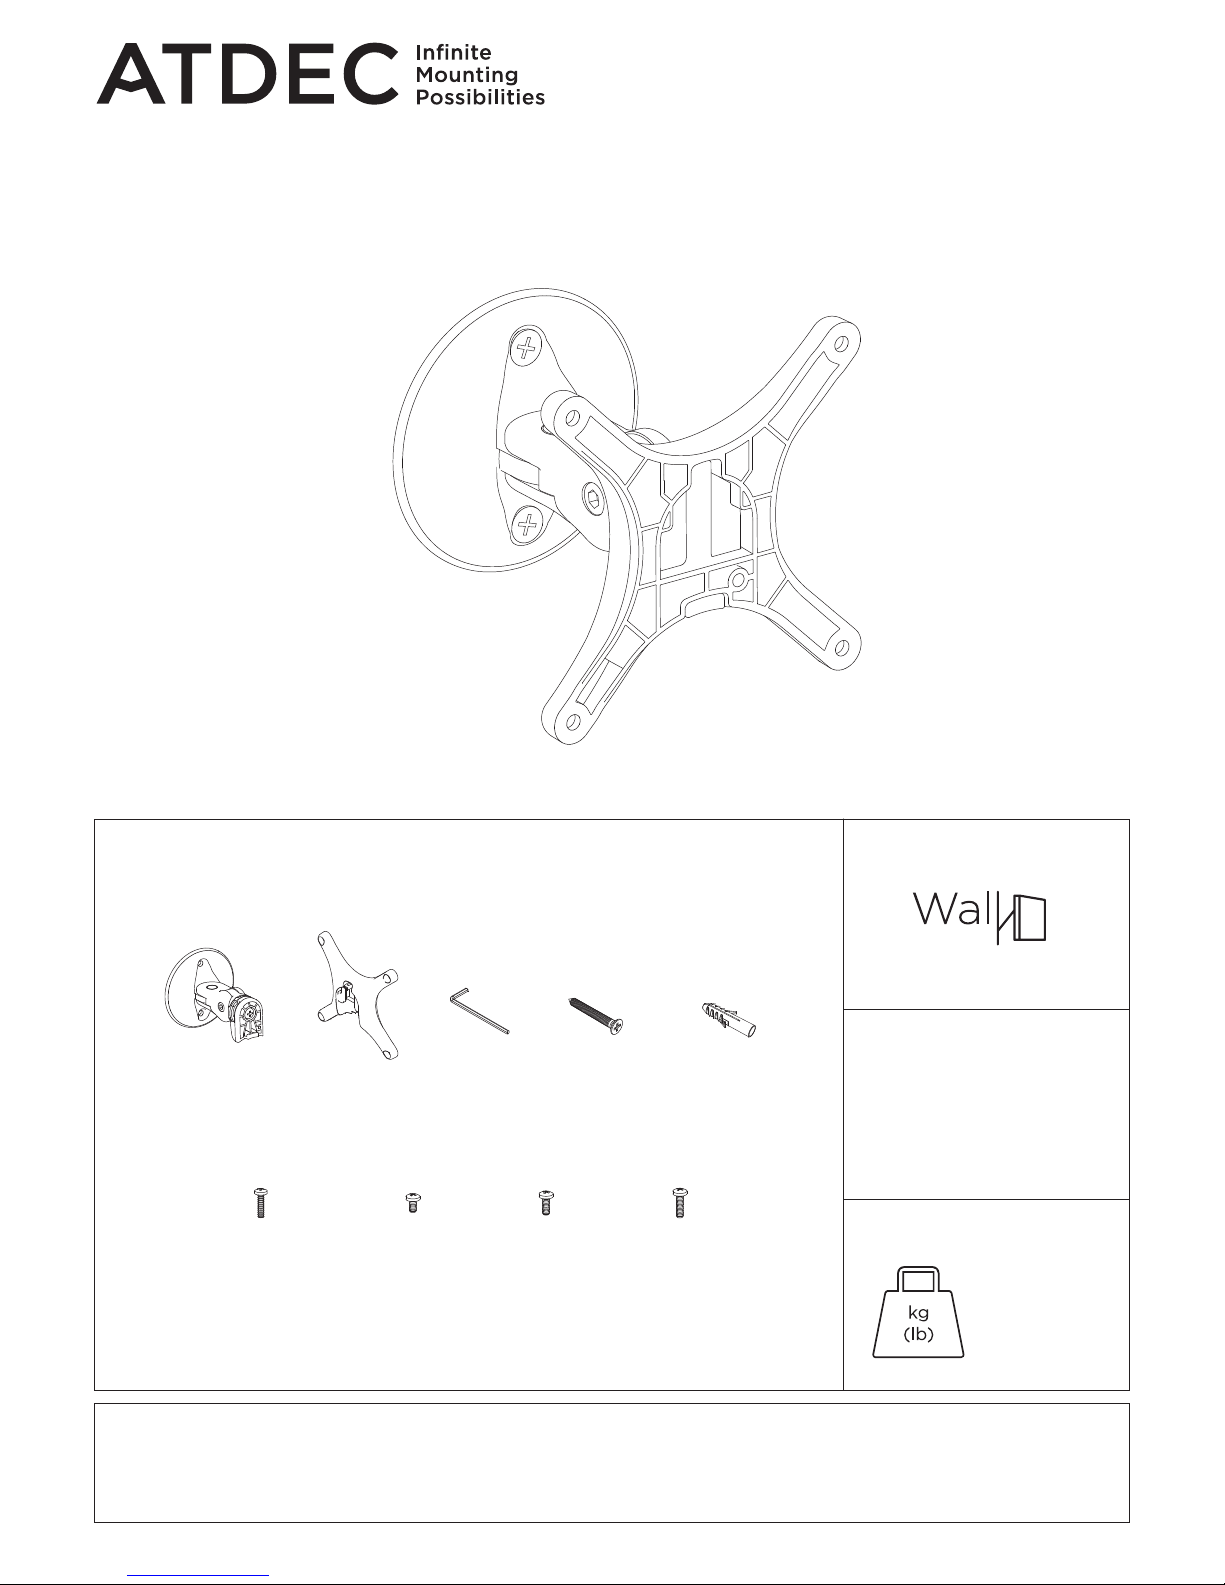
COMPONENT CHECKLIST
B
VESA
head
(x1)
A
Wall direct
assembly
(x1)
F
Security Screw
M4 x 16mm
(x1)
G
Mounting
screws
M4 x 10mm
(x4)
H
Mounting
screws
M4 x 12mm
(x4)
I
Mounting
screws
M4 x 16mm
(x4)
C
5mm
Allen key
(x1)
D
Countersunk
Screw
M6 x 50mm
(x2)
E
Wall plug
(x2)
Installation Guide
AF-WD
Wall Direct Monitor Mount
IMPORTANT INFORMATION
! Please ensure this product is installed as per these installation instructions.
! This product is designed to support a flat panel monitor in a non interactive environment. i.e. It should not be used in a situation
where the display’s position will be frequently change.
! The manufacturer accepts no responsibility for incorrect installation.
REQUIRED TOOLS
WEIGHT RANGE
• Phillips Head Screwdriver
• Drill Bit
• Power Drill
0 - 8kg
(0 - 17.6lbs)
Page 2
AF-WD Page 2 of 2
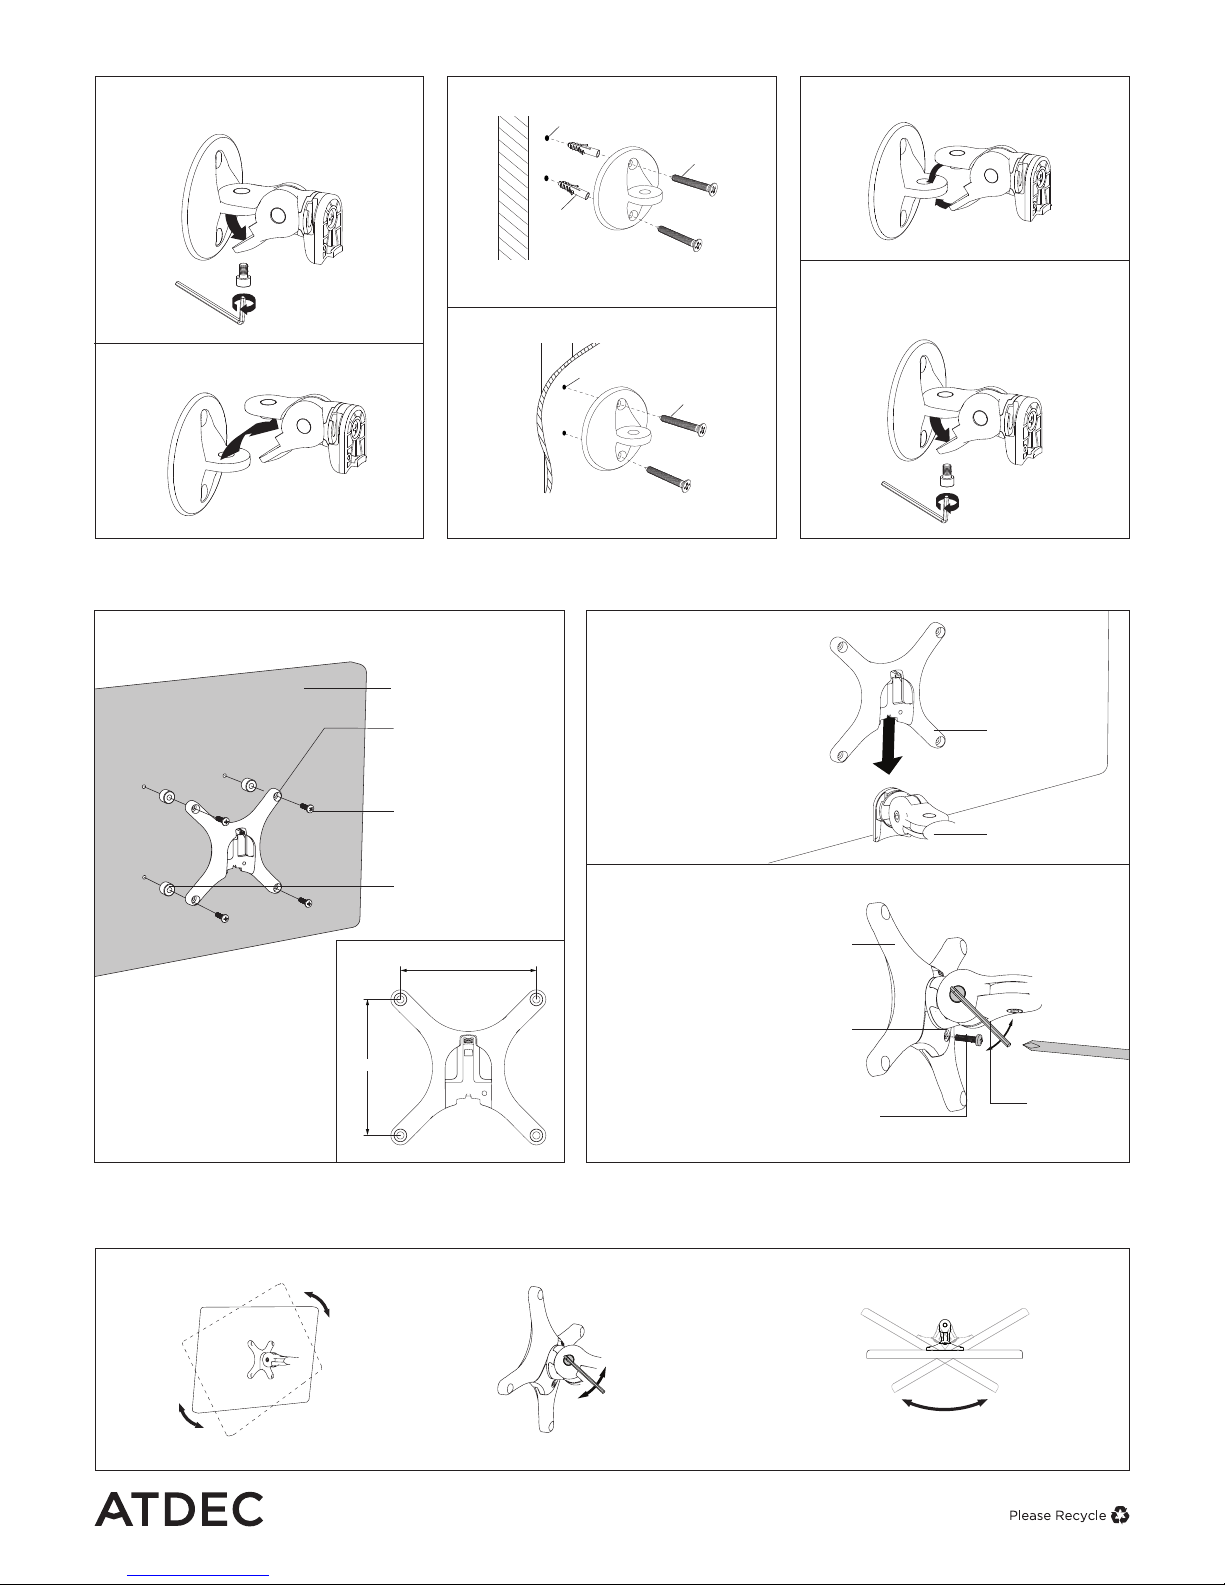
1. Disassemble 2. Attach base to wall 3. Re-assemble
1.1 Using the supplied allen key,
remove the bottom screw
Masonry Wall
Tip: Use a spirit level to ensure
this suface is horizontal
Tip: Use a spirit level to
ensure this suface is horizontal
1.2 Seperate the two components
Timber stud wall
3.1 Reassemble the wall direct assembly
3.2 Close the two halves of the bracket
around the base by firstly positioning
the top half and then the bottom half
4. Install VESA monitor head 5. Mounting Monitor
Optional Spacers
(may be required
for recessed and
uneven surfaces)
VESA monitor
head
Screen
M4x10/12/16mm
Phillips Head
Mounting Screws
4.1 Install VESA monitor head as
100mm
100mm
VESA monitor head
Wall Direct
Assembly
5.2 OPTIONAL
SECURITY SCREW
Ensure the Monitor is
supported, then loosen
the Monitor head screw
with the 5mm Allen Key
and tilt screen up before
installing the M4 x 16mm
Security Screw into the
Security Screw hole
5.1 Insert VESA
monitor head into
the receptacle in
the Arm Assembly
5mm Allen Key
Phillips Head
Screwdriver
Loosen
Tighten
Security
Screw
Hole
M4 x 16mm
Security Screw
Monitor
head
screw
6. Adjusting the Display Bracket
Portrait/ Landscape Tilt (Screen angle up/down) Pan (Screen angle left/right)
5mm Allen Key
Tighten
Loosen
No Allen Key necessary No Allen Key necessary
Note: Support Screen when adjusting tilt.
50mm
Screw
Wall Plug
8mm (5/16”) hole
50mm
Screw
5.5mm (1/4”) hole
atdec.com | atdec.co.uk | atdec.com.au
No portion of this document or any artwork contained herein should be reproduced in any way without
the express written consent of Atdec Pty Ltd. Due to continuing product development, the manufacturer
reserves the right to alter specifications without notice. ©20180228B
Note: Support Screen
when adjusting tilt.
 Loading...