

Page 1

A
A
A
A
T-640
T-640
T-640
T-640 Quick
Quick
Quick
Quick Start
Start
Start
Start Guide
Guide
Guide
Guide
ATCOM TECHNOLOGY CO. , LIMITED
AT-640
AT-640
AT-640
AT-640 Quick
Quick
Quick
Quick Start
Start
Start
Start Guide
Guide
Guide
Guide
ISSUE 1.0
20 11 -7- 28
Page 2

A
A
A
A
T-640
T-640
T-640
T-640 Quick
Quick
Quick
Quick Start
Start
Start
Start Guide
Guide
Guide
Guide
ATCOM TECHNOLOGY CO. , LIMITED
1 、 Installation and access ................................................................................................................. 3
2 、 Configure
AT-640
to make
VoIP
calls ......................................................................................... 4
A 、 WAN Config ............................................................................................................................... 4
B 、 SIP Config .................................................................................................................................. 5
C 、 IAX2 config ................................................................................................................................ 6
Page 3
A
A
A
A
T-640
T-640
T-640
T-640 Quick
Quick
Quick
Quick Start
Start
Start
Start Guide
Guide
Guide
Guide
ATCOM TECHNOLOGY CO. , LIMITED
1
1
1
1
、
、
、
、
Installation
Installation
Installation
Installation and
and
and
and access
access
access
access
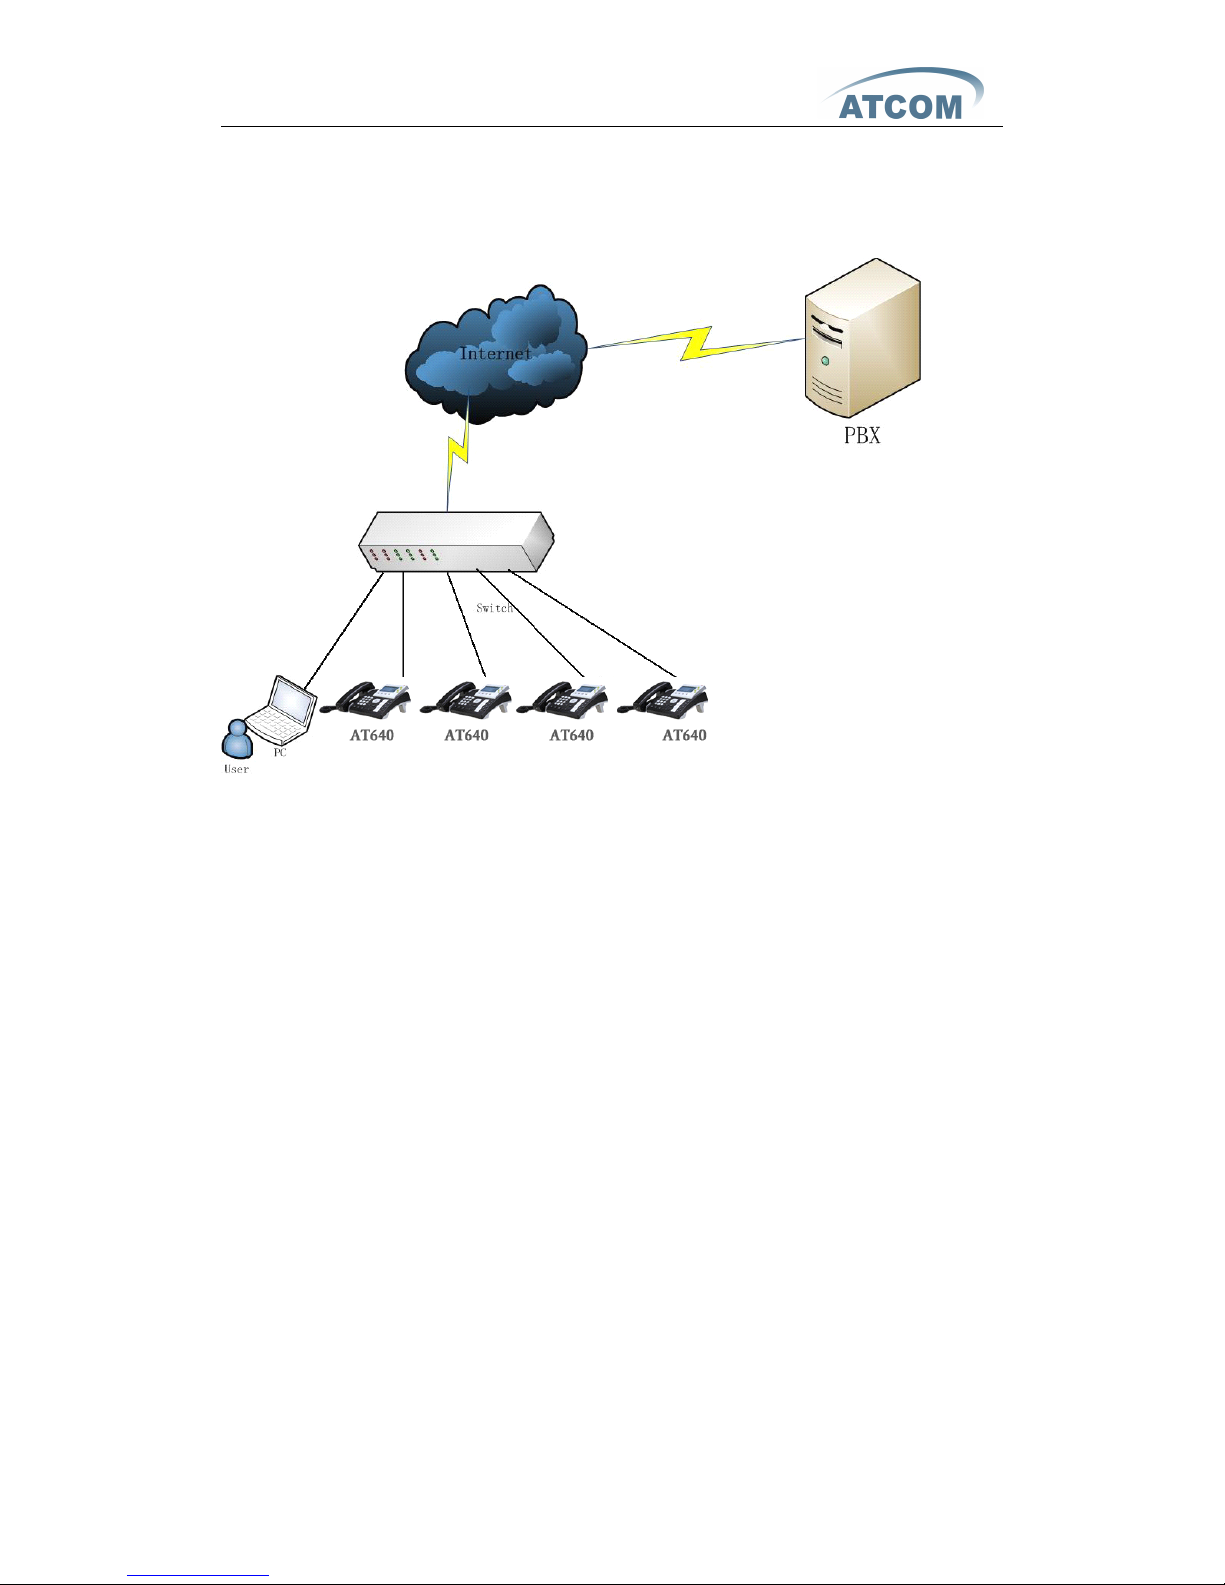
Installation:
Set up AT-640 as below:
If AT-640 is connect to your network. P ress Navigation button up or down to get
the WAN IP address .
Modify your computer’s IP address to the same network as AT-640
K ey in AT-640’s IP address in the web browser and press enter, then you can
access AT-640’s web manage interface. R emember the account is admin/admin
for administrator and guest/guest for user .
Page 4

A
A
A
A
T-640
T-640
T-640
T-640 Quick
Quick
Quick
Quick Start
Start
Start
Start Guide
Guide
Guide
Guide
ATCOM TECHNOLOGY CO. , LIMITED
2
2
2
2
、
、
、
、
Configure
Configure
Configure
Configure AT-640
AT-640
AT-640
AT-640 to
to
to
to make
make
make
make VoIP
VoIP
VoIP
VoIP calls
calls
calls
calls
A
A
A
A
、
、
、
、
WAN
WAN
WAN
WAN Config
Config
Config
Config
E nter
Network
Network
Network
Network �
�
�
� WAN
WAN
WAN
WAN Config
Config
Config
Config
to set the WAN setting :
AT-640 supports three different IP types: Static
IP,
Dynamic obtain IP (DHCP)
and PPPoE.You can use either of these IP types to connect the internet.
Use
Use
Use
Use Static
Static
Static
Static IP:
IP:
IP:
IP:
---- Select “ S tatic ” ;
---- Enter the AT-640’s IP address in the “ IP address ” field.
---- Set the “ Net mask”, default 255.255.255.0
---- Enter the AT -640’s upper gateway IP address ( for example: Router ) in the
“ Gateway ” field
---- Key in the DNS information in the “ Primary DNS ” and“Alter DNS ” fields.
Use
Use
Use
Use DHCP:
DHCP:
DHCP:
DHCP:
---- Select DHCP
If you have a DHCP server in your network , AT-640 will automatically obtain the
network information from your DHCP server.
Use
Use
Use
Use PPPoE:
PPPoE:
PPPoE:
PPPoE:
---- Select PPPoE
---- T ype your PPPoE dialup information in the PPPoE setting fields: PPPoE server
( option), Username and password.
T hen the AT-640 will connect to the internet through PPPoE, and automatically
obtain the IP address, Net mask , Gateway, Primary DNS and Alter DNS
information.
Page 5

A
A
A
A
T-640
T-640
T-640
T-640 Quick
Quick
Quick
Quick Start
Start
Start
Start Guide
Guide
Guide
Guide
ATCOM TECHNOLOGY CO. , LIMITED
B
B
B
B
、
、
、
、
SIP
SIP
SIP
SIP Config
Config
Config
Config
E nter
VoIP
VoIP
VoIP
VoIP
�
�
�
� SIP
SIP
SIP
SIP Config
Config
Config
Config
setting page and set the sip information
----Register
----Register
----Register
----Register Server
Server
Server
Server Addr
Addr
Addr
Addr : sip server address;
----Register
----Register
----Register
----Register Server
Server
Server
Server Port
Port
Port
Port : sip se rver register port;
----Register
----Register
----Register
----Register Username
Username
Username
Username : username of your sip account;
----Register
----Register
----Register
----Register Password
Password
Password
Password : password of your sip account;
--- -Register
-Register
-Register
-Register Number
Number
Number
Number : Phone number of your sip account; the same as username
if none
- ---
---
---
--- check
check
check
check Enable
Enable
Enable
Enable Register
Register
Register
Register ;
T hen you can make VoIP calls if the WAN and SIP config is correct.
Notice:
Notice:
Notice:
Notice: Please go to the “ Config Manage ” and save the config, otherwise you will lose the setting
after device reboot.
Page 6

A
A
A
A
T-640
T-640
T-640
T-640 Quick
Quick
Quick
Quick Start
Start
Start
Start Guide
Guide
Guide
Guide
ATCOM TECHNOLOGY CO. , LIMITED
C
C
C
C
、
、
、
、
IAX2
IAX2
IAX2
IAX2 config
config
config
config
�
Above is the IAX server configuration page
�
IAX Server Addr: Register address of public IAX server
� IAX Server Port: Register port of public IAX server , default port is 4569
�
Account Name: Username of your SIP account (Always the same as the
phone number)
�
Account Password: Password of your IAX account.
�
Local port: Signal port of local, default port is 4569
�
Phone Number: Phone number of your IAX account .
�
Voice mail number: If the IAX support voice mail, but your username of the
voice mail is letters which you cannot input with the ATA , then you use the
number to stand for your username .
�
Voice mail text: if IAX support voice mail, config the domain name of your
mail box here.
�
Echo test number: If the platform support echo test , and the number is test
form , the config the test number to replace the text format The echo test is
to test the error status of terminals and platform
�
Echo test text: echo test number in text format
�
Refresh time: IAX refresh time
�
Enable Register: enable or disable register
�
Enable G.729: Using G.729 speech coding mandatory consultations
Page 7

A
A
A
A
T-640
T-640
T-640
T-640 Quick
Quick
Quick
Quick Start
Start
Start
Start Guide
Guide
Guide
Guide
ATCOM TECHNOLOGY CO. , LIMITED
 Loading...