

Page 1

A20 LTE Quick Start Guide
Version:1.0
2018-8-20
Page 2

A2X(W) Quick Start Guide
Content
1、 Packaging .................................................................................................................................................................... 1
2、 Installation ................................................................................................................................................................... 3
3、 Power up ................................................................................................................................................................... 10
4、 Connetion .................................................................................................................................................................. 10
5、 Quick configuration ................................................................................................................................................ 119
2
Page 3
A2X(W) Quick Start Guide
1. Packaging
In the packaging box, we can see one IP phone, one handset, one bracket, two wall-hung
brackets, one network cable, one handset cable and one 5V,2A power adapter.
2. Installation
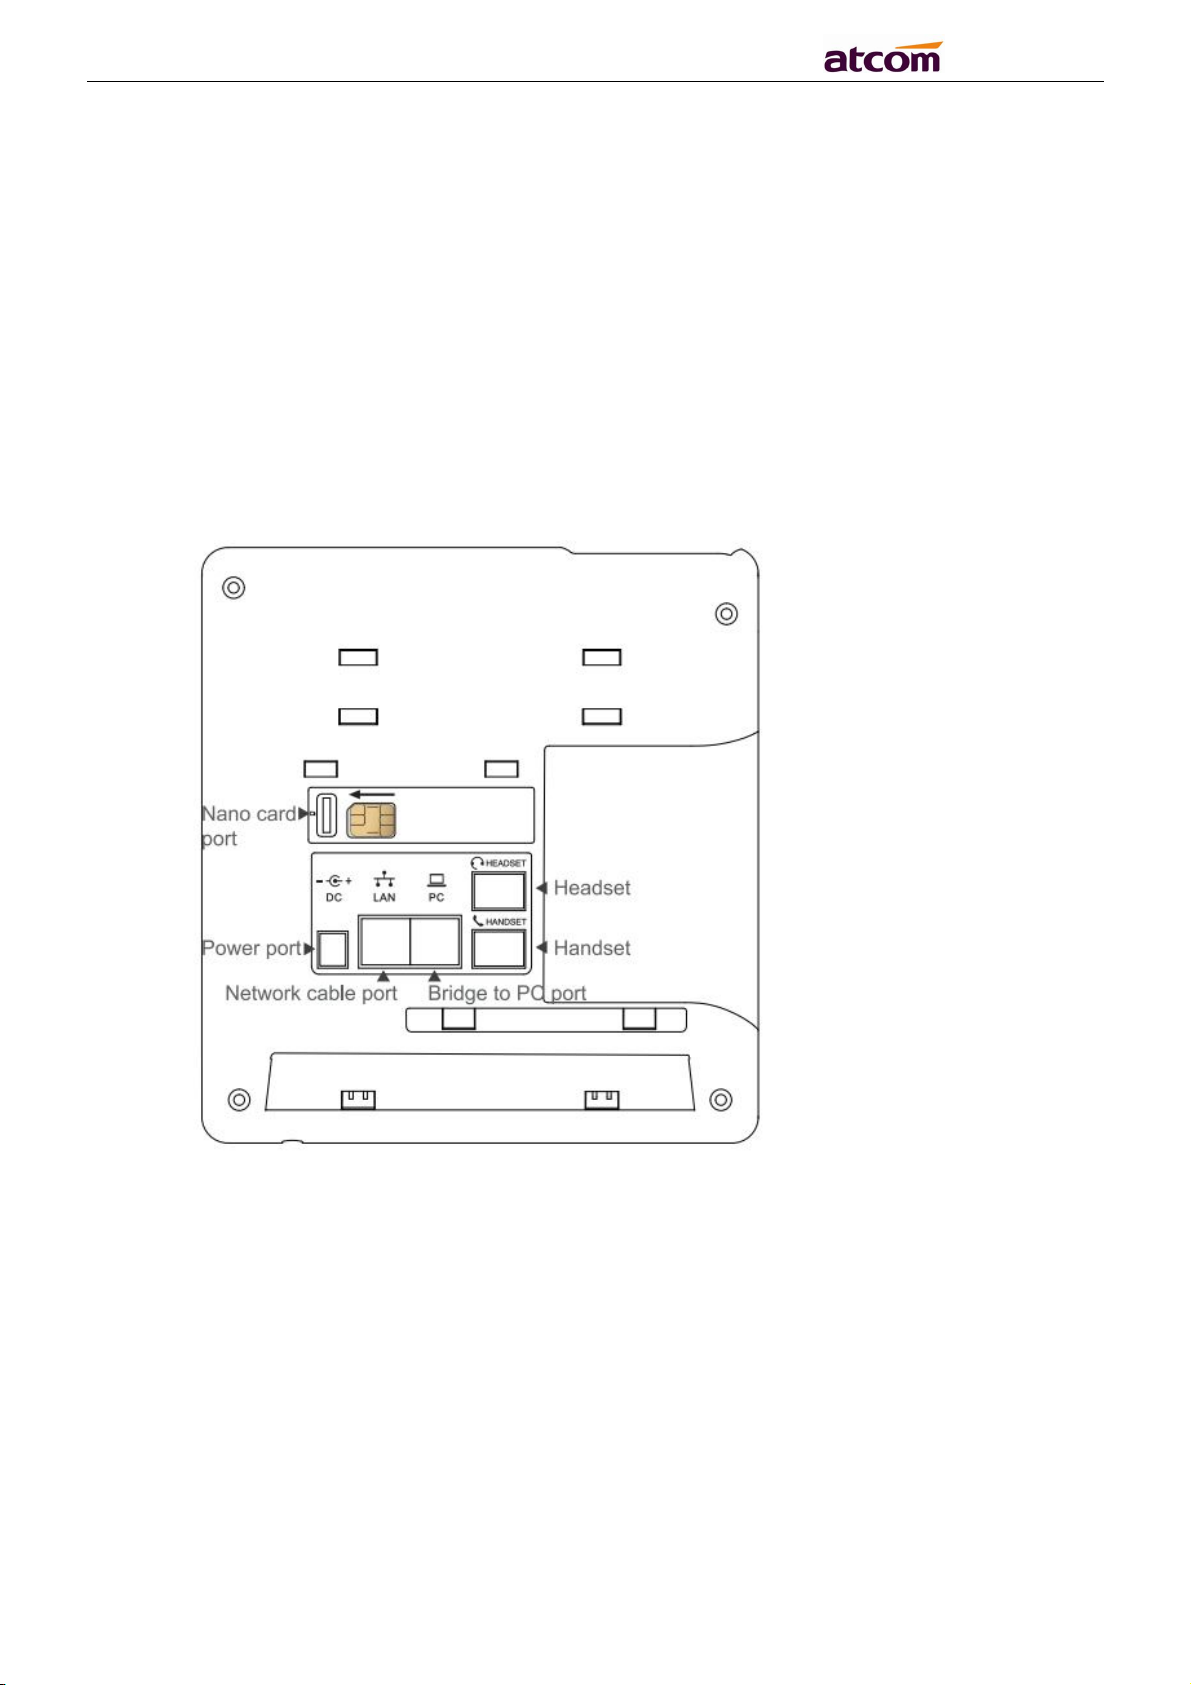
2.1. Connecting port introduction
From as below picture show the connecting port and insert the standard Nano-SIM card
into the back cover way:
(Note: please don’t plug in and off Nano card when the phone connected power)
2.2. Keypad introduction,
Please check the following picture:
3
Page 4

A2X(W) Quick Start Guide
2.3 Installation instruction
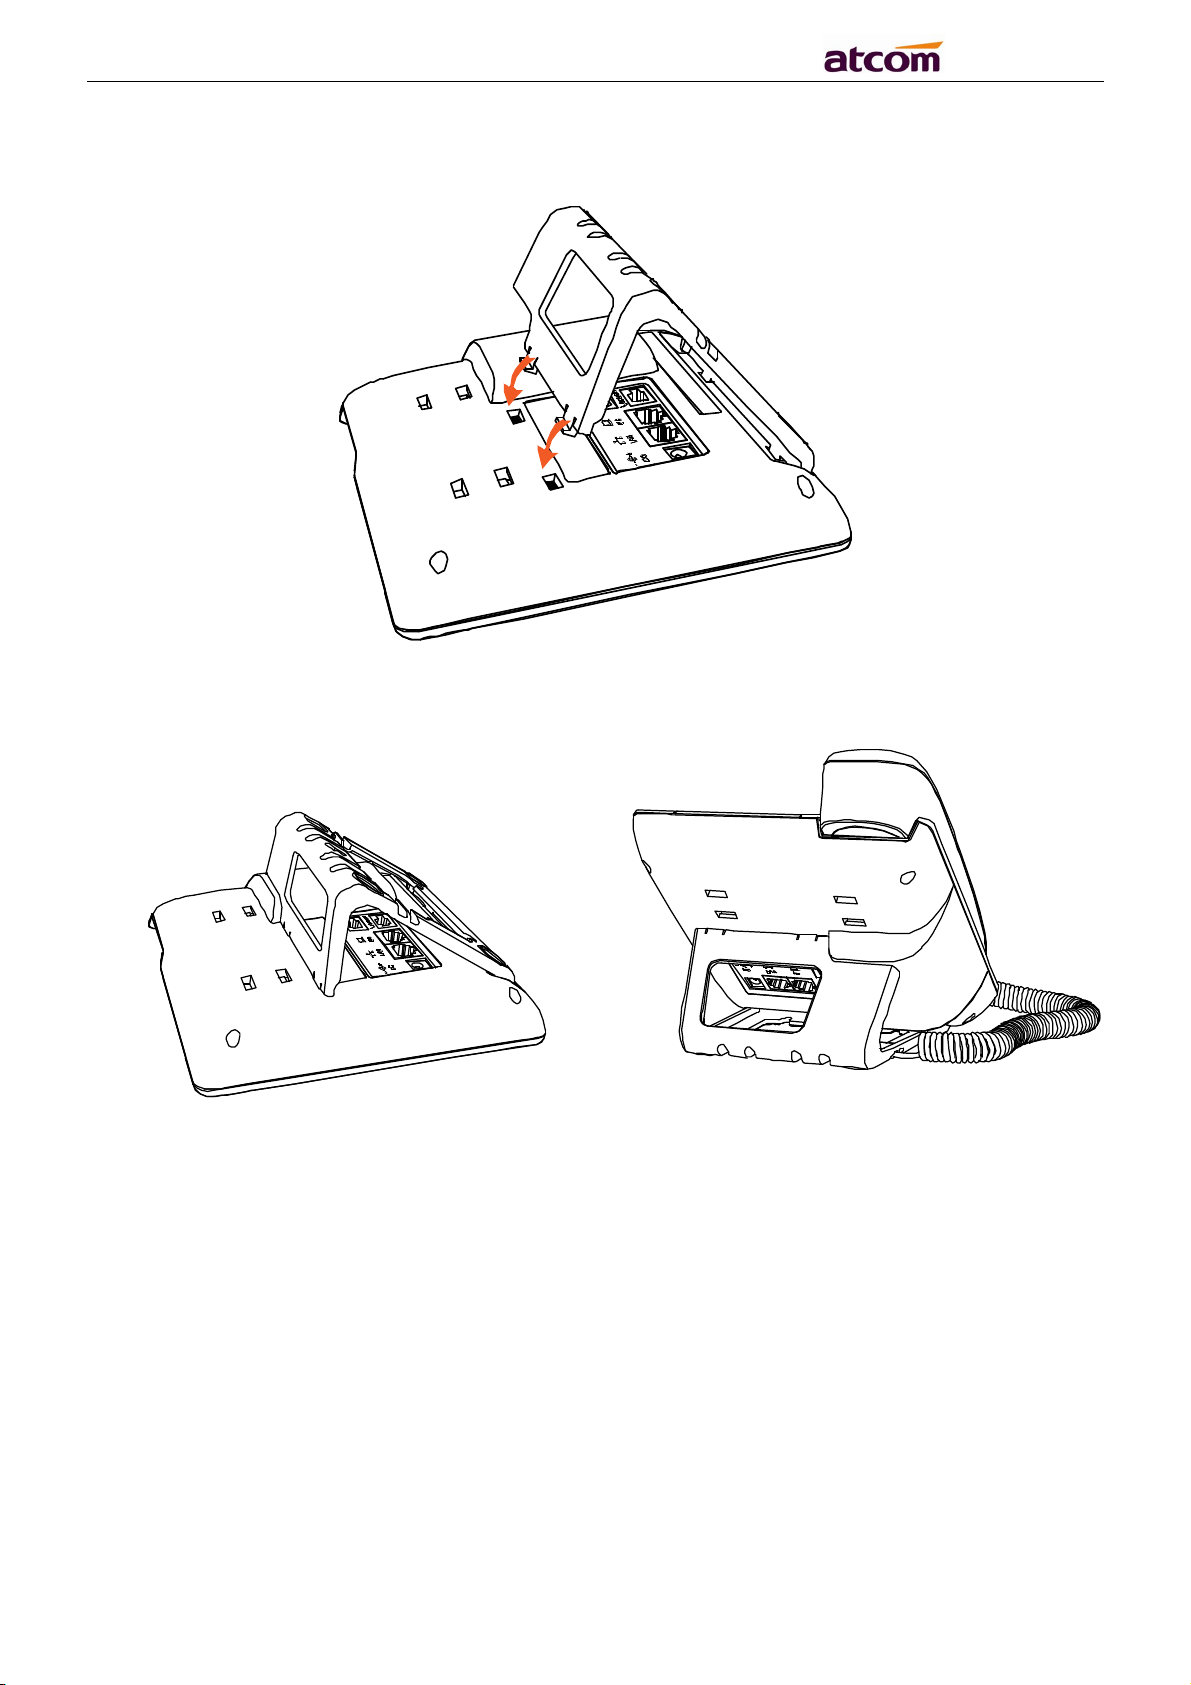
2.3.1 Stand bracket installation instruction
A. Bottom up the IP phone and press one-side joints of stand
bracket into the slot as below:
4
Page 5
A2X(W) Quick Start Guide
B. Press the other side joints into the slot according to the direction of the arrow:
C. After installation, the picture is as below:
D. Remove the stand bracket:
Push the spring joint of stand and pull the stand according to the direction of the
arrow. When the joints are pulled out of the slot, you can take off the stand
bracket
5
Page 6
A2X(W) Quick Start Guide
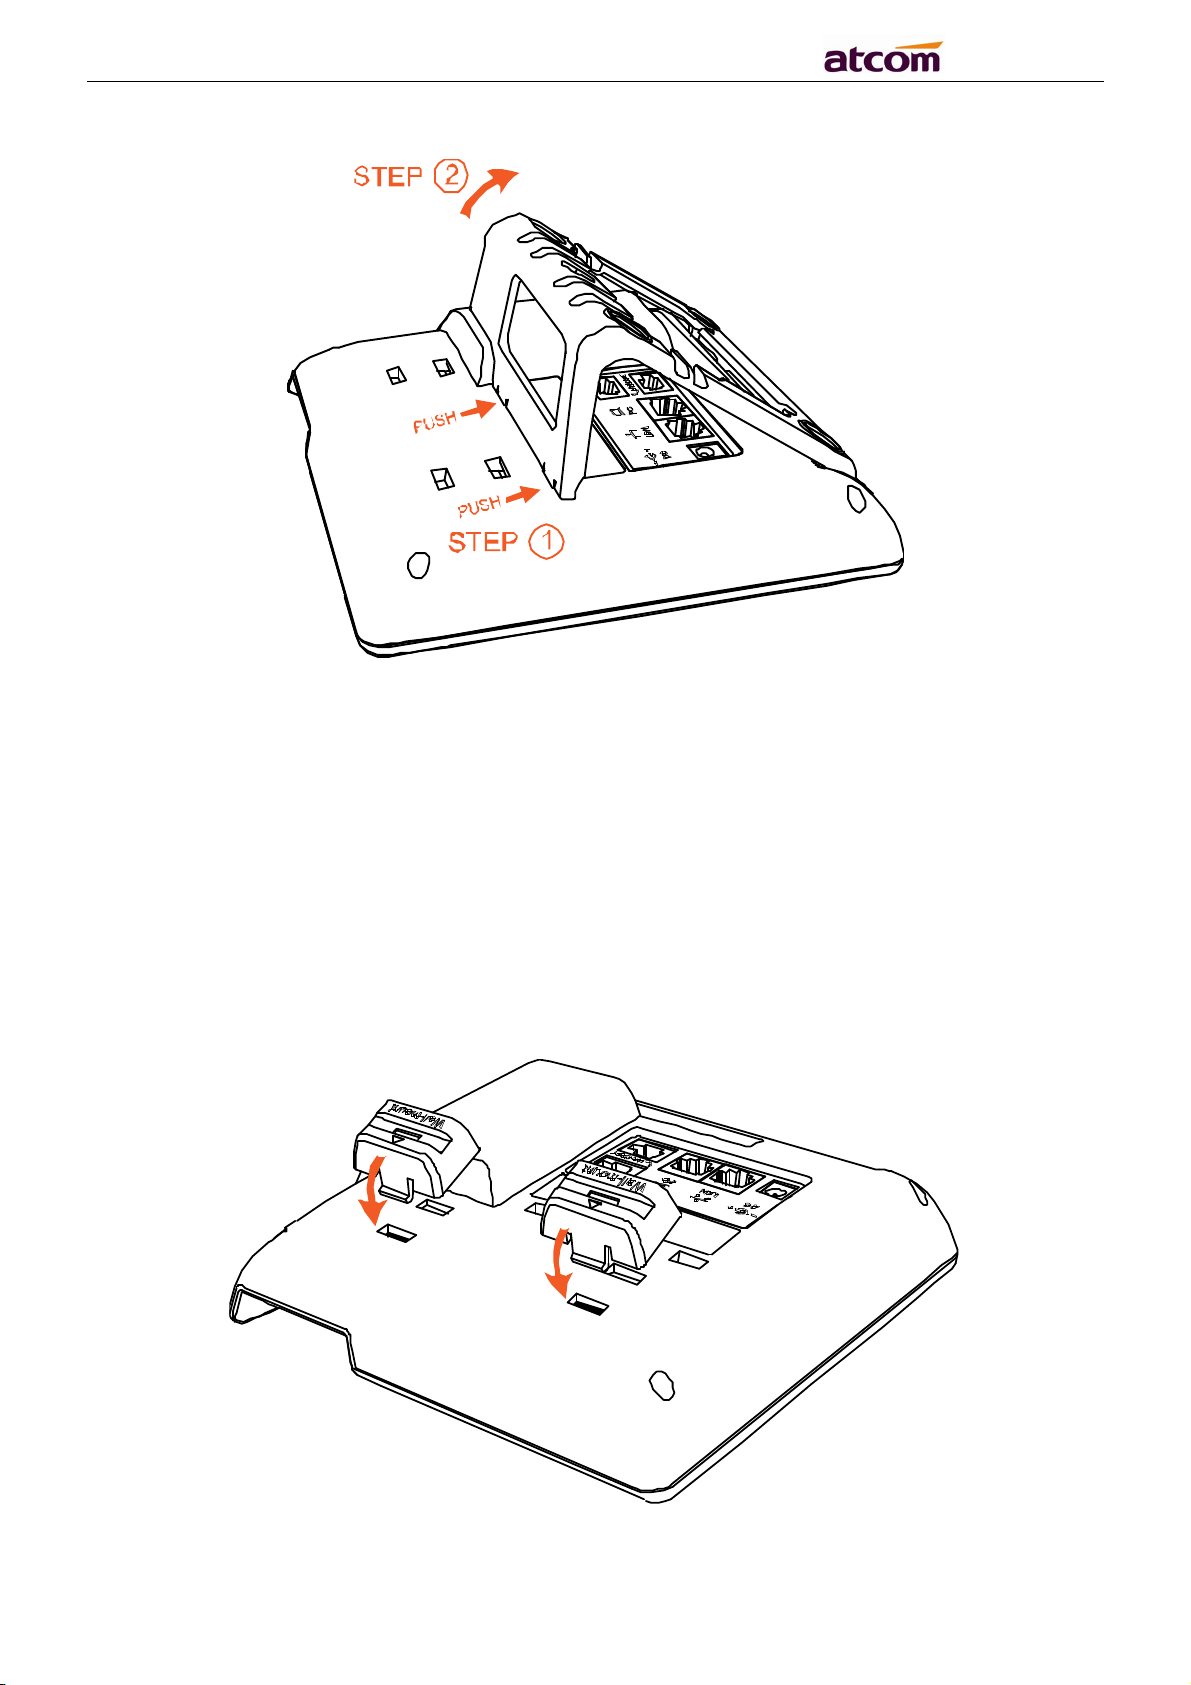
2.3.2 Wall-hung Installation
A. Bottom up the IP phone and press one-side joints of wall-hung stand bracket into
the slot as the picture below:
6
Page 7
A2X(W) Quick Start Guide
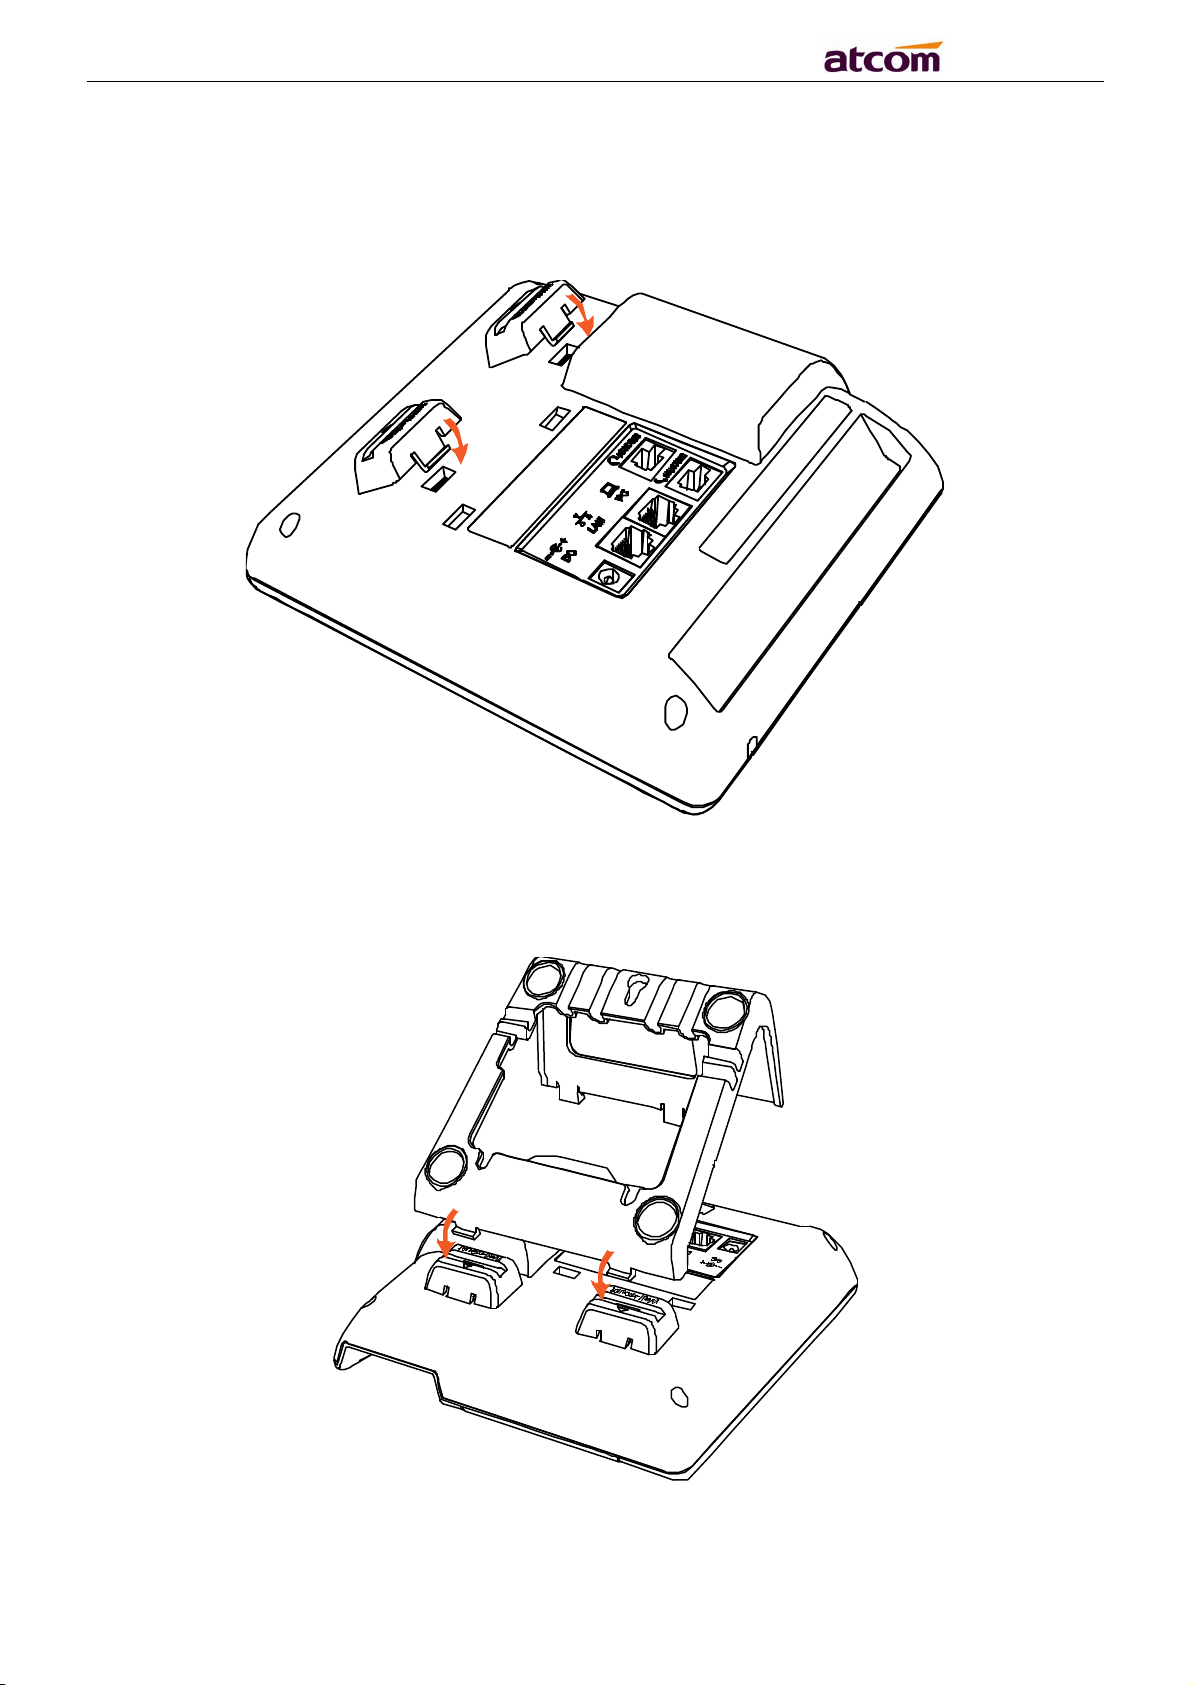
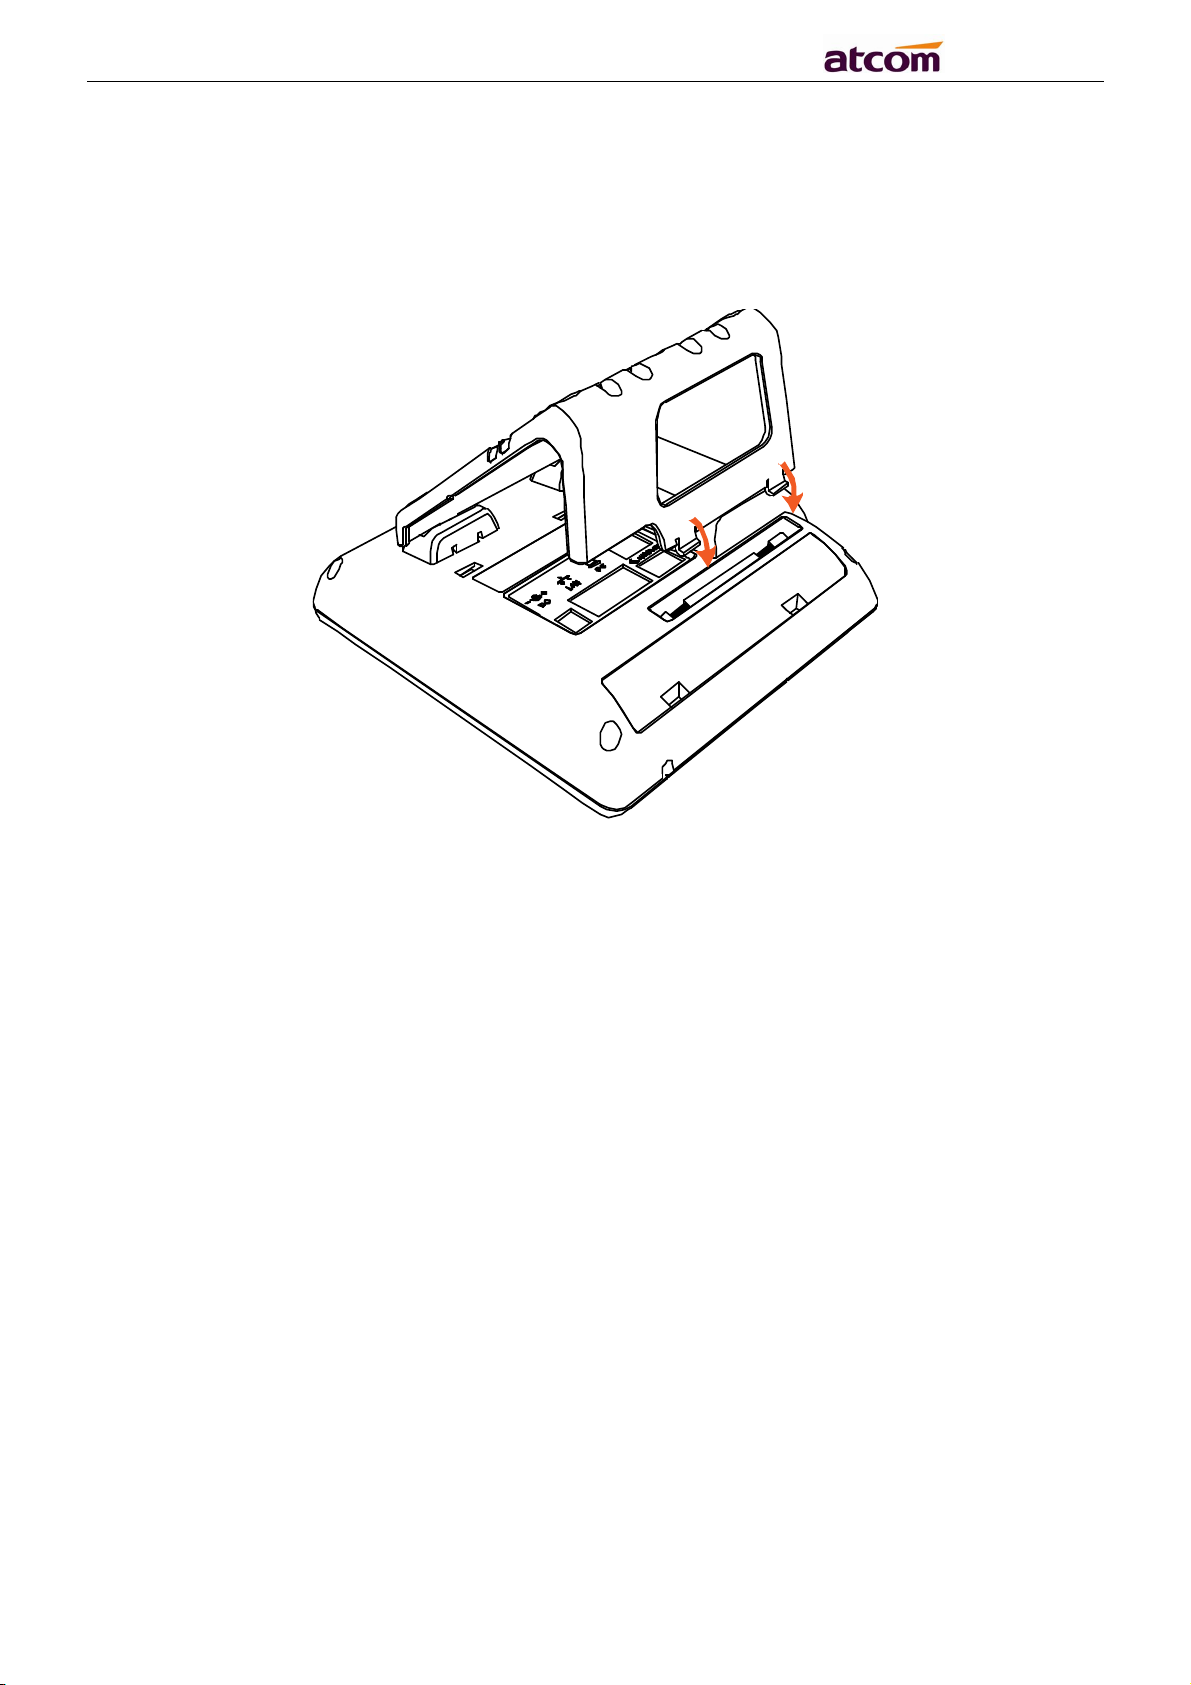
B. Press the other side joints into the slot according to the direction of the arrow
C. After install the wall-hung stand bracket, press one-side joints of stand bracket
into the slot, please refer to the picture as below:
7
Page 8
A2X(W) Quick Start Guide
D. Press the other side joints into the slot according to the direction of the arrow
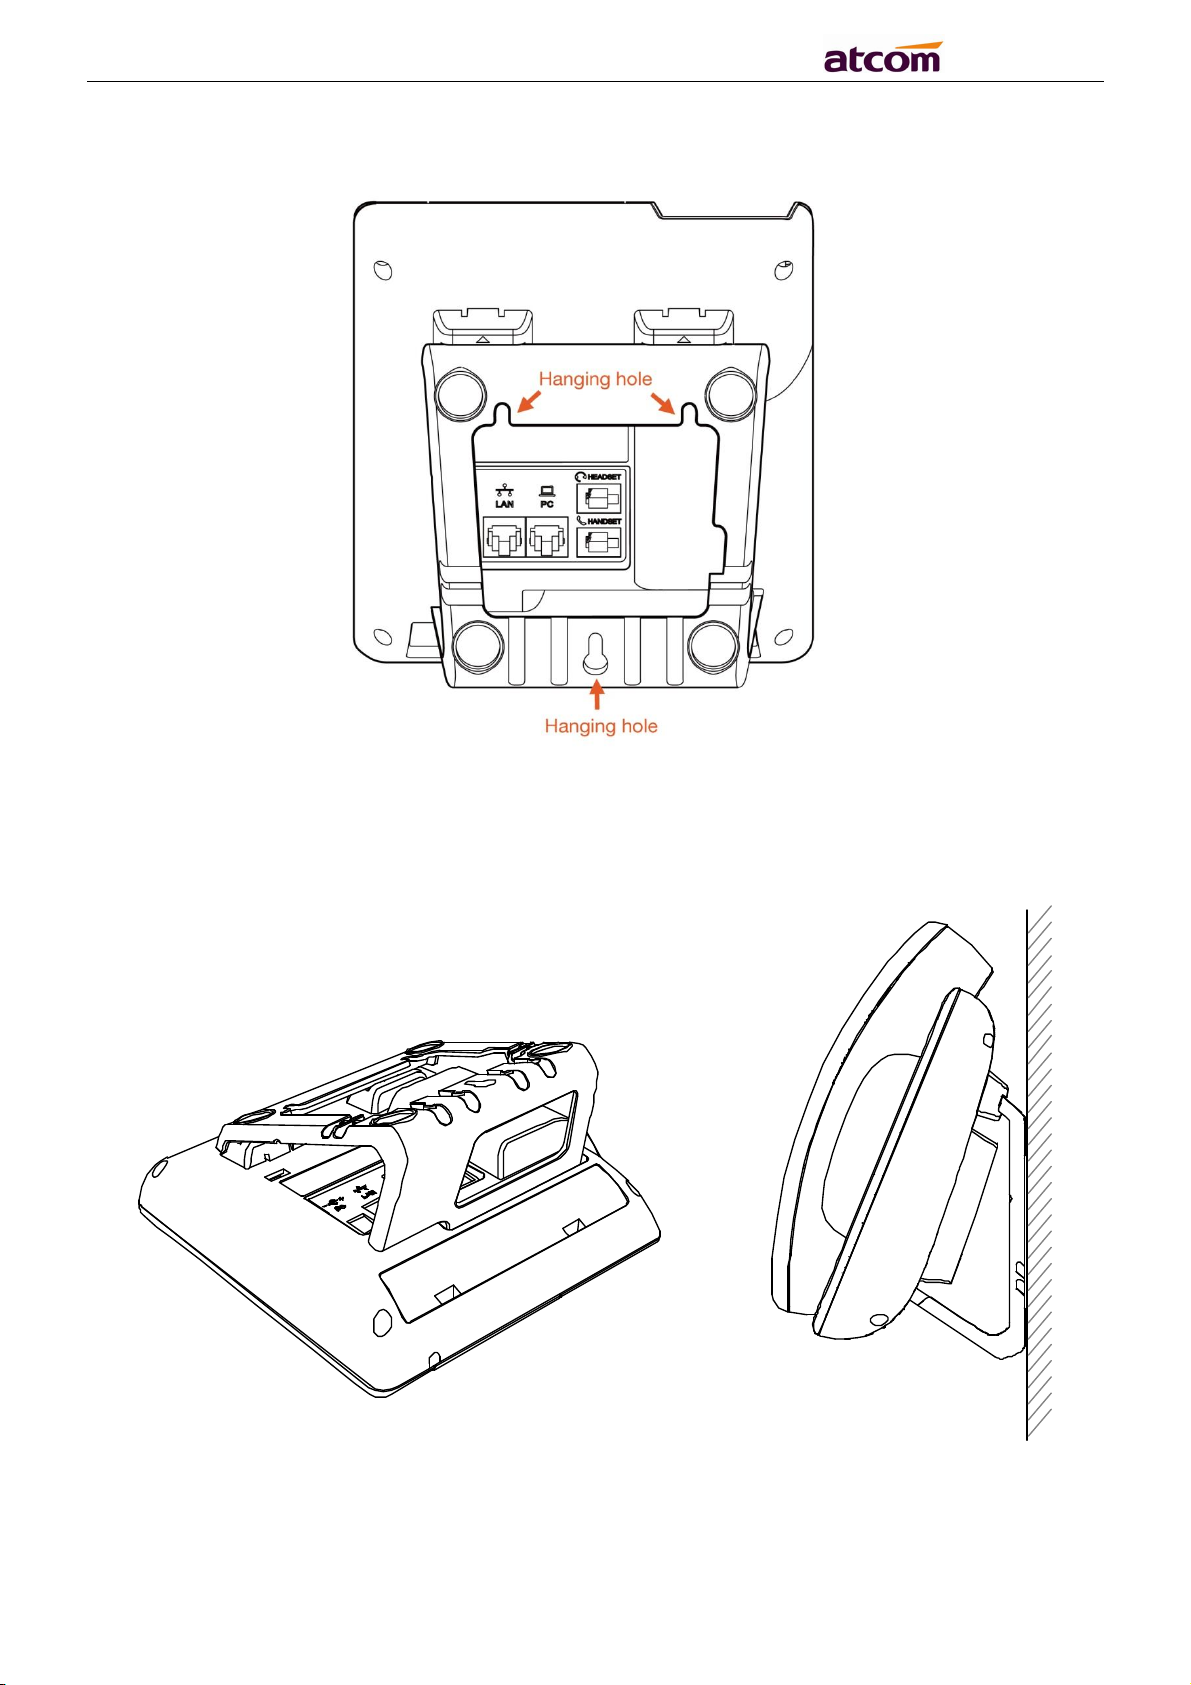
E. Knock in nails or screws on the wall according to the proportion of the distance
between the hanging holes as below:
8
Page 9
A2X(W) Quick Start Guide
F. It is the right picture after fixing the stand bracket below:
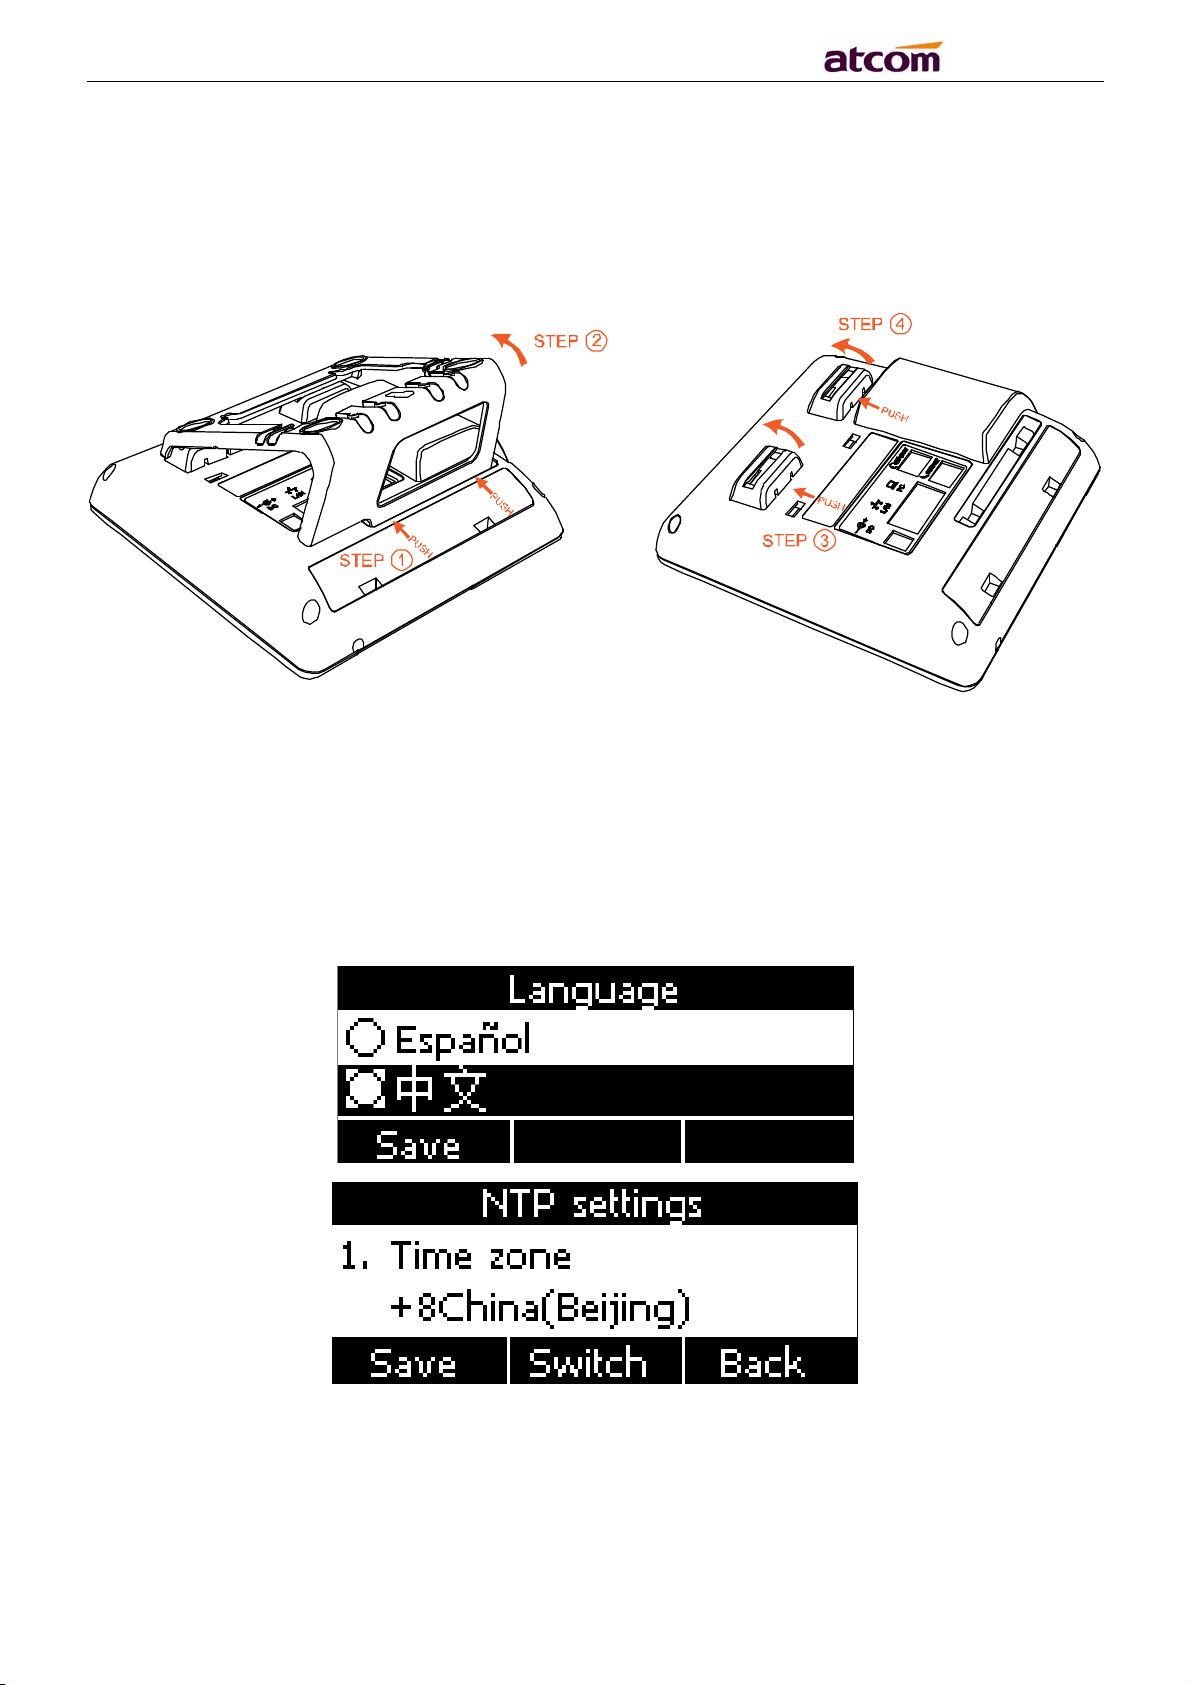
G. Disassemble the stand bracket:
9
Page 10
A2X(W) Quick Start Guide
Push the spring joint of stand and pull the stand according to the direction of the
arrow. According to the direction of the arrow:
3. Power up
3.1. Connect to DC 5V/2000mA power adapter
3.2. The status indicator will be on during power-on, and the Welcome dialog will appear on
the LCD.
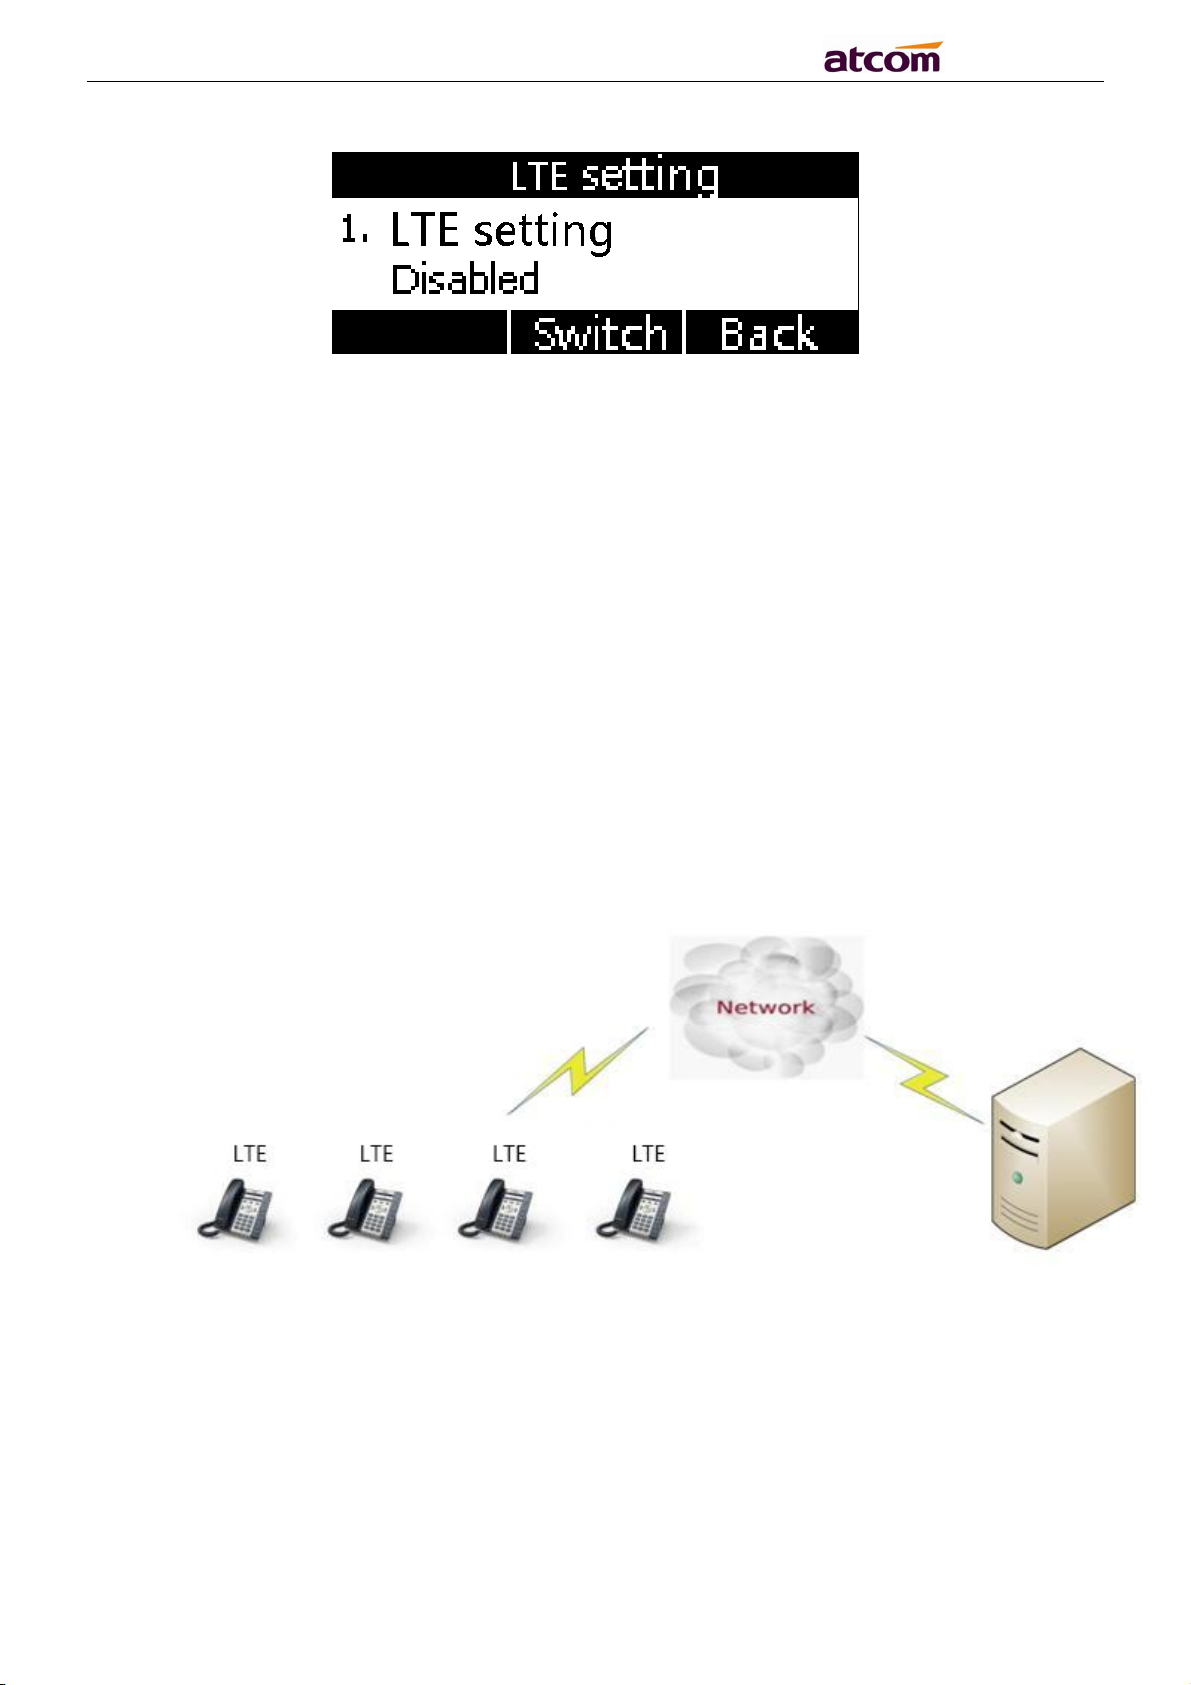
3.3. After boot up finished, User can select the Language and time zone manually, and LTE
setting.
10
Page 11
A2X(W) Quick Start Guide
3.4. If the PIN code is enabled on the SIM card, after entering the standby interface, you will
be asked to enter the PIN code.
According to the network service provide requirement: you need to enter the correct PIN
code within three times. Otherwise, the card will be automatically locked and the PUK
code will be prompted to unlock.
3.5. If the SIM card need input APN code, you can press Menu → LTE setting → APN
setting, choose “Enable” custom APN, and press ↓button to input APN account info.
4. Connection
4.1. Connect to LTE network:
If enable LTE setting, A20 LTE get service network.
(Note: The A20 LTE phone can communicate with other devices through the LTE data
acquisition network. The acquired LTE data network is the public network of the carrier. At
this time, the phone web interface cannot be accessed.)
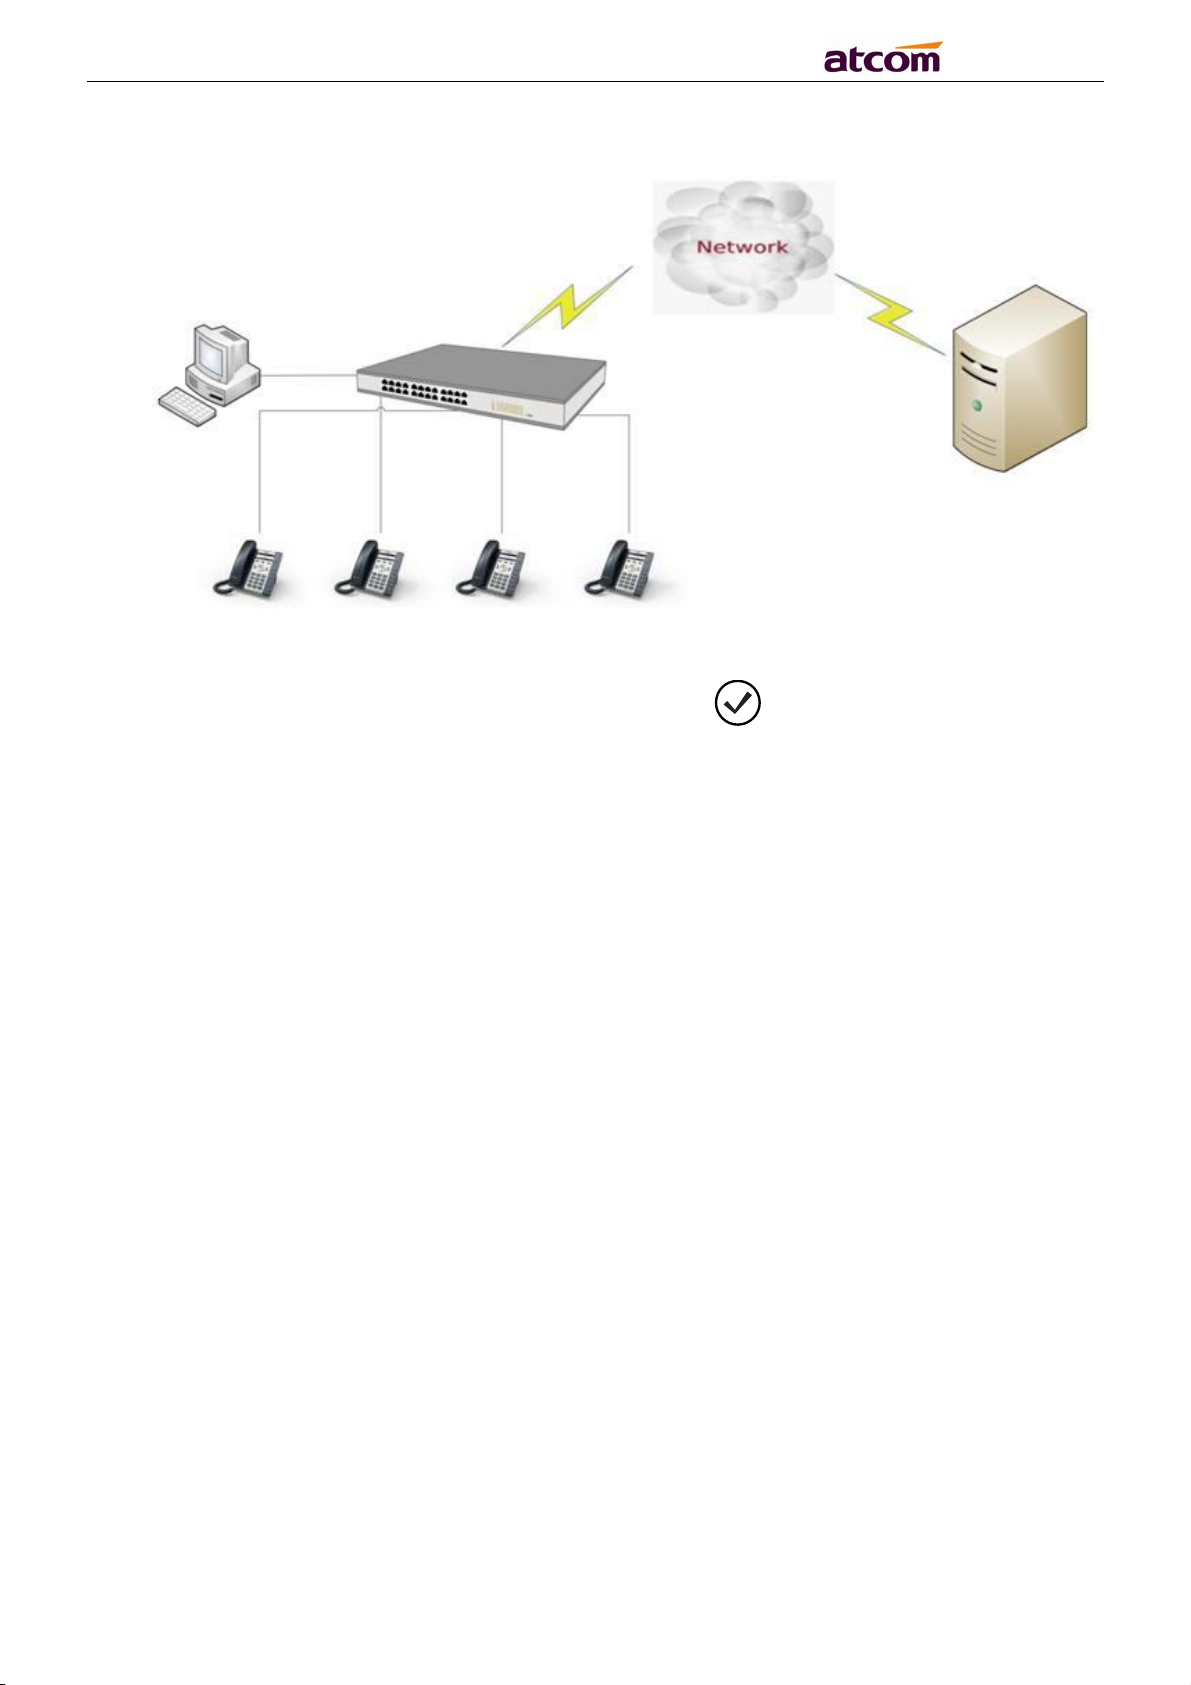
The topology is as follows:
4.1.1. Press Menu → LTE Setting, enable LTE feature
4.1.2. After enable LTE, press ↓ key, you can see Network service, Network type,
Signal strength and IMSI.
4.2. Connect to network cable:
A20 LTE if connected to network via LAN port, then under the Bridge mode, other devices
(Laptop, IP phone) are able to access network via the phone PC port.
11
Page 12
A2X(W) Quick Start Guide
The topology is as follows:
4.3. Check the phone status
You can review its current IP address by pressing key when it is powered on and
connected to the network.
Then press ↓ key, it could see IPv4 address, MAC , Model, Firmware and More.
Press More → Network, it could see the LTE Setting status.
5. Quick Configuration
5.1. LTE network configuration
Under LTE network, you can set the phone accounts through auto provision or phone LCD.
Please look detail in 5.3.
5.2. Network cable configuration
Under Network cable, you can configure phone accounts in three ways: auto provision
configuration, phone LCD configuration, and access to the phone web. Please look detail
in 5.3.
5.3. Configuring Phone Accounts.
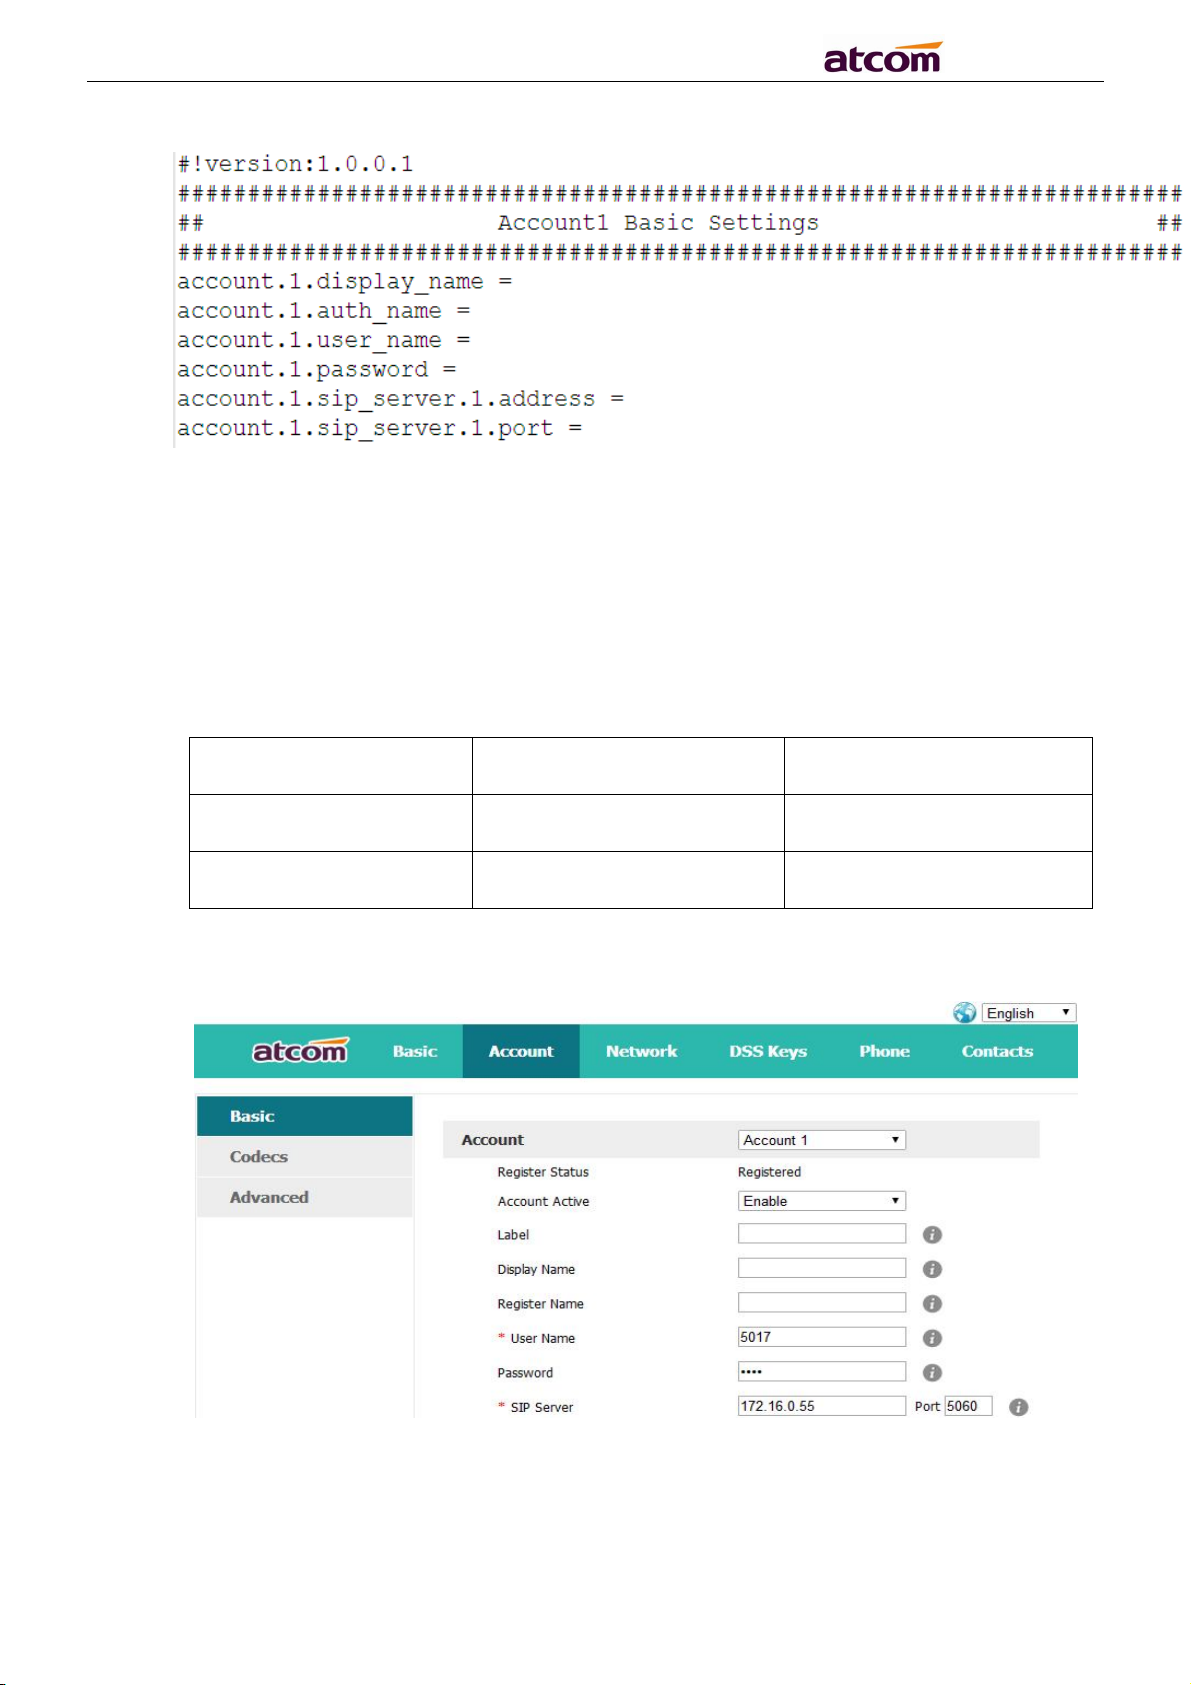
5.3.1 Auto provision configuration account:
12
Page 13
A2X(W) Quick Start Guide
5.3.2 LCD menu configuration account.
Press Menu → Settings → Advanced settings (default password: admin) →
Accounts, input the account info.
5.3.3 Access to the webpage.
When change to network cable mode, input the phone IP address at a
browser , you will be required to input the username and
password to access the web page. The username/password as below:
Username Password Description
admin admin For Administrators
user user For General Users
Press web “Account”→“Basic” and configure the account info.
13
 Loading...