

Page 1

A20/A21/A20W/A21W
Quick Start Guide
Version 2.0
2015-12-25
Page 2

A20/A21/A20W/A21W Quick Start Guide
ATCOM TECHNOLOGY CO., LIMITED
Content
1 Installation and access ............................................................................................................... 2
1.1 Connection .......................................................................................................................... 2
1.2 Installation instruction ......................................................................................................... 2
2 Configuring phone ...................................................................................................................... 8
2.1 Configuring via keypad ....................................................................................................... 9
2.2 Configuring via Webpage .................................................................................................... 9
2.2.1 Login to web ............................................................................................................ 9
2.2.2 Configure phone to register SIP account ................................................................ 10
2.3 Wi-Fi (A20W only) ........................................................................................................... 12
2.3.1 Configure the wifi on the phone ............................................................................. 12
2.3.2 Configure the wifi on the WEB .............................................................................. 12
Page 3
A20/A21/A20W/A21W Quick Start Guide
ATCOM TECHNOLOGY CO., LIMITED
1 Installation and access
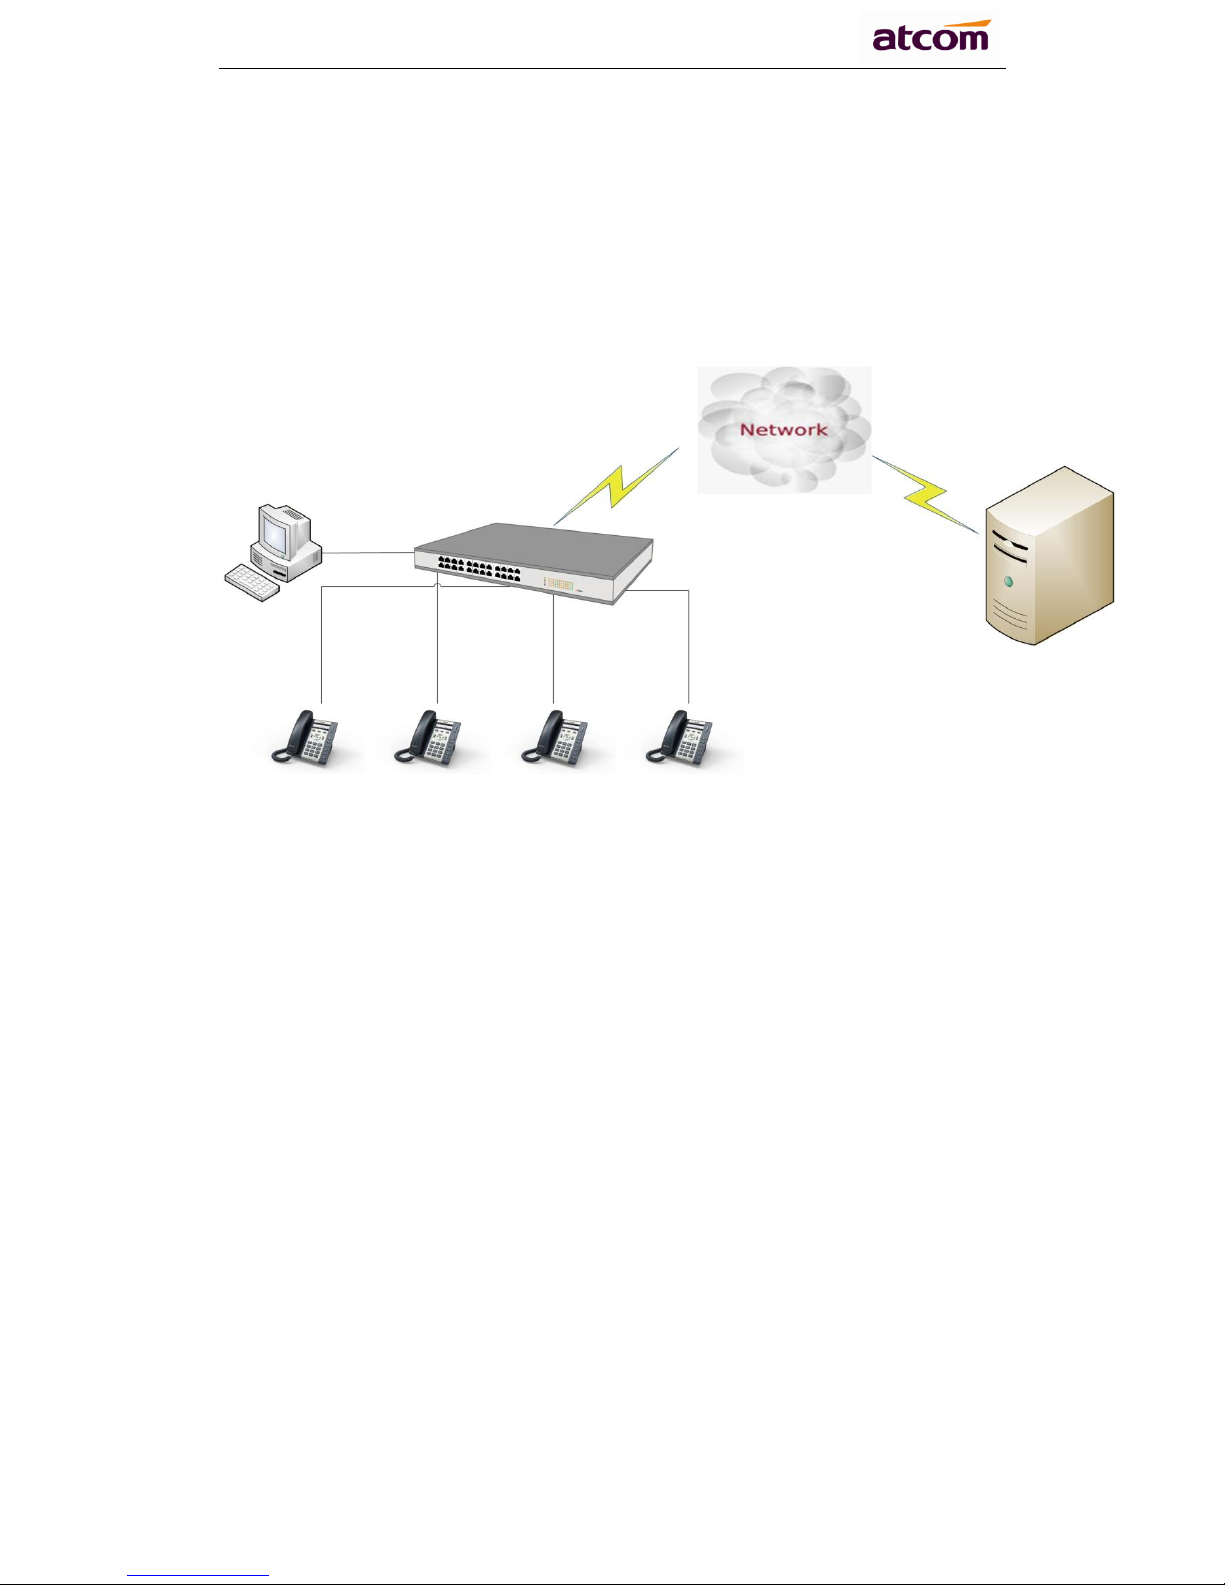
1.1 Connection
Set up A20/A21/A20W/A21W as below:
1.2 Installation instruction
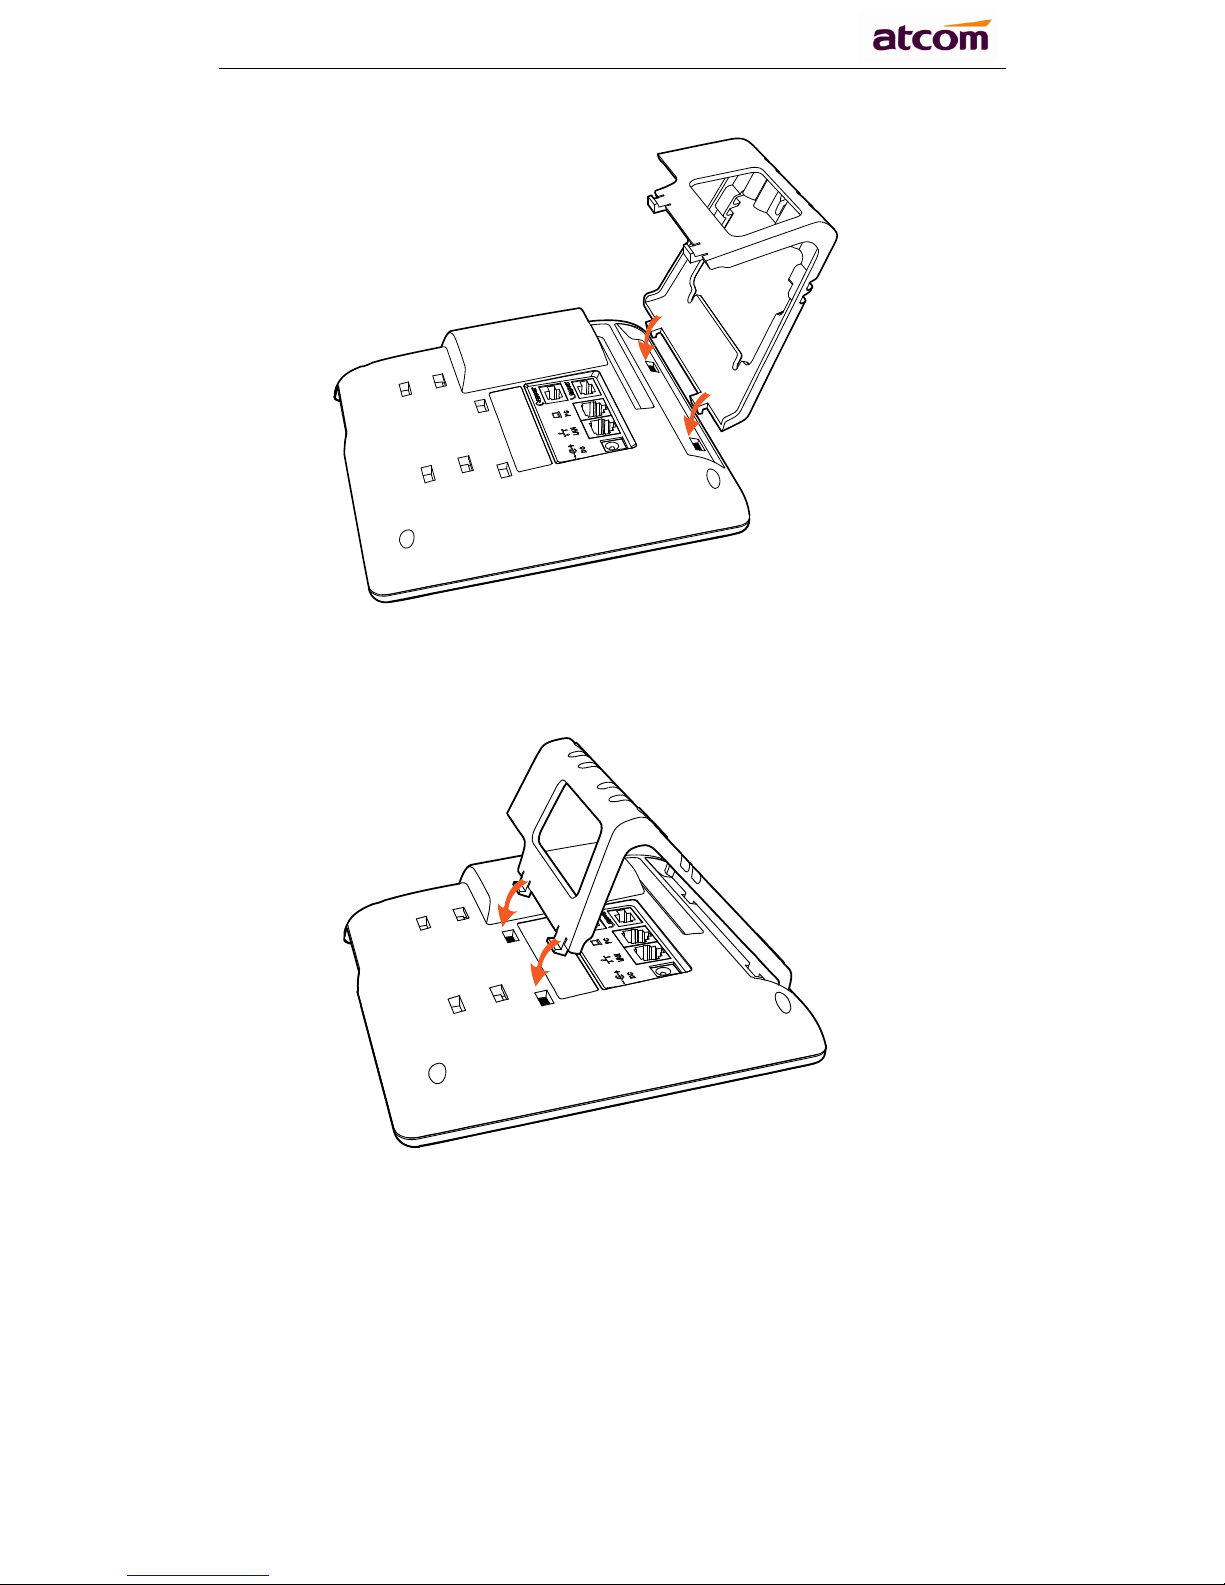
1. Desktop installation
A. Put the bottom side of the IP phone upside and press the plate into the slot,
please refer the picture as below:
Page 4
A20/A21/A20W/A21W Quick Start Guide
ATCOM TECHNOLOGY CO., LIMITED
B. Press the other plate into the slot according to the direction of the arrow
C. It is the right picture after fixing the feet below:
Page 5

A20/A21/A20W/A21W Quick Start Guide
ATCOM TECHNOLOGY CO., LIMITED
D. Disassemble the feet:
Push the plate and pull the feet according to the direction of the arrow. When the
plate is pulled out of the slot, you can take off the feet
2. Wall-hung Installation
A. Put the bottom side of the IP phone upside and press one-side joints of
wall-hung stand bracket into the slot, please refer the picture as below:
Page 6

A20/A21/A20W/A21W Quick Start Guide
ATCOM TECHNOLOGY CO., LIMITED
B. Press the other side joints into the slot according to the direction of the arrow
C. After install the wall-hung stand bracket, press one-side joints of stand
bracket into the slot, please refer the picture as below:
Page 7

A20/A21/A20W/A21W Quick Start Guide
ATCOM TECHNOLOGY CO., LIMITED
D. Press the other side joints into the slot according to the direction of the arrow
E. Knock in nails or screws on the wall according to the proportion of the
distance between the hanging holes as below:
Page 8

A20/A21/A20W/A21W Quick Start Guide
ATCOM TECHNOLOGY CO., LIMITED
F. It is the right picture after fixing the stand bracket below:
G. Disassemble the stand bracket:
Push the spring joint of stand and pull the stand according to the direction of the
arrow.
Page 9

A20/A21/A20W/A21W Quick Start Guide
ATCOM TECHNOLOGY CO., LIMITED
2 Configuring phone
A20/A21/A20W/A21W
Page 10

A20/A21/A20W/A21W Quick Start Guide
ATCOM TECHNOLOGY CO., LIMITED
2.1 Configuring via keypad
Language Setting: The default language of the phone is English, it supports
Chinese, Russian, Arabic, German, French, Portuguese, Turkish, Spanish,
Hebrew, Hungarian, Italian.
Press Menu- input default password 123- Preference- Language to edit the
language list, choose the one you‟d like to set on the phone.
Note: The available language maybe different, it depends on the language
packs currently loaded to the IP phone.
Network Setting:
Press Menu- input default password 123- Network- modify connect type
mode/ check IP address/VLAN/Web server to enter the internet related
configuration page.
Or review its current IP address by pressing key when it is powered on and
connected to the network.
Account Setting:
Press Menu- input default password 123- SIP Account- Enter to configure the
account setting. You can refer to the bellow „Configuring via Web page‟ for
the parameter details.
2.2 Configuring via Webpage
2.2.1 Login to web
Modify your computer‟s IP address to the same network as
A20/A21/A20W/A21W. Enter A20/A21/A20W/A21W‟s IP address in the web
browser and press Enter, then you will access to A20/A21/A20W/A21W's user
webpage without password.
Click „admin‟ which is on the right corner to enter administrator webpage.
Page 11

A20/A21/A20W/A21W Quick Start Guide
ATCOM TECHNOLOGY CO., LIMITED
2.2.2 Configure phone to register SIP account
a) LAN Port Configuration
Enter "Network" -> "Basic" page.
There are 2 ways to connect to internet DHCP and Static, please choose one
according to your own situation.
Network mode: you can choose DHCP, Static.
DHCP: A20/A21/A20W/A21W default to use DHCP to obtain IP from DHCP
Server.
Static: If you want to set the IP as static, you should fill IP, Netmask,
Gateway and DNS information.
b) Password Configuration
Enter "Network" -> "Advance" page.
There are 2 modes to set the authority of web accessing and command line:
User mode and Admin mode. All the parameters can be visible and changed in
Admin mode while part of them can be visible in User mode.
Enable Web Server: enable or disable web access. If choose "no", you can
not access A20/A21/A20W/A21W‟s webpage.
Admin password: set admin webpage access password.(username:admin)
User password: set user webpage access password.(username:user)
c) Account Configuration
Enter "Account" -> "SIP" page to configure SIP account which is provided
from the SIP Server.
Page 12

A20/A21/A20W/A21W Quick Start Guide
ATCOM TECHNOLOGY CO., LIMITED
Display Name: This name will display on the screen of
A20/A21/A20W/A21W. It will display the name configured for the SIP
account by the SIP server preferentially. It can also be kept blank.
User ID: Username of SIP account.
Authenticate ID: normally is the same with User ID, can also be kept blank
if there is no special requirement from the SIP server.
Password: Password of SIP account.
Sip Server: SIP server address, support both IP address and domain name.
Sip Port: SIP server port, default is 5060.
After configured and clicked „Submit‟ to enable register this account, please
check the status of this account in System Status page. The Registration State
will be registered if this account registered successfully.
Page 13

A20/A21/A20W/A21W Quick Start Guide
ATCOM TECHNOLOGY CO., LIMITED
2.3 Wi-Fi (A20W/A21W only)
2.3.1 Configure the wifi on the phone
1 、 Press “Menu”-“Network”-“Connect Mode”,change for the wifi
connection mode,press “OK”.
2、 Press “Menu”-“Network”-“WIFI setting”-“WLAN”,choose the wifi
you want to connect,Press “Connect”,then input the correct wifi password.
3、 Return to the standby interface,and phone successful connected to the
wifi.
2.3.2 Configure the wifi on the WEB
A20W connect to network via Wi-Fi acquiescently, click “Search Wi-Fi” button
to search the available Wi-Fi.
After all available Wi-Fi hotspots are list out, click the round behind the available
Wi-Fi which you want to connect.
Page 14

A20/A21/A20W/A21W Quick Start Guide
ATCOM TECHNOLOGY CO., LIMITED
Input the right “Secret Key” and then click the “Submit” button, the phone will
reboot, and you should disconnect the wire that connect to A20W during
rebooting, or the phone will connect to network via wire preferentially. The Wi-Fi
icon will display on the home screen, it means connect failed when the icon
come with , you should to check the configuration.
 Loading...