

Page 1
ASUS Super Speed N Wireless USB Adapter 1
English
Quick Start Guide
Installation Procedures
Important: Install the WLAN Adapter utilities before inserting the WLAN
Adapter into your computer.
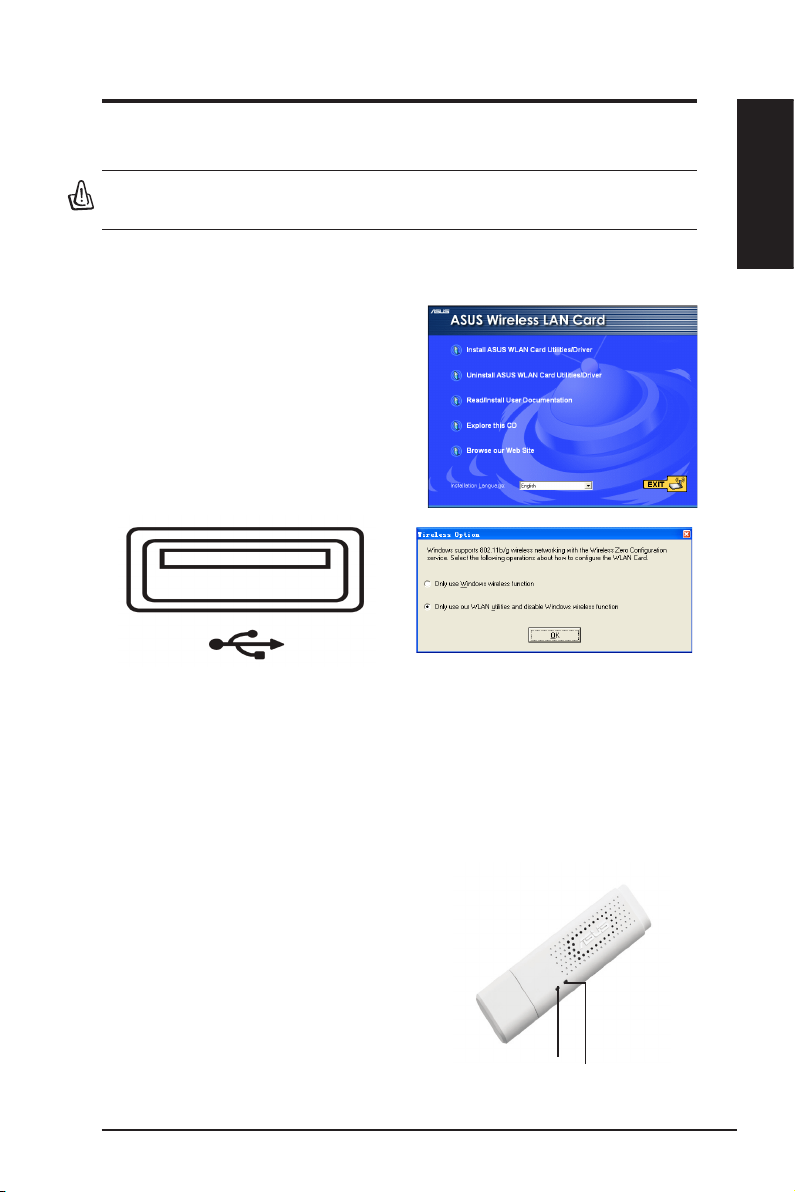
Installing the WLAN utilities and driver
Follow these instructions to install the
WLAN Adapter utilities and driver. Insert
the support CD into your optical drive.
If autorun is enabled in your computer,
the CD automatically displays the utilitymatically displays the utility
menu. Click
Install ASUS WLAN Card
Utilities/Driver
. If autorun is disabled,
double-click SETUP.EXE in the root
directory of the CD.
Insert the WLAN Adapter into your computer
’s USB port using the correct orientation.
Wi n d o ws will automat i c a lly d e t e ct and
co n figur e the WLA N A dapte r usi n g the
utilities and drivers installed in the previous
steps.
Windows XP users: When the program is
launched for the rst time (during Windows
restart), you are asked to choose one utility
to congure the WLAN Adapter. Select "Only
use our WLAN utilities and disable Windows
wireless function".
Reading the WLAN status indicators
The device comes with two LEDs that indicate the status of the WLAN
Adapter.
ACT LED
Blinking:
Transmitting data; the blinking
speed indicates the link speed.
OFF:
Radio off or Adapter is disabled.
LINK LED
ON:
Connected to wireless device.
OFF:
No wireless connection.
LINK
ACT
Page 2
2 ASUS Super Speed N Wireless USB Adapter
English
Quick Start Guide
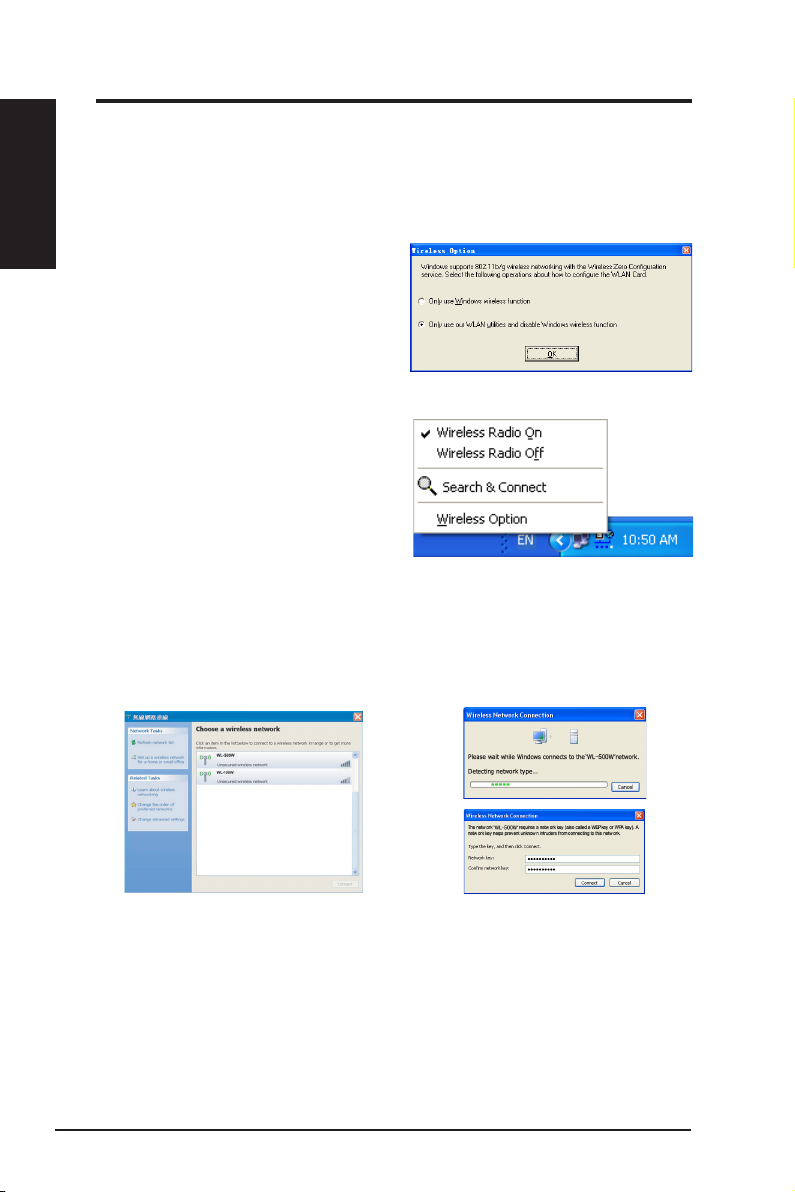
Windows® XP Wireless Options
The wireless options window shown below is only available for Windows® XP.
It appears when you run the Control Center utility at the rst time. Select the
utility you want to use for conguring your WLAN Adapter.
Only use Windows wireless function
–
Only use Windows® XP Wireless
Zero Conguration service to congure
the WLAN Adapter.
Only use our WLAN utilities and
disable XP wireless function
–
Only use ASUS WLAN utilities to congure the WLAN Adapter.
(recommended)
You can open the Wireless Option
setting window at any time by leftclicking the control center icon and
choosing
Wireless Option
.
Taskbar Left-Click Menu
Conguring with Windows® Wireless Zero Conguration service
If you want to configure your WLAN Adapter via Windows® Wireless Zero
Conguration (WZC) service, follow the instruction below to make the settings.
2. A window prompts out asking
you for the key if you have set up
encryption on your wireless router,
input the keys and click
Connect
.
The connection is complete.
1. Double-click the wireless network
icon on the task bar to view available
networks.Select the AP and click
Connect
.
Page 3

ASUS Super Speed N Wireless USB Adapter 3
English
Quick Start Guide
To set up the wireless connection properties, right-click the wireless icon on the
taskbar and select
Open Network Connection
. Then right-click the network
connection icon and select
Property
to open the Wireless Network Connection
Status page.
1. The
General
page shows status, duration,
sp e e d, an d sig n a l st ren g t h. Si g n al
strength is represented by green bars with
5 bars indicating excellent signal and 1
bar meaning poor signal.
2. Select “Wireless Networks” tab to show
Preferred networks
. Use the
Add
button
to add the “SSID” of available networks
and set the connection preference order
wi t h th e
Mo v e up
an d
Mo v e do wn
buttons. The radio tower with a signa l
ico n identi fies the currently connected
access point. Click
Properties
to set the
authentication of the wireless connection.
3. The
Authentication
page allows you to
add security settings. Read Windows help
for more information.
4. The
Advanced
page allows you to set
rewall and sharing. Read Windows help
for more information.
Page 4

4 ASUS Super Speed N Wireless USB Adapter
English
Quick Start Guide
FCC Warning Statement
This device complies with Part 15 of the FCC Rules. Operation is subject to the following two
conditions:
(1) this device may not cause harmful interference, and
(2) this device must accept any interference received, including interference that may cause
undesired operation.
This equipment has been tested and found to comply with the limits for a class B digital
device, pursuant to part 15 of the FCC Rules. These limits are designed to provide reasonable
protection against harmful interference in a residential installation.
This equipment generates, uses and can radiate radio frequency energy and, if not installed
and used in accordance with the instructions, may cause harmful interference to radio
communications. However, there is no guarantee that interference will not occur in a particular
installation. If this equipment does cause harmful interference to radio or television reception,
which can be determined by turning the equipment off and on, the user is encouraged to try to
correct the interference by one or more of the following measures:
- Reorient or relocate the receiving antenna.
- Increase the separation between the equipment and receiver.
- Connect the equipment into an outlet on a circuit different from that to which the receiver is
connected.
- Consult the dealer or an experienced radio/TV technician for help.
CAUTION:
Any changes or modications not expressly approved by the party responsible for compliance
could void the user’s authority to operate the equipment.
Prohibition of Co-location
This device and its antenna(s) must not be co-located or operating in conjunction with any other
antenna or transmitter
Safety Information
To maintain compliance with FCC’s RF exposure guidelines, this equipment should be installed
and operated with minimum distance 20cm between the radiator and your body. Use on the
supplied antenna.
Testing for electric safety according to EN 60950-1 has been conducted. These are considered
relevant and sufcient.
Protection requirements for electromagnetic compatibility – Article 3.1b
Testing for electromagnetic compatibility according to EN 301 489-1 and EN 301 489-17 has been
conducted. These are considered relevant and sufcient.
Effective use of the radio spectrum – Article 3.2
Testing for radio test suites according to EN 300 328- 2 has been conducted. These are considered
relevant and sufcient.
CE Mark Warning
This is a Class B product, in a domestic environment, this product may cause radio interference, in
which case the user may be required to take adequate measures.
Declaration of Conformity for R&TTE directive 1999/5/EC
Essential requirements – Article 3
Protection requirements for health and safety – Article 3.1a
 Loading...