

Page 1
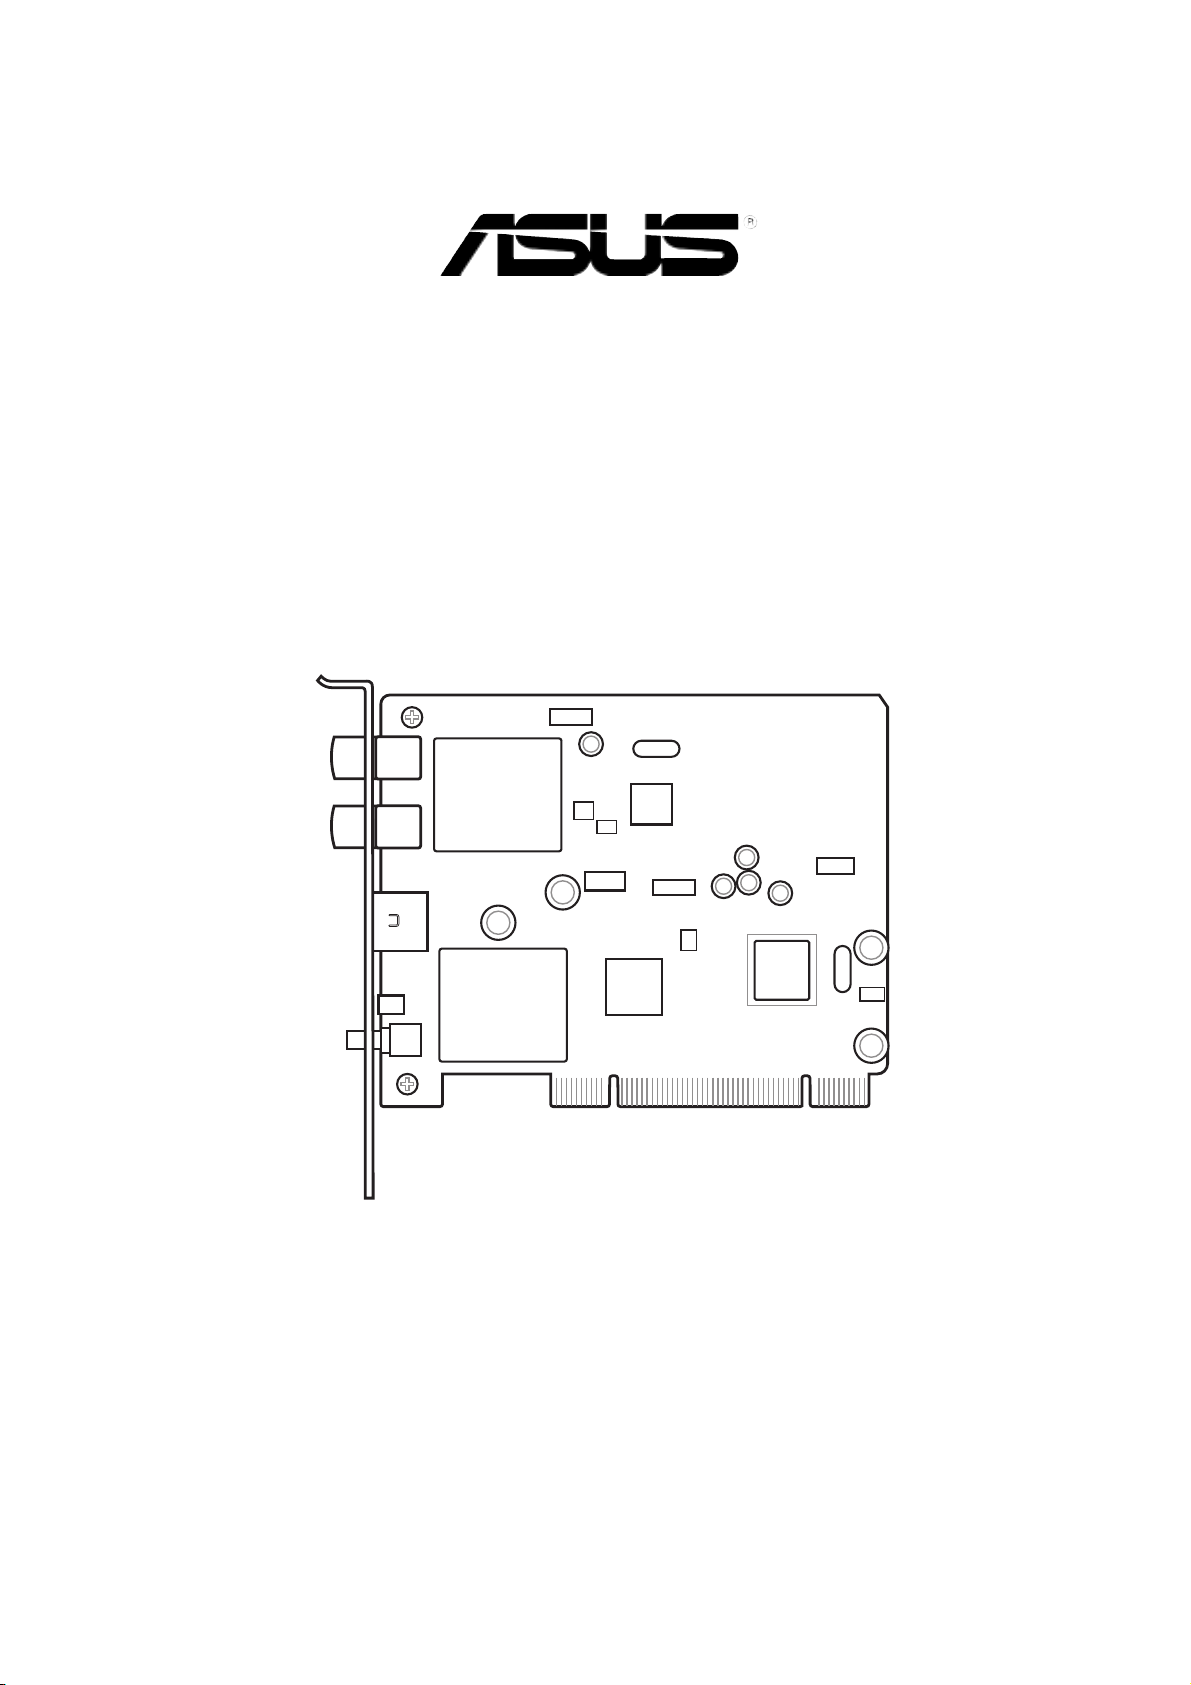
WiFi-TV
IEEE 802.11a/b/g
Wireless LAN Adapter and
Digital/Analog TV/FM Radio Tuner
PCI Card
User guide
Page 2

E2042E2042
E2042
E2042E2042
First Edition V1First Edition V1
First Edition V1
First Edition V1First Edition V1
April 2005April 2005
April 2005
April 2005April 2005
Copyright © 2005 ASUSTeK COMPUTER INC. All Rights Reserved.Copyright © 2005 ASUSTeK COMPUTER INC. All Rights Reserved.
Copyright © 2005 ASUSTeK COMPUTER INC. All Rights Reserved.
Copyright © 2005 ASUSTeK COMPUTER INC. All Rights Reserved.Copyright © 2005 ASUSTeK COMPUTER INC. All Rights Reserved.
No part of this manual, including the products and software described in it, may be reproduced,
transmitted, transcribed, stored in a retrieval system, or translated into any language in any form
or by any means, except documentation kept by the purchaser for backup purposes, without the
express written permission of ASUSTeK COMPUTER INC. (“ASUS”).
Product warranty or service will not be extended if: (1) the product is repaired, modified or
altered, unless such repair, modification of alteration is authorized in writing by ASUS; or (2)
the serial number of the product is defaced or missing.
ASUS PROVIDES THIS MANUAL “AS IS” WITHOUT WARRANTY OF ANY KIND, EITHER
EXPRESS OR IMPLIED, INCLUDING BUT NOT LIMITED TO THE IMPLIED WARRANTIES
OR CONDITIONS OF MERCHANTABILITY OR FITNESS FOR A PARTICULAR PURPOSE.
IN NO EVENT SHALL ASUS, ITS DIRECTORS, OFFICERS, EMPLOYEES OR AGENTS BE
LIABLE FOR ANY INDIRECT, SPECIAL, INCIDENTAL, OR CONSEQUENTIAL DAMAGES
(INCLUDING DAMAGES FOR LOSS OF PROFITS, LOSS OF BUSINESS, LOSS OF USE
OR DATA, INTERRUPTION OF BUSINESS AND THE LIKE), EVEN IF ASUS HAS BEEN
ADVISED OF THE POSSIBILITY OF SUCH DAMAGES ARISING FROM ANY DEFECT OR
ERROR IN THIS MANUAL OR PRODUCT.
SPECIFICATIONS AND INFORMATION CONTAINED IN THIS MANUAL ARE FURNISHED
FOR INFORMATIONAL USE ONLY, AND ARE SUBJECT TO CHANGE AT ANY TIME
WITHOUT NOTICE, AND SHOULD NOT BE CONSTRUED AS A COMMITMENT BY ASUS.
ASUS ASSUMES NO RESPONSIBILITY OR LIABILITY FOR ANY ERRORS OR
INACCURACIES THAT MAY APPEAR IN THIS MANUAL, INCLUDING THE PRODUCTS
AND SOFTWARE DESCRIBED IN IT.
Products and corporate names appearing in this manual may or may not be registered
trademarks or copyrights of their respective companies, and are used only for identification or
explanation and to the owners’ benefit, without intent to infringe.
iiii
ii
iiii
Page 3

Contents
Notices ................................................................................................. v
Safety information .............................................................................. vi
About this guide ................................................................................ vii
WiFi-TV specifications summary ......................................................... ix
Chapter 1:Chapter 1:
Chapter 1:
Chapter 1:Chapter 1:
1.1 Welcome! .............................................................................. 1-2
1.2 Package contents ................................................................. 1-2
1.3 Special features .................................................................... 1-3
1.3.1 Wireless LAN features ............................................ 1-3
1.3.2 TV features ............................................................ 1-4
1.4 Card layout ........................................................................... 1-5
1.5 LED indicator ........................................................................ 1-5
Chapter 2:Chapter 2:
Chapter 2:
Chapter 2:Chapter 2:
2.1 Card installation .................................................................... 2-2
2.1.1 System requirements ............................................. 2-2
2.1.2 Installing the card ................................................... 2-2
2.2 Connecting devices and accessories .................................... 2-3
2.2.1 Digital cable TV and FM radio ................................. 2-3
2.2.2 Analog cable TV ..................................................... 2-3
2.2.2 Television, VCR, or camcorder ................................ 2-3
2.2.3 Wi-Fi antenna .......................................................... 2-4
Product introductionProduct introduction
Product introduction
Product introductionProduct introduction
InstallationInstallation
Installation
InstallationInstallation
2.3 Driver installation ................................................................. 2-6
2.3.1 Running the support CD ......................................... 2-6
2.3.2 Drivers menu .......................................................... 2-6
2.3.3 Manual menu ........................................................... 2-7
2.3.4 ASUS contact information ...................................... 2-7
2.3.5 Wi-Fi driver and utilities installation ........................ 2-8
Chapter 3:Chapter 3:
Chapter 3:
Chapter 3:Chapter 3:
3.1 Recommended network setup .............................................. 3-2
3.1.1 Ad-hoc mode .......................................................... 3-2
3.1.2 Infrastructure mode................................................ 3-2
3.1.3 Software Access Point (Soft AP) ........................... 3-3
3.1.4 Wireless bridge (Wireless Distribution System) ..... 3-4
3.2 Using the One Touch wizard ................................................. 3-5
3.2.1 Launching the setup wizard ................................... 3-5
3.2.2 Creating your own wireless LAN (One Touch) ........ 3-5
3.2.3 Connecting to an access point ............................... 3-8
3.2.4 Connecting to another wireless device .................. 3-9
Wi-Fi featuresWi-Fi features
Wi-Fi features
Wi-Fi featuresWi-Fi features
3.2.5 Customizing your setup ........................................3-11
iiiiii
iii
iiiiii
Page 4

Contents
3.3 Other software support ...................................................... 3-14
3.3.1 Control Center ...................................................... 3-14
3.3.2 Wireless Settings .................................................. 3-16
3.3.3 Mobile Manager ..................................................... 3-17
3.3.4 Site Monitor .......................................................... 3-18
Chapter 4:Chapter 4:
Chapter 4:
Chapter 4:Chapter 4:
4.1 Using PowerCinema .............................................................. 4-2
4.1.1 Launching PowerCinema ......................................... 4-2
4.1.2 Optimizing your computer for multimedia .............. 4-3
4.1.3 Navigating through the home page ........................ 4-6
4.1.4 Using the player controls........................................ 4-6
4.1.5 Watching TV ........................................................... 4-7
4.1.6 Watching movies .................................................... 4-9
4.2 Using PowerDirector ........................................................... 4-10
4.2.1 Adjusting the sound recording settings ............... 4-10
4.2.2 Creating movies .................................................... 4-10
Appendix:Appendix:
Appendix:
Appendix:Appendix:
A.1 Wireless LAN channels ......................................................... A-2
A.1.1 IEEE 802.11b/g ...................................................... A-2
A.1.2 IEEE 802.11a .......................................................... A-3
A.2.1 Using the remote controller ................................... A-4
A.2 Remote controller ................................................................. A-4
TV featuresTV features
TV features
TV featuresTV features
Reference informationReference information
Reference information
Reference informationReference information
A.2.2 Remote controller layout ........................................ A-5
A.2.3 Remote controller functions ................................... A-5
A.2.4 Mouse mode ........................................................... A-6
A.3 International TV systems and standards .............................. A-7
iviv
iv
iviv
Page 5

Notices
Federal Communications Commission StatementFederal Communications Commission Statement
Federal Communications Commission Statement
Federal Communications Commission StatementFederal Communications Commission Statement
This device complies with Part 15 of the FCC Rules. Operation is subject to
the following two conditions:
•
This device may not cause harmful interference, and
•
This device must accept any interference received including interference
that may cause undesired operation.
This equipment has been tested and found to comply with the limits for a
Class B digital device, pursuant to Part 15 of the FCC Rules. These limits are
designed to provide reasonable protection against harmful interference in a
residential installation. This equipment generates, uses and can radiate radio
frequency energy and, if not installed and used in accordance with
manufacturer’s instructions, may cause harmful interference to radio
communications. However, there is no guarantee that interference will not
occur in a particular installation. If this equipment does cause harmful
interference to radio or television reception, which can be determined by
turning the equipment off and on, the user is encouraged to try to correct
the interference by one or more of the following measures:
•
Reorient or relocate the receiving antenna.
•
Increase the separation between the equipment and receiver.
•
Connect the equipment to an outlet on a circuit different from that to
which the receiver is connected.
•
Consult the dealer or an experienced radio/TV technician for help.
The use of shielded cables for connection of the monitor to the graphics
card is required to assure compliance with FCC regulations. Changes or
modifications to this unit not expressly approved by the party
responsible for compliance could void the user’s authority to operate
this equipment.
FCC RF Radiation Exposure StatementFCC RF Radiation Exposure Statement
FCC RF Radiation Exposure Statement
FCC RF Radiation Exposure StatementFCC RF Radiation Exposure Statement
This equipment complies with the FCC RF radiation exposure limits set forth
for an uncontrolled environment. This equipment should be installed and
operated with a mininum distance of 20 cm between the radiator and your
body.
Canadian Department of Communications StatementCanadian Department of Communications Statement
Canadian Department of Communications Statement
Canadian Department of Communications StatementCanadian Department of Communications Statement
This digital apparatus does not exceed the Class B limits for radio noise
emissions from digital apparatus set out in the Radio Interference
Regulations of the Canadian Department of Communications.
This class B digital apparatus complies with Canadian ICES-003.This class B digital apparatus complies with Canadian ICES-003.
This class B digital apparatus complies with Canadian ICES-003.
This class B digital apparatus complies with Canadian ICES-003.This class B digital apparatus complies with Canadian ICES-003.
vv
v
vv
Page 6

Safety information
Electrical safetyElectrical safety
Electrical safety
Electrical safetyElectrical safety
•
To prevent electrical shock hazard, disconnect the power cable from the
electrical outlet before relocating the system.
•
When adding or removing devices to or from the system, ensure that the
power cables for the devices are unplugged before the signal cables are
connected. If possible, disconnect all power cables from the existing
system before you add a device.
•
Before connecting or removing signal cables from the motherboard,
ensure that all power cables are unplugged.
•
Seek professional assistance before using an adapter or extension cord.
These devices could interrupt the grounding circuit.
•
Make sure that your power supply is set to the correct voltage in your
area. If you are not sure about the voltage of the electrical outlet you are
using, contact your local power company.
•
If the power supply is broken, do not try to fix it by yourself. Contact a
qualified service technician or your retailer.
Operation safetyOperation safety
Operation safety
Operation safetyOperation safety
•
Before installing the motherboard and adding devices on it, carefully read
all the manuals that came with the package.
•
Before using the product, make sure all cables are correctly connected
and the power cables are not damaged. If you detect any damage,
contact your dealer immediately.
•
To avoid short circuits, keep paper clips, screws, and staples away from
connectors, slots, sockets and circuitry.
•
Avoid dust, humidity, and temperature extremes. Do not place the
product in any area where it may become wet.
•
Place the product on a stable surface.
•
If you encounter technical problems with the product, contact a qualified
service technician or your retailer.
vivi
vi
vivi
Page 7

About this guide
This user guide contains the information you need when installing and
configuring the card.
How this guide is organizedHow this guide is organized
How this guide is organized
How this guide is organizedHow this guide is organized
This guide contains the following parts:
••
Chapter 1: Product introductionChapter 1: Product introduction
•
Chapter 1: Product introduction
••
Chapter 1: Product introductionChapter 1: Product introduction
This chapter describes the card features and the new technologies it
supports.
••
Chapter 2: Hardware and driver installationChapter 2: Hardware and driver installation
•
Chapter 2: Hardware and driver installation
••
Chapter 2: Hardware and driver installationChapter 2: Hardware and driver installation
This chapter provides step by step instructions on how to install card
and the card drivers and utilities to your computer.
••
Chapter 3: WiFi featuresChapter 3: WiFi features
•
Chapter 3: WiFi features
••
Chapter 3: WiFi featuresChapter 3: WiFi features
This chapter provides information on the Wi-Fi features of the card
including the recommended setup and bundled utilities.
••
Chapter 4: TV featuresChapter 4: TV features
•
Chapter 4: TV features
••
Chapter 4: TV featuresChapter 4: TV features
This chapter provides information on the TV features of the card and
the bundled software application.
••
Appendix: Reference informationAppendix: Reference information
•
Appendix: Reference information
••
Appendix: Reference informationAppendix: Reference information
The Appendix provides information on the wireless LAN channels,
remote controller, and TV standards in your location.
Where to find more informationWhere to find more information
Where to find more information
Where to find more informationWhere to find more information
Refer to the following sources for additional information and for product
and software updates.
1.1.
ASUS websitesASUS websites
1.
ASUS websites
1.1.
ASUS websitesASUS websites
The ASUS website provides updated information on ASUS hardware
and software products. Refer to the ASUS contact information.
2.2.
Optional documentationOptional documentation
2.
Optional documentation
2.2.
Optional documentationOptional documentation
Your product package may include optional documentation, such as
warranty flyers, that may have been added by your dealer. These
documents are not part of the standard package.
viivii
vii
viivii
Page 8

Conventions used in this guideConventions used in this guide
Conventions used in this guide
Conventions used in this guideConventions used in this guide
To make sure that you perform certain tasks properly, take note of the
following symbols used throughout this user guide.
DANGER/WARNING: DANGER/WARNING:
DANGER/WARNING: Information to prevent injury to yourself
DANGER/WARNING: DANGER/WARNING:
when trying to complete a task.
CAUTION:CAUTION:
CAUTION: Information to prevent damage to the components
CAUTION:CAUTION:
when trying to complete a task.
IMPORTANT: IMPORTANT:
IMPORTANT: Instructions that you MUST follow to complete a
IMPORTANT: IMPORTANT:
task.
NOTE: NOTE:
NOTE: Tips and additional information to help you complete a
NOTE: NOTE:
task.
TypographyTypography
Typography
TypographyTypography
Bold textBold text
Bold text Indicates a menu or an item to select.
Bold textBold text
Italics
<Key> Keys enclosed in the less-than and greater-than
<Key1+Key2+Key3> If you must press two or more keys
Command Means that you must type the command exactly
Used to emphasize a word or a phrase.
sign means that you must press the enclosed key.
Example: <Enter> means that you must press the
Enter or Return key.
simultaneously, the key names are linked with a
plus sign (+).
Example: <Ctrl+Alt+D>
as shown, then supply the required item or value
enclosed in brackets.
Example: At the DOS prompt, type the command
line:
format a:
viiiviii
viii
viiiviii
Page 9

WiFi-TV specifications summary
WiFi specificationsWiFi specifications
WiFi specifications
WiFi specificationsWiFi specifications
InterfaceInterface
Interface
InterfaceInterface
Wi-Fi StandardWi-Fi Standard
Wi-Fi Standard
Wi-Fi StandardWi-Fi Standard
TechnologyTechnology
Technology
TechnologyTechnology
PCI bus
IEEE 802.11g; IEEE 802.11a; IEEE 802.11b
Orthogonal Frequency Division Multiplexing (OFDM)
Direct Sequence Spread Spectrum (DSSS)
Data transferData transfer
Data transfer
Data transferData transfer
ratesrates
rates
ratesrates
SupportedSupported
Supported
SupportedSupported
networksnetworks
networks
networksnetworks
OperatingOperating
Operating
OperatingOperating
channelschannels
channels
channelschannels
SecuritySecurity
Security
SecuritySecurity
OperatingOperating
Operating
OperatingOperating
distancedistance
distance
distancedistance
Operating temp.Operating temp.
Operating temp.
Operating temp.Operating temp.
Storage temp.Storage temp.
Storage temp.
Storage temp.Storage temp.
802.11a/g : 54, 48, 36, 24,18, 12, 9, and 6 Mbps
802.11b : 11, 5.5, 2, and1 Mbps
Infrastructure mode
Ad-hoc mode (peer-to-peer)
Software Access Point (Soft AP) mode*
Wireless Bridge (Wireless Distribution System) mode*
802.11b/g : 2412 ~ 2462 MHz
802.11a : 5180 ~ 5240 MHz
5260 ~ 5320 MHz
5745 ~ 5805 MHz
64 or 128-bit Wired Equivalent Privacy (WEP) encryption
Wi-Fi Protected Access (WPA)
Indoor : 130 ft (40 m)
Outdoor : 1000 ft (310 m) LOS**
-20ºC ~ 65ºC
-30ºC ~ 75ºC
CompatibilityCompatibility
Compatibility
CompatibilityCompatibility
Supported OSSupported OS
Supported OS
Supported OSSupported OS
AccessoryAccessory
Accessory
AccessoryAccessory
LEDLED
LED
LEDLED
Software supportSoftware support
Software support
Software supportSoftware support
®®
®
**
On WindowsOn Windows
*
On Windows
**
On WindowsOn Windows
****
Line-of-sightLine-of-sight
**
Line-of-sight
****
Line-of-sightLine-of-sight
®®
2000/XP/2003 Server only 2000/XP/2003 Server only
2000/XP/2003 Server only
2000/XP/2003 Server only 2000/XP/2003 Server only
IEEE 802.11a/b/g devices
Windows® 2000/XP/2003 Server (32-bit version)
Omni-directional dual-band antenna with magnetic base
Green data transmission (AIR) LED
One Touch Wizard
Control Center
Wireless Settings
Mobile Manager
Site Monitor (client mode)
(Continued on the next page)
ixix
ix
ixix
Page 10

WiFi-TV specifications summary
TV specificationsTV specifications
TV specifications
TV specificationsTV specifications
InterfaceInterface
Interface
InterfaceInterface
TV StandardTV Standard
TV Standard
TV StandardTV Standard
SupportedSupported
Supported
SupportedSupported
technologytechnology
technology
technologytechnology
PCI bus
NTSC/PAL/SECAM
Analog TV
Digital TV (DVB-T)
FM radio
PortsPorts
Ports
PortsPorts
Software supportSoftware support
Software support
Software supportSoftware support
Supported OSSupported OS
Supported OS
Supported OSSupported OS
AccessoriesAccessories
Accessories
AccessoriesAccessories
Specifications are subject to change without notice.Specifications are subject to change without notice.
Specifications are subject to change without notice.
Specifications are subject to change without notice.Specifications are subject to change without notice.
Analog PAL/SECAM
Digital PAL/SECAM
Audio-Video In
CyberLink PowerCinema
CyberLink PowerDirector
Intervideo® WinDVD Suite
Windows® XP
WiFi-TV remote controller with USB IR receiver
Audio-Video cable
PAL/SECAM to NTSC RF adapter
FM antenna
xx
x
xx
Page 11

This chapter describes the card
features and the new technologies it
supports.
introduction
Product
1
Page 12

1.1 Welcome!
®®
®
Thank you for buying an ASUSThank you for buying an ASUS
Thank you for buying an ASUS
Thank you for buying an ASUSThank you for buying an ASUS
®®
WiFi-TV! WiFi-TV!
WiFi-TV!
WiFi-TV! WiFi-TV!
The WiFi-TV card delivers a host of new features and latest technologies,
making it another standout in the long line of ASUS quality products!
Before you start installing the card, drivers, and software applications,
check the items in your package with the list below.
1.2 Package contents
Check your WiFi-TV package for the following items.
PCI CardPCI Card
PCI Card ASUS WiFi-TV PCI card
PCI CardPCI Card
CableCable
Cable Audio-Video cable
CableCable
AccessoriesAccessories
Accessories Remote controller with two “AAA” batteries
AccessoriesAccessories
USB remote controller IR receiver with mounting tape
PAL/SECAM to NTSC RF adapter
Omni-directional dual-band antenna
FM antenna
Support CDSupport CD
Supp or t CD ASUS WiFi-TV support CD includes:
Support CDSupport CD
• Card drivers
• CyberLink PowerCinema
• Cyberlink PowerDirector
DocumentationDocumentation
Documentation User guide
DocumentationDocumentation
If any of the above items is damaged or missing, contact your retailer.
1-21-2
1-2
1-21-2
Chapter 1: Product introductionChapter 1: Product introduction
Chapter 1: Product introduction
Chapter 1: Product introductionChapter 1: Product introduction
Page 13

1.3 Special features
1.3.11.3.1
1.3.1
1.3.11.3.1
54 Mbps speed advantage54 Mbps speed advantage
54 Mbps speed advantage
54 Mbps speed advantage54 Mbps speed advantage
With data transmission rate up to five times faster than IEEE 802.11b
standards, the WiFi-TV breaks the wireless data transmission speed barrier
to give you faster Internet connection and file sharing capabilities.
One Touch setup wizardOne Touch setup wizard
One Touch setup wizard
One Touch setup wizardOne Touch setup wizard
Designed for novice home users and experts alike, the One Touch setup
wizard guides you through the entire setup process without the hassles of
configuring confusing network settings.
The One Touch wizard guides you in configuring the WiFi-TV as an access
point and intelligently configures the Internet connection sharing settings
so you can share your Internet connection with other computers in your
home or office network.
Easy integration and flexibilityEasy integration and flexibility
Easy integration and flexibility
Easy integration and flexibilityEasy integration and flexibility
Because WiFi-TV uses IEEE 802.11a/b/g standard, you can easily integrate
all wireless devices using different wireless standards. This flexibility lets
you use the WiFi-TV card in almost any wireless LAN environment.
Wireless LAN featuresWireless LAN features
Wireless LAN features
Wireless LAN featuresWireless LAN features
Soft access point functionSoft access point function
Soft access point function
Soft access point functionSoft access point function
If you are using a Windows® 2000/XP/Server 2003 operating system, you
can transform the WiFi-TV card into a Software Access Point (Soft AP).
When in Soft AP mode, WiFi-TV can support an unlimited number of client
computers with wireless LAN adapters making it an ideal solution for homes
and offices with single Internet connection or network printer.
Wireless bridge capabilityWireless bridge capability
Wireless bridge capability
Wireless bridge capabilityWireless bridge capability
Integrate several wireless LANs using the wireless bridge capability of the
WiFi-TV. With the bundled software utilities, you can connect several
wireless LANs in no time without buying expensive wireless LAN peripherals.
Full software supportFull software support
Full software support
Full software supportFull software support
The WiFi-TV support CD includes the latest utilities that could help you set
up and create a wireless home or office network. These utilities also assist
you in integrating the card to an existing wireless network.
Moveable omni-directional dual-band antennaMoveable omni-directional dual-band antenna
Moveable omni-directional dual-band antenna
Moveable omni-directional dual-band antennaMoveable omni-directional dual-band antenna
A moveable, omni-directional, dual-band antenna comes with your WiFi-TV
card to maximize your wireless coverage.
ASUS WiFi-TVASUS WiFi-TV
ASUS WiFi-TV
ASUS WiFi-TVASUS WiFi-TV
1-31-3
1-3
1-31-3
Page 14

1.3.21.3.2
1.3.2
1.3.21.3.2
Watch TV on your PCWatch TV on your PC
Watch TV on your PC
Watch TV on your PCWatch TV on your PC
The WiFi-TV card lets you watch TV on your PC. With a digital cable TV/FM
radio and analog cable TV interfaces, WiFi-TV supports both digital (DVB-T)
and analog cable TV and FM radio signals. Digital cable TV signals provide
clearer, sharper images, and stereo quality sound. Contact your local cable
TV provider for the availability of this service.
Supports various TV standardsSupports various TV standards
Supports various TV standards
Supports various TV standardsSupports various TV standards
The card supports NTSC, PAL, or SECAM TV standard. If the TV standard in
your area is NTSC, use the PAL/SECAM to NTSC RF adapter to receive TV
signals from your digital or analog cable TV provider.
ConnectivityConnectivity
Connectivity
ConnectivityConnectivity
If you want to watch on your television set or create a movie from your
digital video recorder, you can use the supplied AV cable to connect the
WiFi-TV to your television or camcorder. With this, you still enjoy digital or
analog cable TV signals anytime. You can also use the AV cable to connect
other multimedia devices such as VCRs and digital cameras.
TV featuresTV features
TV features
TV featuresTV features
Full software supportFull software support
Full software support
Full software supportFull software support
Your WiFi-TV package includes the PowerCinema application that allows you
to watch and record your favorite TV programs, watch DVD/VCD movies,
browse photos stored in your computer, or listen to your favorite music CD
or FM radio station.
If you want to watch or create a movie from your home videos, you can
connect your video recorder to the Audio-Video port and create a movie
using the bundled PowerDirector application.
1-41-4
1-4
1-41-4
Chapter 1: Product introductionChapter 1: Product introduction
Chapter 1: Product introduction
Chapter 1: Product introductionChapter 1: Product introduction
Page 15
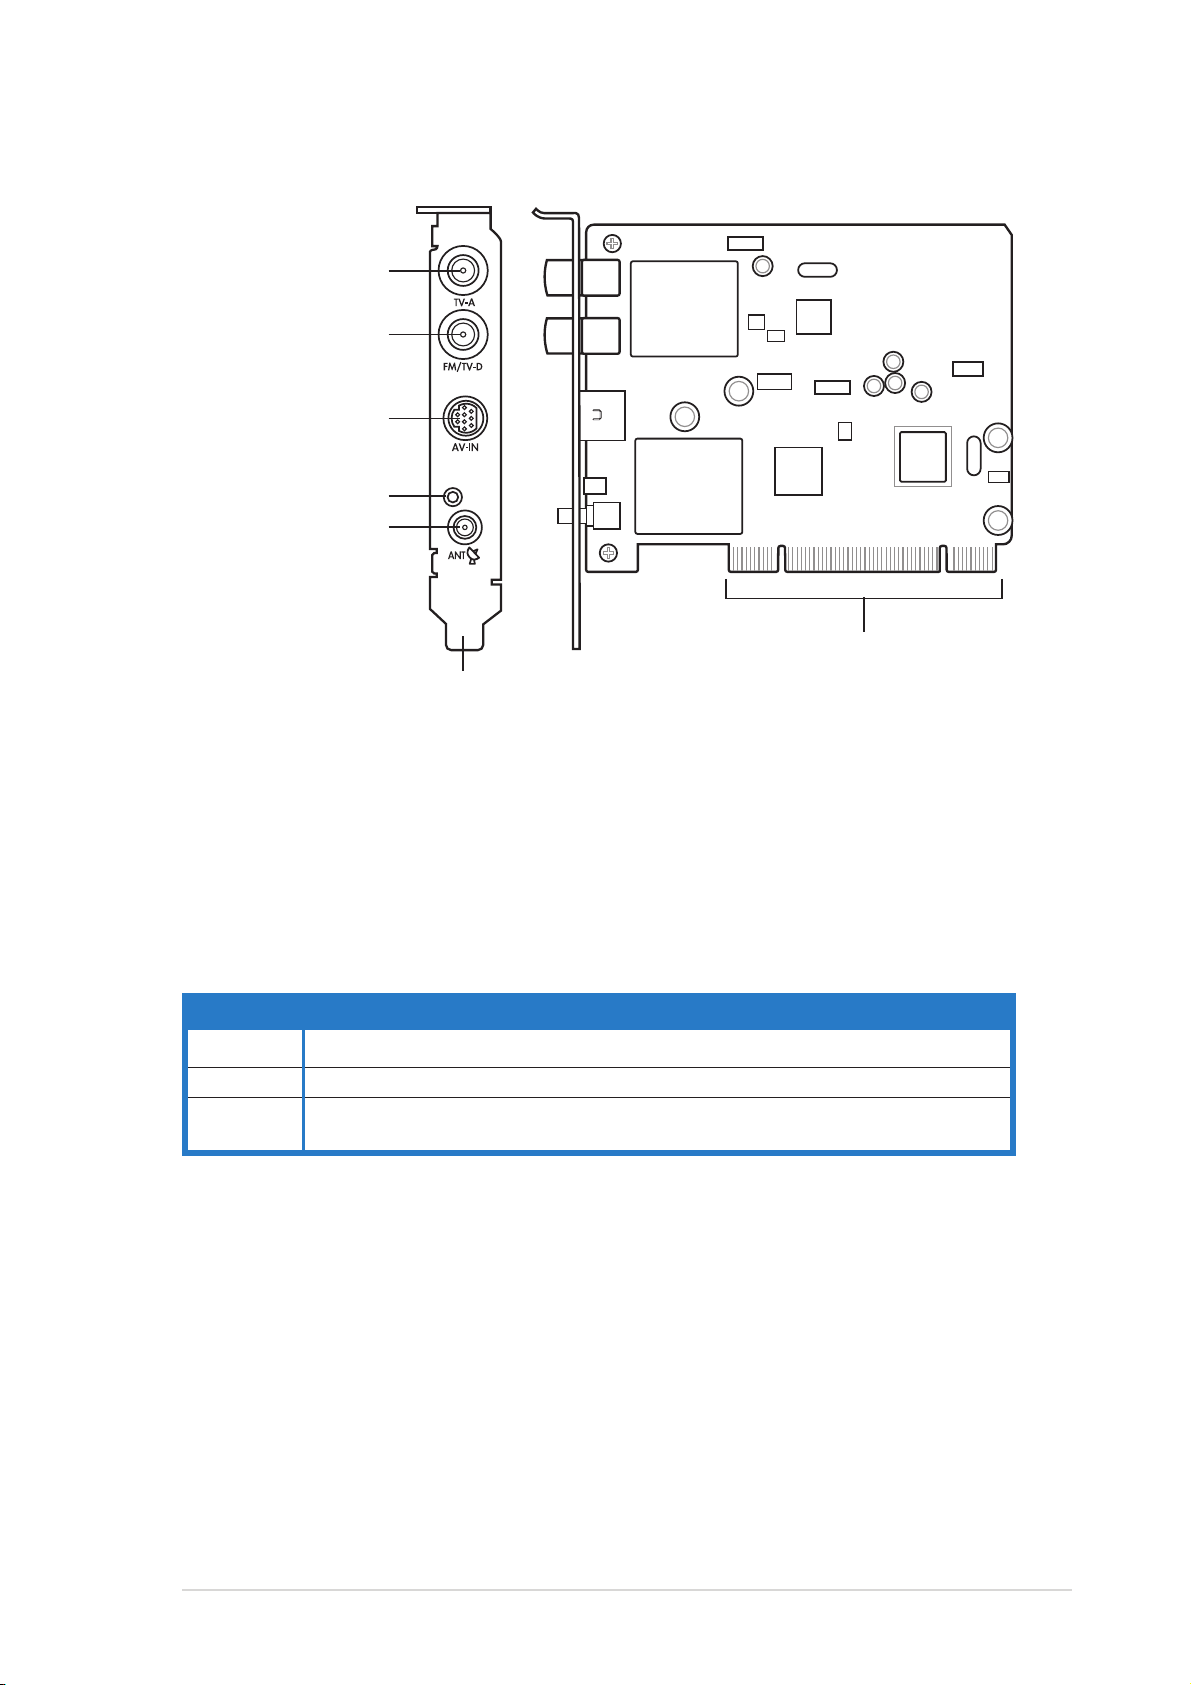
1.4 Card layout
Analog TV port
Digital TV/
FM radio port
Audio-Video port
Wi-Fi activity LED
Wi-Fi antenna port
BracketBracket
Bracket
BracketBracket
PCI connectorsPCI connectors
PCI connectors
PCI connectorsPCI connectors
1.5 LED indicator
The card comes with a wireless LAN activity LED. Refer to the table below
for the LED indications.
Wireless LAN LED indicationsWireless LAN LED indications
Wireless LAN LED indications
Wireless LAN LED indicationsWireless LAN LED indications
StatusStatus
Status
StatusStatus
OnOn
O n The WiFi-TV is on but has no data activity
OnOn
OffOff
O f f The WiFi-TV card is off
OffOff
FlashingFlashing
Flashing The WiFi-TV card is transmitting and/or receiving data
FlashingFlashing
The WiFi-TV card scanning for available access points or another wireless device
IndicationIndication
Indication
IndicationIndication
ASUS WiFi-TVASUS WiFi-TV
ASUS WiFi-TV
ASUS WiFi-TVASUS WiFi-TV
1-51-5
1-5
1-51-5
Page 16

1-61-6
1-6
1-61-6
Chapter 1: Product introductionChapter 1: Product introduction
Chapter 1: Product introduction
Chapter 1: Product introductionChapter 1: Product introduction
Page 17

This chapter provides step by step
instructions on how to install card and
the card drivers and utilities to your
computer.
Installation
2
Page 18
2.1 Card installation
2.1.12.1.1
2.1.1
2.1.12.1.1
Before installing the WiFi-TV card, make sure that your system meets the
following requirements.
• Intel
AMD Athlon™ processor
• Windows
• 64 MB system memory (minimum)
• Microsoft DirectX 9.0 or higher
• Windows Media Player 9 or higher
• Optical drive for utilities and driver installation
• Available PCI slot
• Local digital or analog cable TV subscription
2.1.22.1.2
2.1.2
2.1.22.1.2
System requirementsSystem requirements
System requirements
System requirementsSystem requirements
®
Pentium™ 4 600+ series processor
®
2000/XP/2003 Server
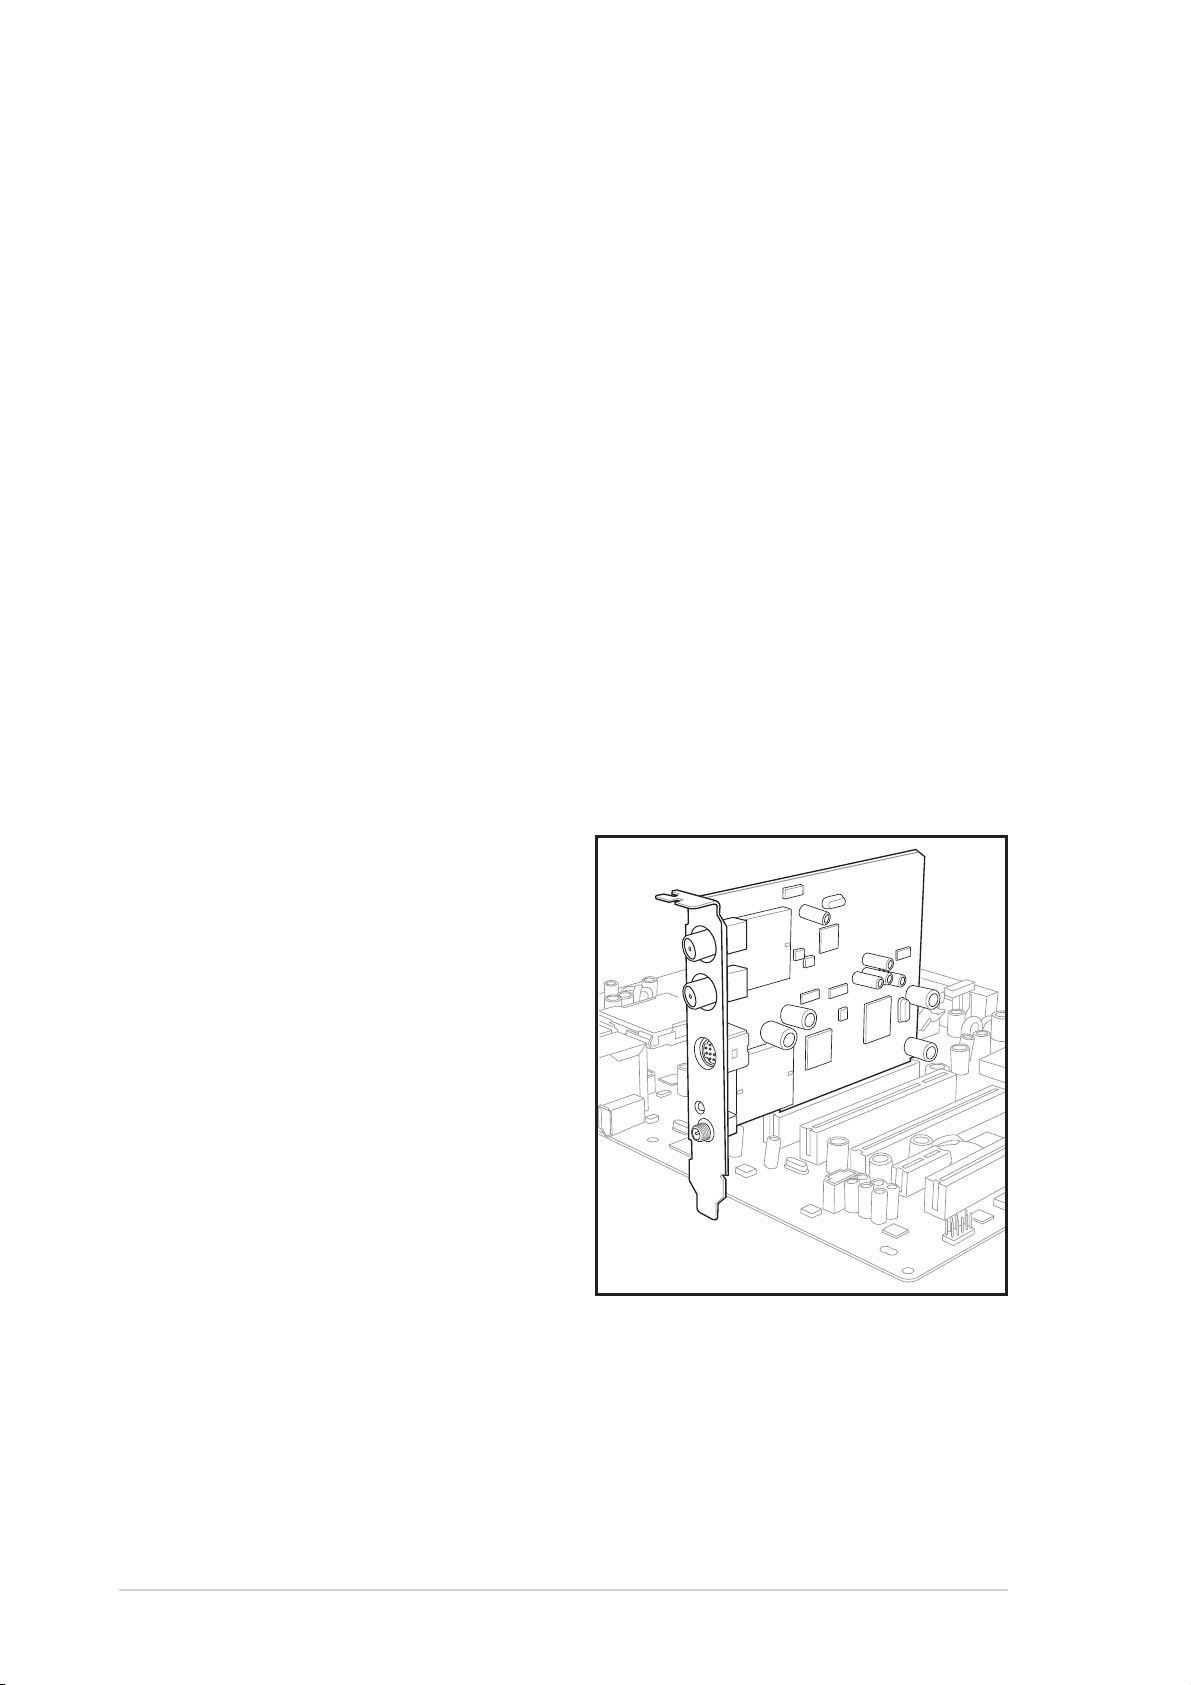
Installing the cardInstalling the card
Installing the card
Installing the cardInstalling the card
To install the WiFi-TV card:
1. Remove the system unit
cover (if your motherboard is
already installed in a chassis).
2. Remove the bracket opposite
the PCI slot that you intend
to use. Keep the screw for
later use.
3. Align the card connector with
the slot and press firmly until
the card is completely seated
on the slot. Refer to the
drawing on the right.
4. Secure the card to the
chassis with the screw you
removed earlier.
5. Replace the system cover.
2-22-2
2-2
2-22-2
Chapter 2: InstallationChapter 2: Installation
Chapter 2: Installation
Chapter 2: InstallationChapter 2: Installation
Page 19

2.2 Connecting devices and accessories
2.2.12.2.1
2.2.1
2.2.12.2.1
If you have a digital cable TV
subscription, insert the cable TV
connector to the cable port labeled
TV-D to receive digital TV signals. You
can also connect the bundled FM radio
antenna to this port.
2.2.22.2.2
2.2.2
2.2.22.2.2
If you have an analog cable TV
subscription, you can connect the
cable TV connector to the cable port
on connector to the lower coaxial cable
port to receive analog TV signals.
Digital cable TV and FM radioDigital cable TV and FM radio
Digital cable TV and FM radio
Digital cable TV and FM radioDigital cable TV and FM radio
Analog cable TVAnalog cable TV
Analog cable TV
Analog cable TVAnalog cable TV
If the TV standard in your
location is NTSC, use the PAL/
SECAM to NTSC RF adapter to
receive cable TV signals. Refer to
the Appendix for details.
2.2.22.2.2
2.2.2
2.2.22.2.2
If you want to watch TV on your
television set or record TV shows on
your VCR, DVD recorder or camcorder,
you can use the supplied audio-video
cable to connect these appliances.
Connect one end of the audio-video
cable to the AV-IN port, then connect
the plugs to the appliance. Refer to the
plug specifications table on the next
page.
Television, VCR, or camcorderTelevision, VCR, or camcorder
Television, VCR, or camcorder
Television, VCR, or camcorderTelevision, VCR, or camcorder
ASUS WiFi-TVASUS WiFi-TV
ASUS WiFi-TV
ASUS WiFi-TVASUS WiFi-TV
2-32-3
2-3
2-32-3
Page 20

Audio-Video cable plugsAudio-Video cable plugs
Audio-Video cable plugs
Audio-Video cable plugsAudio-Video cable plugs
PlugPlug
Plug
PlugPlug
2.2.32.2.3
2.2.3
2.2.32.2.3
Wi-Fi antennaWi-Fi antenna
Wi-Fi antenna
Wi-Fi antennaWi-Fi antenna
Name (Color)Name (Color)
Name (Color)
Name (Color)Name (Color)
S-Video S-Video
S-Video (black) television/VCR/camcorder with S-Video port
S-Video S-Video
Video In Video In
Video In (yellow) TV/VCR with a composite Video In port
Video In Video In
Left Audio In Left Audio In
Left Audio In (white) TV/VCR with a composite Left Audio In port
Left Audio In Left Audio In
Right Audio In Right Audio In
Right Audio In (red) TV/VCR with a composite Right Audio In port
Right Audio In Right Audio In
Connects to aConnects to a
Connects to a
Connects to aConnects to a
The multi-directional, moveable, and dual-band antenna maximizes the
WiFi-TV wireless coverage.
To install the antenna:
1. Locate the wireless LAN
antenna port on the card
bracket.
2. Connect the antenna twist-on
connector (female) to the
wireless LAN antenna port
(male).
3. Place the antenna at an
elevated location to enhance
your wireless coverage.
• Do not place the antenna under your table or in a closed
compartment.
• The speed of wireless transmission decreases as you move farther
from the access point. To achieve faster data transmission, minimize
the distance between the WiFi-TV and the access point
(Infrastructure mode) or the other wireless device.
2-42-4
2-4
2-42-4
Chapter 2: InstallationChapter 2: Installation
Chapter 2: Installation
Chapter 2: InstallationChapter 2: Installation
Page 21

Operating rangeOperating range
Operating range
Operating rangeOperating range
The WiFi-TV range is dependent on the operating environment. Every home
or office layout varies in obstacles, barriers, or wall types that could reflect
or absorb radio signals. For example, two wireless devices in an open space
can achieve an operating distance of up to 200 ft, while the same devices
can only achieve up to 80 ft when used indoors.
By default, the device automatically adjusts the data rate to maintain an
operational wireless transmission. Therefore, a wireless device that is close
to the access point may operate at higher speeds while a wireless device
far from the access point may operate at lower speeds.
Site surveySite survey
Site survey
Site surveySite survey
A site survey (provided with the ASUS WiFi-TV card) analyzes the
installation environment and recommends the best location for wireless
LAN devices and access points.
ASUS WiFi-TVASUS WiFi-TV
ASUS WiFi-TV
ASUS WiFi-TVASUS WiFi-TV
2-52-5
2-5
2-52-5
Page 22

2.3 Driver installation
The support CD that came with the WiFi-TV package contains the drivers
and utilities that you can install to avail all card features. Make sure that
you install all necessary motherboard drivers and utilities before installing
the WiFi-TV drivers.
The contents of the support CD may change at any time without notice.
Visit the ASUS website (www.asus.com) for updates.
2.3.12.3.1
2.3.1
2.3.12.3.1
Running the support CDRunning the support CD
Running the support CD
Running the support CDRunning the support CD
Place the support CD to the optical drive. The CD automatically displays the
Drivers Drivers
Dri ve rs menu if Autorun is enabled in your computer.
Drivers Drivers
Click an icon toClick an icon to
Click an icon to
Click an icon toClick an icon to
display supportdisplay support
display support
display supportdisplay support
CD/motherboardCD/motherboard
CD/motherboard
CD/motherboardCD/motherboard
informationinformation
information
informationinformation
Click an item to installClick an item to install
Click an item to install
Click an item to installClick an item to install
Autorun Autorun
If
Autorun is NOT enabled in your computer, browse the contents of
Autorun Autorun
the support CD to locate the file ASSETUP.EXE from the BIN folder.
ASSETUP.EXEASSETUP.EXE
ASSETUP.EXE to run the CD.
ASSETUP.EXEASSETUP.EXE
2.3.22.3.2
2.3.2
2.3.22.3.2
Double-click the
Drivers menuDrivers menu
Drivers menu
Drivers menuDrivers menu
The drivers menu shows the available device drivers and utilities. Install the
necessary drivers to activate the card features
ASUS Hybrid TV Tuner Card ApplicationASUS Hybrid TV Tuner Card Application
ASUS Hybrid TV Tuner Card Application
ASUS Hybrid TV Tuner Card ApplicationASUS Hybrid TV Tuner Card Application
Installs the TV tuner driver.
ASUS PowerCinema ApplicationASUS PowerCinema Application
ASUS PowerCinema Application
ASUS PowerCinema ApplicationASUS PowerCinema Application
Installs the PowerCinema application.
ASUS Wireless LAN adapter DriverASUS Wireless LAN adapter Driver
ASUS Wireless LAN adapter Driver
ASUS Wireless LAN adapter DriverASUS Wireless LAN adapter Driver
Installs the driver and utilities for the wireless LAN adapter.
2-62-6
2-6
2-62-6
Chapter 2: InstallationChapter 2: Installation
Chapter 2: Installation
Chapter 2: InstallationChapter 2: Installation
Page 23

2.3.32.3.3
2.3.3
2.3.32.3.3
ManualManual
The
Manual menu contains the user manual(s) for third party components
ManualManual
and applications.
Manual menuManual menu
Manual menu
Manual menuManual menu
Most user manual files are in Portable Document Format (PDF). Install
the Adobe Acrobat Reader application from the
opening a user manual file.
2.3.42.3.4
2.3.4
2.3.42.3.4
Click the
also find this information on the inside front cover of this user guide.
ASUS contact informationASUS contact information
ASUS contact information
ASUS contact informationASUS contact information
Contact Contact
Contact tab to display the ASUS contact information. You can
Contact Contact
Utilities Utilities
Utilities tab before
Utilities Utilities
ASUS WiFi-TVASUS WiFi-TV
ASUS WiFi-TV
ASUS WiFi-TVASUS WiFi-TV
2-72-7
2-7
2-72-7
Page 24

2.3.52.3.5
2.3.5
2.3.52.3.5
Wi-Fi driver and utilities installationWi-Fi driver and utilities installation
Wi-Fi driver and utilities installation
Wi-Fi driver and utilities installationWi-Fi driver and utilities installation
If you are using a Windows® operating system, your computer
auto-detects the WiFi-TV during start-up and displays an
Hardware Wizard Hardware Wizard
Hardware Wizard window. Click
Hardware Wizard Hardware Wizard
following instructions.
Cancel Cancel
Cancel then proceed with the
Cancel Cancel
Add NewAdd New
Add New
Add NewAdd New
To install the Wi-Fi driver and utilities:
1. Place the WiFi-TV card support CD to the optical drive.
2. The CD automatically displays the Drivers menu. See page 2-6 for details.
3. Click
ASUS Wireless LAN Utility and DriverASUS Wireless LAN Utility and Driver
ASUS Wireless LAN Utility and Driver. The ASUS Wireless
ASUS Wireless LAN Utility and DriverASUS Wireless LAN Utility and Driver
LAN Card installation window appears.
4. Click
Install ASUS WLAN Card Utilities/DriverInstall ASUS WLAN Card Utilities/Driver
Install ASUS WLAN Card Utilities/Driver.
Install ASUS WLAN Card Utilities/DriverInstall ASUS WLAN Card Utilities/Driver
5. Follow screen instructions to complete installation.
6. When finished, restart your computer.
®®
®
WindowsWindows
Windows
WindowsWindows
If you are using Windows
XP, a
Wireless OptionWireless Option
Wireless Option
Wireless OptionWireless Option
®®
XP wireless options XP wireless options
XP wireless options
XP wireless options XP wireless options
®
window appears during
startup. Select
ASUS utilities andASUS utilities and
ASUS utilities and
ASUS utilities andASUS utilities and
disable XP wirelessdisable XP wireless
disable XP wireless
disable XP wirelessdisable XP wireless
functionfunction
function,
functionfunction
2-82-8
2-8
2-82-8
Only useOnly use
Only use
Only useOnly use
then click
Make sure you select the ASUS utilities option to avail of the WiFi-TV
Soft AP features.
OKOK
OK.
OKOK
Chapter 2: InstallationChapter 2: Installation
Chapter 2: Installation
Chapter 2: InstallationChapter 2: Installation
Page 25

This chapter provides information on
the Wi-Fi features of the card
including the recommended setup and
bundled utilities.
Wi-Fi features
3
Page 26

3.1 Recommended network setup
You can use the ASUS WiFi-TV in various wireless network configurations.
After installing the card and the wireless LAN adapter drivers to your
computer, select the most appropriate configuration for your home or
office wireless network.
The following descriptions are for reference only and may not exactly
match your actual network configuration.
3.1.13.1.1
3.1.1
3.1.13.1.1
When in
Ad-hoc modeAd-hoc mode
Ad-hoc mode
Ad-hoc modeAd-hoc mode
Ad-hoc Ad-hoc
Ad-hoc mode, the WiFi-TV
Ad-hoc Ad-hoc
connects to another wireless device
(also called station) within its
operating range. Select this
configuration when no access point
(AP) is present in your wireless
network.
3.1.23.1.2
3.1.2
3.1.23.1.2
Infrastructure modeInfrastructure mode
Infrastructure mode
Infrastructure modeInfrastructure mode
WiFi-TVWiFi-TV
WiFi-TV
WiFi-TVWiFi-TV
Station 1Station 1
Station 1
Station 1Station 1
Station 2Station 2
Station 2
Station 2Station 2
MODE
Station 3Station 3
Station 3
Station 3Station 3
Infrastructure Infrastructure
In
Infrastructure mode, the
Infrastructure Infrastructure
wireless network is centered on an
access point (AP) that provides a
central link for wireless clients to
communicate with each other or
with a wired network.
In this setup, the WiFi-TV functions
as a wireless client/station that
connects to an AP to establish
connection to a wired or wireless
LAN.
3-23-2
3-2
3-23-2
InternetInternet
Internet
InternetInternet
Station 1Station 1
Station 1
Station 1Station 1
ADSLADSL
ADSL
ADSLADSL
ModemModem
Modem
ModemModem
WiFi-TVWiFi-TV
WiFi-TV
WiFi-TVWiFi-TV
Station 2Station 2
Station 2
Station 2Station 2
Chapter 3: Wi-Fi featuresChapter 3: Wi-Fi features
Chapter 3: Wi-Fi features
Chapter 3: Wi-Fi featuresChapter 3: Wi-Fi features
AccessAccess
Access
AccessAccess
PointPoint
Point
PointPoint
Page 27

3.1.33.1.3
3.1.3
3.1.33.1.3
Software Access Point (Soft AP)Software Access Point (Soft AP)
Software Access Point (Soft AP)
Software Access Point (Soft AP)Software Access Point (Soft AP)
You can configure the WiFi-TV as a software access point (Soft AP). In this
mode, the WiFi-TV becomes the access point that connects wireless clients
to the Internet or network printer.
Set WiFi-TV to this mode if:
®
• you are using Windows
2000/XP/2003 Server operating system
• the motherboard has an onboard Ethernet/Gigabit LAN adapter
The WiFi-TV Soft AP feature can support an unlimited number of wireless
clients and is ideal for homes with several computers but with only a single
Internet connection and/or one printer.
InternetInternet
Internet
InternetInternet
MODE
Client 1Client 1
Client 1
Client 1Client 1
ADSL ModemADSL Modem
ADSL Modem
ADSL ModemADSL Modem
Client 2Client 2
Client 2
Client 2Client 2
Printer 1Printer 1
Printer 1
Printer 1Printer 1
WiFi-TVWiFi-TV
WiFi-TV
WiFi-TVWiFi-TV
Client 3Client 3
Client 3
Client 3Client 3
Client 4Client 4
Client 4
Client 4Client 4
ASUS WiFi-TVASUS WiFi-TV
ASUS WiFi-TV
ASUS WiFi-TVASUS WiFi-TV
3-33-3
3-3
3-33-3
Page 28

3.1.43.1.4
3.1.4
3.1.43.1.4
Wireless bridge (Wireless Distribution System)Wireless bridge (Wireless Distribution System)
Wireless bridge (Wireless Distribution System)
Wireless bridge (Wireless Distribution System)Wireless bridge (Wireless Distribution System)
In a wireless bridge setup, the WiFi-TV connects two or more APs while
maintaining connection to its wireless clients. The wireless bridge feature
of the WiFi-TV is a cost-effective solution for integrating several wireless
networks.
Printer 2Printer 2
Printer 2
InternetInternet
Internet
InternetInternet
ADSL ModemADSL Modem
ADSL Modem
ADSL ModemADSL Modem
MODE
Printer 1Printer 1
Printer 1
Printer 1Printer 1
Printer 2Printer 2
Client 1Client 1
Client 1
Client 1Client 1
MODE
Client 1Client 1
Client 1
Client 1Client 1
AccessAccess
Access
AccessAccess
Point 1Point 1
Point 1
Point 1Point 1
Client 2Client 2
Client 2
Client 2Client 2
Client 1Client 1
Client 1
Client 1Client 1
Client 2Client 2
Client 2
Client 2Client 2
WiFi-TVWiFi-TV
WiFi-TV
WiFi-TVWiFi-TV
AccessAccess
Access
AccessAccess
Point 2Point 2
Point 2
Point 2Point 2
Client 2Client 2
Client 2
Client 2Client 2
3-43-4
3-4
3-43-4
Chapter 3: Wi-Fi featuresChapter 3: Wi-Fi features
Chapter 3: Wi-Fi features
Chapter 3: Wi-Fi featuresChapter 3: Wi-Fi features
Page 29

3.2 Using the One Touch wizard
The One Touch wizard allows you to configure the WiFi-TV through stepby-step instructions. The wizard helps you to:
• Configure the WiFi-TV as an access point, and
• Set the Internet connection sharing feature.
Make sure that you have selected the most appropriate configuration for
your wireless home network before you proceed. Refer to section 3.1
“Recommended network setup” for details.
3.2.13.2.1
3.2.1
3.2.13.2.1
This utility launches automatically when you restart the system after
installing the WiFi-TV drivers and utilities.
You can also launch the wizard from the desktop by clicking
All Programs All Programs
All Programs >
All Programs All Programs
3.2.23.2.2
3.2.2
3.2.23.2.2
You can create your own wireless local area network (WLAN) in your home
if your:
• home network does not have an existing access point
• computer is connected to the Internet and you intend to share this
connection to other computers/devices in your home network
• other computers/devices have an IEEE 802.11a/b/g wireless LAN
adapter (i.e. Centrino™ notebooks, PDAs with Wi-Fi feature)
• operating system is Windows
Launching the setup wizardLaunching the setup wizard
Launching the setup wizard
Launching the setup wizardLaunching the setup wizard
StartStart
Start >
StartStart
ASUS Utility ASUS Utility
ASUS Utility >
ASUS Utility ASUS Utility
Creating your own wireless LAN (One Touch)Creating your own wireless LAN (One Touch)
Creating your own wireless LAN (One Touch)
Creating your own wireless LAN (One Touch)Creating your own wireless LAN (One Touch)
WLAN Card WLAN Card
WLAN Card >
WLAN Card WLAN Card
®
2000/XP/2003 Server
One Touch WizardOne Touch Wizard
One Touch Wizard.
One Touch WizardOne Touch Wizard
To create your own wireless LAN:
1. In the
section, select
Wireless LAN (AP)Wireless LAN (AP)
Wireless LAN (AP), then
Wireless LAN (AP)Wireless LAN (AP)
select
(Recommended for home(Recommended for home
(Recommended for home
(Recommended for home(Recommended for home
users)users)
users).
users)users)
2. Click
ASUS WiFi-TVASUS WiFi-TV
ASUS WiFi-TV
ASUS WiFi-TVASUS WiFi-TV
Operation ModeOperation Mode
Operation Mode
Operation ModeOperation Mode
Create a newCreate a new
Create a new
Create a newCreate a new
One TouchOne Touch
One Touch
One TouchOne Touch
NextNext
Next.
NextNext
3-53-5
3-5
3-53-5
Page 30

3. Assign a Service Set Identifier
(SSID) for the WiFi-TV
(i.e. Tech Comm Department).
By default, the wizard uses
the computer name as the
SSID. The SSID identifies the
wireless device in a
network. All wireless
devices within a network
must have the same SSID to
establish connection.
4. Check the
Data encryption (WEP-enabled) Data encryption (WEP-enabled)
Data encryption (WEP-enabled) option if you want to
Data encryption (WEP-enabled) Data encryption (WEP-enabled)
secure your wireless network with a Wired Equivalent Privacy (WEP)
key, then click
NextNext
Next.
NextNext
The wizard automatically
configures the WiFi-TV card
settings indicates that you
have successfully created your
wireless LAN.
5. If the access point has an
enabled DHCP server, select
Obtain an IP addressObtain an IP address
Obtain an IP address
Obtain an IP addressObtain an IP address
automaticallyautomatically
automatically; otherwise,
automaticallyautomatically
assign the IP address manually
by entering the values in the IP
address field.
3-63-6
3-6
3-63-6
6. Click
Inquire the IP address with
your network administrator.
FinishFinish
Finish.
FinishFinish
Chapter 3: Wi-Fi featuresChapter 3: Wi-Fi features
Chapter 3: Wi-Fi features
Chapter 3: Wi-Fi featuresChapter 3: Wi-Fi features
Page 31

7. An
Important InformationImportant Information
Important Information
Important InformationImportant Information
window displays the WiFi-TV
settings.
Write down the SSID and
encryption settings in a piece
of paper for reference.
OKOK
Click
O K to close the window.
OKOK
All wireless computers/
devices in your home
network must have the
same settings as that of the
WiFi-TV to establish
connection.
ASUS WiFi-TVASUS WiFi-TV
ASUS WiFi-TV
ASUS WiFi-TVASUS WiFi-TV
3-73-7
3-7
3-73-7
Page 32

3.2.33.2.3
3.2.3
3.2.33.2.3
If you have an existing access point in your home network, follow these
instructions to connect the WiFi-TV to the access point.
1. Launch the One Touch wizard.
Connecting to an access pointConnecting to an access point
Connecting to an access point
Connecting to an access pointConnecting to an access point
2. Select
Wireless LAN (Station)Wireless LAN (Station)
Wireless LAN (Station),
Wireless LAN (Station)Wireless LAN (Station)
then click
The wizard scans for available
access point(s) and wireless
devices in your location.
3. Select an access point from
the list, then click
access point is marked with
the icon
The wizard connects the
WiFi-TV to the selected access
point.
Connect to otherConnect to other
Connect to other
Connect to otherConnect to other
NextNext
Next.
NextNext
NextNext
Next. An
NextNext
.
4. When connected to an access
point, the wizard displays the
connection information.
Next Next
Click
Next to configure the
Next Next
TCP/IP settings.
If the WiFi-TV fails to connect
to an access point, the wizard
instructs you to change the
WiFi-TV settings or click the
Back Back
Back button to rescan.
Back Back
3-83-8
3-8
3-83-8
Chapter 3: Wi-Fi featuresChapter 3: Wi-Fi features
Chapter 3: Wi-Fi features
Chapter 3: Wi-Fi featuresChapter 3: Wi-Fi features
Page 33

5. If the access point has an
enabled DHCP server, select
Obtain an IP addressObtain an IP address
Obtain an IP address
Obtain an IP addressObtain an IP address
automaticallyautomatically
automatically; otherwise,
automaticallyautomatically
assign the IP address manually
by entering the values in the IP
address field.
Inquire the IP address with
your network administrator.
6. Click
3.2.43.2.4
3.2.4
3.2.43.2.4
If no access point or Internet connection is present in your home network,
you can use the wizard to connect the WiFi-TV to another wireless
computer, notebook, or PDA for file or printer sharing. This is called an
Ad-hoc Ad-hoc
Ad-hoc network.
Ad-hoc Ad-hoc
To connect to another wireless computer or device:
1. Launch the One Touch wizard.
2. Select the
FinishFinish
Finish.
FinishFinish
Connecting to another wireless deviceConnecting to another wireless device
Connecting to another wireless device
Connecting to another wireless deviceConnecting to another wireless device
Connect toConnect to
Connect to
Connect toConnect to
other Wireless LANother Wireless LAN
other Wireless LAN
other Wireless LANother Wireless LAN
(Station) (Station)
(Station) option, then click
(Station) (Station)
NextNext
Next.
NextNext
3. Select a wireless device from
the list, then click
wireless device is marked with
the icon
The wizard connects the
WiFi-TV to the selected
wireless device.
ASUS WiFi-TVASUS WiFi-TV
ASUS WiFi-TV
ASUS WiFi-TVASUS WiFi-TV
.
NextNext
N ex t. A
NextNext
3-93-9
3-9
3-93-9
Page 34

The window design changes from
highlight a wireless device from the list.
4. When connected to the
wireless device, the wizard
displays the connection
information.
Next Next
Click
Next to configure the
Next Next
TCP/IP settings.
If the WiFi-TV fails to connect
to a wireless device, the
wizard instructs you to change
the WiFi-TV settings or click
Back Back
the
Back button to rescan.
Back Back
5. Assign the IP address manually
by entering the values in the IP
address field.
Wireless LAN Wireless LAN
Wireless LAN to
Wireless LAN Wireless LAN
Ad Hoc Ad Hoc
Ad Hoc when you
Ad Hoc Ad Hoc
3-103-10
3-10
3-103-10
6. Click
In an Ad-hoc network, you must specify the WiFi-TV IP address manually.
Make sure that the WiFi-TV IP address is on the same subnet as that of
the other wireless device to establish connection. For example, if the
other wireless device IP is 192.168.0.1, then the WiFi-TV IP must be
192.168.0.X, where X = 2 ~ 254).
FinishFinish
Finish.
FinishFinish
Chapter 3: Wi-Fi featuresChapter 3: Wi-Fi features
Chapter 3: Wi-Fi features
Chapter 3: Wi-Fi featuresChapter 3: Wi-Fi features
Page 35

3.2.53.2.5
3.2.5
3.2.53.2.5
Customizing your setupCustomizing your setup
Customizing your setup
Customizing your setupCustomizing your setup
If you are familiar with wireless network settings, you can configure the
WiFi-TV using the
Customized (Office and Advanced Users)Customized (Office and Advanced Users)
Customized (Office and Advanced Users) option
Customized (Office and Advanced Users)Customized (Office and Advanced Users)
in the setup wizard.
To customize the WiFi-TV setup:
1. Launch the One Touch wizard.
2. Select
wireless LAN (AP) wireless LAN (AP)
wireless LAN (AP) from
wireless LAN (AP) wireless LAN (AP)
the
then select
(Office and advanced(Office and advanced
(Office and advanced
(Office and advanced(Office and advanced
users)users)
users).
users)users)
3. Click
Create a newCreate a new
Create a new
Create a newCreate a new
Operation Mode Operation Mode
Operation Mode field,
Operation Mode Operation Mode
CustomizedCustomized
Customized
CustomizedCustomized
NextNext
Next.
NextNext
4. Assign a Service Set Identifier
(SSID) for the WiFi-TV
(i.e. Tech Comm Department).
By default, the wizard uses
the computer name as the
SSID. The SSID identifies the
wireless device in a
network. All wireless
devices within a network
must have the same SSID to
establish connection.
5. Select the WiFi-TV card channel or check the
Selection Selection
Selection option to allow the wizard to assign the clearest channel.
Selection Selection
If you specified a channel, all wireless devices within the network must
use the same channel to establish connection.
6. Click
ASUS WiFi-TVASUS WiFi-TV
ASUS WiFi-TV
ASUS WiFi-TVASUS WiFi-TV
Next Next
Next to continue.
Next Next
Auto ChannelAuto Channel
Auto Channel
Auto ChannelAuto Channel
3-113-11
3-11
3-113-11
Page 36

7. Set the
Authentication Authentication
Authentication to
Authentication Authentication
SharedShared
Shared. Refer to the table
SharedShared
NetworkNetwork
Network
NetworkNetwork
Open Open
Open or
Open Open
below for a comparison of the
network authentication
methods.
Network authentication methodsNetwork authentication methods
Network authentication methods
Network authentication methodsNetwork authentication methods
MethodMethod
Method
MethodMethod
OpenOpen
Open The WiFi-TV accepts connection requests from any wireless device within
OpenOpen
SharedShared
Shared Only wireless device(s) with the same encryption are allowed connection
SharedShared
8. Enable
Data EncryptionData Encryption
Data Encryption,
Data EncryptionData Encryption
then click
9. When you enable
EncryptionEncryption
Encryption, select the Wired
EncryptionEncryption
DescriptionDescription
Description
DescriptionDescription
its operating range.
to the WiFi-TV.
NextNext
Next.
NextNext
DataData
Data
DataData
Equivalent Privacy (WEP)
encryption
Key LengthKey Length
Key Length, then select the
Key LengthKey Length
Key Format Key Format
Key Format and
Key Format Key Format
generation mode.
3-123-12
3-12
3-123-12
Refer to the next page for
ways on how to set the
WEP encryption keys.
Assign the WEP keys then click
NextNext
Next.
NextNext
Chapter 3: Wi-Fi featuresChapter 3: Wi-Fi features
Chapter 3: Wi-Fi features
Chapter 3: Wi-Fi featuresChapter 3: Wi-Fi features
Page 37

Two ways to assign WEP keysTwo ways to assign WEP keys
Two ways to assign WEP keys
Two ways to assign WEP keysTwo ways to assign WEP keys
Manual AssignmentManual Assignment
Manual Assignment. For a 64-bit encryption, enter 10 hexadecimal digits
Manual AssignmentManual Assignment
(0 ~ 9, a ~ f, A ~ F) or five ASCII characters in each of the four WEP keys.
For 128-bit encryption enter 26 hexadecimal digits (0 ~ 9, a ~ f, A ~ F) or
13 ASCII characters in each of the four WEP keys.
Automatic GenerationAutomatic Generation
Automatic Generation. Type a combination of up to 64 letters,
Automatic GenerationAutomatic Generation
numbers, or symbols in the
Passphrase Passphrase
Passphrase field. The utility uses an
Passphrase Passphrase
algorithm to generate four WEP keys based on the typed combination.
10. Select
address automaticallyaddress automatically
address automatically;
address automaticallyaddress automatically
Obtain an IPObtain an IP
Obtain an IP
Obtain an IPObtain an IP
otherwise, assign the IP
address manually by entering
the values in the IP address
field.
11. Click
FinishFinish
Finish.
FinishFinish
12. The wizard configures the
WiFi-TV card settings, then
displays an
Information Information
Information window.
Information Information
ImportantImportant
Important
ImportantImportant
Write down the SSID and
encryption settings in a piece
of paper for reference.
OKOK
Click
O K to close the window.
OKOK
All wireless computers/
devices in your home network
must have the same settings
as that of the WiFi-TV to
establish connection to the
Internet.
ASUS WiFi-TVASUS WiFi-TV
ASUS WiFi-TV
ASUS WiFi-TVASUS WiFi-TV
3-133-13
3-13
3-133-13
Page 38

3.3 Other software support
The WiFi-TV comes with several utilities to configure and set up the
WiFi-TV in your home or office network. The following applications are
automatically installed when you install the WiFi-TV drivers and utilities.
The bundled software applications are subject to change without notice.
Visit the ASUS website for updates.
3.3.13.3.1
3.3.1
3.3.13.3.1
Control CenterControl Center
Control Center
Control CenterControl Center
Use this utility to launch the Wireless Settings, Mobile Manager, and Site
Monitor applications. During system startup, the Control Center launches
automatically and displays an icon in the taskbar. This icon provides
Internet connection and link quality indications.
Control Center iconsControl Center icons
Control Center icons
Control Center iconsControl Center icons
The Control Center icon changes automatically to indicate the WiFi-TV
mode, Internet connection status, and link quality to an access point or
another wireless device. Refer to the table below for Control Center icon
indications.
Infrastructure modeInfrastructure mode
Infrastructure mode (WiFi-TV to an access point)
Infrastructure modeInfrastructure mode
IconIcon
Icon
IconIcon
IndicationIndication
Indication
IndicationIndication
IconIcon
Icon
IconIcon
IndicationIndication
Indication
IndicationIndication
Excellent link quality and Excellent link quality but not
connected to the Internet connected to the Internet
Good link quality and Good link quality but not
connected to the Internet connected to the Internet
Fair link quality and Fair link quality but not
connected to the Internet connected to the Internet
Poor link quality but Poor link quality and not
connected to the Internet connected to the Internet
Not linked but connected Not linked and not
to the Internet connected to the Internet
Ad-hoc mode Ad-hoc mode
Ad-hoc mode (WiFi-TV to another wireless device)
Ad-hoc mode Ad-hoc mode
IconIcon
Icon
IconIcon
IndicationIndication
Indication
IndicationIndication
The WiFi-TV is connected to a wireless device.
The WiFi-TV is not connected to a wireless device.
The WiFi-TV is connected to the Internet.
3-143-14
3-14
3-143-14
Chapter 3: Wi-Fi featuresChapter 3: Wi-Fi features
Chapter 3: Wi-Fi features
Chapter 3: Wi-Fi featuresChapter 3: Wi-Fi features
Page 39

Access point modeAccess point mode
Access point mode
Access point modeAccess point mode
IconIcon
Icon
IconIcon
Right-click menuRight-click menu
Right-click menu
Right-click menuRight-click menu
IndicationIndication
Indication
IndicationIndication
The WiFi-TV is in access point mode.
Right-clicking the Control Center icon
displays the WiFi-TV software
applications. Refer to the succeeding
sections for details on these
applications.
Left-click menuLeft-click menu
Left-click menu
Left-click menuLeft-click menu
Left-clicking the Control Center icon
displays the left-click menu.
Search & Connect Search & Connect
Search & Connect – View available wireless networks within range.
Search & Connect Search & Connect
Wireless Option Wireless Option
Wireless Option – This window
Wireless Option Wireless Option
allows you to select the utility to use
in the configuring the WiFi-TV. Select
“Only use ASUS utilities and“Only use ASUS utilities and
“Only use ASUS utilities and
“Only use ASUS utilities and“Only use ASUS utilities and
disable Windows wirelessdisable Windows wireless
disable Windows wireless
disable Windows wirelessdisable Windows wireless
function” function”
function” to avail all WiFi-TV
function” function”
features.
ASUS WiFi-TVASUS WiFi-TV
ASUS WiFi-TV
ASUS WiFi-TVASUS WiFi-TV
3-153-15
3-15
3-153-15
Page 40

3.3.23.3.2
3.3.2
3.3.23.3.2
Wireless Settings Wireless Settings
The
Wireless Settings is the main interface that allows you to control
Wireless Settings Wireless Settings
Wireless SettingsWireless Settings
Wireless Settings
Wireless SettingsWireless Settings
the WiFi-TV. Use the Wireless Settings to view the operational and
connection status, or to modify the WiFi-TV configuration.
To launch the Wireless Settings utility, click the
Center Center
Center icon on the desktop or right-click the Control Center icon on the
Center Center
taskbar, then select
Wireless Settings Wireless Settings
Wireless Settings from the menu.
Wireless Settings Wireless Settings
ASUS WLAN ControlASUS WLAN Control
ASUS WLAN Control
ASUS WLAN ControlASUS WLAN Control
Click the icons on the left panel to display the information or configuration
sheet on the right.
Tabbed property sheetsTabbed property sheets
Tabbed property sheets
Tabbed property sheetsTabbed property sheets
IconsIcons
Icons
IconsIcons
Link statusLink status
Link status
Link statusLink status
Control buttonsControl buttons
Control buttons
Control buttonsControl buttons
Help Help
Click
Help for detailed information on the Wireless Settings.
Help Help
3-163-16
3-16
3-163-16
Chapter 3: Wi-Fi featuresChapter 3: Wi-Fi features
Chapter 3: Wi-Fi features
Chapter 3: Wi-Fi featuresChapter 3: Wi-Fi features
Page 41

3.3.33.3.3
3.3.3
3.3.33.3.3
Mobile Manager Mobile Manager
The
Mobile Manager is a convenient tool to set up and manage multiple
Mobile Manager Mobile Manager
alternative network settings for different locations. You must set up this
utility once so you can easily switch configurations when changing
locations.
To launch the Mobile Manager utility:
Mobile ManagerMobile Manager
Mobile Manager
Mobile ManagerMobile Manager
Click the
Mobile ManagerMobile Manager
Mobile Manager from the Windows
Mobile ManagerMobile Manager
OROR
OR
OROR
Right-click the
Manager Manager
Manager from the menu.
Manager Manager
StartStart
Start >
StartStart
All ProgramsAll Programs
All Programs >
All ProgramsAll Programs
Control CenterControl Center
Control Center icon on the taskbar, then select
Control CenterControl Center
ASUS Utility ASUS Utility
ASUS Utility >
ASUS Utility ASUS Utility
®
desktop.
WLAN Card WLAN Card
WLAN Card >
WLAN Card WLAN Card
MobileMobile
Mobile
MobileMobile
You can use the Mobile Manager utility main window to create, edit, or
activate a configuration. The main window displays the menu bar, tool bar,
and existing configurations.
Click the toolbar buttons to access common commands in the Mobile
Manager utility. All toolbar button commands are also available from the
menu bar.
See the help file for details on the ASUS Mobile Manager.
ASUS WiFi-TVASUS WiFi-TV
ASUS WiFi-TV
ASUS WiFi-TVASUS WiFi-TV
3-173-17
3-17
3-173-17
Page 42

3.3.43.3.4
3.3.4
3.3.43.3.4
Site Monitor Site Monitor
The
Site Monitor utility measures the signal-to-noise (SNR) values of all
Site Monitor Site Monitor
Site MonitorSite Monitor
Site Monitor
Site MonitorSite Monitor
available wireless networks. Use this utility to determine the best location
to place the WiFi-TV.
To launch the Site Monitor:
1. Click the
CardCard
C ar d >
CardCard
Right-click the
MonitorMonitor
Monitor from the menu.
MonitorMonitor
2. Click
StartStart
Start, then select
StartStart
Site MonitorSite Monitor
Site Monitor, or
Site MonitorSite Monitor
Control CenterControl Center
Control Center icon on the taskbar, then select
Control CenterControl Center
OK OK
O K when the
OK OK
Site Survey Message Site Survey Message
Site Survey Message appears.
Site Survey Message Site Survey Message
ProgramsPrograms
Programs >
ProgramsPrograms
ASUS Utility ASUS Utility
ASUS Utility >
ASUS Utility ASUS Utility
WLAN WLAN
WLAN
WLAN WLAN
SiteSite
Site
SiteSite
The Site Monitor main window displays the available wireless connections
and the signal-to-noise (SNR) value of a selected connection.
3-183-18
3-18
3-183-18
• Some AP disable their SSID broadcasting to hide themselves from the
Site Monitor. You can join these APs if you specify the same SSID.
• Click
Help Help
Help for details on the ASUS Site Monitor.
Help Help
Chapter 3: Wi-Fi featuresChapter 3: Wi-Fi features
Chapter 3: Wi-Fi features
Chapter 3: Wi-Fi featuresChapter 3: Wi-Fi features
Page 43

This chapter provides information on
the TV features of the card and the
bundled software application.
TV features
4
Page 44

4.1 Using PowerCinema
The PowerCinema application comes with the ASUS WiFi-TV card support
CD. This application allows you to watch TV and DVDs, listen to FM radio or
music CDs, or browse pictures stored in your computer. Use the mouse or
the remote controller to navigate through the user interface. For details on
the remote controller, see the Appendix.
For more information on this application, browse and/or print the
Cyberlink PowerCinema 4.0 User’s Manual from the support CD Manual
tab. Refer to page 2-4.
4.1.14.1.1
4.1.1
4.1.14.1.1
Launching PowerCinemaLaunching PowerCinema
Launching PowerCinema
Launching PowerCinemaLaunching PowerCinema
There are three ways to launch the PowerCinema application.
®®
®
®®
(1)(1)
(1)
(1)(1)
From the WindowsFrom the Windows
From the Windows
From the WindowsFrom the Windows
StartStart
Click
Start >
StartStart
PowerCinema.PowerCinema.
PowerCinema.
PowerCinema.PowerCinema.
All Programs All Programs
All Programs >
All Programs All Programs
Start menu Start menu
Start menu
Start menu Start menu
Cyberlink PowerCinema 4.0 Cyberlink PowerCinema 4.0
Cyberlink PowerCinema 4.0 >
Cyberlink PowerCinema 4.0 Cyberlink PowerCinema 4.0
4-24-2
4-2
4-24-2
(2)(2)
(2)
(2)(2)
From the PowerCinema iconFrom the PowerCinema icon
From the PowerCinema icon
From the PowerCinema iconFrom the PowerCinema icon
Double-click the CyberLink PowerCinema icon on the
desktop.
(3)(3)
(3)
(3)(3)
From the remote controllerFrom the remote controller
From the remote controller
From the remote controllerFrom the remote controller
Press the
Home Home
Home key or any system button (except Power and
Home Home
Toggle) to launch the application. Refer to the Appendix for details on
the remote controller.
Chapter 4: TV featuresChapter 4: TV features
Chapter 4: TV features
Chapter 4: TV featuresChapter 4: TV features
Page 45

4.1.24.1.2
4.1.2
4.1.24.1.2
During initial launch, a Setup Wizard prompts you to optimize your
computer for various multimedia functions.
To optimize your computer:
1. From the Setup Wizard initial
window, click
continue.
2. Select the screen ratio of
your display device, then
click
Optimizing your computer for multimediaOptimizing your computer for multimedia
Optimizing your computer for multimedia
Optimizing your computer for multimediaOptimizing your computer for multimedia
Next Next
Next to
Next Next
NextNext
Next.
NextNext
3. Select the type of TV tuner
card, then click
If you have a digital cable TV
subscription, select
otherwise, select
4. Select the TV connection
type, then click
If you have a cable TV
subscription, select
otherwise, select
NextNext
Next.
NextNext
DigitalDigital
Digital;
DigitalDigital
AnalogAnalog
Analog.
AnalogAnalog
NextNext
Next.
NextNext
CableCable
Cable;
CableCable
AntennaAntenna
Antenna.
AntennaAntenna
ASUS WiFi-TVASUS WiFi-TV
ASUS WiFi-TV
ASUS WiFi-TVASUS WiFi-TV
4-34-3
4-3
4-34-3
Page 46

5. Select your location, then
NextNext
click
Next.
NextNext
Setting the correct
location allows the
application to select the
appropriate TV standard
and DVD region to your
location.
6. When prompted, click
Autoscan for TVAutoscan for TV
Autoscan for TV
Autoscan for TVAutoscan for TV
Channels NowChannels Now
Channels Now
Channels NowChannels Now
(recommended); otherwise,
Next Next
click
Next to continue.
Next Next
A new window appears
when you autoscan the
channels.
7. When prompted, click
Search for RadioSearch for Radio
Search for Radio
Search for RadioSearch for Radio
Stations NowStations Now
Stations Now
Stations NowStations Now
(recommended); otherwise,
Next Next
click
Next to continue.
Next Next
8. The application then prompts
you to search for stored
music files in your computer.
Search for MusicSearch for Music
Click
Search for Music
Search for MusicSearch for Music
Now Now
Now (recommended);
Now Now
otherwise, click
Next Next
Next to
Next Next
continue.
4-44-4
4-4
4-44-4
Chapter 4: TV featuresChapter 4: TV features
Chapter 4: TV features
Chapter 4: TV featuresChapter 4: TV features
Page 47

9. Select a two- or threedimensional display effect,
then click
NextNext
Next.
NextNext
10. When prompted, key-in your
name and e-mail address,
then click
NextNext
Next.
NextNext
11. Click Finish to close the
Setup Wizard and to display
the PowerCinema 4 main
menu.
You can run the Setup Wizard anytime by clicking or selecting from the
PowerCinema home page.
ASUS WiFi-TVASUS WiFi-TV
ASUS WiFi-TV
ASUS WiFi-TVASUS WiFi-TV
4-54-5
4-5
4-54-5
Page 48

4.1.34.1.3
4.1.3
4.1.34.1.3
The home page has six multimedia functions (TV, Movies, Videos, Music,
Pictures, Radio, Extras) and a configuration option (Settings) that you can
select by pressing the up/down arrow of the remote controller or by using
the mouse. To launch a function, press the OK button of the remote
controller or click the mouse.
Navigating through the home pageNavigating through the home page
Navigating through the home page
Navigating through the home pageNavigating through the home page
4.1.44.1.4
4.1.4
4.1.44.1.4
When using a mouse, each multimedia screen has a player control at the
bottom left corner of the display that allows control of the current
function. The player controls correspond to the remote controller buttons.
Using the player controlsUsing the player controls
Using the player controls
Using the player controlsUsing the player controls
Refer to the Cyberlink PowerCinema 4.0 User’s Manual from the support
CD for details on the player control.
4-64-6
4-6
4-64-6
Chapter 4: TV featuresChapter 4: TV features
Chapter 4: TV features
Chapter 4: TV featuresChapter 4: TV features
Page 49

4.1.54.1.5
4.1.5
4.1.54.1.5
Watching TVWatching TV
Watching TV
Watching TVWatching TV
The PowerCinema application allows you to watch TV on your computer.
Select
TV TV
T V from the home page, then press
TV TV
OK OK
O K from the remote controller,
OK OK
or click the mouse to display the TV screen.
Make sure that you autoscan the channels before you watch TV on your
computer. Use the PowerCinema 4
Settings Settings
Settings button from the TV screen to scan for available channels
Settings Settings
and/or configure the TV settings.
Setup Wizard Setup Wizard
Setup Wizard or click the
Setup Wizard Setup Wizard
To watch TV in full screen, highlight the TV window using the remote
controller or mouse, then press the remote controller
OK OK
O K button or click
OK OK
the mouse. To change channels, use the remote controller or the keyboard
Page Up/Page Down keys or the numeric keys.
TV buttonsTV buttons
TV buttons
TV buttonsTV buttons
ButtonsButtons
Buttons
ButtonsButtons
Live TVLive TV
Live TV Watch full screen live TV on your computer
Live TVLive TV
Recorded TVRecorded TV
Recorded TV Play, sort, and manage recorded TV programs
Recorded TVRecorded TV
ScheduleSchedule
Schedule Set the channel, program, and time for TV recording
ScheduleSchedule
TV PreviewTV Preview
TV Preview Display a thumbnail of each available channel
TV PreviewTV Preview
Program GuideProgram Guide
Program Guide View the program guide from your Electronic Program Guide (EPG)
Program GuideProgram Guide
Click this button toClick this button to
Click this button to
Click this button toClick this button to
provider or EPG source (Internet)
Find ProgramFind Program
Find Program Search for programs by channel or category
Find ProgramFind Program
SettingsSettings
Settings Change or adjust the signal, channel, recording, and EPG settings
SettingsSettings
ASUS WiFi-TVASUS WiFi-TV
ASUS WiFi-TV
ASUS WiFi-TVASUS WiFi-TV
4-74-7
4-7
4-74-7
Page 50

Changing the TV signalChanging the TV signal
Changing the TV signal
Changing the TV signalChanging the TV signal
If you have a digital cable TV subscription, you must change the TV signal
setting using the TV Settings window.
To change the signal setting:
1. From the TV screen, select
SettingsSettings
Settings, then press
SettingsSettings
OKOK
OK.
OKOK
2. Select
Signal Settings Signal Settings
Signal Settings from
Signal Settings Signal Settings
the TV settings window, then
press
3. Select
OKOK
OK.
OKOK
Signal Type Signal Type
Signal Type from the
Signal Type Signal Type
signal settings window, then
press
OKOK
OK.
OKOK
4-84-8
4-8
4-84-8
You can also change these settings using the
Settings Settings
Settings screen
Settings Settings
Chapter 4: TV featuresChapter 4: TV features
Chapter 4: TV features
Chapter 4: TV featuresChapter 4: TV features
Page 51

4. Select
then press
Digital Digital
Digital from the menu,
Digital Digital
OKOK
OK.
OKOK
5. Highlight the
then press
4.1.64.1.6
4.1.6
4.1.64.1.6
The PowerCinema allows you to watch DVD or VCD movies on your computer.
Watching moviesWatching movies
Watching movies
Watching moviesWatching movies
Apply Apply
Apply button,
Apply Apply
OKOK
OK.
OKOK
To watch a movie:
1. Insert the DVD or VCD movie to the optical drive. When playing DVDs,
make sure that the optical drive supports the DVD standard.
2. Select
controller, or click the mouse to start watching the movie.
3. Use the remote controller or the player control to stop, play, pause,
forward, or rewind the movie.
ASUS WiFi-TVASUS WiFi-TV
ASUS WiFi-TV
ASUS WiFi-TVASUS WiFi-TV
Movies Movies
Movies from the main menu, then press
Movies Movies
Refer to the Cyberlink PowerCinema 4.0 User’s Manual from the support
CD for details on how to watch movies, play music, and browse photos.
OK OK
O K from the remote
OK OK
4-94-9
4-9
4-94-9
Page 52

4.2 Using PowerDirector
You can create a DVD movie of your favorite home videos using the
PowerDirector application and the AV IN port of the WiFi-TV card.
4.2.14.2.1
4.2.1
4.2.14.2.1
You must adjust the sound recording settings before creating a movie.
To do this:
1. From the Windows
2. Click
and Audio Devicesand Audio Devices
and Audio Devices from
and Audio Devicesand Audio Devices
the Control Panel window,
click
DevicesDevices
Devices.
DevicesDevices
3. Click the
set the
Default device Default device
Default device to
Default device Default device
BDA Analog Audio CaptureBDA Analog Audio Capture
BDA Analog Audio Capture.
BDA Analog Audio CaptureBDA Analog Audio Capture
Adjusting the sound recording settingsAdjusting the sound recording settings
Adjusting the sound recording settings
Adjusting the sound recording settingsAdjusting the sound recording settings
®
desktop, click
Sounds, Speech,Sounds, Speech,
Sounds, Speech,
Sounds, Speech,Sounds, Speech,
Sounds and AudioSounds and Audio
Sounds and Audio
Sounds and AudioSounds and Audio
Audio Audio
Audio tab, then
Audio Audio
Sound RecordingSound Recording
Sound Recording
Sound RecordingSound Recording
713x713x
713x
713x713x
StartStart
Start, then click
StartStart
Control PanelControl Panel
Control Panel.
Control PanelControl Panel
4. Click
4.2.24.2.2
4.2.2
4.2.24.2.2
To create a movie:
1. Connect the audio and video source (i.e. camcorder, video recorder,
2. Use the PowerDirector application to capture and create movies from
ApplyApply
Apply.
ApplyApply
Creating moviesCreating movies
Creating movies
Creating moviesCreating movies
VCR) to the WiFi-TV AV IN connector. See page 2-3 to 2-4 for details.
your videos. Refer to the application help for details.
4-104-10
4-10
4-104-10
Chapter 4: TV featuresChapter 4: TV features
Chapter 4: TV features
Chapter 4: TV featuresChapter 4: TV features
Page 53

The Appendix provides information on
the wireless LAN channels, remote
controller, and TV standards in your
location.
Reference
information
A
Page 54

A.1 Wireless LAN channels
A.1.1A.1.1
A.1.1
A.1.1A.1.1
IEEE 802.11b/gIEEE 802.11b/g
IEEE 802.11b/g
IEEE 802.11b/gIEEE 802.11b/g
The IEEE 802.11b/g standard for wireless LAN allocated the 2.4 GHz
frequency band into 14 overlapping operating channels. Each channel
corresponds to a different set of frequencies. The table below shows the
center frequencies of each channel.
ChannelChannel
Channel
ChannelChannel
1 2.412 GHz 8 2.447 GHz
2 2.417 GHz 9 2.452 GHz
3 2.422 GHz 10 2.457 GHz
4 2.427 GHz 11 2.462 GHz
5 2.432 GHz 12 2.467 GHz
6 2.437 GHz 13 2.472 GHz
7 2.442 GHz 14 2.484 GHz
If several Wi-Fi devices are operating in the same vicinity, the distance
between the center frequencies of channels used must be at least
25 MHz to avoid interference.
CenterCenter
Center
CenterCenter
FrequencyFrequency
Frequency
FrequencyFrequency
ChannelChannel
Channel
ChannelChannel
CenterCenter
Center
CenterCenter
FrequencyFrequency
Frequency
FrequencyFrequency
The number of channels available for the wireless LAN adapter (in IEEE
802.11b/g) mode varies by country/region. Refer to the table below to
determine the number of channels available in your location.
Country/Region (Regulating Body)Country/Region (Regulating Body)
Country/Region (Regulating Body)
Country/Region (Regulating Body)Country/Region (Regulating Body)
Australia (ACA) Channels 1 to 13
Belgium (RTT&E/EMC/LVD) Channels 1 to 13
Bulgaria (RTT&E/EMC/LVD) Channels 1 to 13
Canada (CSA/cUL 950 3rd Edition) Channels 1 to 11
China (MII) Channels 1 to 11
Cyprus (RTT&E/EMC/LVD) Channels 1 to 13
Czech Republic (RTT&E/EMC/LVD) Channels 1 to 13
Denmark (RTT&E/EMC/LVD) Channels 1 to 13
Finland (RTT&E/EMC/LVD) Channels 1 to 13
France (RTT&E/EMC/LVD) Channels 1 to 13
Germany (RTT&E/EMC/LVD) Channels 1 to 13
Greece (RTT&E/EMC/LVD) Channels 1 to 13
Available ChannelsAvailable Channels
Available Channels
Available ChannelsAvailable Channels
A-2A-2
A-2
A-2A-2
Hong Kong (OFTA) Channels 1 to 13
Hungary (RTT&E/EMC/LVD) Channels 1 to 13
Iceland (RTT&E/EMC/LVD) Channels 1 to 13
(continued on the next page)(continued on the next page)
(continued on the next page)
(continued on the next page)(continued on the next page)
AppendixAppendix
Appendix
AppendixAppendix
: Reference information: Reference information
: Reference information
: Reference information: Reference information
Page 55

Country/Region (Regulating Body)Country/Region (Regulating Body)
Country/Region (Regulating Body)
Country/Region (Regulating Body)Country/Region (Regulating Body)
Ireland (RTT&E/EMC/LVD) Channels 1 to 13
Italy (RTT&E/EMC/LVD) Channels 1 to 13
Japan (TELEC) Channels 1 to 14
Luxembourg (RTT&E/EMC/LVD) Channels 1 to 13
Malaysia (SIRIM/CMC) Channels 1 to 13
Mexico Channels 9 to 11
Netherlands Antilles (RTT&E/EMC/LVD) Channels 1 to 13
Netherlands/Holland (RTT&E/EMC/LVD) Channels 1 to 13
New Zealand (PTC) Channels 1 to 13
Norway (RTT&E/EMC/LVD) Channels 1 to 13
Portugal (RTT&E/EMC/LVD) Channels 1 to 13
Saudi Arabia Channels 1 to 13
Singapore Channels 1 to 13
South Korea (KS) Channels 1 to 13
Spain (RTT&E/EMC/LVD) Channels 1 to 13
Sweden (RTT&E/EMC/LVD) Channels 1 to 13
Available ChannelsAvailable Channels
Available Channels
Available ChannelsAvailable Channels
Switzerland (RTT&E/EMC/LVD) Channels 1 to 13
Taiwan (DGT) Channels 1 to 11
Turkey (TTAS) Channels 1 to 13
United Kingdom (RTT&E/EMC/LVD) Channels 1 to 13
United States (FCC) Channels 1 to 11
Channels 1, 6 and 11 are independent and do not overlap each other.
We recommended that you tune your wireless LAN adapter to these
channels.
A.1.2A.1.2
A.1.2
A.1.2A.1.2
IEEE 802.11aIEEE 802.11a
IEEE 802.11a
IEEE 802.11aIEEE 802.11a
The number of channels available for the wireless LAN adapter (in
IEEE 802.11a) mode varies by region. Refer to the table below to
determine the channels available in your location.
Region (Regulating Body)Region (Regulating Body)
Region (Regulating Body)
Region (Regulating Body)Region (Regulating Body)
North America 36, 40, 44, 48, 52, 56, 60, 64, 149, 153, 157, 161
Singapore 36, 40, 44, 48, 52, 56, 60, 64, 149, 153, 157, 161
Available ChannelsAvailable Channels
Available Channels
Available ChannelsAvailable Channels
Europe (ETSI) 36, 40, 44, 48, 52, 56, 60, 64, 100, 104, 108, 112, 116,
120, 124, 128, 132, 136, 140
Japan (MKK) 240, 244, 248, 252, 8, 2, 16, 36, 40, 44, 48, 52, 56, 60, 64
Taiwan (DGT) 52, 56, 60, 64, 100, 104, 108, 112, 116, 120, 124, 128,
132, 136, 140, 149, 153, 157, 161
ASUS WiFi-TVASUS WiFi-TV
ASUS WiFi-TV
ASUS WiFi-TVASUS WiFi-TV
A-3A-3
A-3
A-3A-3
Page 56

A.2 Remote controller
The ASUS remote controller allows you to operate the WiFi-TV from a
distance. Use the remote controller to navigate through the PowerCinema
windows.
Remote controller specificationsRemote controller specifications
Remote controller specifications
Remote controller specificationsRemote controller specifications
Operating rangeOperating range
Operating range 5 meters (max)
Operating rangeOperating range
Power SourcePower Source
Power Source 3V (2 x “AAA” batteries)
Power SourcePower Source
ReceiverReceiver
Receiver USB infrared receiver (supplied)
ReceiverReceiver
A.2.1A.2.1
A.2.1
A.2.1A.2.1
Using the remote controllerUsing the remote controller
Using the remote controller
Using the remote controllerUsing the remote controller
To use the remote controller:
1. Install the remote controller batteries.
2. Insert the USB plug of the remote
controller receiver to an available USB
port in your computer. Refer to the
illustration on the right.
3. Install the receiver at an unboscured
location for optimum operation.
4. Turn on your computer, then open the
PowerCinema application. Refer to
Chapter 4 for details.
5. Use the remote controller to navigate
through the PowerCinema windows.
Remote controller receiverRemote controller receiver
Remote controller receiver
Remote controller receiverRemote controller receiver
A-4A-4
A-4
A-4A-4
AppendixAppendix
Appendix
AppendixAppendix
: Reference information: Reference information
: Reference information
: Reference information: Reference information
Page 57

A.2.2A.2.2
A.2.2
A.2.2A.2.2
Back buttonBack button
Back button
Back buttonBack button
Volume controlVolume control
Volume control
Volume controlVolume control
Mute buttonMute button
Mute button
Mute buttonMute button
Remote controller layoutRemote controller layout
Remote controller layout
Remote controller layoutRemote controller layout
buttonbutton
button
buttonbutton
System buttonsSystem buttons
System buttons
System buttonsSystem buttons
LEDLED
LED
LEDLED
Navigation buttonNavigation button
Navigation button
Navigation buttonNavigation button
OK buttonOK button
OK button
OK buttonOK button
Maximize/Minimize buttonMaximize/Minimize button
Maximize/Minimize button
Maximize/Minimize buttonMaximize/Minimize button
Control buttonsControl buttons
Control buttons
Control buttonsControl buttons
Channel buttonChannel button
Channel button
Channel buttonChannel button
Record buttonRecord button
Record button
Record buttonRecord button
Last channel buttonLast channel button
Last channel button
Last channel buttonLast channel button
SubtitleSubtitle
Subtitle
SubtitleSubtitle
buttonbutton
button
buttonbutton
A.2.3A.2.3
A.2.3
A.2.3A.2.3
System buttonsSystem buttons
System buttons
System buttonsSystem buttons
ButtonButton
Button
ButtonButton
Remote controller functionsRemote controller functions
Remote controller functions
Remote controller functionsRemote controller functions
Press toPress to
Press to
Press toPress to
Turn off the computer
Launch the TV mode
Print the screen (Pictures mode)
Toggle the remote controller as mouse or vice-versa
Launch the Music mode
Launch the Pictures mode
Numeric keysNumeric keys
Numeric keys
Numeric keysNumeric keys
Language buttonLanguage button
Language button
Language buttonLanguage button
Launch the Video Mode
Play a CD/DVD movie
ASUS WiFi-TVASUS WiFi-TV
ASUS WiFi-TV
ASUS WiFi-TVASUS WiFi-TV
A-5A-5
A-5
A-5A-5
Page 58

A.2.4A.2.4
A.2.4
A.2.4A.2.4
Mouse modeMouse mode
Mouse mode
Mouse modeMouse mode
You can use the remote controller instead of the mouse to navigate
through, and select icons from the desktop. Press , then use the
navigation button to move through the desktop and the back and
maximize/minimize button for the left and right-click mouse function. Refer
to the illustration below for the function of the remote controller keys
when toggled to a mouse.
Move upMove up
Move up
Move upMove up
Move rightMove right
Move right
Move rightMove right
Left-clickLeft-click
Left-click
Left-clickLeft-click
Move rightMove right
Move right
Move rightMove right
Move downMove down
Move down
Move downMove down
Right-clickRight-click
Right-click
Right-clickRight-click
A-6A-6
A-6
A-6A-6
AppendixAppendix
Appendix
AppendixAppendix
: Reference information: Reference information
: Reference information
: Reference information: Reference information
Page 59

A.3 International TV systems
and standards
• TV systems and standards may change anytime without notice. This
list is provided for reference only.
• Make sure that your TV card conforms with the system or standard
used in your country or location.
AREAAREA
AREA
AREAAREA
TVTV
TV
TVTV
COLORCOLOR
COLOR
COLORCOLOR
STEREOSTEREO
STEREO
STEREOSTEREO
SUBTITLESUBTITLE
SUBTITLE
SUBTITLESUBTITLE
Albania B/G PAL
Argentina N PAL-N
Australia B/G PAL FM-FM Teletext
Austria B/G PAL FM-FM Teletext
Azores Is. (Portugal) B PA L
Bahamas M NTSC
Bahrain B PAL
Barbados N NTSC
Belgium B/G PAL Nicam Teletext
Bermuda M NTSC
Brazil M PAL-M MTS
Bulgaria D SECAM
Canada M NTSC MTS CC
Canary Is. B PAL
China D PAL
Colombia N NTSC
Cyprus B PAL
Czech Republic D/K SECAM/PAL
Denmark B PAL Nicam TeleText
Egypt B SECAM
Faroe Islands (DK) B PAL
Finland B/G PAL Nicam TeleText
France E/L SECAM Antiope
Gambia I PAL
Germany B/G PAL FM-FM TeleText
Germany
(prev East)
B/G SECAM/PAL
Gibraltar B PAL
Greece B/H SECAM
Hong Kong I PAL Nicam
Hungary B/G PAL Nicam
& D /K (was SECAM) (Budapest only)
Iceland B PAL
India B PAL
Indonesia B PAL
Iran H SECAM
Ireland I PAL Nicam TeleText
ASUS WiFi-TVASUS WiFi-TV
ASUS WiFi-TV
ASUS WiFi-TVASUS WiFi-TV
A-7A-7
A-7
A-7A-7
Page 60

AREAAREA
AREA
AREAAREA
Israel B/G PAL Nicam TeleText
Italy B/G PAL FM/FM TeleText
Jamaica M SECAM
Japan M NTSC Matrix
Jordan B PAL
Kenya B PAL
Korea M NTSC
Luxembourg B/G PAL TeleText
Madeira B PAL
Madagascar B SECAM
Malaysia B PAL
Malta B/G PAL
Mauritius B SECAM
Mexico M NTSC MTS CC
Monaco L/G SECAM/PAL
Morocco B SECAM
Netherlands B/G PAL FM-FM TeleText
New Zealand B/G PAL Nicam TeleText
North Korea D, D/K SECAM/PAL
Norway B/G PAL Nicam
Pakistan B PAL
Paraguay N PAL
Peru M NTSC
Philipines M NTSC
Poland D/K PAL Teletext
Portugal B/G PAL Nicam Teletext
Romania G PAL
Russia D/K SECAM
Saudi Arabia B SECAM
Seychelles I PAL
Singapore B PAL
South Africa I PAL
South Korea N NTSC
Spain B/G PAL Nicam
Sri Lanka B/G PAL
Sweden B/G PAL Nicam Teletext
Switzerland B/G PAL FM-FM TeleText
Tahiti KI SECAM
Taiwan M NTSC
Thailand B PAL
Trinidad M NTSC
Tunisia B SECAM
Turkey BPAL TeleText
Ukraine D/K SECAM
United Arab Emirates B/G PAL
United States M NTSC
United Kingdom I PAL
Vietnam M/D NTSC/SECAM
Yugoslavia B/G PAL
Zambia B/G PAL
Zimbabwe B/G PAL
TVTV
TV
TVTV
COLORCOLOR
COLOR
COLORCOLOR
STEREOSTEREO
STEREO
STEREOSTEREO
SUBTITLESUBTITLE
SUBTITLE
SUBTITLESUBTITLE
A-8A-8
A-8
A-8A-8
AppendixAppendix
Appendix
AppendixAppendix
: Reference information: Reference information
: Reference information
: Reference information: Reference information
 Loading...