

Page 1
Quick Start Guide - Introduction 第 64 頁,共 160 頁
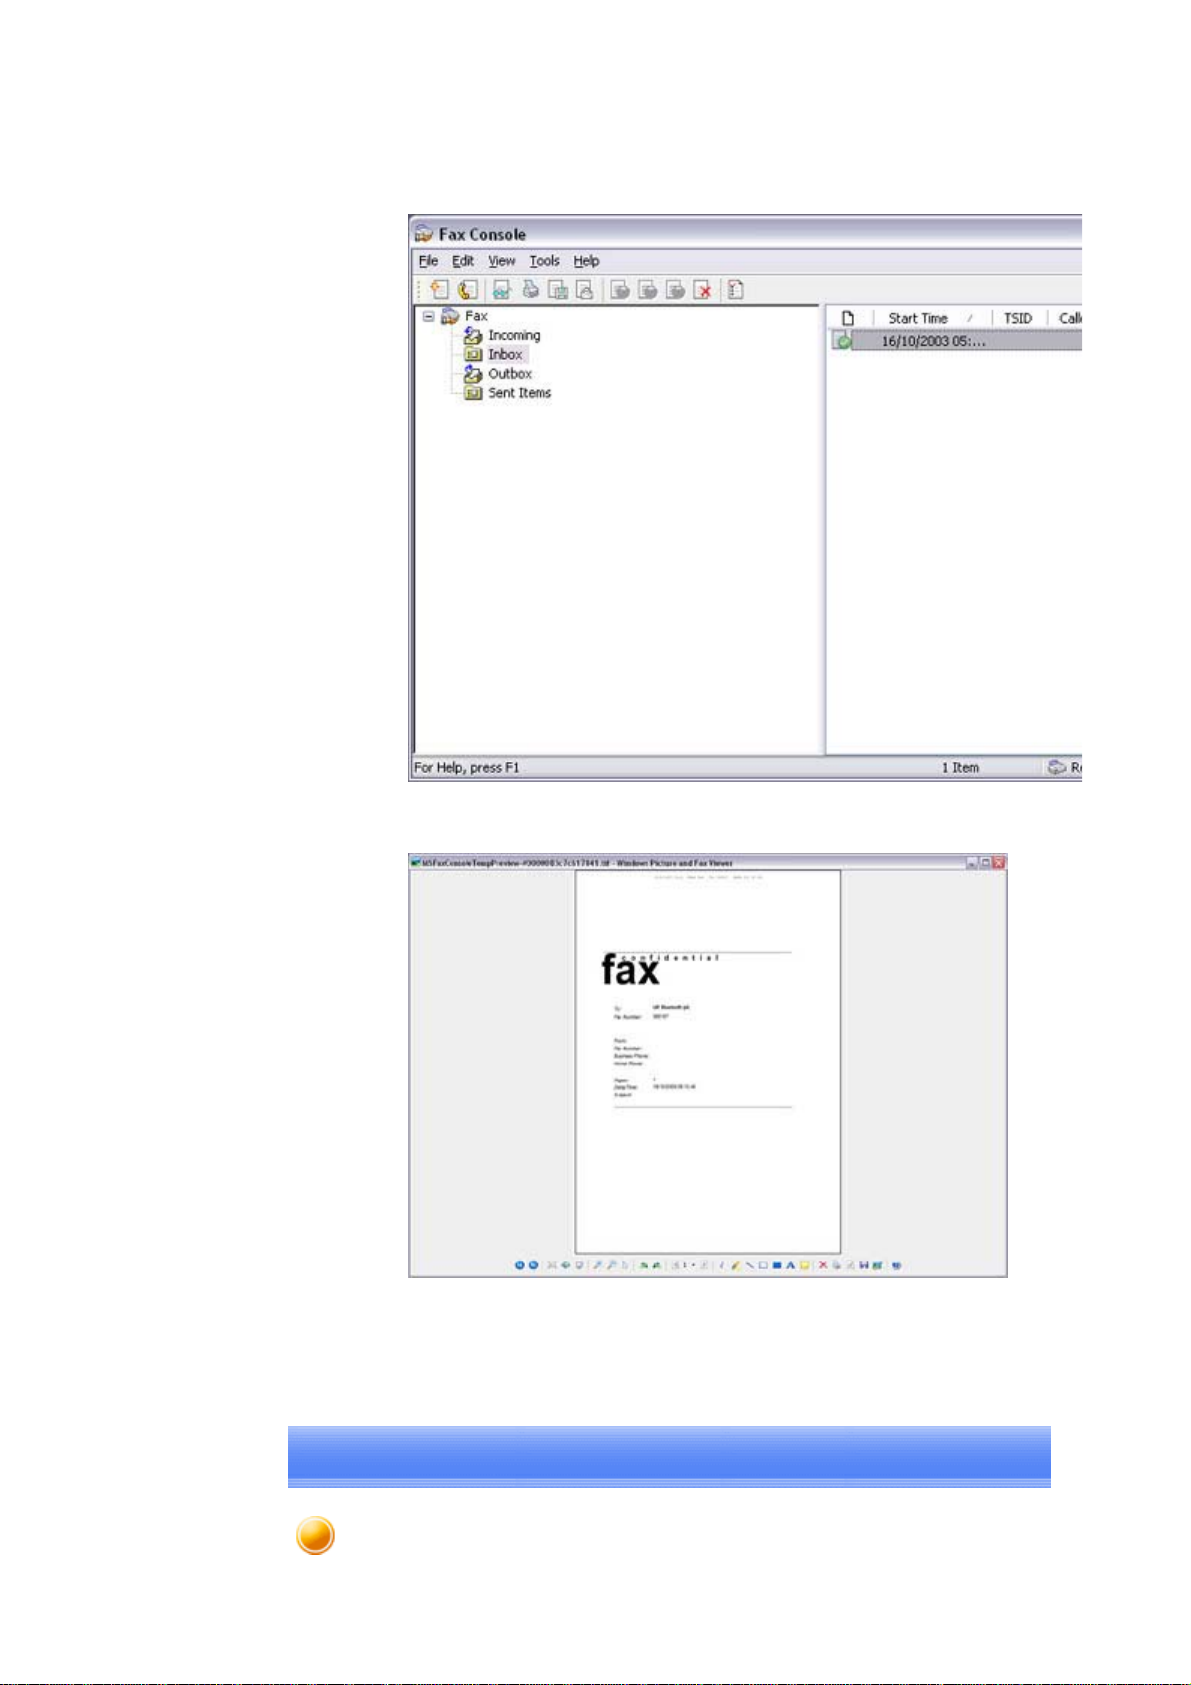
The [Fax Console] window will appear
.
3. In the [Fax Console] window, double-click on the fax that has arrived
An image of the received fax will be displayed.
Related topic: "Sending a fax"
file://C:\Documents and Settings\anitachou\Local Settings\Temp\~hh3F24.htm 2004/11/30
Printing
Page 2
Quick Start Guide - Introduction 第 65 頁,共 160 頁
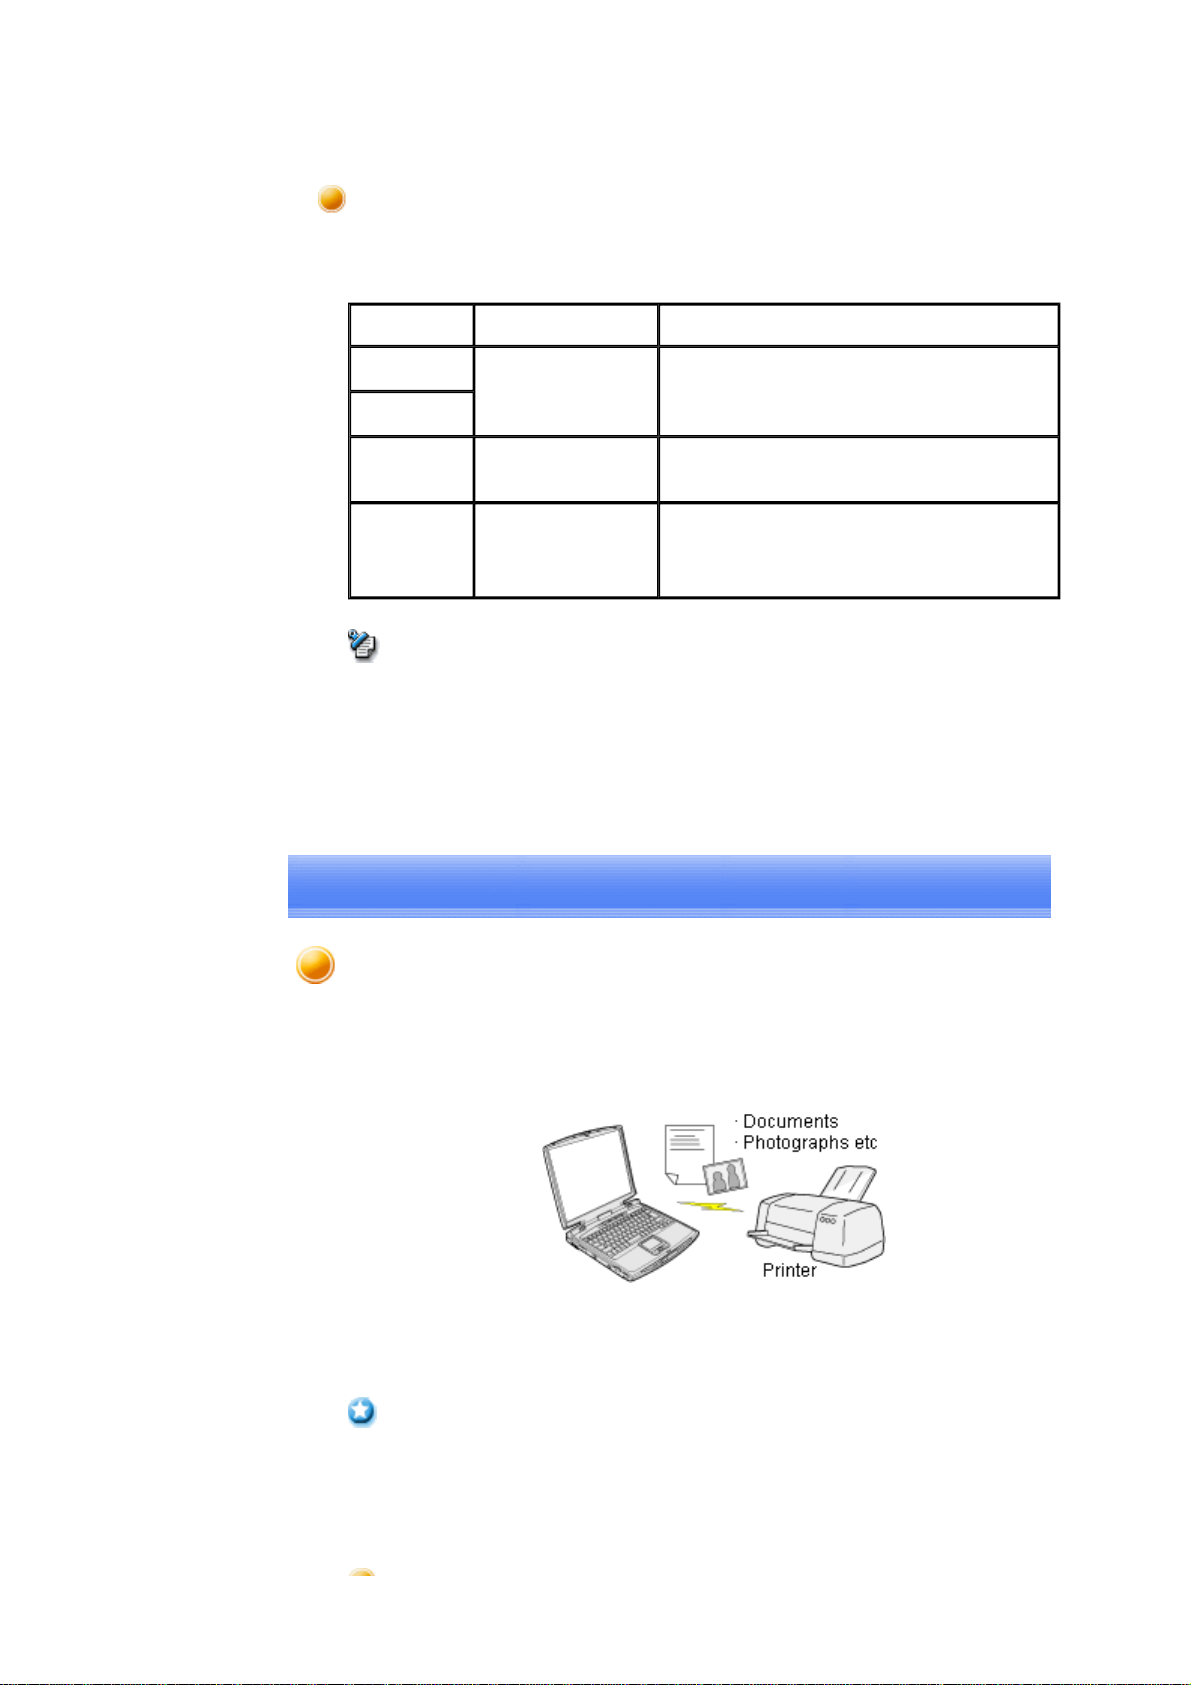
This section describes how to use a Bluetooth -compatible printer for printing.
Types of printer functions
When printing using Bluetooth, the methods for configuring and using the printer will vary
with the corresponding profile.
Profile Bluetooth Settings Operation
HCRP (*1)
You must register the
printer in Bluetooth
SPP
Settings
OPP (*2) Not required
Allows you to print from various applications, as
with ordinary cable-connected printers.
→"Printing document and images"
Allows you to print business card data directly.
→"Printing business card data"
Allows you to print image data directly.
BIP Not required
→"Printing images directly from a digital camera
or other device"
Note
z (*1) The majority of Bluetooth-compatible printers support HCRP.
If you have selected Express Mode, HCRP will be chosen as the default profile. If the
printer does not support HCRP, then SPP will be the next choice.
z (*2) The printing of business cards using OPP complies exclusively with the business
card (vCARD) standard.
Printing documents and images [HCRP] [SPP]
This section describes how to print using a Bluetooth -compatible printer.
→Setting up the printer
→Printing
Important
z Please ensure that any printer-specific drivers have been installed on the PC before you
have established a Bluetooth connection.
z A Bluetooth passkey (PIN code) is required for you to connect to the printer. Please
make a note of your Bluetooth passkey before you start the set -up process.
file://C:\Documents and Settings\anitachou\Local Settings\Temp\~hh3F24.htm 2004/11/30
Page 3
Quick Start Guide - Introduction 第 66 頁,共 160 頁
Setti
ng up the printer
Procedure
1. Turn on the printer
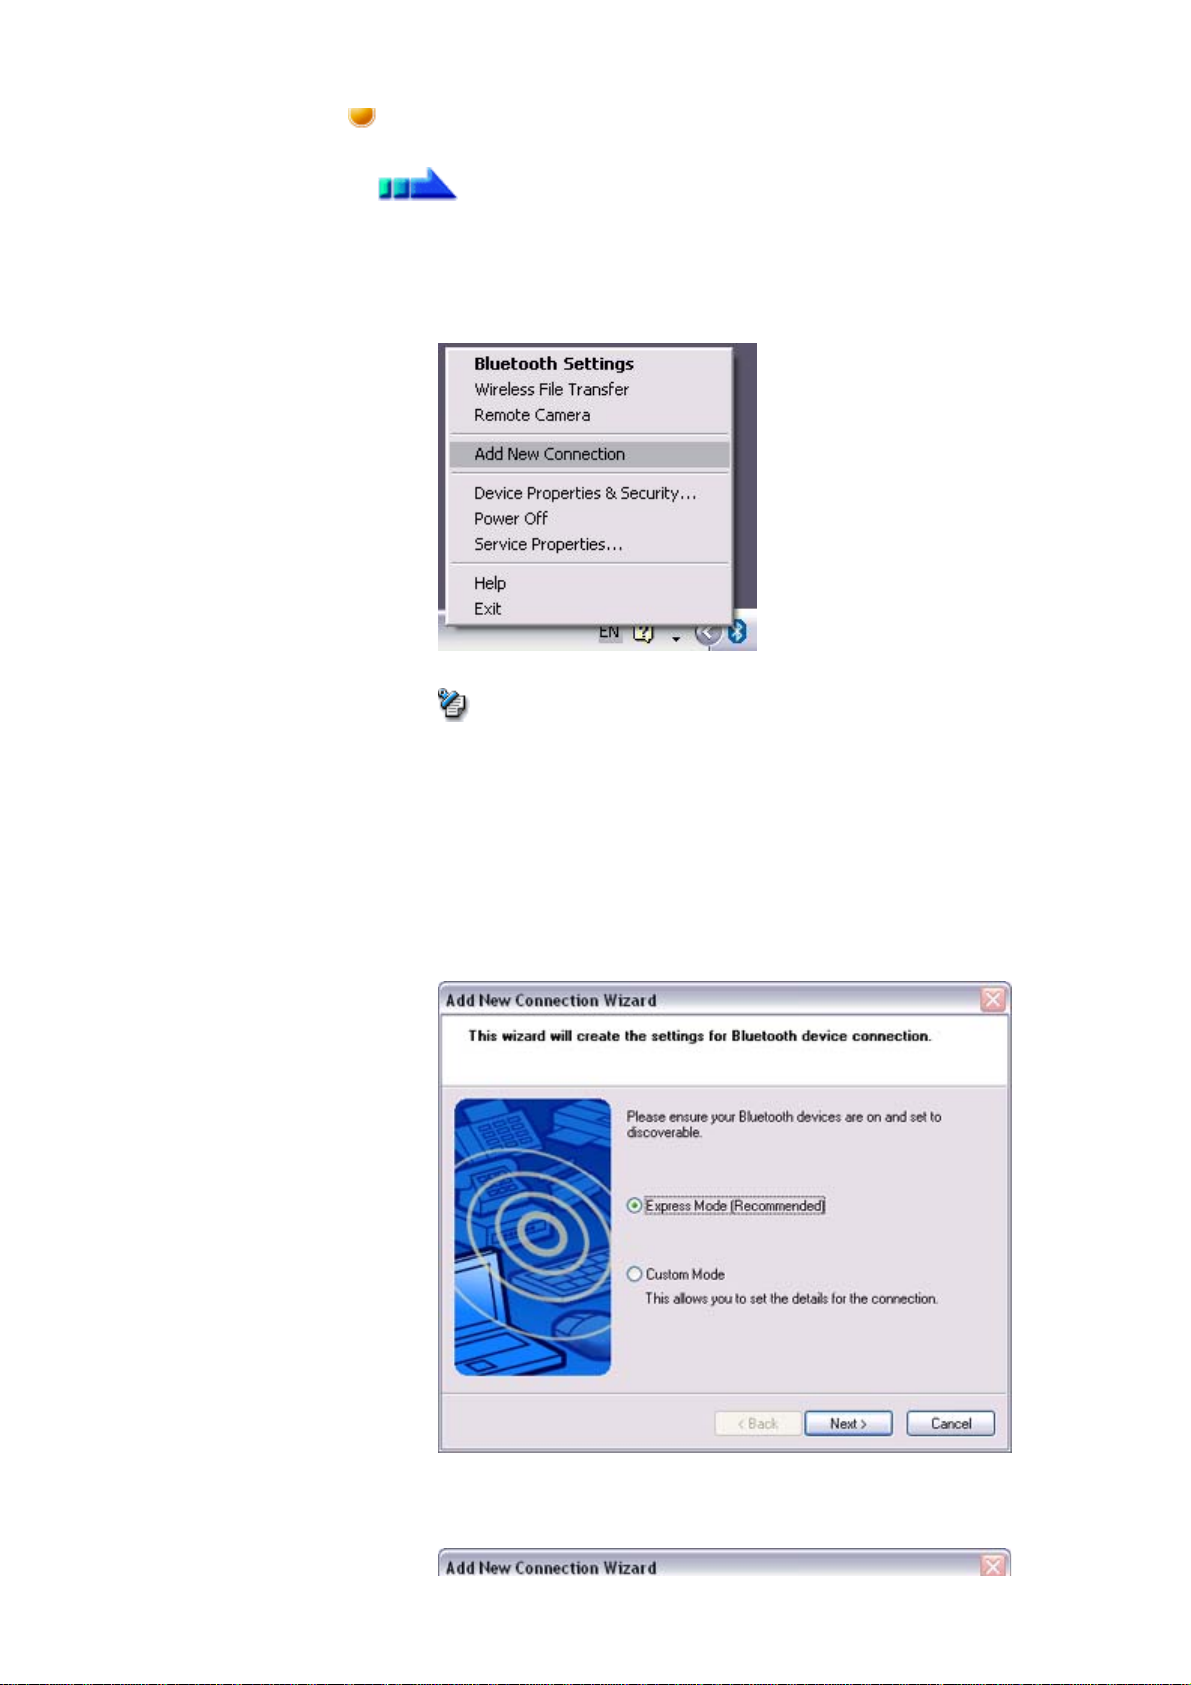
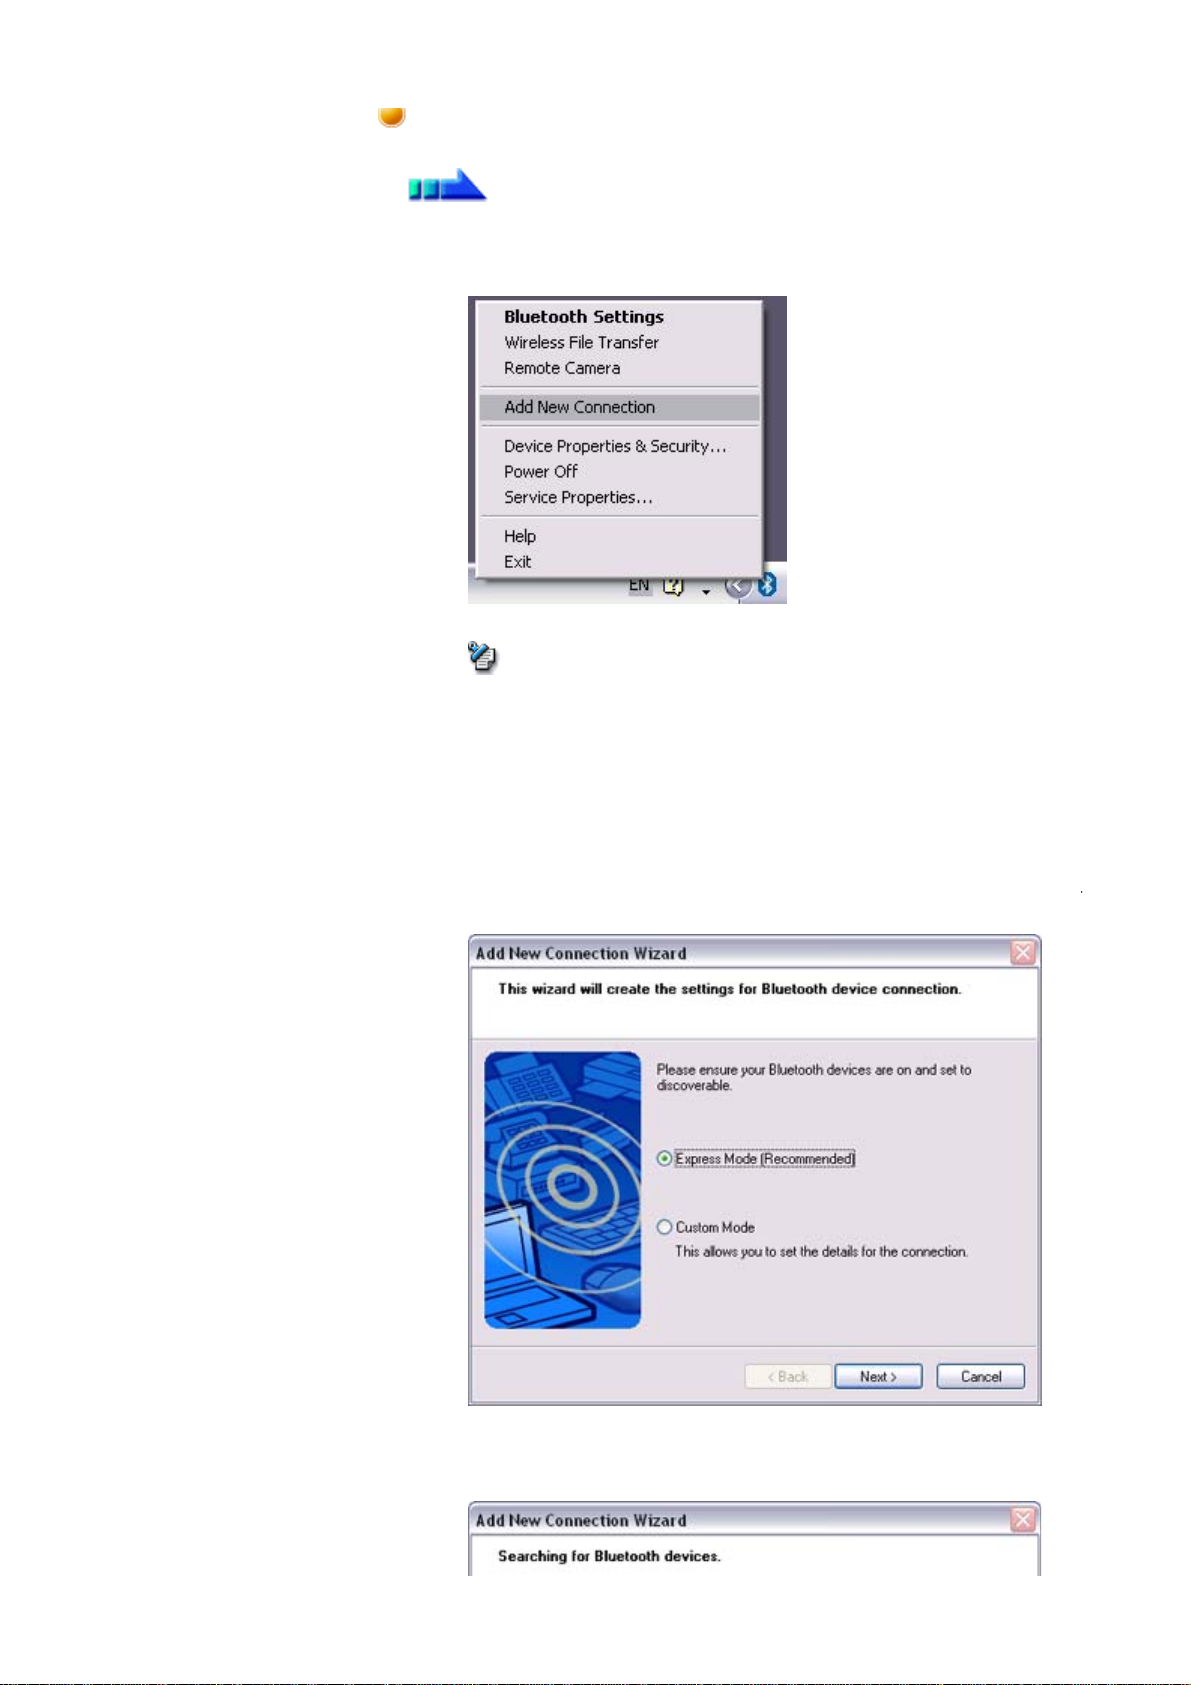
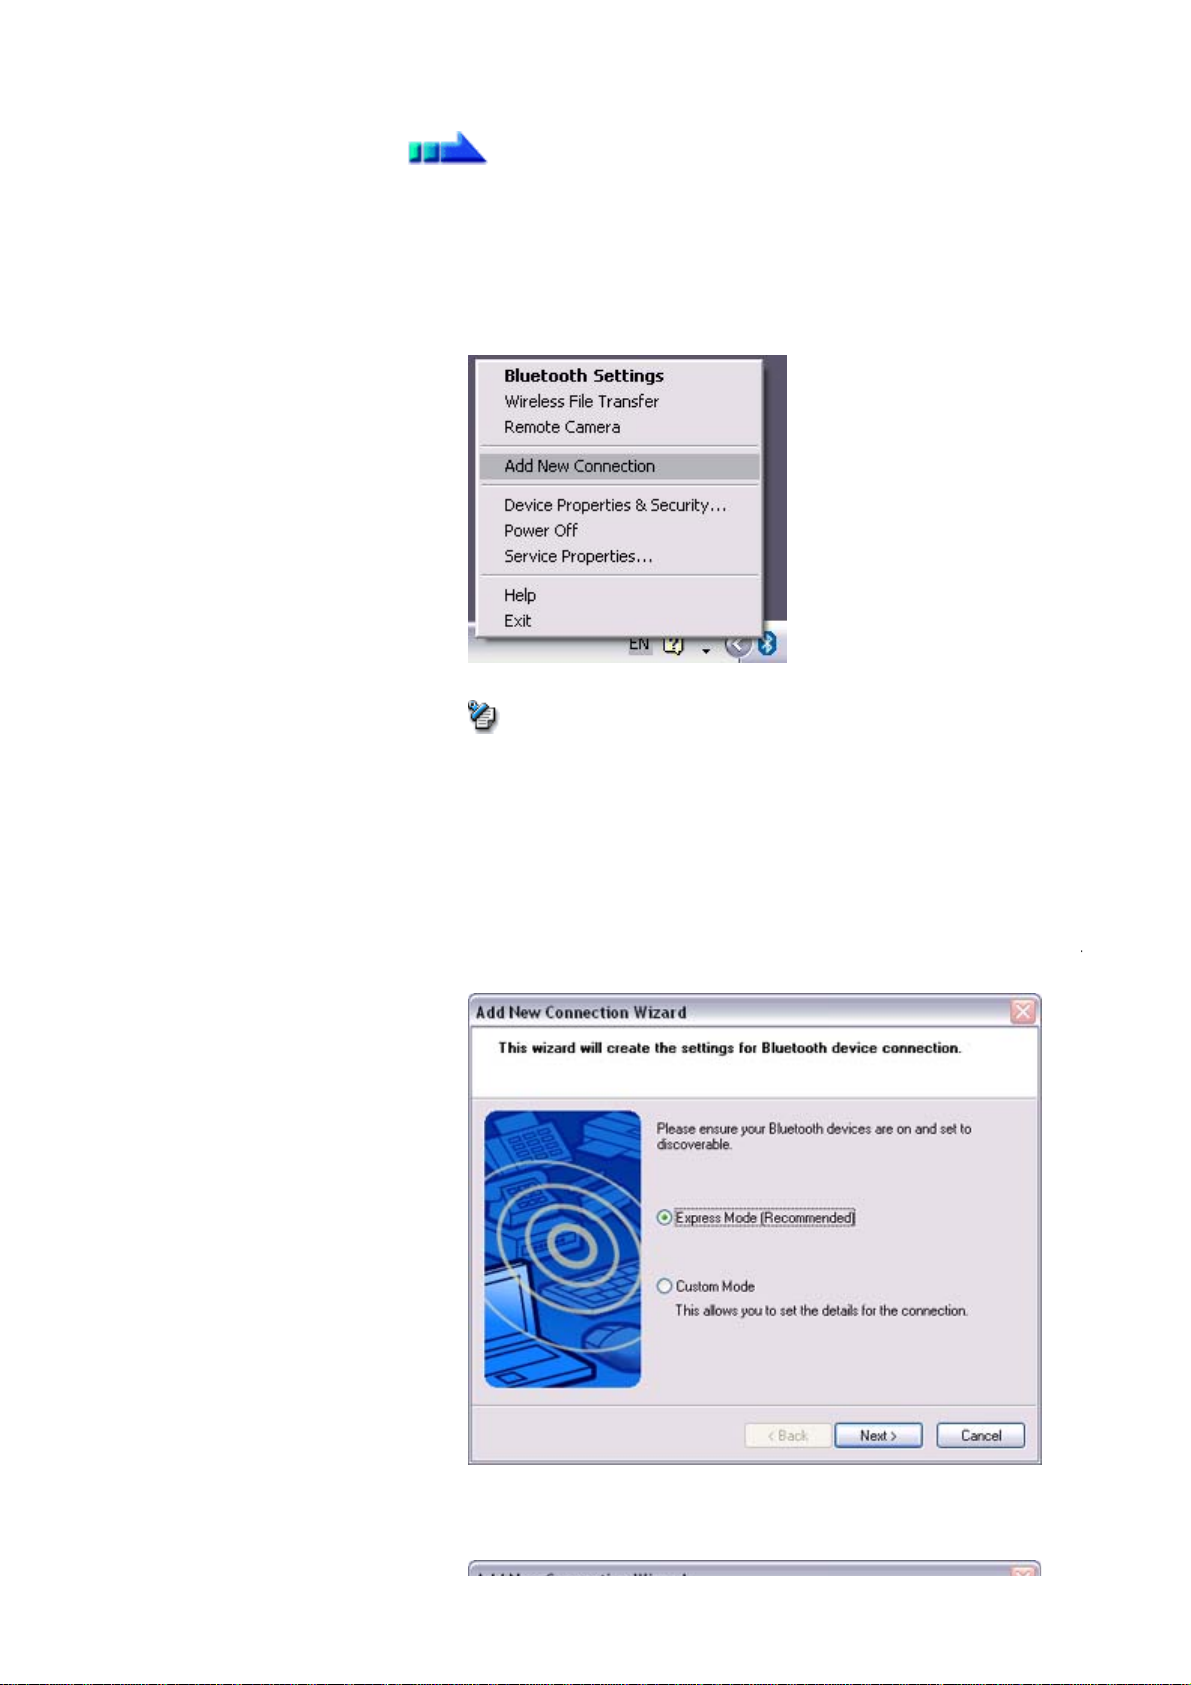
2. Right-click on the Bluetooth icon in the task tray, and then click on [Add New
Connection]
Note
{ Alternatively, click [Start]→[All Programs]→[Bluetooth]→[Bluetooth
Settings], and then click on [New Connection] from the active [Bluetooth
Settings] window.
The [Add New Connection Wizard (Welcome to the Add New Connection
Wizard)] window will appear.
3. Confirm that [Express Mode] has been selected, and then click on the [Next]
button
The [Add New Connection Wizard (Searching for Bluetooth devices)] window
will appear.
file://C:\Documents and Settings\anitachou\Local Settings\Temp\~hh3F24.htm 2004/11/30
Page 4
Quick Start Guide - Introduction 第 67 頁,共 160 頁
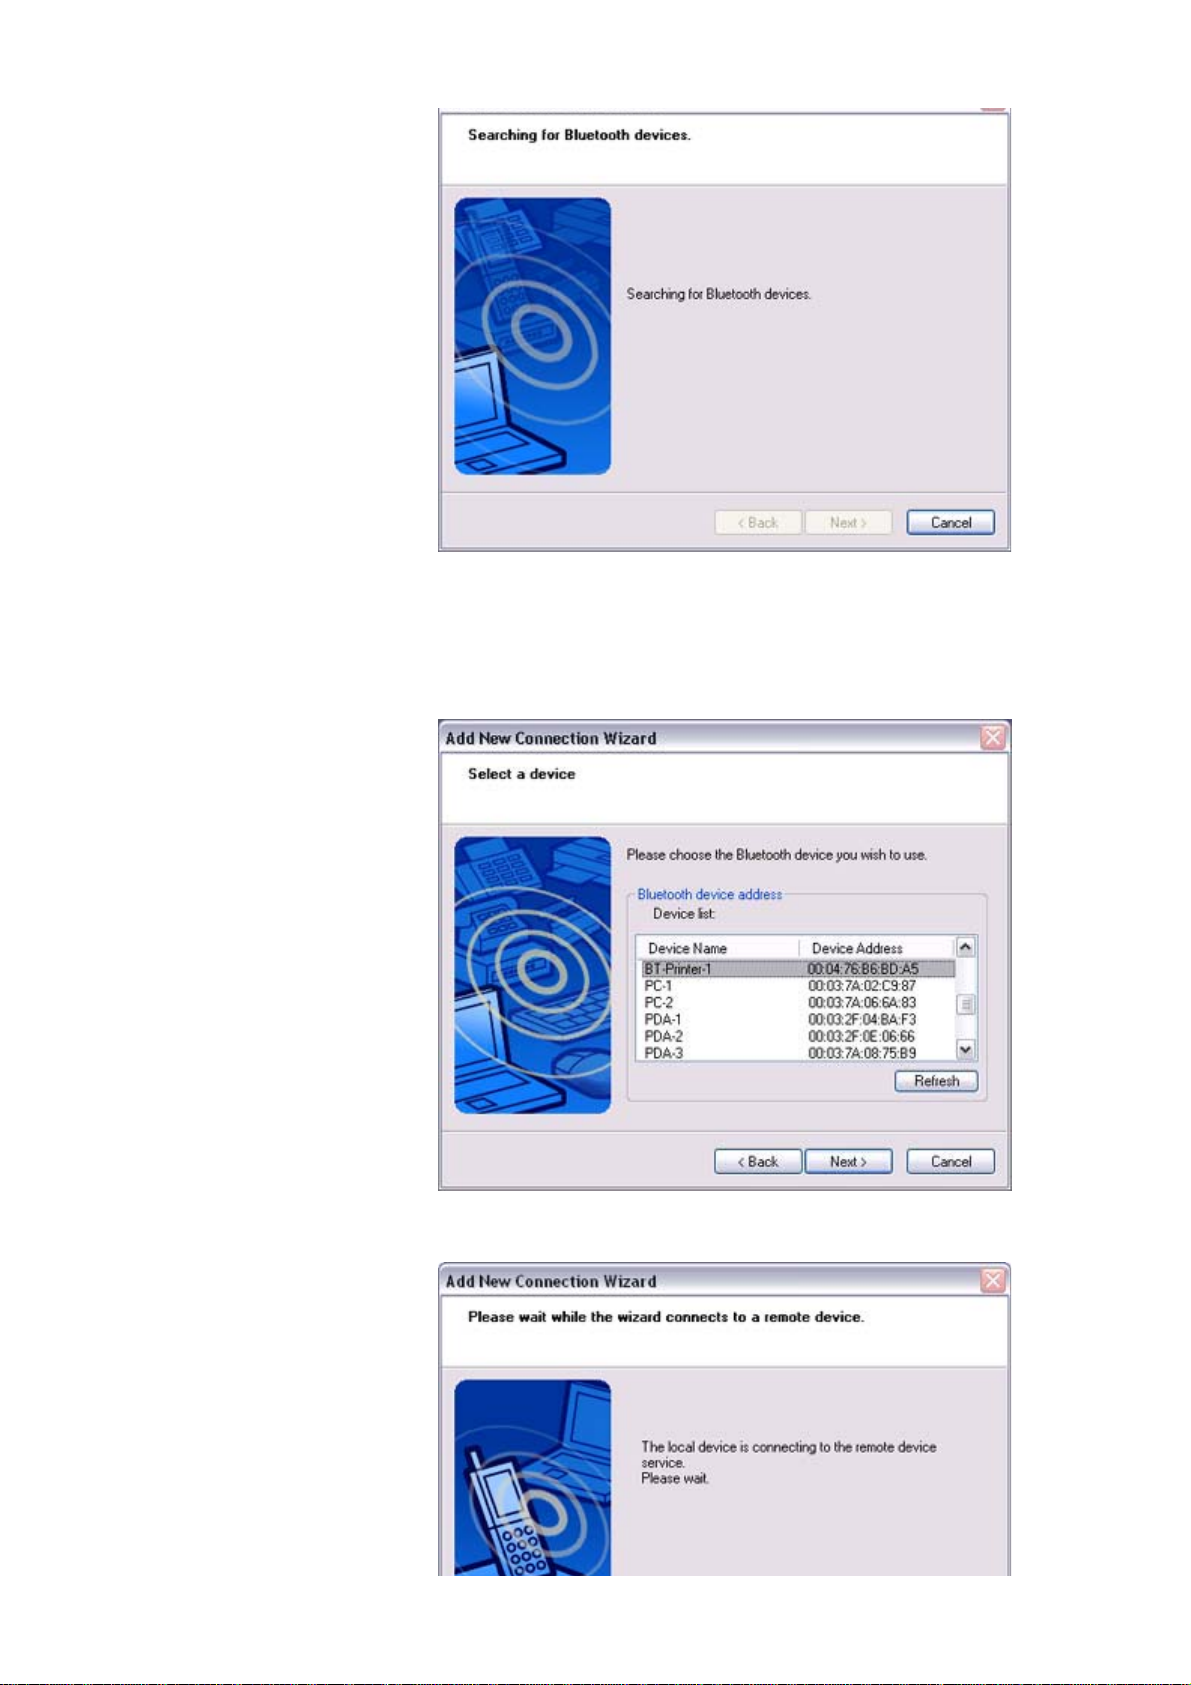
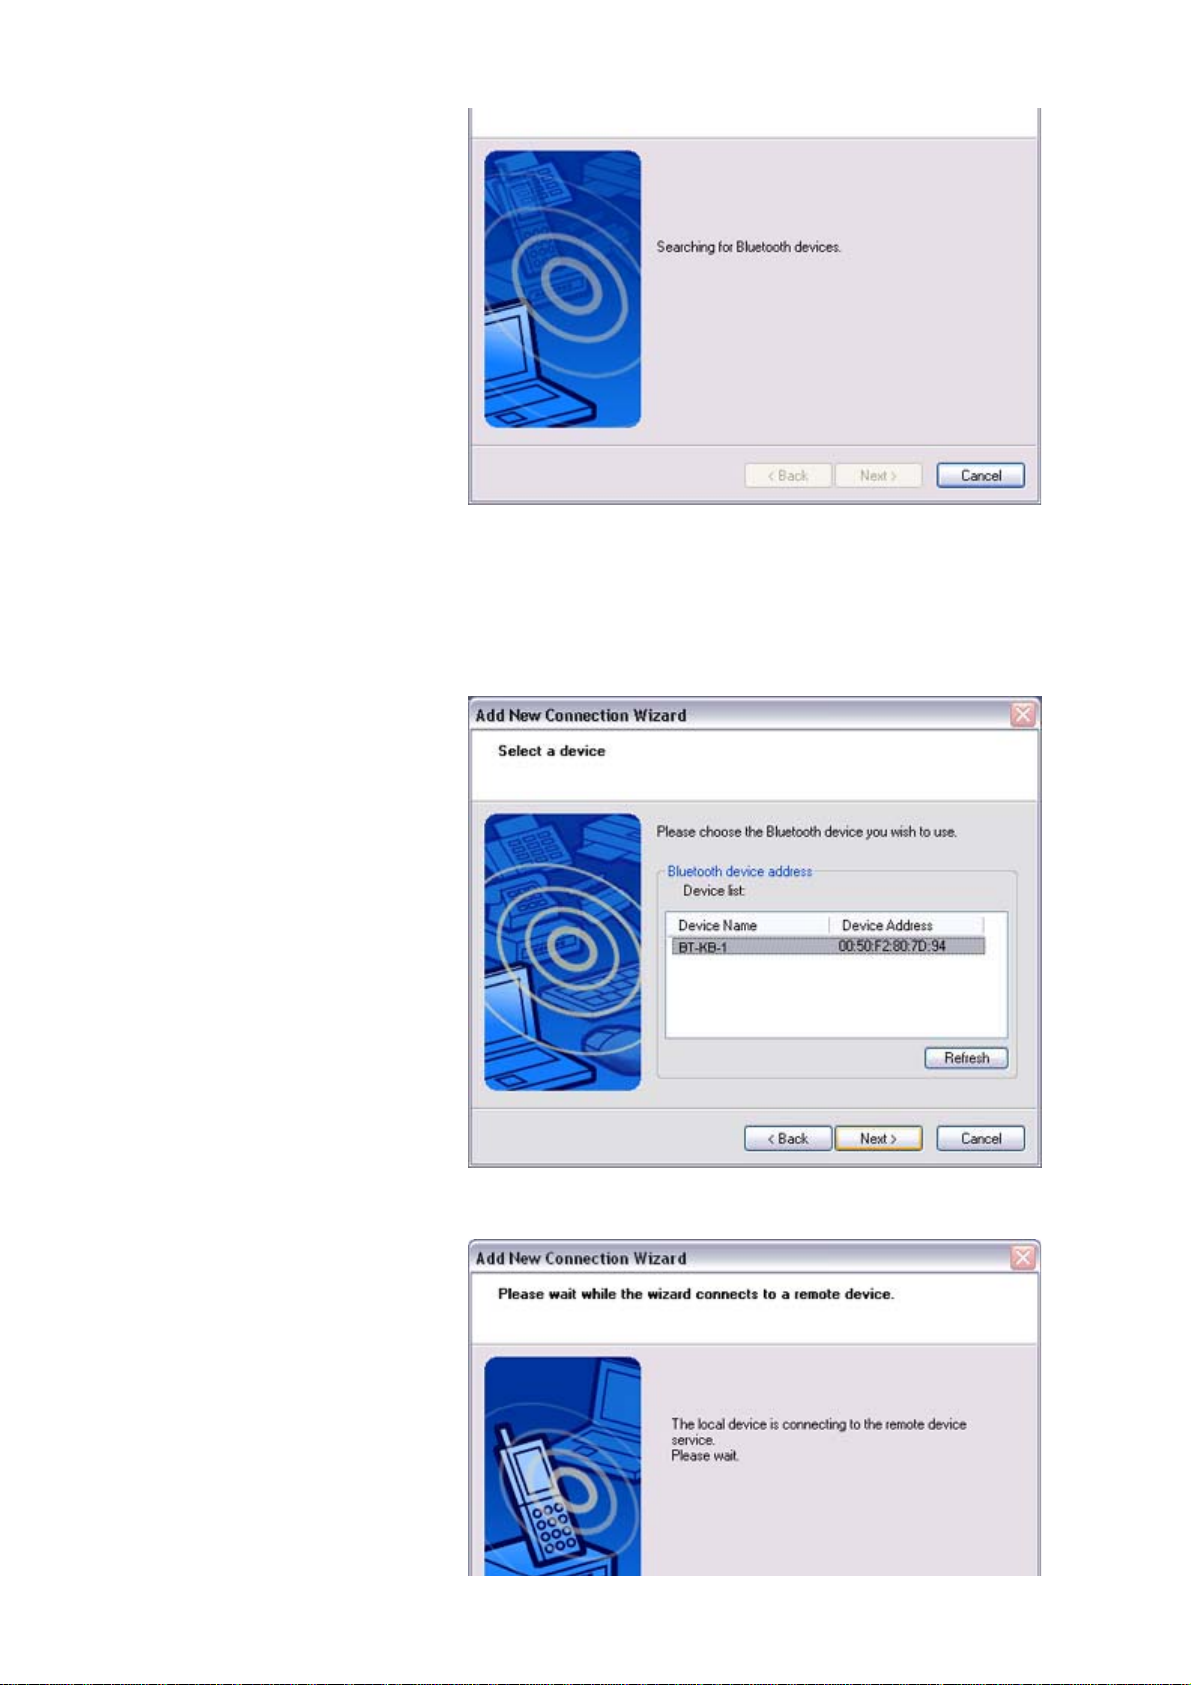
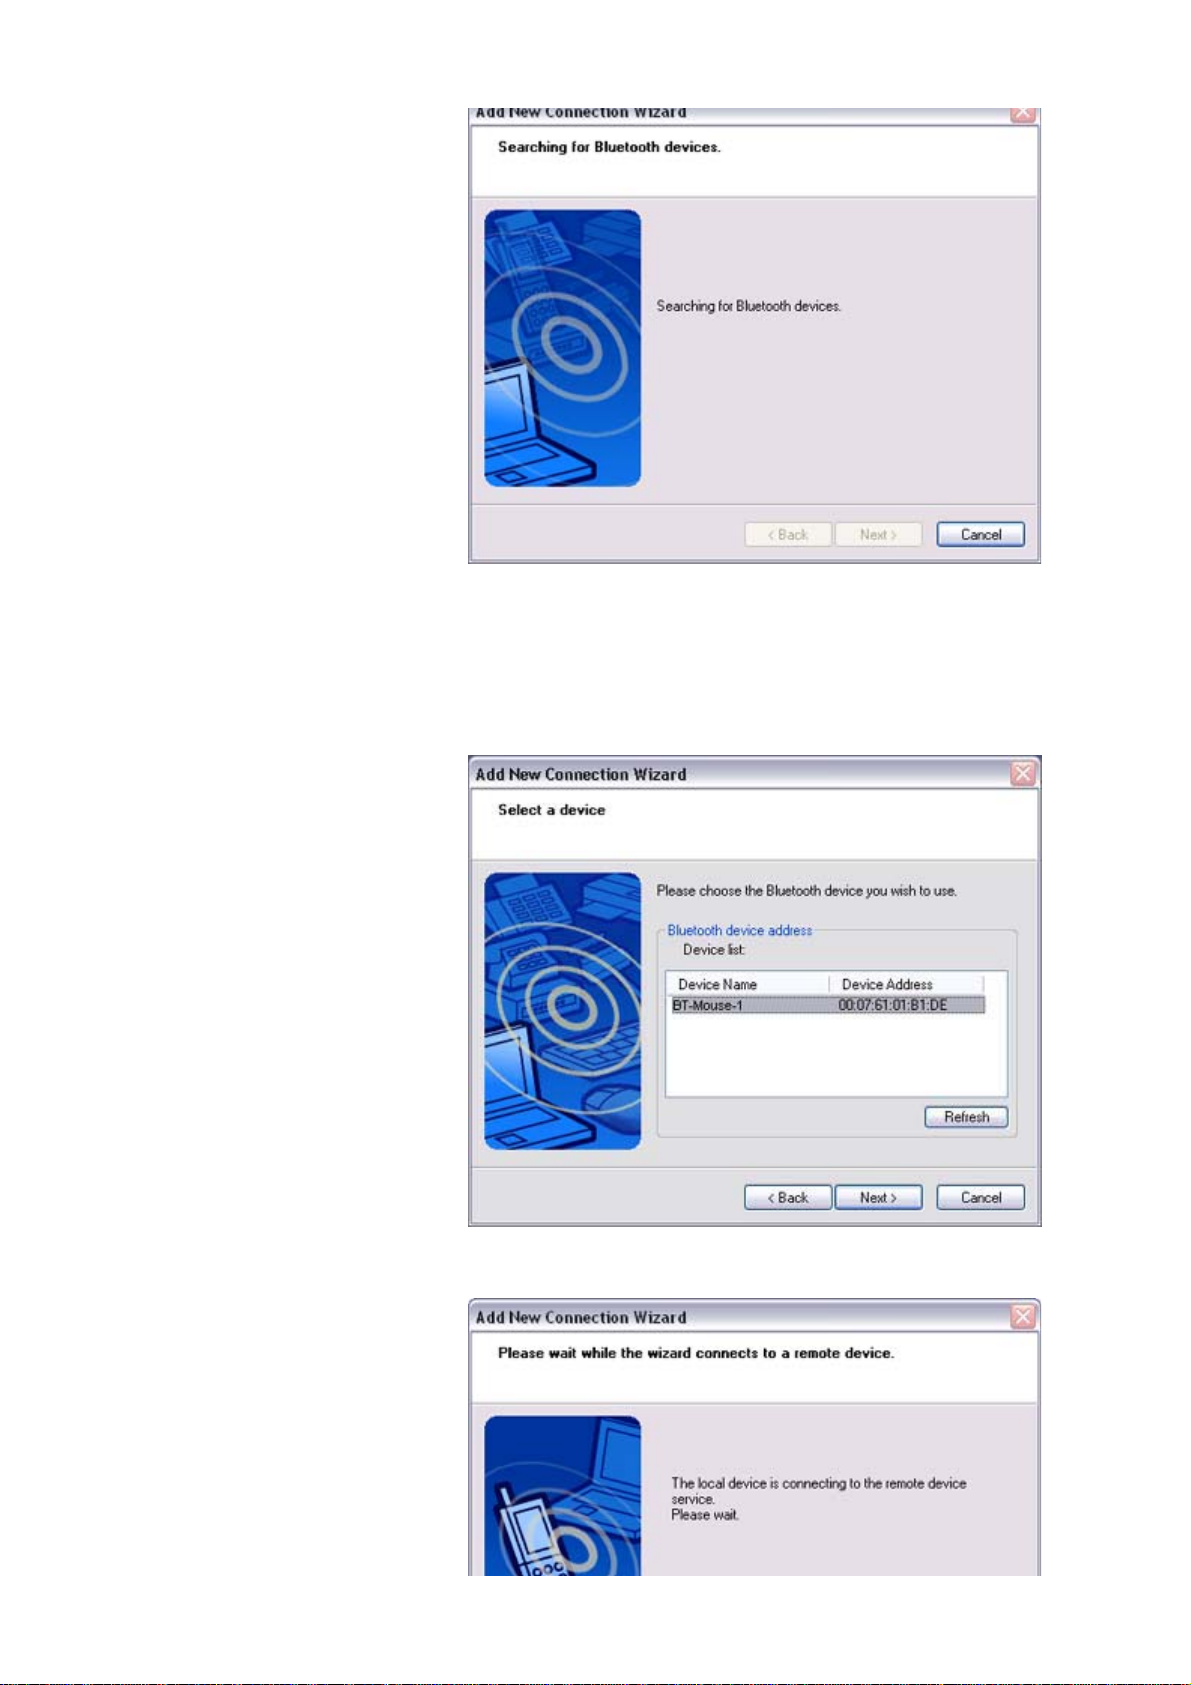
Once the program has finished searching for the devices, the [Add New
Connection Wizard (Device Selection)] window will appear.
4. Select the device name of the printer from [Device List], and then click on the
[Next] button
The [Add New Connection Wizard (Searching for Services)] window will appear.
file://C:\Documents and Settings\anitachou\Local Settings\Temp\~hh3F24.htm 2004/11/30
Page 5

Quick Start Guide - Introduction 第 68 頁,共 160 頁
5. If you are connecting to the printer for the first time, enter the passkey for the
device from the [Bluetooth Passkey (PIN Code)] window, and then click on the
[OK] button.
Once the services have been detected successfully, connection to the device and
creation of the HCRP port will be performed automatically.
If you have not yet installed a printer, a message prompting you to install a printer
will appear.
6. Click on the [OK] button
The [Add Printer Wizard (Starting the Add Printer Wizard)] window will appear.
7. Click on the [Next] button
file://C:\Documents and Settings\anitachou\Local Settings\Temp\~hh3F24.htm 2004/11/30
Page 6
Quick Start Guide - Introduction 第 69 頁,共 160 頁
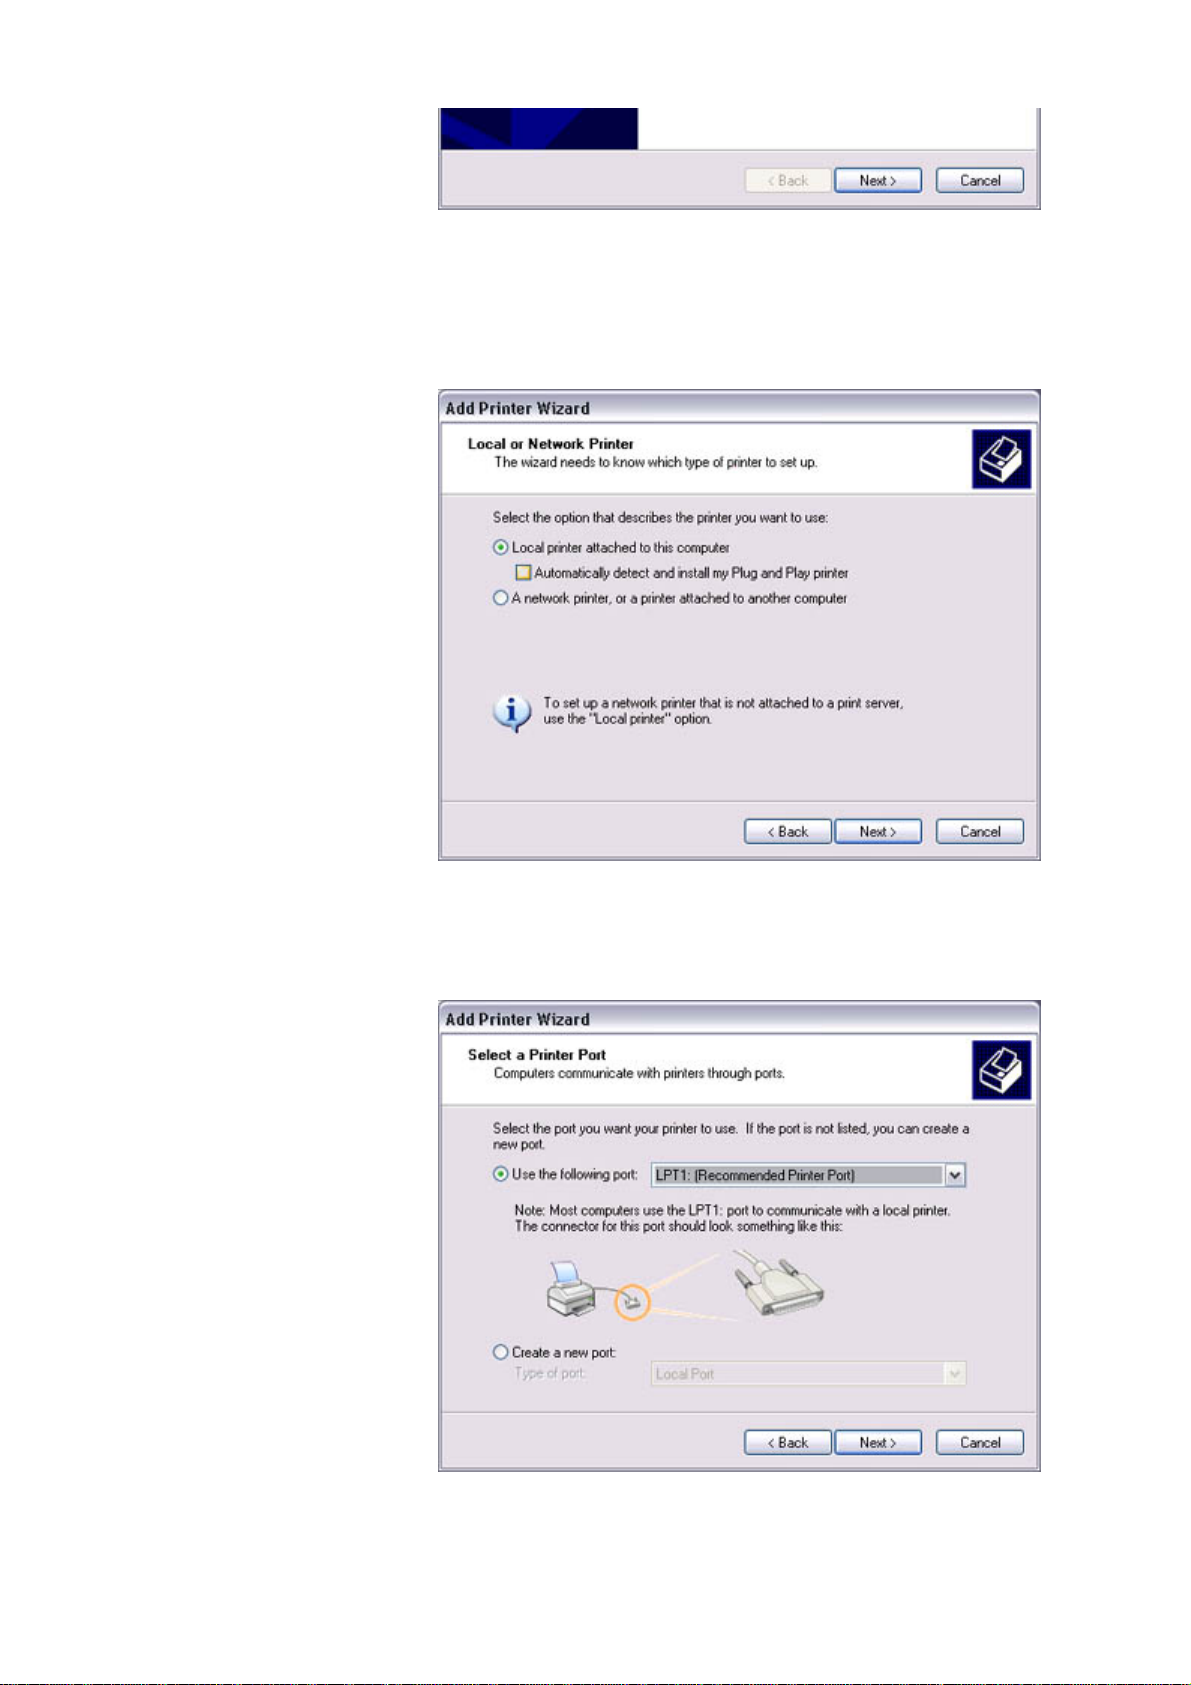
The [Add Printer Wizard (Local Printer or Network Printer)] window will appear.
8. Select "Local printer attached to this computer", remove the check next to
"Automatically detect and install my Plug and Play printer", and then click on the
[Next] button
The [Add Printer Wizard (Select Printer Port)] window will appear.
9. Select the desired port, and then click on the [Next] button
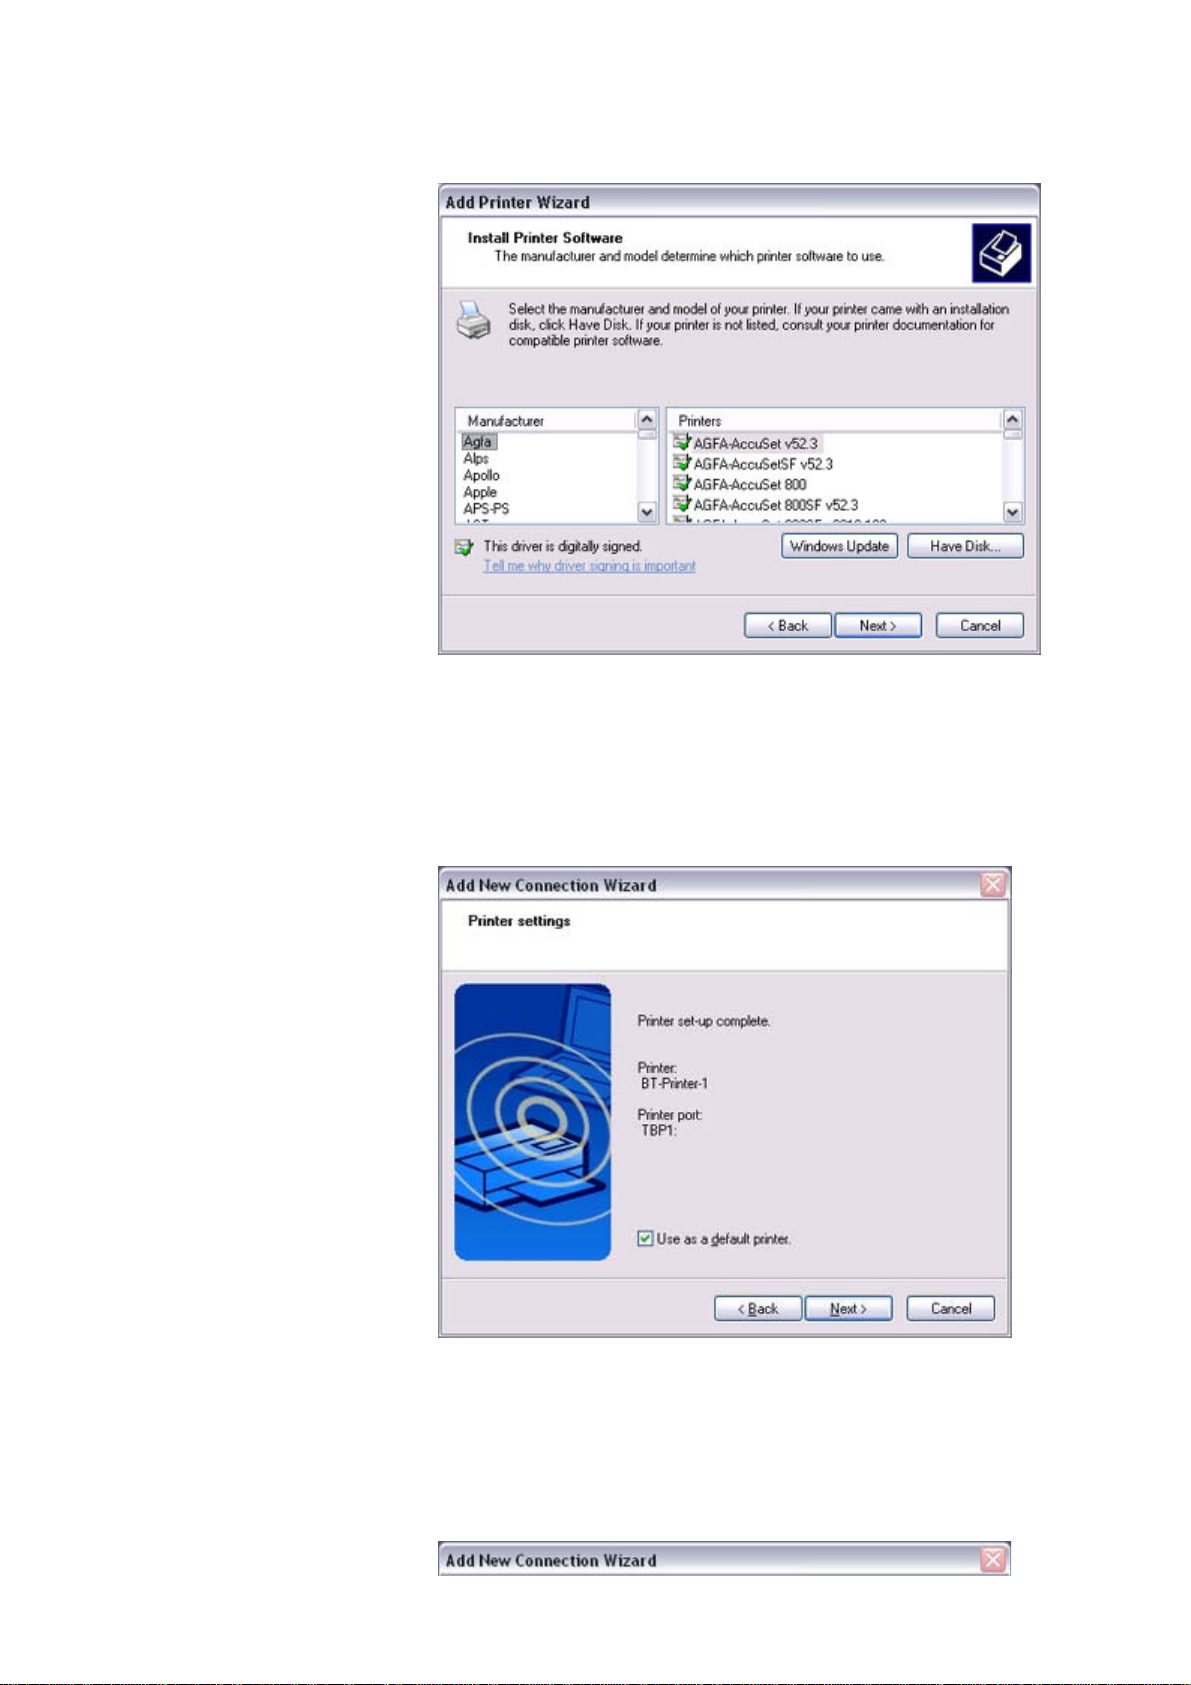
The [Add Printer Wizard (Install Printer Software)] window will appear.
file://C:\Documents and Settings\anitachou\Local Settings\Temp\~hh3F24.htm 2004/11/30
Page 7
Quick Start Guide - Introduction 第 70 頁,共 160 頁
10. Select the [Manufacturer] and [Printer] as pertains to the printer to be installed, or
click on the [Use Device] button, and then click on the [Next] button
Please install the printer according to the instructions in the windows that follow.
Once installation is complete, a message of confirmation will appear in the [Add
New Connection Wizard (Printer Settings)] window.
11. Click on [Next]
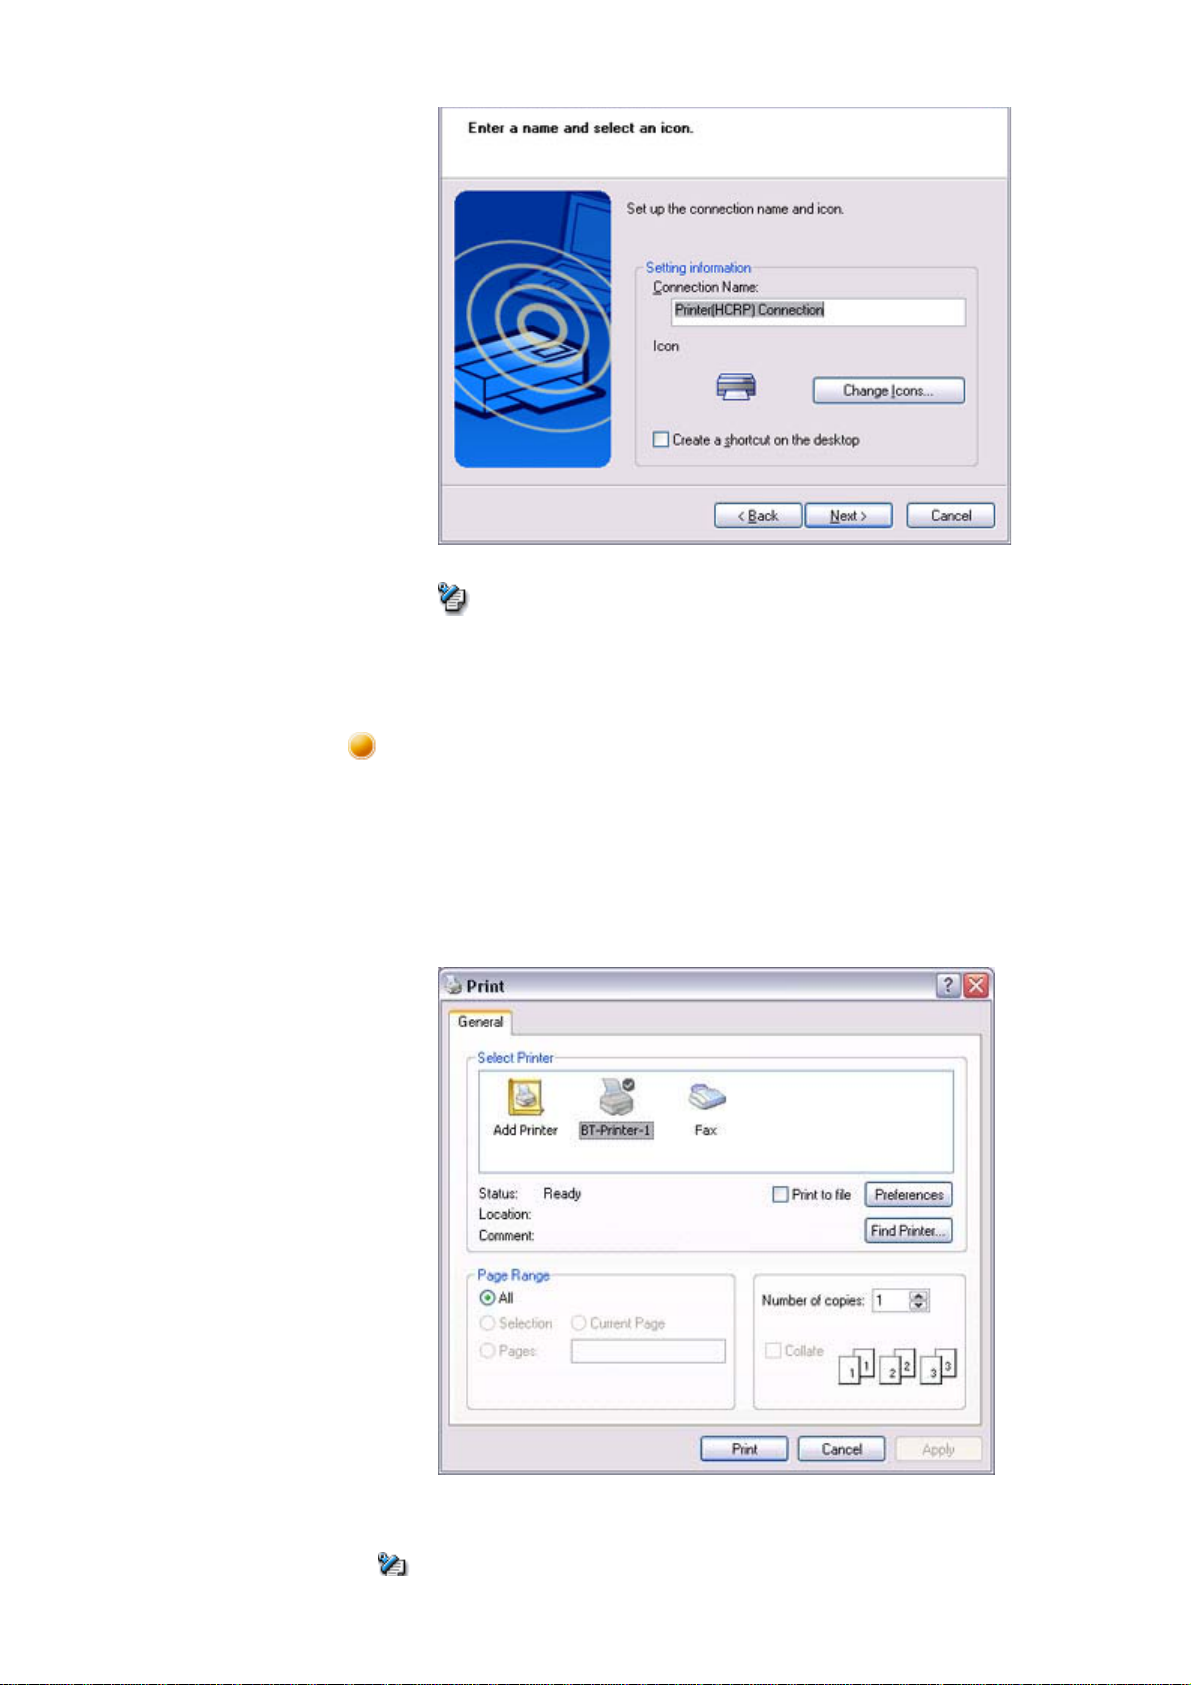
The [Add New Connection Wizard (Connection Name Settings)] window will
appear.
12. Enter the type and name of the icon displayed after registration, and then click on
the [Next] button
Please click on the [Next] button if you are satisfied with the settings.
file://C:\Documents and Settings\anitachou\Local Settings\Temp\~hh3F24.htm 2004/11/30
Page 8
Quick Start Guide - Introduction 第 71 頁,共 160 頁
Note
{ You can change the connection icon and icon name.
→"Changing the connection icon name"
→"Changing the connection icon"
Printing
Try to print from the message pad.
1. Click [File]→[Print]
The [Print] screen will appear.
2. Select wireless printer from under [Select Printer], and then click on the [Print]
button
Printing will commence.
Note
file://C:\Documents and Settings\anitachou\Local Settings\Temp\~hh3F24.htm 2004/11/30
Page 9
Quick Start Guide - Introduction 第 72 頁,共 160 頁
e
yp
y, op
a
z If you have connected to a printer using HCRP or SPP profiles, all future Bluetooth
connections to that printer will be established automatically once you have printed a
document from your PC.
Printing images directly from a digital camera or other device
[BIP]
If you have a printer that supports BIP (Basic Imaging Profile), you can send images dir
to a printer to be printed out, without having to perform any special set -up procedure.
→Printing image files on a printer (using icons)
→Printing image files on a printer (by right -clicking the mouse)
Note
z Below is a list of file t
{ Bitmap (*.bmp)
{ JPEG (*.jpg; *.jpeg)
{ PNG (*.png)
es (extensions) of images that can be printed out directly.
Procedure
■Printing image files on a printer (using icons)
1. Turn on the printer
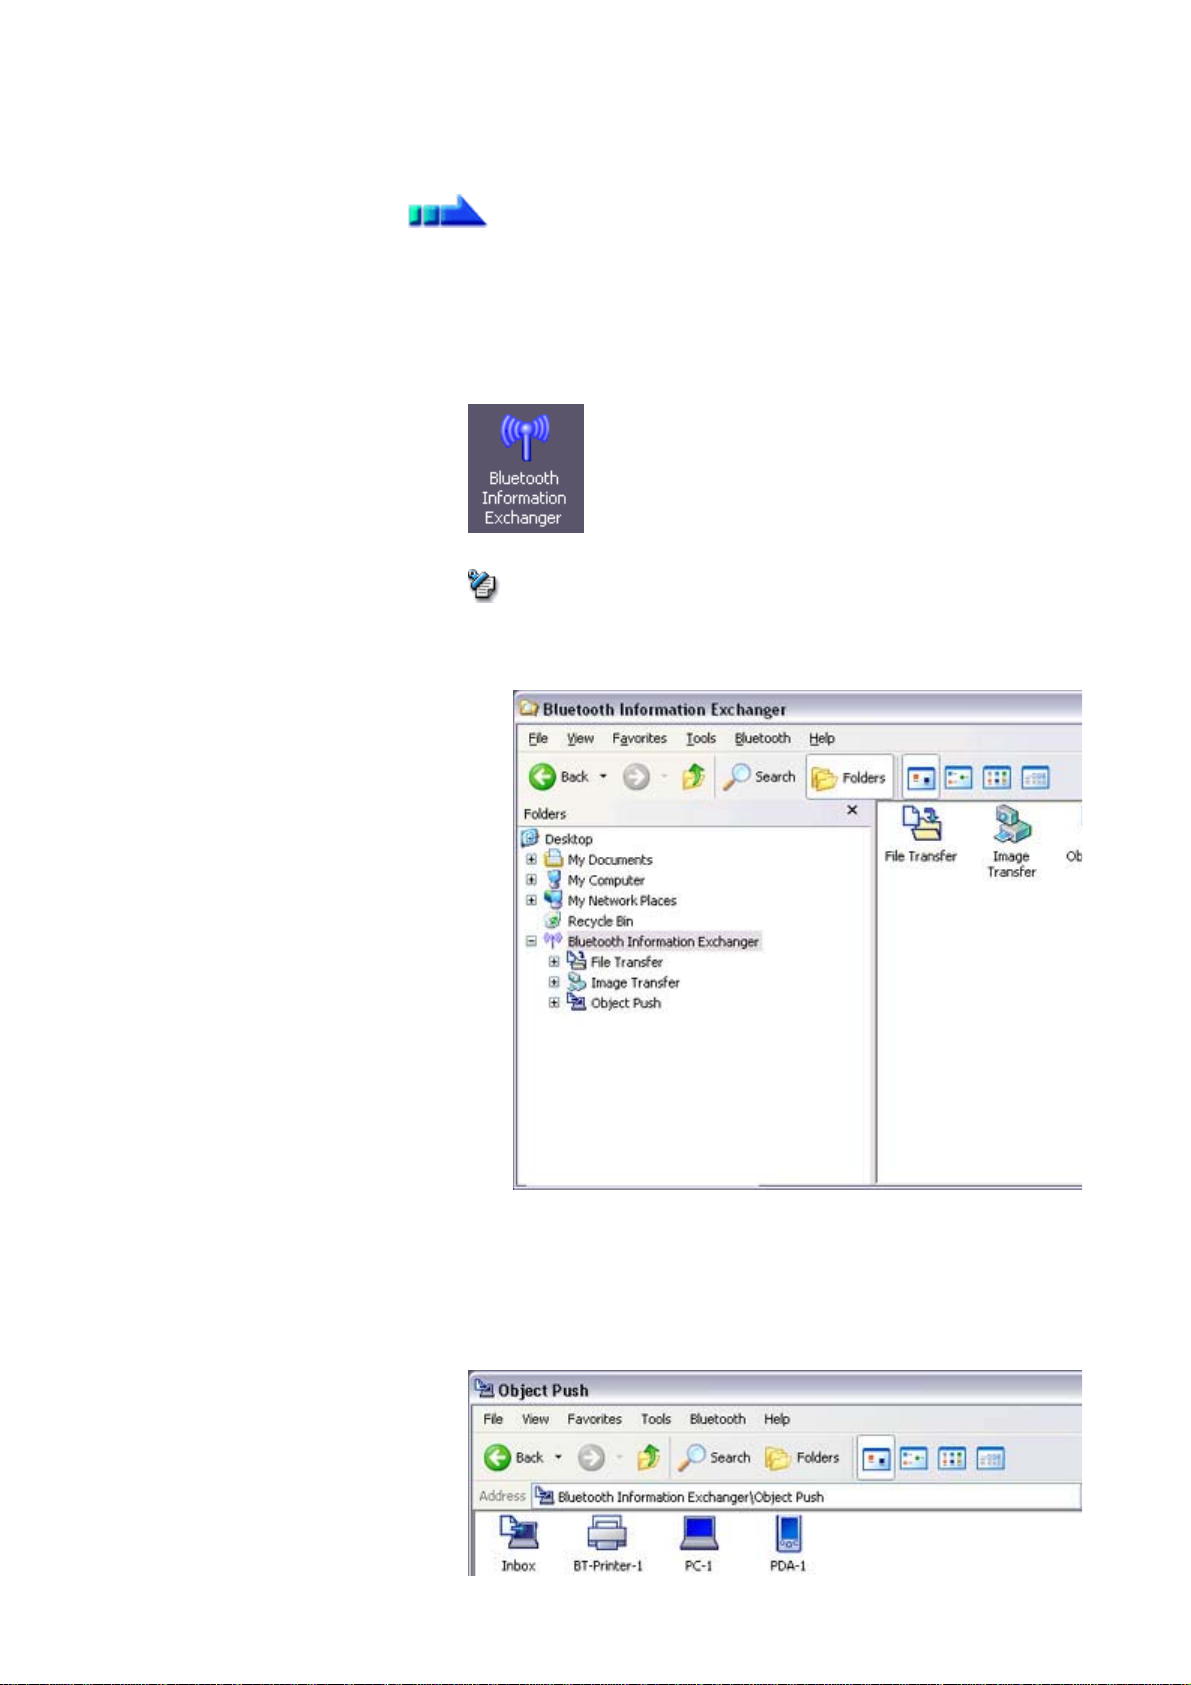
2. Click on the Bluetooth Information Exchanger icon on the Desktop
Note
{ Alternativel
en Explorer and click on the Bluetooth Information Exch
folder for the same result.
file://C:\Documents and Settings\anitachou\Local Settings\Temp\~hh3F24.htm 2004/11/30
Page 10
Quick Start Guide - Introduction 第 73 頁,共 160 頁
y
pr
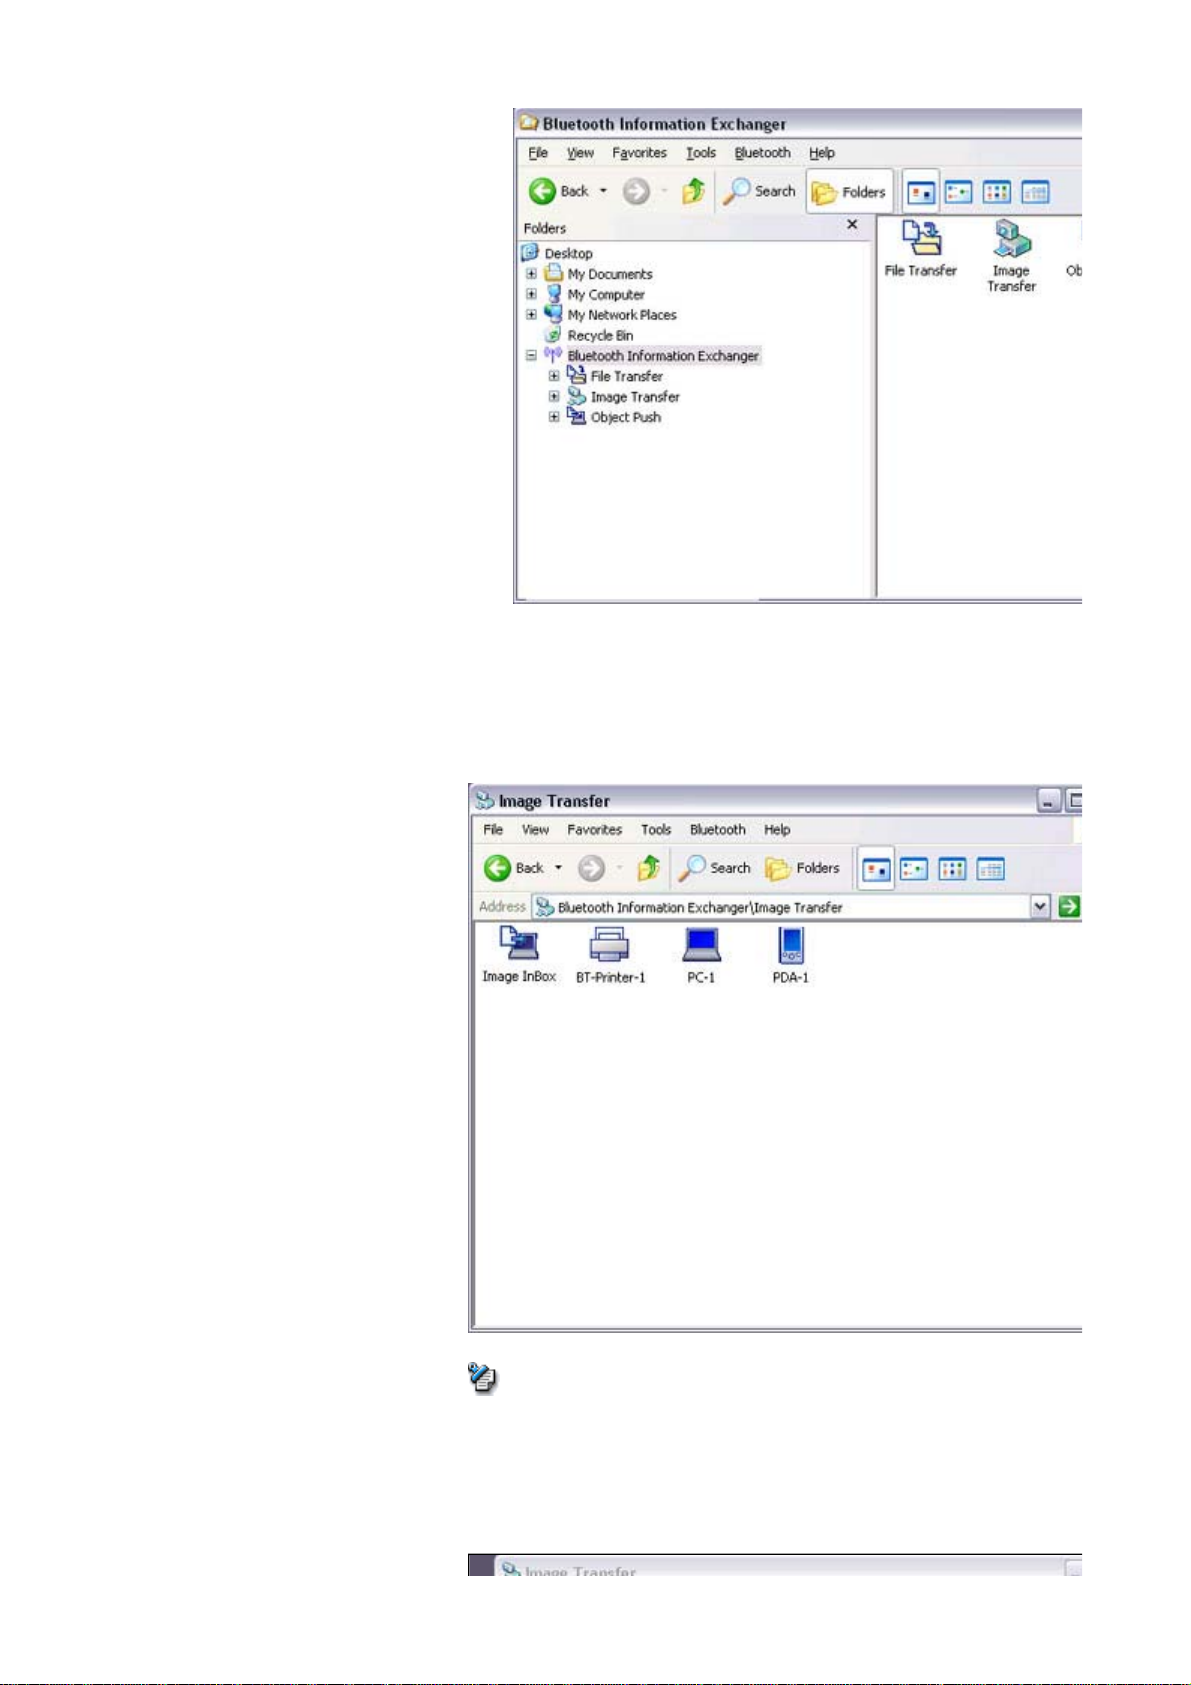
The [Bluetooth Information Exchanger] window will appear.
3. Double-click on the [Image Transfer] icon
A list of devices will appear in the [Image Transfer] window.
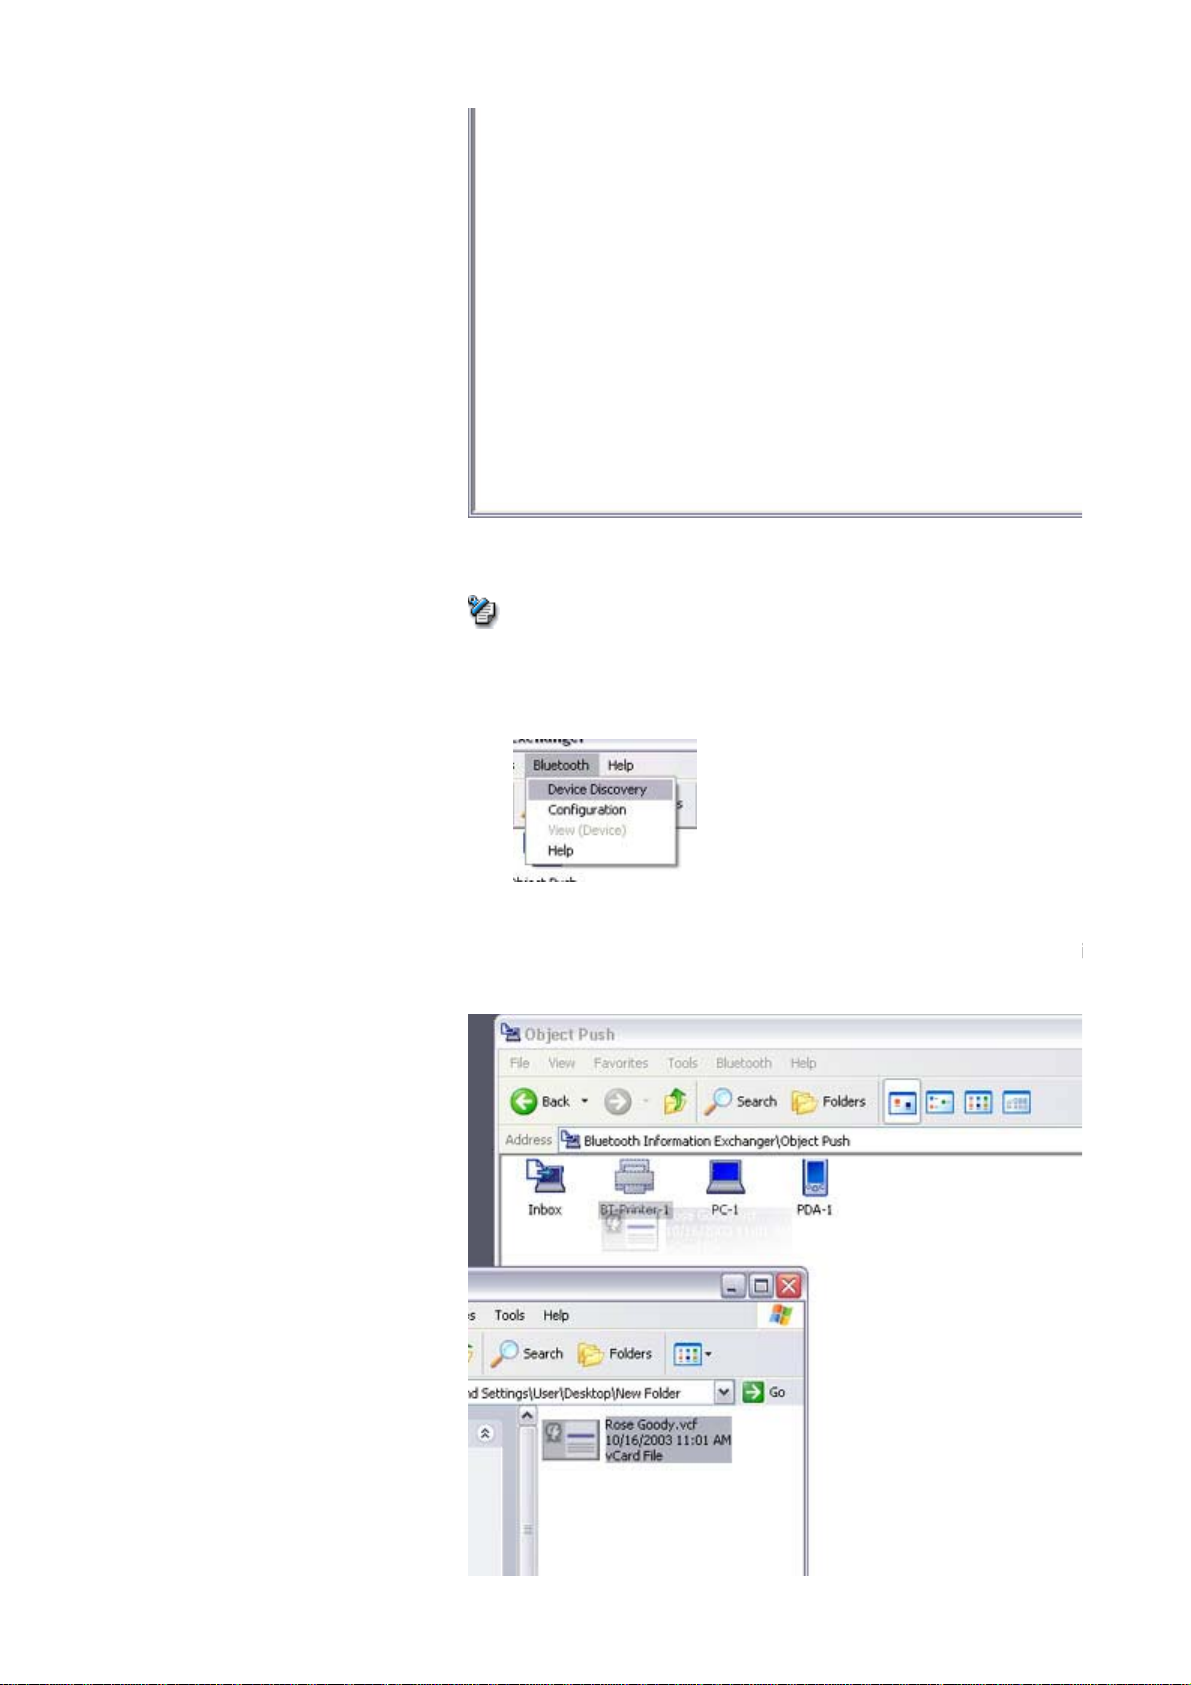
Note
{ If
our desired printer does not appear in the list, please confirm that the
has been turned on, and then click on [Bluetooth] →[Search Devices]
A device search will be performed.
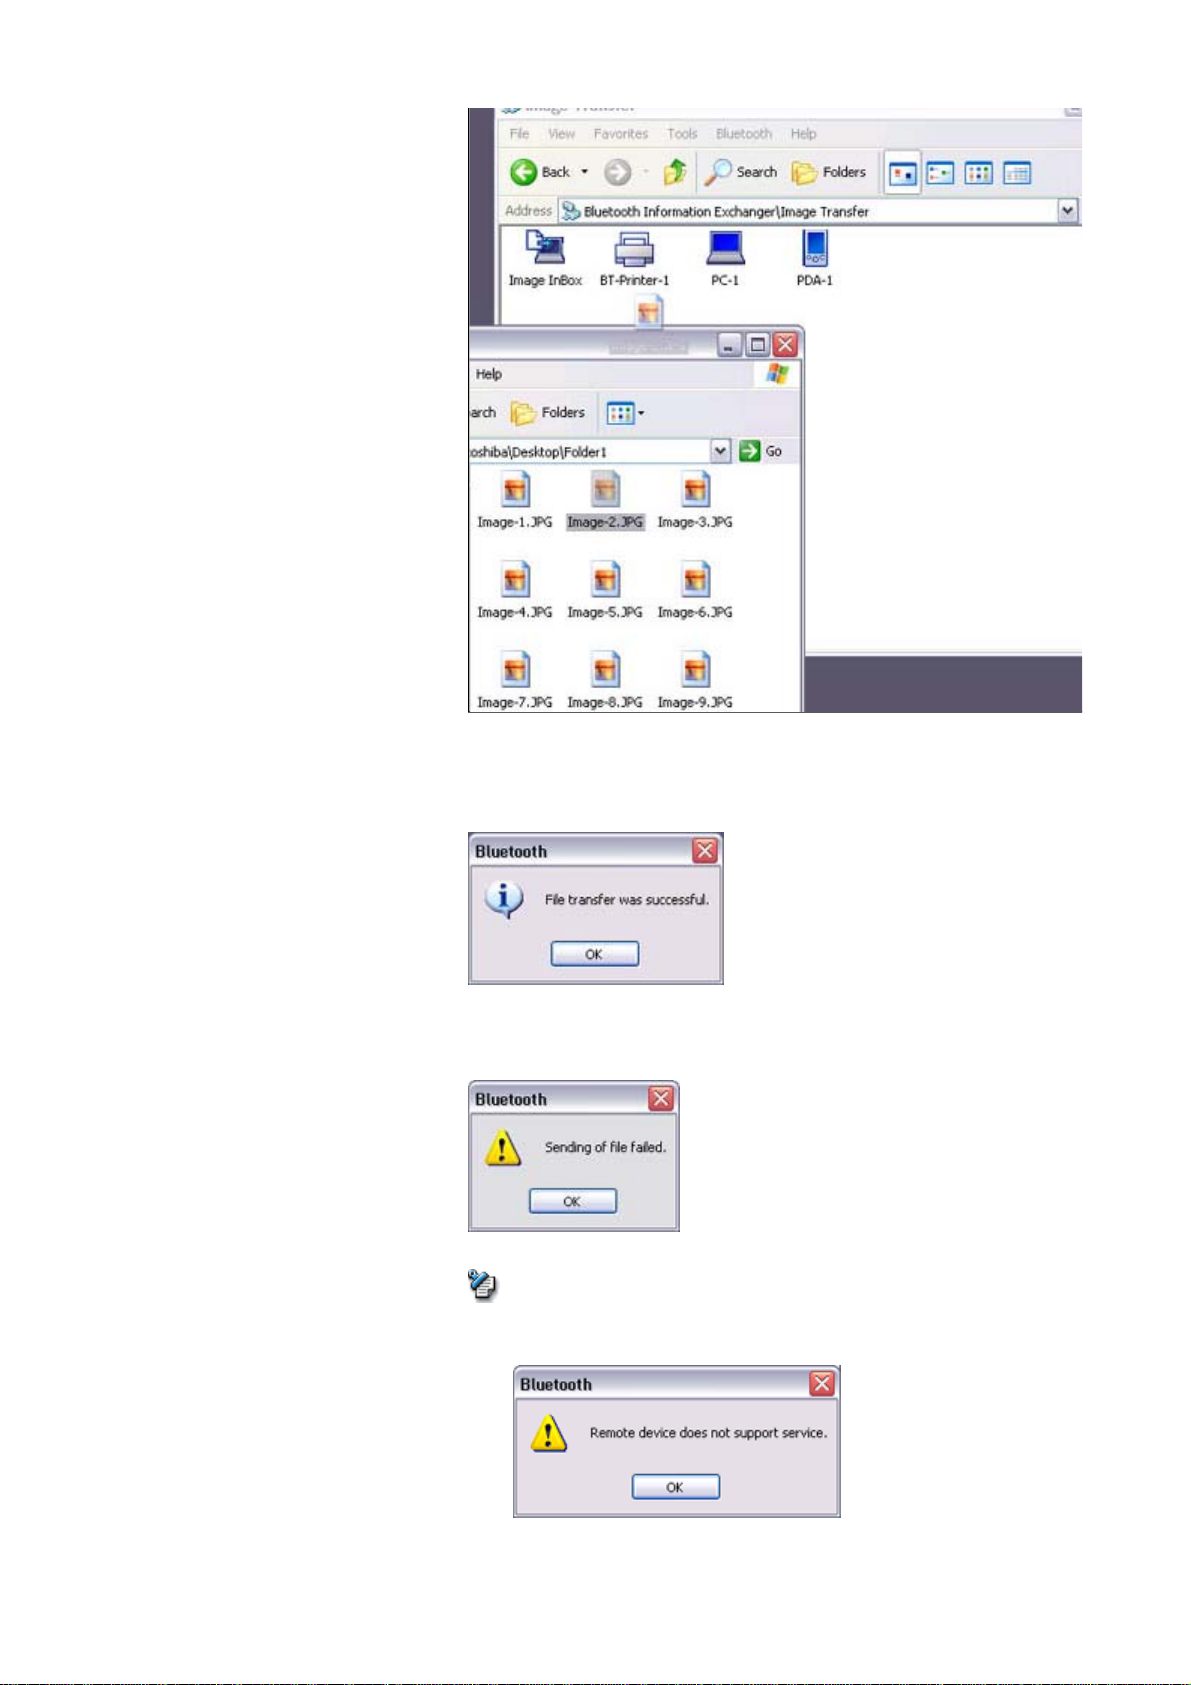
4. Drag and drop the file to be sent on top of the icon of the destination printer
file://C:\Documents and Settings\anitachou\Local Settings\Temp\~hh3F24.htm 2004/11/30
Page 11
Quick Start Guide - Introduction 第 74 頁,共 160 頁
p
a
g
p
ppe
The file will be sent to the printer.
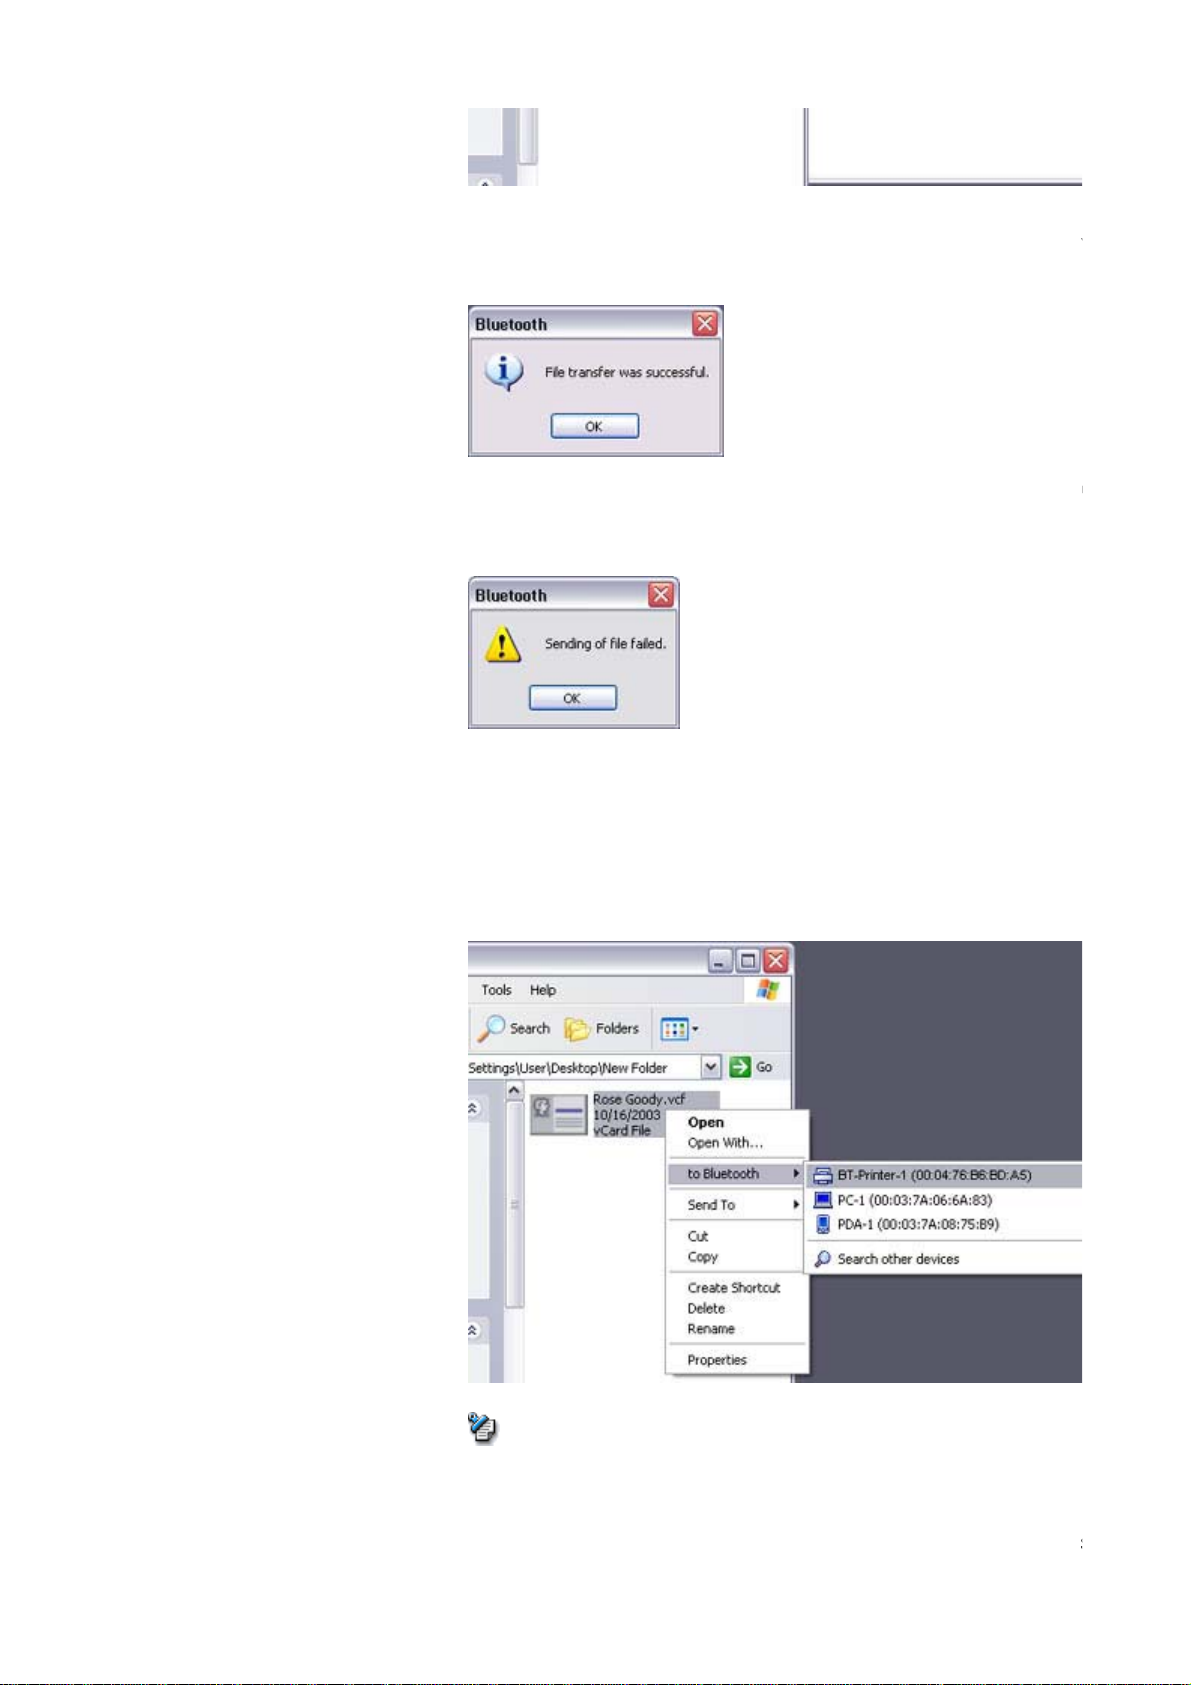
If the file has been sent to the
the image will be printed out. Please click on the [OK] button.
The messa
on the [OK] button to close the message, and repeat the printing procedure.
e below will appear if the file transmission was unsuccessful. Please
Note
rinter successfully, the message below will appe
{ If the
■Printing image files to a printer (by right -clicking the mouse)
file://C:\Documents and Settings\anitachou\Local Settings\Temp\~hh3F24.htm 2004/11/30
rinter does not support the BIP profile, the message below will a
Page 12
Quick Start Guide - Introduction 第 75 頁,共 160 頁
,
[
y
e
i
s
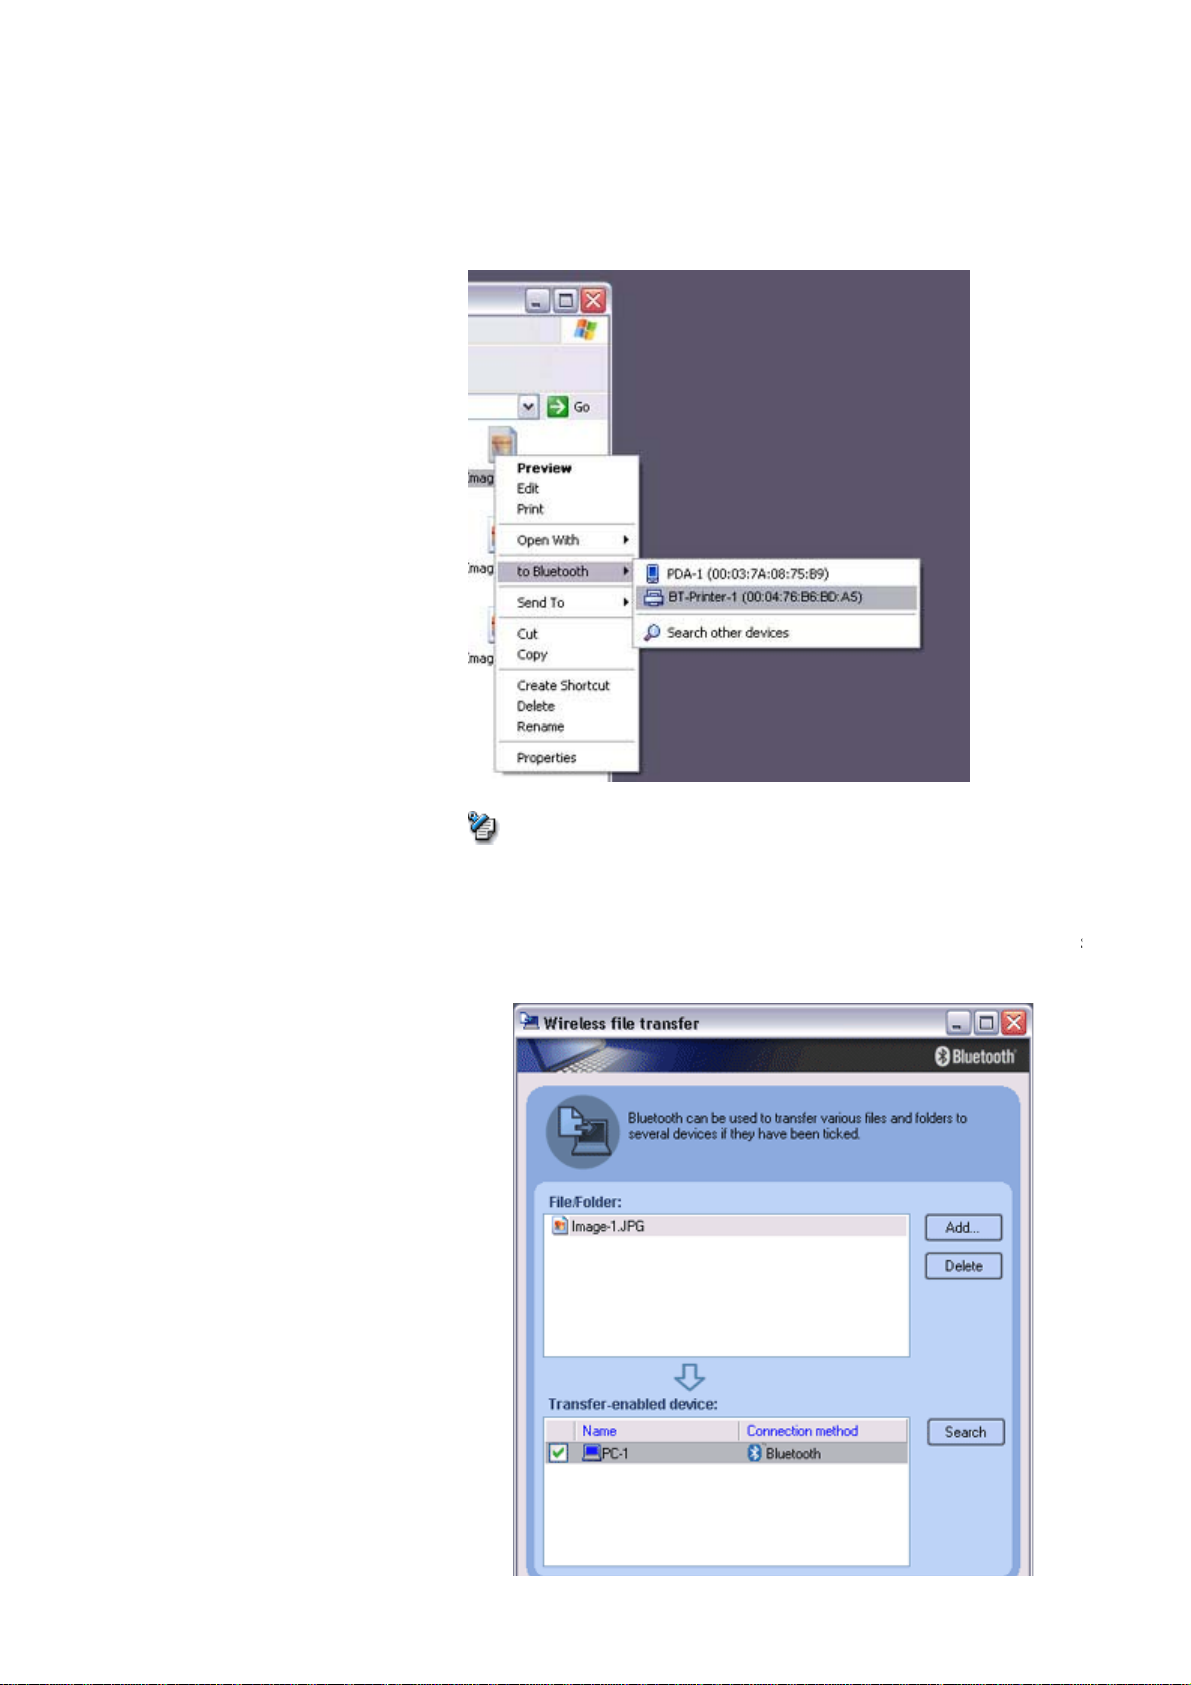
1. Turn on the printer
2. Right-click on the file to be sent
Bluetooth]
and then click on the destination printer under
Note
{ If
our desired device does not appear in the list, please confirm that the d
has been turned on, and then click on [to Bluetooth] →[Search Other Dev
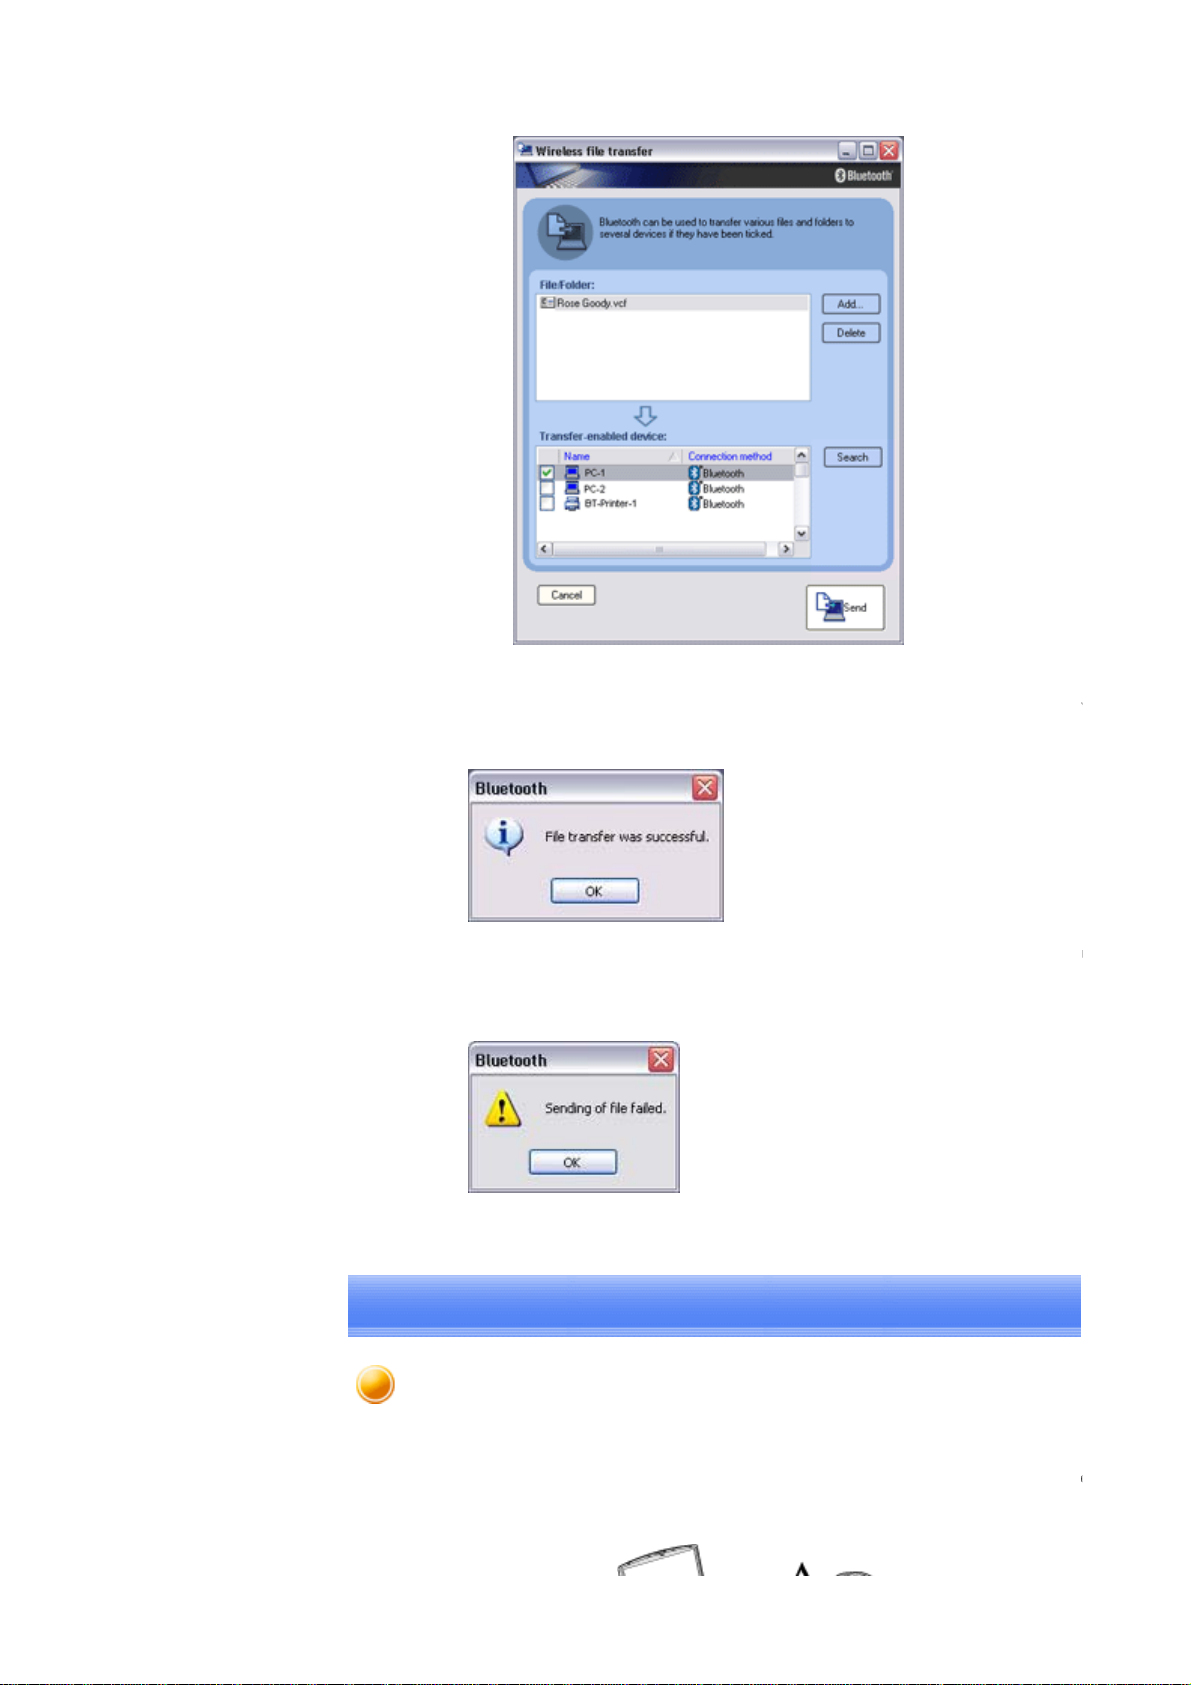
Once the device has been detected, the message below will appear. Please
the destination device, and click on the [Send] button.
file://C:\Documents and Settings\anitachou\Local Settings\Temp\~hh3F24.htm 2004/11/30
Page 13
Quick Start Guide - Introduction 第 76 頁,共 160 頁
p
a
g
p
ppe
n
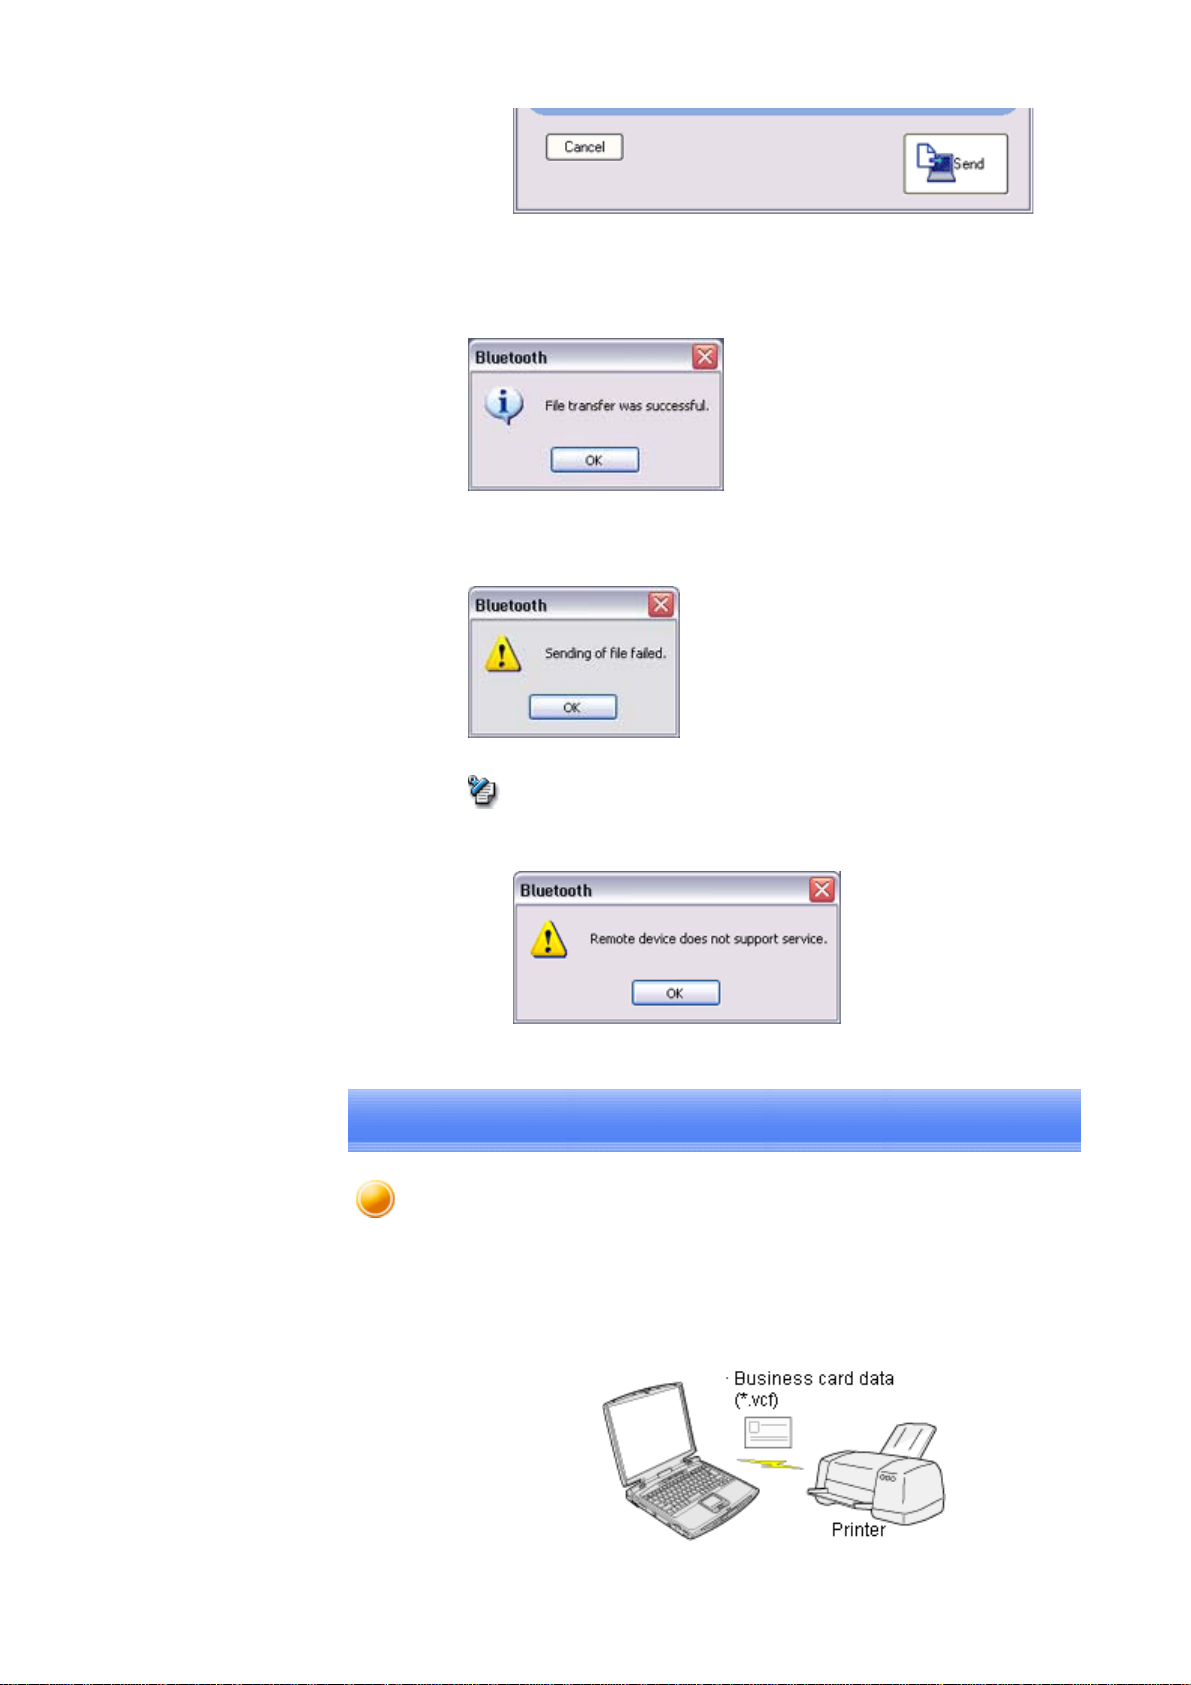
A window indicating that the file is being sent to the printer will appear.
If the file has been sent to the
the image will be printed out. Please click on the [OK] button.
rinter successfully, the message below will appe
The messa
on the [OK] button to close the message, and repeat the printing procedure.
{ If the
e below will appear if the file transmission was unsuccessful. Please
Note
rinter does not support the BIP profile, the message below will a
Printing business card data [OPP]
If you have a printer that supports OPP (Object Push Profile), you can directly send busi
card data that conforms to the "vCard" standard to a printer and print it out.
file://C:\Documents and Settings\anitachou\Local Settings\Temp\~hh3F24.htm 2004/11/30
Page 14
Quick Start Guide - Introduction 第 77 頁,共 160 頁
→Printing business card data (using icons)
→Printing business card data (by right-clicking the mouse)
Procedure
■Printing business card data (using icons)
1. Turn on the printer
2. Click on the Bluetooth Information Exchanger icon on the Desktop
Note
{ Alternatively, open Explorer and click on the Bluetooth Information Exch
folder for the same result.
The [Bluetooth Information Exchanger] window will appear.
3. Double-click on the [Object Push] icon
A list of devices will appear in the [Object Push] window.
file://C:\Documents and Settings\anitachou\Local Settings\Temp\~hh3F24.htm 2004/11/30
Page 15
Quick Start Guide - Introduction 第 78 頁,共 160 頁
y
pr
g
i
Here, the image will be sent to the target printer.
4. Dra
printer
Note
{ If
our desired printer does not appear in the list, please confirm that the
has been turned on, and then click on [Bluetooth] →[Search Devices]
A device search will be performed.
and drop the business card data to be sent on top of the icon of the destinat
file://C:\Documents and Settings\anitachou\Local Settings\Temp\~hh3F24.htm 2004/11/30
Page 16
Quick Start Guide - Introduction 第 79 頁,共 160 頁
p
w
g
u
,
n
y
e
i
s
The business card will be sent to the printer.
If the business card has been sent to the
appear, and the image will be printed out. Please click on the [OK] button.
rinter successfully, the message below
The messa
Please click on the [OK] button to close the message, and repeat the printing
procedure.
■Printing business card data (by right-clicking the mouse)
1. Turn on the printer
2. Right-click on the business card data to be sent
printer under [to Bluetooth]
e below will appear if the business card transmission was unsuccessf
and then click on the destinatio
Note
{ If
our desired device does not appear in the list, please confirm that the d
has been turned on, and then click on [to Bluetooth] →[Search Other Dev
Once the device has been detected, the message below will appear. Please
the destination device, and click on the [Send] button.
file://C:\Documents and Settings\anitachou\Local Settings\Temp\~hh3F24.htm 2004/11/30
Page 17
Quick Start Guide - Introduction 第 80 頁,共 160 頁
,[]
p
w
g
u
o
The business card will be sent to the printer.
If the business card has been sent to the
appear, and the image will be printed out. Please click on the [OK] button.
The messa
Please click on the [OK] button to close the message, and repeat the printing
procedure.
e below will appear if the business card transmission was unsuccessf
rinter successfully, the message below
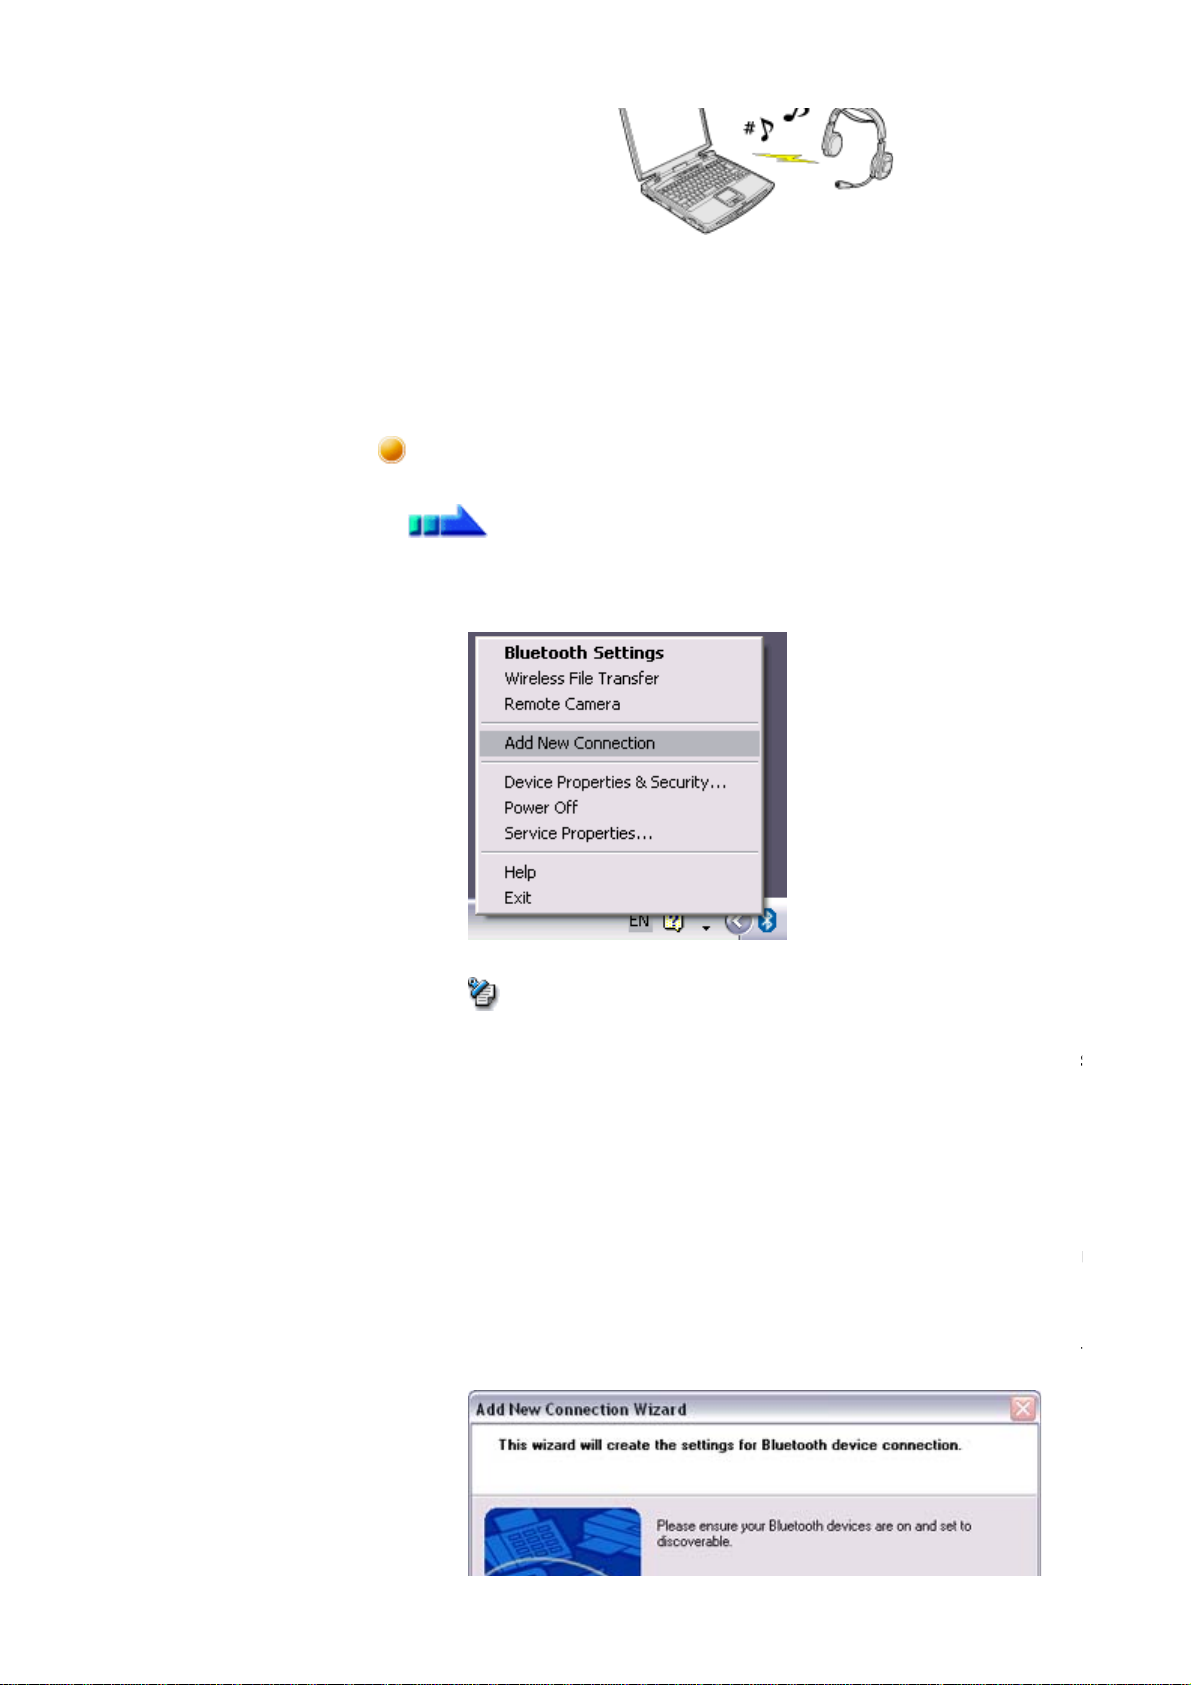
Listening to music using the stereo headphones 【GAVDP】
【A2DP】 【AVRCP】
This section describes how to use the stereo headphones to listen to your favourite music or
audio files stored on your PC.
file://C:\Documents and Settings\anitachou\Local Settings\Temp\~hh3F24.htm 2004/11/30
Page 18
Quick Start Guide - Introduction 第 81 頁,共 160 頁
gs],
gs
[
r
g
n
[Exp
t
→Configuring the stereo headphones
→Connecting to the stereo headphones
→Listening to music or other audio files
→Playing music using remote control
→Copyright protection function
Configuring the stereo headphones
Procedure
1. Right-click on the Bluetooth icon in the task tray, and click on [Add New
Connection].
Note
{ Alternatively, click [Start]→[All Programs]→[Bluetooth]→[Bluetooth
Settin
screen that has opened.
Add New Connection Wizard (Welcome to the Add New Connection Wiza
The
will appear.
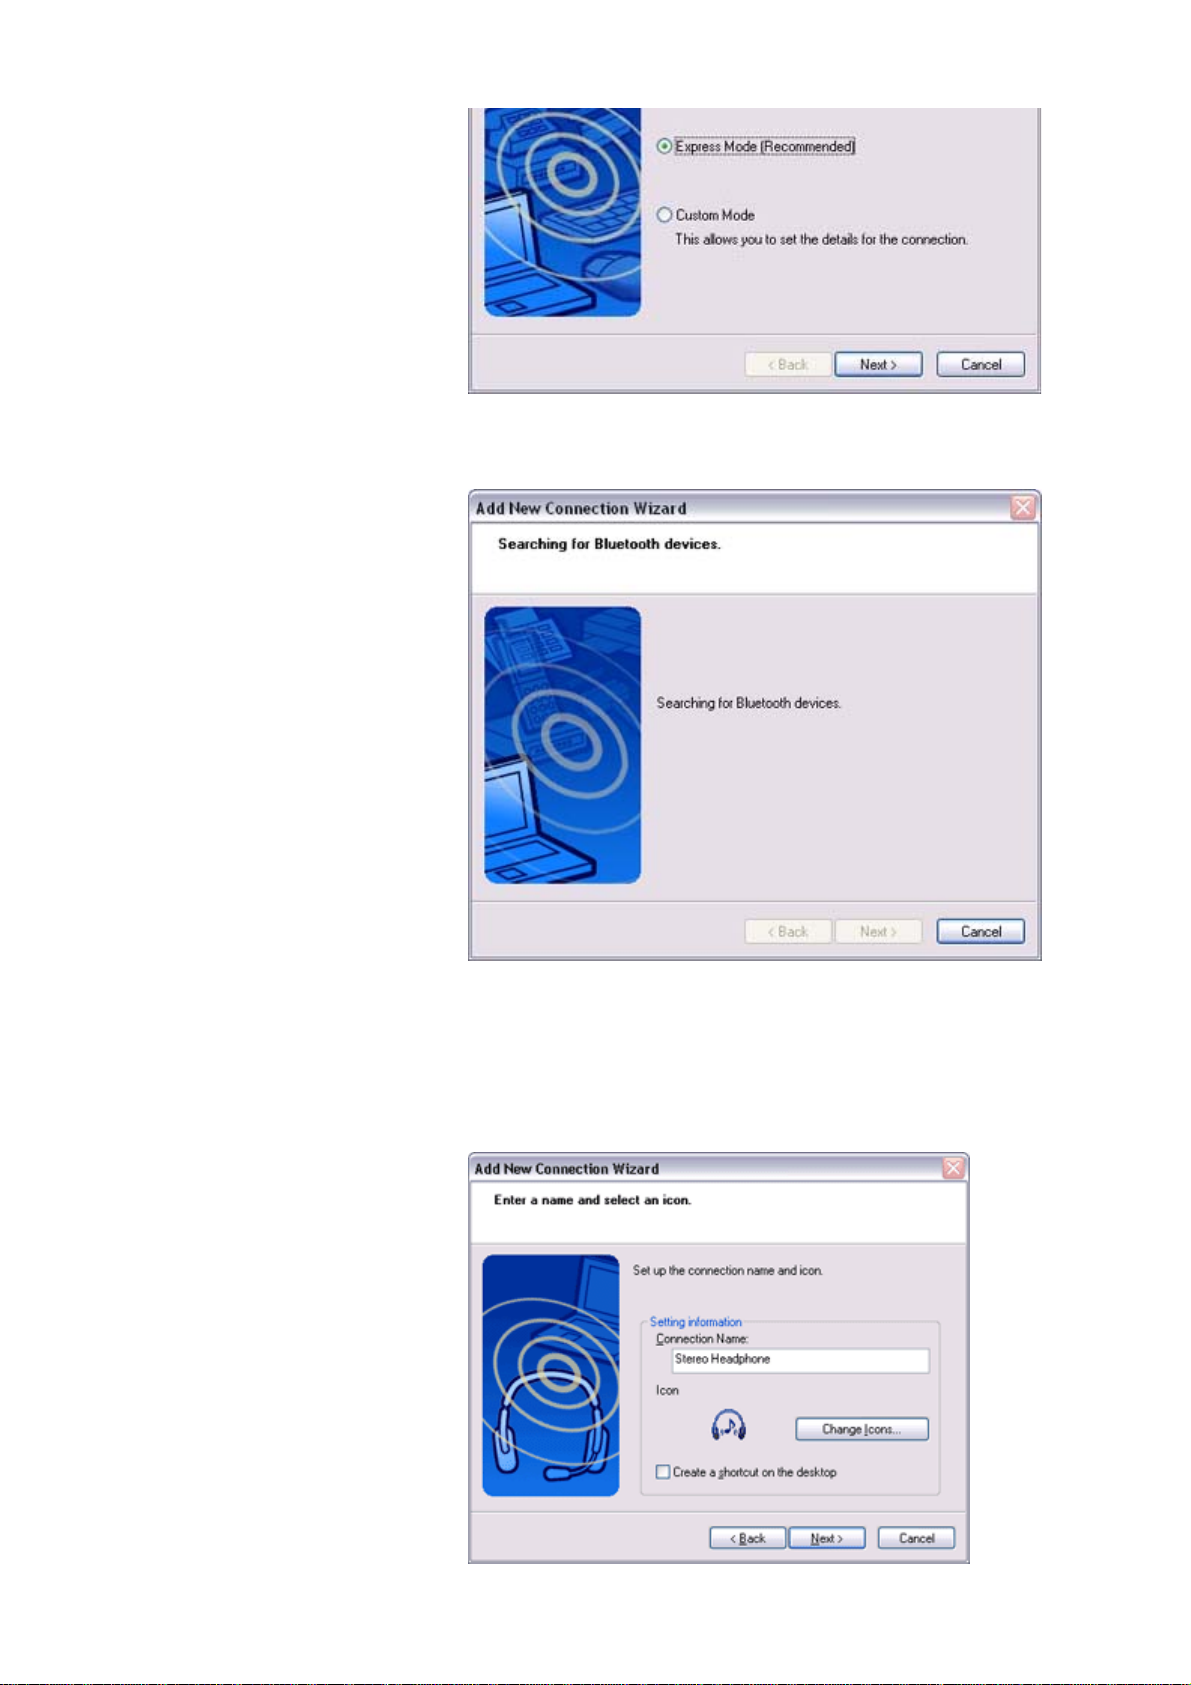
2. Switch ON the stereo headphones and activate "Discoverable" mode
Please refer to the user
how to operate them.
3. Confirm that
and then click on [New Connection] from the [Bluetooth Settin
uide for the stereo headphones for further information o
ress Mode] has been selected, and then click on the [Next] but
file://C:\Documents and Settings\anitachou\Local Settings\Temp\~hh3F24.htm 2004/11/30
Page 19
Quick Start Guide - Introduction 第 82 頁,共 160 頁
i
,
e
p
[N
The [Add New Connection Wizard (Searching for Bluetooth Devices)] screen w
appear.
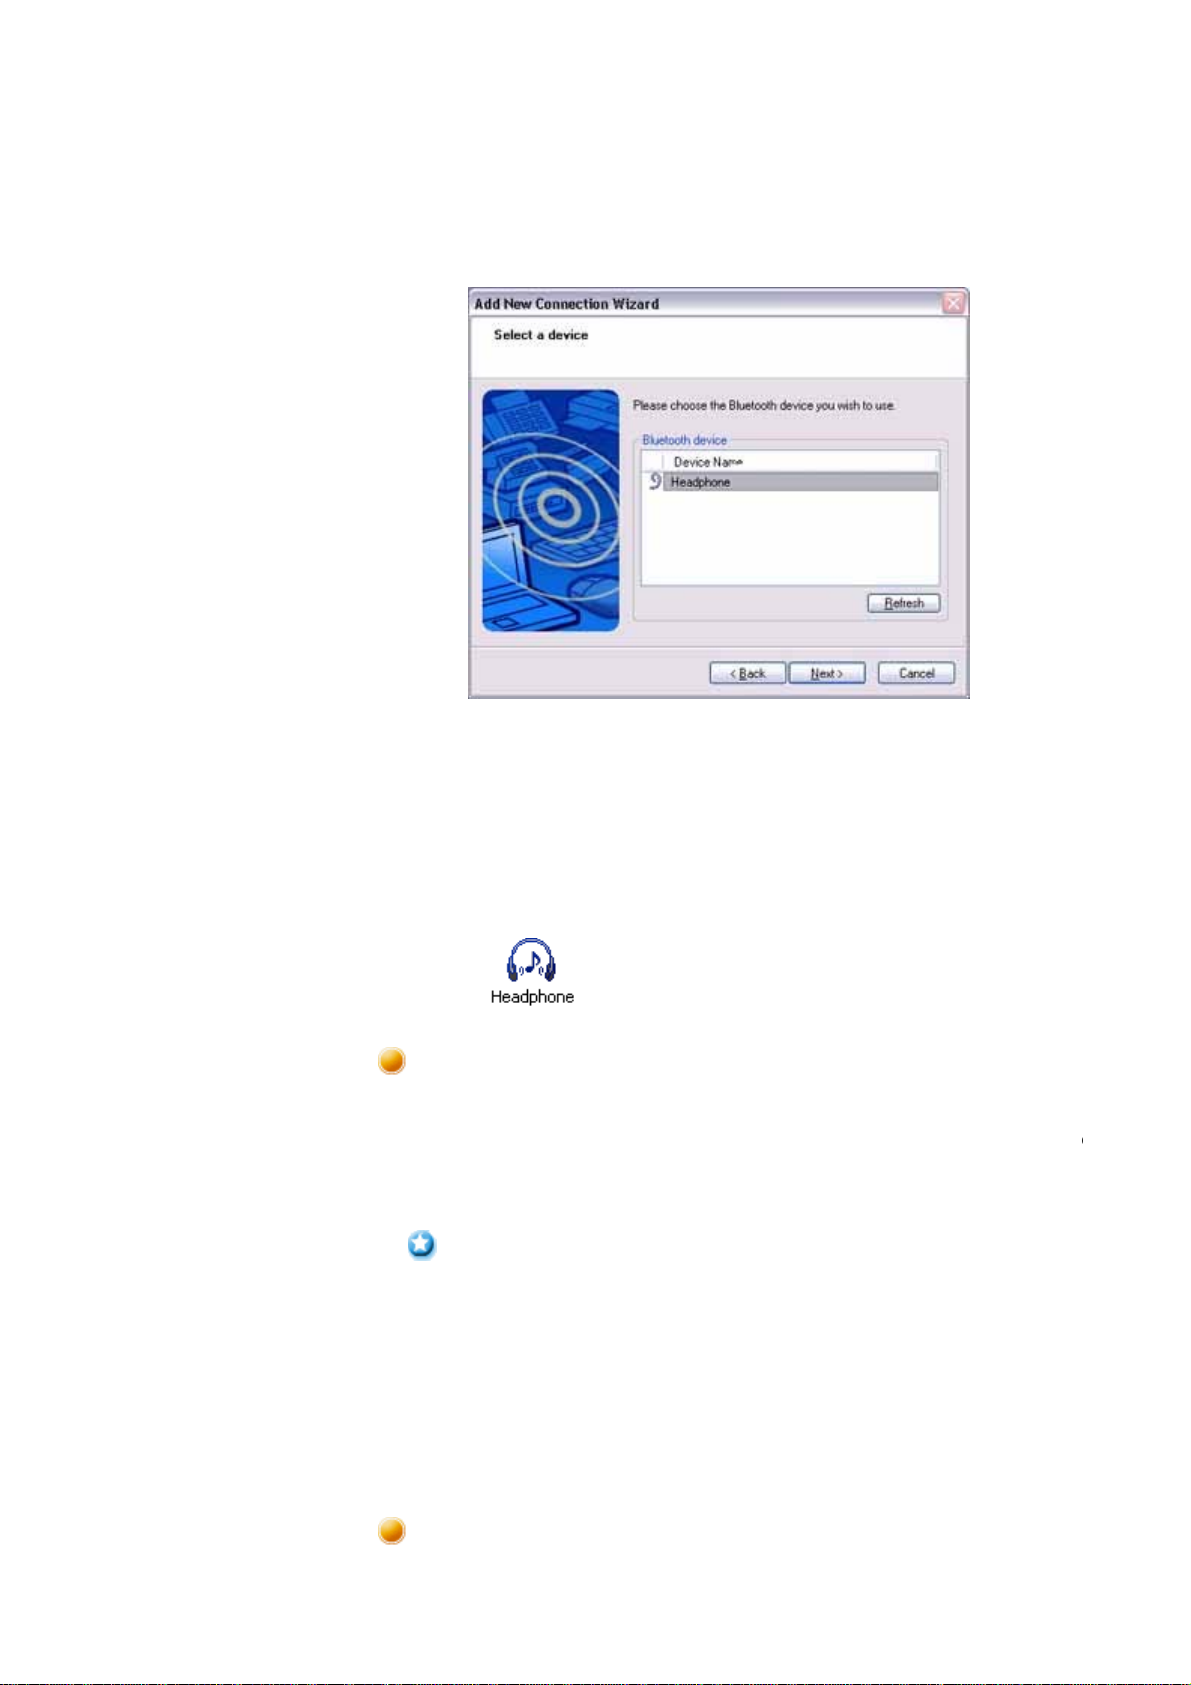
Once the search for the devices has ended
Device)] screen will appear.
4. Select the device name of the stereo head
button
the [Add New Connection Wizard (S
hones from the list, and click on the
file://C:\Documents and Settings\anitachou\Local Settings\Temp\~hh3F24.htm 2004/11/30
Page 20
Quick Start Guide - Introduction 第 83 頁,共 160 頁
g
g
g
p
gs
e
g
The [Add New Connection Wizard (Searching for Services)] screen will appear.
5. Confi
ure the type and name of the icon to appear once registration is complete,
click on the [Next] button
Please click the [Next] button once you are satisfied with the configuration.
The [Add New Connection Wizard (Configure Connection Name)] screen will
appear.
6. Click on the [Finish] button
The settin
s will be registered, and the icon will appear on the [Bluetooth Settin
screen.
Connecting to the stereo headphones
You can connect to the stereo head
Please refer to the user guide for information on how to make a connection from the ster
headphones.
Important
z Please close the followin
your stereo headphones and PC.
{ Music/video playback applications
{ e-Conferencing applications
{ Voice-recognition applications
hones from the icon registered in [Bluetooth Settin
audio applications before any connection is made betwe
Please finish connecting the stereo headphones before launching any of these
applications.
Listening to music or other audio files
file://C:\Documents and Settings\anitachou\Local Settings\Temp\~hh3F24.htm 2004/11/30
Page 21
Quick Start Guide - Introduction 第 84 頁,共 160 頁
1.Playing
fil
PC
p
m
[
play
y
d
play
e
y
m
e
played, op
n
y
a
n
y
h
g
r
music or other audio
es on your
Important
{ Please confirm the
oints below if you are unable to hear anything despite
having properly connected the stereo headphones.
Click [Start]→[All Programs]→[Accessories]→[Entertainment]→[Volu
Control].
Remove the tick next to
Mute] if it has been ticked. If the volume is at its
lowest setting, please adjust it to an appropriate level.
{ Music
back may be interrupted if other Bluetooth devices are currentl
connected to your PC. When you are listening to music, it is recommende
the stereo headphones be the only connected device.
{ Music
back may be interrupted if you are some distance away from th
or if there are any obstructions between you and the PC.
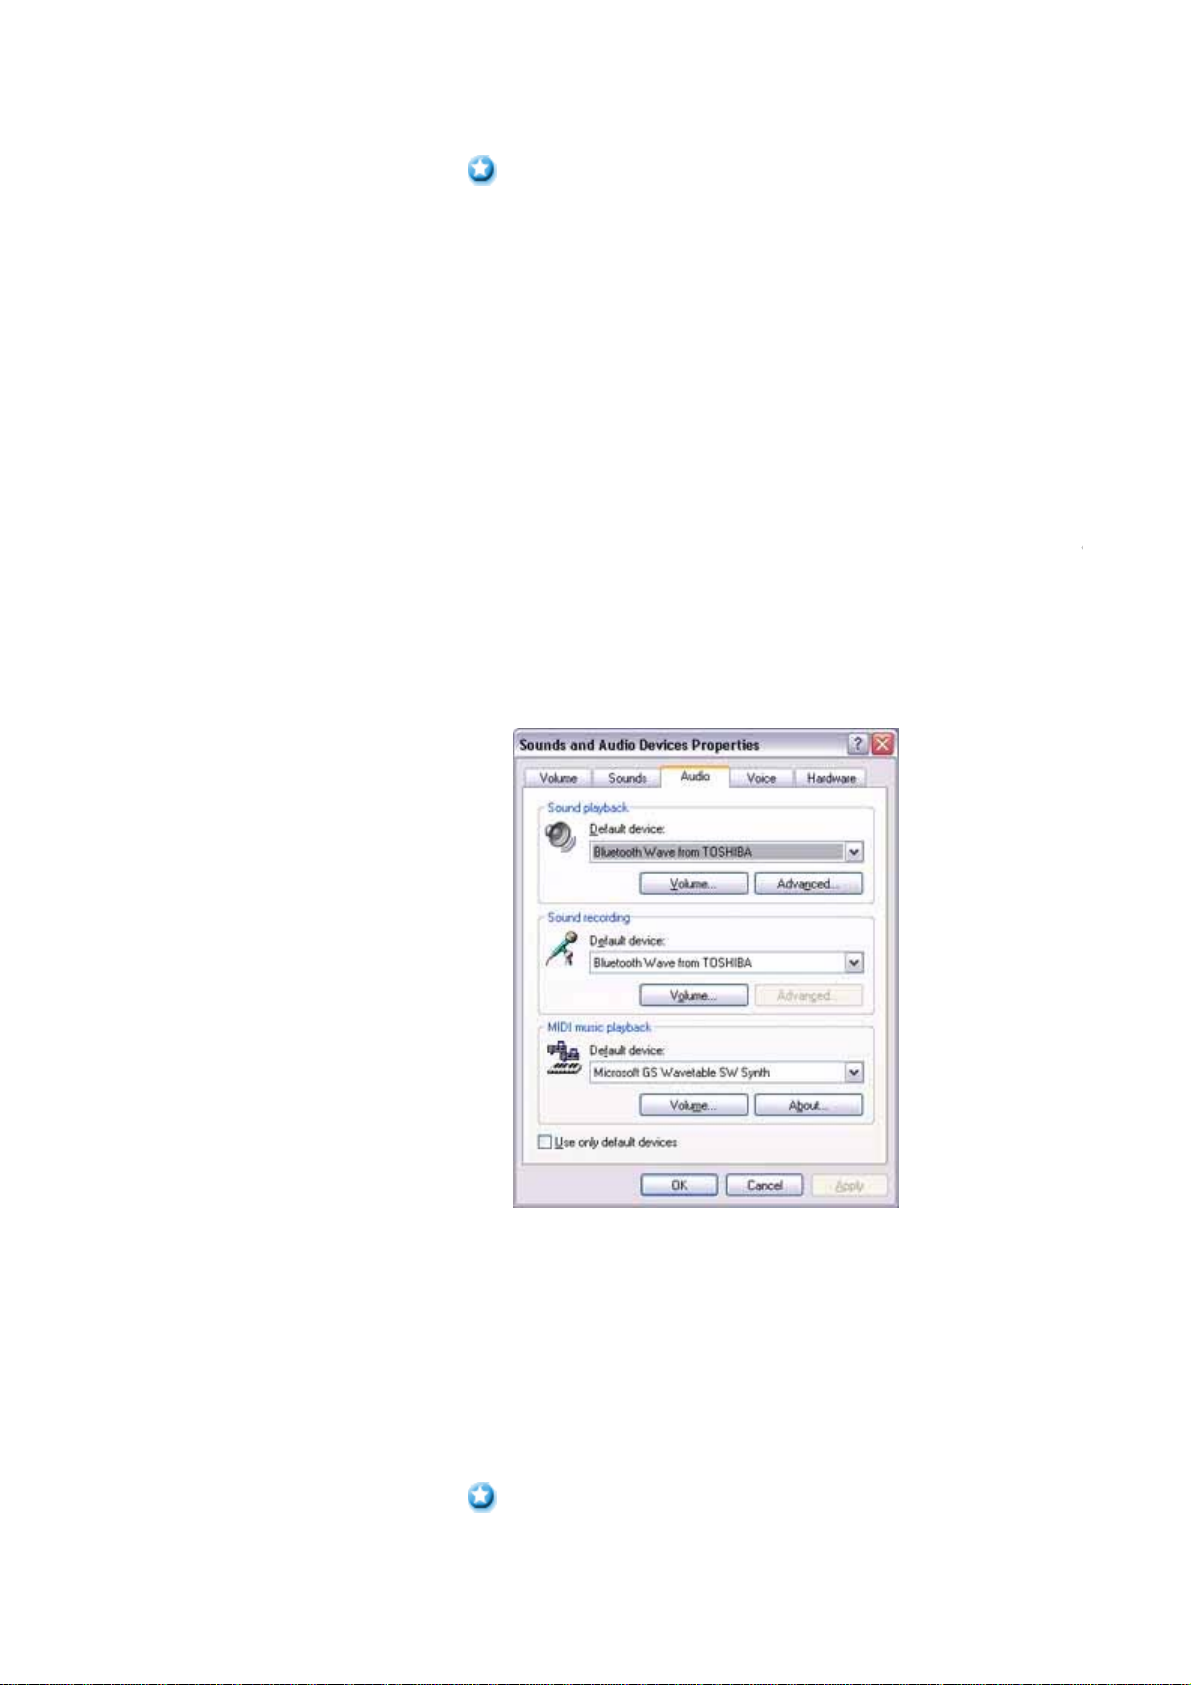
{ If
ou are unable to hear any sound out of your stereo headphones while
or audio is currently playing in a related application, please stop the files b
en [Sounds and Audio Devices] from the Control Panel, and cha
the default device to "Toshiba Bluetooth Wave."
If
ou are still unable to hear any sound from the stereo headphones even
having set "Toshiba Bluetooth Wave" as the default device, please re -lau
application.
2. Finishing listening to music and disconnecting
1. Right-click on the icon for the currentl
connected mode from [Bluetoot
Settings] on your PC, and click on "Disconnect."
A message confirming the disconnection may appear.
2. Click on the "Yes" button after having followed the instructions in the
message.
The icon will indicate that the device has been disconnected.
Important
{ Please close the followin
audio applications before you disconnect the ste
headphones from your PC:
file://C:\Documents and Settings\anitachou\Local Settings\Temp\~hh3F24.htm 2004/11/30
Page 22

Quick Start Guide - Introduction 第 85 頁,共 160 頁
p
o
g
f
Music/video playback applications
e-Conferencing applications
Voice-recognition applications
Please com
letely disconnect the stereo headphones before launching any
these applications.
Please refer to the user
uide for information on terminating a connection
the stereo headphones.
Playing music using remote control
Music applications and video playback applications installed on your PC
(e.g.,"Windows Media Player 9" and "InterVideo WinDVD") may be operated
with the remote control button/switch on your stereo headphones.
The remote control used with the stereo headphones must be compliant with
the Bluetooth AVRCP profile. Please refer to the headphones user guide for
further information.
You can configure the application to be operated using the switch/button
according to the following procedure.
Procedure
1. Double-click on the Bluetooth icon in the taskbar
Launches "Bluetooth Settings."
2. Click on [Bluetooth]→[Select AV Player] from the menu bar
The [Select AV Player] screen will appear.
3. Select the application, and click on the [OK] button
The functions and switch/button that can be operated may differ depending on
the application used for music/video playback as well as the version.
The procedure below can be performed in order to change the position where
the receive command is displayed or to not have the command displayed.
Procedure
1. Double-click on the Bluetooth icon in the taskbar
Launches "Bluetooth Settings."
2. Click on [Bluetooth]→[Select AV Player] from the menu bar.
The [Select AV Player] screen will appear.
3. Select the appropriate item from the pull -down menu of positions
where the receive command is to be displayed, and then click on the
[OK] button.
If the receive command appears but does not function properly, sometimes
the problem may be rectified by changing the setting to "Do not display."
The commands supported by this application are shown below. Please refer to
the headphone user guide for commands that are supported by the stereo
headphones. Problems with operation may be encountered with certain
versions of "Windows Media Player 9" and "InterVideo WinDVD."
file://C:\Documents and Settings\anitachou\Local Settings\Temp\~hh3F24.htm 2004/11/30
Page 23

Quick Start Guide - Introduction 第 86 頁,共 160 頁
[Windows Media Player 9]
[
g
p
u
z Play
z Stop
z Pause
z Next
z Previous
z Fast forward
z Rewind
[InterVideo WinDVD]
z Play
z Stop
z Pause
z Next chapter
z Previous chapter
z Fast Forward
z Fast Backward
z Up
z Down
z Left
z Right
z Select
z Root menu
z Angle
Copyright protection function
A copyright protection function is supported according to the SCMS -T format
as defined in the Bluetooth specifications. Follow the configuration procedure
below to establish connections only with devices that support this function.
Procedure
1. Double-click on the Bluetooth icon in the task tray.
Launches "Bluetooth Settings."
2. Select
Bluetooth] from the menu, and click on [Copyright Protection Settin
The copyright protection dialog will appear.
3. Tick the box next to "Only connect to devices that are copyright the SCMS-T format," and click on the OK button.
Using a wireless keyboard [HID]
This section describes how to connect a Bluetooth -compatible keyboard to a PC.
rotected
file://C:\Documents and Settings\anitachou\Local Settings\Temp\~hh3F24.htm 2004/11/30
Page 24
Quick Start Guide - Introduction 第 87 頁,共 160 頁
e
[
r
[Exp
t
w
Setti
d
ng up the wireless keyboar
Procedure
1. Right-click on the Bluetooth icon in the task tray, and then click on [Add New
Connection]
Note
{ Alternatively, click [Start]→[All Programs]→[Bluetooth]→[Bluetooth S
and then click on [New Connection] from the active [Bluetooth Settings]
window.
Add New Connection Wizard (Welcome to the Add New Connection Wiza
The
window will appear.
2. Confirm that
ress Mode] has been selected, and then click on the [Next] but
The [Add New Connection Wizard (Searching for Bluetooth devices)] window
appear.
file://C:\Documents and Settings\anitachou\Local Settings\Temp\~hh3F24.htm 2004/11/30
Page 25
Quick Start Guide - Introduction 第 88 頁,共 160 頁
i
y
e
[
r
Once the program has finished searching for the devices, the [Add New Connect
Wizard (Device Selection)] window will appear.
3. Select the device name of the ke
[Next] button
The
Add New Connection Wizard (Searching for Services)] window will appea
board from [Device List], and then click on th
file://C:\Documents and Settings\anitachou\Local Settings\Temp\~hh3F24.htm 2004/11/30
Page 26
Quick Start Guide - Introduction 第 89 頁,共 160 頁
prog
e
[
p
n
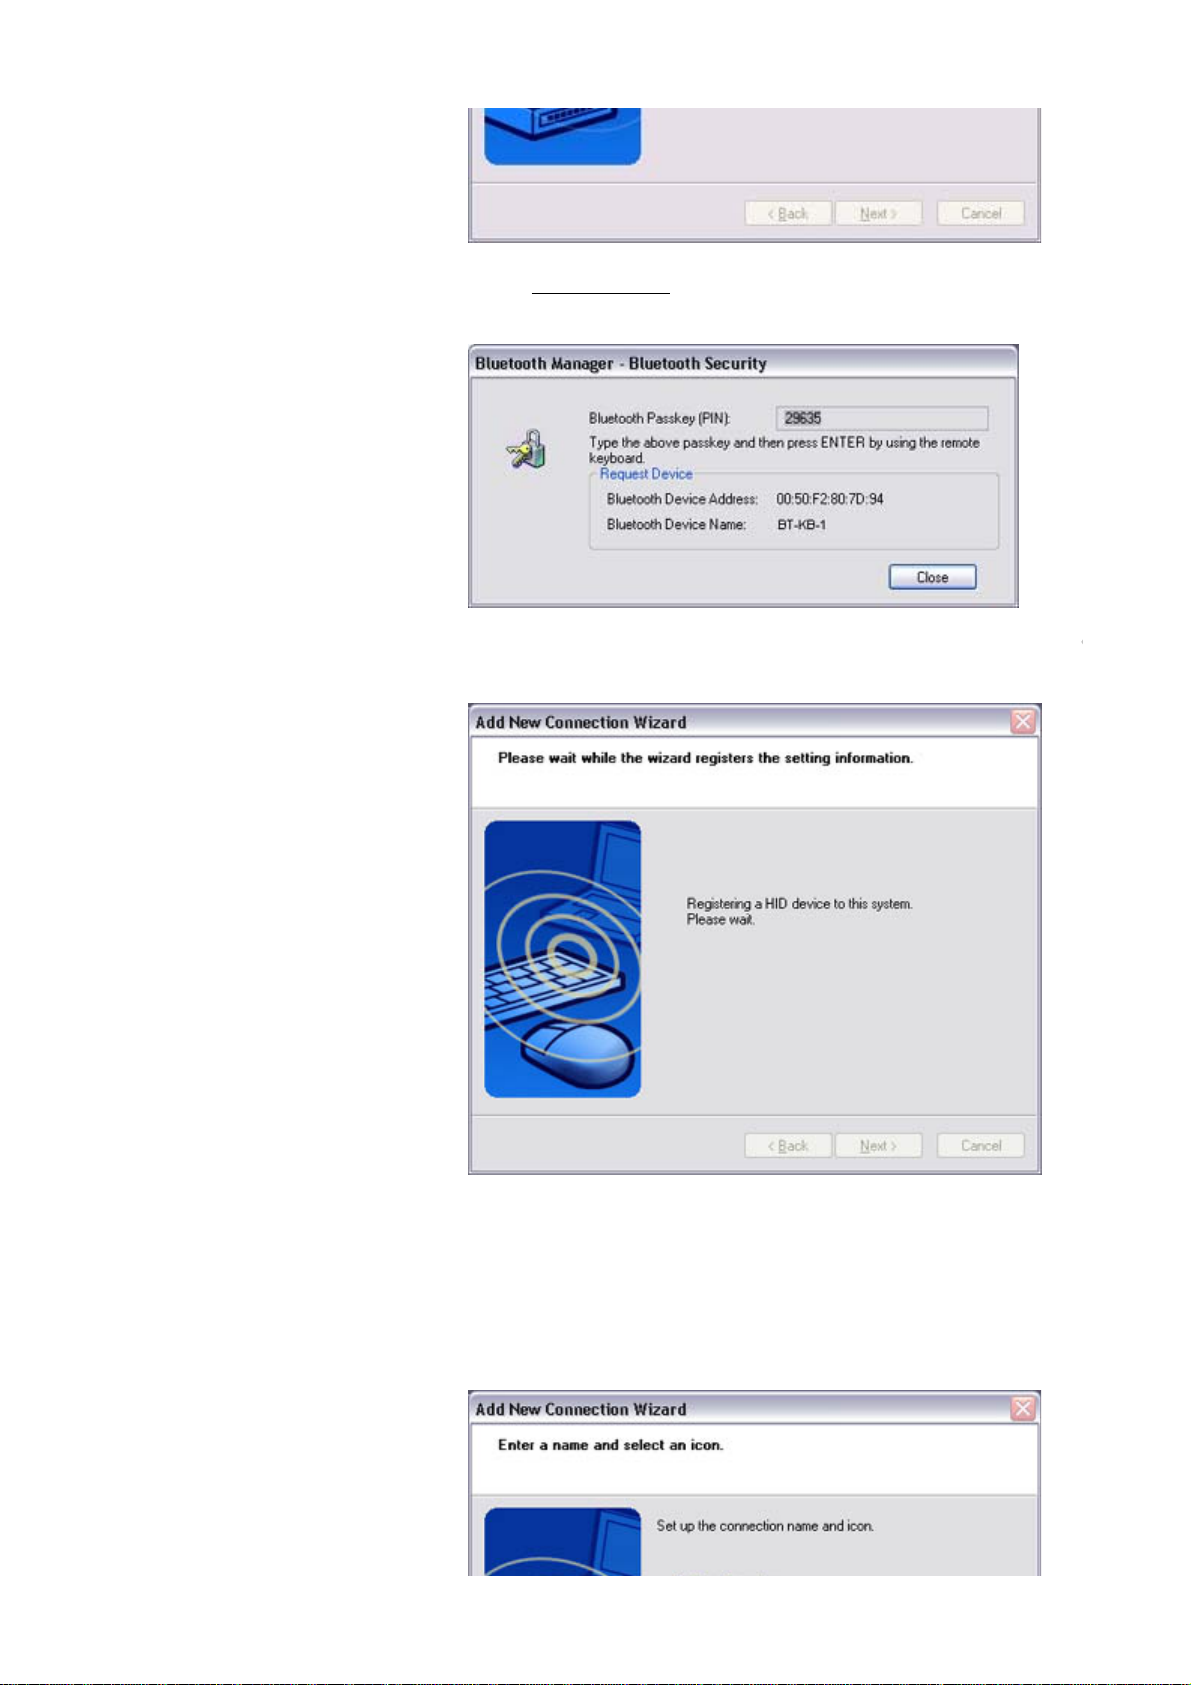
4. Use the wireless keyboard
Code)], and then hit the [Enter] key
Once the
registration of settings information will be performed automatically.
ram has detected the services successfully, connection to the devic
to enter the numbers that appear in [Bluetooth Passke
Add New Connection Wizard (Connection Name Settings)] window will a
The
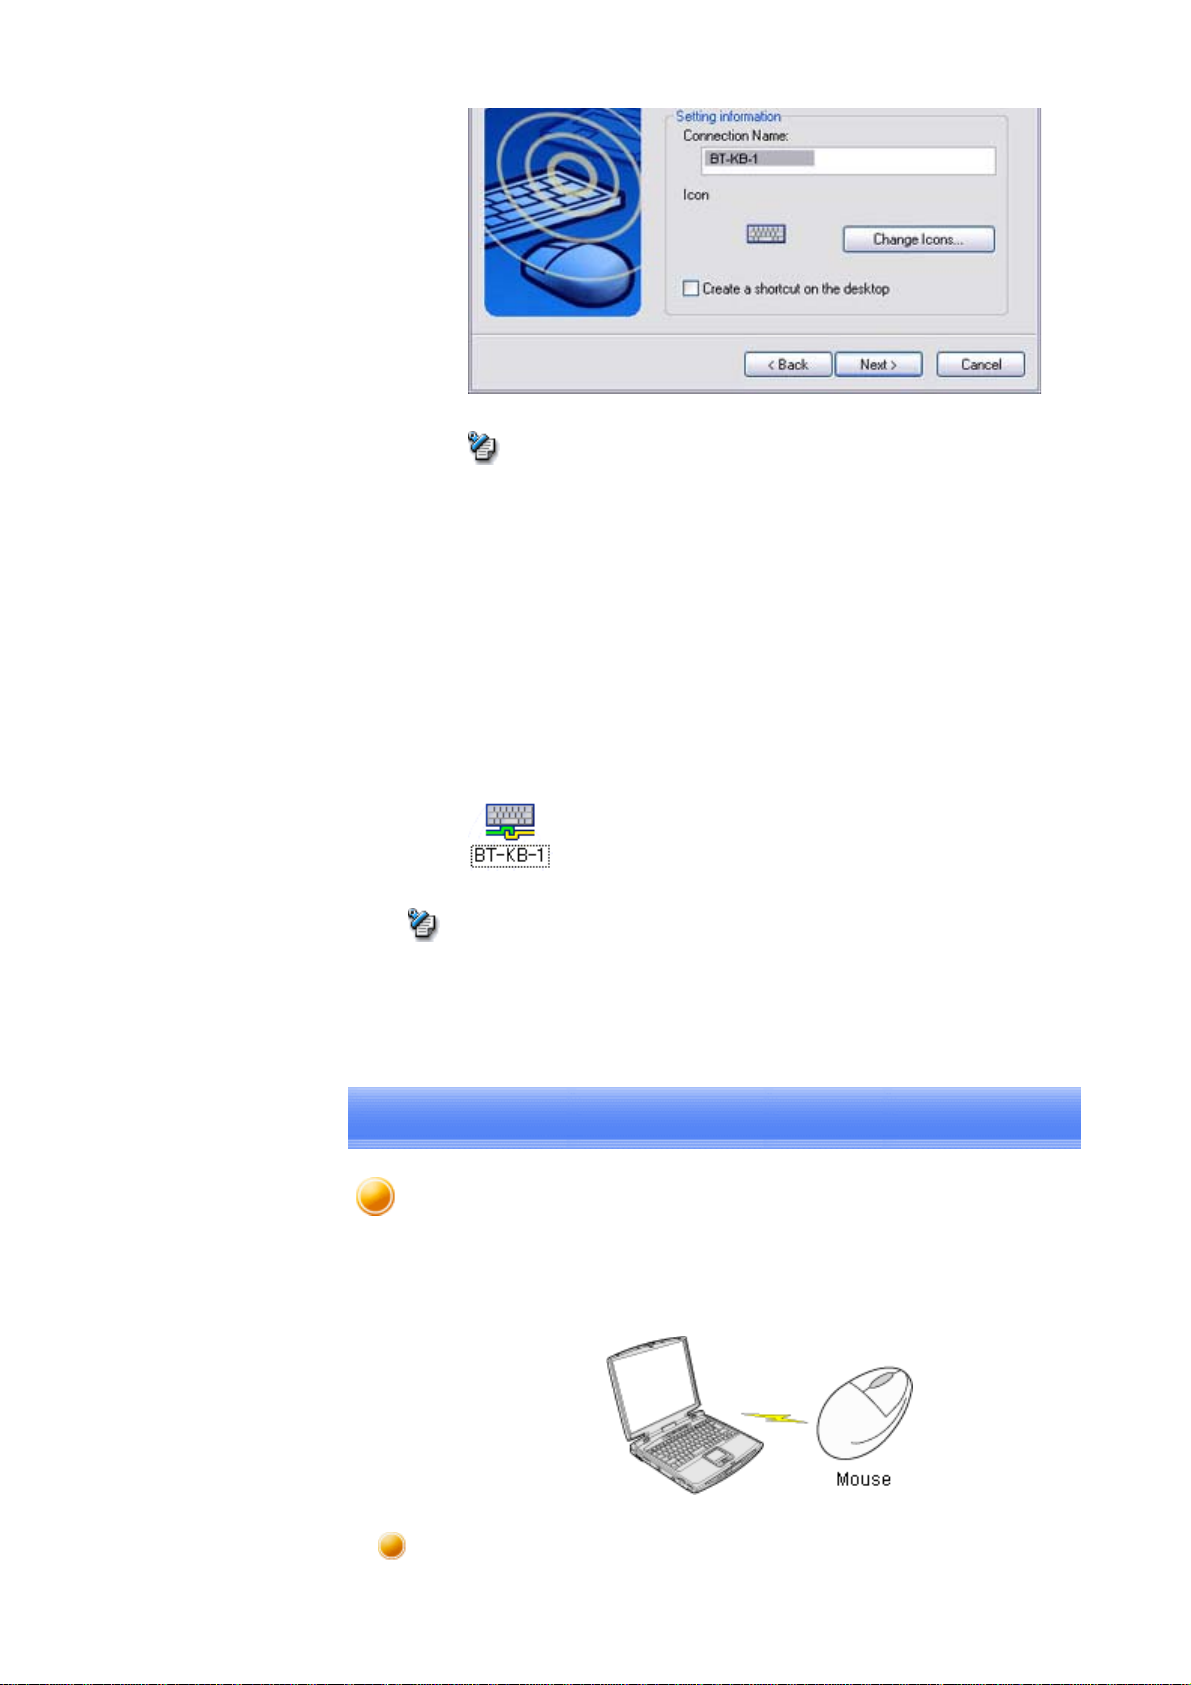
5. Enter the type and name of the icon displayed after registration, and then click o
[Next] button
Please click on the [Next] button if you are satisfied with the settings.
file://C:\Documents and Settings\anitachou\Local Settings\Temp\~hh3F24.htm 2004/11/30
Page 27
Quick Start Guide - Introduction 第 90 頁,共 160 頁
[
r
g
o
g
Note
{ You can change the connection icon and icon name.
→"Changing a connection icon name"
→"Changing a connection icon"
The
Add New Connection Wizard (Completing the Add New Connection Wiza
window will appear.
6. Click on the [Finish] button
The settin
Settings] window.
Note
z Pressin
thereafter.
Please connect manually if automatic connection is unsuccessful.
s information will be registered, and an icon will appear in the [Bluet
any key on the wireless keyboard will automatically connect it to the PC
Using a wireless mouse [HID]
This section describes how to connect a Bluetooth -compatible mouse to a PC.
Setting up the wireless mouse
file://C:\Documents and Settings\anitachou\Local Settings\Temp\~hh3F24.htm 2004/11/30
Page 28
Quick Start Guide - Introduction 第 91 頁,共 160 頁
e
[
r
[Exp
t
w
Procedure
1. Turn on the wireless mouse, and set it to be connectable via Bluetooth
Please refer to the instruction manual for details on how to operate the mouse.
2. Right-click on the Bluetooth icon in the task tray, and then click on [Add New
Connection]
Note
{ Alternatively, click [Start]→[All Programs]→[Bluetooth]→[Bluetooth S
and then click on [New Connection] from the active [Bluetooth Settings]
window.
Add New Connection Wizard (Welcome to the Add New Connection Wiza
The
window will appear.
3. Confirm that
ress Mode] has been selected, and then click on the [Next] but
The [Add New Connection Wizard (Searching for Bluetooth devices)] window
appear.
file://C:\Documents and Settings\anitachou\Local Settings\Temp\~hh3F24.htm 2004/11/30
Page 29
Quick Start Guide - Introduction 第 92 頁,共 160 頁
i
[
[N
[
r
Once the program has finished searching for the devices, the [Add New Connect
Wizard (Device Selection)] window will appear.
4. Select the device name of the mouse from
button
Device List], and then click on the
The
Add New Connection Wizard (Searching for Services)] window will appea
file://C:\Documents and Settings\anitachou\Local Settings\Temp\~hh3F24.htm 2004/11/30
Page 30
Quick Start Guide - Introduction 第 93 頁,共 160 頁
[
p
n
[
r
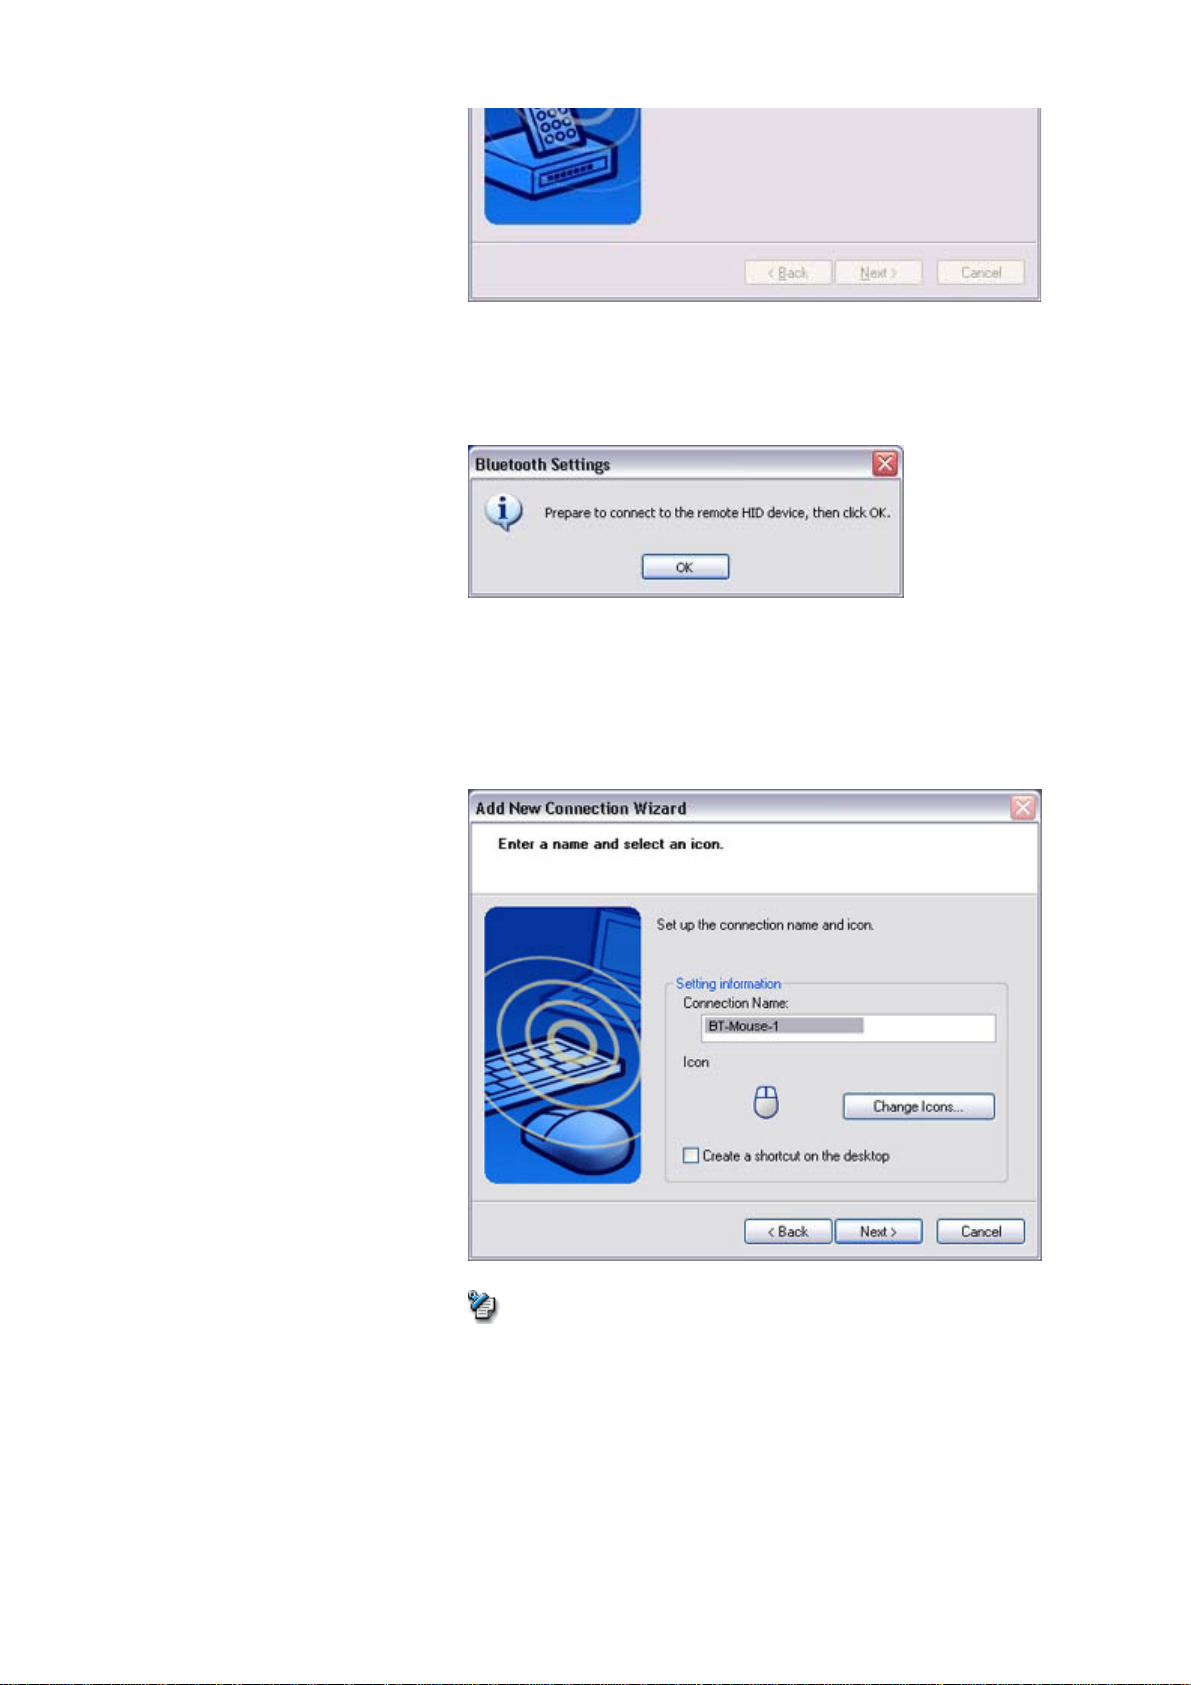
A message confirming a device connection will appear.
5. Click on the [OK] button
The
Add New Connection Wizard (Connection Name Settings)] window will a
6. Enter the type and name of the icon displayed after registration, and then click o
[Next] button
Please click on the [Next] button if you are satisfied with the settings.
Note
{ Please use this window to change the connection name and icon.
- Changing the connection icon name
- Changing the connection icon
Add New Connection Wizard (Completing the Add New Connection Wiza
The
window will appear.
7. Click on the [Finish] button
file://C:\Documents and Settings\anitachou\Local Settings\Temp\~hh3F24.htm 2004/11/30
Page 31

Quick Start Guide - Introduction 第 94 頁,共 160 頁
P
p
f
The settings information will be have been registered, and an icon will appear in
[Bluetooth Settings] window.
Note
{ Clicking on one of the mouse buttons or otherwise operating it will
automatically connect it to the PC thereafter. Please connect manually if
automatic connection is unsuccessful.
Exchanging files with a PC or PDA [FTP]
You can send and receive files other than business card data with a Bluetooth -enabled
PDA.
Use "File transfer" in the Bluetooth Information Exchanger to exchange files.
Note
z The same o
z "File transfer" cannot be used to send or receive business card data. Please instead
"Object Push" to perform these activities.
→Sending files to a PC or PDA (using icons)
→Sending files to a PC or PDA (by right-clicking the mouse)
→Receiving files from a PC or PDA
erations will be valid as long as the PC and PDA support the FTP pro
Procedure
■Sending files to a PC or PDA (using icons)
1. Turn on the PC or PDA
2. Double-click on the Bluetooth Information Exchanger icon on the Desktop
file://C:\Documents and Settings\anitachou\Local Settings\Temp\~hh3F24.htm 2004/11/30
Page 32

Quick Start Guide - Introduction 第 95 頁,共 160 頁
y, op
Note
{ Alternativel
Exchanger folder will produce the same result.
ening Explorer and clicking on the Bluetooth Information
The [Bluetooth Information Exchanger] window will appear.
3. Double-click on the [File transfer] icon
A list of devices will appear in the [File transfer] window.
Note
file://C:\Documents and Settings\anitachou\Local Settings\Temp\~hh3F24.htm 2004/11/30
Page 33

Quick Start Guide - Introduction 第 96 頁,共 160 頁
pp
v
g
o
g
g
t
t
i
y
w
{ If the desired device does not a
ear in the list, please confirm that the de
has been turned on, and then select [Bluetooth] →[Search Devices].
A device search will be performed.
{ You can also use "Image transfer" when sending individual image files.
4. Use the mouse to dra
and drop the file you wish to send over the destination ic
In this case, the file will be sent to a PC named "PC -1".
Note
{ When usin
"File transfer", you can send individual files as well as entire
folders.
5. Confirm that the file is being sent
The file will be sent to the PC.
Note
{ When sendin
files using "File transfer", a message requesting permission
receive the files may appear on the destination (receiving) device. The con
the message will vary with the Bluetooth software installed on the destinat
device, so please be sure to follow the instructions provided.
If
ou are using the Bluetooth Utility, a message similar to the one below
appear.
If the file has been sent successfully, the message below will appear.
Please click on the [OK] button.
file://C:\Documents and Settings\anitachou\Local Settings\Temp\~hh3F24.htm 2004/11/30
Page 34

Quick Start Guide - Introduction 第 97 頁,共 160 頁
e
g
l
g
y
The message below will appear if the file transmission was unsuccessful.
Please click on the [OK] button to close the message, and repeat the procedure.
Note
{ Files that have been sent will be saved in a file transfer shared folder on th
destination device.
{ Additionally, with "File transfer", you can open the shared folder on the
destination device usin
there.
Explorer, specify a subfolder, and then send the fi
{ You can use Properties in the Bluetooth Information Exchan
er to change
location of the "Shared folder" on the hard drive.
■Sending files to a PC or PDA (by right-clicking the mouse)
1. Turn on the PC or PDA
Confirm that a Bluetooth connection has been enabled before proceeding.
2. Right-click on the file
ou wish to send, and then select its destination from [to
Bluetooth]
file://C:\Documents and Settings\anitachou\Local Settings\Temp\~hh3F24.htm 2004/11/30
Page 35

Quick Start Guide - Introduction 第 98 頁,共 160 頁
pp
v
]
s
Note
{ If the desired device does not a
has been turned on, and then select [to Bluetooth] →[Search other devices
Once the devices have been detected, the message below will appear. Plea
select the destination device, and then click on the [Send] button.
ear in the list, please confirm that the de
3. Confirm that the file is being sent
The file will be sent to the PC.
file://C:\Documents and Settings\anitachou\Local Settings\Temp\~hh3F24.htm 2004/11/30
Page 36

Quick Start Guide - Introduction 第 99 頁,共 160 頁
g
t
t
i
y
w
[OK]
u
e
i
Note
{ When sendin
files using "File transfer", a message requesting permission
receive the files may appear on the destination (receiving) device. The con
the message will vary with the Bluetooth software installed on the destinat
device, so please be sure to follow the instructions provided.
If
ou are using the Bluetooth Utility, a message similar to the one below
appear.
If the file has been sent successfully, the message below will appear.
Please click on the [OK] button.
The message below will appear if the file transmission was unsuccessful.
Please click on the
button to close the message, and then repeat the proced
Note
{ Files that have been sent will be saved in a file transfer shared folder on th
destination device.
■Receiving files from a PC or PDA
Your PC is able to receive files that have been saved in the shared folder on the destinat
PC or PDA. Received files will be saved in the shared folder under "File transfer".
1. Turn on the PC or PDA
Confirm that a Bluetooth connection has been enabled before proceeding.
2. Double-click on the Bluetooth Information Exchanger icon on the Desktop
file://C:\Documents and Settings\anitachou\Local Settings\Temp\~hh3F24.htm 2004/11/30
Page 37

Quick Start Guide - Introduction 第 100 頁,共 160 頁
y, op
Note
{ Alternativel
Exchanger folder will produce the same result.
ening Explorer and clicking on the Bluetooth Information
The [Bluetooth Information Exchanger] window will appear.
3. Double-click on the [File transfer] icon
A list of devices will appear in the [File transfer] window.
"
file://C:\Documents and Settings\anitachou\Local Settings\Temp\~hh3F24.htm 2004/11/30
"
Page 38

Quick Start Guide - Introduction 第 101 頁,共 160 頁
In this case, the file will be received from the PDA named My Mobile
, y
y
g
.
4. Double-click on the [PDA-1] icon
The file saved in the shared folder in "My Mobile" will appear.
5. Right-click on the file you wish to receive, and then select "Receive file".
The file will be received from a PDA.
Note
{ With "File transfer"
Please right-click on the folder
Subsequent operations should be performed in the same manner as when
receiving individual files.
If the file has been received successfully, the message below will appear.
Please click on the [OK] button.
ou can send individual files as well as entire folders.
ou wish to receive, and select "Receive fo
The messa
on the [OK] button to close the message, and repeat the procedure.
file://C:\Documents and Settings\anitachou\Local Settings\Temp\~hh3F24.htm 2004/11/30
e below will appear if the file transmission was unsuccessful. Please
Page 39

Quick Start Guide - Introduction 第 102 頁,共 160 頁
g
c
g
Note
{ The received file will be saved in the "Shared folder" under "File transfer"
Bluetooth Information Exchanger
You can use Properties under the Bluetooth Information Exchan
the location of the "Shared folder" on the hard drive.
Sending images to a mobile telephone [BIP]
You can send image data to a Bluetooth -compatible mobile telephone.
Large images will be automatically reduced to fit on the telephone display screen.
Images are sent using "Image transfer" under Bluetooth Information Exchanger.
er to spe
Note
z The mobile telephone must support the BIP profile.
z The followin
file://C:\Documents and Settings\anitachou\Local Settings\Temp\~hh3F24.htm 2004/11/30
image file formats can be sent and received using "Image transfer":
Page 40

Quick Start Guide - Introduction 第 103 頁,共 160 頁
{
Bitmap (*.bmp)
y, op
{ JPEG (*.jpg, *.jpeg)
{ PNG (*.png)
→Sending images to a mobile telephone (using icons)
→Sending images to a mobile telephone (by right -clicking the mouse)
Procedure
■Sending images to a mobile telephone (using icons)
1. Turn on the PC or PDA
Confirm that a Bluetooth connection has been enabled before proceeding.
2. Double-click on the Bluetooth Information Exchanger icon on the Desktop
Note
{ Alternativel
ening Explorer and clicking on the Bluetooth Information
Exchanger folder will produce the same result.
The [Bluetooth Information Exchanger] window will appear.
3. Double-click on the [Image transfer] icon
A list of devices will appear in the [Image transfer] window.
file://C:\Documents and Settings\anitachou\Local Settings\Temp\~hh3F24.htm 2004/11/30
Page 41

Quick Start Guide - Introduction 第 104 頁,共 160 頁
pp
v
Note
{ If the desired device does not a
has been turned on, and then select [Bluetooth] →[Search Devices].
A device search will be performed.
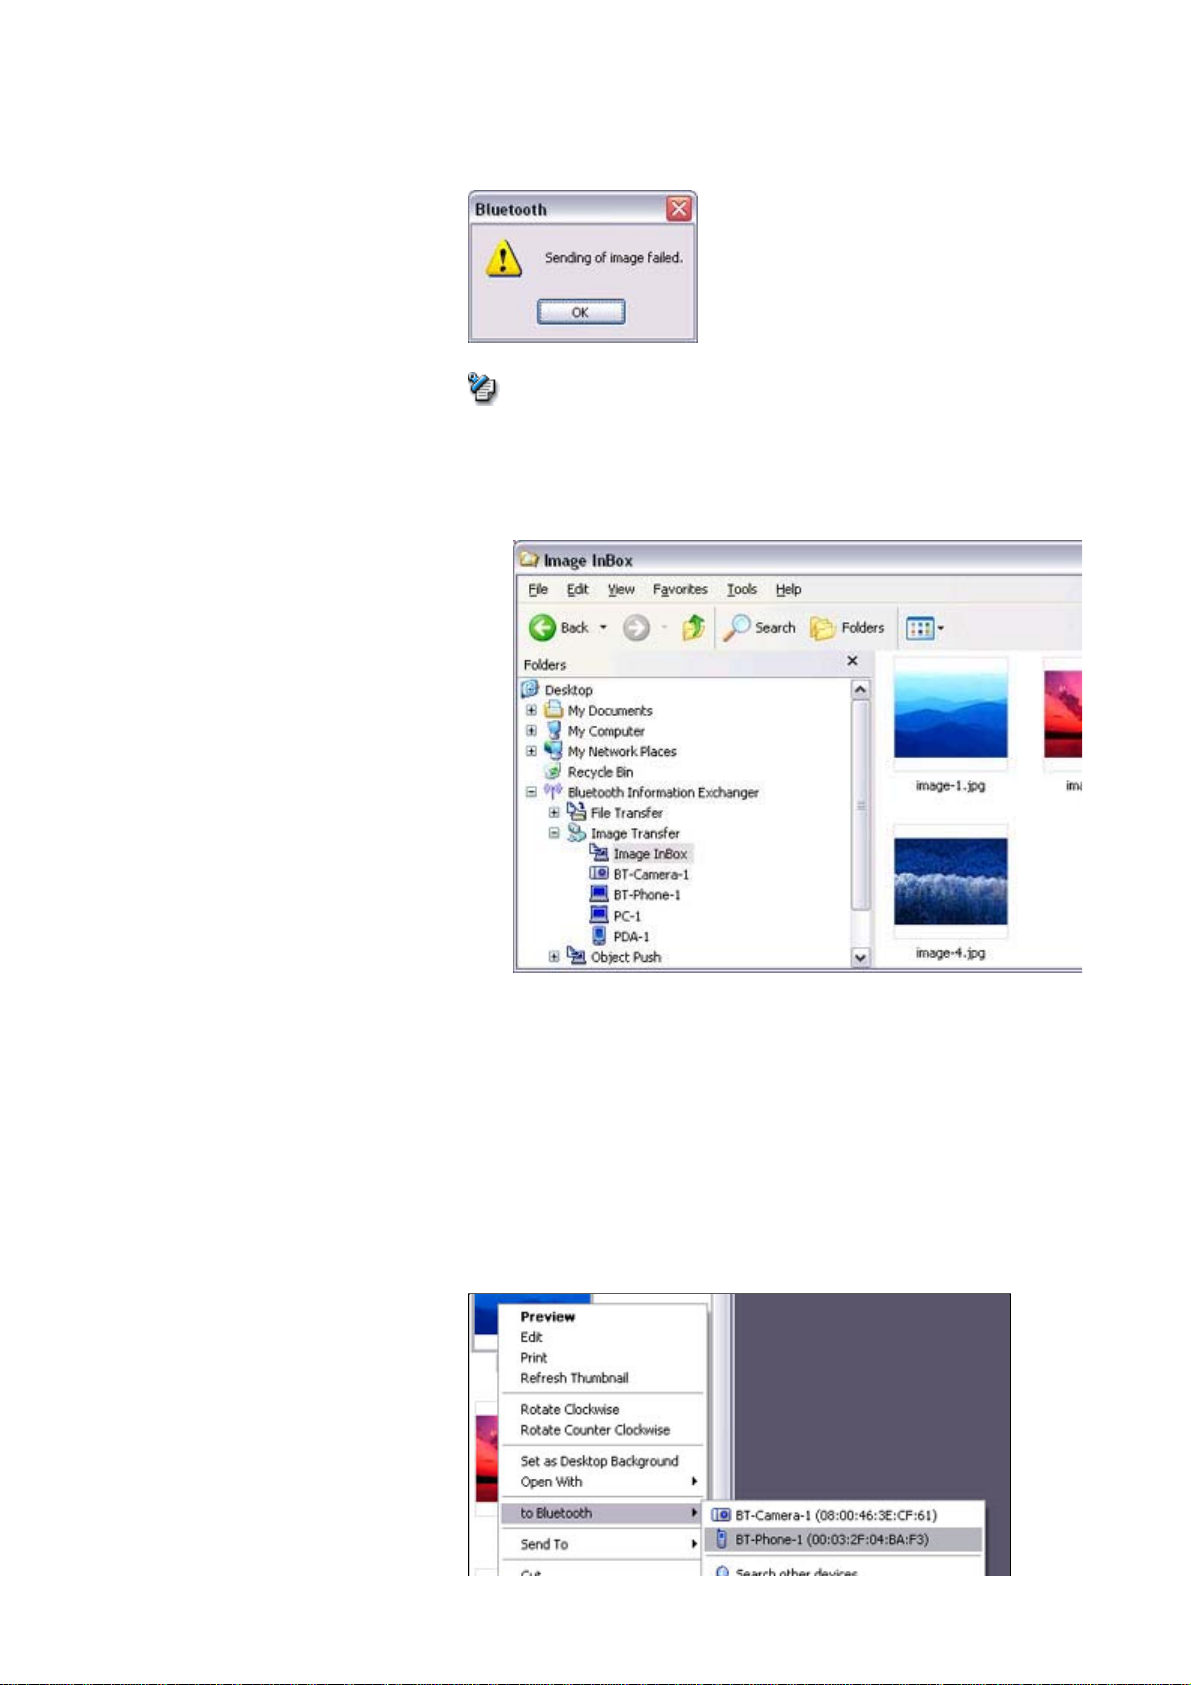
4. Drag and drop the file you wish to send over the destination icon
In this case, the image will be sent to a mobile telephone named "BT -Phone-1".
ear in the list, please confirm that the de
The image will be sent.
If the image has been sent successfully, the message below will appear.
Please click on the [OK] button.
The message below will appear if the image transmission was unsuccessful.
Please click on the [OK] button to close the message, and repeat the procedure.
file://C:\Documents and Settings\anitachou\Local Settings\Temp\~hh3F24.htm 2004/11/30
Page 42

Quick Start Guide - Introduction 第 105 頁,共 160 頁
y
o
pp
v
]
s
■Sending images to a mobile telephone (by right -clicking the mouse)
1. Turn on the mobile telephone
Confirm that a Bluetooth connection has been enabled before proceeding.
2. Right-click on the file
Bluetooth]
Note
ou wish to send, and then click on its destination from [t
{ If the desired device does not a
has been turned on, and then select [to Bluetooth] →[Search other devices
Once the devices have been detected, the message below will appear. Plea
select the destination device, and then click on the [Send] button.
file://C:\Documents and Settings\anitachou\Local Settings\Temp\~hh3F24.htm 2004/11/30
ear in the list, please confirm that the de
Page 43

Quick Start Guide - Introduction 第 106 頁,共 160 頁
The image will be sent.
If the image has been sent successfully, the message below will appear.
Please click on the [OK] button.
The message below will appear if the image transmission was unsuccessful.
Please click on the [OK] button to close the message, and repeat the procedure.
Sending images to a PC or PDA [BIP]
You can send image data to a Bluetooth -enabled PC or PDA.
Images are sent using "Image transfer" under Bluetooth Information Exchanger.
Note
file://C:\Documents and Settings\anitachou\Local Settings\Temp\~hh3F24.htm 2004/11/30
Page 44

Quick Start Guide - Introduction 第 107 頁,共 160 頁
g
y, op
z The followin
{ Bitmap (*.bmp)
{ JPEG (*.jpg, *.jpeg)
{ PNG (*.png)
image file formats can be sent and received using "Image transfer":
→Sending images to a PC or PDA (using icons)
→Sending images to a PC or PDA (by right-clicking the mouse)
Procedure
■Sending images to a PC or PDA (using icons)
1. Turn on the PC or PDA
Confirm that a Bluetooth connection has been enabled before proceeding.
2. Double-click on the Bluetooth Information Exchanger icon on the Desktop
Note
{ Alternativel
ening Explorer and clicking on the Bluetooth Information
Exchanger folder will produce the same result.
The [Bluetooth Information Exchanger] window will appear.
3. Double-click on the [Image transfer] icon
A list of devices will appear in the [Image transfer] window.
file://C:\Documents and Settings\anitachou\Local Settings\Temp\~hh3F24.htm 2004/11/30
Page 45
Quick Start Guide - Introduction 第 108 頁,共 160 頁
pp
v
Note
{ If the desired device does not a
has been turned on, and then select [Bluetooth] →[Search Devices].
A device search will be performed.
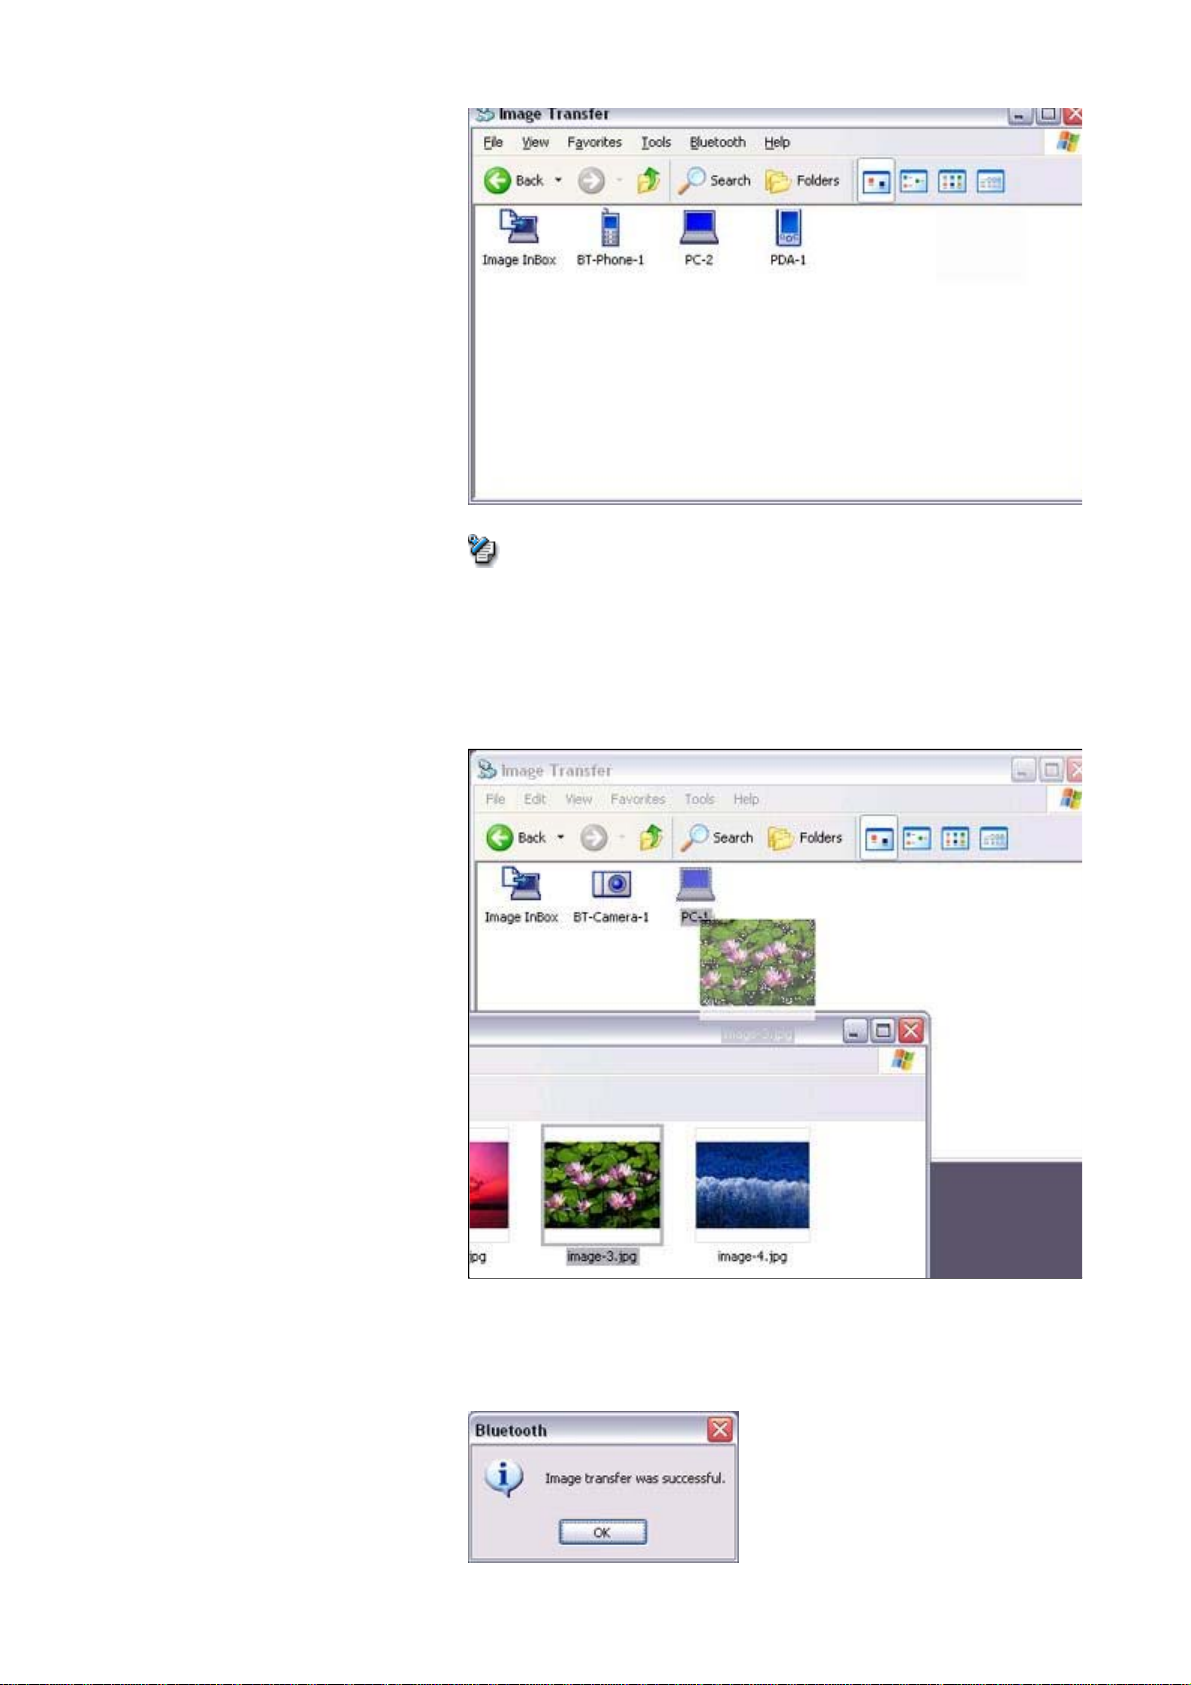
4. Drag and drop the file you wish to send over the destination icon
In this case, the image will be sent to a PC named "PC -1".
ear in the list, please confirm that the de
The image will be sent.
If the image has been sent successfully, the message below will appear.
Please click on the [OK] button.
file://C:\Documents and Settings\anitachou\Local Settings\Temp\~hh3F24.htm 2004/11/30
Page 46
Quick Start Guide - Introduction 第 109 頁,共 160 頁
g
e
g
a
g
n
y
o
The message below will appear if the image transmission was unsuccessful.
Please click on the [OK] button to close the message, and repeat the procedure.
Note
{ Ima
es that have been sent will be saved in an image transfer folder on th
destination device.
{ Ima
es received using "Image transfer" in the Bluetooth Information Exch
will be saved in the "Image Box" in "Image transfer".
{ You can use Properties under the Bluetooth Information Exchan
the location of the "Image Box" folder on the hard drive.
er to cha
■Sending images to a PC or PDA (by right-clicking the mouse)
1. Turn on the PC or PDA
Confirm that a Bluetooth connection has been enabled before proceeding
2. Right-click on the file
ou wish to send, and then click on its destination from [t
Bluetooth]
file://C:\Documents and Settings\anitachou\Local Settings\Temp\~hh3F24.htm 2004/11/30
Page 47

Quick Start Guide - Introduction 第 110 頁,共 160 頁
pp
v
]
s
Note
{ If the desired device does not a
has been turned on, and then select [to Bluetooth] →[Search other devices
Once the devices have been detected, the message below will appear. Plea
select the destination device, and then click on the [Send] button.
ear in the list, please confirm that the de
The image will be sent.
If the image has been sent successfully, the message below will appear.
Please click on the [OK] button.
The message below will appear if the image transmission was unsuccessful.
Please click on the [OK] button to close the message, and repeat the procedure.
file://C:\Documents and Settings\anitachou\Local Settings\Temp\~hh3F24.htm 2004/11/30
Page 48

Quick Start Guide - Introduction 第 111 頁,共 160 頁
g
a
v
p
a
y
g
e
y
y
i
Note
{ When you send images by right-clickin
the mouse, the image data that h
sent will be saved in the image transfer shared folder on the destination de
This is also the case when you send images using icons.
Exchanging business card data with a PC or PDA [OPP]
You can exchange business card data with a Bluetooth -enabled PC or PDA.
Business card data are exchanged using "Object Push" under Bluetooth Information
Exchanger.
Note
z Data com
liant with the "vCARD" standard are the only type of business card dat
to be sent and received with "Object Push".
Business card data can be used by applications such as Microsoft Outlook.
z Business card data can be created in vCARD format b
Microsoft Outlook and oth
similar applications.
→"Creating business card data in the vCARD format "
z You can send business card data directly from Microsoft Outlook.
→"Sending business card data from Outlook "
z The OPP profile must be supported by the PC or PDA of the other party.
→Selecting a business card and sending it to a PC or PDA (using icons)
→Selecting a business card and sending it to a PC or PDA (by right -clickin
→Sending your personal business card
→Receiving a business card from another party
→Exchanging business cards
Procedure
■Selecting a business card and sending it to a PC or PDA (using icons)
Select a business card
alread
received through exchanges with your business or other contacts, and then send
ou wish to send from among all the business card data you have
another party.
the mous
file://C:\Documents and Settings\anitachou\Local Settings\Temp\~hh3F24.htm 2004/11/30
Page 49

Quick Start Guide - Introduction 第 112 頁,共 160 頁
y, op
1. Turn on the PC or PDA
Confirm that a Bluetooth connection has been enabled before proceeding.
2. Double-click on the Bluetooth Information Exchanger icon on the Desktop
Note
{ Alternativel
Exchanger folder will produce the same result.
ening Explorer and clicking on the Bluetooth Information
The [Bluetooth Information Exchanger] window will appear.
3. Double-click on the [Object Push] icon
A list of devices will appear in the [Object Push] window.
file://C:\Documents and Settings\anitachou\Local Settings\Temp\~hh3F24.htm 2004/11/30
Page 50

Quick Start Guide - Introduction 第 113 頁,共 160 頁
pp
v
y
y app
.
h
p
m
Note
{ If the desired device does not a
ear in the list, please confirm that the de
has been turned on, and then select [Bluetooth] →[Search Devices].
A device search will be performed.
4. Use the mouse to drag and drop the business card you wish to send over the
destination icon
In this case, the business card will be sent to a PC named "PC -1".
The business card will be sent.
Note
{ When
ou try to send a business card, a message requesting permission to
receive the card ma
ear on the device belonging to the other party (i.e
the receiving end). The content of the message will vary with the Bluetoot
software installed on the destination device, so please be sure to follow the
instructions
rovided. If you are using the Bluetooth Utility, a message si
the one below will appear.
If the business card has been sent successfully, the message below will appear.
Please click on the [OK] button.
file://C:\Documents and Settings\anitachou\Local Settings\Temp\~hh3F24.htm 2004/11/30
Page 51

Quick Start Guide - Introduction 第 114 頁,共 160 頁
u
g
c
g
r
g
r
g
e
y
o
The message below will appear if the business card transmission was unsuccessf
Please click on the [OK] button to close the message, and repeat the procedure.
Memo
{ Data that have been sent will be saved in a folder for exchan
ed business
on the destination device.
{ You can confi
ure an associated application (Microsoft Outlook etc) to sta
automatically when you have received a business card, allowing you to vie
card details.
You can use Properties under Bluetooth Information Exchan
whether or not you would like such an application to start automatically.
■Selecting a business card and sending it to a PC or PDA (by right -clickin
1. Turn on the PC or PDA
Confirm that a Bluetooth connection has been enabled before proceeding.
2. Right-click on the business card
ou wish to send, and then click on its destinati
from [to Bluetooth]
file://C:\Documents and Settings\anitachou\Local Settings\Temp\~hh3F24.htm 2004/11/30
er to configu
the mous
Page 52

Quick Start Guide - Introduction 第 115 頁,共 160 頁
pp
v
]
s
y
y app
.
h
y
w
Note
{ If the desired device does not a
ear in the list, please confirm that the de
has been turned on, and then select [to Bluetooth] →[Search other devices
Once the devices have been detected, the message below will appear. Plea
select the destination device, and then click on the [Send] button.
The business card will be sent.
Note
{ When
ou try to send a business card, a message requesting permission to
receive the files ma
ear on the device belonging to the other party (i.e
the receiving end). The content of the message will vary with the Bluetoot
software installed on the destination device, so please be sure to follow the
instructions provided.
If
ou are using the Bluetooth Utility, a message similar to the one below
appear.
file://C:\Documents and Settings\anitachou\Local Settings\Temp\~hh3F24.htm 2004/11/30
Page 53

Quick Start Guide - Introduction 第 116 頁,共 160 頁
g
u
g
c
prep
pa
g
g
y
.
If the business card has been sent successfully, the message below will appear.
Please click on the [OK] button.
The messa
e below will appear if the business card transmission was unsuccessf
Please click on the [OK] button to close the message, and repeat the procedure.
Note
{ Data that have been sent will be saved in a folder for exchan
on the destination device.
■Sending your personal business card
You can
are a business card bearing your name and other details such as your com
and telephone numbers, and then send it to another party.
Note
z Please use Properties under Bluetooth Information Exchan
which data to use for your own business card.
z You can onl
have one business card registered as your own that is able to be sent
ed business
er beforehand to confi
1. Turn on the PC or PDA
Confirm that a Bluetooth connection has been enabled before proceeding
2. Double-click on the Bluetooth Information Exchanger icon on the Desktop
Note
file://C:\Documents and Settings\anitachou\Local Settings\Temp\~hh3F24.htm 2004/11/30
Page 54

Quick Start Guide - Introduction 第 117 頁,共 160 頁
y, op
pp
v
{ Alternativel
ening Explorer and clicking on the Bluetooth Information
Exchanger folder will produce the same result.
The [Bluetooth Information Exchanger] window will appear.
3. Double-click on the [Object Push] icon
A list of devices will appear in the [Object Push] window.
Note
{ If the desired device does not a
ear in the list, please confirm that the de
has been turned on, and then select [Bluetooth] →[Search Devices].
A device search will be performed.
4. Right-click on the destination icon, and then click on [Send business card To]
In this case, your personal business card will be sent to a PC named "PC -1".
file://C:\Documents and Settings\anitachou\Local Settings\Temp\~hh3F24.htm 2004/11/30
Page 55

Quick Start Guide - Introduction 第 118 頁,共 160 頁
y
y app
.
h
p
m
a
y
g
u
The business card will be sent.
Note
{ When
ou try to send a business card, a message requesting permission to
receive the files ma
ear on the device belonging to the other party (i.e
the receiving end). The content of the message will vary with the Bluetoot
software installed on the destination device, so please be sure to follow the
instructions
rovided. If you are using the Bluetooth Utility, a message si
the one below will appear.
{ Business cards that have been sent will be saved in the Inbox of the destin
party.
our business card has been sent successfully, the message below will appear.
If
Please click on the [OK] button.
The messa
e below will appear if the business card transmission was unsuccessf
Please click on the [OK] button to close the message, and repeat the procedure.
file://C:\Documents and Settings\anitachou\Local Settings\Temp\~hh3F24.htm 2004/11/30
Page 56

Quick Start Guide - Introduction 第 119 頁,共 160 頁
g
r
y, op
Note
{ Data that has been sent will be saved in a folder for exchan
ed business ca
the destination device.
■Acquiring a business card from another party
You can use your PC to acquire a business card from a party containing their details.
1. Turn on the PC or PDA
Confirm that a Bluetooth connection has been enabled before proceeding
2. Double-click on the Bluetooth Information Exchanger icon on the Desktop
Note
{ Alternativel
ening Explorer and clicking on the Bluetooth Information
Exchanger folder will produce the same result.
The [Bluetooth Information Exchanger] window will appear.
3. Double-click on the [Object Push] icon
A list of devices will appear in the [Object Push] window.
file://C:\Documents and Settings\anitachou\Local Settings\Temp\~hh3F24.htm 2004/11/30
Page 57

Quick Start Guide - Introduction 第 120 頁,共 160 頁
pp
v
p
c
,
e
y
y app
o
w
o
y
w
Note
{ If the desired device does not a
has been turned on, and then select [Bluetooth] →[Search Devices].
A device search will be performed.
4. Right-click on the icon of the
[Receive business card]
In this case
the business card of the other party will be acquired from a PC nam
"PC-1".
ear in the list, please confirm that the de
arty whose card you wish to acquire, and then cli
The business card will be received.
Note
{ When
ou try to acquire a business card, a message requesting permission
send the files ma
ear on the device belonging to the other party (i.e.,
sending end). The content of the message will vary with the Bluetooth soft
installed on the destination device, so please be sure to follow the instructi
provided.
If
ou are using the Bluetooth Utility, a message similar to the one below
appear.
file://C:\Documents and Settings\anitachou\Local Settings\Temp\~hh3F24.htm 2004/11/30
Page 58

Quick Start Guide - Introduction 第 121 頁,共 160 頁
a
g
e
g
t
y, op
If the business card has been received successfully, the message below will appe
Please click on the [OK] button.
The messa
e below will appear if the business card was unsuccessfully received.
Please click on the [OK] button to close the message, and repeat the procedure.
Note
{ Business card data that have been received will be saved in the Inbox und
"Object Push".
You can use Properties under the Bluetooth Information Exchan
location of the Inbox on the hard drive.
■Exchanging business cards
Simultaneously exchange your business card with one belonging to another party.
1. Turn on the PC or PDA
Confirm that a Bluetooth connection has been enabled before proceeding.
er to set
2. Double-click on the Bluetooth Information Exchanger icon on the Desktop
Note
{ Alternativel
ening Explorer and clicking on the Bluetooth Information
Exchanger folder will produce the same result.
file://C:\Documents and Settings\anitachou\Local Settings\Temp\~hh3F24.htm 2004/11/30
Page 59

Quick Start Guide - Introduction 第 122 頁,共 160 頁
pp
v
p
a
The [Bluetooth Information Exchanger] window will appear.
3. Double-click on the [Object Push] icon
A list of devices will appear in the [Object Push] window.
Note
{ If the desired device does not a
has been turned on, and then select [Bluetooth] →[Search Devices].
A device search will be performed.
ear in the list, please confirm that the de
4. Right-click on the icon of the
and then click on [Object Push]
In this case, the business cards will be exchanged with a PC named "PC -1".
file://C:\Documents and Settings\anitachou\Local Settings\Temp\~hh3F24.htm 2004/11/30
arty with whom you wish to exchange business c
Page 60

Quick Start Guide - Introduction 第 123 頁,共 160 頁
y
y app
.
h
y
w
a
y
,
m
[
r
The business card from the party who executed the "Exchange business cards"
command will be sent first.
Note
{ When
ou try to send a business card, a message requesting permission to
receive the files ma
ear on the device belonging to the other party (i.e
the receiving end). The content of the message will vary with the Bluetoot
software installed on the destination device, so please be sure to follow the
instructions provided.
If
ou are using the Bluetooth Utility, a message similar to the one below
appear.
A message of confirmation will appear if the card has been successfully sent.
Note
{ Business cards that have been sent will be saved in the Inbox of the destin
party.
our business card has finished being sent, the program will start receiving
Once
business card belonging to the other party.
Note
{ When a business card is to be received
a message such as the one below
appear on the device belonging to the other party.
Please click on the
Yes] button if you give permission for the business ca
be sent.
file://C:\Documents and Settings\anitachou\Local Settings\Temp\~hh3F24.htm 2004/11/30
Page 61

Quick Start Guide - Introduction 第 124 頁,共 160 頁
A message of confirmation will appear if the card has been successfully received
g
t
p
y
C
Note
{ Business cards that have been received will be saved in the "Inbox" under
"Object Push".
You can use Properties under the Bluetooth Information Exchan
location of the Inbox on the hard drive.
er to set
Using a Bluetooth-compatible camera [BIP]
By connecting a Bluetooth-com
to operate the camera shutter from the PC and transmit the captured images to it as well.
→Connecting the camera
→Taking pictures
→Viewing images saved on your PC
atible digital camera to your PC via Bluetooth, you will be
Connecting the camera
Use the "Remote Camera" tool in the Bluetooth Utilit
Procedure
1. Click on [Start ]→[All Programs]→[Bluetooth]→[Remote Camera]
to connect the camera to your P
Note
{ In Windows 2000, click on [Start]→[Programs]→[Bluetooth]→[Remote
Camera].
The [Remote Camera] window will appear.
2. Turn on the camera, and set it to be connectable via Bluetooth
file://C:\Documents and Settings\anitachou\Local Settings\Temp\~hh3F24.htm 2004/11/30
Page 62

Quick Start Guide - Introduction 第 125 頁,共 160 頁
p
a
n
e
Note
{ Different cameras are o
and model used. Please refer to the instruction manual for further details o
to operate your camera.
3. Click on the [Camera Search...] button
erated in different ways, depending on the manuf
The camera will be detected and its icon displayed.
4. Right-click on the camera icon, and select [Connect]
The camera will be connected, and images from the camera will appear on -scre
file://C:\Documents and Settings\anitachou\Local Settings\Temp\~hh3F24.htm 2004/11/30
Page 63

Quick Start Guide - Introduction 第 126 頁,共 160 頁
w
Taking pictures
By placing the mouse cursor over the on-screen image, the camera's operating window
appear.
You can operate the camera from this window.
Procedure
■Taking a single picture
1. Click on the button in the operating window.
A single image will be captured and sent to the PC.
■Taking several consecutive frames
1. Click on the button in the operating window
A succession of images will be captured and sent to the PC.
file://C:\Documents and Settings\anitachou\Local Settings\Temp\~hh3F24.htm 2004/11/30
Page 64

Quick Start Guide - Introduction 第 127 頁,共 160 頁
p
e
p
d
g
l
ges,
m
p
e
[
[<][>]
m
Note
{ The remote camera shutter cannot be o
erated while the camera is connect
the PC.
{ The number of consecutive
ictures taken can be set to anywhere between
16
1. In the [Remote Camera] window, click on [Bluetooth]→[Pro
[Consecutive Image Settings]
Change number of consecutive images] dialog box will appe
The
2. Click on the
buttons to select the number of consecutive i
to be captured
erti
Important
{ Images are not only sent to the PC, but are stored in the camera's on -boar
memory as well.
Please be aware of the remainin
memory capacity when you are taking a
number of pictures.
{ Large file sizes are common for high-resolution ima
and may take so
to be transferred to the PC.
file://C:\Documents and Settings\anitachou\Local Settings\Temp\~hh3F24.htm 2004/11/30
Page 65

Quick Start Guide - Introduction 第 128 頁,共 160 頁
n
[Exp
p
r
y
b
y
o
Viewing images saves on your PC
A "Remote Camera" folder will be created in the "Bluetooth" folder under "My Docume
during initial set-up. A folder bearing the same name as the camera will be created in it,
images will be saved in this folder.
Click the
images have been saved.
lorer] button in the [Remote Camera] window to display the folder where
Note
z This window is an exam
the [View] menu in Explorer.
le showing pictures when [Filmstrip] has been selected f
Synchronising information using ActiveSync [SPP]
This section describes how to s
etc) with your PC using Microsoft ActiveSync.
When
ou connect via Bluetooth instead of with a standard cable, you will always be able t
synchronise your data without the hassle of having to connect the cable.
nchronize information on your PDA (calendars, contacts, in
file://C:\Documents and Settings\anitachou\Local Settings\Temp\~hh3F24.htm 2004/11/30
Page 66

Quick Start Guide - Introduction 第 129 頁,共 160 頁
y
y
e
g
n
p
n
→Connecting using ActiveSync
→Establishing a partnership between ActiveSync and a PDA
→Finishing an ActiveSync connection
→Cancelling a partnership
Important
z Please use ActiveS
nc v.3.7 or higher. Also please establish a partnership between the
devices using a USB or infrared link before you connect via Bluetooth.
z Please refer to the ActiveS
nc Help or other manuals for information on how to use th
application.
z Microsoft Outlook 2002 or another schedule mana
ement tool must also be installed o
PC.
Connecting using ActiveSync
Both the PC and PDA must be set up in order for a connection to be established.
■Preparing the PC
Procedure
1. On the PC, click on [Start]→[All Programs]→[Microsoft ActiveSync]
The initial ActiveSync set-up window will appear.
It is assumed in the ex
established with other devices.
lanation below that no ActiveSync connections have bee
2. Click [File]→[Connection Settings]
file://C:\Documents and Settings\anitachou\Local Settings\Temp\~hh3F24.htm 2004/11/30
Page 67

Quick Start Guide - Introduction 第 130 頁,共 160 頁
[
r
p,
)
(4)
The [Connection Settings] window will appear.
3. Place a check next to
and then select "COM7".
Allow serial cable or infrared connection to this COM po
Note
{ In the standard set-u
under "Preparing the PDA" below). When using a different port, please
change the port number selected in this window.
■Preparing the PDA
the port is configured to "COM7" (refer to Steps (3
Procedure
1. Tap on the Bluetooth icon in the bottom right of the screen
file://C:\Documents and Settings\anitachou\Local Settings\Temp\~hh3F24.htm 2004/11/30
Page 68

Quick Start Guide - Introduction 第 131 頁,共 160 頁
p
r
g
Important
{ The graphic above shows an example of a PDA operating window.
The connection
model of PDA you use. Please refer to the product instruction manuals for
further details.
The [Bluetooth Settings] window will open.
The messa
registered.
e "Connection not registered" will appear if no Bluetooth device has
rocedure may be different depending on the manufacture
Please tap on [OK] to close the message.
2. Double click on [Tools]→[Search for peripheral components]
file://C:\Documents and Settings\anitachou\Local Settings\Temp\~hh3F24.htm 2004/11/30
Page 69

Quick Start Guide - Introduction 第 132 頁,共 160 頁
,
p
e
The application searches for nearby Bluetooth devices.
3. Tap and hold on the destination PC icon, and then select [Update Services]
A search for services will be carried out
connection status will appear as list in the lower window.
and then a list of service names and the
4. Ta
file://C:\Documents and Settings\anitachou\Local Settings\Temp\~hh3F24.htm 2004/11/30
and hold on "COM7" from the list of service names, and then select "Regist
ActiveSync".
Page 70

Quick Start Guide - Introduction 第 133 頁,共 160 頁
g
p p
a
5. Tap [OK] in the confirmation message window
An ActiveSync connection will be initiated.
Establishing a partnership between ActiveSync and a PDA
Once a connection has been successfully established with a PDA, the procedure for
establishin
PC.
Performing this set-u
PDA.
1. In the [New Partnership (Set Up a Partnership)] window, select "Standard
file://C:\Documents and Settings\anitachou\Local Settings\Temp\~hh3F24.htm 2004/11/30
a partnership with the PDA will be started by the ActiveSync application on
rocedure will enable data to be synchronised between your PC
Procedure
partnership", and then click on the [Next] button
Page 71

Quick Start Guide - Introduction 第 134 頁,共 160 頁
ppe
yp
d
The [New Partnership (Specify Data Synchronisation Method)] window will a
2. Select "Synchronise with this PC", and then click on the [Next] button
The [New Partnership (Select Synchronisation Settings)] window will appear.
3. Select the t
click on the [Next] button
file://C:\Documents and Settings\anitachou\Local Settings\Temp\~hh3F24.htm 2004/11/30
e of information to be synchronised between your PC and PDA, an
Page 72

Quick Start Guide - Introduction 第 135 頁,共 160 頁
y
u
The [New Partnership (Completing Setup)] window will appear.
4. Click on the [Finish] button
When
ou click on the [Finish] button, ActiveSync will begin to synchronise yo
information.
[Confirming changes]
↓
(Synchronisation process)
↓
[Synchronisation complete]
file://C:\Documents and Settings\anitachou\Local Settings\Temp\~hh3F24.htm 2004/11/30
Page 73

Quick Start Guide - Introduction 第 136 頁,共 160 頁
p
,
p
p
y
While the ActiveSync connection is active, synchronisation will be performed
whenever information is changed on either the PC or the PDA.
Once a
thereafter
your information.
artnership has been established, every time you start your PC (and PDA
a Bluetooth connection will be opened and ActiveSync will synchroni
Finishing an ActiveSync connection
Follow the
manually.
1. Ta
rocedure below on your PDA if you want to end an ActiveSync connection
Procedure
and hold on "COM7" in the Bluetooth Settings window, and select [ActiveS
Release]
Cancelling a partnership
file://C:\Documents and Settings\anitachou\Local Settings\Temp\~hh3F24.htm 2004/11/30
Page 74

Quick Start Guide - Introduction 第 137 頁,共 160 頁
Follow the procedure below from the ActiveSync window on the PC if you want to canc
y
pe
o
partnership between your PC and PDA.
Procedure
1. Click on [File]→"Delete partnership"
Click on the [Yes] button when the confirmation message appears.
Note
{ If
ou wish to create another ActiveSync connection, you will have to re
above procedure to re-establish a partnership.
Using a headset to communicate [HSP]
This section provides a description of how to use a Bluetooth -compatible wireless headset t
communicate (chat) using Microsoft NetMeeting or other software.
→Registering the headset
→Making a connection to the headset
→Disconnecting from the headset
Registering the headset
file://C:\Documents and Settings\anitachou\Local Settings\Temp\~hh3F24.htm 2004/11/30
Page 75

Quick Start Guide - Introduction 第 138 頁,共 160 頁
e
y, y
o
e
[
r
y
t
y
Procedure
1. Right-click on the Bluetooth icon in the tasktray, then click on [Add New Conn
Wizard]
Note
{ Alternativel
ou can click on [Start]>[All Programs]>[Bluetooth]>[Bluet
Settings], then click on [New Connection] in the [Bluetooth Settings] scre
has opened.
Add New Connection Wizard (Welcome to the Add New Connection Wiza
The
screen will appear.
2. Turn the headset power on
Once
ou have turned on the headset, set the mode to enable a Bluetooth connec
Important
{ The procedure for operating the headset may differ depending on the
manufacturer and model.
Please consult
our user guide for a detailed description of how to operate
unit.
3. Confirm that [Express Mode] has been selected, then click on the [Next] button
file://C:\Documents and Settings\anitachou\Local Settings\Temp\~hh3F24.htm 2004/11/30
Page 76

Quick Start Guide - Introduction 第 139 頁,共 160 頁
i
p
(S
,
o
prop
The [Add New Connection Wizard (Searching for Bluetooth Devices)] screen w
appear.
Once the device search has been com
a Device)] screen will appear.
4. Select the name of the headset device from the list
leted, the [Add New Connection Wizard
then click on the [Next] butt
5. Answering with the headset
If the service has been
headset is being called, and a tone will accordingly sound in the headset.
file://C:\Documents and Settings\anitachou\Local Settings\Temp\~hh3F24.htm 2004/11/30
erly detected, a screen will appear indicating that the
Page 77

Quick Start Guide - Introduction 第 140 頁,共 160 頁
y
[
))]
y
o
w
e
n
g
o
Please press the headset switch.
Important
{ The procedure for operating the headset may differ depending on the
manufacturer and model.
Please consult
unit.
Add New Connection Wizard (Configuring (Connecting to Voice Circuit
The
screen will appear, and device configuration will be performed.
our user guide for a detailed description of how to operate
Note
{ If
ou are connecting to the headset for the first time, or if another Blueto
audio device has not yet been registered, the following [Found New Hard
Wizard] screen will appear, from which you can proceed to install the driv
If another audio device has already been registered (i.e., the driver has bee
installed), you can proceed to Step 9 without having to install the driver.
6. Click on the [Next] button
The [Install Hardware] screen will appear.
7. Click on the [Continue Anyway] button
The followin
screen will appear automatically. You may disregard it and click
[Continue Anyway] button.
file://C:\Documents and Settings\anitachou\Local Settings\Temp\~hh3F24.htm 2004/11/30
Page 78

Quick Start Guide - Introduction 第 141 頁,共 160 頁
r
The [Add New Connection Wizard (Completing the Found New Hardware Wiza
screen, which is the final screen of the installation wizard, will appear.
8. Click on the [Finish] button
Once driver installation is complete, the [Add New Connection Wizard (Enter
Connection Name)] will appear.
9. Confirm the information you have entered, and click on the [Next] button
file://C:\Documents and Settings\anitachou\Local Settings\Temp\~hh3F24.htm 2004/11/30
Page 79

Quick Start Guide - Introduction 第 142 頁,共 160 頁
r
g
n
g
g
h
pp
e
yer,
i
y
r
The [Add New Connection Wizard (Completing the Add New Connection Wiza
screen will appear.
10. Click on the [Finish] button
The confi
uration information will be registered, and an icon will be displayed i
[Bluetooth Settings] screen.
Making a connection to the headset
You can make a connection to the headset from an icon that has been re
Settings].
Important
z Before makin
headset's power, and that it has been enabled for a Bluetooth connection.
Please ensure that the following audio -related a
connect the headset to your PC.
{ Windows Media Pla
playback software
{ Windows Messenger and other e-conferencing software
ou wish to use these applications, please terminate the headset connection befo
If
launch them.
a connection to the headset, please check that you have turned on t
lications have been closed befor
BeatJam, InterVideo WinDVD and other music/aud
istered in [Blue
Procedure
1. Right-click on the headset icon, then click on [Connect].
file://C:\Documents and Settings\anitachou\Local Settings\Temp\~hh3F24.htm 2004/11/30
Page 80

Quick Start Guide - Introduction 第 143 頁,共 160 頁
prop
ge
[
2. Answer with the headset
A screen will appear indicating that the headset is being called, and a tone will
accordingly sound in the headset.
Please press the headset switch.
If the connection has been
indicate a connected state.
You may now launch conferencing and voice-recognition software and use the
headset.
erly established, the icon's appearance will chan
Disconnecting from the headset
Please follow the steps below to disconnect from the headset.
Procedure
1. Right-click on the headset icon in the
[Disconnect].
Bluetooth Settings] screen, then click on
file://C:\Documents and Settings\anitachou\Local Settings\Temp\~hh3F24.htm 2004/11/30
Page 81

Quick Start Guide - Introduction 第 144 頁,共 160 頁
c
[
n
e
e
p
d
o
i
A message will appear, requesting confirmation that you wish to disconnect. Cli
the [Yes] button.
The icon on the
Bluetooth Settings] screen will appear as shown below, indicati
that the device has been disconnected.
Troubleshooting
This section describes possible causes and countermeasures to be considered when your Blu
device cannot be configured properly, functions abnormally or presents other problems relat
its operation.
Basic understanding
The section "What you need to know about using Bluetooth " describes the basic conce
be aware of when using Bluetooth. Should you still encounter problems after having rea
through this information, please refer to the following list, which has been arranged acc
to application.
Troubleshooting by application
z General operation of the Bluetooth Utility
z Using a wireless modem station
z Using an access point
z Using a printer
z Using a Bluetooth headset
z Using a keyboard or mouse
z Using a camera
z Using a PDA
z Using a mobile telephone
General operation of the Bluetooth Utility
Important
z Please refer to "What you need to know about using Bluetooth " for an understand
the basic concepts to be aware of when using Bluetooth.
Bluetooth Manager
file://C:\Documents and Settings\anitachou\Local Settings\Temp\~hh3F24.htm 2004/11/30
Page 82

Quick Start Guide - Introduction 第 145 頁,共 160 頁
pp
b
g
i
y
g p
i
Bluetooth icon does not appear in task tray
z If the Bluetooth icon does not a
ear in the task tray, Bluetooth Manager will not
active, which will prevent you from being able to use any of the functions of the
Bluetooth Utility.
Start the utilities as instructed below to enable Bluetooth Mana
er to start automat
and allow all functions to be utilized.
Bluetooth Settings
(from Windows XP)
[Start] > [All Programs] > [Bluetooth] > [Bluetooth Settings]
(from Windows 2000)
[Start] > [Programs] > [Bluetooth] > [Bluetooth Settings]
Remote Camera
(from Windows XP)
[Start] > [All Programs] > [Bluetooth] > [Remote Camera]
(from Windows 2000)
[Start] > [Programs] > [Bluetooth] > [Remote Camera]
Wireless File Transfer
(from Windows XP)
[Start] > [All Programs] > [Bluetooth] > [Wireless File Transfer]
(from Windows 2000)
[Start] > [Programs] > [Bluetooth] > [Wireless File Transfer]
Bluetooth Settings
Clicking on the [New Connection] button brings up the message "Unable to prepare
Bluetooth."
z The wireless communication switch is turned off.
Please switch it on.
Remote device(s) cannot be detected
z The other device(s) may have been set to Non -discoverable mode.
Please check the mode settings on the device.
Services on a remote device are undiscoverable
z The other device ma
Please check the profile being used on the other device.
z The following profiles are compatible with Bluetooth Settings.
DUN, FAX, LAP, SPP, HID, HCRP, FTP, OPP, HSP, PAN and BIP
be using a profile that is not supported by the Bluetooth Util
Devices runnin
rofiles other than those above will not be able to be registered w
Bluetooth Settings.
Bluetooth Information Exchanger
An error occurs when you try to send a file using the right -click menu.
file://C:\Documents and Settings\anitachou\Local Settings\Temp\~hh3F24.htm 2004/11/30
Page 83

Quick Start Guide - Introduction 第 146 頁,共 160 頁
,
o
p
b
]
m
o
p
yy g g
i
g
e
g
z Select and right-click on a file
and then you can choose either the FTP or OPP pr
use when you click on [Send to Bluetooth Device].
If neither
rofile is supported by the destination device, the file will not be able to
sent from the right-click menu.
The transmission will also fail if you use FTP to send a file to a device that only
supports the OPP profile.
Should this occur, please click on [Bluetooth] →[Profiles
under [Bluetooth Infor
Exchanger] to configure the Transfer mode.
Cannot open shared folder on remote device using [File Transfer].
z The other device may have a certain security level enforced (Non -connectable m
etc). Please confirm the security settings of the other device.
Please enter the correct password if you are asked to enter one.
Remote Camera
z See "Using a camera"
Bluetooth Local COM
Cannot add port
z A maximum of 64 virtual COM
orts can be added. You will be unable to add ano
port if 64 ports have already been configured.
Using a wireless modem station
Important
z Please refer to "What you need to know about using Bluetooth " for an understand
the basic concepts to be aware of when using Bluetooth.
Modem station cannot be detected
z If the modem station is connected to and is bein
used by another device, the mod
station will be undetectable even if you search for it.
Cannot connect to modem station
z If the modem station is connected to and is bein
file://C:\Documents and Settings\anitachou\Local Settings\Temp\~hh3F24.htm 2004/11/30
used by another device, no other
Page 84

Quick Start Guide - Introduction 第 147 頁,共 160 頁
device will be able to connect to the modem station
p
r
[Cap
y
p
p
n
e
p
p
p
y
e
y
m
ype
y
e
t
p
,
o
y
m
ype
.
Bluetooth passkey entry failed
z The Bluetooth
asskey (PIN code) comprises a sequence of alphanumeric characte
with the letters able to be rendered in upper and lower case.
If
s Lock] is on, the Bluetooth passkey may not be able to be entered correctl
Cannot connect to telephone line
z Please ensure that the tele
hone cable is connected from the socket to the "LINE"
terminal on the modem station.
Note
{ If the tele
hone cable has come loose because it has not been fully inserted i
the socket, the resulting poor contact may prevent data from being transmitt
accurately.
{ Communication will be im
ossible if the interior of the cable has been broke
Please replace the cable with another one.
z Please ensure that the two slide switches on the underside of the main unit have be
to the "NORMAL" and "MODEM" positions respectively.
Cannot connect to the Internet
z The tele
hone number of the connection (i.e., the telephone number for the access
of your Internet service provider) may not be correct. Please check the telephone
number.
z The user ID and/or
assword for the provider with whom you have signed up may
been entered incorrectly. Please check the user ID and password.
z The default connection ma
have been configured with different settings. Please s
connection configured for mobile telephone use as the default connection.
z When
ou place a call using a company switchboard or other exchange, the syste
require you to enter a "0" before the telephone number itself. Please check the t
telephone line you are using.
Cannot send or receive faxes
z Once
ou have registered a wireless modem station as your fax server, you will ne
enter the fax settings from the [Printer and Faxes] window in the Control Panel.
Please refer to "Using a modem station for fax transmissions " for information on
configuration procedure.
z The tele
hone number of the fax destination may have been entered incorrectly. Pl
check the telephone number.
z If the setting under COM Auto Connect Settings has been set to "Off"
not automatically be established with the modem. Please connect to the modem
manually.
a connecti
file://C:\Documents and Settings\anitachou\Local Settings\Temp\~hh3F24.htm 2004/11/30
z When
ou place a call using a company switchboard or other exchange, the syste
require you to enter a "0" before the telephone number itself. Please check the t
telephone line you are using.
Page 85

Quick Start Guide - Introduction 第 148 頁,共 160 頁
[
]
y
[
e
z The fax service may not have been enabled for sending (or receiving).
Please check the settings by following the procedure below.
1. Open [Printers and Faxes] from the Control Panel, right -click on the
and then click on [Properties]
The [Fax properties] window will appear.
2. Select the [Device] tab, right-click on the modem
on [Properties]
ou wish to use, and the
Fax
3. Select the
checked.
file://C:\Documents and Settings\anitachou\Local Settings\Temp\~hh3F24.htm 2004/11/30
Send] tab, and then confirm that "Enable device to send" has b
Page 86

Quick Start Guide - Introduction 第 149 頁,共 160 頁
h
4. Select the [Receive] tab, and then confirm that "Enable device to receive"
been checked (when you wish to receive faxes)
5. Click on the [OK] button
Using an access point
Important
file://C:\Documents and Settings\anitachou\Local Settings\Temp\~hh3F24.htm 2004/11/30
Page 87

Quick Start Guide - Introduction 第 150 頁,共 160 頁
Pl
"
Wh
h
" f
di
p
p
p
e
y
h
y
h
p
p
p
y
m
n
i
z
ease refer to
the basic concepts to be aware of when using Bluetooth.
Access point cannot be detected
at you need to know about using Bluetoot
or an understan
z If the access
oint is connected to and is being used by another device, the access
will be undetectable even if you search for it.
Cannot connect to access point
z If the access
oint is connected to and is being used by another device, no other d
will be able to connect to the access point.
Cannot connect to LAN
z The LAN cable ma
not be properly connected to the access point. Please check t
connection status.
Note
{ If the LAN cable has come loose because it has not been full
socket, the resulting poor contact may prevent data from being transmitted
accurately.
{ Communication will be im
broken. Please replace the cable with another one.
z The access
oint may not have been configured correctly, and may not be able to
maintain the connection to the LAN.
Please refer to the
roduct instruction manual for information on how to configure
access point.
inserted into t
ossible if the interior of the LAN cable has been
Cannot connect to the Internet
z If
ou are using a LAN to connect to the Internet, the LAN environment of the co
or location where you are trying to establish the connection may require you to co
via a proxy server .
Please click here for information on configuring a proxy server.
Using a printer
Important
z Please refer to "What you need to know about using Bluetooth " for an understand
the basic concepts to be aware of when using Bluetooth.
file://C:\Documents and Settings\anitachou\Local Settings\Temp\~hh3F24.htm 2004/11/30
Page 88

Quick Start Guide - Introduction 第 151 頁,共 160 頁
p
p
w
p
y
p
m
y
y
o
Pri
d
i
g
g
t
p
o
g
a
nter cannot be detecte
z If the
rinter is connected to and is being used by another device, the printer will b
undetectable even if you search for it.
Cannot connect to printer
z If the
rinter is connected to and is being used by another device, no other device
able to connect to the printer.
Cannot print/garbled print output
z The
rinter driver of the printer you are using may not have been installed correctl
Please refer to your product instruction manual and re -install the driver.
z Please check to see if the
z If
ou are using a printer while several Bluetooth devices are connected to the PC,
devices ma
not functional normally. Please disconnect the other devices and try t
rinter has run out of paper, ink or other consumable ite
again.
Using a Bluetooth Headset
Important
z Please refer to "What you need to know about using Bluetooth " for an understand
the basic concepts to be aware of when using Bluetooth.
Bluetooth Headset cannot be detected
z If the Bluetooth Headset is connected to and is bein
Bluetooth Headset will be undetectable even if you search for it.
Cannot connect to Bluetooth Headset
z If the Bluetooth Headset is connected to and is bein
device will be able to connect to the Bluetooth Headset.
z A Bluetooth connection will be im
ossible if the Bluetooth Headset is connected t
power adaptor.
Please remove the power adaptor and re-connect.
used by another device, the
used by another device, no o
Sound cuts out/cannot hear anything
z Usin
a Bluetooth headset with other Bluetooth devices may cause problems such
interruptions in sound, reduced transfer speed or failure during file transfer, and
file://C:\Documents and Settings\anitachou\Local Settings\Temp\~hh3F24.htm 2004/11/30
Page 89

Quick Start Guide - Introduction 第 152 頁,共 160 頁
e
g op
(
g play
pp
y
o
i
y
y
o
i
disconnection of the other Bluetooth devices. We strongly recommend using a Blu
headset on its own, not in connection with other Bluetooth devices.
z Please confirm that the Bluetooth Headset is bein
ensure that the correct mode
z Please confirm that the voice file or CD is bein
z Please check the volume settings on your Bluetooth Headset and PC.
z If Windows Media Player or another audio-related a
connect
our Bluetooth Headset, you may find it impossible to connect properly t
audio or communications) mode has been selected).
erated correctly (for example
ed back normally on your PC
lication is active when you
Bluetooth Headset, or even to use it at all.
Please start such applications after you have connected to the Bluetooth Headset.
Using a keyboard or mouse
Important
z Please refer to "What you need to know about using Bluetooth " for an understand
the basic concepts to be aware of when using Bluetooth.
Keyboard or mouse cannot be detected
z If the ke
board or mouse is connected to and is being used by another device, the
keyboard or mouse will be undetectable even if you search for it.
Cannot connect to keyboard or mouse
z If the ke
board or mouse is connected to and is being used by another device, no
device will be able to connect to the keyboard or mouse.
Using a camera
Important
z Please refer to "What you need to know about using Bluetooth " for an understand
the basic concepts to be aware of when using Bluetooth.
file://C:\Documents and Settings\anitachou\Local Settings\Temp\~hh3F24.htm 2004/11/30
Page 90

Quick Start Guide - Introduction 第 153 頁,共 160 頁
g
b
g
w
p
t
y
y
r
C
d
i
p
n
yp
amera cannot be detecte
z If the camera is connected to and is bein
used by another device, the camera will
undetectable even if you search for it.
Cannot connect to camera
z If the camera is connected to and is bein
used by another device, no other device
be able to connect to the camera.
Images from the camera can be displayed, but no pictures can be taken
z The memory card in the camera may be full.
Please make a backu
of all your necessary data on alternative media, then delete
images from the memory card, and ascertain how much free space remains.
Camera images do not appear in window
z The camera ma
not have been set to remote camera mode (image browse mode,
configuration mode, etc).
Certain cameras will end the Bluetooth connection automaticall
if you change the
settings in a mode other than remote camera mode. Please re -connect to the came
when you next wish to use the device in remote camera mode.
Using a PDA
Important
z Please refer to "What you need to know about using Bluetooth " for an understand
the basic concepts to be aware of when using Bluetooth.
Cannot make an ActiveSync connection
z Please confirm that you have installed ActiveSync v3.7 or higher on your PC.
z ActiveSync is installed to COM7 as a default. Please refer to " Synchronising
information using ActiveSync" and re-configure your ActiveSync connection.
If a
ort other than COM7 has been used, please amend the ActiveSync connectio
settings accordingly.
Cannot locate a saved file
z The t
e of file sent to your PDA, as well as the profile used to send the file, may
where folders saved on your PDA are located.
file://C:\Documents and Settings\anitachou\Local Settings\Temp\~hh3F24.htm 2004/11/30
Page 91

Quick Start Guide - Introduction 第 154 頁,共 160 頁
g
s
g
r
i
p
o
p
h
pprop
y
pp
p
p
y
e
Examples:
Ima
es transferred to your PDA using "Image transfer" > saved in the "Image tran
folder
Ima
es transferred to your PDA using "File transfer" > saved in the "Shared folde
Using a mobile telephone
Important
z Please refer to "What you need to know about using Bluetooth " for an understand
the basic concepts to be aware of when using Bluetooth.
Mobile telephone cannot be detected
z If the mobile tele
hone is connected to and is being used by another device, the m
telephone will be undetectable even if you search for it.
Cannot connect to mobile telephone
z If the mobile tele
hone is connected to and is being used by another device, no ot
device will be able to connect to the mobile telephone.
Cannot send images to mobile telephone
z Please use the a
riate transfer method, according to the profiles supported by
mobile telephone.
If OPP is supported: right-click on a file to send it
If BIP is su
orted: use "Image transfer" under Bluetooth Information Exchanger t
send images
Cannot connect to the Internet
z The tele
hone number of the connection (i.e., the telephone number for the access
of your Internet service provider) may not be correct. Please check the telephone
number.
z The user ID and/or
assword for the provider with whom you have signed up may
been entered incorrectly. Please check the user ID and password.
z The default connection ma
have been configured with different settings. Please s
connection configured for mobile telephone use as the default connection.
file://C:\Documents and Settings\anitachou\Local Settings\Temp\~hh3F24.htm 2004/11/30
Page 92

Quick Start Guide - Introduction 第 155 頁,共 160 頁
y
e
t
p
,
o
[
]
y
Cannot send or receive faxes
z Once
ou have registered a mobile telephone as your fax server, you will need to
the fax settings from the [Printer and Faxes] window in the Control Panel.
Please refer to "Using a modem station for fax transmissions " for information on
configuration procedure.
z The tele
hone number of the fax destination may have been entered incorrectly. Pl
check the telephone number.
z If the setting under COM Auto Connect Settings has been set to "Off"
a connecti
not automatically be established with the modem. Please connect to the mobile
telephone manually.
z The fax service may not have been enabled for sending (or receiving).
Please check the settings by following the procedure below.
1. Open [Printers and Faxes] from the Control Panel, right -click on the
and then click on [Properties]
Fax
The [Fax properties] window will appear.
2. Select the [Device] tab, right-click on the modem
on [Properties]
ou wish to use, and the
file://C:\Documents and Settings\anitachou\Local Settings\Temp\~hh3F24.htm 2004/11/30
Page 93

Quick Start Guide - Introduction 第 156 頁,共 160 頁
e
[
h
3. Select the [Send] tab, and then confirm that "Enable device to send" has b
checked.
4. Select the
been checked when you wish to receive faxes)
Receive] tab, and then confirm that "Enable device to receive"
5. Click on the [OK] button
file://C:\Documents and Settings\anitachou\Local Settings\Temp\~hh3F24.htm 2004/11/30
Page 94

Quick Start Guide - Introduction 第 157 頁,共 160 頁
p
t
m
y
o
,
h
y
u
Glossary
This glossary provides definitions for Bluetooth -related terminology.
You will be able to look up the meanings of any uncertain terms here.
A2DP Profile
Abbreviation of Advanced Audio Distribution.
A Bluetooth
audio devices.
rofile allowing you to adjust the sound quality of wireless headsets and o
AVRCP Profile
Abbreviation of Audio/Video Remote Control Profile. A Bluetooth profile enabling re
control functions to be sent and received. Remote control commands can be received b
Bluetooth Utility.
Bluetooth Profile
A specification that guarantees the connection to the service function of a remote Bluet
device.
For a Bluetooth device to send and receive information to and from another device
devices must support shared profiles designated for each function, such as dial -up
networking, faxing, printing and human interface devices.
bot
DHCP
Abbreviation of Dynamic Host Configuration Protocol
DHCP is a function that automaticall
avoid having to set up IP addresses on each computer.
file://C:\Documents and Settings\anitachou\Local Settings\Temp\~hh3F24.htm 2004/11/30
sets up IP addresses. This function will allow yo
Page 95

Quick Start Guide - Introduction 第 158 頁,共 160 頁
DUN Profil
p
o
s
p
r
h
p
i
e
A Bluetooth profile for Dial-up Networking.
This profile enables you to establish a dial -u
station, mobile telephone, or similar device.
FAX Profile
A Bluetooth profile that enables you to establish a Bluetooth connection with a wireles
modem station, mobile telephone, or similar device to send or receive a fax.
Bluetooth connection with a wireless m
FTP
Abbreviation of File Transfer Profile.
A Bluetooth
to and from the local device.
rofile that enables you to browse folders on a wireless device and transfe
GAVDP Profile
Abbreviation of Generic Audio-Video Distribution Profile. This is a Bluetooth profile.
HCRP
Abbreviation of Hardcopy Cable Replacement Profile. A Bluetooth profile that establis
connection to a device only when you print, unlike SPP (Serial Port Profile).
HID Profile
Abbreviation of Human Interface Device Profile.
A Bluetooth
device.
file://C:\Documents and Settings\anitachou\Local Settings\Temp\~hh3F24.htm 2004/11/30
rofile that enables you to connect to a wireless mouse, keyboard or other
Page 96

Quick Start Guide - Introduction 第 159 頁,共 160 頁
p
s
p
c
g
t
o
v
h
y
t
p
po
configured for a Bluetooth connection. This can be used for printers and printer adapters
p
LAP
Abbreviation of LAN Access Profile.
A Bluetooth
point to access a LAN via PPP.
OPP
Abbreviation of Object Push Profile.
A Bluetooth
rofile that enables you to establish a Bluetooth connection to a LAN acce
rofile that enables you to exchange business cards with a wireless device.
Passkey
Also known as a PIN code
This is a
to be established to a wireless device. You need to know the passkey in order to connec
device that requires authentication.
Even when the authentication settin
Bluetooth Utility, the passkey entry dialog box will appear automatically if authenticati
required, enabling you to authenticate a device. A link key will be created once you ha
authenticated a device, eliminating the need for a passkey to connect to that device in t
future.
assword consisting of up to 16 alphanumeric characters that enables a conne
has been disabled in the User Mode Properties of
Pairing
A security function. In order for Bluetooth devices to authenticate each other, a passke
code) is entered in each terminal when they are connected for the first time, and a secre
bit link key is generated. This action is known as "pairing."
SPP
Abbreviation of Serial Port Profile.
A Bluetooth
file://C:\Documents and Settings\anitachou\Local Settings\Temp\~hh3F24.htm 2004/11/30
rofile that enables communication with a device through a virtual serial
Page 97

Quick Start Guide - Introduction 第 160 頁,共 160 頁
configured for a Bluetooth connection. This can be used for printers and printer adapters
p
g
, (e)
h
r
y
h
PDAs, using a method different from HCRP or ActiveSync .
TCP/IP
Abbreviation of Transmission Control Protocol/Internet Protocol.
Standard communications
Internet. Usin
the same protocol enables computers to exchange data with each other.
rotocol (convention for enabling data communication) used
vCARD
Common standard for electronic business cards.
Names
form of electronic business cards (in *.vcf format), allowing all parties to easily registe
other's data in their address books.
The standard is extensivel
mail/schedule management software.
mail addresses, telephone numbers and other information are exchanged in t
compatible with Microsoft Outlook, Lotus Organizer and ot
file://C:\Documents and Settings\anitachou\Local Settings\Temp\~hh3F24.htm 2004/11/30
 Loading...