

Page 1
s
Asus V66
User Manual
Page 2

Contents
Preface i
About this manual i
Additional Information ii
FCC Regulations ii
European Notice iii
RF Exposure Information (SAR) iii
Proper Disposal iv
Safety Warnings v
Welcome 1
Package Contents 1
Overview 2
Specifications 2
Menu Map 4
Inserting the SIM card, mini
SD card, and battery 7
Getting Started 7
Charging the battery 8
Turning the phone on/off 8
Function Keys 9
Unlocking the keypad 11
Standby Mode 12
Using the Menu 13
Text Entry 14
Connecting to a Computer 16
Calls 17
Making a call 17
Answering a Call 17
Answer Mode 17
Canceling an Incoming Call 18
Diverting a Call 18
Redialing a Number 18
Call Logs 18
Call Time/Cost 19
Options During a Call 20
Other call options 20
Adding Contacts 21
Phonebook 21
Searching for a Contact 21
Shortcut to Contact Entries 22
Copy Contacts 22
Deleting Contacts 23
Caller Groups 23
Extra Number 24
Phonebook Settings 25
My vCard 25
Messages 26
SMS 26
MMS 28
Chatting Rooms 29
E-mail 30
Voice Mail 30
Cell Broadcast 31
Input Methods 31
Page 3

Manner 32
Settings 33
Phone Settings 33
Display Settings 35
Tone Settings 36
Call Settings 37
Network Settings 39
Security Settings 40
Factory Settings 42
Camera 43
Taking Photos 43
Viewing and Managing
Photos 43
Photo Capture Settings 44
Recording Videos 46
Viewing and Managing
Videos 46
Video Capture Settings 47
Media Center 49
Audio Player 49
FM Radio 50
Java 51
Games 52
Melody Composer 52
Organizer 54
Alarm 54
Calendar 54
Tasks List 55
Calculator 55
World Clock 56
Voice Recorder 56
Image Editor 57
Stopwatch 57
File Manager 58
Viewing drive contents 59
Units Converter 59
Currency Exchange 60
Health Manager 60
Network 61
WAP 61
Data Account 62
Page 4
Preface
Congratulations on your purchase of an Asus V66 mobile telephone. Read this manual carefully
and keep it in a safe place for future reference.
About this manual
Every effort has been made to ensure that the contents of this manual are correct and up to date.
However, no guarantee is made regarding the accuracy of the contents, and the manufacturer
reserves the right to make changes without notice.
Copyright© Asus 2005
Preface
i
Page 5

Additional Information
The use of this equipment may be subject to local
rules and regulations. The following rules and
regulations may be relevant in some or all areas
where your handset will be in operation.
FCC Regulations
This model phone complies with part 15 of the
FCC Rules. Operation is subject to the condition
that this device does not cause harmful interference.
This device complies with Part 15 of the FCC
Rules. Operation is subject to the following two
conditions:(1) this device may not cause harmful
interference and (2) this device must accept any
interference received, including interference that
may cause undesired operation.
This equipment has been tested and found to
comply with the limits for a Class B digital device,
pursuant to Part 15 of the FCC Rules. These
limits are designed to provide reasonable
protection against harmful interference in a
residential installation. This equipment generates, uses and can radiate radio frequency energy
and, if not installed and used in accordance with
the instructions, may cause harmful interference
to radio communications. However, there is no
guarantee that interference will not occur in a
particular installation If this equipment does
cause harmful interference to radio or television
reception, which can be determined by turning the
ii
equipment off and on, the user is encouraged to
try to correct the interference by one or more of
the following measures:
• Reorient or relocate the receiving
antenna.
• Increase the separation between the
equipment and receiver.
• Connect the equipment into an outlet on
a circuit different from that to which the
receiver is connected.
• Consult the dealer or an experienced
radio/TV technician for help.
Changes or modifications not expressly approved
by the party responsible for compliance could void
the user‘s authority to operate the equipment.
The antenna(s) used for this transmitter must not
be co-located or operating in conjunction with any
other antenna or transmitter.
This EUT is in compliance with SAR for general
population /uncontrolled exposure limits in ANSI/
IEEE C95.1-1999 and had been tested in
accordance with the measurement methods and
procedures specified in OET Bulletin 65
Supplement C.
Page 6

European Notice
Products with the mark comply with the Radio
& Telecommunication Terminal Equipment
Directive (1999/5/EEC), the Electromagnetic
Compatibility Directive (89/336/EEC) and the
Low Voltage Directive (73/23/EEC) - as
amended by Directive 93/68/ECC - issued by
the Commission of the European Community.
Compliance with these directives implies
conformity to the following European Standards:
• 1999/5/EEC Radio & Telecommunication Terminal Equipment Directive
(R&TTE) EN 301 511
• Specific Absorption Rate (SAR)
Standard: EN 50360, EN 50361
• 73/23/EEC Low Voltage Directive
(LVD) Standard: EN 60950:2000
• 89/336/EEC Electromagnetic Compatibility (EMC-Directive) Standard: EN
301489-1/7
• The manufacturer cannot be held
responsible for modifications made by
the user and the consequences thereof,
which may alter the conformity of the
product with the mark.
RF Exposure Information (SAR)
This model phone meets the government’s
requirements for exposure to radio waves.
This phone is designed and manufactured not
to exceed the emission limits for exposure to
radio frequency (RF) energy set by the Federal
Communications Commission of the U.S.
Government.
The exposure standard for wireless mobile
phones employs a unit of measurement known
as the Specific Absorption Rate, or SAR. The
SAR limit set by the FCC is 1.6W/kg. Tests for
SAR are conducted using standard operating
positions accepted by the FCC with the phone
transmitting at its highest certified power level
in all tested frequency bands. Although the
SAR is determined at the highest certified
power level, the actual SAR level of the phone
while operating can be well below the maximum
value. This is because the phone is designed to
operate at multiple power levels so as to use
only the power required to reach the network. In
general, the closer you are to a wireless base
station antenna, the lower the power output.
The highest SAR value for the model phone as
reported to the FCC when tested for use at the
ear is 0.616 W/kg and when worn on the body,
as described in this user guide, is 0.819 W/kg.
(Body-worn measurements differ among phone
models, depending upon avail-able enhancements and FCC requirements.)
Preface
iii
Page 7

While there may be differences between the
S
SAR levels of various phones and at various
positions, they all meet the government
requirement.
The FCC has granted an Equipment Authorization for this model phone with all reported SAR
levels evaluated as in compliance with the FCC
RF exposure guidelines. SAR information on
this model phone is on file with the FCC and
can be found under the Display Grant section of
tap://www.fcc.gov/oet/fccid after searching on
FCC ID: MSQV66
For body worn operation, this phone has been
tested and meets the FCC RF exposure
guidelines for use with an accessory that
contains no metal and the positions the
handset a minimum of 1.5 cm from the body.
Use of other enhancements may not ensure
compliance with FCC RF exposure guidelines.
If you do not use a body-worn accessory and
are not holding the phone at the ear, position
the handset a minimum of 1.5 cm from your
body when the phone is switched on.
Proper Disposal
The symbol of the crossed out bin indicates
that the product (electrical and electronic equipment) should not be placed in municipal waste.
Please check local regulations for disposal of
electronic products.
iv
Page 8

Safety Warnings
Read the following safety warnings carefully
before using your cell phone.
• This equipment is intended for use with
power supplied from supplied battery
charger(s) and/or power supply unit(s).
Other usage will invalidate any certification
given to this apparatus and may be
dangerous.
• Switch off your cellular telephone when in
an aircraft. The use of cellular telephones
in an aircraft may be dangerous to the
operation of the aircraft, disrupt cellular
networks, and may be illegal. Failure to
observe this instruction may lead to
suspension or denial of cellular telephone
services to the offender, legal action or
both.
• Do not use the phone or phone equipment
when at a refueling point.
• Observe restrictions on the use of radio
equipment in fuel depots, chemical plants,
or where blasting operations are in
progress.
• The use of the Alert device to operate a
vehicle’s lights or horn on public roads is
not permitted.
You MUST exercise proper control of your
vehicle at all times. Observe the following
safety precautions when driving:
• Do not use a hand-held telephone or
microphone while you are driving.
• When driving, find a safe place to stop the
vehicle before using the phone.
• Do not speak into a hands-free microphone if it will distract you from driving.
• You MUST NOT stop on the hard shoulder
of a motorway to answer or make a call,
except in an emergency.
• The radio equipment should be connected
to the antenna via a non-radiating cable
(e.g. coaxial cable). The antenna must be
mounted in a position such that no part of
the human body will normally rest close to
any part of the antenna unless there is an
intervening metallic screen, such as a
metallic roof.
NOTES:
• In some areas where electric current is
unstable, it is recommended that you plug
the charger to an AVR (AC Voltage
Regulator) instead of direct connection to
a power outlet. Unstable power current
may damage the charger and / or the
device.
• You can connect the USB charger or USB
data cable to the device in only one
orientation. Incorrect insertion of the cable
connector may cause short circuiting and
may damage the device.
Preface
v
Page 9
Welcome
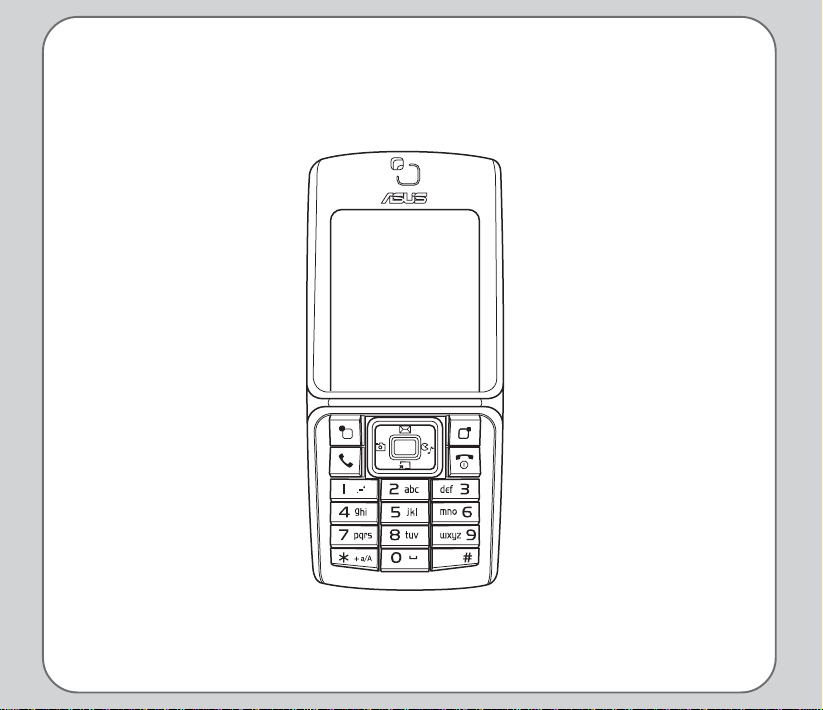
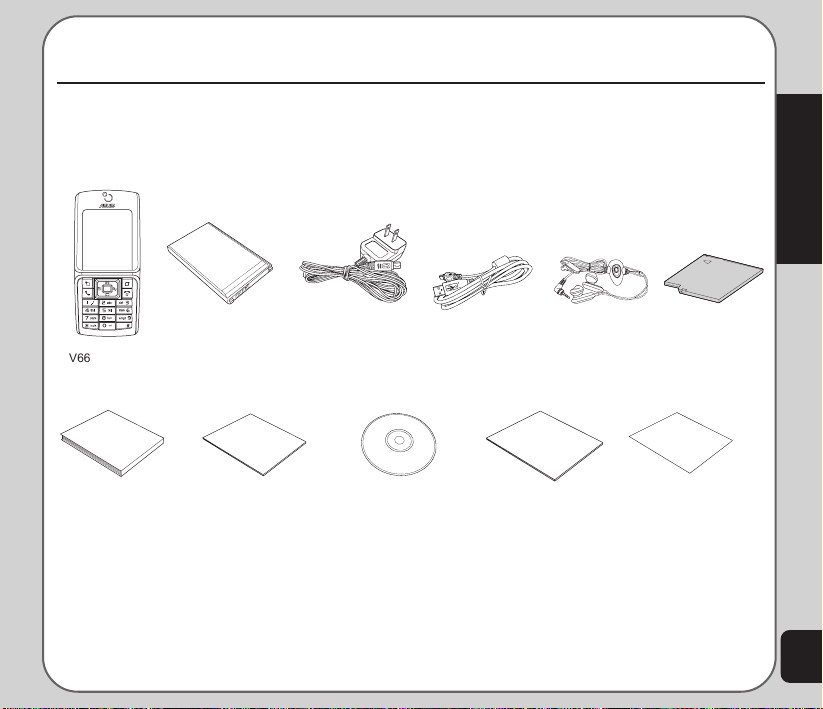
Congratulations on your purchase of an Asus V66 cell phone. The following illustration displays the
package contents of your new phone.
Package Contents
Welcome
V66 handset 720 mAh Li-ion
User Manual
battery
Quick Start Guide
Travel charger Stereo headset Mini-SD card
CD-ROM
USB cable
Manual
Handset Manager
Handset Manager
manual
(optional)
warranty card
Warranty cardUser manual Quick start guide Handset Manager
1
Page 10
Overview
V66s
The V66 is a stylish and fashionable new phone from Asus, with all the functions and utilities to
make it a useful tool in today’s mobile world. The V66 comes equipped with a built-in camera,
MMS/SMS messaging capability, organizer, java games, audio player, WAP, GPRS, and a mini SD
card slot. In addition to the internal 32 MB phone memory, the mini SD card* provides additional
memory where you can store your contact information, messages, text, graphics, and audio files.
The V66’s audio player enables you to play back your favorite music.
Features
• Wide variety of calling and messaging functions
• Built-in camera
• Media center with audio player, FM radio receiver, and games for your entertainment
• MMS and SMS messaging capability
• Personal information organizer with alarm, calendar, calculator and other useful tools to
manage your time
• WAP and GPRS capability to check e-mail or browse web services
2
*
* Note: miniSD card is an optional accessory.Accessory bundle may vary in different territories.
Page 11
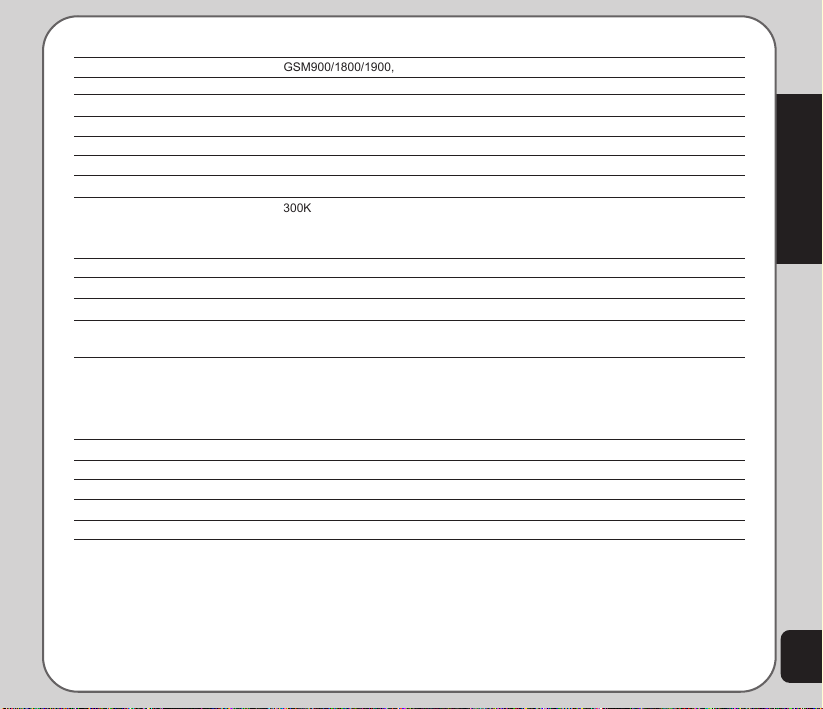
Specifications
1.3 M
GSM 850 / 1900 :
System supported GSM900/1800/1900, GPRS Class B/Multi-Slot Class 10
Size 99.8 x 43.8 x 18.7 mm
Weight 90g
Battery 720 mAh Li-ion
Standby Time 200 hours
Talk Time 2.5 ~ 5 hours
Display 1.8-inch, 256K colors, TFT, 128 x 160
Camera 300K pixel CMOS
Supports video recording
4/6/9 continuous shots
WAP Supports WAP 1.2.1 and WAP 2.0
Java Supports J2ME (CLDC + MiDP 1.0.3)
Messaging Supports SMS, EMS, MMS
Ring tone 64 polyphonic ring tones
Supports MIDI, WAV, AMR and MP3
Phone book 300 sets + SIM card
Caller ID with photos
10 sets for speed dialing
10 sets for voice messaging
Record Record an unlimited number of files, up to memory capacity
Calendar 10 sets
Internal Memory 32 MB
External storage Mini-SD card
PIM tool Alarm, calculator, worldwide clock, calendar, note, currency, timer, etc.
Note: All specifications are subject to change without further notice.
Welcome
3
Page 12

Menu Map
Network
Messages
Manner
Settings
4
Service Provider
WAP
Data Account
SMS
MMS
Chatting Rooms
Email
Voice Mail
Cell Broadcast
Input Methods
Normal
Meeting
Indoor
Outdoor
Headset
Phone Settings
• Date / Time
• Power On/Off Timer
• Input Methods
• Language
• Default Encoding
• Shortcut
• Greeting Text
• Speed Dial
• Auto Update
• Firmware Upgrade
Display Settings
• Themes
• Wallpaper
• Screen Saver
• Show Date and Time
• Show Owner Number
• Show Operator Name
• Show Manner
• Brightness
Tone Settings
Incoming Ringtone
Alarm Tone
Power On
Power off
Message Tone
Key Tone
Call Settings
• Hide My No.
• Call Waiting
• Call Forwarding
• Call Barring
• Line Switching
• Call Time Reminder
• Call Time Display
• Auto Redial
• Closed User Group
• Call Filter
Network Settings
• Network Selection
• Preferred Networks
Page 13

• Band Selection
• GPRS Connection
Security Settings
• SIM Lock
• Phone Lock Code
• Auto Keypad Lock
• Fixed Dial
• Barred Dial
• Change Password
Factory Settings
Camera
Capture
• My Album
• Camera Settings
• Image Settings
• Effect
• Frame
• Multi-Capture
• Capture Timer
• Default Storage
• Restore Default
Video Recorder
• My Video
• CamCorder Settings
• Video Settings
• Effect
• Default Storage
• Restore Default
My Album
My Video
Media Center
Audio Player
FM Radio
Java
Java Settin
Games
Game Settings
Melody Composer
Tone Settings
Organizer
Alarm
Calendar
Tasks List
Calculator
World Clock
Voice Recorder
Image Editor
Stopwatch
• Typical
•nWay
File Manager
Units Converter
Currency Exchange
Health Manager
• Calculate BMI
• Menstrual
Phonebook
Quick Find
Search Entry
Add
Welcome
5
Page 14

Copy All
Delete All
Delete
Caller Group
Extra number
• My Phone Number
• Service Number
• SOS Number
Settings
• Memory Status
• Default Storage
• Fields
• My vCard
Calls
Missed Calls
Dialed Calls
Received Calls
Delete Call Log
Call Time
Call Cost
SMS Counter
GPRS Counter
6
Page 15
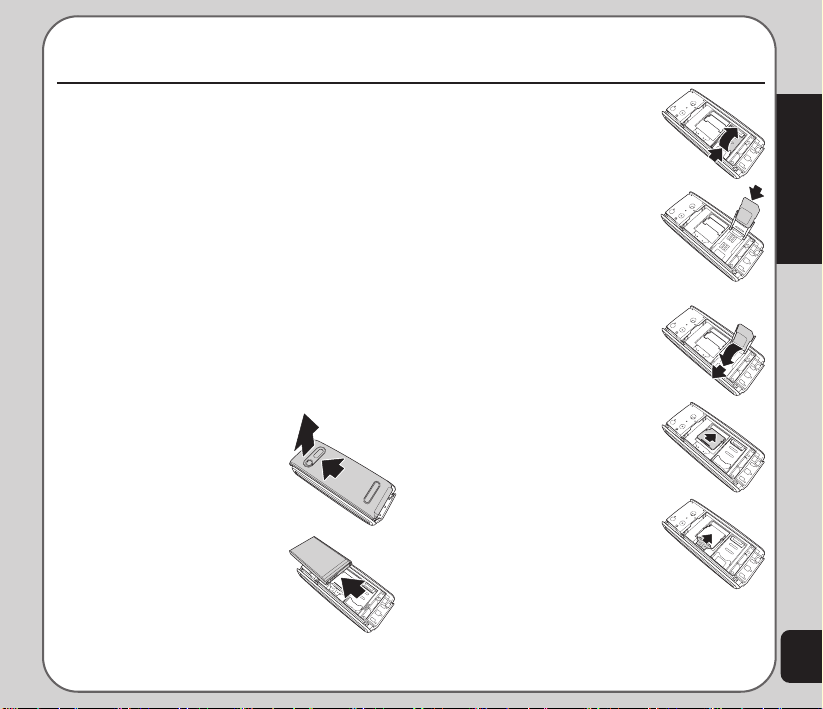
Getting Started
Inserting the SIM card, mini SD card, and battery
When you register with a service provider, you
receive a SIM card (Subscriber Identity Module
card). Your phone must have a SIM card in
order to make calls. The SIM card is a computer chip that contains your phone number,
phonebook information, and service provider
information. Handle it with care and do not
bend it or expose it to static electricity or dirt.
Be sure the power to your phone is off before
you insert your SIM card.
The SIM card and the mini SD card slots are
situated underneath the battery. To insert the
cards, follow these steps:
1.Press the back cover and
slide the cover off to
remove it.
2.Remove the battery. The
battery compartment has
a notch at the top to make
it easier to grasp and
remove it.
3.Lift the SIM card holder
using your fingernail.
4.Insert the SIM card into
the holder with the correct
orientation. The gold
contacts of the SIM card
should face down.
5.Place the SIM card holder
back in place.
6.To place the mini SD card,
place the card in the slot
with the gold contacts
facing down.
7.Secure the mini SD card
in place with the metal
clasp by moving it towards
the card.
Note: In some regions the mini SD card may be supplied as an
optional accessory only.
Getting Started
7
Page 16

8.Place the battery back into
the battery compartment
noting the correct polarity.
9.Place the back cover
against the phone case,
make sure to put the pins in
the bottom case first,then
slide it upwards to lock into
place.
Caution:
• Use only the battery recommended by the
manufacturer. Using an incompatible battery with the
phone may cause risk of an explosion.
• Dispose of the used batteries as instructed by the
manufacturer or ask your local authorities for
assistance.
Charging the battery
1.Connect the charger plug to a power outlet.
2.Connect the charger to the socket at the
bottom of the phone. The connector can
only be inserted one way.
Low Battery Indicators
The battery indicator in the upper right corner of
the screen indicates how much charge remains in
the battery. As additional reminders, when the
battery is low, the phone emits a double beep.
The message “battery low” also appears on the
screen.
Note: If the battery has been deeply discharged, it may take
several minutes before the battery level indicator is displayed.
Turning the phone on/off
To turn the phone on, do the following:
1.Hold down the power/end key until the
screen lights up.
2.If needed, enter your SIM card PIN code
and press the Enter key.
To turn the phone off, do the following:
• Press the power/end key and hold until
the phone shuts down.
Note: If you set an alarm using the Organizer menu and turn off
the phone, the phone will turn itself on when the alarm is
activated. After you disable the alarm, the phone prompts you if
you want to keep the phone turned on or off. See the Organizer
section for details about setting an alarm.
8
Note: For best battery performance, allow the battery to charge
and discharge completely the first few times you use it.
Page 17

Function Keys
The following table lists the phone keys and
their functions.
Power/end key
• Hold to turn the phone on or off.
• Press to stop an incoming call or
cancel a call you are dialing.
• Press to exit a menu or submenu.
Call key
• Press to dial or answer calls.
• Hold to redial the last number
called.
Left soft key
• Press to display the menu.
• Press to perform the function
currently displayed in the lower left
corner of the screen.
• Press to move left while navigating
menus.
Right soft key
• Press to view phone book when
the phone is in idle mode.
• Press to perform the function
currently displayed in the lower
right corner of the screen.
• Press to move right while
navigating menus.
Up joystick key
• Press to scroll up through menu
items.
• Press to display the SMS inbox when
the phone is in standby mode
Down joystick key
• Press to scroll down through menu
items.
• Press to display a list of your
shortcuts when the phone is in
standby mode.
Left joystick key
• Press to scroll left through menu
items.
• Press to display the Camera menu
when the phone is in standby mode.
Right joystick key
• Press to scroll right through menu
items.
• Press to display the Media Center
menu when the phone is in
standby mode.
Enter key
• Press to display the main menu.
• Press to confirm selection of a menu
item when the phone is in
standby mode.
Getting Started
9
Page 18
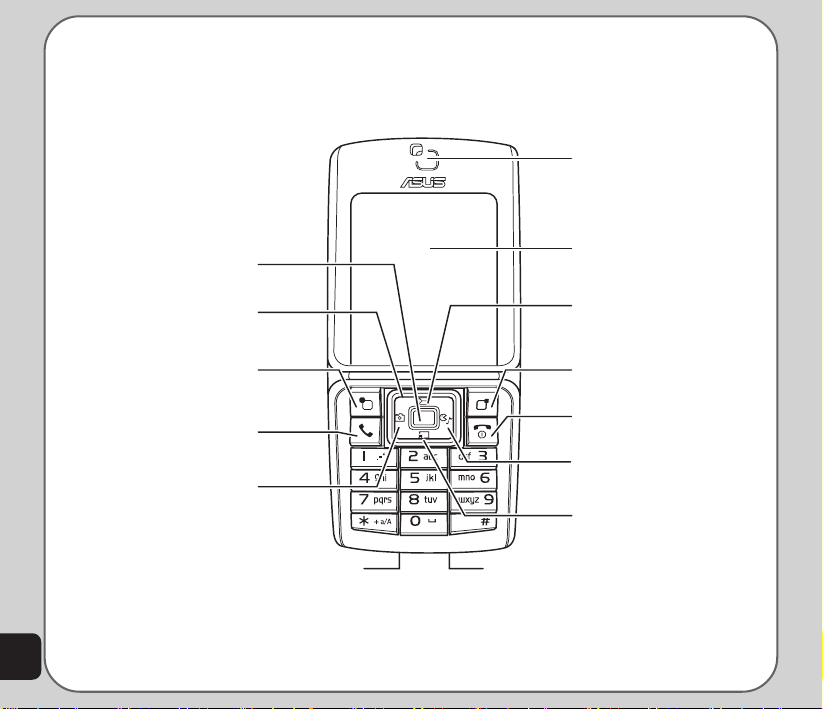
Front view
Speaker
Enter key
Displays the main menu; confirms
selection of a menu item
Joystick
Includes up, down, right,
left keys for on-screen navigation
Left soft key
Displays the main menu; selects
left menu items
Call key
Answers a call; displays call
history
Left joystick key
Displays the camera menu;
scrolls left through menu items,
and displays previous page
10
Headset jack
Charger/mini
USB socket
Screen
Up joystick key
Displays the SMS inbox; scrolls up
through menu items
Right soft key
Displays phone book when idle;
selects right menu items
Power/end key
Turns power on or off; ends a call;
exits menu
Right joystick key
Displays the Media Center menu;
scrolls right through menu items,
and displays next page
Down joystick key
Displays your shortcuts menu;
scrolls down through menu items
Page 19
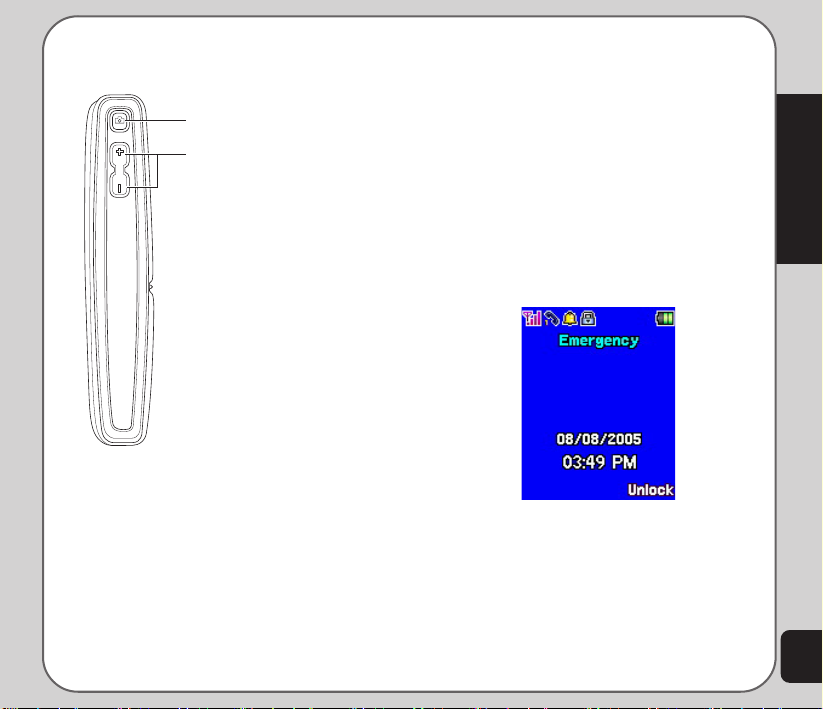
Left view
Capture button
Captures photos
Side key
Increases or decreases the volume
for calls, key tones, or playing
media files.
Unlocking the keypad
The keypad of the phone can be locked
automatically after a specific time interval to
prevent tampering or accidental pressing of any
buttons. Refer to Security Setup in the Settings
section to learn how to lock the keypad.
To unlock the keypad, do the following:
1.The screen shows Unlock in the lower
right corner of the screen. Select this
option by pressing the right soft key which
is just under the word Unlock on the
screen.
2.Press the # key on the keypad to unlock
the keypad as prompted on the screen.
The keypad is then unlocked.
Getting Started
11
Page 20
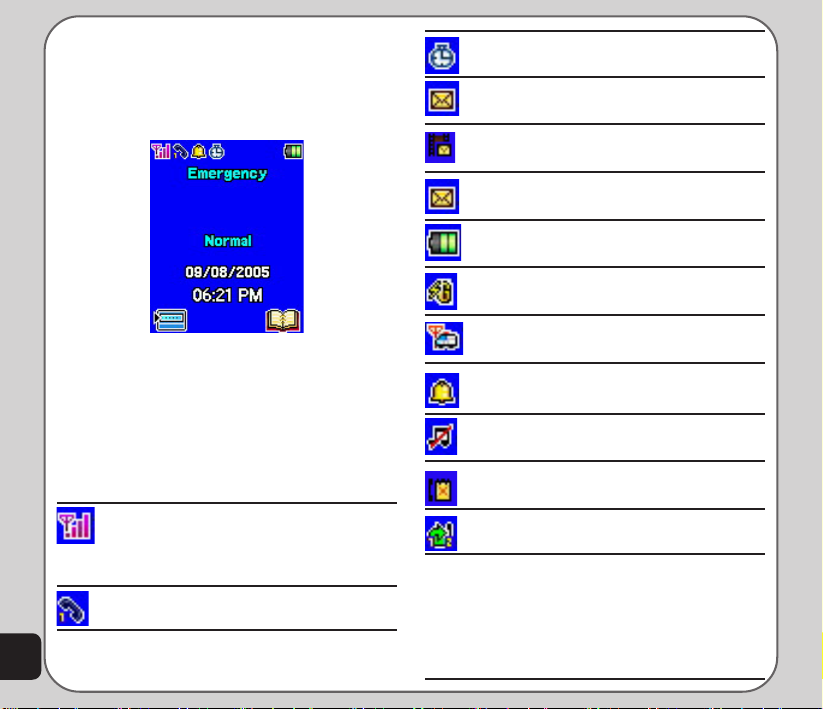
Standby Mode
When your phone is on, but not in use, it is in
standby mode. During standby mode, the upper
part of the display screen shows various icons.
The date and time is displayed at the lower
center of the screen. Beneath the date and time
are Menu in the left corner and Name in the
right corner. Press the left soft key to view the
main menu, and the right soft key to view the
phone book.
The Standby screen icons are as follows:
Vertical bars indicate the strength of the
GSM network signal. Four bars
indicates that your current position has
the best reception.
Line 1 or line 2 is selected for calls.
Alarm has been set.
A text message has been received.
A multimedia message has been
received.
The SMS memory is full (blinking icon).
Indicates battery charge status.
Phone is using GPRS network.
Phone is in roaming mode.
Ringtone is enabled.
Ringtone is disabled.
Indicates a missed call.
Call divert is enabled,
12
Page 21
Using the Menu
In the standby mode, press the left soft key to
view the main menu.
Follow these tips to navigate through the menu
and menu options.
• To view the menu, press the left soft key
or the Enter key.
• Use the up, down, left, and right joystick
keys to move through the various menu
items.
• The lower left corner of the screen
displays the name of the menu item
currently selected while the lower right
corner displays Back. Press the left soft
key (situated under the name of the
menu item) to select the menu item. Press
the right soft key which is situated under
Back to exit the menu.
• Each menu item also displays a small
number beneath it. You can also press the
number corresponding to a menu item, on
the keypad to select the item.
• To quickly exit from the menu, press the
Power/End key.
• Use the joystick keys to select the
submenu items and options. The right and
left soft keys can also be used for
selecting various options in submenus.
For example, to view missed calls, do the
following:
1.Use the joystick keys to select Calls from
the main menu.
2.Press the left soft key to confirm the
selection. The Calls submenu opens.
3.Press the left soft key to select the
Missed Calls option. A list of missed calls
opens.
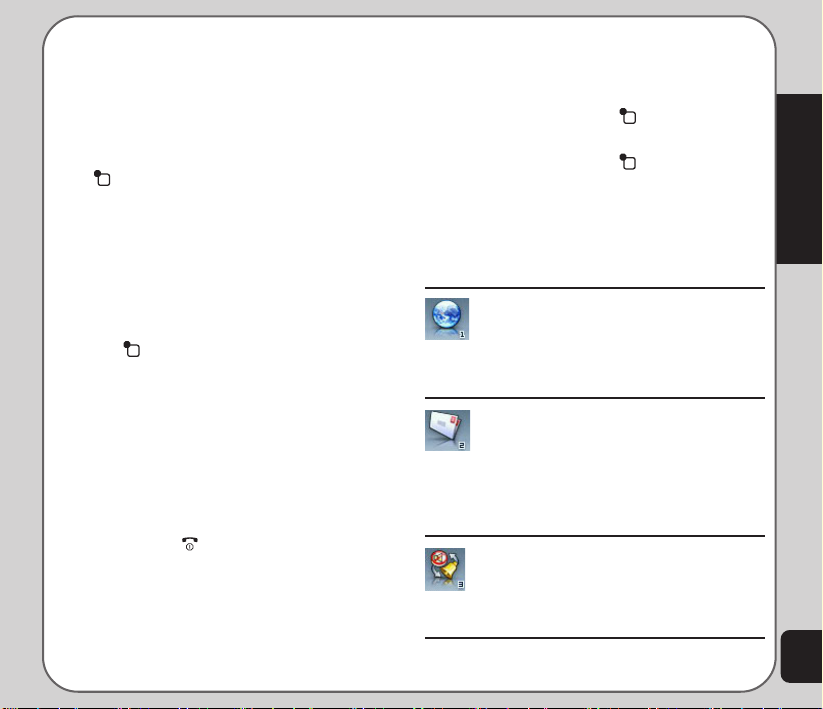
The following table provides a list of all the
main menu items:
Network: Enables you to specify the
WAP and data settings and set up
GSM and GPRS settings. Enables
access to the internet and to STK SIM
card services.
Messages: Gives you access to
messages received. Compose and
send text (SMS) and multimedia (MMS)
messages here. You can also check
email, chat, and broadcast a message
using this menu.
Manner: Enables you to select and
customize the phone settings including
the ring tone, volume, ring type, and
answer mode.
Getting Started
13
Page 22

14
Settings: Lets you adjust phone
settings such as call settings, themes,
shortcuts, network settings, and
security settings. You can also restore
all settings to their factory default from
this menu.
Camera: Enables you to take pictures
as well as record video with your
phone. You can also access all your
pictures and videos from this menu
item.
Media Center: Consists of an audio
player, FM radio, games, and a melody
composer.
Organizer: Contains useful tools
such as an alarm, a calendar for
scheduling appointments, a to do list,
and a simple calculator. You can also
record memos, edit simple images,
manage all your data using a file
manager, or convert units or currency
Phonebook: Enables you to manage
names and telephone numbers for
easy access and caller recognition.
Calls: Stores information about calls
made, received, and missed.
Text Entry
When you add names to your phone book,
send a text message, or use your WAP
browser, you need to enter text. Your cell phone
has several text entry methods. You can enter
letters individually or with predictive text entry,
which helps you complete words as you enter
them. You can enter letters in upper case, lower
case, or both, or insert symbols.
Basics
• Use the alphanumeric keypad to enter
letters and numbers. Each key is assigned
multiple characters.
• Select Clear, in the lower right corner of
the screen, to delete a letter if you make a
mistake.
• To enter spaces or symbols, press the
0
key. The symbol table is displayed.
Use the joystick to highlight a symbol and
press the enter key to select it. The 9
character represents a space.
• To enter up or lower case charactors,
press *, then the letter.
Page 23

Key Assigned Characters
1 . , - ? ! ‘ @ : # $ / _ 1
2 A B C 2
3 D E F 3
4 G H I 4
5 J K L 5
6 M N O 6
7 P Q R S 7
8 T U V 8
9 W X Y Z 9
0 0, display symbol table
Choosing text entry methods
From any text entry screen, such as a text
message window, select Options > Input
Method.
ABC input
ABC input enables you to enter individual
letters one by one. This is ideal for adding a
phonebook entry or entering a WAP address.
When you press a key, the characters
assigned to the key appear in the lower center
of the screen. Press the key repeatedly to
scroll through these characters. Pause for a
moment and the selected letter appears on the
screen. For practice, try entering text into a
text message (SMS) as follows:
From the menu, go to Messages > SMS >
Write Message. Before entering text, first
make sure that the entry method is set to
multitap. Press Option and select ABC input.
To enter the words “my phone” into the text
entry area, follow these steps:
1.Press the 6 key to select m.
2.Press the 9 key three times to select y.
3.Press 0 key, followed by the enter key
or right soft key to enter a space.
4.Press 7 to enter p, then press 4 two
times to enter h. Continue in this fashion
until the word “phone” is entered.
Smart ABC
Smart ABC is a predictive text entry method. It
uses a built-in dictionary to predict the word you
are typing. You can choose the correct word by
pressing the keys repetitively and scrolling
through the words suggested by the phone. By
reducing the number of keystrokes, the smart
ABC helps some users to type messages more
quickly.
Whenever you press a key, a list of possible
characters or character combinations is
created. To enter text, use the up and down
joystick keys to find the character combination
you want. Press the right joystick key to
proceed entering the next character. If you
Getting Started
15
Page 24

make a mistake, press Clear.
Here is an example of how to enter the word
“baby” using smart text entry.
1.First press the 2 key. The letter a
appears on the screen.
2.Press the 2 key again quickly to go to
the next suggestion which is ba. If you
press the up/down joystick keys, the
phone scrolls through all possible twoletter combinations of the letters a, b, and
c.
3.Press the 2 key again quickly to
display three-letter combinations of the
letters a, b, and c.
4.Press the up/down joystick keys to scroll
through the possible words. When you
see the bab combination, press the right
joystick key to proceed to the next letter.
5.Press the 9 key and the letter x
appears. Press the up/down joystick keys
to scroll through letter options and
select y.
6.Press Option > Done when finished.
Note: For smart text entry to work properly, ensure the
language settings in your phone match the language you want
to type in. For setting language, see Phone Setup under
Settings.
Numeric text entry
Numeric text entry allows you to create a text
message composed of numbers. To use this
16
method, select Option > Input Method and
then select Numeric. Now you can directly
input the numbers using the keypad.
Symbols text entry
With this method, you can enter various types
of symbols. Select Option > Input Method >
Insert Symbols. A list of symbols is displayed.
Use the joystick keys to select the desired
symbol and select OK when done.
Connecting to a Computer
Connect the mobile phone to a computer using
the supplied USB cable.
The phone memory appears on your computer
as a removable disk. If the miniSD card is
installed in the phone, it also appears on the
computer as a removable disk.
You can transfer files between the computer
and the phone using a file viewer, such as
Windows Explorer or My Documents.
For increased functionality, including tools for
creating and editing messages, images, music,
and more, use the Handset Manager software
included in your package.
For more information, refer to the Handset
Manager software.
Page 25

Calls
Making a call
Follow these steps to place a call:
1.Enter the number you wish to dial using
the keypad. If you make a mistake, select
Clear to delete at any time. The right soft
key is just under the word Clear on the
lower right screen; select this key to clear
a number.
2.Press the Power/end key to cancel the
call and return to standby mode. Alternately, select Abort using the right soft
key to cancel the call.
3.Press the Call key to connect the call
after you finish dialing the number.
4.Press the Power/end key to disconnect the call.
Making International Calls
To dial an international call, do the following:
1. First enter a + by holding down the * key.
2. After the +, enter the international access
code for the country you wish to dial,
followed by the telephone number
including the area code.
Answering a Call
When you receive a call, the phone alerts you
by sounding the ring tone and vibration
according to the specified ring tone and
vibration settings. To answer the call, do the
following:
1. Press the Call key to answer the call.
2. Press the Power/end key to end the
call and disconnect.
Alternately, select Option > Answer to answer
the call.
Answer Mode
The default setting for the phone is to answer
when you press the Call key. However, you
can also set the phone to pick up by pressing
any key. To enable the phone to answer a call
by pressing any key, select Manner and then
choose the manner setting that you want.
For example, if you select General, then
choose Personalize > Answer Mode > Any
Key. Set the Any Key option to On to enable
the setting.
Remember to Activate the manner setting to
make sure that the answer mode is set.
Calls
17
Page 26

Canceling an Incoming Call
If you would like to cancel an incoming call,
press the Power/end key. Alternately, you
can press the right soft key to select the
Reject option to reject the call. Depending on
your service provider, the caller may be
transferred to your voice mail or may hear a
busy signal.
Diverting a Call
If you want to divert an incoming call to another
number, do the following:
1.When you receive the call, press Option
and then select the Deflect item.
2.Enter the phone number to which you
want to divert the call using the keypad.
Alternately, select Search using the left
soft key and then browse through the
phone book to select a number.
3.Select OK when done.
Redialing a Number
The phone provides a quick method to redial a
number that has been dialed previously. To
redial a number, do the following:
1. Press the Call key. A list of numbers
dialed previously appears, with the last
18
number dialed at the beginning of the list.
2. Select the number you wish to dial and
press the Call key to dial the number.
Dialed numbers can also be accessed from
Calls > Dialed Calls.
Call Logs
Call logs consist of information about missed,
dialed, and received calls. To view lists of
missed, dialed calls or received calls, select
Calls from the main menu. Then select Missed
Calls, Dialed Calls, or Received Calls to view
the type of calls you require. The number of
calls in a list is limited to 20 entries. Older calls
are dropped from the list when the limit is
reached. Most recent calls appear first in a list.
Returning a Missed Call
If you have missed a call, a message appears
on your standby screen to tell you a call was
missed. Select Read to see the most recent
missed calls. To view a complete list of missed
calls, do the following:
1.Select Calls > Missed Calls. A list of
missed calls is displayed.
2.Scroll through the list and select the
desired call. Press the Call key to call
the number.
Page 27

To view additional information, select a missed
call number from the list and select OK. The
date, time, phone number of the calling party as
well as the number of times the call was
received is displayed. To call the number, press
the Call key. You may also select Option >
Dial to call the number.
To dial a number from the received or dialed
call logs, follow the same procedure as for
returning a missed call.
Deleting Call Logs
To delete call logs, do the following:
1.Select Calls from the main menu and then
select Delete Call Log.
2.Select from one of the following options:
Missed Calls
Dialed Calls
Received Calls
Delete All
Calls
Call Log Options
While viewing a number from the dialed,
received or missed call logs, you can select
Option to view other functions as follows:
• Delete: Deletes the number from the list.
Deleting can create space for other
numbers.
• Save to Phone book: Adds the number to
the phonebook.
• Dial: Calls the selected number.
• Edit: Modifies the number. This may be
useful for adding an area code, for
example. Modify the number and then
select Save to save the number to your
phone book.
Call Time/Cost
Depending on the type of service package you
have, you may pay according to the length of
your calls. Some users like to monitor the
length of their calls. Your phone offers a
convenient and accurate way to keep track of
length and costs of calls using Call Time and
Call Cost.
• Select Calls > Call Time to see the
various call times. You can view the Last
Duration, Dialed Calls, Answered Calls.
You can also reset the timer using the
Clear Counters option.
• Select Calls > Call Cost to calculate your
phone bill. You can display the Last Call
Cost, All Calls Cost, or Clear Counters.
You can also set Call Cost Limit and the Price
Per Unit. Some of these settings require that
you enter a PIN that can be obtained from your
service provider.
19
Page 28

Options During a Call
When a call is in progress, you have the
following options available:
• Hold / Retrieve: Puts a current call on
hold or retrieves a call on hold.
• End: Ends a call.
• New Call: Places a new call.
• Phone Book: Displays the phone book
menu. You can use this function to check
a contact phone number during a call.
• SMS: Displays the messages menu. This
is convenient in loud speaker mode if you
want to send an SMS during a call.
• Sound Recorder: Starts recording the
conversation. To stop recording, select
Stop.
• Mute: Mutes a call.
• DTMF: Allows the recipient to hear key
press tones.
• H-Free: Switches to hands-free (loudspeaker) mode.
Other call options
There are other advanced call features in your
phone, found in the Settings > Call submenu.
There are features for call waiting, to show or
hide your number when making calls, control
the time of calls, conveniently redial numbers,
or select a line.
These features are discussed in the “Call
20
Settings” section of the Settings chapter in this
manual.
Page 29

Phonebook
Adding Contacts
Read this section to learn how to add new
contacts to your phonebook
Adding a New Entry
Use the Add function to add a new contact to
your phonebook. Follow these steps to add a
new entry:
1. From the main menu, select Phonebook
> Add, OR
From the idle screen, enter a telephone
number using the number keys, then
press the left soft key to select Save.
2. Select the storage location. Select SIM or
Handset then press the enter key.
NOTE: If you choose to add the new entry to the phone, it will
not appear in the phonebook if you transfer your SIM card to
another phone. If you choose to add the new entry to the SIM
card, you can add only a name and a number.
3. Enter a name and number using the
keypad. If you are adding the new entry to
the phone, you can also add a home
number, company name, e-mail address,
office number, fax number, an associated
sound or picture stored in the phone
memory, and put the contact in a caller
group.
NOTE: You can control which fields are available for contact
entries in Phonebook > Settings > Fields. See the section
“Phonebook Settings” in this chapter for more information.
Searching for a Contact
Read this section to learn how to search for
contacts in your phonebook.
Quick Find
Follow these steps to perform a Quick Find
search:
1. From the main menu, select Phonebook
> Quick Find.
A list of all the contacts in your phonebook
is displayed in alphabetical order.
2. Use the joystick to highlight a contact
3. Press the Call key to call the contact.
Press the Enter key to view details for a
contact.
Select Options with the left soft key ,
then select Options to view, edit, delete,
copy, move or send a v-card.
4. Press the right soft key to return to the
previous screen.
Phonebook
21
Page 30

Search Entry
Use the Search Entry function to search for a
specific entry. Follow these steps to use the
search entry function:
1. From the main menu, select Phonebook
> Search Entry.
The data entry screen opens.
2. Enter a search term using the keypad. You
don’t need to type a whole word. For
instance, if you are looking for the entry
“office,” you may want to type simply “off.”
3. Press the Enter key.
4. Press the Enter key again to start the
search, or you can also change the text
input method and start the search again.
All entries that satisfy your search criteria
are displayed.
Shortcut to Contact Entries
From the idle screen, you can directly access
individual contact entries by pressing a number
key, followed by the # pound (hash) key.
For example, if you press 3#, the third contact
entry in the phonebook appears.
NOTE: Only contacts stored on the SIM card can be added as
a shortcut
Copy Contacts
You can move contacts from your SIM card to
phone memory or from phone memory to SIM
card.
22
Follow these steps to move contacts:
1. From the main menu, select Phonebook
> Copy All.
2. Use the joystick to highlight From SIM to
copy contacts from the SIM card, or From
Phone to copy contacts from the phone.
3. Press the Enter key to select the option.
4. Select Yes to confirm, or No to abort.
When all contacts are copied, a “Done”
message appears on-screen.
OR, transfer contact information to the SIM
card or handset as follows:
1. From the idle screen press the right soft
key to open the phonebook. A list of
contacts appears. Select the contact entry
you wish to transfer. Select Options with
the left soft key , then select Copy.
2. Select the desired location, SIM or
Handset.
3. The confirmation message “Copy It”?
appears. Select Yes to copy.
To copy a single entry from the phonebook to
either SIM card or handset select:
Phonebook > Quick Find > Option > Option
> Copy
You can then select whether to copy the entry
to SIM or handset.
You can also select Options > Move transfer a
SIM contact entry to the Handset or a Handset
entry to the SIM card.
Page 31

Deleting Contacts
You can delete individual contacts using the
Delete function. To delete individual contacts:
1. From the main menu, select Phonebook
> Delete, OR
From the idle screen press the right soft
key to open the phonebook. Select
Options with the left soft key , then
select Delete.
The list of contacts in the phonebook
appears.
2 Select a contact to delete, then select
Delete.
3. A confirmation message appears, “Delete
it?” Select Yes to confirm.
You can delete all contacts from the handset or
SIM using the Delete All function. To delete all
contacts:
1. From the main menu, select Phonebook
> Delete All.
2. You are prompted to select a location.
Select From SIM to delete all contacts
stored on the SIM.
Select From Phone to delete all contacts
stored in the phone.
NOTE: When you attempt to delete all the contacts from the
SIM or phone, you are asked for a password. The default
password is 1234. See the “Security Settings” section in
chapter 6 for more information on passwords.
Caller Groups
You can separate contacts into groups to
identify them. There are five caller groups:
Friends, Family, VIP, Business, and Others.
You can change the name of any caller group.
You can add contacts from your phonebook to
a caller group and you can define ringtones,
pictures, etc.
To change the name of a caller group:
1. From the main menu, select Phonebook
> Caller Group.
2. Use the joystick to highlight a caller group,
then press the enter key.
3. Press the enter key to select the current
group name at the top of the list.
4. Use the keypad to enter a new name.
5. Use the right soft key to clear
characters.
6. Press the left soft key to select Option
> Done when the new name is complete.
Press it a second time to confirm. You can
also change the input method here.
To change the alert:
1. Select the caller group to modify as
described in the previous procedure.
2. Use the joystick to select the alert option
(second in the list).
3. Use the right and left joystick option to
cycle through ring, vibrate only, vibrate
and ring, vibrate then ring, or none.
Phonebook
23
Page 32

This option determines what the phone
does when someone from the chosen
caller group calls the phone.
To change the ringtone:
1. Select the caller group to modify as
described in the previous procedures.
2. Use the joystick to select the ringtone
option (third in the list).
3. Use the right and left joystick option to
cycle through the available ringtones.
Each tone is played as it is displayed.
The chosen ringtone will sound when
someone from the current caller group
calls the phone.
To change the picture:
1. Select the caller group to modify as
described in the previous procedures.
2. Use the joystick to select the picture
option (fourth in the list).
3. Use the right and left joystick option to
cycle through the picture options.
This option determines which picture is
displayed when someone from the chosen
caller group calls the phone.
NOTE: If you select a picture from file, it must be smaller than
20K in size. You can read more about storing images in your
camera memory in the camera section, section 7.
To add or delete members from a caller group:
1. Select the caller group to modify as
described in the previous procedures.
2. Use the joystick to select the member list
24
option (last in the list).
3. Press the enter key to display the member
list.
4. Use the joystick to highlight a member of
the list to modify.
5. Press the left soft key to enter the
options menu.
6. Use the joystick to highlight the Add or
Delete option.
7. Press the left soft key to confirm.
NOTE: If you selected the Delete option, you must press the
left function key again to confirm. If you selected the Add
option, you must highlight a new member from the displayed
list and press the Enter key to confirm.
Extra Number
The extra number setting is used to store
special numbers. You can store your own
number here, a service dial number, and an
SOS number.
NOTE: Some of these functions may not be supported by your
service provider. The service dial number and SOS number are
not configurable and are set by your service provider.
To add extra numbers:
1. From the main menu, select Phonebook
> Extra Number.
2. Select My Phone Number to store your
own number.
Select Service Number to store a service
number.
Select SOS Number to store an SOS
number.
Page 33

3. Select an entry from the list, and a textentry screen appears. Enter the desired
number.
You can input both text and numbers. Use
the left soft key to select Option if you
need to change the input method.
When you have finished typing, press the
Enter key to confirm.
4. To edit or delete previous entries, select
an entry, then the left soft key to select
Option.
NOTE: SOS numbers vary according to region and service
provider. Please contact your service provider for details about
SOS numbers.
Phonebook Settings
The phonebook settings menu enables you to
view memory status, set the preferred storage
media, determine which fields appear in the
phonebook, edit and send a vCard, and turn on/
off the human voice prompt feature.
To view memory status:
1. From the main menu, select Phonebook
> Settings > Memory Status.
2. Select OK to display memory status.
To set the preferred storage:
1. From the main menu, select Phonebook
> Settings > Default Storage.
2. Highlight the preferred storage location
then select OK to confirm.
The phonebook fields include additional contact
information, such as Fax Number, E-Mail
Address, Incoming Ringtone, etc. You can
choose to deactivate these fields for all
contacts if this simplifies the phonebook for
you. You can later reactivate the fields if
desired.
To edit the phonebook fields:
1. From the main menu, select Phonebook
> Settings > Fields.
A list of fields is displayed.
2. Highlight a field and press the left soft key
to deactivate or activate a field.
My vCard
A vCard is a virtual calling card that you can
send to people. It can contain your name,
number, home number, company name, e-mail
address, office number, and fax number.
To edit and send your vCard:
1. From the main menu, select Phonebook
> Settings > My vCard.
2. Select the Edit or Send to option.
The edit option enables you to fill in all the
fields. The send option enables you to
send by SMS, MMS, or save to a file. See
the next chapter for more information
about sending MMS and SMS messages.
Phonebook
25
Page 34

Read this section to learn how to use SMS, and
MMS messaging features of your new phone.
You can even send e-mail and use text chat.
This section also covers voice mail features,
broadcasting messages, and setting the
preferred text input.
SMS
An SMS message is a simple text message.
SMS messages can be sent and received with
your phone.
Composing an SMS Message
To compose an SMS message:
1. From the main menu, select Messages >
SMS > Write Message.
2. Enter your text message using the
alphanumeric keypad. See the section
“Text Entry,” in the Getting Started chapter
for more information about how to type
your message.
3. Press the left soft key to display the
Option menu.
The Option menu includes the following:
• Done
• Common Words
• Insert Object
26
• Text Format
• Input Method
Messages
Inserted objects can include a picture, an
animation, or a sound. Some phones may not
be able to receive SMS messages that contain
a anything other than text. Use the Text Format
option to adjust the size and style of the text.
1. Highlight an option and select OK.
2. When your message is complete, select
the Done option.
The send options menu is displayed.
3. Use the joystick to select a send option:
The send options require that you type in
a telephone number or press the left soft
key to search the phonebook.
The Send to Many option lets you send to up to
10 recipients.
The Send by Group option lets you send to an
entire group. Choose a group using the joystick
and press the left soft key to send.
The Save option saves a copy of the message
in the outbox which can be recovered later for
editing or sending.
Common Words
The common words feature contains common
text phrase that you can conveniently enter
without having to type the whole phrase. There
are 10 preset common words phrase which you
can use or edit. To add a common words
Page 35

phrase to an SMS:
1. Begin an SMS message as described in
the section “Composing an SMS Message” in this chapter.
2. Before typing any text, press the left soft
key to display the Option menu.
3. Use the joystick to highlight the Common
Word option and press the enter key to
confirm.
4. Use the joystick to highlight the common
words phrase you would like to add, then
press the enter key to confirm.
The text from the template appears in the
message. You can add to the text, or edit
the text before sending or saving the
message.
5. Send or save the message as normal.
To edit a common words phrase:
1. From the main screen, select Messages >
SMS > Common Words.
The common words list is displayed.
2. Use the joystick to highlight a common
words phrase to edit, then press the enter
key to confirm.
3. Use the joystick to highlight the Edit
optionto edit the wording, or selct the
delete option to delete it completely.
The edit screen displays the existing common
words phrases and gives you the option to
change them.
Settings
The settings menu enables you to configure
your SMS message settings. Up to three
profiles can be defined that contain, message
center number, valid period for each message
and message type. You can also configure
common settings which includes a delivery
report and reply path. You can also view
memory status, set the preferred storage
medium, and set the preferred bearer.
To configure common settings:
1. From the main menu, select Messages >
SMS > Settings > Common Settings.
2. Select Delivery Report or Reply Path
options then press the Enter key to
enable or disable the feature.
To check the memory status:
1. From the main menu, select Messages >
SMS > Settings > Memory Status.
2. Select OK to display the Memory Status.
To set the preferred storage option:
1. From the main menu, select Messages >
SMS > Settings > Default Outbox.
2. Select SIM or Handset.
A small pop out box tells you the percentage of storage space already used in each
location.
The preferred bearer option sets the type of
network you prefer. When there is a choice of a
GSM or GPRS network, the phone then uses
Messages
27
Page 36

the network of your preference.
To set the preferred bearer option:
1. From the main menu, select Messages >
SMS > Settings > Pref Bearer.
2. Select the network option you prefer.
Select Pref GMS or Pref GPRS to set a
preference, or GPRS Only or GMS only if
you want to use only one kind of network.
Press the Enter key to confirm your
selection.
SMS Counter
There is an SMS counter which can keep a log
of the number of SMS messages sent and
received.
To view the SMS counter:
1. From the main menu, select Calls > SMS
Counter.
2. Use the joystick to highlight the Sent or
Received option.
The number of sent or received messages
is displayed.
MMS
MMS messages are like SMS messages but
they can also contain sounds and pictures.
Writing an MMS Message
Writing an MMS message is not very different
28
from creating an SMS message. MMS
messages are made up of slides. Each slide
contains a combination of text, images, or
audio.
To create an MMS message:
1. From the main menu, select Messages >
MMS > Edit MMS.
2. Select a To field then select Edit to
confirm.
3. Use the joystick to highlight the Add
Number or Add E-mail option then press
the enter key to confirm.
You can either add an e-mail address or
number manually, or press the left soft key
to access the phonebook.
4. After you have entered the recipient(s),
select OK, then Done.
5. Use the joystick to highlight and select Cc,
and Bcc recipients. Enter recipients in
these fields in the same way as the To
field.
6. Use the joystick to highlight the Subject
field then press the enter key to confirm.
7. Use the keypad to enter a subject.
To create a slide:
1. To create a slide, use the joystick to
highlight the Edit Content field then press
the enter key to confirm.
You can enter text in the same way as you
would for an SMS message.
2. Press the left soft key to display the
Option menu.
Page 37

3. Use the joystick to highlight an option and
press the enter key to confirm.
You can add an image, add audio, attach
a file, or change the input method.
4. When your message is complete, highlight
the Done option with the joystick, then
press the enter key to confirm.
You have just created one slide. Repeat
the process to add more slides.
To send the MMS message:
1. Press the right soft key to display the
Send menu.
2. Use the joystick to highlight a Send option,
then press the enter key to confirm.
Viewing an MMS Message
Some MMS messages are longer than the
screen. To move up or down a page, press and
hold the up or down joystick key.
Using Templates
There are templates stored on your phone
which contain text, images, and sound. You can
create MMS messages based on templates
stored on your phone. You can also edit any of
the existing templates.
To use a template:
1. From the main menu, select Messages >
MMS > Templates.
A list of available templates appears.
2. Highlight a template, then select Options.
Select View to preview the template.
Select Properties to view fields and the
size of the template.
Select Write Message to send the
message.
3. Edit the To, Cc, Bcc, and Subject fields
as described in the previous procedure.
4. Edit the content if required as described in
the previous procedure.
5. Send the completed message as
described in the previous procedure.
Message Settings
MMS message settings can be used to set
validity period, delivery report, read report,
priority, slide timing, and delivery time.
To configure message settings:
1. From the main menu, select Messages >
MMS > Settings.
2. You can change any setting by highlighting it with the joystick and then using the
left and right joystick keys to scroll through
the options for each setting.
Chatting Rooms
You can use your phone to chat with other cell
phone users.
To use the chat function:
1. From the main menu, select Messages >
Chatting Rooms.
Messages
29
Page 38

2. Use the joystick to highlight a chatroom
from the list, the press the enter key to
confirm.
3. Press the enter key to display the
chatroom information.
4. Enter a nickname and destination number
if required.
5. Press the left soft key to save your new
settings.
6. Use the joystick key to select the Start
New option, then press the Enter key to
confirm.
The chat session begins.
You can use the phone to send e-mail
messages. Before you can use the e-mail
feature you must set up an account. Settings
such as incoming and outgoing servers are
entered in e-mail profiles. Contact your service
provider for details about e-mail settings.
To set up an e-mail account:
1. From the main menu, select Messages >
Email > Email Profile.
A list of e-mail profiles is displayed.
2. Use the joystick to highlight a profile to
use, then press the enter key to confirm.
3. Use the joystick button to highlight the
Edit option, then press the enter key to
confirm.
30
The profile menu is displayed. Here you
can configure profile settings, the outgoing
server, the incoming server and your
signature.
4. Use the joystick to highlight the Profile
Setting option, then press the enter key to
confirm.
The Profile Setting menu is displayed.
5. Use the joystick to highlight each field and
press the enter key to change any field.
Once your e-mail profile is complete, you need
to activate it.
1. From the main menu, select Messages >
Email > Email Profile.
A list of profiles is displayed.
2. Use the joystick to highlight a profile to
use, then press the enter key to confirm.
3. Press the enter key to activate the
selected profile.
Once your profile is activated, you can send
and receive e-mail with your phone.
Voice Mail
You can set up two voice mail accounts on your
phone that will take messages for you when
you are not able to answer your phone.
To set up a voice mail server:
1. From the main menu, select Messages >
Voice Mail.
A list of voice mail accounts is displayed.
2. Use the joystick to highlight a voicemail
account, then press the enter key to
Page 39

confirm.
3. Press the enter key to edit the voice mail
details.
4. Type in the voice mail number.
You can also erase voice mail details or
connect to a voice mail account here.
Note: Voice mail is a service provider feature. Contact your
service provider for voice mail numbers and settings or other
voice mail assistance.
Cell Broadcast
Use the Cell Broadcast option to set cell
broadcast parameters.
To set broadcast message parameters:
1. From the main menu, select Messages >
Cell Broadcast.
2. Use the joystick to highlight the Activate
option, then press the enter key to toggle
the setting on or off.
3. Select the Read Topic option then press
the enter key to read stored broadcast
messages.
4. Use the joystick to highlight the Language
option then press the enter key to display
the language menu.
Use the joystick to check the language
options that you want to receive.
5. Use the joystick to highlight the Topics
option then press the enter key to
confirm.
6. Use the joystick to select, add, edit, or
delete channels.
Input Methods
The preferred input setting lets you define the
default input method when writing messages.
To set the preferred input method:
1. From the main menu, select Messages >
Input Methods.
2. Use the joystick to highlight an input
method, then press the enter key to
confirm.
Messages
31
Page 40

The phone can be set to behave in a number
of manners. Each manner is designed to be
used in a particular environment. For instance,
if you are in a meeting you may want your
phone to alert you silently when a call comes
in.
To select a manner:
1. From the main menu, select Manner.
A list of manners appears.
2. Highlight a manner from the list, then
press the enter key to confirm.
3. Press the enter key a second time to
activate the selected manner.
Manner Settings
Each manner can be personalized to suit your
own needs.
To personalize a manner:
1. From the main menu, select Manner.
2. Press the left soft key to display the
Options menu.
3. Use the joystick key to highlight Person-
alize from the list of options and press the
enter key to confirm.
A list of customizable features is
displayed, including tone settings,
volume, answer mode, and more.
4. Select a feature to customize from the list
32
and press the enter key to confirm.
Manner
The feature submenu is displayed.
For example, for Ring Mode, you can
select ring only, vibrate, vibrate and ring,
or vibrate, then ring.
5. Highlight a feature from the submenu and
press the enter key to confirm changes.
Page 41

Settings
Phone Settings
The Phone menu enables you to configure
handset features including time and date,
scheduling power on and off, language,
preferred input method, default encoding type,
display characteristic, brightness, greeting text,
speed dial, and automatic update of date and
time.
To access the phone setup menu:
1. From the main menu, select Settings >
Phone Settings.
2. A list of phone settings is displayed.
Date/Time
The Settings > Phone Settings> Date/Time
option enables you to set the time, and also set
a time zone by selecting your location and a
format for displaying dates.
Power On/Off Timer
The phone can be set to turn on or off
automatically. The Settings > Phone Set-
tings> Power On/Off Timer option enables
you to schedule times to turn power on or off.
Up to four power on / off times can be defined.
Highlight a number from the list using the
joystick and press the enter key.
Use the right and left joystick keys to change
settings for each field.
The Status field sets the status of the phone to
On or Off at the time of the scheduled power
on/off. The Power field sets whether the phone
is to turn on or off. The Time field sets the time
for the power to turn on or off.
In the submenu, use the joystick to move
between fields and the enter key to change a
setting.
Define the status, enabled or disabled. Define
the event, on or off, and define the time,
Input Methods
The Settings > Phone Settings> Input
Method enables you to set the default input
method for entering numbers, or roman
alphabet or Chinese characters.
The “Text Entry” section of the Getting Started
chapter for details on inputting text.
Language
The Settings > Phone Settings> Language
option enables you to set the default language
used in menus.
Settings
33
Page 42

Shortcut
To edit the shortcut list:
1. From the main menu, select Settings
>Phone Settings> Shortcut.
A list of current shortcuts is displayed.
2. Use the joystick to highlight a number in
the shortcut list. You can replace this
number with a different menu item.
3. Press the left soft key to select the
Settings selection.
A list of available menu items is displayed.
4. Highlight an item from the list using the
joystick and press the enter key to
confirm.
The new item replaces the previous item
on the shortcut list.
Greeting Text
The Settings > Phone Settings> Greeting
Text option sets a short phrase that appears
each time the phone is turned on.
Greeting text can be entered and edited. Set
the status to On if you want the text to appear,
or to Off if you do not want it to appear.
Speed Dial
The Settings > Phone Settings> Speed Dial
option assigns single keys to numbers in your
phone book so that you can quickly and
conveniently dial those numbers.
34
Number keys 2~9 can be assigned one speed
dial number each. Pressing and holding a key
with an assigned speed dial number calls that
number.
Before using the speed dial function, the
Enable Speed Dial item must be set to On.
Auto Update of Date and Time
Auto update of date and time is a network
service that automatically updates the date and
time in your phone when you travel or if daylight
savings time is used in your area.
You can enable Settings > Phone Settings>
Auto update of date and time option to take
advantage of this service, if offered by your
service provider.
To enable this option, highlight the Auto update
of date and time option and toggle between
On and Off using the right and left joystick
keys.
Firmware Update
You can check for firmware upgrades at the
Asus web page, www.asus.com. If an upgrade
is available, you can download the firmware
from the computer to the miniSD card.
To upgrade firmware:
1. Download available firmware from the
Asus web page, www.asus.com.
Page 43

2. Save the firmware file in the Firmware
folder in the miniSD card. If the miniSD
card does not have a Firmware folder,
then create a new folder and name it
“Firmware.”
Firmware files end in a .bin extension.
3. Install the miniSD card in your phone.
4. From the phone’s main menu, go to
Settings > Phone Settings > Firmware
Update.
5. Select the firmware upgrade .bin file.
The phone then upgrades the firmware.
6. You must shut down then restart the
phone for the new firmware to take effect.
If an error occurs, an error message appears. If
this occurs, refer to the following list of error
messages and their solutions.
1. Message: “Not enough voltage to
update!”:
Solution: Charge the battery so at least
two bars appear in the battery icon in the
idle screen.
2. Message: “Versions of file and handset do
not match!”
3. Message: “File content error!”
4. Message: “Invalid file format.”
Solution for error messages 2 – 4: The
downloaded file was not an upgrade for
your phone. Download an appropriate
upgrade.
Display Settings
The Settings > Display Settings option
enables you to change wallpaper image, screen
saver image, date and time display, manner,
and showing your own number.
Themes
Themes are color schemes that can be set on
your phone. The theme can also be set to
change hourly, daily, weekly, monthly, or
seasonally.
To set a theme:
1. From the main menu, press Settings >
Display Settings>Themes.
A list of themes is displayed.
2. Use the joystick to highlight a theme.
3. Press the left soft key to select Option.
4. Use the joystick to highlight an option and
press the enter key to confirm.
The Activate option activates the selected
theme. The Theme Timer option defines
how often the theme is updated. The Set
Order option defines the order in which the
themes are updated.
Wallpaper
To set the wallpaper:
1. From the main menu, press Settings >
Display Settings>Wallpaper.
2. Select the Default option from the
wallpaper menu.
Settings
35
Page 44

3. Use the joystick to highlight an image to
use as wallpaper and press the enter key
to confirm.
You can also choose your own picture as
wallpaper. Instead of choosing a Default
wallpaper, select Custom and browse to the
location of the picture.
Screen Saver
To set the screen saver:
1. From the main menu, press Settings >
Display Settings>Screen Saver.
2. Use the joystick to highlight the Settings
option.
3. Use the joystick to highlight the Status
option and use the joystick left and right
keys to set the screen saver to On or Off
status.
4. Use the joystick to highlight the Waiting
Time option and use the joystick left and
right keys to set the screen saver waiting
time.
5. Press the left soft key to confirm the
settings.
Select a screen saver using the Select Option
in the same way that you selected a wallpaper.
Date and time
To turn the date and time display on and off,
press Settings > Display Settings> Show
Date and Time and press the enter key to
36
toggle the setting on or off.
Show Owner Number
To turn the owner number display on and off,
press Settings > Display Settings> Show
Owner Number and press the enter key to
toggle the setting on or off.
Show Operator Number
To turn the operator number display on and off,
press Settings > Display Settings> Show
Operator Number and press the enter key to
toggle the setting on or off.
Show Manner
To turn the manner display on and off, press
Settings > Display Settings> Show Manner
and press the enter key to toggle the setting on
or off.
Brightness
To adjust the brightness, press Settings >
Display Settings> Brightness and press the
enter key to display the brightness control.
Use the left and right joystick keys to adjust the
brightness. Press the left soft key to confirm
the setting.
Tone Settings
Use the Tone Settings menu to set different
tones for different events.
Different tones can be set for Incoming Ring
Tone, Alarm Tone, Power On, Power Off,
Page 45

Message Tone, and Key Tone.
To assign a tone:
1. Press Settings > Tone Settings to
display the Tone Settings menu.
2. Select the event from the menu for which
you want to assign tone and press the left
soft key to confirm.
3. Select a tone from the list of available
tones and press the left soft key to
confirm.
Call Settings
The Call menu contains call features that
control or restrict the calls you make or receive.
There are also features to show or hide your
number when making calls, control the time of
calls, conveniently redial numbers, or select a
line.
Call menu features include Hide My No., Call
Waiting, Call Forwarding, Call Barring, Line
Switching, Call Time Reminder, Call Time
Display, Auto Redial, Closed User Groups, and
Call Filter.
Hide My Number
The Settings > Call Settings > Hide My No.
option enables you to withhold your number, so
that when you call someone, your number is
not shown.
You can choose to activate or deactivate this
option, or let the network set the option.
Call Waiting
If your service provider offers call waiting, you
first need to enable the Settings > Call
Settings > Call Waiting option.
To enable call waiting:
1. Highlight the Call Waiting option from the
Call Setup menu and press the enter key
to confirm.
2. You can choose to activate, deactivate, or
query the current setting.
To use the call waiting feature:
1. When you receive a call during another
call, press the Call key to receive the
second call.
2. Press the Call key to switch back to
the first call or to switch between calls.
Highlight the Call Waiting option from the Call
Setup menu and press the enter key to confirm.
You can choose to activate, deactivate, or
query the current setting.
Call Forwarding
The Settings > Call Settings> Call Forwarding option can be accessed from the Call
menu. With call forwarding, you can direct calls
directly to your voice message box when you
Settings
37
Page 46

are busy and cannot take calls.
You can choose to forward all voice calls, or
forward if unreachable, if calls are not answered, if busy, or divert all data calls.
Select Cancel to deactivate call forwarding.
Call Barring
Call barring is a service available through your
service provider. This service restricts different
types of incoming and outgoing calls. The
Settings > Call Settings> Call Barring option
enables you to bar outgoing calls, incoming
calls, cancel all bars, or change the barring
password.
Options for Outgoing Calls include All Calls,
International Calls, International Except Home
Options for Incoming Calls include All Calls,
and When Roaming
NOTE: A call barring password is required to make changes to
call barring settings. Contact your service provider if you don’t
know your password.
Line Switching
Depending on your service provider and SIM
card, you may have more than one line
available for use. Although the network
automatically assigns a line to you, you may
38
also use the Settings > Call Settings> Line
Switching option select a line to use. This
option can be used when line quality differs or
when you have difficulty placing a call because
of busy lines.
To use line switching, select the line switching
option, then press the enter key to toggle
among available lines.
Call Time Reminder
If you want to limit the length of your calls, use
the Settings > Call Settings > Call Time
Reminder option. After the time limit specified,
your phone sounds a reminder for you.
To set a call time reminder:
1. Select Single if you want to use a
reminder just once at a specific time.
Select Periodic if you would like a
reminder at regular intervals.
2. A time field appears. Fill in the number of
seconds after which a reminder should
sound, then select OK.
You can choose to turn the function off, turn it
on for a single call, or turn it on periodically.
Call Time Display
If you would like to monitor or keep track of the
length of your calls, use the Settings > Call
Settings> Call Time Display option. When
enabled, the screen displays the time length of
your calls.
Page 47

To enable call time display, select the Call Time
Display option, then press the enter key to
toggle the function On and Off.
NOTE: Select Calls > Call Time to see records of call times.
For more information about call times and costs, refer to the
section “Call Time/Cost” in the Call chapter of this manual.
Auto Redial
When the Settings > Call Settings> Auto
Redial option is enabled, the number is
redialed automatically if it fails to connect when
you call the first time.
To activate the Auto Redial option, select it,
then press the enter key to toggle the function
On or Off.
Closed User Group
A closed user group is a service provided by
some service providers that permits network
access by members of the group only. The
Settings > Call Settings> Closed User Group
option enables you to add closed user groups,
edit existing ones, and activate or deactivate
them.
To add a closed user group:
1. Highlight the Closed User Group option,
then press the enter key.
2. A group list appears. Select an empty slot,
then select Add.
3. A text entry screen appears. Enter the
telephone numbers of group members.
You can also input text if desired.
Call Filter
The Settings > Call Settings> Call Filter
option enables you to set up call filters. Call
filters block the numbers or types of numbers
you specify from reaching your phone.
To block numbers, select Ignore List. Use the
left soft key to select Accept Unknown Call
or Reject Unknown Call. You can enter
specific numbers to block by selecting and
entry line and pressing the Enter key.
To enter numbers that you do not want the
phone to block, select Privileged List.
Call filters can be turned on and off. Select
Filter Settings, then press the Enter key. To
turn filters off, select Off then press the Enter
key. To turn filters on, select Ignore List, then
press the Enter key. To turn filters on, you must
have previously set one or more numbers to
block in the Ignore List.
Network Settings
The default network settings in the phone are
for automatic detection of the best available
lines for the type of content you are sending.
Your phone also offers the flexibility to let you
manually select various network options to suit
your preferences
Settings
39
Page 48

Network menu features include Network
Selection, Preferred Network, Band Selection,
and GPRS Connection.
Preferred Network
To select a preferred network:
1. Highlight the Preferred Network option,
then press the enter key.
2. Highlight the desired network from the list,
then select OK.
NOTE: There may be only one network listed, depending on
your geographic location. Higher fees may also result from
using a network other than that of your service provider.
Network Selection
With the Settings >Network Settings>
Network Selection option, you can select
available networks manually from various
service providers. Or you can set the network
selection option to Automatic and the phone will
select a network for you automatically.
Band Selection
Depending on your geographic location, one or
more bandwidths are available on a GSM
network. In the Network Settings> Band
Selection option, you can set bandwidth
preferences.
40
Select from 900, 1800, 1900, or Dual Band.
GPRS Connection
Some users may prefer to use GPRS network
for faster data transmission and support of
multimedia files, such as delivery of polyphonic
ring tones, color graphics, games, and
software.
If a GPRS network is available, you can set
your usage preference with the GPRS option
can set through the Network >GPRS option.
Highlight the GPRS option and press the enter
key to toggle between Always and When
Needed.
Security Settings
The Security menu contains features to prevent
information from being accessed or calls being
charged to your account. There are password
features to protect both your phone and your
SIM card in case of loss, theft, or unauthorized
use. You can also control the numbers dialed
from the phone with Barred Dial.
Security features include SIM Lock, Auto
Keypad Lock, Fixed Dial, Barred Dial, and
Change Password.
SIM Lock
Using the Settings>Security Settings> SIM
Lock option protects the SIM card from
Page 49

unauthorized use if the phone is stolen or used
by others.
Highlight the SIM Lock option from the Security
Setup menu and use the right and left joystick
keys to toggle the option to On or Off.
NOTE: This option requires a default password from your
service provider. Consult your service provider if needed.
Phone Lock Code
The Settings >Security Settings> Phone
Lock Code option provides additional security
by locking the handset. Even if the SIM card is
changed, the phone cannot be used until a
password is entered to unlock it.
NOTE: The default password is 1234. See the section ”Change
Password” in this chapter for information on setting your own
password.
Highlight the SIM Lock option from the Security
Setup menu and press the right and left
joystick keys to toggle the option to On or Off.
Auto Keypad Lock
The Settings >Security Settings> Auto
Keypad Lock option locks the keypad after a
specified period of time.
To set the auto keypad lock:
1. Highlight the Auto Keypad Lock option,
then press the enter key.
2. Select to lock the keypad after 5 seconds,
30 seconds, 1 minute, or 5 minutes of
inactivity. Select None to disable the
function.
For information on unlocking the keypad, see
the section “Unlocking the Keypad” in the
Getting Started chapter of this manual.
Fixed Dial
The Settings >Security Settings> Fixed Dial
function limits dialing to the numbers that you
specify. Fixed dialing is a service offered by
some service providers.
The Fixed Dial option can be set to On or Off
and a fixed dial list can be defined.
NOTE: This option requires a password, known as PIN2.
Consult your service provider if you don’t know the password.
Barred Dial
The Settings >Security Settings> Barred Dial
option enables you to block dialing of certain
numbers. Barred dialing is a service offered by
some service providers.
To enable the option, highlight the Barred Dial
option from the Security Setup menu and press
the enter key to toggle the option to On or Off.
NOTE: This option requires a password. Consult your service
provider if you don’t know your password. This function may not
be supported by all service providers.
Change Password
Use the Settings >Security Settings> Change
Password option to change passwords for SIM
card PINs or for the phone.
Settings
41
Page 50

To change a password:
1. Highlight the Change Password option
and press the enter key
2. Select the password you wish to change:
PIN, PIN2, or Phonelock.
3. You are prompted to enter the old
password, then enter the new password.
NOTE: The default phonelock password is 1234. Consult your
service provider if you have forgotten a PIN password or need
further assistance with PIN passwords.
Factory Settings
The Settings >Security Settings> Factory
Settings option restores all settings to factory
default, just as they were when you purchased
the phone.
To restore factory default settings:
Highlight the Restore Factory Default option
from the Security Setup menu and press the
enter key. All factory default settings are then
restored.
NOTE: This option requires a password. Use the default
password, 1234, to access this setting.
42
Page 51

Camera
The phone is equipped with a high quality
camera for capturing still pictures and video.
Taking Photos
Follow these steps to capture still pictures with
your phone.
1. Press the menu button on the keypad to
display the main menu screen.
2. Use the joystick to highlight the Camera
icon and press the enter key to confirm.
3. Highlight the Capture option, then press
the enter key to enter capture mode.
4. Point the camera lens at the subject and
use the LCD screen to frame your picture.
5. Press the enter key or the capture button
on the side of the camera to capture the
image.
Capture
button
CCaC
6. Press the left soft key to save the
image in your album.
Zoom Function
The phone has an easy-to-use zoom function.
To zoom in on an object, press the up joystick
key.
To zoom out, press the down joystick key.
You can preview the zoom effect on the
phone’s screen. In addition, a slide bar on the
right of the screen moves as zoom is applied.
Brightness
While in capture mode, adjust the brightness of
the display by pressing the right and left joystick
keys.
Viewing and Managing Photos
Use the My Album option to view and manage
the still images in your album.
To open My Album:
1. While in capture mode, select Option >
My Album, or
From the main menu, select Camera > My
Album.
A list of stored images is displayed.
Camera
43
Page 52

2. To view an enlarged thumbnail, highlight
an image and press the enter key. You
can browse photos in this enlarged view
using the up and down joystick keys.
3. Press the left soft key to display the
Option menu. You can view, send,
rename, delete, and sort photos. You can
also set the default storage to handset or
memory card.
Photo Capture Settings
The camera can be configured to capture
images of different size and quality. You can
also capture photos with frames or special
effects, take multi-capture photos, use a timer,
or set the default storage location.
To access photo capture settings:
Put the camera into capture mode, as
described in the “Taking Photos” section of this
manual, then select Option.
A list of photo capture settings then appears.
Camera Settings
Use the camera settings option to set the white
balance, shutter sound, EV, night mode, and
AC frequency.
To access the Camera Setting menu:
1. While in capture mode, select Option >
Camera Settings.
2. Highlight an option to adjust using the
44
joystick.
3. Adjust the values of settings using the
joystick left and right keys.
Camera Settings Shortcuts
The number keys also act as shortcut keys for
the camera settings. The keys are assigned as
follows:
1
Effect
2
White Balance
3
Capture Timer
4
Multi-Capture
5
Night Mode
6
Image Quality
7
Image Size
Press the key repeatedly to change a given
setting. For example, if you press 4 for
Multi-Capture, pressing again enables you to
apply deactivate, 4 Shot, 6 Shot or 9 Shot to
the setting.
Image Settings
Use the image setting option to set the image
size and quality.
To access the Image Setting menu:
1. While in capture mode, select Option >
Image Settings.
2. Highlight an option to adjust using the
joystick.
3. Adjust the values of settings using the
joystick left/right action.
Page 53

Effect
Use the Effect option to apply photo effects as
you capture photos. For example, you can
capture photos with a photo negative effect,
alter colors, or make the photo look like a
sketched drawing.
To apply photo effects:
1. While in capture mode, select Option >
Effect.
A list of photo effects appears.
2. Highlight an effect from the list using the
joystick and press the enter key to apply
the setting.
Frame
Use the Add Frame option to add frames to
pictures you capture.
To apply frames to photos:
1. While in capture mode, select Option >
Frame.
2. Highlight a frame from the list.
You can use the up and down joystick
keys to scroll through the other frames to
view them all.
3. To select a frame, press the enter key. The
selected frame is then displayed on the
capture screen.
4. To remove a frame, select Option >
Frame > No Frame.
While in capture mode, the side key is acts as
shortcut key to add frames. Press + or - to
scroll through frames or return to capture with
no frame.
Multi-Capture
The Multi-Capture enables multiple capture
shots, so the camera captures three or five
shots with a single click of the button.
To enable the multi-capture function:
1. While in capture mode, select Option >
Multi-Capture.
2. Select a number of shots. Select
Deactivate for standard single shots, or 4
Shot 6 Shot or 9 Shot for multi-capture
shots.
Capture Timer
Use the delay timer to add a delay time
between pressing the capture button and the
picture actually being captured. This can allow
enough time to take pictures of yourself.
To set the capture timer:
1. While in capture mode, select Option >
Capture Timer.
2. Select 5 sec, 10 sec, or 15 sec, or
Deactivate to turn the function off.
Camera
45
Page 54

Default Storage
Use the default storage option to set where
captured pictures are stored. You can store
captured pictures either in the handset
(internal) memory, or on a mini SD card if
installed.
To set the storage option:
1. While in capture mode, select Option >
Default Storage.
2. Highlight Handset or Memory Card, then
press the enter key to confirm.
Restore Default
Use the Restore Default option to restore all
factory default camera settings.
To restore default settings:
1. While in capture mode, select Option >
Restore Default.
2. A message asking you to confirm the
action is displayed.
3. Select Yes with the left soft key to
restore defaults, or select No with the right
soft key to abort.
Recording Videos
Follow these instructions for shooting video:
1. From the main menu screen, highlight the
Camera icon, then press the enter key.
2. Select the Video Recorder option, then
46
press the enter key to enter capture mode.
3. Point the camera lens at the subject and
use the LCD screen to frame your video.
4. Press the enter key or the capture button
to begin recording. Press the enter key or
the capture button again to stop recording.
Zoom Function
The phone’s video recorder also has a zoom
function.
To zoom in on an object, press the up joystick
key.
To zoom out, press the down joystick key.
You can preview the zoom effect on the
phone’s screen. A slide bar at the bottom of the
screen moves as zoom is applied.
Viewing and Managing Videos
Select the My Video option to view and play the
videos in your album.
To open My Video:
1. While in video capture mode, select
Option > My Video, or
From the main menu, select Camera > My
Video.
A list of stored videos is displayed.
2. Use the joystick to highlight a video, then
press the enter key to play.
To pause, press the enter key. Press the
enter key again or select Resume to
resume.
Page 55

3. To edit files, select Option. You can view,
forward, rename, or delete files. You can
also sort image files or set the default
storage location.
Some video playing features are explained in
the following sections.
Full-Screen Mode
While the video is playing, a progress bar and
the time elapsed is shown at the bottom of the
screen. If you wish to view the video in fullscreen mode, press the * key to toggle in and
out of full-screen mode.
Rewind and Fast Forward
To rewind, press and hold the left joystick key.
To fast forward, press and hold the right joystick
key.
Video Playback Speed
You can select from five different video
playback speeds: ×1/2, ×1, ×2, ×4, and ×8.
To select a playback speed, press the up and
down joystick key. Use the up key to select a
higher speed and the down key to select a
lower speed.
The current speed is shown in the lower left of
the screen.
Volume
To adjust volume, press the side volume key.
Press + to increase volume, and - to decrease
volume.
Capturing a Still Photo
You can capture a still photo from a video by
pressing the capture button on the side of the
camera while the video is playing.
Video Capture Settings
The camera can be configured to capture
videos of different size and quality. You can
also capture videos with special effects, or set
the default storage location to handset or
memory card.
To access video capture settings:
Put the camera into video recorder capture
mode, as described in the “Recording Videos”
section of this manual, then select Option.
Camcorder Settings
The Camcorder Settings includes options
related to lighting conditions. There are settings
for white balance, EV, Night mode, and AC
frequency.
To open the Camcorder Settings menu:
1. While in video recorder capture mode,
select Option > Camcorder Settings.
2. Highlight an option to adjust.
Camera
47
Page 56

3. Adjust the value of a setting using the
joystick left and right keys.
NOTES: EV stands for exposure value. The EV option enables
you to manually raise or lower the exposure value.
The AC Frequency option adjusts for lighting flicker. Select the
frequency of electrical current in your area.
Video Settings
Use the Video Settings option to set the video
quality, file size limit, record time limit, turn the
audio on and off, and set the encode format.
To open the video setting menu:
1. While in video recorder capture mode,
select Option > Video Settings.
2. Highlight a setting to adjust.
3. Adjust the value of a setting using the
joystick left and right keys.
Video Settings Shortcuts
The number keys also act as shortcut keys to
the video settings. The keys are assigned as
follows:
1
Effect
2
White Balance
3
Night Mode
Effect
Use the Effect option to apply a photo effect,
such as a photo negative effect or a color
effect, when you shoot a video.
48
1. While in video recorder capture mode,
select Option > Effect.
A list of effects appears.
2. Highlight an effect from the list using the
joystick, then press the enter key to apply
the setting.
Default Storage
Use the default storage option to set where
captured videos are stored. You can store
captured videos either in the handset (internal)
memory, or on a mini SD card if installed.
To set the storage option:
1. While in video recorder capture mode,
select Option > Default Storage.
2. Highlight Handset or Memory Card, then
press the enter key to confirm.
Restore Default
Use the Restore Default option to restore all
factory default video settings.
To restore default settings:
1. While in video recorder capture mode,
select Option > Restore Default.
2. A message asking you to confirm the
action is displayed.
3. Select Yes with the left soft key to
restore defaults, or select No with the right
soft key to abort.
Page 57

Media Center
Audio Player
The phone is equipped with a high quality
audio player for digital music files.
To start the audio player
1. Press the menu button on the keypad to
display the main menu screen.
2. Use the joystick to highlight the Media
Center icon.
3. Press the enter key to display the media
center menu.
4. Use the joystick to highlight the Audio
Player option from the list and press the
enter key to confirm.
The audio player opens.
5. Press the left soft key to select List and
display a list of available digital music
files. The automatically generated list is
located in the Audio\ folder
6. Use the joystick to highlight a music file to
play and press the enter key to select it.
7. The enter key and the up, down, right, left
joystick keys act as play controls. When
you push a key, the corresponding onscreen symbol lights up.
Joystick key assignments are as follows:
• Enter/ Up Joystick: Play, Pause,
• Down Joystick: Stop,
• Left Joystick: Reverse,
• Right Joystick: Fast Forward,
NOTE: You need to connect earphones to the earphone socket
on the bottom of the phone to listen to music files.
Adding music files
To add music files to your phone you must first
connect the phone to a computer with digital
music files.
Connect the phone to the computer USB port
using the USB cable provided.
The when the phone is connected to the
computer it will appear in Windows Explorer as
two removable disk drives. One drive is the
internal phone memory and the other is the
mini SD card if installed.
Drag and drop your digital music files to the
audio folder in the internal phone memory, or
the audio folder in the SD card memory. If you
add files to folders other than these, you will not
be able to play them with the phone’s audio
player.
Media Center
49
Page 58

Editing Music Files
You can play a file, view file details, set a file as
a ringtone, add or remove files, or control other
settings related to the playlist, the list of songs
played by the audio player.
To edit music files:
1. From the main menu, select Media
Center > Audio Player > List.
2. Highlight a file, then select Option.
A list of editing options appears.
To add or delete files, you must set
Option > Settings to Deactivate as
described below.
NOTE: If you want to view the ID3 tag of an MP3 file, select the
Details option.
Option > Settings contains settings to control
the playlist and the appearance of the audio
player. Select from the following options. Use
the right and left joystick keys to toggle
settings:
• Play from Handset or from Card. Set the
location of the playlist as either handset or
memory card.
• List Auto Gen. When set to Activate, a
playlist is automatically generated from
music files on your phone or memory
card. The playlist is created in the Audio
folder of the handset or memory card.
Set to Deactivate if you want to manually
add or delete files from playlists.
• Skin. Select from three different skins, or
50
outward appearances for the audio player.
• Loop. Select One to loop, or repeat, the
current song. Select All to repeat all the
songs in the playlist.
• Shuffle. Select Activate to randomly
repeat songs in the playlist. Select
Deactivate to play the songs in order.
• Background Play. Select Background
Play to continue listening to music files or
radio even if you leave the media center to
use other menu functions. Music stops,
however, for playing games or for making
phone calls.
FM Radio
The FM radio function provides high quality
stereo radio reception through earphones.
• To start the radio:
1. From the main menu, select Media Center
> FM Radio.
2. The FM radio opens.
NOTE: You must plug in the earphones and press the button on
the microphone module for the FM radio to work.
• To tune the radio, use the left and right
joystick keys.
• To control the volume, use the volume
key on the side of the phone.
• To turn the radio on and off, use the down
joystick key.
• To search for stations, use the up joystick
key.
Page 59

FM Radio Options
When the radio is displayed, press the left soft
key to display the Option menu. There are
options to access preset stations, to manually
select a frequency, search for stations, create a
list of preset frequencies, and change the radio
settings.
The channel list contains preset frequencies. To
access the channel list:
1. Start the radio, then select Option >
Channel List.
The channel list is displayed.
2. Highlight any of the preset channels in the
list and press the enter key to confirm, OR
Press a number key. The number keys act
as shortcuts to preset stations.
3. Select the Play option to play.
Select Edit to display an edit screen.
4. To edit a channel entry you must type in a
channel name and a frequency in the
fields provided.
5. Press the left soft key to save the new
preset channel.
To select a channel manually:
1. Start the radio, then select Option >
Manual Input.
2. Press the number keys to enter a
frequency for a radio station.
3. Press the left soft key to listen to the
station.
To search and create a list of preset channels
automatically:
1. Start the radio, then select Option >
Preset List.
2. Press the enter key to begin the search.
Strongest stations found while searching
are allocated a preset channel.
To select and play a preset channel:
1. Start the radio, then select Option >
Channel List.
2. Select a channel from the list, then press
the enter key to play.
To add the current station to the preset list while
listening to a station, press and hold a number
key. The station is then set as a preset station.
To switch to a preset station while listening to
the radio, short-press the number key for the
preset channel.
To change FM radio settings:
Start the radio, then select Option > Settings.
In the Settings submenu you can change the
skin and turn background play on or off.
Java
A selection of games created with Java
technology comes preloaded on your phone.
To start a Java game:
1. From the main menu, select Media
Center > Java.
A list of Java games appears.
Media Center
51
Page 60

2. Highlight a Java game from the list and
press the enter key to launch the game.
Java Settings
You can alter a number of Java settings and
view the resources available to Java applications using the Java Settings option.
To open the Java Settings menu:
1. From the main menu, select Media
Center > Java Settings.
2. Highlight an option to change.
3. Use the right and left joystick keys to
change the setting.
NOTE: Not all settings can be changed. Some fields only
display resources available.
Games
A selection of games comes preloaded on your
phone.
To start a game:
1. From the main menu, select Media
Center > Games.
2. Highlight a game from the list displayed
and press the enter key to launch it.
Game Settings
You can audio and vibration of games using the
Game Settings option.
To open the Game Settings menu:
1. From the main menu, select Media
52
Center > Game Settings.
2. Highlight an option to change.
3. Use the right and left joystick keys to
change settings.
Melody Composer
Use the melody composer to create midi tunes
of your own. You can also edit existing midi files
on your phone.
To create a new tune:
From the main menu, select Media Center >
Melody Composer > Add.
A blank music staff is displayed.
• Use the keys 1-7 to enter notes C-B.
• Each note can be pushed up or down
an octave by highlighting it with the
joystick and then using the joystick up
down action to move it up or down.
• Sharpen a note by highlighting it with
the joystick and then pressing the #
key.
• Change the length of a note by
highlighting it with the joystick and
pressing the * key.
• Add a rest using the 0 key.
• Add a vibration effect by pressing 8.
This effect is marked with wavy lines on
the staff.
• Add an effect to turn the screen on and
off by pressing 9. This effect is
marked by a rainbow flag on the staff.
Page 61

• If you would like to edit your tune by
turning off the vibration or screen on /
off effects, select the effect on the staff,
then press the down joystick key to
deactivate it. An “x” then appears on the
effect. Press the up joystick key to
reactivate.
You can play your tune at any time from the
Option menu. From the Option menu, you can
also select an instrument to play your tune,
adjust the speed and save your work.
Media Center
53
Page 62

The organizer menu gives you access to a
number of features including alarms, calendar,
task list, calculator, world clock, sound recorder,
image editor, stopwatch, file manager, units
converter, currency converter, and health
manager.
Alarm
The phone can function as an alarm clock. Up
to three alarms can be programmed.
To program an alarm.
1. From the main menu, select Organizer >
Alarm.
A list of alarms is displayed.
2. Highlight an alarm to program then press
the enter key to confirm.
The Edit Alarm screen is displayed.
3. Highlight fields to edit. Enter new values
using the keypad or use the left right
joystick action to cycle through the
available options.
The Repeat function defines whether the alarm
sounds once at the same time every day, or on
specific days.
Press the left soft key to stop the alarm or
the right soft key for the five minute snooze
function.
54
Organizer
Calendar
The calendar function helps you keep track of
day-to-day tasks.
To open the calendar:
1. From the main menu, select Organizer >
Calendar.
2. The calendar is displayed.
Dates with tasks appear framed in red.
To select a date on the calendar:
1. Use the joystick to highlight a specific date
on the calendar, OR
Select Option > Go to Date and enter the
year, month, and day. The selected date
then appears highlighted on the calendar.
2. Select Option to view options for that
date.
Options include viewing tasks entered for
that day and jumping to another day.
To access tasks:
1. Select a calendar date as described in the
previous procedure.
2. Select Option > Tasks List.
3. Highlight a task, then press the enter key
to view details. OR
Select Option to view the Option menu.
The Option menu enables you to view,
add, edit, delete, or send a task.
See the “Tasks List” section in this chapter
for more information about tasks.
Page 63

Tasks List
You can create a list of tasks for a date on the
calendar. Access Tasks List from the Organizer
menu, or the Calendar tool, as described in the
“Calendar” section of this chapter.
To access the Tasks List:
1. From the main menu, select Organizer >
Tasks List.
Stored tasks are then displayed.
2. Select Add to add a new task. There are
fields for date, time, content, and alarms.
Select date and time fields using the
joystick keys.
Select Content and press the enter key. A
text entry window opens to enter information about the task(s) for this date. Select
Save to save content.
The Alarm Notify field activates or
deactivates the alarm. Select Activate or
Deactivate using the right and left joystick
keys.
If you chose to activate the alarm, set a
frequency for the alarm in the Alarm Type
field. Select Once, Every Day, Day
(Monday through Friday), Weekly, or
Monthly, using the right and left joystick
keys.
3. To edit a task, highlight a task from the list
then press the enter key to confirm.
4. Highlight an option from the option menu
and press the enter key to confirm.
To enter a recurring daily, weekly, or monthly
task:
1. Follow the steps described above to add
or edit tasks.
2. In the date field, enter the date you would
like the recurring task to begin.
3. In the Alarm Notify field, select Activate.
4. In the Alarm Type field, select Every Day,
Day (Monday through Friday), Weekly, or
Monthly.
The task is then recorded for all relevant
dates after the starting date. These dates
appear framed in red in the calendar.
Calculator
The phone includes a calculator function.
To use the calculator:
1. From the main menu, select Organizer >
Calculator.
The Calculator is displayed.
2. Use the keypad to enter numbers and the
up, down, right, left joystick keys to select
the +, - ,
Press the enter key to select =.
3. Press twice on the up, down, right, or left
joystick keys to access memory functions:
÷÷
÷ , × functions.
÷÷
• m+ Select m+ then press the enter key
to add a number to memory. Select m+
to add the number stored in memory.
• m- Select m- to subtract the number
stored in memory.
Organizer
55
Page 64

• mc Select mc then press the Enter key
to clear memory.
• mr Select mr to retrieve and enter the
number in memory.
The number stored in memory appears in
[brackets] at the top of the screen.
Note that most of the functions are selected
with the joystick alone, with no need to press
OK or the enter key. For example, compute
239 + 1,238 + 439 as follows:
1. Enter 239 with the number keys.
2. Press the up joystick key once to select
the + function.
3. Enter 1,238 with the number keys.
4. Press the up joystick key once to select
the + function. The subtotal, 1,477,
appears.
5. Enter 439 with the number keys. The
subtotal, 1916, appears.
6. Press the enter key to display the total,
1916.
NOTES:
1. Numbers are cleared from memory once you exit the
calculator.
2. Press the # key to enter a decimal point.
World Clock
The world clock function enables you to see the
time in various major cities of the world.
To open the world clock:
1. From the main menu, select Organizer >
56
World Clock.
The World Clock is displayed.
The clock displays a map and the current time
in your own location. You can move the location
east or west.
Voice Recorder
The voice recorder lets you record and play
back sounds.
To open the voice recorder:
1. From the main menu, select Organizer >
Voice Recorder.
The Voice Recorder is displayed.
2. Use the joystick to highlight an existing file
from the list and press the enter key to
confirm. Alternatively, press the left soft
key to display the Option menu.
From the option menu you can make a
new recording, play the current recording,
append the current recording, rename the
current recording, delete the current
recording, delete all recordings, change
settings, or send the recording.
Recorder settings include the default
storage location and the file format. Files
can be stored in AMR or WAV formats.
3. Highlight an item from the option menu
and press the enter key to confirm.
Page 65

Image Editor
Use the Image Editor to create and edit
images.
To create a new image:
1. From the main menu, select Organizer >
Image Editor.
2. Image Editor contains five slots for image
files. Highlight a slot to save the image
file, then select Add.
The Image Editor is displayed.
3. Use the 5 key on the keypad to toggle
between the pencil tool and the cursor
tool.
Move the pen or the cursor around the
screen using the other number keys.
4. Select Option to save the file, to adjust
pen setting or fill background, to cut, copy,
zoom, resize, or view help.
In Pen Settings, you can set the size of
the pen line in pixels, set the move factor,
or the distance the pen moves with each
key press, or choose from several colors
for the pen line.
You can also select from several colors in
Fill Background, including custom color.
The Mark setting shows a preview of
current settings.
5. Highlight an image from the list to edit
using the joystick, or select Add to add a
new image. Press the enter key to
confirm.
Stopwatch
The phone includes a stopwatch function.
There are two styles of stopwatch to choose
from: Typical or nWay.
The Typical stopwatch is a simple timer that
can be started and stopped using the enter key.
The nWay stopwatch consists of four simultaneous timers that can be started by pressing
the joystick up, down, left, or right. Only one
timer can be running at any time. The total time
appears at the top of the screen.
To use the stopwatches:
1. From the main menu, select Organizer >
Stopwatch.
The Stopwatch menu screen is displayed.
2. Select the type of stopwatch you want to
use and press the enter key to confirm.
3. Select Start to begin timing.
4. Select Stop to stop timing.
5. Select Back to exit. A message asks if you
would like to save the timing. Select Yes
or No.
6. If you select Yes to save the timing, enter a
name for the file. After entering a file
name, select Back, then Option > Done
to save the file.
Note: When the left soft key displays the “resume”
message, a long press of the key wil reset the stopwatch.
Organizer
57
Page 66

Typical Stopwatch Functions
If you select the Typical stopwatch, you are
then prompted to select one of three functions:
Split Timing, Lap Timing, or Record.
Split timing can time portions within a main
recording.
To enter a split time:
1. Press the right soft key to select Mark.
The current time elapsed then appears in
a list of times, while the stopwatch
continues to run.
2. Select Mark again to add another split
time to the list.
The Lap Timer, like the Split Timer, records
portions, or laps, of a main timing. The Split
Timer, however, displays cumulative time
elapsed, whereas the lap timer displays
individual lap times.
To enter a lap time:
Press the right soft key to select Lap. The
lap time is then added to a list of lap times.
Select Record to view saved stopwatch
records.
nWay Stopwatch
The nWay stopwatch enables you to track up to
four individual times simultaneously.
To use the nWay stopwatch:
1. Select Start. All the times begin to record.
2. There are four times, marked by up, down,
58
right and left arrows.
Select a time by pressing the corresponding up, down, right, or left joystick keys.
The selected time is then colored red.
3. Press the left soft key to select Stop or
Resume for individual times.
4. If you select a time, the time restarts.
File Manager
The file manager is a feature that enables you
to find and manipulate files stored in the
memory of your phone or on a mini SD card if
installed.
To open the file manager:
1. From the main menu, select Organizer >
File Manager.
Two virtual disk drives are displayed. The
first in the list represents the mini SD
memory card, and the second represents
the internal handset memory.
2. Use the joystick to highlight a drive and
press the enter key to confirm.
Options for the selected drive are then
displayed. You can open the drive and
view contents, create a new folder, or
format the drive. You can also select the
Remove option to remove a mini SD card.
Page 67

Viewing drive contents
You can view the files stored in the memory of
the phone or on mini SD card using the file
manager.
To view the contents of a drive:
1. Open the file manager as described in the
“File Manager” section of this chapter.
2. Use the joystick to highlight a drive and
press the enter key to confirm.
3. Press the enter key to display the list of
folders and files stored on the selected
drive.
4. Select Option to open to view drive
contents, create a new folder, or format
the drive.
NOTE: Formatting a drive erases all the contents of the drive.
Do not select unless you have backed up important
information.
If the selected drive contains folders, you can
browse up and down the folder list using the
joystick. Press the enter key to display contents
of a highlighted folder.
While viewing folders, select Option to access
folder options, including open, create folder,
rename, delete, and sort.
To edit files within folders, highlight a file, then
select Options. You can forward files, show
details, rename, copy, move, delete, delete all,
or sort files.
To play image, audio, or video files, highlight
the file, then press the enter key.
Units Converter
The Units converter is a useful tool to convert
weights and measures from imperial (pounds,
feet, and inches) to metric or metric to imperial.
To use the unit converter:
1. From the main menu, select Organizer >
Units Converter.
The Units Converter menu is displayed.
2. Use the joystick to highlight the Weight or
Length option and press the enter key to
confirm.
3. With the top field highlighted, use the left
and right joystick keys to select a
conversion type.
For weight conversions, convert between
pounds or ounces and kilograms.
For length conversions, convert among
yards, feet, and inches, and meters,
centimeters, and kilometers.
4. Highlight either of the measurement fields
using the up and down joystick keys.
You can convert in either direction,
depending on which field you fill in and
which you leave blank. For example, to
convert kilometers to miles, complete the
Km field and leave the Mile field blank.
5. Input a number using the keypad.
6. Press the enter key to confirm.
The measure is converted and displayed.
Organizer
59
Page 68

Currency Exchange
The currency exchange is a useful tool to help
you convert one currency to another or back
again.
To use the currency exchange:
1. From the main menu, select Organizer >
Currency Exchange.
The currency exchange is displayed.
2. Use the keypad to enter a conversion
factor and press the enter key to confirm.
Use the # key to enter a decimal point.
3. With the top field highlighted, use the left
and right joystick keys to select the
direction of conversion (e.g. 2:1 or 1:2).
4. Use the joystick to highlight the Local or
Foreign currency field and enter a
number using the keypad. Use the # key
to enter a decimal point.
5. Press the enter key to display the result.
Health Manager
The health manager includes a Body Mass
Index (BMI) calculator, and a menstrual cycle
chart.
To use the BMI calculator:
1. From the main menu, select Organizer >
Health > Calculate BMI.
2. Highlight the top field, then use the left
and right joystick keys to enter your sex,
60
Male or Female.
3. Highlight the height and weight fields and
enter a value for each using the number
keys.
4. Press the enter key to calculate your BMI.
The display also indicates the normal BMI
range for your height.
To use the menstrual cycle calculator:
1. From the main menu, select Organizer >
Health > Menstrual.
2. Use the keypad to enter the date of the
start of your last menstrual cycle and the
days of an average period.
Press the enter key to confirm.
Your menstrual cycle chart is then
displayed.
The most fertile period is displayed in
yellow.
The menses period is displayed in red.
Page 69

Network
The Network menu gives you access to
wireless services, such as WAP web browsing
or WAP push.
WAP
Use the WAP menu to set the homepage,
bookmarks, view recent pages, enter an
internet address, service inbox, and change
settings.
To open the WAP menu:
1. From the main menu, select Network >
WAP .
2. Highlight an option to change.
3. Press the enter key to change the
highlighted setting.
Browsing WAP pages
Browsing WAP pages is much like browsing
web pages with your computer. However, rather
than using a mouse, you navigate with the
joystick keys and with the enter key.
Scrolling
Some WAP pages are longer than the phone’s
screen. To scroll up or down a page, press and
hold the up or down joystick key.
Viewing Links
Web links appear as colored or underlined, just
as on a computer. To view a link, press the
enter key.
WAP Settings
Many important WAP settings are dependent
upon your service provider’s system setup.
Contact your service provider for details.
If, as part of your WAP settings, you need to
change the WAP proxy IP address, refer to the
following instructions.
Changing the WAP Proxy IP Address
One or more WAP profiles should already be
set up before changing the IP address.
1. Select WAP > Settings > Profiles. A list
of available profiles appears.
2. Select a profile, then press the enter key.
The selected profile is activated.
You can also highlight a profile and press the
left soft key, Options button. You can then
either select Activate, to activate the profile, or
Profiles. If you select Profiles, you can view
and edit the profile settings.
To edit proxy IP address, select Conn. Type-
>Conn. Oriented.
Network
61
Page 70

WAP Push
WAP Push is a method for sending multimedia
content to your phone. If your service provider
offers WAP push services, you can use WAP
push to receive such content as wallpaper,
ringtones, or java games. The message is sent
as a WAP accessible URL, or web address.
Set WAP Push settings in WAP >
Settings>Push Settings. Receive WAP Push
content in WAP > Push Inbox.
Data Account
The Network > Data Account option displays a
list of available network services.
To view data account information:
1. Select a network type, GSM or GPRS, to
view a list of available data accounts for
each type of network. These data
accounts contain access details for
available service providers in your area.
2. Highlight a data account from the list, and
press the enter key to view details,
including account name, number, user
name, password, line type, speed, and
DNS.
62
 Loading...