

Viewing your videosViewing your videos
Viewing your videos
Viewing your videosViewing your videos
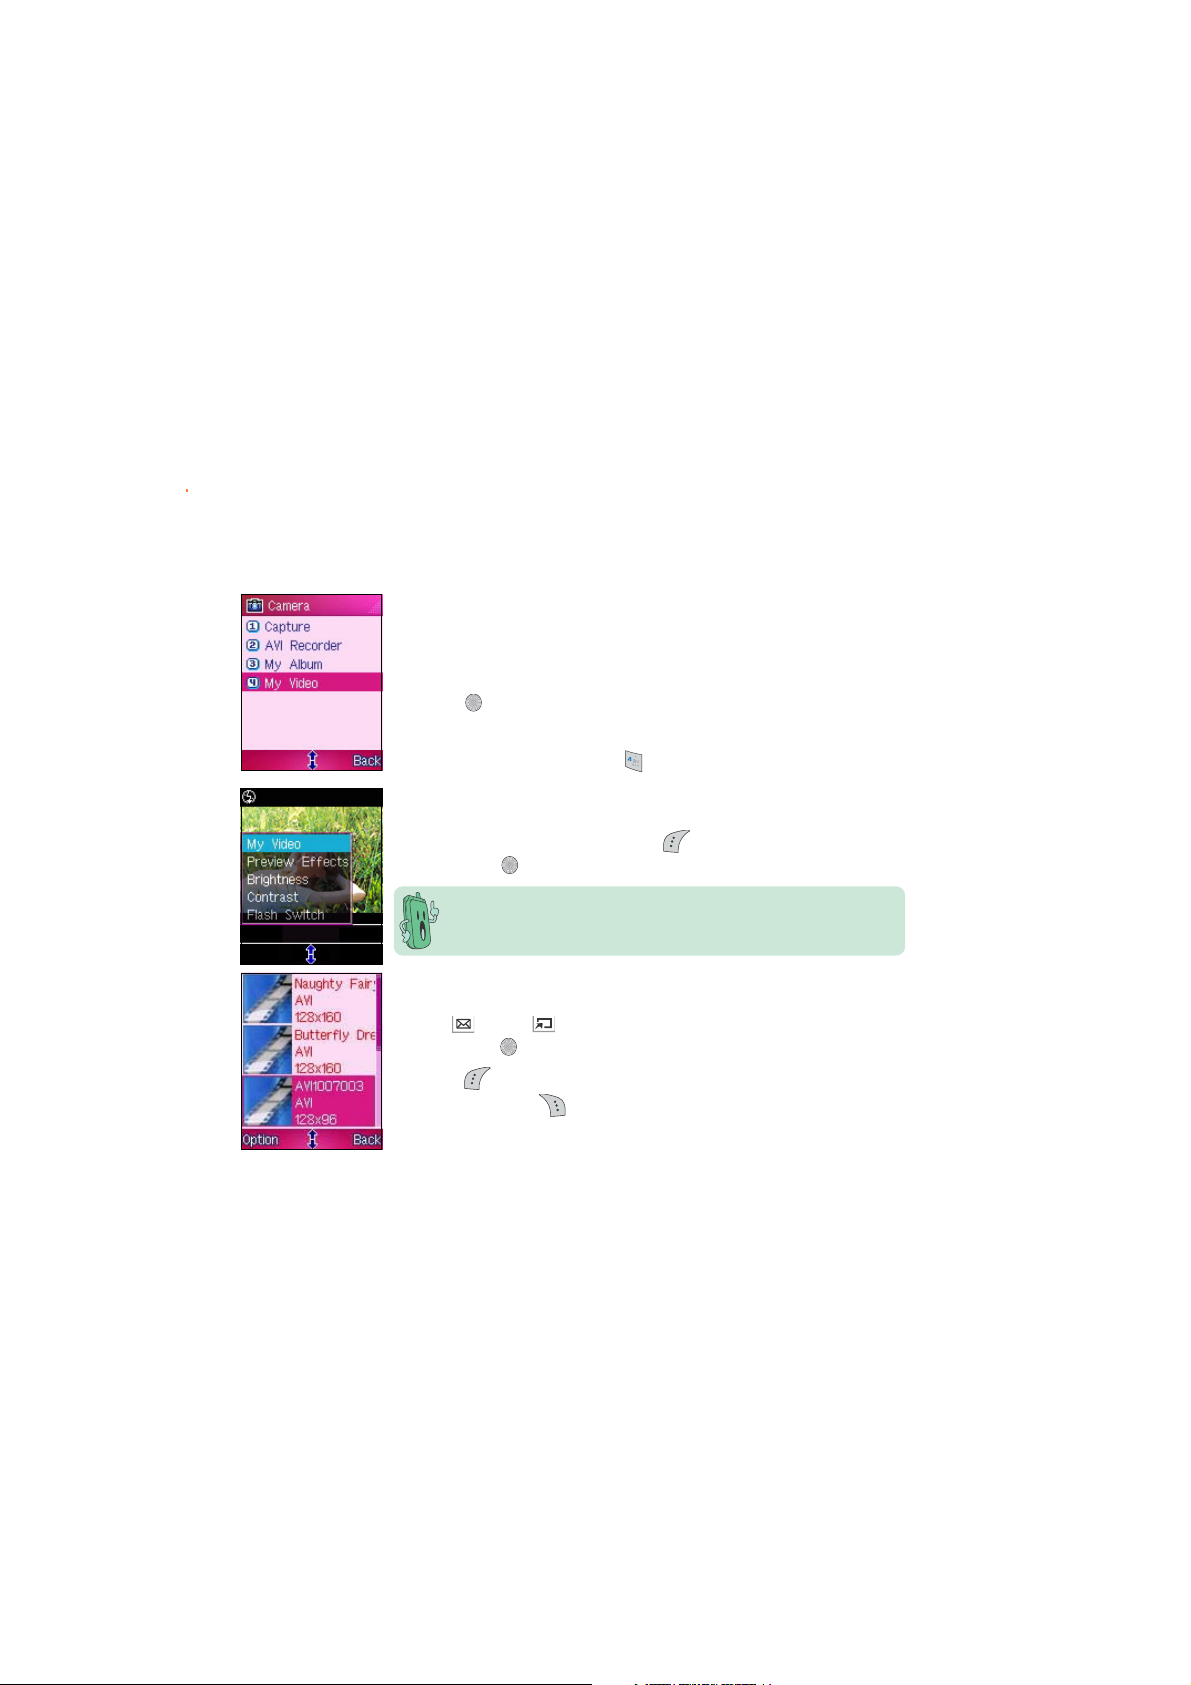
You can play and view all saved videos in the
To open the
Go to the Camera menu, select
press
OROR
OR
OROR
In the
To open the
When in the video recorder, press (Option), select
then press
To play a video:
1. Use (up) or (down) to select the video you want to play,
then press . The video plays on the screen.
2. Press
Otherwise press
My Video My Video
My V i d e o folder from the Camera menu:
My Video My Video
My Video My Video
My Video from the menu, then
My Video My Video
.
CameraCamera
Ca m e r a menu, press
CameraCamera
My Video My Video
My V i d e o folder from the video recorder display:
My Video My Video
.
The phone remains in camera mode when you access the
VideoVideo
V i d e o folder from the video recorder display.
VideoVideo
(Option) to access the video settings menu.
(Back) to return to
to open
My Video My Video
My Video folder.
My Video My Video
My VideoMy Video
My Video.
My VideoMy Video
My VideoMy Video
My Video,
My VideoMy Video
My VideoMy Video
My Video.
My VideoMy Video
MyMy
My
MyMy
231231
231
231231
Using the video optionsUsing the video options
Using the video options
Using the video optionsUsing the video options
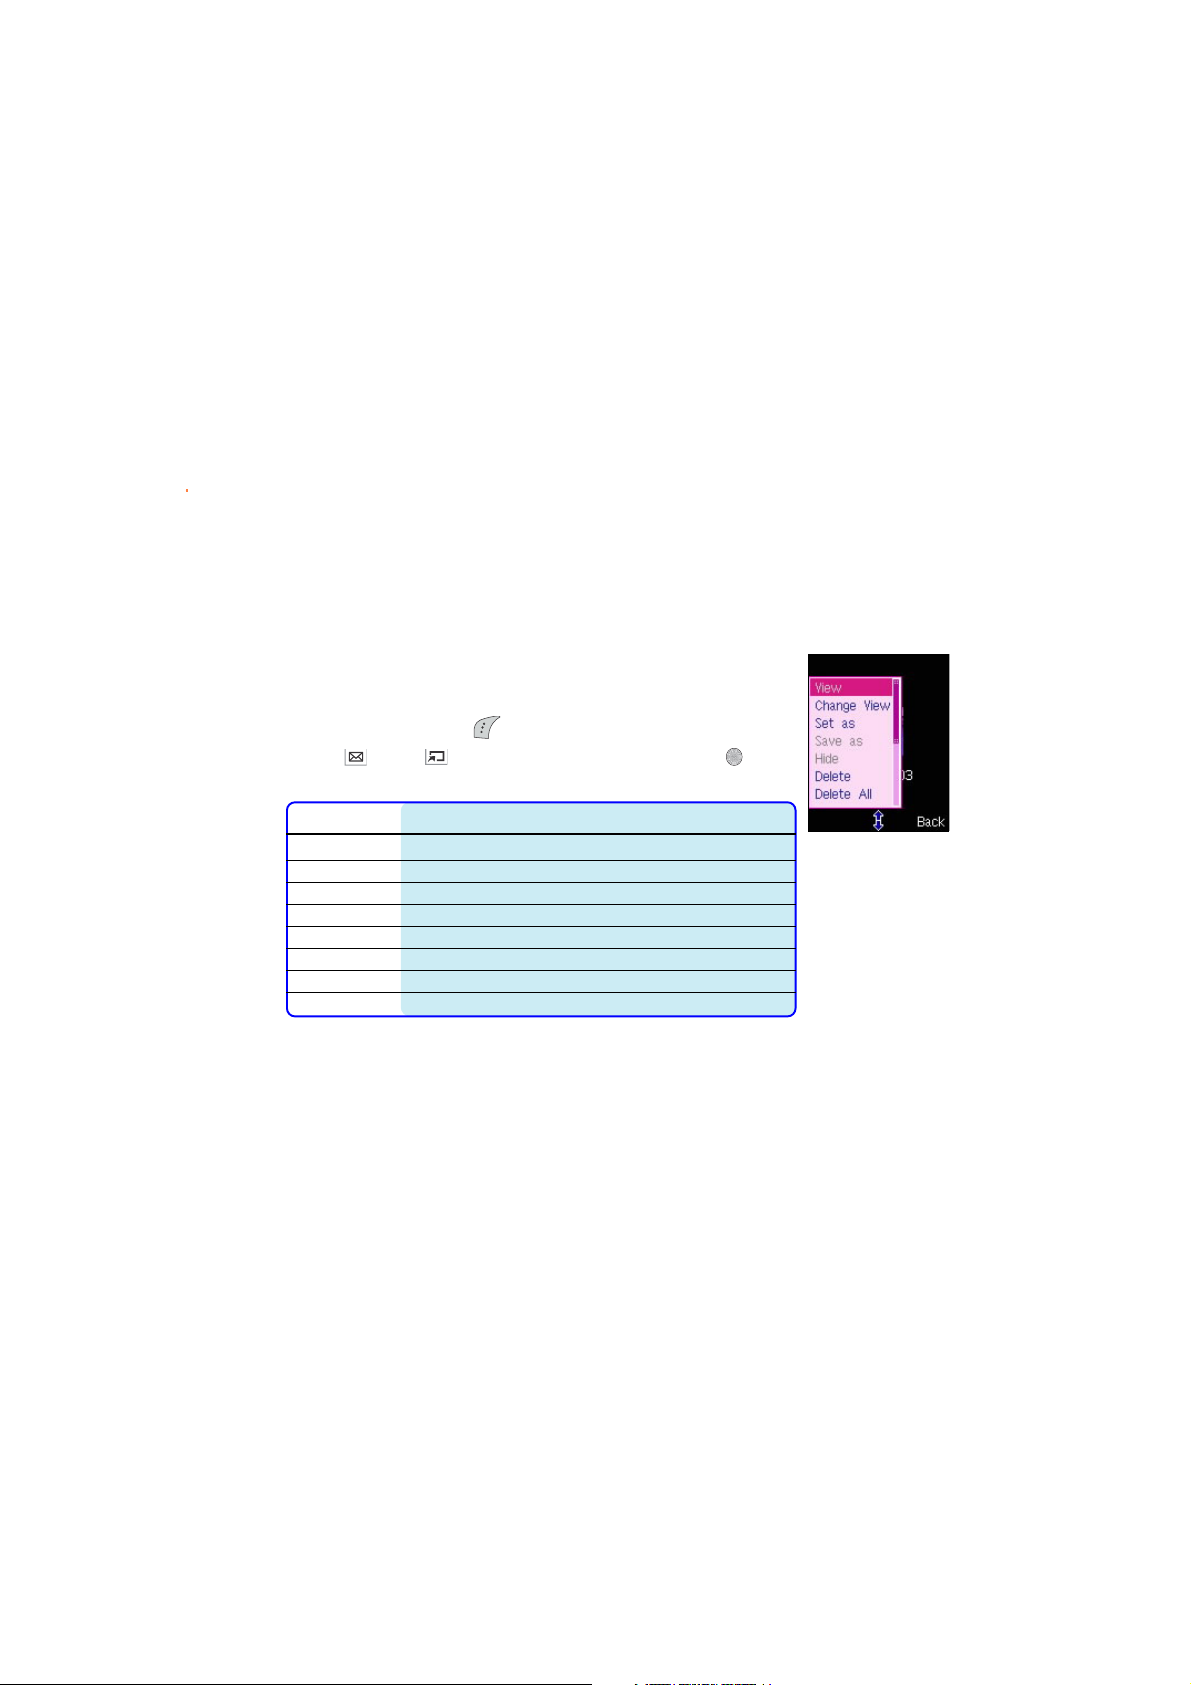
The video options allow you to view, delete, and rename video files
saved in the My Video folder. You can also use this menu to set a video
as power on or off animation.
To access the video options:
232232
232
232232
1. From
2. Use
My VideoMy Video
My Video, press (Option) to display the video options menu.
My VideoMy Video
(up) or (down) to select an option, then press . Refer
to the table below for a description of each option.
OptionOption
Option
OptionOption
ViewView
V i e w open a video file
ViewView
Change ViewChange View
C h a n g e V i e w view videos in namelist or thumbnail modes
Change ViewChange View
Set asSet as
S e t a s save a video file as power on or off animation
Set asSet as
DeleteDelete
D e l e t e delete a video file
DeleteDelete
Delete AllDelete All
D e l e t e A l l delete all video files in the My Video folder
Delete AllDelete All
RenameRename
R e n a m e rename a video file
RenameRename
DetailDetail
D e t a i l view the video file details including the file name, size, format, etc.
DetailDetail
StorageStorage
S t o r a g e view the My Video storage status
StorageStorage
Allows you toAllows you to
Allows you to
Allows you toAllows you to

9 M303
This chapter provides information on
how to use the phone organizer for
your daily activities.
Organizing your stuff

Chapter summaryChapter summary
Chapter summary
Chapter summaryChapter summary
Organizer ........................................................................................ 244
Launching the Organizer .......................................................... 244
Calendar .......................................................................................... 245
Displaying the calendar options ............................................... 246
Adding a calendar event or record .......................................... 247
Viewing all calendar events or records .................................... 248
Deleting calendar events or records ........................................ 248
Setting the start of the week day ........................................... 249
Setting a holiday ...................................................................... 250
Viewing set holiday(s) ............................................................. 250
Listing horoscopes ................................................................... 251
Alarm ............................................................................................ 252
Setting an alarm ....................................................................... 252
Turning off an alarm................................................................. 254
World Clock ..................................................................................... 255
Changing the local time ........................................................... 256
Viewing other locations ........................................................... 257
Calculator ........................................................................................ 258
Text Memo ...................................................................................... 259
Creating a text memo .............................................................. 259
242242
242
242242

Voice Memo .................................................................................... 261
Creating a voice memo ............................................................ 261
Listening to a voice memo....................................................... 263
Sending a voice memo using MMS ........................................... 264
Deleting a voice memo(s) ........................................................ 265
Memory Status ................................................................................ 266
Viewing the memory status ..................................................... 266
Voice Recognition ........................................................................... 267
Recording a voice for name dialing .......................................... 267
Recording voice commands ..................................................... 269
Currency Exchange ......................................................................... 270
Adding an exchange rate ......................................................... 270
Calculating an exchange rate ................................................... 271
Adding an exchange currency .................................................. 272
Stopwatch ....................................................................................... 273
Using the split stopwatch ........................................................ 274
Using the lap stopwatch .......................................................... 275
243243
243
243243
Organizer
OrganizerOrganizer
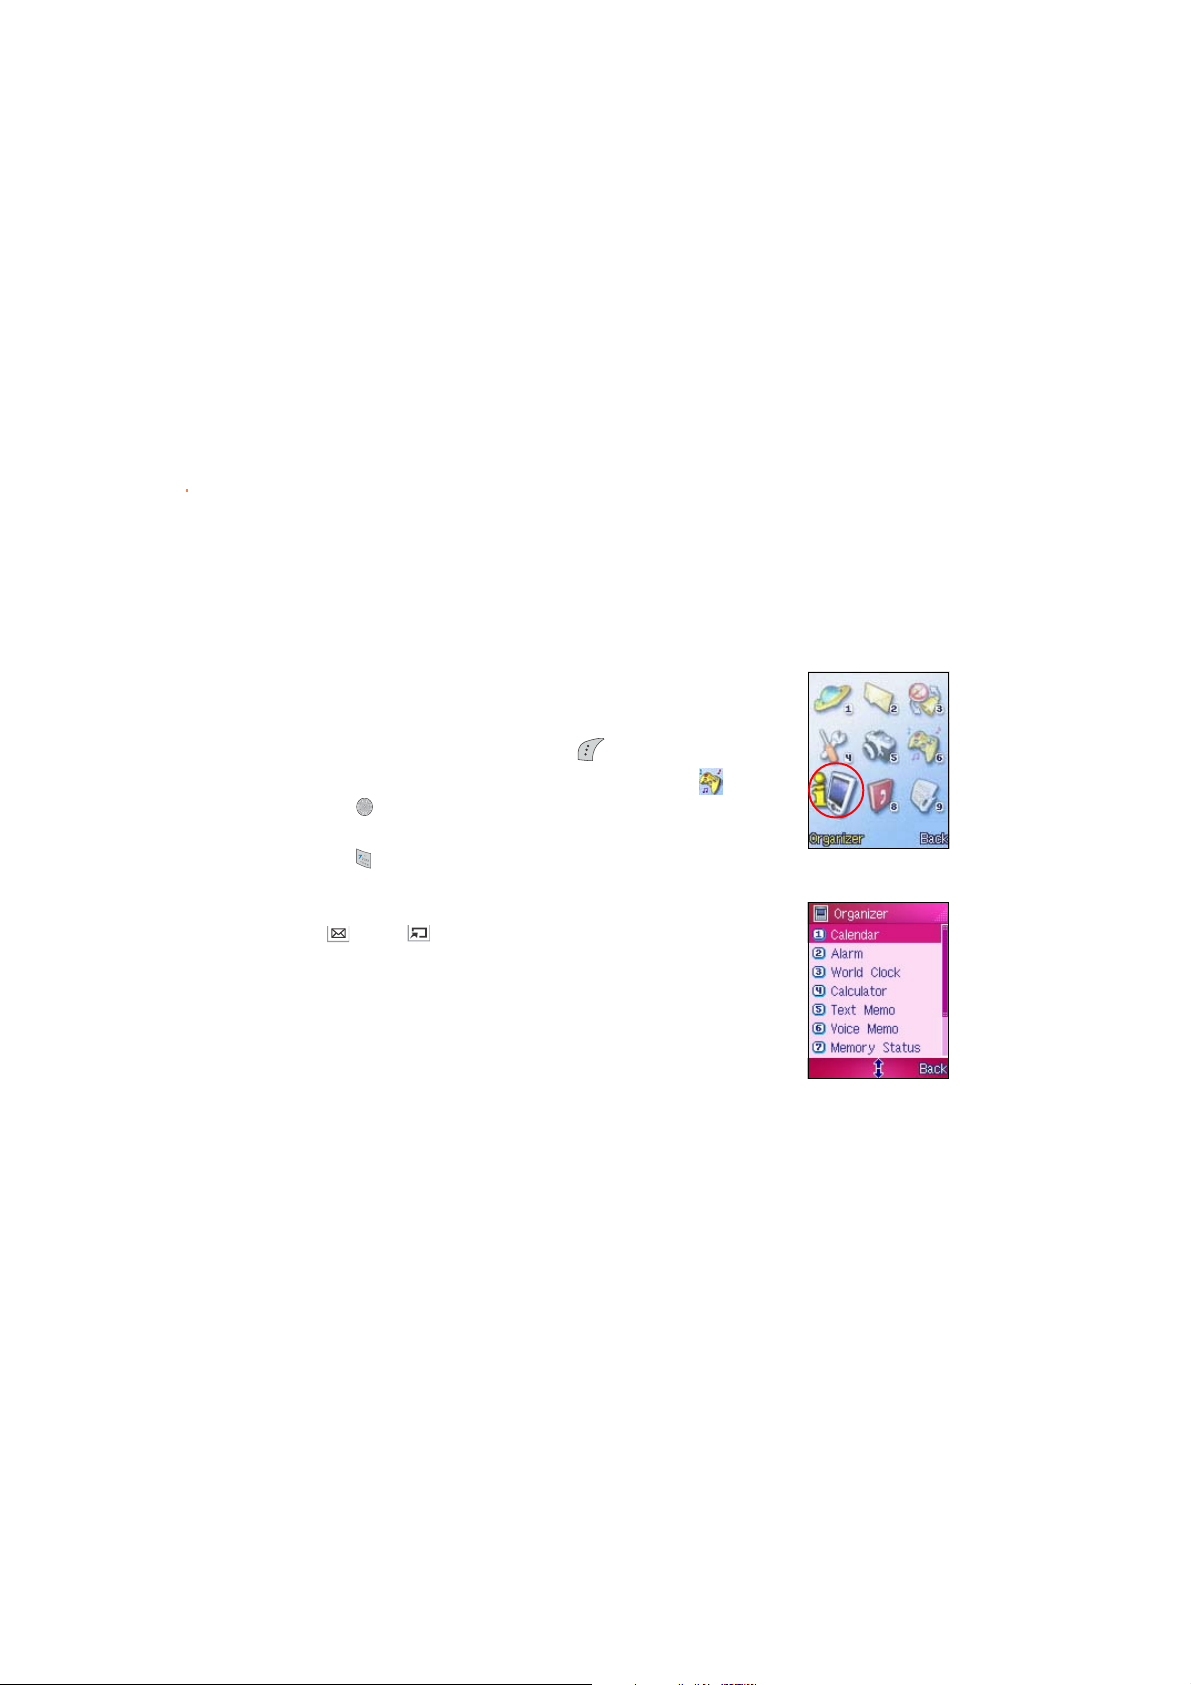
The
Organi z e r menu allows you to organize your daily activities
OrganizerOrganizer
through helpful applications such as the Calendar, Voice and Text Memo,
Calculator, Currency Exchange, Alarm, World Clock, etc.
Launching the OrganizerLaunching the Organizer
Launching the Organizer
Launching the OrganizerLaunching the Organizer
244244
244
244244
To open the
1. Put the phone in idle mode, then press to display the main menu.
2. Use the navigation keys to select the
press
OROR
OR
OROR
Press
OrganizerOrganizer
The
Organizer menu consists of 10 menu items that you can select
OrganizerOrganizer
using
number preceding each menu item.
OrganizerOrganizer
Organizer menu:
OrganizerOrganizer
OrganizerOrganizer
Organizer icon , then
OrganizerOrganizer
to display the
to display the
(up) or (down), or by using the keypad to press the
OrganizerOrganizer
Organizer menu.
OrganizerOrganizer
OrganizerOrganizer
Organizer menu.
OrganizerOrganizer
Calendar
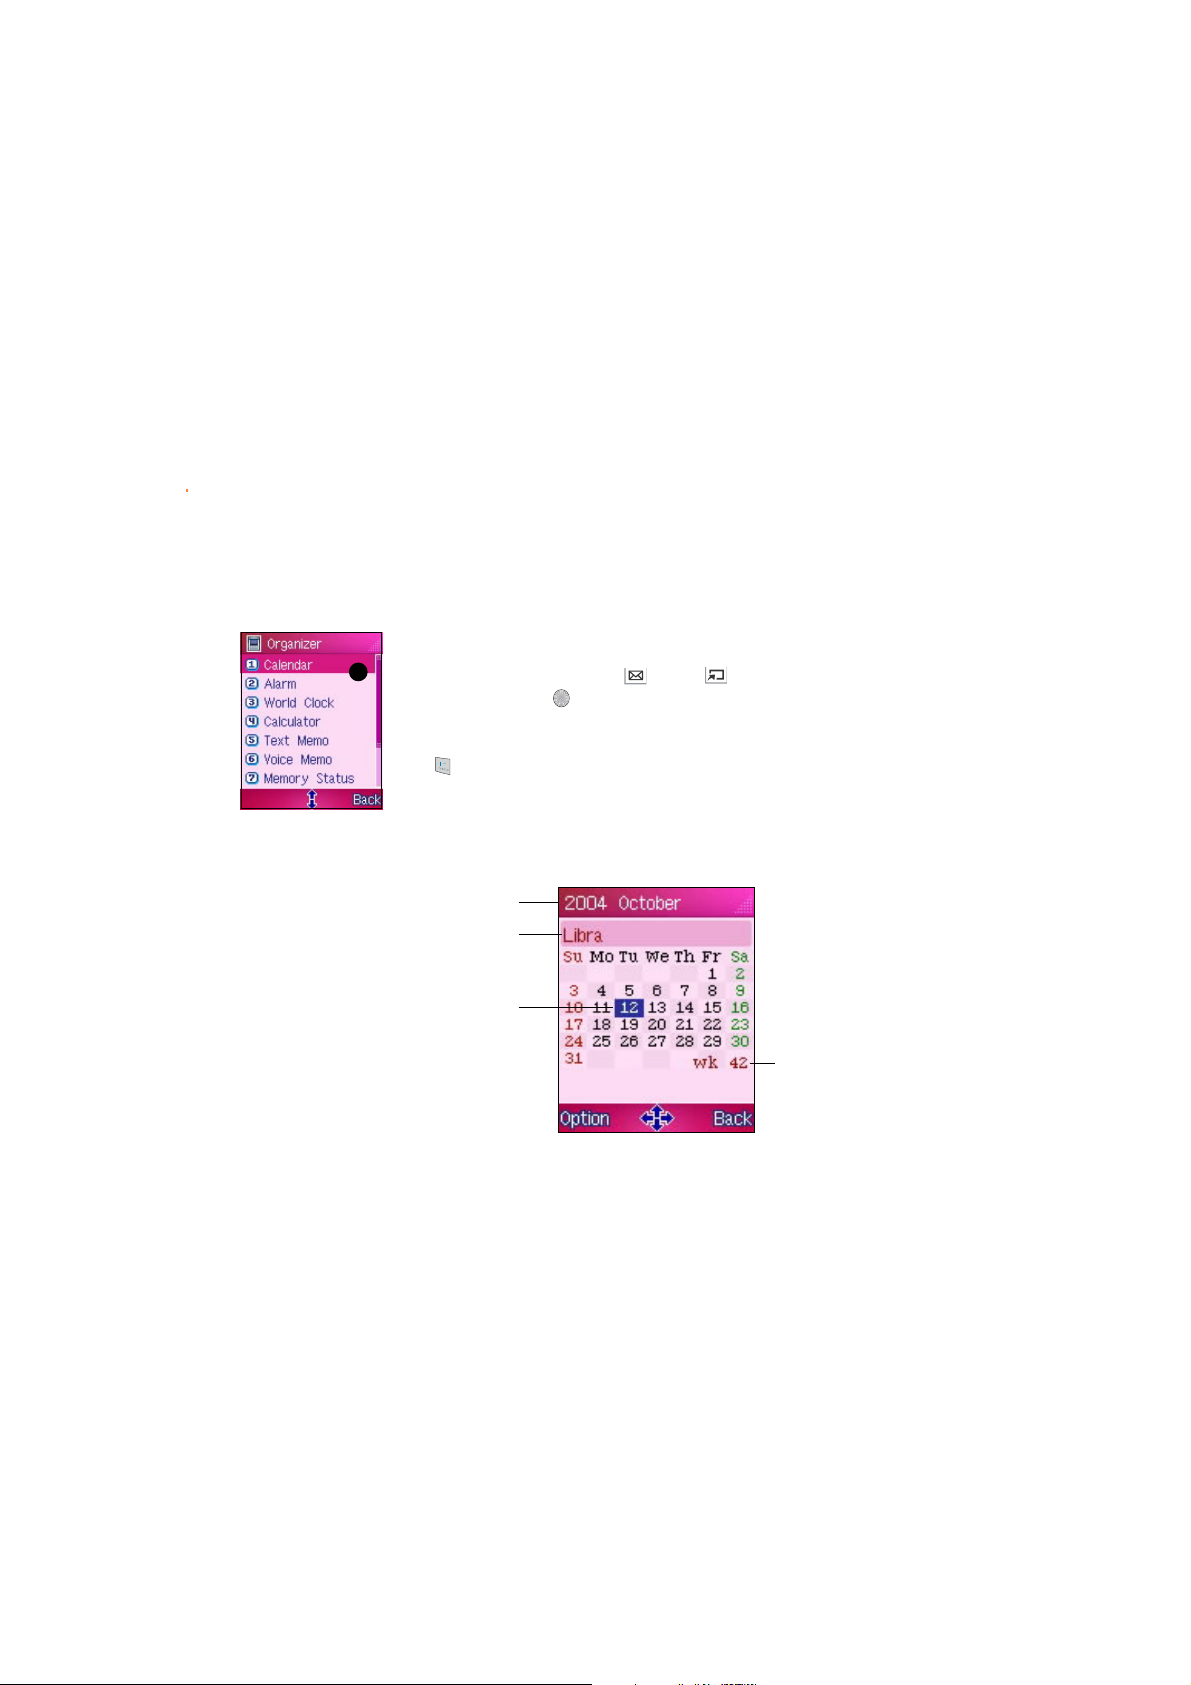
The Calendar menu allows you to manage your daily schedule with
settings that you can customize according to your needs
To open the
11
1
11
From the
CalendarCalendar
Ca l e n d a r, then press .
CalendarCalendar
OROR
OR
OROR
Press
Calendar displayCalendar display
Calendar display
Calendar displayCalendar display
Year/MonthYear/Month
Year/Month
Year/MonthYear/Month
Zodiac signZodiac sign
Zodiac sign
Zodiac signZodiac sign
Current dateCurrent date
Current date
Current dateCurrent date
CalendarCalendar
Calendar:
CalendarCalendar
OrganizerOrganizer
Organizer menu, use (up) or (down) to select
OrganizerOrganizer
to display the
CalendarCalendar
Calendar.
CalendarCalendar
Week numberWeek number
Week number
Week numberWeek number
245245
245
245245
Displaying the calendar optionsDisplaying the calendar options
Displaying the calendar options
Displaying the calendar optionsDisplaying the calendar options
To display the phone book menu options:
246246
246
246246
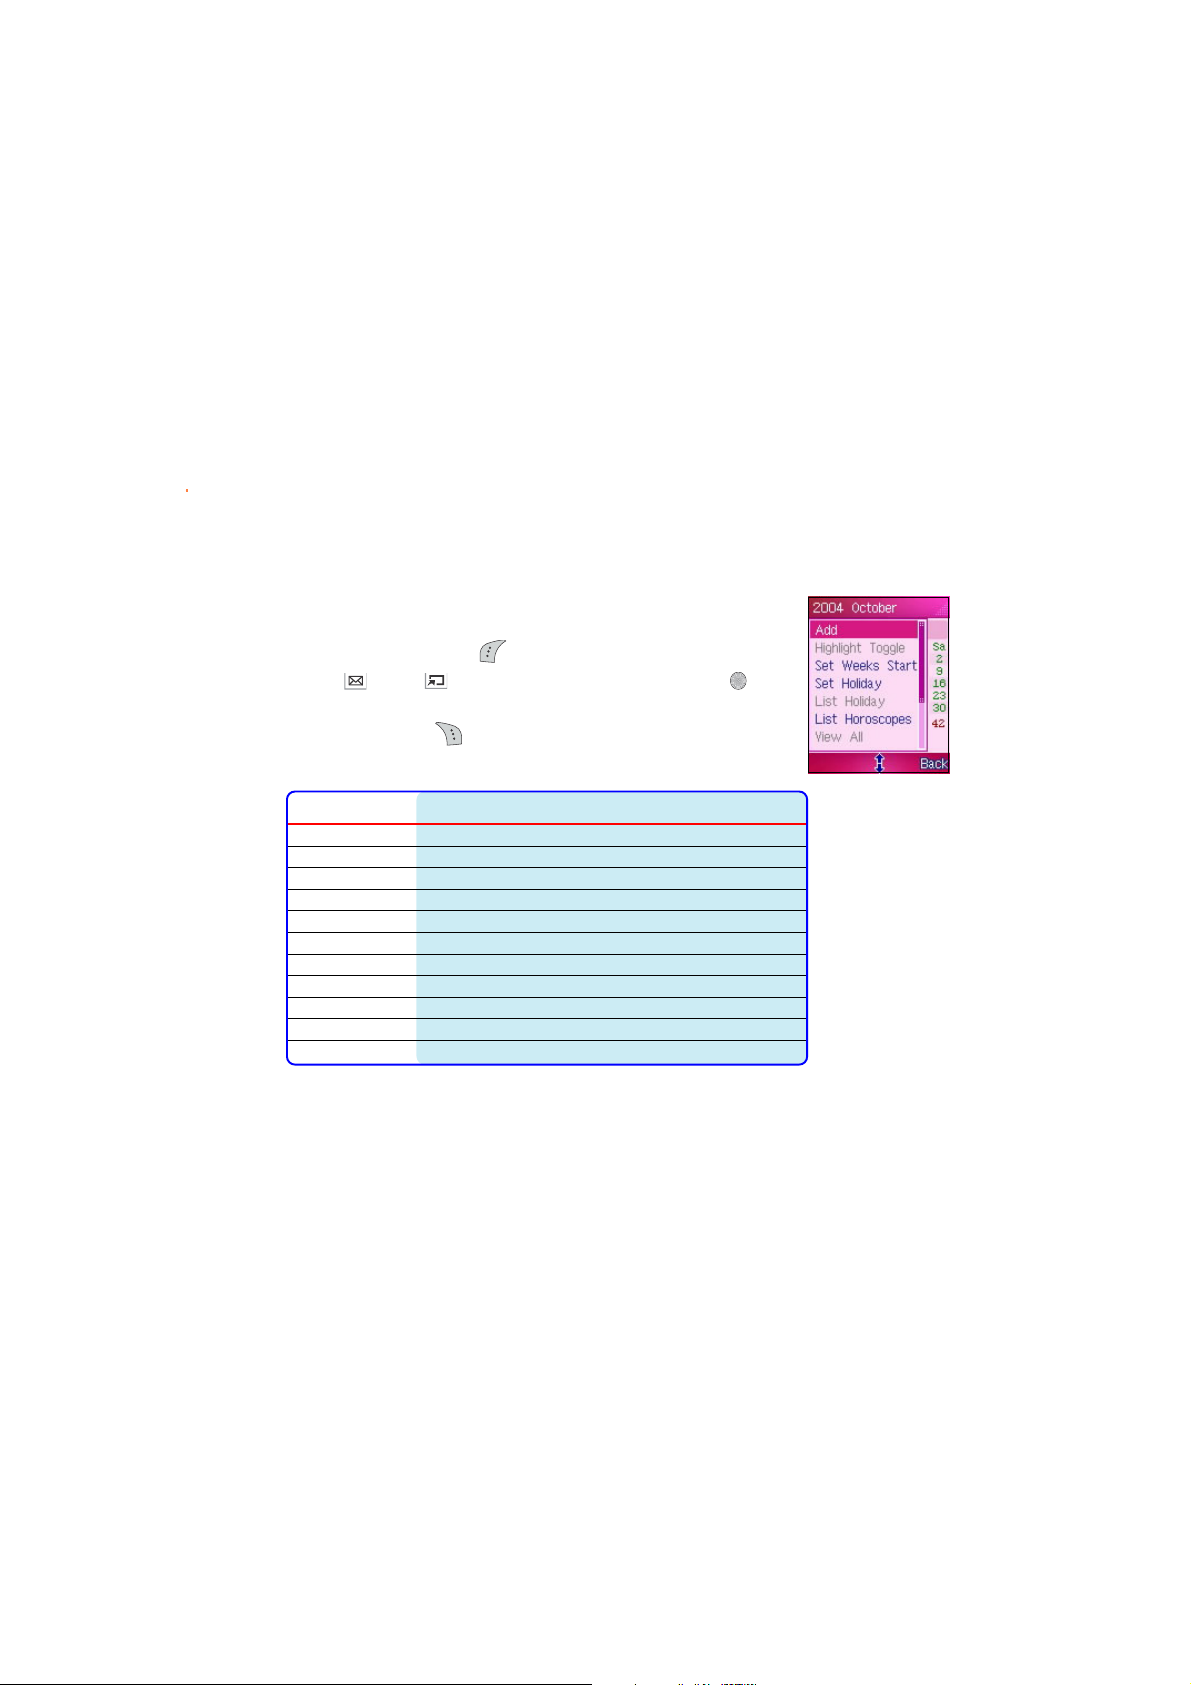
1. In the
2. Use
CalendarCalendar
Calendar, press (Option) to display the calendar options.
CalendarCalendar
(up) or (down) to highlight an item, then press .
Refer to the table below for a brief description of each item.
Otherwise, press
OptionsOptions
Options
OptionsOptions
Add add a calendar event or record
Highlight Toggle enable or disable the the calendar event/record highlight design
Set Weeks Start set the week start to Sunday or Monday
Set Holiday set a holiday in the calendar
List Holiday view all set holidays in the calendar
List Horoscopes list the zodiac signs
View All view all events and records in the calendar
Delete Past delete past calendar events or records
Delete All delete all calendar events or records
Go To Date move to a specified date
Storage view the calendar memory information
(Back) to return to the
Allows you toAllows you to
Allows you to
Allows you toAllows you to
OrganizerOrganizer
Organizer menu.
OrganizerOrganizer
Adding a calendar event or recordAdding a calendar event or record
Adding a calendar event or record
Adding a calendar event or recordAdding a calendar event or record
To add a calendar event or record:
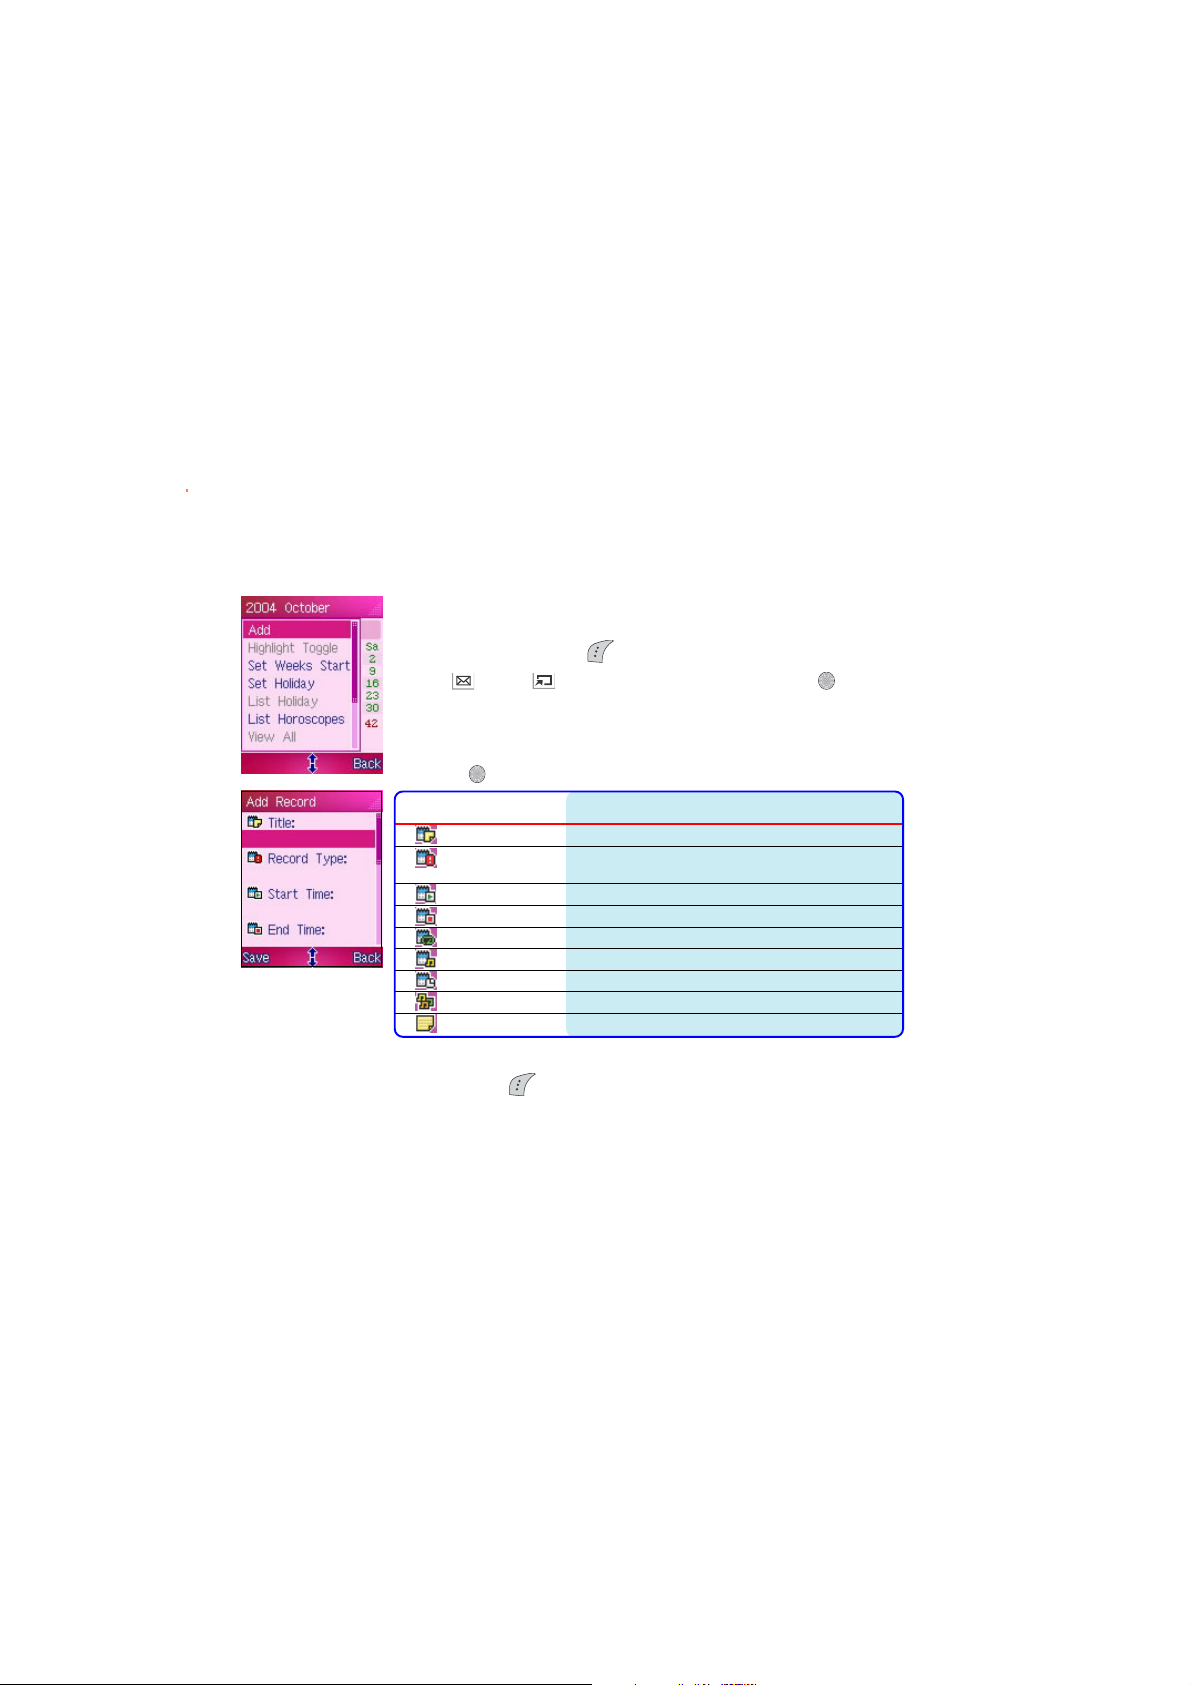
1. In the
2. Use
3. The
CalendarCalendar
Calendar, press (Option) to display the calendar options.
CalendarCalendar
(up) or (down) to highlight
Add Record Add Record
The
Add Record screen appears.
Add Record Add Record
Add Record Add Record
Add Record window allows you to customize the following
Add Record Add Record
AddAdd
Add, then press .
AddAdd
calendar event/record information. Select an information field,
press
InformationInformation
Information
InformationInformation
, then modify the information as desired.
Sets the calendar eventSets the calendar event
Sets the calendar event
Sets the calendar eventSets the calendar event
Title title
Record Type type (birthday, meeting, etc.) and
Start Time start time
End Time end or finish time
Repeat Type frequency
Play Ringtone turns the calendar event ring tone option on or off
Reminder time reminder time
Ringtone ringtone
Content content or other remarks
importance (low, normal, high)
4. After you finish filling-up all the required calendar event/record
fields, press (Save) to save the calendar event/record.
5. Go to the specified calendar event/record date using the
DateDate
D a t e command. Depending on your
DateDate
Highlight Toggle Highlight Toggle
Highlight Toggle settings,
Highlight Toggle Highlight Toggle
the date is highlighted in a different color for easy recognition.
Go ToGo To
Go To
Go ToGo To
247247
247
247247

Viewing all calendar events or recordsViewing all calendar events or records
Viewing all calendar events or records
Viewing all calendar events or recordsViewing all calendar events or records
To view all calendar events or records:
248248
248
248248
1. In the
2. Use
3. Use
4. When finished, press
Deleting calendar events or recordsDeleting calendar events or records
Deleting calendar events or records
Deleting calendar events or recordsDeleting calendar events or records
To delete all
1. In the
2. Use (up) or (down) to highlight
3. When prompted, press
CalendarCalendar
Calendar, press (Option) to display the calendar options.
CalendarCalendar
(up) or (down) to highlight
View All View All
The
View A l l screen appears and displays a list of all calendar
View All View All
events/records. Take note of the icon that precedes a calendar
event or record.
this calendar event/record has reached its reminder time
this calendar event/record has not reached its reminder time
(up) or (down) to highlight an event/record, then
press to view the event/record details.
(Back) to return to the
pastpast
p a s t calendar events or records:
pastpast
CalendarCalendar
Calendar, press (Option) to display the calendar options.
CalendarCalendar
(Yes) to delete all past calendar events
and records. A
indicate that all past calendar events or records has been deleted.
The screen returns to the
Deleted successfully!Deleted successfully!
Deleted successfully! message appears to
Deleted successfully!Deleted successfully!
CalendarCalendar
Calendar.
CalendarCalendar
View AllView All
View All, then press .
View AllView All
View All View All
View All menu.
View All View All
Delete PastDelete Past
Delete Past, then press .
Delete PastDelete Past

To delete all calendar events or records:
1. In the
2. Use (up) or (down) to highlight
3. When prompted, press (Yes) to delete all calendar events and
Setting the start of the week daySetting the start of the week day
Setting the start of the week day
Setting the start of the week daySetting the start of the week day
To set the start of the week day:
1. In the
2. Use
3. Press
4. When finished, press (Back) to return to the calendar.
CalendarCalendar
Calendar, press (Option) to display the calendar options.
CalendarCalendar
Delete AllDelete All
Delete All, then press .
Delete AllDelete All
records. A
that all calendar events or records has been deleted. The screen
returns to the
press . The
start of the week day, then press
Deleted successfully!Deleted successfully!
Deleted s u c c e s s fully! message appears to indicate
Deleted successfully!Deleted successfully!
CalendarCalendar
Calendar.
CalendarCalendar
CalendarCalendar
Calendar, press (Option) to display the calendar options.
CalendarCalendar
(up) or (down) to highlight
Set Weeks Start Set Weeks Start
Set Weeks Sta r t screen appears.
Set Weeks Start Set Weeks Start
(up) or (down) to select
Set Weeks StartSet Weeks Start
Set Weeks Start, then
Set Weeks StartSet Weeks Start
SundaySunday
Sunday or
SundaySunday
.
MondayMonday
Monday as the
MondayMonday
249249
249
249249

Setting a holidaySetting a holiday
Setting a holiday
Setting a holidaySetting a holiday
To set a holiday:
250250
250
250250
1. In the
2. Use
3. Key-in the holiday date and name in the respective fields, then press
Viewing set holiday(s)Viewing set holiday(s)
Viewing set holiday(s)
Viewing set holiday(s)Viewing set holiday(s)
To view all set holiday(s):
1. In the
2. Use (up) or (down) to highlight
CalendarCalendar
Calendar, press (Option) to display the calendar options.
CalendarCalendar
(up) or (down) to highlight
(Save). A
holiday has been set. The screen returns to the Calendar.
press
listed holidays.
Data Saved!Data Saved!
Data Saved! message appears to indicate that the
Data Saved!Data Saved!
Depending on your
displayed in a different color for easy recognition.
CalendarCalendar
Calendar, press (Option) to display the calendar options.
CalendarCalendar
List Holiday List Holiday
. The
List Holiday screen appears displaying a list of all
List Holiday List Holiday
Highlight Toggle Highlight Toggle
Highlight Toggle settings, the holiday is
Highlight Toggle Highlight Toggle
Set HolidaySet Holiday
Set Holiday, then press .
Set HolidaySet Holiday
List HolidayList Holiday
List Holiday, then
List HolidayList Holiday

3. Use (up) or (down) to highlight a holiday, then press to
view the holiday details.
4. When finished, press (Back) to return to the
menu.
Listing horoscopesListing horoscopes
Listing horoscopes
Listing horoscopesListing horoscopes
To view a list of horoscopes:
List HolidayList Holiday
List Holiday
List HolidayList Holiday
1. In the
2. Use (up) or
CalendarCalendar
Calendar, press (Option) to display the calendar options.
CalendarCalendar
(down) to highlight
List HoroscopesList Horoscopes
List Horoscopes,
List HoroscopesList Horoscopes
then press .
3. Scroll through the
horoscopes using
(up) or
(down).
251251
251
251251
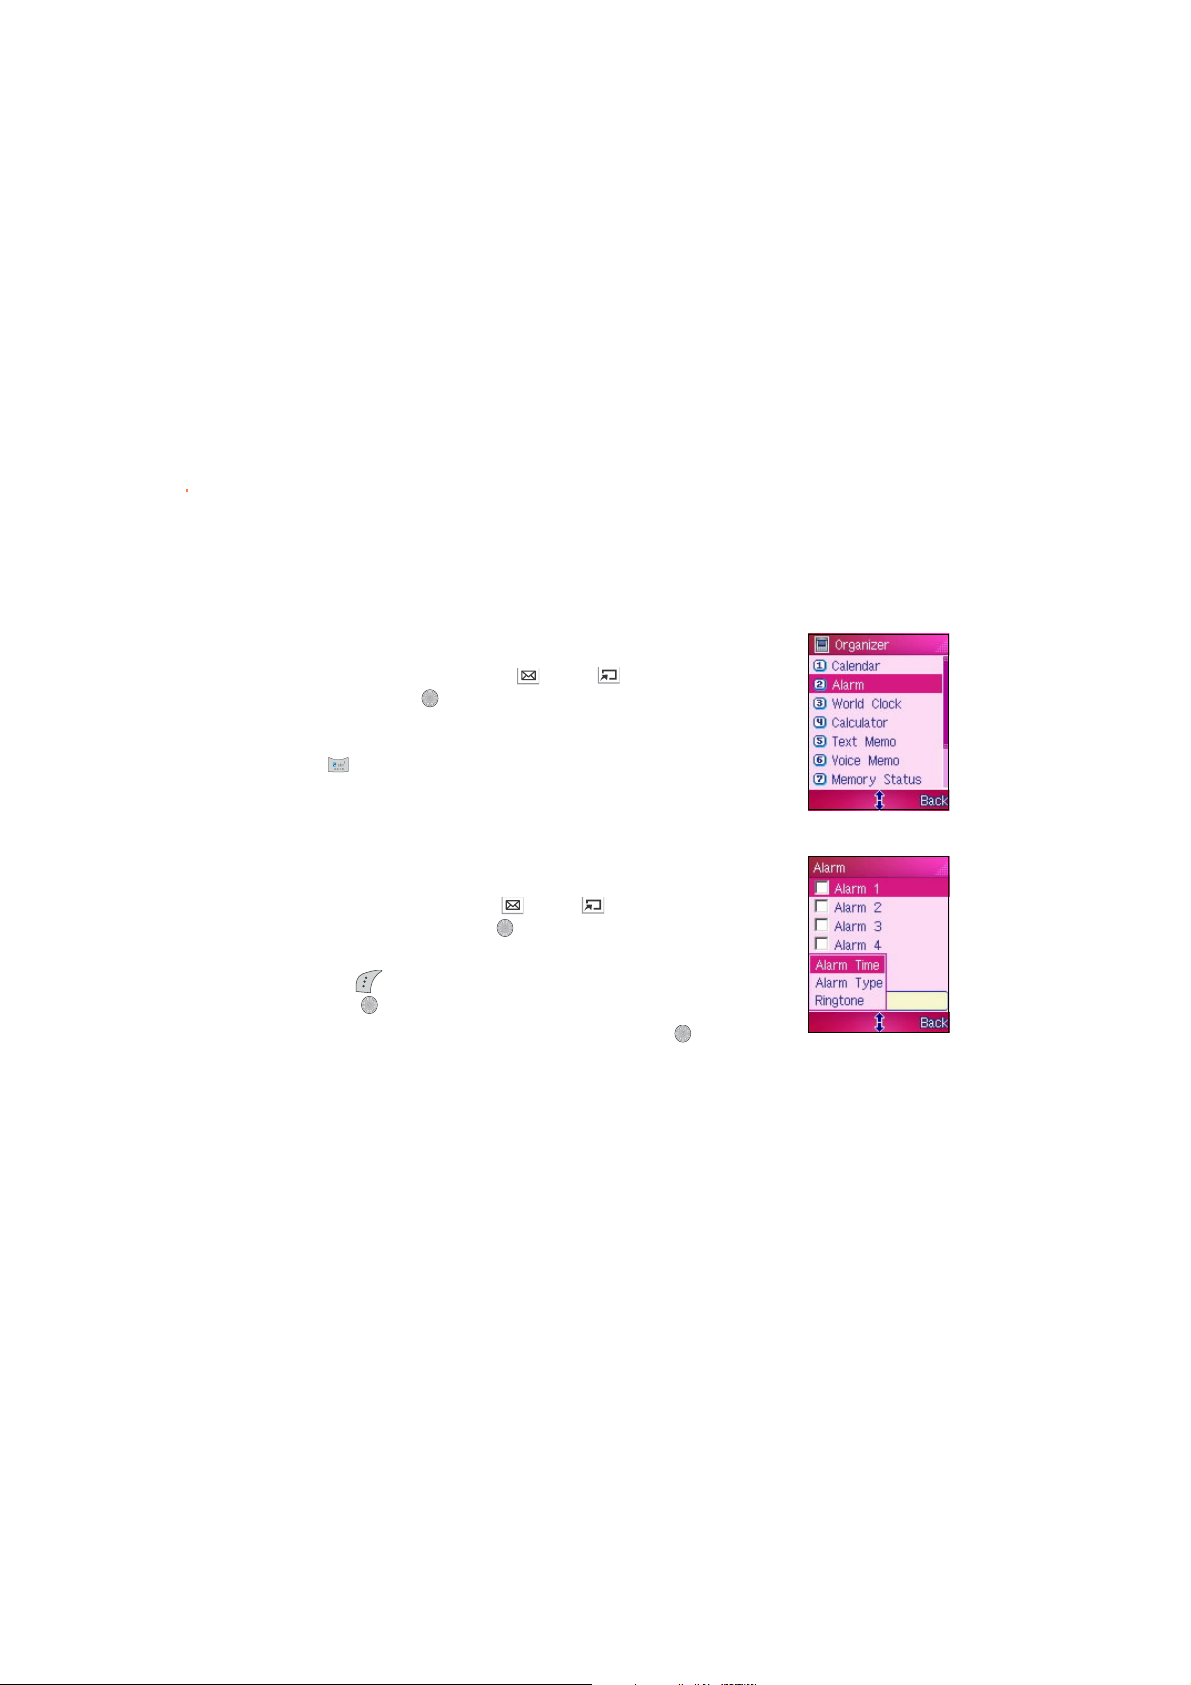
Alarm
AlarmAlarm
The
A l a r m menu allows you to set five alarms with different frequency,
AlarmAlarm
time, and alarm tone, so you are notified of important events anytime.
To open the
From the
AlarmAlarm
Alarm, then press .
AlarmAlarm
OROR
OR
OROR
Press
Setting an alarmSetting an alarm
Setting an alarm
Setting an alarmSetting an alarm
To set an alarm:
AlarmAlarm
Alarm:
AlarmAlarm
OrganizerOrganizer
Organizer menu, use (up) or (down) to select
OrganizerOrganizer
to display the
AlarmAlarm
Alarm menu.
AlarmAlarm
252252
252
252252
1. In the
2. Press (Option), select
3. Key-in the alarm time using the keypad, then press
AlarmAlarm
Alarm menu, press (up) or (down) to highlight an
AlarmAlarm
alarm number, then press
checked out.
press .
The display returns to the
displayed at the bottom left corner of the display.
. The box preceding the alarm number is
Alarm Time Alarm Time
Alarm Time from the menu, then
Alarm Time Alarm Time
when finished.
AlarmAlarm
A l a r m menu with the alarm time
AlarmAlarm

4. Press (Option),
Alarm TypeAlarm Type
select
Alarm Type
Alarm TypeAlarm Type
from the menu, then
press
.
5. Use
(up) or
(down) to highlight
the alarm frequency,
then press .
6. Press
return to the
(Back) to
AlarmAlarm
Alarm
AlarmAlarm
menu.
7. Press (Option),
RingtoneRingtone
select
Ringtone
RingtoneRingtone
from the menu, then
press .
• If the phone is off and an alarm reaches its specified time, the phone automatically
turns on and sounds the alarm ring tone.
• If the phone is on during an alarm, press to turn off the alarm, or press to
put the alarm in lazy mode. In lazy mode, the alarm sounds every five minutes until
you press . You can put an alarm to lazy mode five times.
8. Use (up) or
(down) to highlight
the alarm ring tone,
then press
.
9. Press (Back) to
return to the
AlarmAlarm
Alarm
AlarmAlarm
menu.
253253
253
253253

Turning off an alarmTurning off an alarm
Turning off an alarm
Turning off an alarmTurning off an alarm
To turn-off an alarm:
254254
254
254254
1. In the
2. Press
AlarmAlarm
A l a r m menu, use (up) or (down) to highlight the
AlarmAlarm
alarm you wish to turn off, then press to uncheck the box
preceding the alarm.
(Back) to return to the
OrganizerOrganizer
Organizer menu.
OrganizerOrganizer

World Clock
World ClockWorld Clock
The
World Clock lets you know the time in other countries and cities.
World ClockWorld Clock
This menu allows you to set the local time or view the time in other
parts of the world with the local time as reference.
To open the
From the
ClockClock
C l o c k, then press .
ClockClock
OROR
OR
OROR
World Clock World Clock
World Clock screen:
World Clock World Clock
OrganizerOrganizer
Organizer menu, use (up) or (down) to select
OrganizerOrganizer
WorldWorld
World
WorldWorld
Press to display the
World Clock displayWorld Clock display
World Clock display
World Clock displayWorld Clock display
GMT time lineGMT time line
GMT time line
GMT time lineGMT time line
Local dateLocal date
Local date
Local dateLocal date
LocationLocation
Location
LocationLocation
GMT referenceGMT reference
GMT reference
GMT referenceGMT reference
World Clock World Clock
World Clock screen.
World Clock World Clock
Local time lineLocal time line
Local time line
Local time lineLocal time line
Local timeLocal time
Local time
Local timeLocal time
255255
255
255255

256256
256
256256
Changing the local timeChanging the local time
Changing the local time
Changing the local timeChanging the local time
To change the local time using the time line:
1. Press (left) or (right) to move the local time line across the
world map until it is over the desired location.
2. The selected location and time information are shown below the
world map. Press
3. When prompted, press
A message appears on screen telling you that the local time has
been changed.
The display returns to the
To change the local time using the World Clock option:
1. Press (left) or (right) to move the local time line across the
world map until it is over the desired location.
2. The selected location and time information are shown below the
world map. Press
pop-up menu, then press .
3. When prompted, press (Yes) to confirm the local time change.
A message appears on screen telling you that the local time has
been changed.
The display returns to the
to change the local time.
(Yes) to confirm the local time change.
World Clock World Clock
World Clock screen.
World Clock World Clock
(Option), select
World Clock World Clock
World Clock screen.
World Clock World Clock
Set as Local Set as Local
Set as Local from the
Set as Local Set as Local

Viewing other locationsViewing other locations
Viewing other locations
Viewing other locationsViewing other locations
If you cannot locate your city or country using the time line, you can
view other locations using the World Clock options. To do this:
11
1
11
1. In the
2. To specify your search, tap
3. Select the city or country of location, then press
22
2
22
44
4
44
4. When prompted, press
World Clock World Clock
World Clock screen, press
World Clock World Clock
from the pop-up menu, then press
countries appears.
location, then press
the selected continent is displayed.
time.
message appears on screen telling you that the local time has been
changed.
The display returns to the
. A list of all available cities and countries in
(Yes) to confirm the local time change. A
World Clock World Clock
World Clock screen.
World Clock World Clock
(Option), select
. A list of all available cities and
(Option), select the continent of
View AllView All
View All
View AllView All
to set the local
257257
257
257257

Calculator
The calculator allows you to compute simple mathematical operations.
To open the
From the
CalculatorCalculator
Calculator, then press .
CalculatorCalculator
OROR
OR
OROR
CalculatorCalculator
Calculator:
CalculatorCalculator
OrganizerOrganizer
Organizer menu, use (up) or (down) to select
OrganizerOrganizer
258258
258
258258
to display the
Press
CalculatorCalculator
Calculator.
CalculatorCalculator
The function of the following keys changes when the phone is in
calculator mode.
KeyKey
Key
KeyKey
FunctionFunction
Function
FunctionFunction
[+] add [–] subtract
[÷] divide [x] multiply
[.] decimal point C / AC
Clear Back
[=] equal
KeyKey
Key
KeyKey
FunctionFunction
Function
FunctionFunction
The calculator functions like a normal calculator. Use the keypad to
key-in the numerals, then select a mathematical operation to use.
Press to return to the
OrganizerOrganizer
Organizer menu.
OrganizerOrganizer

Text Memo
The text memo menu allows you to create short memos containing
important notices or reminders.
To open the
From the
MemoMemo
M e m o, then press .
MemoMemo
OROR
OR
OROR
Press
Creating a text memoCreating a text memo
Creating a text memo
Creating a text memoCreating a text memo
To create a text memo:
Text MemoText Memo
Text Memo:
Text MemoText Memo
OrganizerOrganizer
Organizer menu, use (up) or (down) to select
OrganizerOrganizer
to display the
You can create a text memo of up to 70 characters.
Text Memo.Text Memo.
Text Memo.
Text Memo.Text Memo.
TextText
Text
TextText
1. In the
Text Memo Text Memo
Text Memo screen, use (up) or (down) to highlight a
Text Memo Text Memo
blank text memo, then press
OROR
OR
OROR
Press
(Option), select
.
EditEdit
E d i t from the menu, then press .
EditEdit
259259
259
259259

The blank text
memo screen
appears.
3. Press (Option),
Edit TitleEdit Title
select
Edit Title
Edit TitleEdit Title
from the menu, then
press
.
4. When prompted,
key-in the text
memo title then
.
press
260260
260
260260
5. Press (Option),
EditEdit
select
Edit
EditEdit
ContentContent
Co n t e n t from the
ContentContent
menu, then
press .
7. When finished, press
(Option), select
SaveSave
S a v e from the
SaveSave
menu, then press .
6. When prompted,
key-in the text
memo content then
.
press
8. The title of the
created text memo
now appears in the
text memo list.
Press (Back) to
return to the
OrganizerOrganizer
Organizer menu.
OrganizerOrganizer

SavedSaved
5. A
Saved
SavedSaved
successfully!successfully!
successfully!
successfully!successfully!
screen appears to
indicate that the
currency exchange
rate has been saved.
The display returns
CurrencyCurrency
to the
Currency
CurrencyCurrency
ExchangeExchange
Exchange screen
ExchangeExchange
55
5
55
showing the created
currency conversion
and rate.
Calculating an exchange rateCalculating an exchange rate
Calculating an exchange rate
Calculating an exchange rateCalculating an exchange rate
To calculate for the exchange rate:
1. In the
Currency Exhange Currency Exhange
Currency Exhange screen, press (Option), highlight
Currency Exhange Currency Exhange
CalculateCalculate
Calculate from the pop-up menu, then press
CalculateCalculate
. The
screen appears.
2. Select a reference currency field using (up) or (down), then
11
1
11
key-in the amount of currency to be exchanged.
3. When finished, press
to calculate the equivalent amount on the
other currency using the exchange rate.
4. When finished, press
22
2
22
compute a new exchange rate. Otherwise, press
return to the
22
2
22
Currency Exchange Currency Exchange
Currency Exchange screen.
Currency Exchange Currency Exchange
(Clear) to clear the currency field(s) and
(Back) to
CalculateCalculate
Calculate
CalculateCalculate
271271
271
271271

Adding an exchange currencyAdding an exchange currency
Adding an exchange currency
Adding an exchange currencyAdding an exchange currency
To add an exchange currency:
272272
272
272272
1. In the
2. In the
3. Key-in the currency name using the keypad, then press
Currency Exhange Currency Exhange
Currency Exhange screen, press (Option), highlight
Currency Exhange Currency Exhange
List CurrencyList Currency
List Currency from the pop-up menu, then press
List CurrencyList Currency
CurrencyCurrency
Currency screen appears with the list of available currencies.
CurrencyCurrency
CurrencyCurrency
Currency screen, press
CurrencyCurrency
the pop-up menu, then press
appears.
A currency name is limited to only four characters.
The display returns to the
currency.
CurrencyCurrency
Currency screen with the created
CurrencyCurrency
(Option), highlight
Modify Currency Modify Currency
. The
Modify Currency screen
Modify Currency Modify Currency
. The
AddAdd
Add from
AddAdd
.
11
1
11
22
2
22
33
3
33

Stopwatch
StopwatchStopwatch
The
Stopwatch allows you to record time in split and lap modes.
StopwatchStopwatch
To open the
From the
StopwatchStopwatch
Stopwatch, then press .
StopwatchStopwatch
OROR
OR
OROR
Press
You can switch the stopwatch from
pressing
StopwatchStopwatch
Stopwatch:
StopwatchStopwatch
OrganizerOrganizer
Organizer menu, use (up) or (down) to select
OrganizerOrganizer
to display the
StopwatchStopwatch
Stopwatch screen.
StopwatchStopwatch
splitsplit
split to
splitsplit
laplap
l a p mode or vice versa by
laplap
(up) or (down).
Lap modeLap mode
Lap mode
Lap modeLap mode
Split modeSplit mode
Split mode
Split modeSplit mode
Lap stopwatch is commonly used for timing races and other sports that
are divided into laps, such as car racing. Split stopwatch is used to
determine the time for an individual to finish a given task, such as in a
speech competition.
273273
273
273273

Using the split stopwatchUsing the split stopwatch
Using the split stopwatch
Using the split stopwatchUsing the split stopwatch
274274
274
274274
To use the split stopwatch:
1. In the
2. Press to start the stopwatch.
3. Press
4. Press to stop the stopwatch.
5. After recording the time, press
StopwatchStopwatch
Stopwatch screen, select the split stopwatch mode by
StopwatchStopwatch
pressing
displayed at the bottom of the screen. You can create a maximum
eight marks for a given time. You can also view the time marks by
pressing (left) or (right) while the stopwatch is in progress.
(up) or (down).
(Mark) to mark a specific time. The marked time is
(Reset) to reset the stopwatch.
11
1
11
33
3
33

Using the lap stopwatchUsing the lap stopwatch
Using the lap stopwatch
Using the lap stopwatchUsing the lap stopwatch
To use the lap stopwatch:
11
1
11
1. In the
2. Press to start the stopwatch.
3. Press
4. Press to stop the stopwatch.
5. After recording the time, press
33
3
33
StopwatchStopwatch
Stopwatch screen, select the lap stopwatch mode by
StopwatchStopwatch
pressing
at the bottom of the screen. When necessary, press
mark the second lap time, and so on. The screen displays the latest
two laps.
(up) or (down).
(Mark) to mark the first lap time. The lap time is displayed
(Mark) to
(Reset) to reset the stopwatch.
275275
275
275275

FCC Regulations:
zThis mobile phone complies with part 15 of the FCC Rules. Operation is subject to
the condition that this device does not cause harmful interference.
zThis mobile phone complies with part 15 of the FCC Rules. Operation is subject to
the following two conditions: (1) This device may not cause harmful interference, and
(2) this device must accept any interference received, including interference that may
cause undesired operation.
zThis mobile phone has been tested and found to comply with the limits for a Class B
digital device, pursuant to Part 15 of the FCC Rules. These limits are designed to
provide reasonable protection against harmful interference in a residential installation.
This equipment generates, uses and can radiated radio frequency energy and, if not
installed and used in accordance with the instructions, may cause harmful interference
to radio communications. However, there is no guarantee that interference will not
occur in a particular installation If this equipment does cause harmful interference to
radio or television reception, which can be determined by turning the equipment off
and on, the user is encouraged to try to correct the interference by one or more of the
following measures:
-Reorient or relocate the receiving antenna.
-Increase the separation between the equipment and receiver.
-Connect the equipment into an outlet on a circuit different from that to which the
receiver is connected.
-Consult the dealer or an experienced radio/TV technician for help.
Changes or modifications not expressly approved by the party responsible for
compliance could void the user‘s authority to operate the equipment.

RF Exposure Information (SAR)
This model phone meets the government’s requirements for exposure to radio waves.
This phone is designed and manufactured not to exceed the emission limits for
exposure to radio frequency (RF) energy set by the Federal Communications
Commission of the U.S. Government.
The exposure standard for wireless mobile phones employs a unit of measurement
known as the Specific Absorption Rate, or SAR. The SAR limit set by the FCC is
1.6W/kg.
by the FCC with the phone transmitting at its highest certified power level in all tested
frequency bands. Although the SAR is determined at the highest certified power
level, the actual SAR level of the phone while operating can be well below the
maximum value. This is because the phone is designed to operate at multiple power
levels so as to use only the poser required to reach the network. In general, the
closer you are to a wireless base station antenna, the lower the power output.
*
Tests for SAR are conducted using standard operating positions accepted
The highest SAR value for the model phone as reported to the FCC when tested for
use at the ear is 1.15 W/kg and when worn on the body, as described in this user guide,
is 0.357 W/kg. (Body-worn measurements differ among phone models, depending
upon available enhancements and FCC requirements.)
While there may be differences between the SAR levels of various phones and at
various positions, they all meet the government requirement.
The FCC has granted an Equipment Authorization for this model phone with all
reported SAR levels evaluated as in compliance with the FCC RF exposure guidelines.
SAR information on this model phone is on file with the FCC and can be found under
the Display Grant section of http://www.fcc.gov/oet/fccid
after searching on FCC ID:
MSQM303.
For body worn operation, this phone has been tested and meets the FCC RF exposure
guidelines for use with an accessory that contains no metal and the positions the
handset a minimum of 1.5 cm from the body. Use of other enhancements may not
ensure compliance with FCC RF exposure guidelines. If you do no t use a
body-worn accessory and are not holding the phone at the ear, position the handset a
minimum of 1.5 cm from your body when the phone is switched on.
 Loading...