

Page 1

ASUS Eee PC
4-31
Games
Select an available game and have fun.
Click to return to the Play tab
Sound Recorder
Allows you to record a sound clip.
Initiates Sound
Recorder
Switches to new buffer
Starts recording
Stops recording
Playback
Review
Advance
Turns on/off monitor
Page 2

4-32
Chapter 4: Using the Eee PC
Settings
Desktop Mode
The Desktop Mode allows you to select the display mode and adjust
your Eee PC display resolution.
You can use both external and internal displays, external display only
or internal display only. If an external display is not connected, the
first two options will be grayed out. You can also manually adjust the
display resolution or set it automatically adjust.
If you set your display resolution to 600x480 or below, use the
touchpad to scroll up and down the screen.
Connect an external monitor before booting up the Eee PC.
If you have installed Windows XP to your Eee PC, right-click the
ASUS Eee PC Utility icon in the Notification area to adjust the
display resolution.
Click to start
the anti-virus
application
Page 3
ASUS Eee PC
4-33
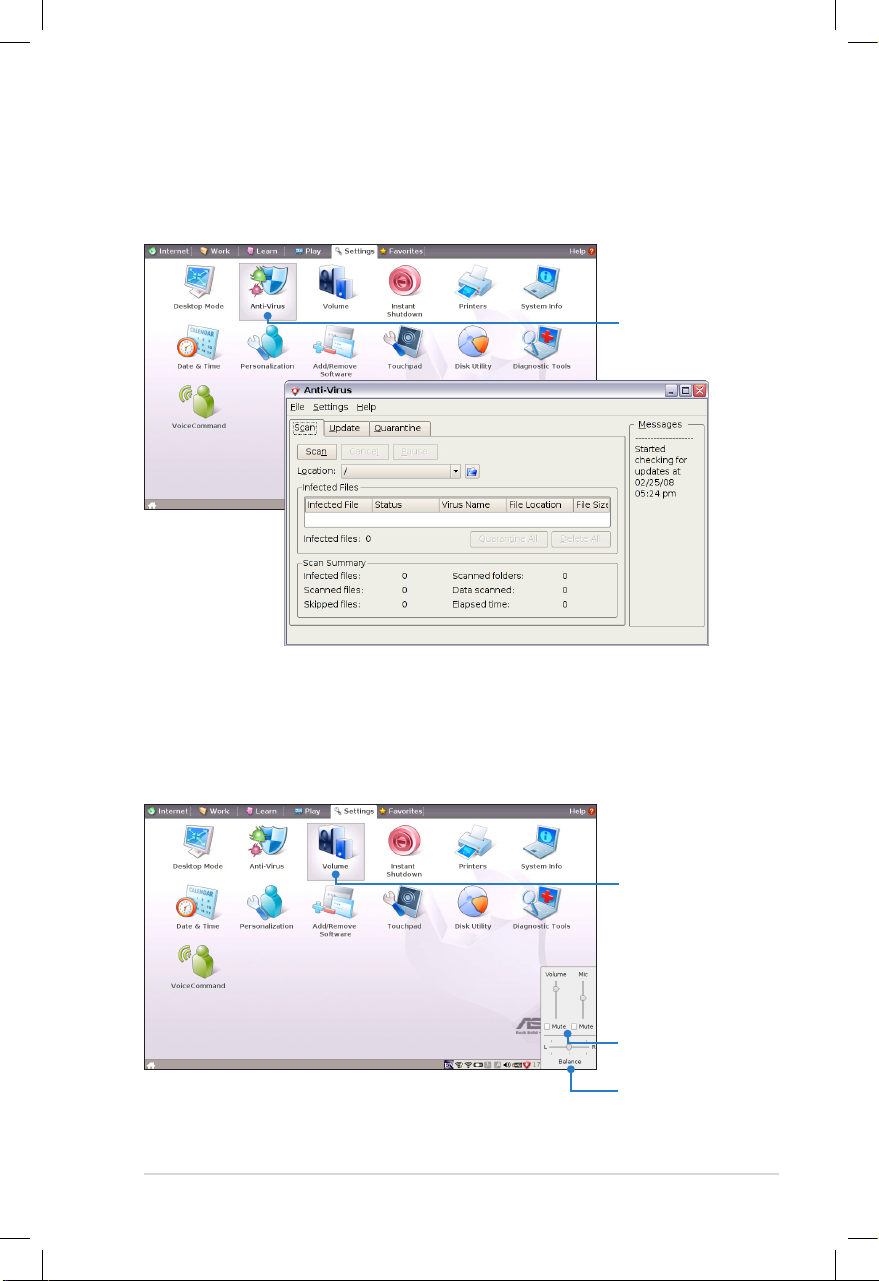
Anti-Virus
From the Settings tab, select Anti-Virus and perform virus scanning
to protect your Eee PC.
Volume
Click the speakers icon to open the control panel. Adjust the system
volume and balance by moving the sliders.
Click to customize
Adjust the system
and microphone
volume
Adjust the
balance
Click to start
the anti-virus
application
Page 4

4-34
Chapter 4: Using the Eee PC
Instant Shutdown
Click Instant Shutdown and select an action from the dialog box
shown below. You can activate the task manager, put the system in
standby, restart, or shut down the system.
Printers
To setup your printer, double-click Printers and press Add to add a
new printer. The installed printers display in the window.
Refer to the QVL in Appendix or visit our website for the latest
qualified vendor for the printers.
Page 5

ASUS Eee PC
4-35
System Info
This option displays the system information of your Eee PC.
Date & Time
Adjusts the system date and time of your Eee PC.
The displayed system information differs depending on model.
Page 6

4-36
Chapter 4: Using the Eee PC
Personalization
Select Personalization to renew
your information or change your
preferences.
Add/Remove Software
You can download and install software from our server with network
access. Follow the instructions below to install software. You can
remove the software you install from our server later when they are
no longer needed.
Removing the pre-installed software is not allowed.
To install new software or update the existing software:
1. Make sure you have connected to network.
2. Click the tab on the top to switch the category and the screen
will display the available software on the server.
3. Locate the software you want to install/update.
4. Click the Install button to install/update the selected software.
Press the Install
button to
install/update the
software
Click to switch the
category
2
4
Locate the
software you want
to install/update
3
Page 7

ASUS Eee PC
4-37
5. Click OK to confirm the installation.
6. Your Eee PC starts the download and installs/updates the
selected software from the server.
7. Click Yes to restart the system for the installed/updated
application to work properly.
Page 8

4-38
Chapter 4: Using the Eee PC
BIOS update
To update the BIOS:
DO NOT shut down or reset the system or unplug the power
cord while updating the BIOS! Doing so would cause the system
boot failure!
1. Ensure you are connected to a network.
2. Go to Settings > Add/Remove Software.
3. Click the Settings tab on the top to switch the category.
4. Click the Open button in BIOS Updates
Click to
display the
available
BIOS
updates
4
Click to
switch the
category
3
5. Locate the latest BIOS and click the Install button to update the
BIOS.
Click to
install the
BIOS
Page 9

ASUS Eee PC
4-39
6. Click OK to reboot and update the BIOS.
Touchpad
Edit your touchpad preferences by clicking Touchpad. You can
adjust all touchpad settings.
Page 10

4-40
Chapter 4: Using the Eee PC
Diagnostic Tools
The Diagnostic Tool helps you with easy trouble-shooting.
System Info.
Click the System Info. button on the left to display the system
information.
Click to switch between system
information summary and
details
The system information varies depending on model.
Disk Utility
Selecting Disk Utility allows you to
check your Eee PC SSD condition
including total disk space, the
used space, and the remaining
space. Click the tabs to switch the
displayed disk drive.
• Data in My Documents is stored in the Primary Drive and files
saved to My Documents 2 are located in the Extra Drive.
• Extra Drive may not be available for all Eee PC models.
• The disk space varies depending on model.
 Loading...