

Page 1
GSM/GPRS CF+ Card
User ’s manual
Page 2

FCC RF EXPOSURE INFORMATION
Read this information before using your handset
In August 1996 the Federal Communication Commission (FCC) of the United States with its
action in Report and Order FCC 96-326 adopted an updated safety standard for human exposure
to radio frequency (RF) electromagnetic energy emitted by FCC regulated transmitters. Those
guidelines are consistent with the safety standard previously set by both U.S and international
standards bodies. The design of this phone complies with the FCC guidelines and these
international standards.
Use only the supplied or an approved antenna. Unauthorized antennas, modifications, or
attachments could impair call quality, damage the phone, or result in violation of FCC
regulations.
Do not use the phone with a damaged antenna. If a damaged antenna comes into contact with
the skin, a minor burn may result. Please contact your local dealer for replacement antenna.
Body-worn Operation
This device was tested for typical body-worn operations. To comply with FCC RF exposure
requirements, a minimum separation distance of 0.6 inches (1.5 cm) must be maintained
between the user’s body and the handset, including the antenna. Third-party belt-clips, holsters,
and similar accessories used by this device should not contain any metallic components. Bodyworn accessories that do not meet these requirements may not comply with FCC RF exposure
requirements and should be avoided.
For more information about RF exposure, please visit the FCC website at www.fcc.gov
1
Page 3

Copyright
No part of this manual, including the products and software described in it, may be
reproduced, transmitted, transcribed, stored in a retrieval system, or translated into any
language in any form or by any means, except documentation kept by the purchaser for
backup purposes, without the express written permission of the MANUFACTURER.
The MANUFACTURER provides this manual “as is” without warranty of any kind, either
express or implied, including but not limited to the implied warranties or conditions of
merchantability or fitness for a particular purpose. In no event shall the MANUFACTURER,
its directors, officers, employees, or agents be liable for any indirect, special, incidental, or
consequential damages (including damages for loss of profits, loss of business, loss of use
or data, interruption of business and the like), even if the MANUFACTURER has been
advised of the possibility of such damages arising from any defect or error in this manual
or product.
Specifications and information contained in this manual are furnished for informational use
only, and are subject to change at any time without notice, and should not be construed as
a commitment by the MANUFACTURER. The MANUFACTURER assumes no
responsibility or liability for any errors or inaccuracies that may appear in this manual,
including the products and software described in it.
Product warranty or service will not be extended if: (1) the product is repaired, modified or
altered, unless such repair, modification of alteration is authorized in writing by the
MANUFACTURER; or (2) the serial number of the product is defaced or missing.
Products and corporate names appearing in this manual may or may not be registered
trademarks or copyrights of their respective companies, and are used only for identification
or explanation and to the owners’ benefit, without intent to infringe.
Product Name: GSM/GPRS CF+ Card
Manual Edition: First edition V1 (E1290)
Release Date: June 2003
ii GSM/GPRS CF+ Card
Page 4

Contents
Safety instructions ........................................................................... i v
Chapter 1 Product introduction ............................................... 1-1
Welcome!............................................................................... 1-1
1.1 Package Contents ...................................................... 1-1
1.2 Specifications ............................................................. 1-2
1.3 CF card parts.............................................................. 1-2
1.4 LED status description................................................ 1-2
1.5 Installing and removing a SIM card ............................ 1-3
1.6 Connecting to a PCMCIA adapter .............................. 1-4
1.7 Installing to a notebook PC......................................... 1-5
1.8 Installing to a PDA ...................................................... 1-5
1.9 Connecting a headset................................................. 1-6
Chapter 2 Notebook PC installation ........................................ 2-1
2.1 System requirements.................................................. 2-1
2.2 Driver installation ........................................................ 2-1
2.2.1 Windows XP/2000 driver installation ............ 2-1
2.2.2 Windows 98/ME driver installation................ 2-2
2.3 Installing mobile PhoneTools ...................................... 2-3
2.4 mobile PhoneTools functions...................................... 2-7
2.5 Creating a GPRS connection ..................................... 2-8
Chapter 3 Pocket PC installation ............................................. 3-1
3.1 System requirements.................................................. 3-1
3.2 Installing pocket PhoneTools ...................................... 3-1
3.3 Running pocket PhoneTools....................................... 3-5
3.4 pocket PhoneTools functions...................................... 3-7
3.4.1 Main menu .................................................... 3-7
3.4.2 Dialer menu .................................................. 3-8
3.5 Creating a GPRS connection ..................................... 3-9
GSM/GPRS CF+ Card iii
Page 5
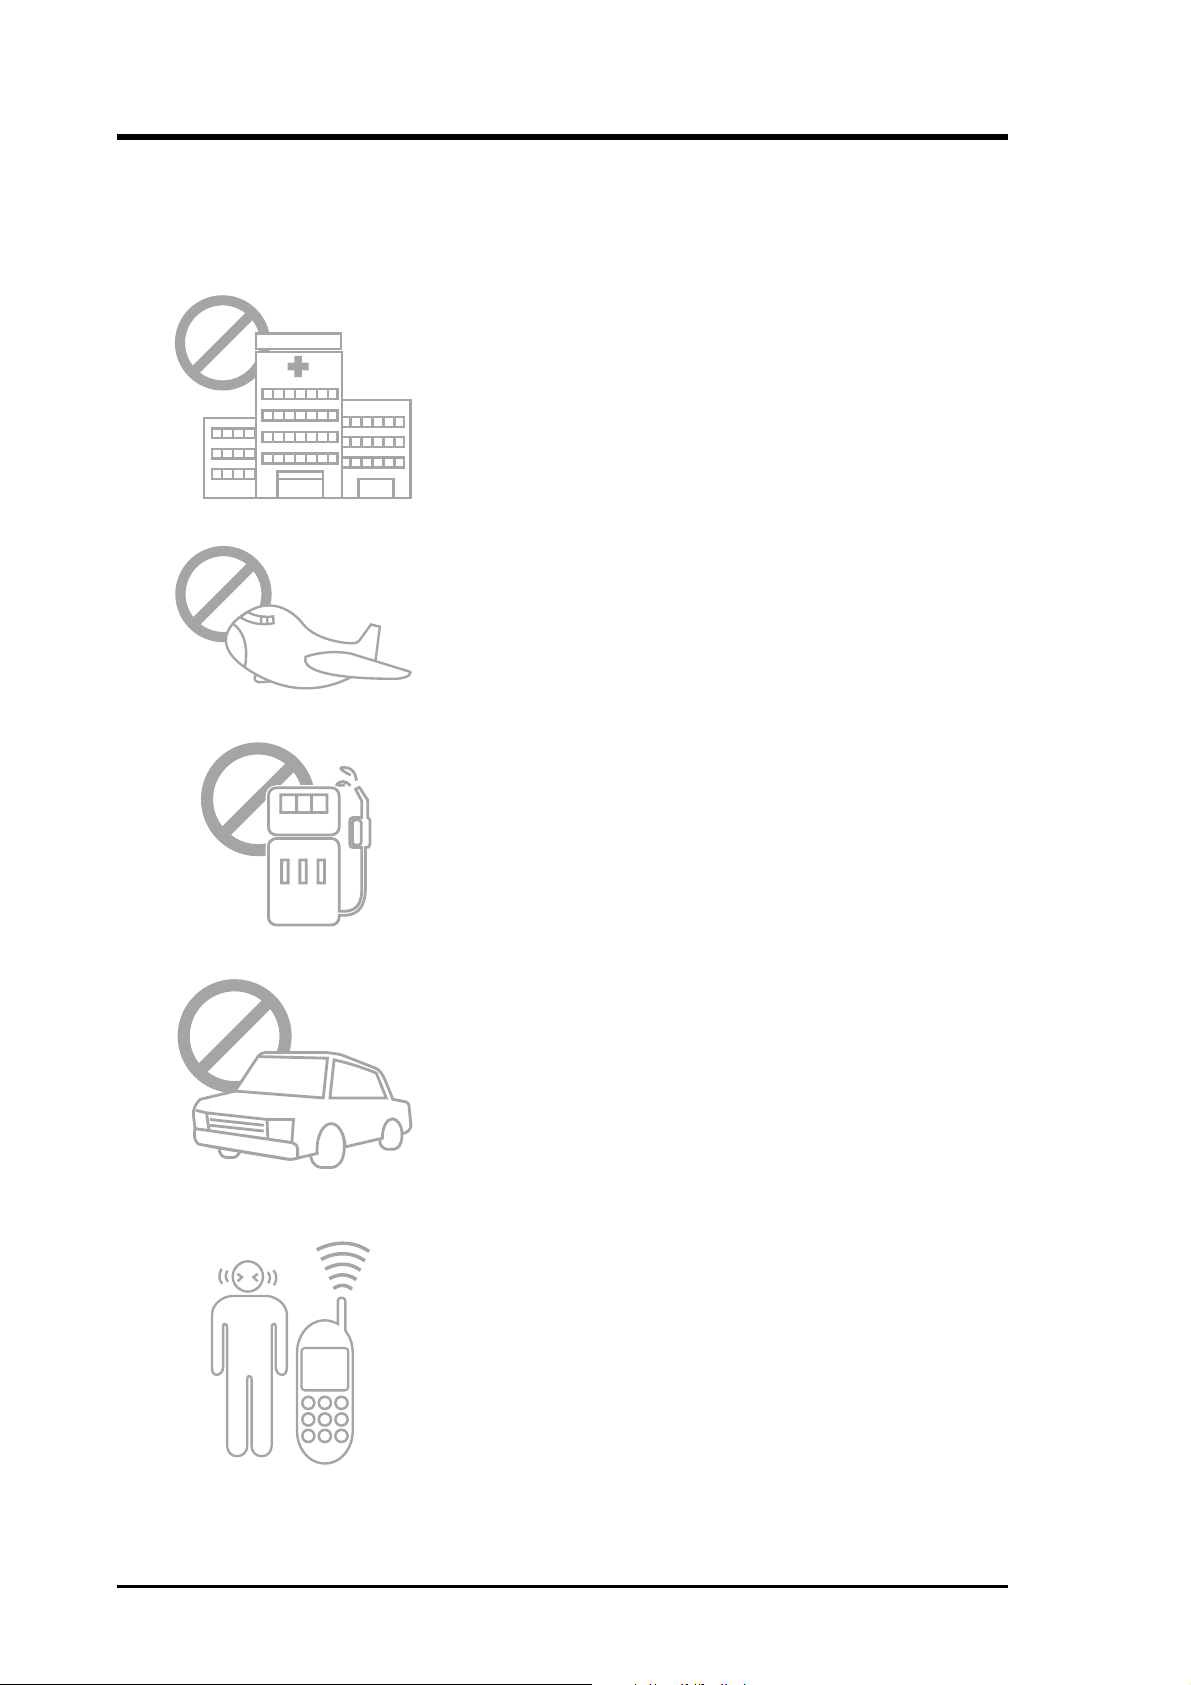
Safety instructions
Use of radio equipment is prohibited in hospitals. DO
NOT use the GSM/GPRS CF card phone or online
network features in hospitals to avoid interference with
medical equipment.
Most airlines have restrictions on using electronic
devices. DO NOT use the GSM/GPRS CF card while
on an airplane, especially during take off and landing,
to avoid interference with normal operation of aviation
instruments.
use the GSM/GPRS CF card while at any gas station.
Make sure to shut off the unit before entering the gas
station to avoid hazards.
Traffic laws prohibit the use of radio communication
equipment while driving. DO NOT use the GSM/GPRS
CF card or any radio communication equipment while
driving to avoid distraction and prevent accidents. If the
equipment must be used, be sure to use hand-free
accessories.
When turned on, radio communication equipment units
continuously emit a radio wave. It is recommended to
shut off the radio equipment when not in use to
minimize electromagnetic waves, and save battery
power.
iv GSM/GPRS CF+ Card
Page 6
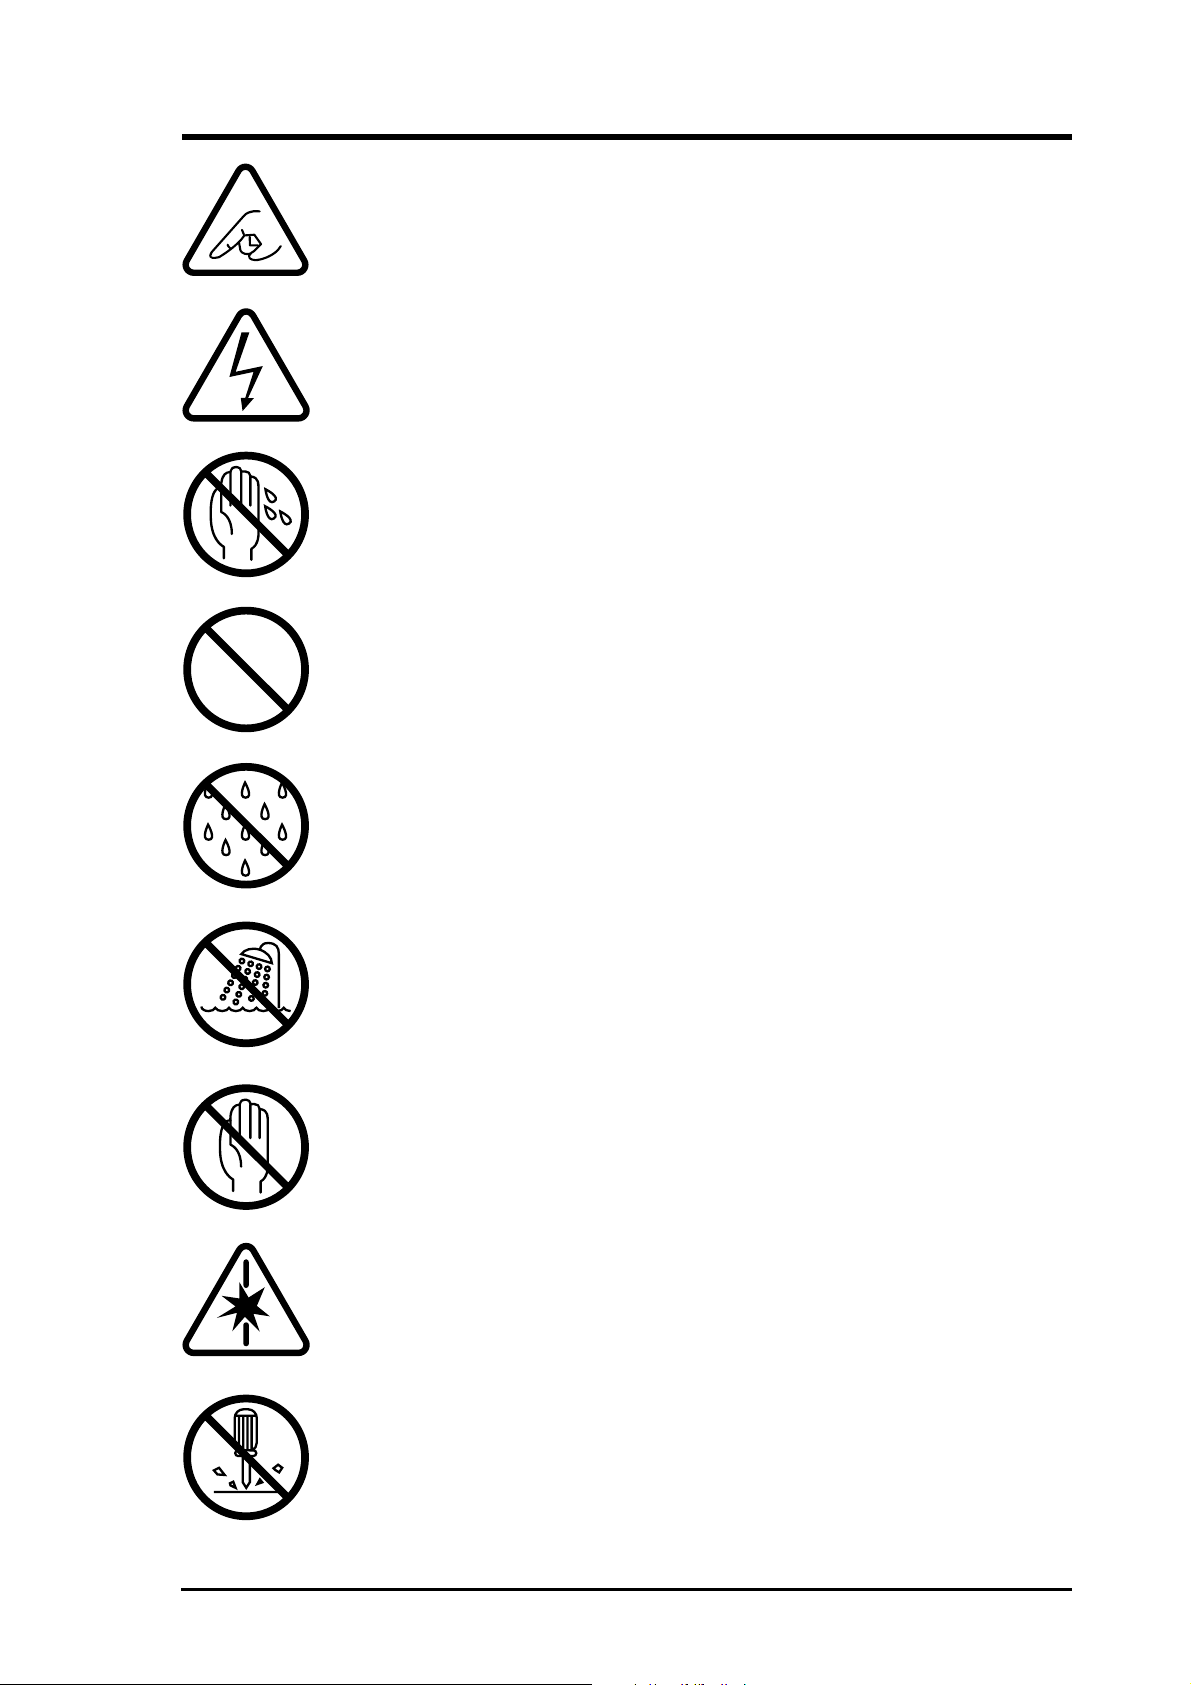
Check if all peripherals are properly connected before
turning on any equipment.
Make sure to disconnect the power plug from the power
source before installing or removing peripherals.
Make sure to dry your hands before handling the product to
prevent water from seeping through the internal parts.
Droplets of water may cause short circuit and damage to the
product.
DO NOT place the unit near steaming electrical appliances,
such as electric pots and thermal jars, etc.
Use the product only under a dry environment. Humid
places are not appropriate for the product.
DO NOT use the product in damp environments, such as
bathrooms.
DO NOT place the product on unstable surfaces. Make sure
to place it on a sturdy table and in a place beyond the reach
of children.
DO NOT share the same extension power line for the
product and high power-consuming appliances to avoid
power overload.
NEVER attempt to disassemble the product! Doing so may
cause permanent damage to the product and void the
warranty.
GSM/GPRS CF+ Card v
Page 7

Notes
vi GSM/GPRS CF+ Card
Page 8
Product Introduction
Welcome!
Thank you for purchasing the GSM/GPRS CF+ card!
The GSM/GPRS CF+ card is a tri-band CompactFlash
your mobility in the world as it can operate at 900MHz, 1800MHz, and
1900MHz. The CF card allows not only high-speed GPRS data transmission but
also voice communication capability through a headset.
The card fits any computer equipped with a Compact Flash (CF) Type II socket
or Personal Computer Memory Card International Association (PCMCIA) Type
II socket with a CF adapter.
With this GSM/GPRS CF+ card and your notebook PC or PDA, you can easily
tap into the sophisticated world of wireless communication, anytime, anywhere!
Surf the web, send and receive e-mails and SMS, receive phone calls, and more!
®
(CF™) card that extends
1.1 Package Contents
Check your package for the following items:
Chapter 1
• GSM/GPRS CF+ card
• Headset
• PCMCIA adapter
• Support CD (includes software, drivers,
utilities, and reference manual)
• User’s manual
If any of the above items is damaged or
missing, contact your dealer.
GSM/GPRS CF+ Card 1-1
Page 9
Product Introduction
1.2 Specifications
Chapter 1
Frequency Tri-band operation (900MHz, 1800MHz, and 1900MHz)
Operating modes GSM/GPRS
GPRS mode Class B, multi-slot class 10
Downlink speed up to 57.6 Kbps
Uplink speed up to 28.8 Kbps
GSM mode Upload and download speeds up to 9.6 Kbps
2-way SMS (Short Message Service)
Voice (using headset for audio input/output)
LED Tri-color LED indicates network status
Power 3.3V for both PCMCIA and CompactFlash® slots
Dimensions 65.9mm x 45.2mm x 10.5mm
Weight 25g
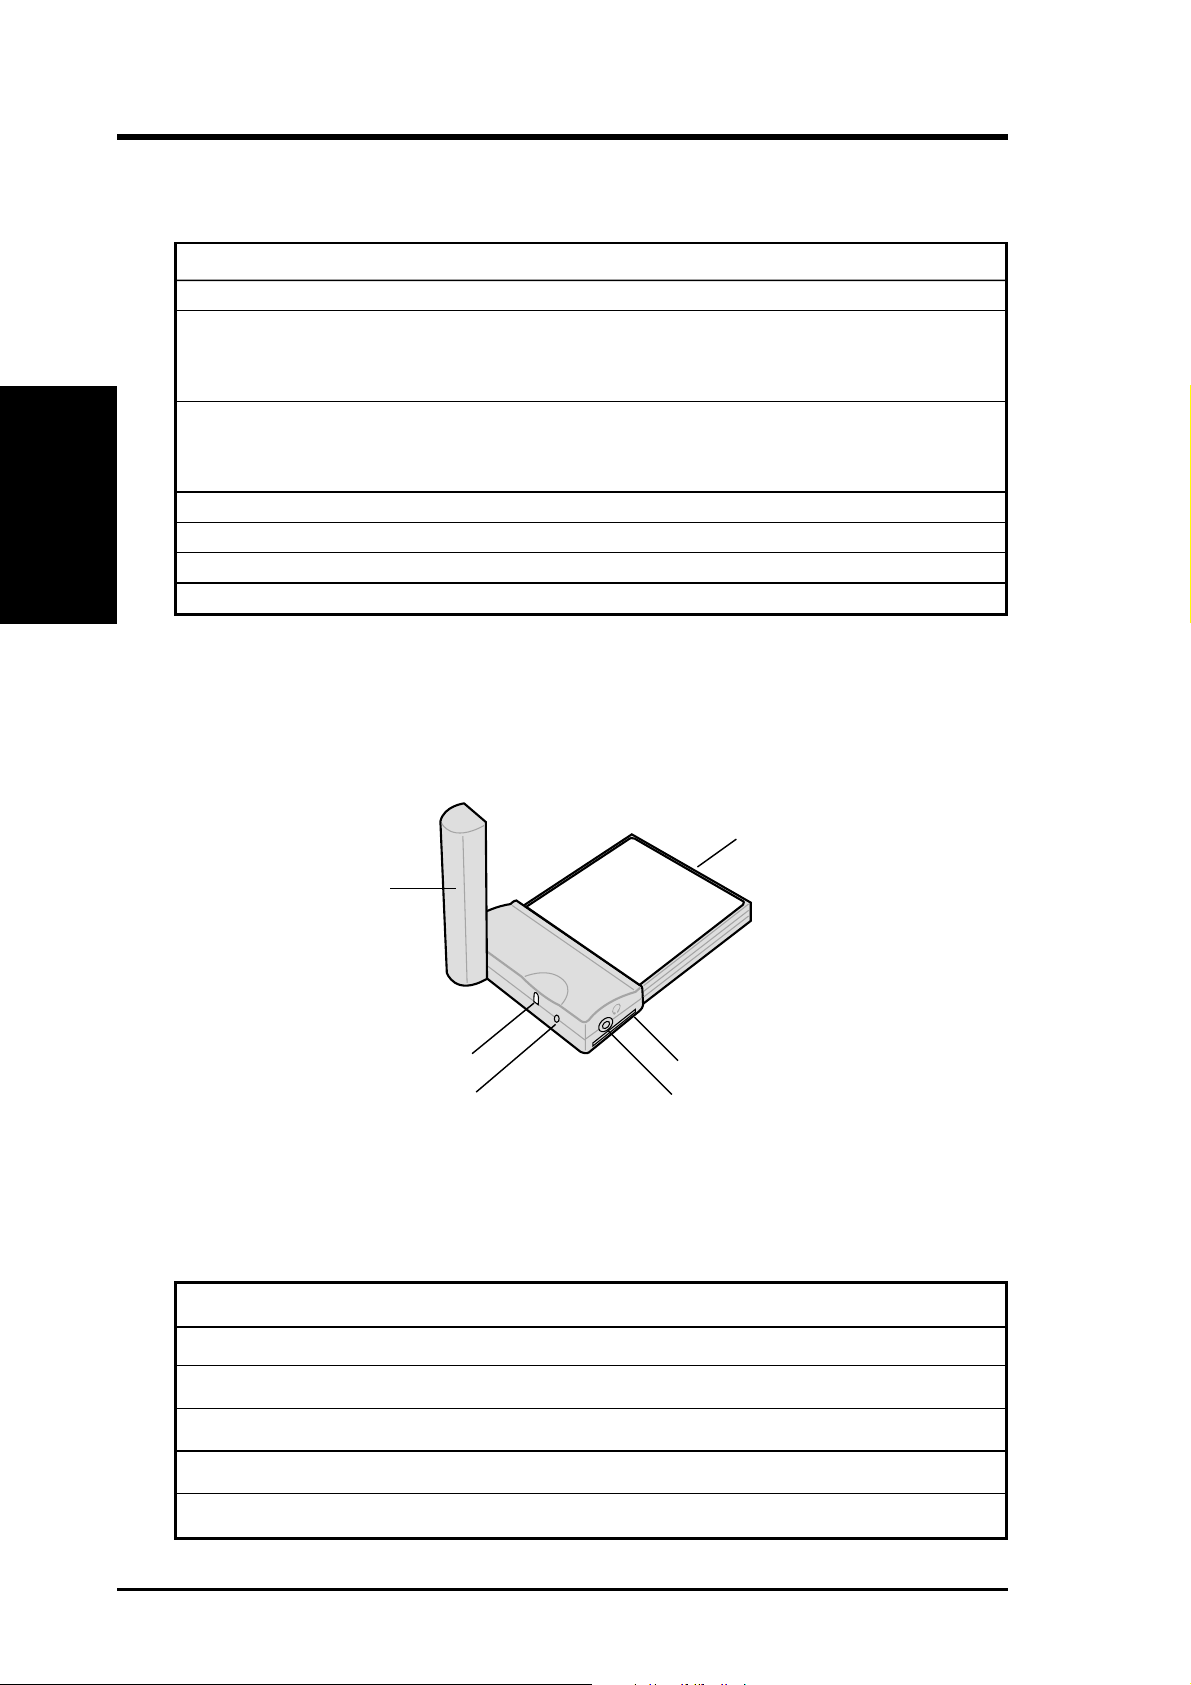
1.3 CF card parts
50-pin interface
connector (female)
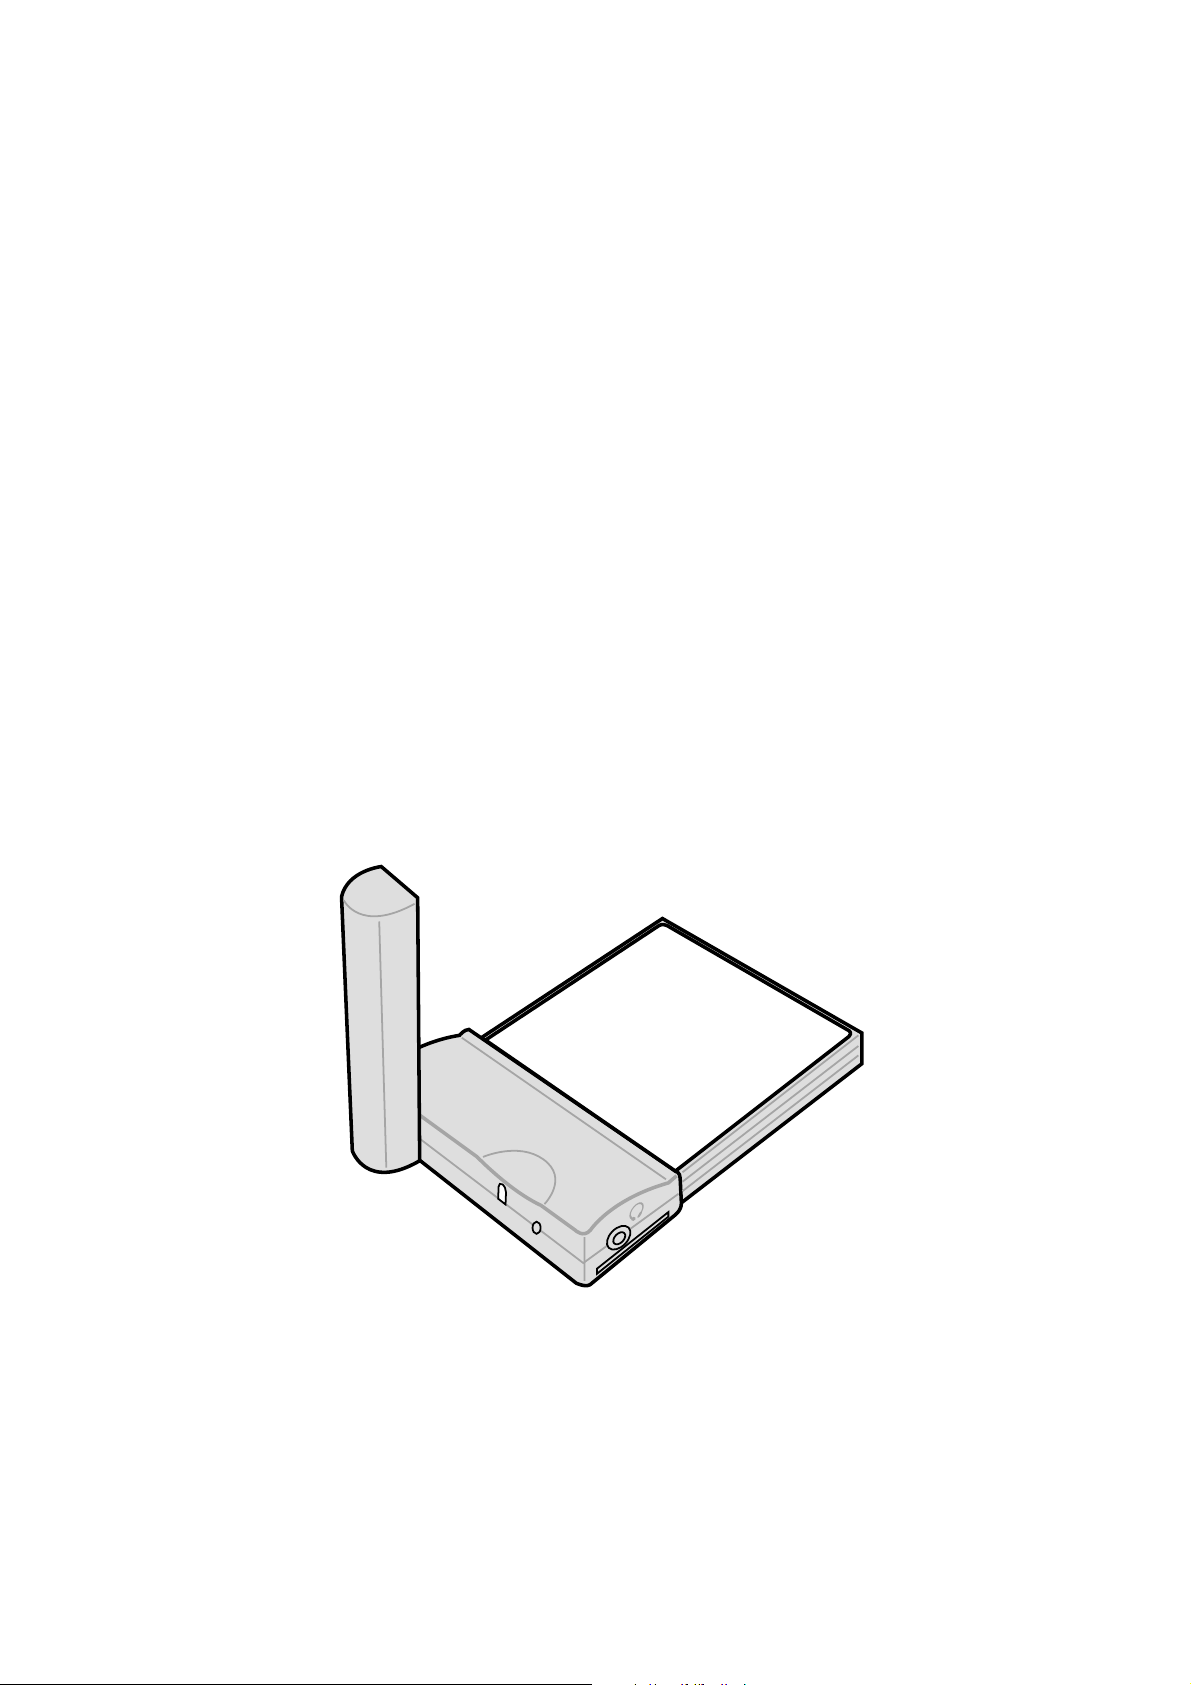
Antenna
LED
Antenna lock
Headset connector
SIM card slot
1.4 LED status description
LED color LED status Connection status
OFF OFF No connection
Green Blinks every second GSM/GPRS network search in progress
Green Blinks every 3 seconds Connected to a network
Red Blinks every 3 seconds Transferring voice/data to a remote party
Orange Blinks every 3 seconds Roaming
1-2 GSM/GPRS CF+ Card
Page 10
Product Introduction
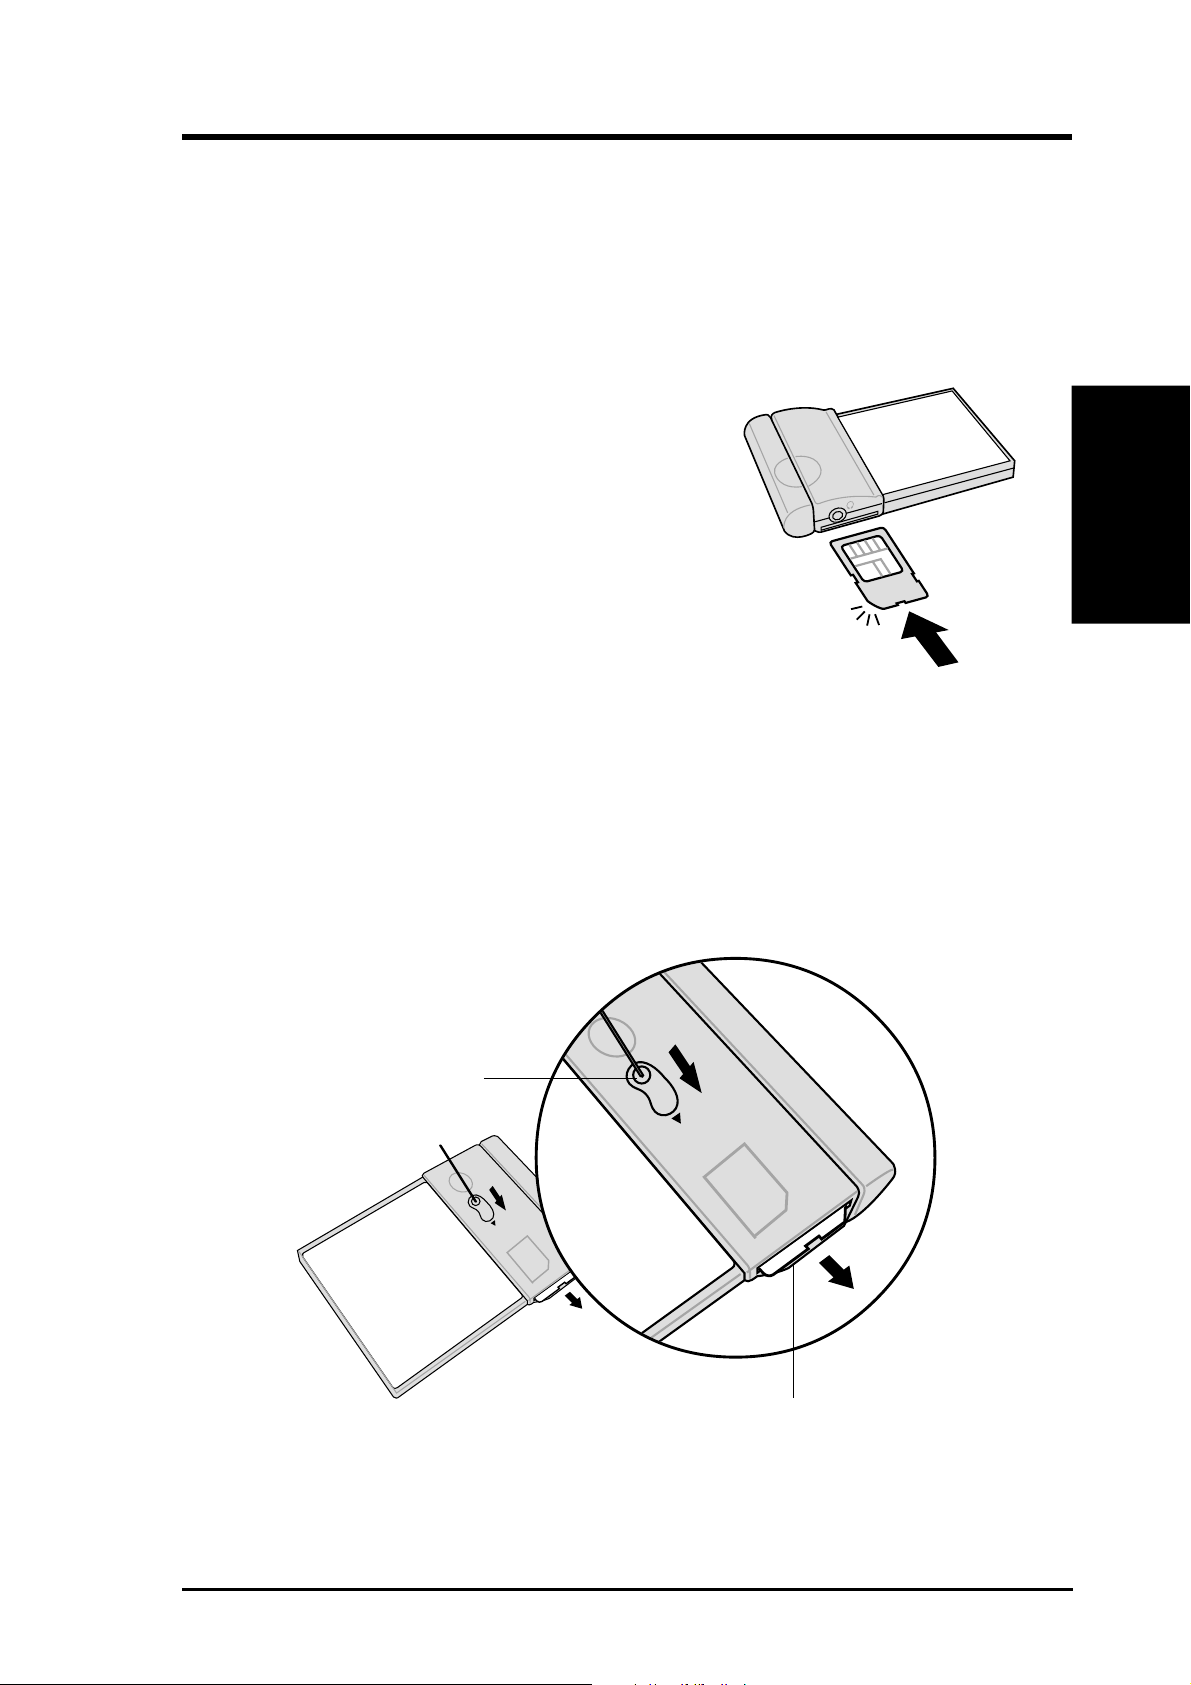
1.5 Installing and removing a SIM card
You need to use a SIM (Subscriber Identity Module) card with your CF card to
allow mobile communication through GPRS or GSM modes.
To install a SIM card:
1. Locate the SIM card slot.
2. Position the SIM card with the contact gold plate
up and the notched corner parallel to the
antenna.
3. Insert the SIM card all the way into the slot.
(The edge of the SIM card should align with the
side of the CF card slot.)
To remove a SIM card:
1. Locate the SIM card eject hole at the back of the CF card.
2. Insert a pen tip on the eject hole and slide it toward the direction of the
arrow. The SIM card slides out.
3. Remove the SIM card from the slot.
Eject hole
Chapter 1
SIM card
GSM/GPRS CF+ Card 1-3
Page 11
Product Introduction
1.6 Connecting to a PCMCIA adapter
The PCMCIA card adapter included in the product package fits in any PC
equipped with a Personal Computer Memory Card International Association
(PCMCIA) Type II socket.
To connect the CF card to a PCMCIA adapter:
Chapter 1
1. Position the CF card and the PCMCIA adapter as shown.
2. Slide the side grooves of the CF card to the rails of the adapter. The 50-pin
DO NOT flip up the CF card antenna at this time to avoid breaking the
hinge.
female connector on the card should match the 50-pin male connector on the
adapter.
Rail
50-pin male connector
50-pin female connector
(underneath)
Side groove
3. Carefully press the CF card into the slot until it fits completely.
PCMCIA adapter lock
The adapter has a lock that secures the card and protects the connector pins.
When not in use, slide the latch to the upper right corner of the groove.
Latch location
Lock groove
when locked
1-4 GSM/GPRS CF+ Card
Page 12

Product Introduction
1.7 Installing to a notebook PC
To install the CF card to your notebook PC:
1. Insert the CF card to the PCMCIA
adapter. See section “1.6 Connecting
to a PCMCIA adapter” for
instructions.
Always connect the CF card to
the PCMCIA adapter before
installing into a notebook PC.
2. Install the card into a Type II PCMCIA slot
of your notebook PC.
3. Flip up the antenna perpendicular to the
card.
3
1.8 Installing to a PDA
To install the CF card to your PDA:
1. Insert the card into the Type II CF card slot of your PDA.
2. Flip up the antenna parallel to the card.
1
2
Chapter 1
1
2
GSM/GPRS CF+ Card 1-5
Page 13

Product Introduction
1.9 Connecting a headset
To make or receive voice calls, you need to connect the headset to the connector
on the side of the CF card. The headset that came with your card package
includes an ON/OFF switch. Press the switch to answer a voice call. Press the
switch again to terminate a call.
Chapter 1
Headset
connector
ON/OFF switch
1-6 GSM/GPRS CF+ Card
Page 14

Notebook PC installation
2.1 System requirements
Before using your GSM/GPRS CF+ card, make sure that your notebook PC has
the following:
• Pentium
• Type II PC card slot
• Microsoft® Windows® 98/ME/2000/XP operating system
• a hard disk drive with at least 20MB free space
• at least 32MB system memory for Windows 98/ME
or at least 64MB for Windows 2000/XP
• GPRS/Fax option (included in the subcription contract with your SIM card operator)
®
II 233MHz (or faster) CPU
2.2 Driver installation
2.2.1 Windows XP/2000 driver installation
Make sure to insert the GSM/GPRS CF+ card into the card slot before
installing the driver.
1. Turn on your notebook PC. The
Found New Hardware Wizard
appears to guide you through the
installation. Click Next.
2. Select GPRS Modem. Click
Next.
Chapter 2
3. Click Finish to complete the
installation.
GSM/GPRS CF+ Card 2-1
Page 15

Notebook PC installation
2.2.2 Windows 98/ME driver installation
Make sure to insert the GSM/GPRS CF+ card into the card slot before
installing the driver.
1. Turn on your notebook PC. The
Chapter 2
3. Check Specify a location. Insert
Add New Hardware Wizard
appears to guide you through the
installation. Click Next.
the support CD and click Browse
to select the path E:\Driver.
2. Select Search for the best driver
for your device (Recommended).
Click Next.
4. Click Next.
4. Click Finish to complete the
installation.
2-2 GSM/GPRS CF+ Card
Page 16

Notebook PC installation
2.3 Installing mobile PhoneTools
To install mobile PhoneTools:
1. Make sure that that GSM/GPRS CF+ card is installed in the card slot of your
notebook PC.
2. Insert the support CD into the CD-ROM drive. The mobile PhoneTools setup
program is automatically launched if Autorun is enabled in your PC.
If the setup program did not start automatically, follow these steps:
a. Select the Run command from the Start menu on the taskbar.
b. Assuming that D: is your CD-ROM drive, type D:\Setup.exe on the
command bar.
OR
Select the drive that contains the support CD. Click Browse, double-
click Setup.exe .
3. The installation wizard starts and guides you through the step-by-step
installation. Follow the screen prompts to complete the installation.
The mobile PhoneTools program group is added to your Start menu, and the
icon
the program.
Proceed to the next page for the step-by-step installation process.
is appears on your desktop after you have successfully installed
Chapter 2
GSM/GPRS CF+ Card 2-3
Page 17

Notebook PC installation
mobile PhoneTools installation process
1. Launch the installation wizard.
Chapter 2
3. Click on Install the application. 4. Click Install mobile PhoneTools.
(See step 2 on the previous page.)
2. Select your desired language from
the list that appears.
5. The mobile PhoneTools setup
screen appears. Click Next to
continue the installation.
2-4 GSM/GPRS CF+ Card
6. Read the license agreement, then
click Yes.
Page 18

Notebook PC installation
7. Enter your registration
information. Click Next.
9. If you have previously installed
mobile PhoneTools, you will be
asked if you want to keep the
documents (files) from the
previous version. Click Yes to
keep, or No to erase files from the
previous version.
8. Specify the destination folder for
the PhoneTools files. Click Next.
Chapter 2
10. Specify the program folder where
Setup will add the PhoneTools
program icons. Click Next.
11. Review your settings then click
Next to start copying the program
files. Click Back if you want to
change any of the settings.
GSM/GPRS CF+ Card 2-5
12. Wait while Setup copies and
installs the program files. The
screen shows the setup status.
Click Cancel if you wish to stop
the installation.
Page 19

Notebook PC installation
13. Specify the phonebook that you
Chapter 2
15. After you have restarted your
wish to use with mobile
PhoneTools. You may either select
from the available list or create a
new phonebook. Click Next.
computer, run the mobile
PhoneTools. From your Windows
desktop, click Start then
Programs. Select mobile
PhoneTools to specify your
location, and phone and modem
information.
14. Check the item Yes, I want to
restart my computer now.
Click Finish to complete Setup
and restart your computer.
16. Type in the required information,
then click OK when done.
The mobile PhoneTools user
interface appears after you have
finished the settings. See next
section for the user interface
functions.
You only need to set your location, and phone and modem information
the first time you run mobile PhoneTools. The above screens will not
appear the next time you run the program.
2-6 GSM/GPRS CF+ Card
Page 20

Notebook PC installation
2.4 mobile PhoneTools functions
Make sure that you have inserted a SIM card into the GSM/GPRS CF
card if you wish to make a call or connect to the Internet. See section
“1.5 Installing and removing a SIM card” for instructions.
Click to close mobile PhoneTools
Click to minimize mobile
PhoneTools and place an icon on
Network signal indicator
Roaming indicator
Click to display
your phonebook
Click to display
online help
the taskbar
Battery power indicator
When blinking, indicates that you
have new email or fax messages
Network operator name
Click to display special functions
Chapter 2
Click to make a call
connection after
dialing a desired
phone number
Click to terminate a call
Click to access all mobile
PhoneTools functionalities
and setup options
Launches or ends GPRS connection
Opens the Send Message window to
write and send SMS messages
Opens the Send E-mail window
Opens the Phonebook
Synchronizes your Phonebook
Provides information on cellular,
phonebook, and SMS capacities
Click the mobile PhoneTools icon on your desktop anytime to
display the user interface.
GSM/GPRS CF+ Card 2-7
Page 21

Notebook PC installation
2.5 Creating a GPRS connection
1. Click the Menu button. From the
Chapter 2
pop-up menu, click Setup then
select Internet connections...
2. Double-click the Add New GPRS
Connection icon.
3. Click Next.
4. Select Create a new connection.
Click Next.
2-8 GSM/GPRS CF+ Card
Page 22

Notebook PC installation
5. Type a name for your connection.
Select the country where you are
located and your operator (service
provider). Click Next.
7. Enter the access point name
(APN) provided by your operator.
Click Next.
6. Select the type of connection that
you wish to set up. Click Next.
Chapter 2
8. Enter the IP address provided by
your operator. Click Next.
9. Set your network access
configuration based on the
information provided by your
operator. Click Next.
GSM/GPRS CF+ Card 2-9
10. Click Next.
Page 23

Notebook PC installation
11. Click Next. 12. When prompted to create a fall-
Chapter 2
back connection, select No.
13. Click Finish when done creating a
GPRS connection.
14. The GPRS connection icon
appears on the window. Doubleclick the icon whenever you wish
to connect to the network.
2-10 GSM/GPRS CF+ Card
Page 24

Pocket PC installation
3.1 System requirements
Before using your GSM/GPRS CF+ card, make sure that you have the
following:
• A PDA (Pocket PC) with at least 6MB free space, a Type II CF card slot, and
a Pocket PC 2002 operating system
®
• A computer with Windows
98/ME/2000/XP operating system
3.2 Installing pocket PhoneTools
Make sure that you have installed ActiveSync® on your computer
before installing pocket PhoneTools. Refer to your Pocket PC user
manual for more information on ActiveSync®.
To install pocket PhoneTools:
1. Connect your Pocket PC to your
computer.
2. Insert the support CD into the
CD-ROM drive. The pocket
PhoneTools setup program is
automatically launched if
Autorun is enabled in your
computer.
If the setup program did not start automatically, follow these steps:
a. Select the Run command from the Start menu on the taskbar.
b. Assuming that D: is your CD-ROM drive, type D:\Setup.exe on the
command bar.
OR
Select the drive that contains the support CD. Click Browse, double-
click Setup.exe .
Chapter 3
3. The installation wizard starts and guides you through the step-by-step
installation. Follow the screen prompts to complete the installation.
Proceed to the next page for the step-by-step installation process.
GSM/GPRS CF+ Card 3-1
Page 25

Pocket PC installation
pocket PhoneTools installation process
1. Launch the installation wizard.
Chapter 3
3. Click on Install the application. 4. Click Install pocket PhoneTools.
(See step 2 on the previous page.)
2. Select your desired language from
the list that appears.
5. The pocket PhoneTools setup
screen appears. Click Next to
continue the installation.
3-2 GSM/GPRS CF+ Card
6. Read the license agreement, then
click Yes.
Page 26

Pocket PC installation
7. Specify the destination folder for
the PhoneTools files. Click Next.
9. The screen shows your computer
establishing a connection to your
mobile device. Click Cancel if
you wish to stop the process.
8. Wait while Setup copies and
installs the program files. The
screen shows the setup status.
Click Cancel if you wish to stop
the installation.
10. When prompted, click Yes to use
the default BVRP Software
pocket PhoneTools directory, or
click No if you wish to install the
files to another directory.
Chapter 3
11. The screen shows the installation
status. Click Cancel if you wish to
stop the process.
GSM/GPRS CF+ Card 3-3
12. When done, you are asked to
check your mobile device if you
need to perform additional steps to
complete the installation. Click
OK.
Page 27

Pocket PC installation
13. When the installation is complete,
Chapter 3
the pocket PhoneTools icon
appears in the Programs menu of
your mobile device. Proceed to the
next section to run and configure
pocket PhoneTools.
3-4 GSM/GPRS CF+ Card
Page 28

Pocket PC installation
3.3 Running pocket PhoneTools
1. From the Programs window, tap
the pocket PhoneTools icon.
2. Tap Yes when prompted to select a
network operator.
Chapter 3
3. Type the required operator
settings. Tap OK .
4. Tap OK.
GSM/GPRS CF+ Card 3-5
Page 29

Pocket PC installation
5. When prompted, tap Yes to save
Chapter 3
your changes.
6. After saving your changes, the
pocket PhoneTools interface
appears. Proceed to the next
section for information on the
pocket PhoneTools functions.
To connect to a network, proceed to section “3.5 Creating a GPRS
connection.”
3-6 GSM/GPRS CF+ Card
Page 30

Pocket PC installation
3.4 pocket PhoneTools functions
3.4.1 Main menu
Tap to display sent messages
Tap to display the Outbox items
Tap to display the Inbox items
Tap to sort items
Display area
Tap to display your
cellular phonebooks
Toolbar items
Toolbar items
Tap to retrieve SMS Tap to launch the Dialer menu
Tap to create a
new SMS
Tap to show or
hide the toolbar
Tap to add a
phonebook entry
Chapter 3
Tap to connect to
the Internet
See the Pocket PC online help for more details on the pocket
PhoneTools functions.
GSM/GPRS CF+ Card 3-7
Page 31

Pocket PC installation
3.4.2 Dialer menu
To launch the Dialer menu, simply tap the Dialer... icon on the main menu
toolbar.
Tap to end a phone call
Chapter 3
Tap to make a phone call
Tap to connect to
the Internet
Tap to dial the
number you
wish to call
Tap to clear an dialled number
Tap to display
battery status
Tap to display
connection status
Tap to turn speaker
ON or OFF
Tap to turn microphone
ON or OFF
Tap and hold this
slider to adjust the
audio volume
Tap to display a log of your calls
Tap to make a fast call from a
stored phone number
Tap to select a contact number
See the Pocket PC online help for more details on the Dialer functions.
3-8 GSM/GPRS CF+ Card
Page 32

Pocket PC installation
3.5 Creating a GPRS connection
1. From the PhoneTools taskbar, tap
Tools then Settings.
2. From the General Setup screen,
tap Internet Connection.
Chapter 3
3. Tap New... to create a connection.
4. Type a name for your connection
then tap Next.
GSM/GPRS CF+ Card 3-9
Page 33

Pocket PC installation
5. Check the box beside Internet
Chapter 3
Explorer. Tap Next.
6. Select GPRS for the network to
use. Tap Next.
7. Enter the access point name
(APN) provided by your operator.
Tap Next.
8. Configure your IP address based
on the information provided by
your operator. Tap Next.
3-10 GSM/GPRS CF+ Card
Page 34

Pocket PC installation
9. Configure your DNS addresses
based on the information provided
by your operator. Tap Next.
10. Tap Next.
11. Tap Next. 12. Select No when prompted to
create a fall-back connection. Tap
Next.
Chapter 3
GSM/GPRS CF+ Card 3-11
Page 35

Pocket PC installation
13. The new connection you created
Chapter 3
My Connection is added to the
list. Tap OK to close the window
and return to the General Setup
menu.
14. Tap the OK to go to the pocket
PhoneTools main menu.
15. Tap the Internet connection icon
to start connecting to a network.
16. Tap the network connection icon
on the taskbar to display the
connection status.
Internet Connection
3-12 GSM/GPRS CF+ Card
 Loading...