How it Works
Log In / Sign Up
Buy Points
How it Works
FAQ
Contact Us
Questions and Suggestions
Users
Asus
Loading...
T
TH8319
TH8355
TH8435
TH8492
TH8496
TH8517
TH8553
TH8609
TH8619
TH8654
TH8713
TH8770
TH8798
TH8803
TH8828
TH8923
TH8994
2
th9024
TH9036
TH9042
TH9054
TH9105
TH9152
TH9159
TH9188
TH9330
TH9364
TH9399
th9510
TH9526
TH9537
TH9561
TH9564
TH9627
TH9655
TH9802
TH9813
Theta 7.1
Theta Electret
Throne
Throne Qi Gundam LTD
ThunderboltEX 3
2
ThunderboltEX 3-TR
2
ThunderboltEX II
2
Thunderboltex Ii-dual
Tinker board
3
Tinker Board S
Tinker Boars S
Tinker Edge R
Tinker R/BR
2
TINKER S/BR
2
TLL37100
TLL42200
2
TLW32001
3
TLW42001
2
TM420IA-EC044T
TM420IA-EC173T
3
TM-55
TM-58
TM8
TM-AC1900
3
TotalMedia Theatre
Touch VT168H
TP200SA
31
TP200SA-FV0110TS
TP200SA-FV0131T
TP201SA
TP201SA-FV0007T
TP202NA
2
TP202NA-EH008R
TP202NA-EH008T
TP202NA-EH008TS
4
TP203MAH
30
TP203NA
32
TP203NA-BP027TS
TP203NA-BP034TS
TP203NA-BP038T
TP203NA-BP055TS
TP203NAH
32
TP300LA
22
TP300LD
TP300LJ
35
TP300UA
32
TP301U
TP301UA
31
TP301UJ
31
TP370QL
33
TP370QL-EL001T
TP401CA
32
TP401CAE
33
TP401MA
3
TP401MA-BZ044TS
TP401NA
31
TP410UA
34
TP410UA-EC658R
TP410UF
30
TP410UR
31
TP412FA
4
TP412FA-EC013T
TP412FA-EC035T
2
Loading...
Loading...
Nothing found
TINKER S/BR
User’s Manual
14 pgs
1.39 Mb
0
User’s Manual [pt]
2 pgs
1.55 Mb
0
Table of contents
Loading...
Asus TINKER S/BR User’s Manual
...
Asus User’s Manual
Download
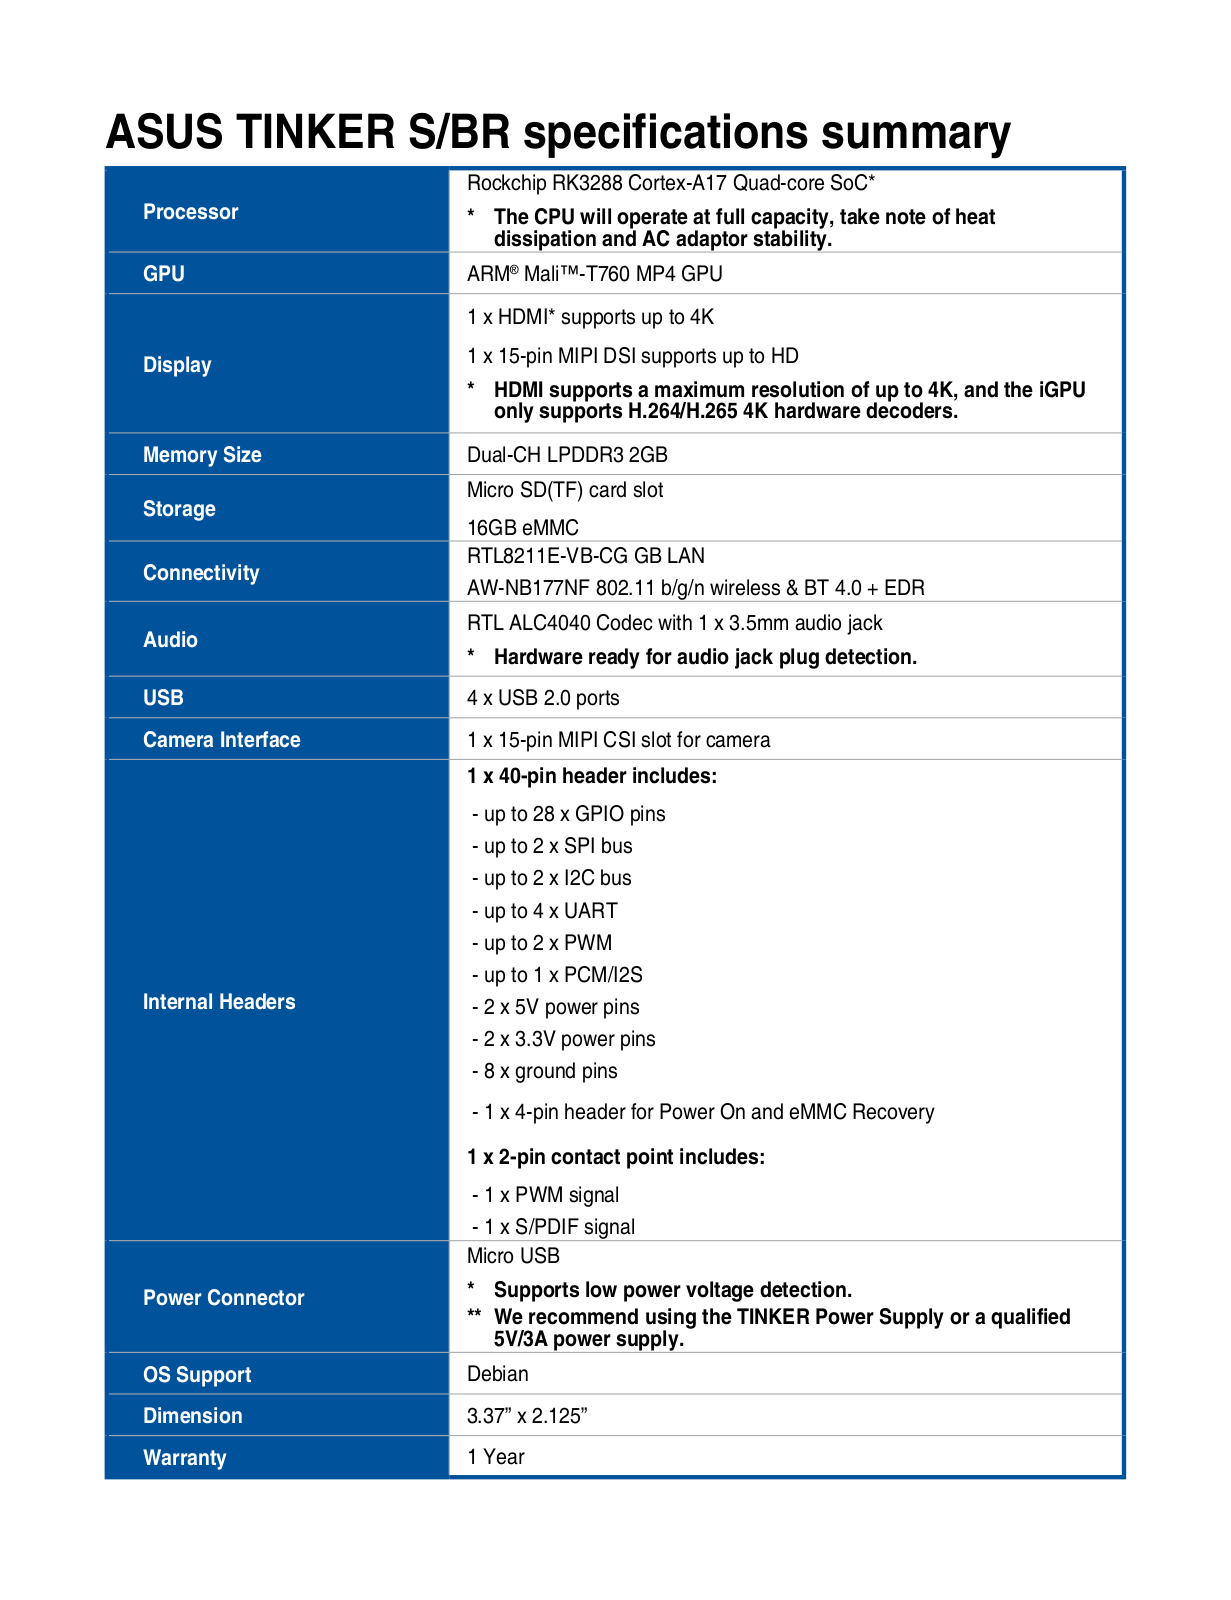
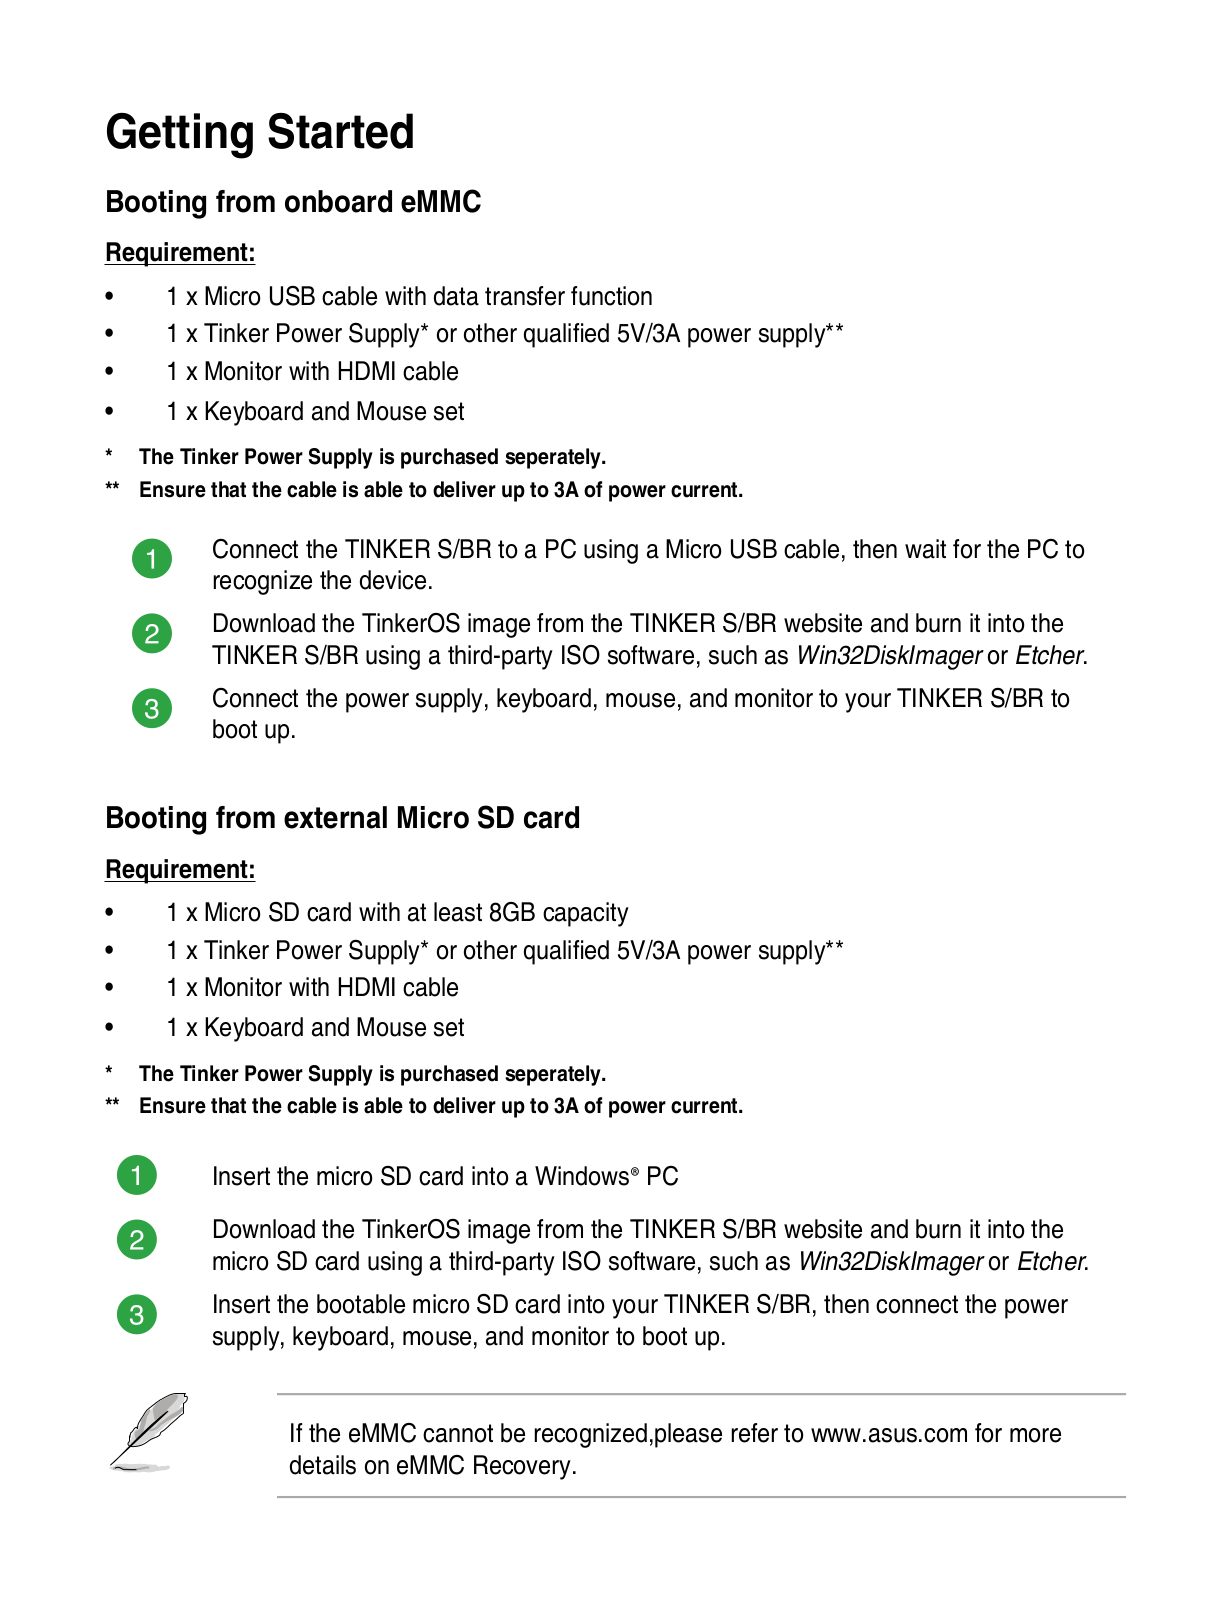
Specifications and Main Features
Frequently Asked Questions
User Manual
Download
Loading...
+
9
hidden pages
Unhide
You need points to download manuals.
1 point = 1 manual.
You can buy points or you can get point for every manual you upload.
Buy points
Upload your manuals
 Loading...