


Eee Pad User Manual
TF201 Series
E6835
ASUS is devoted to creating environment-friendly products/
packagings to safeguard consumers’ health while minimizing
the impact on the environment. The reduction of the number
of the manual pages complies with the reduction of carbon
emission.
For the detailed user manual and related information, refer
to the user manual included in the device or visit the ASUS
Support Site at http://support.asus.com/
There are three main types of airport security devices: X-ray machines (used
on items placed on conveyor belts), magnetic detectors (used on people
walking through security checks), and magnetic wands
(hand-held devices used on people or individual items). You can send your
Eee Pad through airport X-ray machines. But do not send your Eee Pad
through airport magnetic detectors or expose it to magnetic wands.
Airplane Precautions
Ask an airline personnel if you want to use your Eee Pad onboard an aircraft.
Most airlines have restrictions for using electronic devices. Most airlines allow
electronic use only between and not during takeos and landings.
Charging Your Batteries
If you intend to use battery power, be sure to fully charge your battery pack
before going on long trips. Remember that the power adapter charges the
battery pack as long as it is plugged into the computer and an AC power source.
Be aware that it takes much longer to charge the battery pack when the Eee Pad
is in use.
Remember to fully charge the battery (8 hours or more) before rst use and
whenever it is depleted to prolong battery life. The battery reaches its maximum
capacity after a few full charging and discharging cycles.
ASUS Eee Pad
2
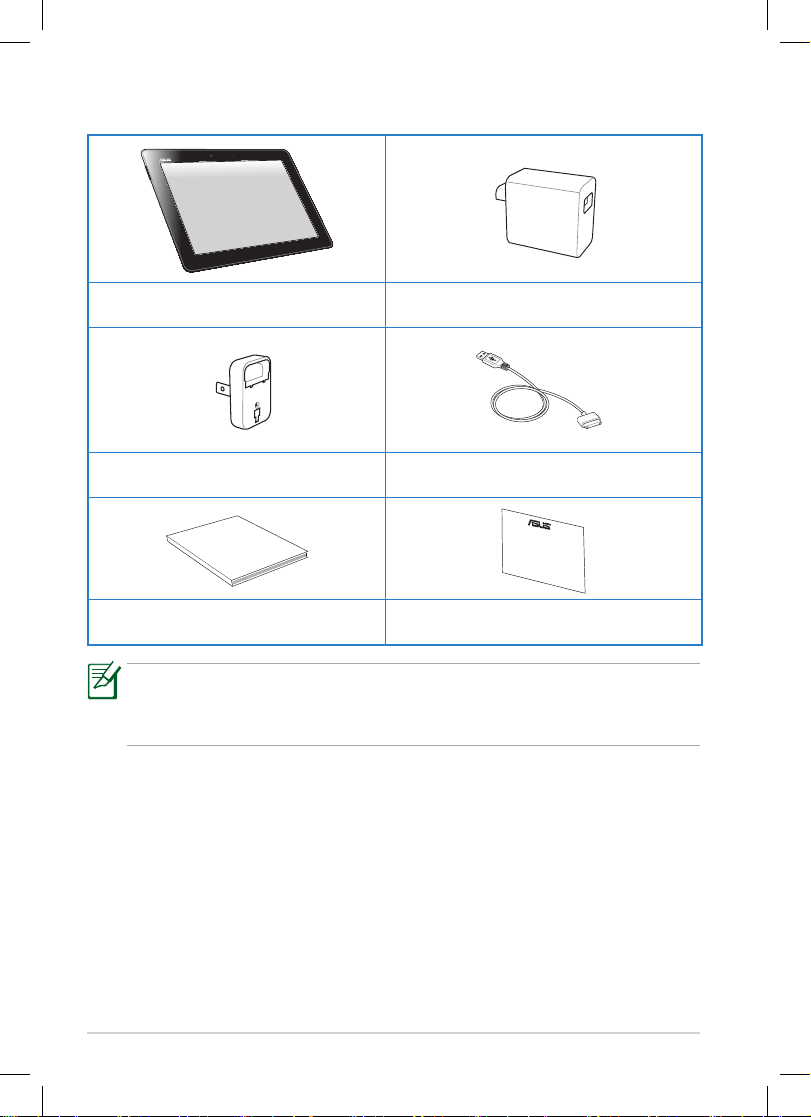
Package Contents
• If any of the items is damaged or missing, contact your retailer.
• The power plug that comes with your Eee Pad may vary depending
on your territory to t the wall outlet.
Eee Pad USB Charger
Power Plug Docking connector to USB cable
User Manual
User Manual Warranty Card
ASUS Eee Pad
3
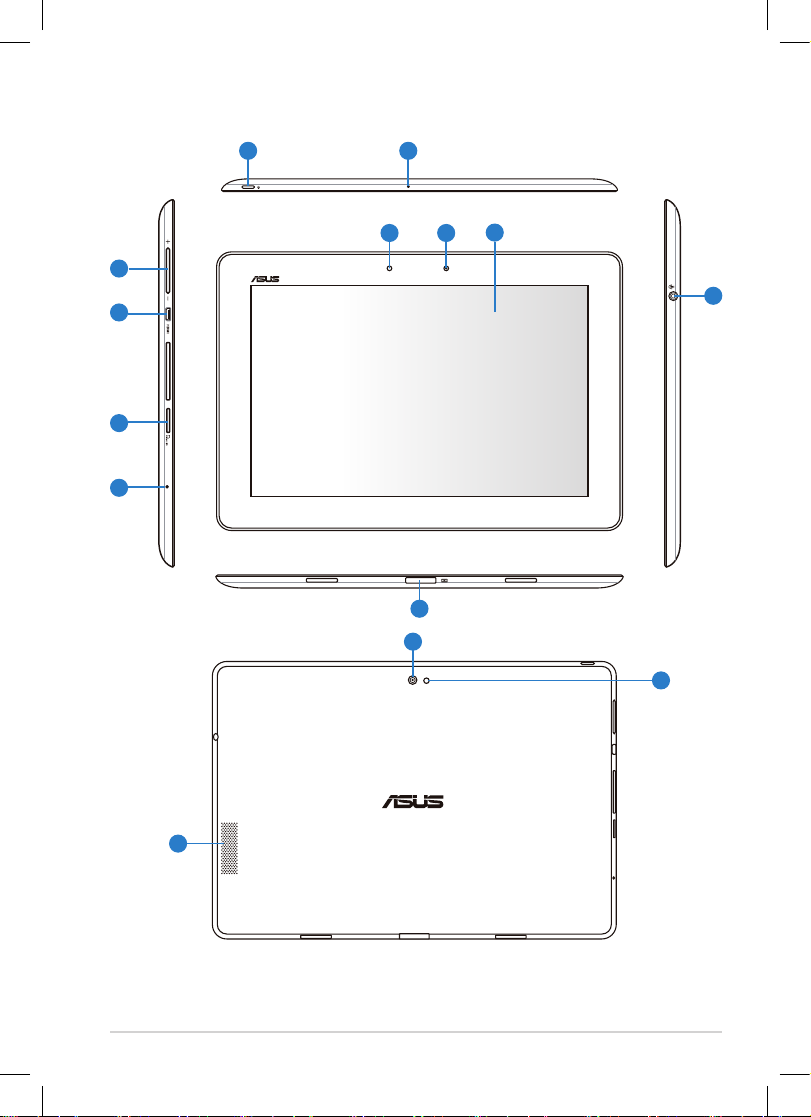
Your Eee Pad
10
21
11
3
5
4
6
7
9
8
13
12
14
ASUS Eee Pad
4
1
Power button
The power button turns your Eee Pad on/o. Hold the power button
for 2 seconds and release the button to power on your Eee Pad. When
the Eee Pad is powered on, press the power button to put the Eee
Pad into sleep mode or wake it up from sleep mode. Hold the power
button for 0.5 second to display the shutdown dialog box.
2
Built-in Microphone
The built-in mono microphone can be used for video conferencing,
voice narrations, or simple audio recordings.
3
Volume Key
Press this button to increase or decrease the system volume.
4
micro HDMI port
Insert a micro HDMI cable into this port to connect to a highdenition multimedia interface (HDMI) device.
5
Micro SD Card Slot
Insert Micro SD card into this slot.
6
Reset Button
If the system becomes unresponsive, press the reset button to force
the Eee Pad to restart.
Forcing the system to restart may result in data loss. Please
inspect your data to ensure there is no data loss. It is strongly
recommended that important data be backed up regularly.
7
Light Sensor
The light sensor detects the amount of light in your environment and
automatically adjust the brightness of the display panel for better
viewing.
8
Built-in front Camera
Use the built-in camera for picture taking, video recording, video
conferencing, and other interactive applications.
 Loading...