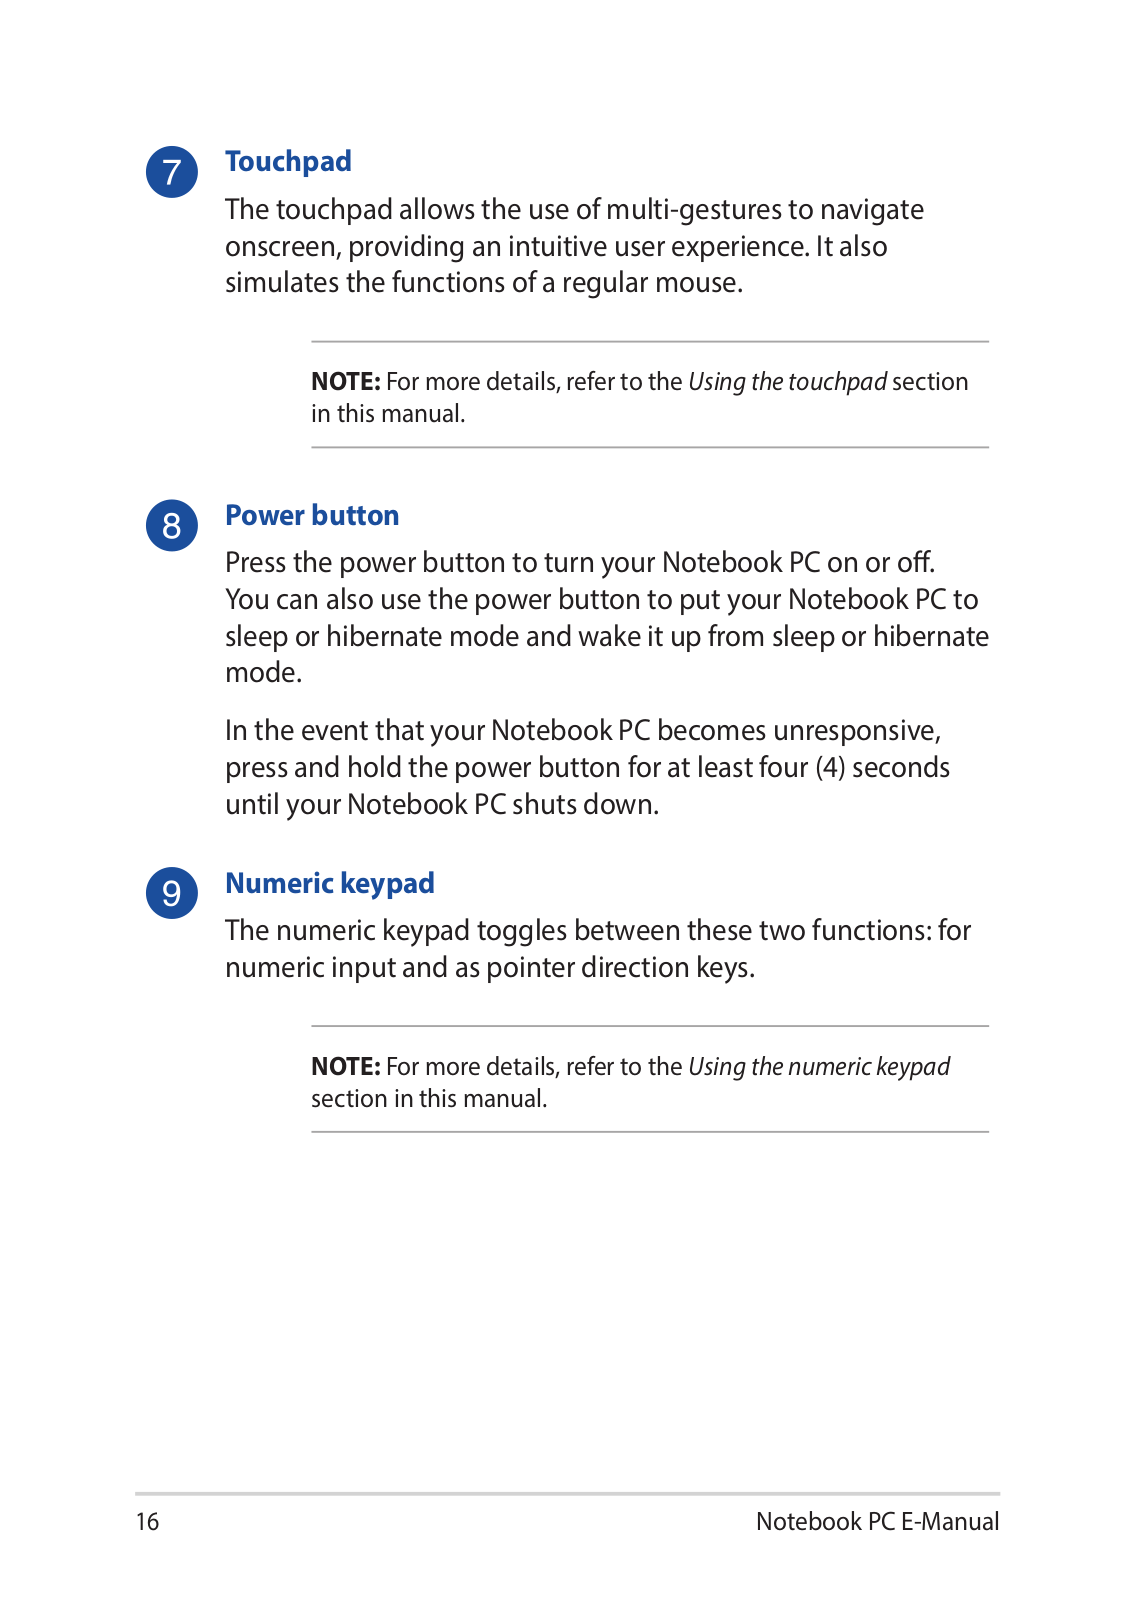
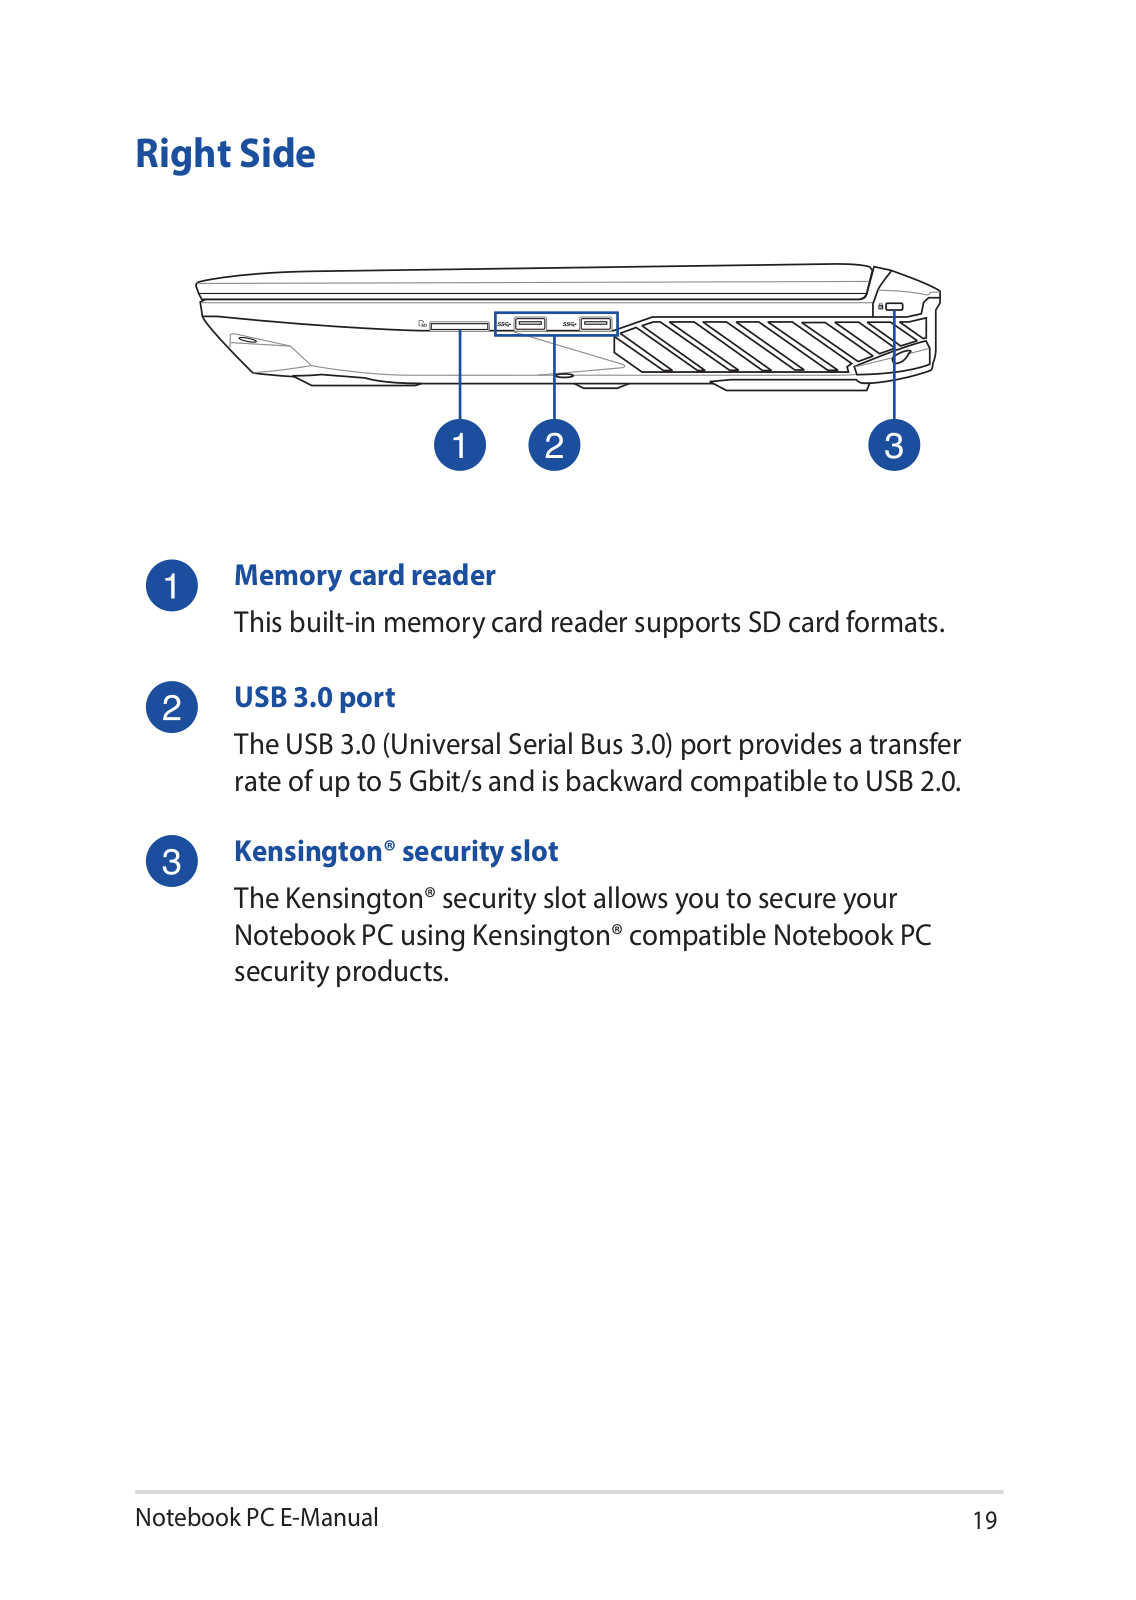
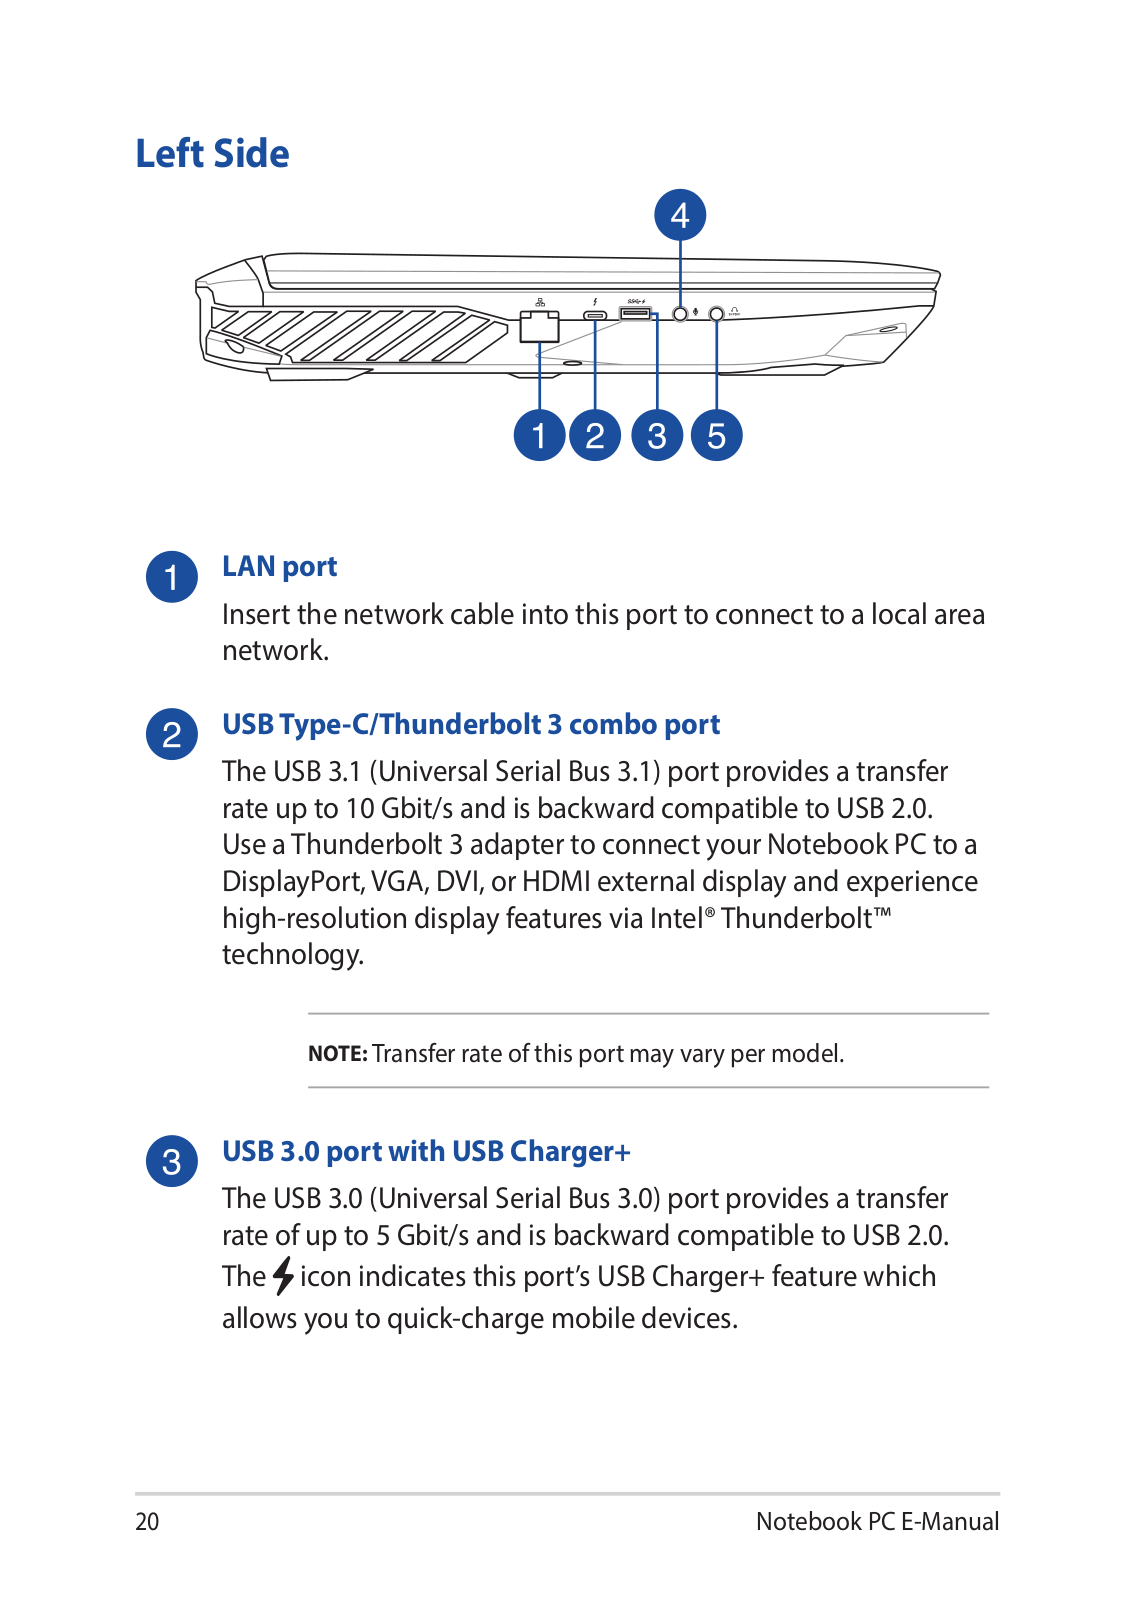
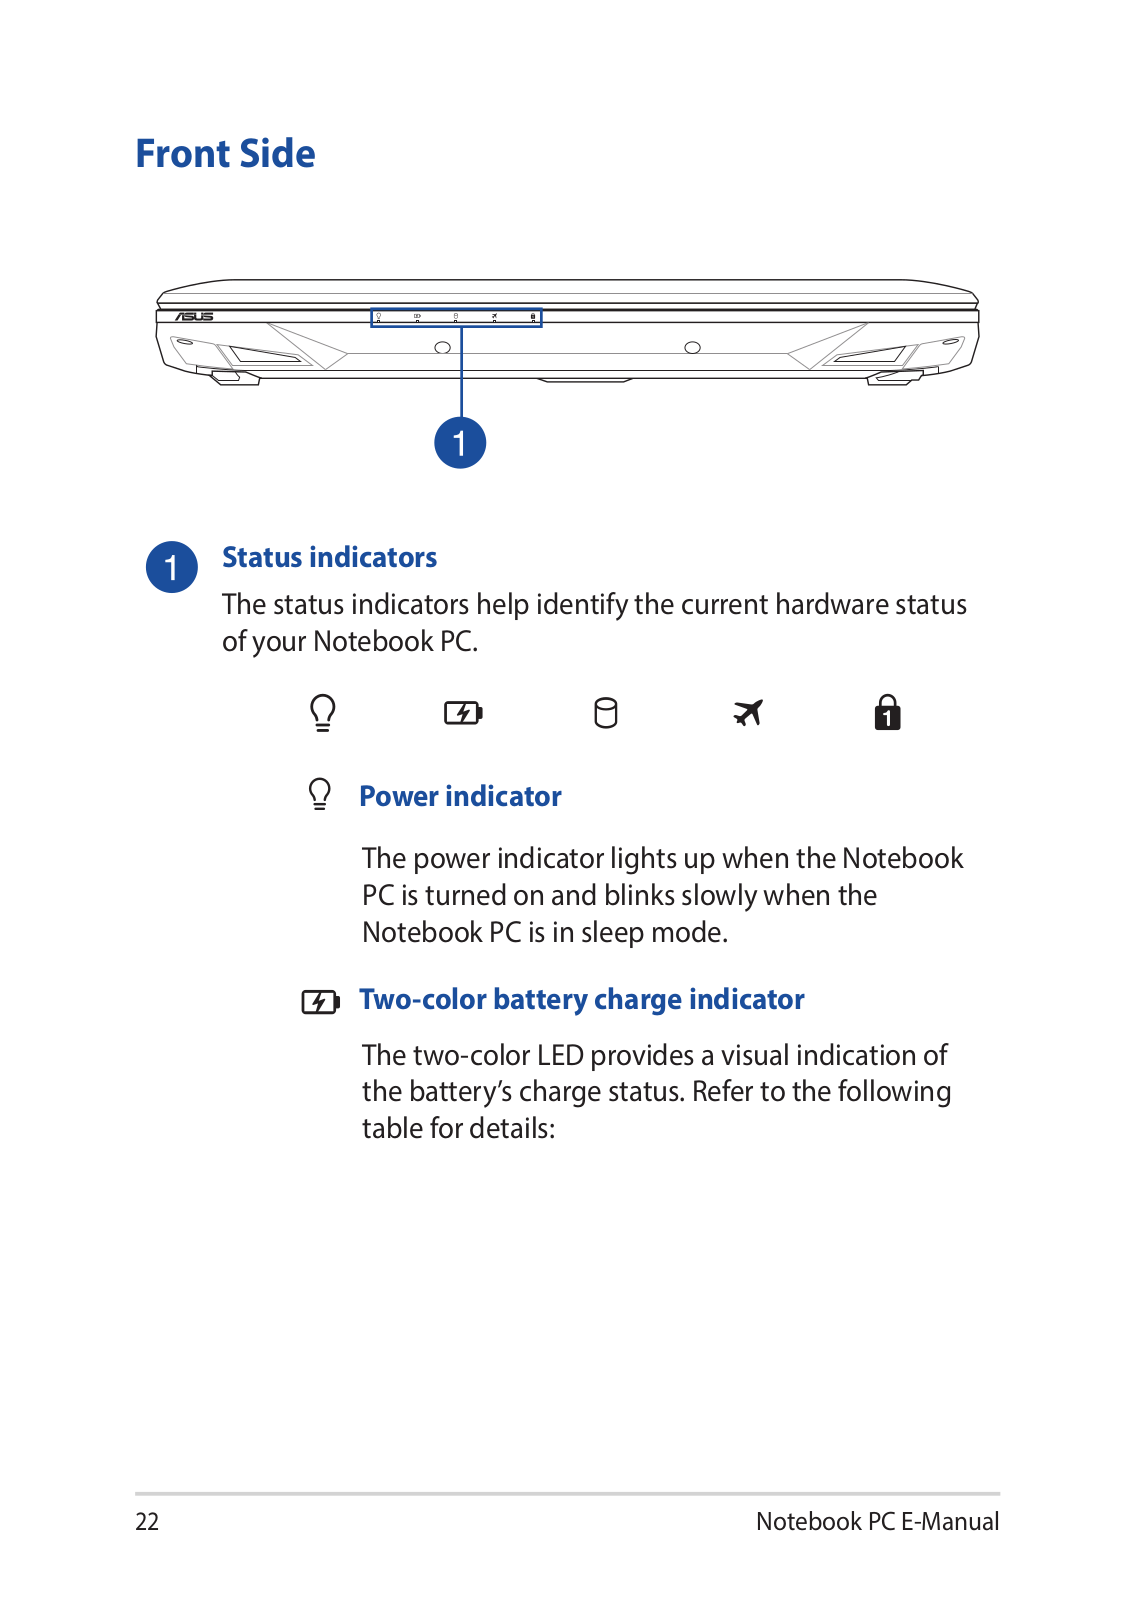
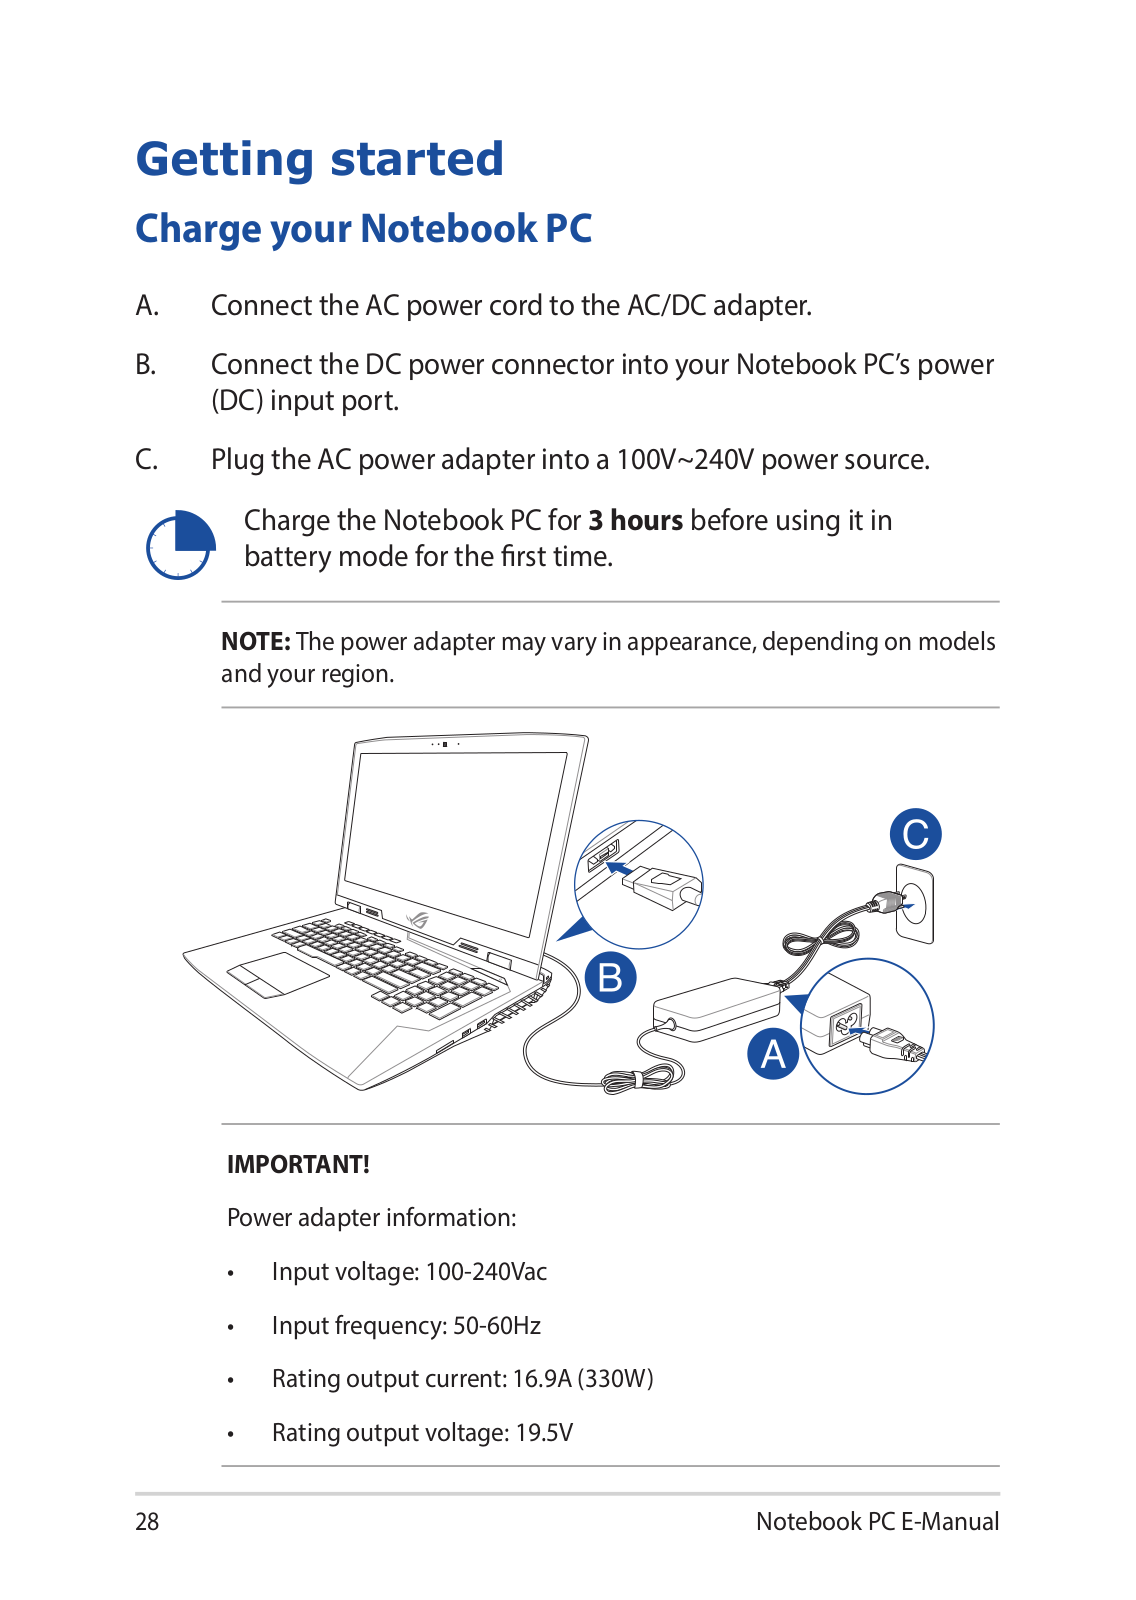
How it Works
Log In / Sign Up
Buy Points
How it Works
FAQ
Contact Us
Questions and Suggestions
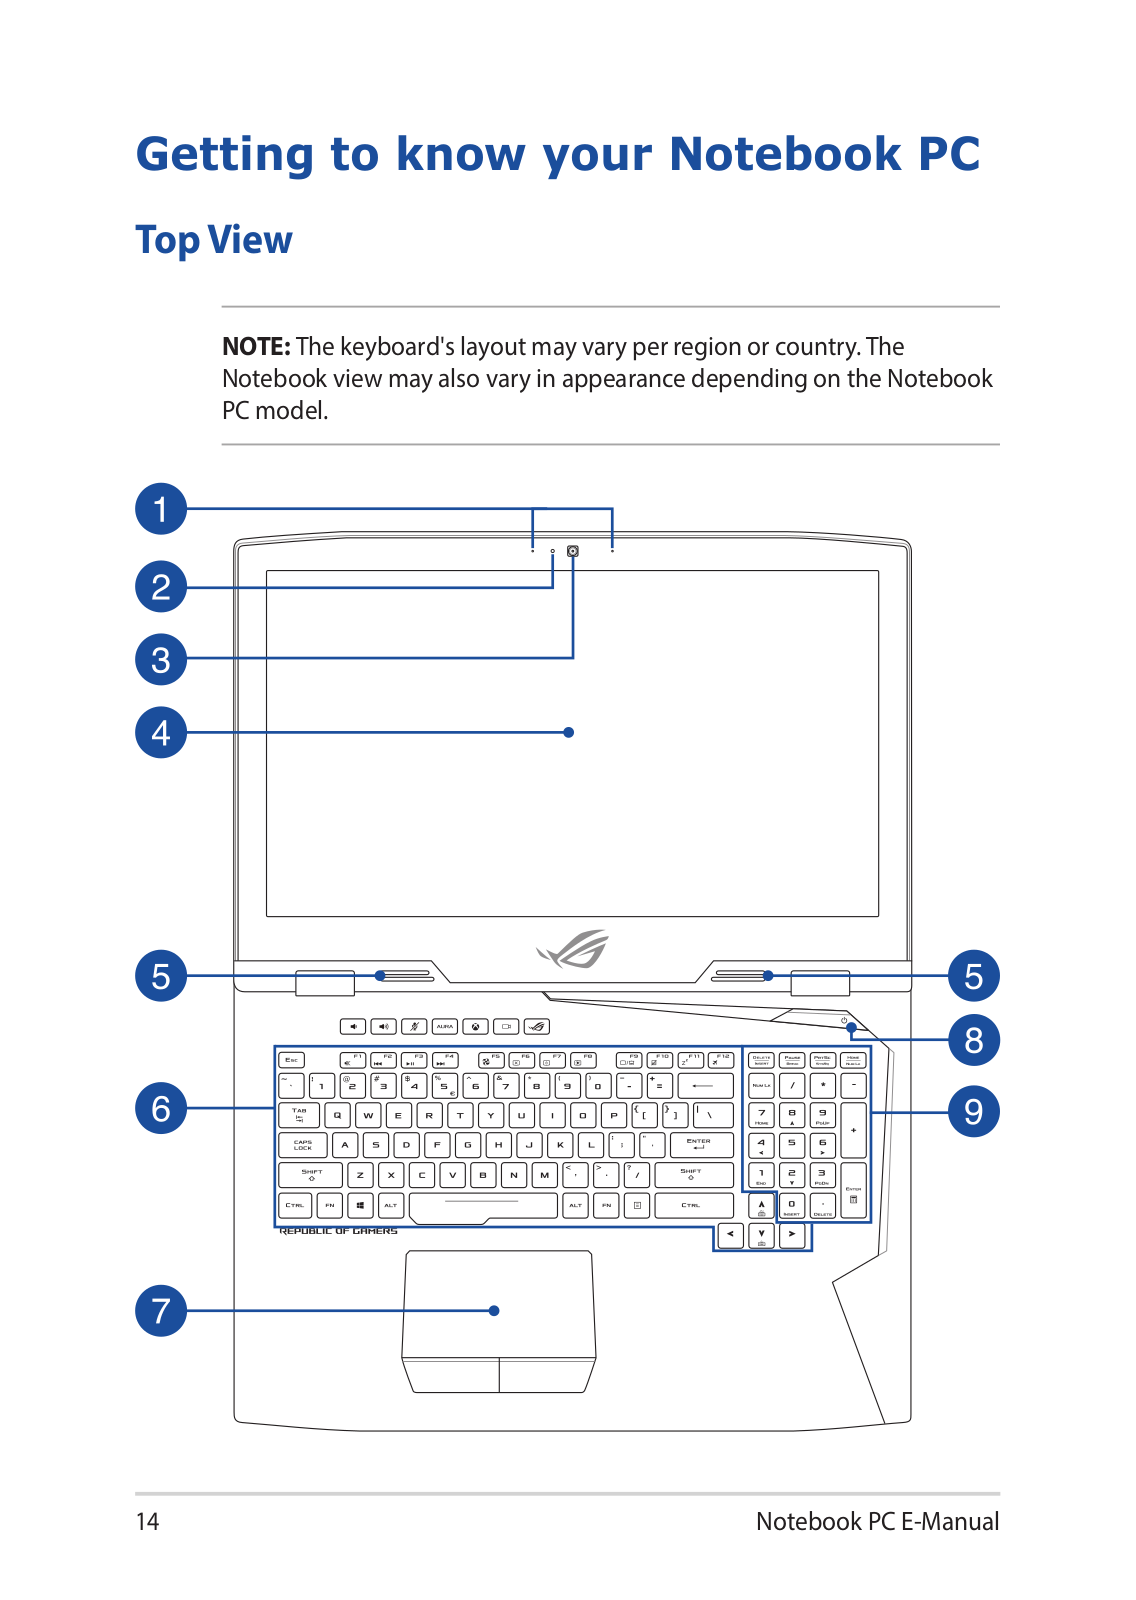
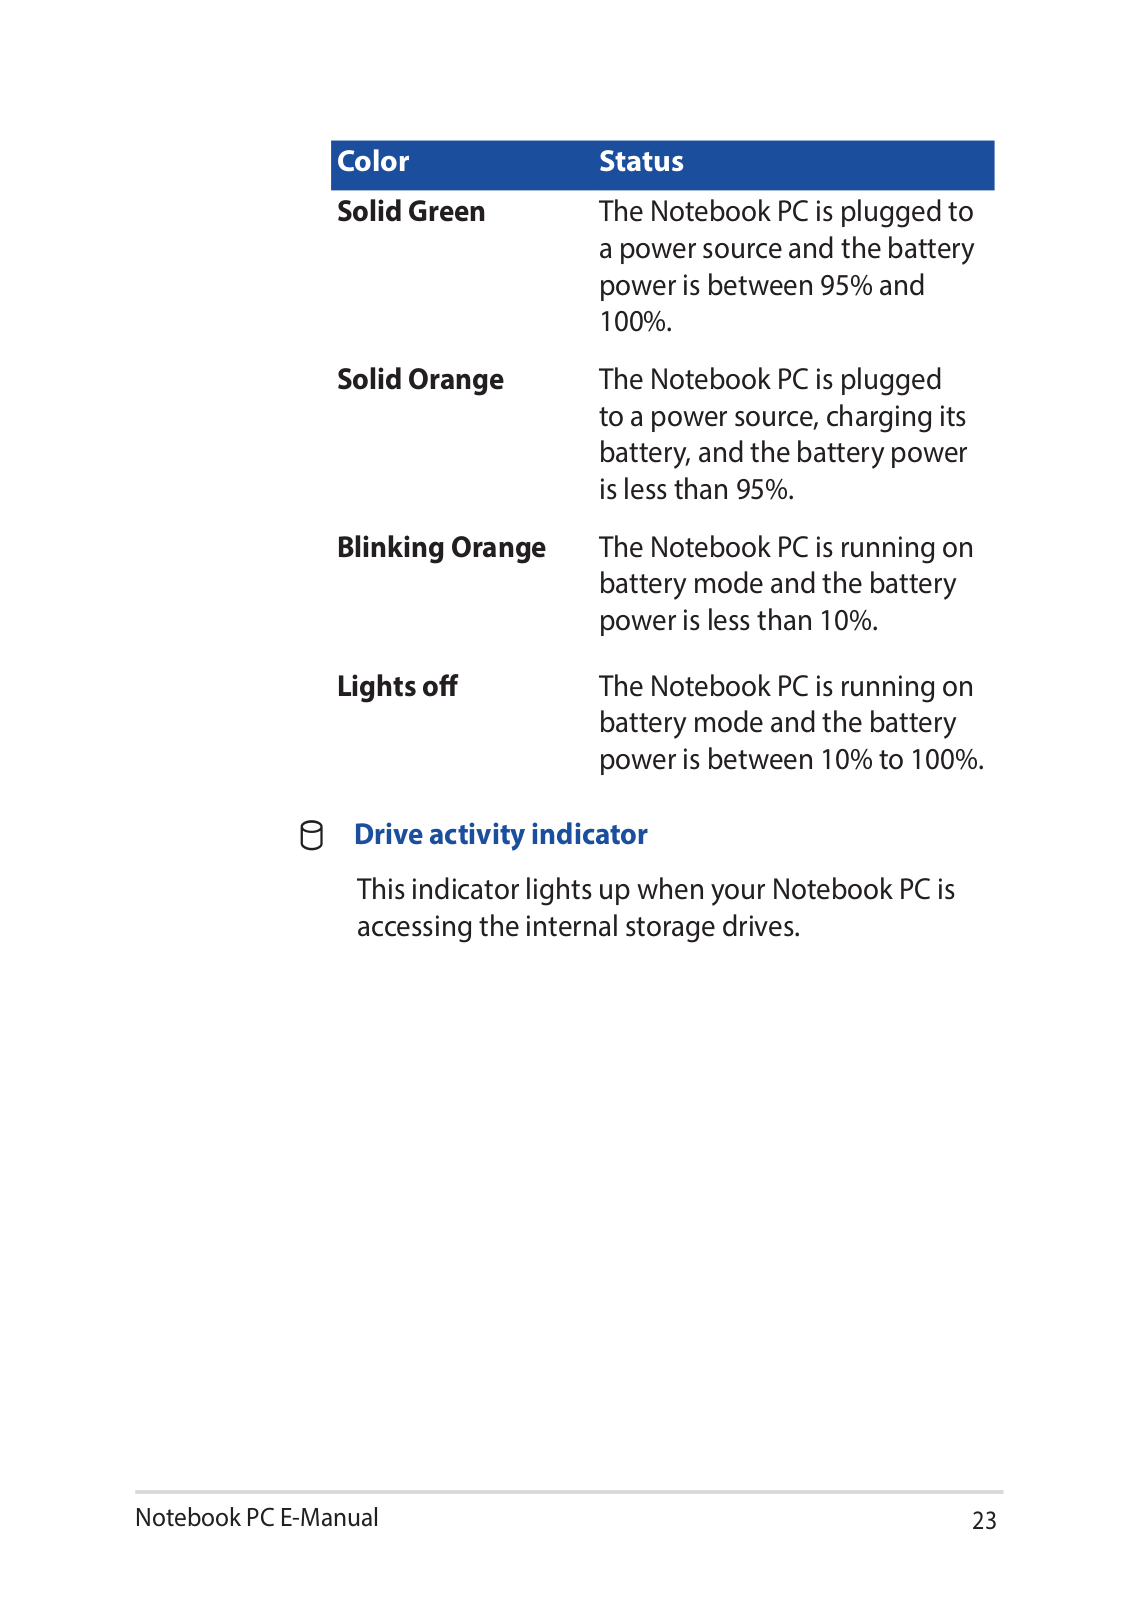
Users
Asus
Loading...
G
G551VW
32
G552VW
28
G552VW-DM475T
G552VW-DM773T
G552VX
23
G553V
G55VW
4
G55VW-DS71
G55VW-S1129V
G55VW-S1167H
G55VW-SO039V
G55VW-SO106V
G56JK
30
G56JK-CN128H
G56JR
29
G56JR-CN283H
G58V
G58VW
32
G60
G6072
G6093
G60J
21
G60J-JX017V
G60J-JX027V
G60J-JX031V
G60J-JX057V
G60JW
32
G60JX
10
G60VW
30
G60VX
G60VX-JX038C
G60Vx-JX040C
G60VX-JX150V
G6428
G6434
G6911
G6932
G6951
G6997
G7003
G701VI
28
G701VI-BA030T
G701VIK-BA045T
G701VIK-GB042T
G701VO
31
G702VS
21
G702VT-GC006T
G703
38
G7034
G703GI
G703GI-E5088R
G703GS
G703GS-E5051T
G703GX
G703GX-E5055T
G703GX-E5088T
G703GXR-EV003T
2
G703GXR-EV028T
G703GXR-EV038T
G703GXR-EV051T
G703VI
G703VI-E5132T
G703VI-GB008T
G703VM
G7040
G7047
G7075
G7094
G7096
G7097
G7098
G70AB
26
G70S
2
G70S-7T015G
G70S-7T025G
G70S-7T051G
G70SG-7T002G
G70V
5
G712LU
65
G712LU-EV013T
G712LV
65
G712LW
65
G713IH
66
G713IM
65
G713IR
65
G713QE
65
G713QM
65
G713QM-HX038
G713QR
67
G7147
G7163
G7198
G71G
2
G71G-7T020G
G71G K40IN
G71GX
5
G71V
3
G71V-7T043G
G7220
G7246
Loading...
Loading...
Nothing found
G703GI-E5088R
User Manual
114 pgs
8.67 Mb
0
Table of contents
Loading...
Asus G703GI-E5088R User Manual
...
Asus User Manual
Download
Loading...
+
84
hidden pages
Unhide
You need points to download manuals.
1 point = 1 manual.
You can buy points or you can get point for every manual you upload.
Buy points
Upload your manuals
 Loading...