

Page 1
Quick Use Guide
E4041
15G06Q048000
Windows® XP Edition
Page 2
Quick Use Guide - 2
Remember to fully charge the battery before first use and
whenever it is depleted to prolong battery life.
Status Indicators
Status indicators represent various hardware/software conditions.
Power Indicator
Battery Charge Indicator
When you open the display panel, do not force it down to the
table or else the hinges may break! Never lift the Eee PC by the
display panel!
Solid State disk (SSD)
Indicator
Wireless Indicator
Damage may occur if you
use a different adapter
to power the Eee PC. You
may damage both your
battery pack(s) and the
Eee PC with a faulty AC-DC
adapter.
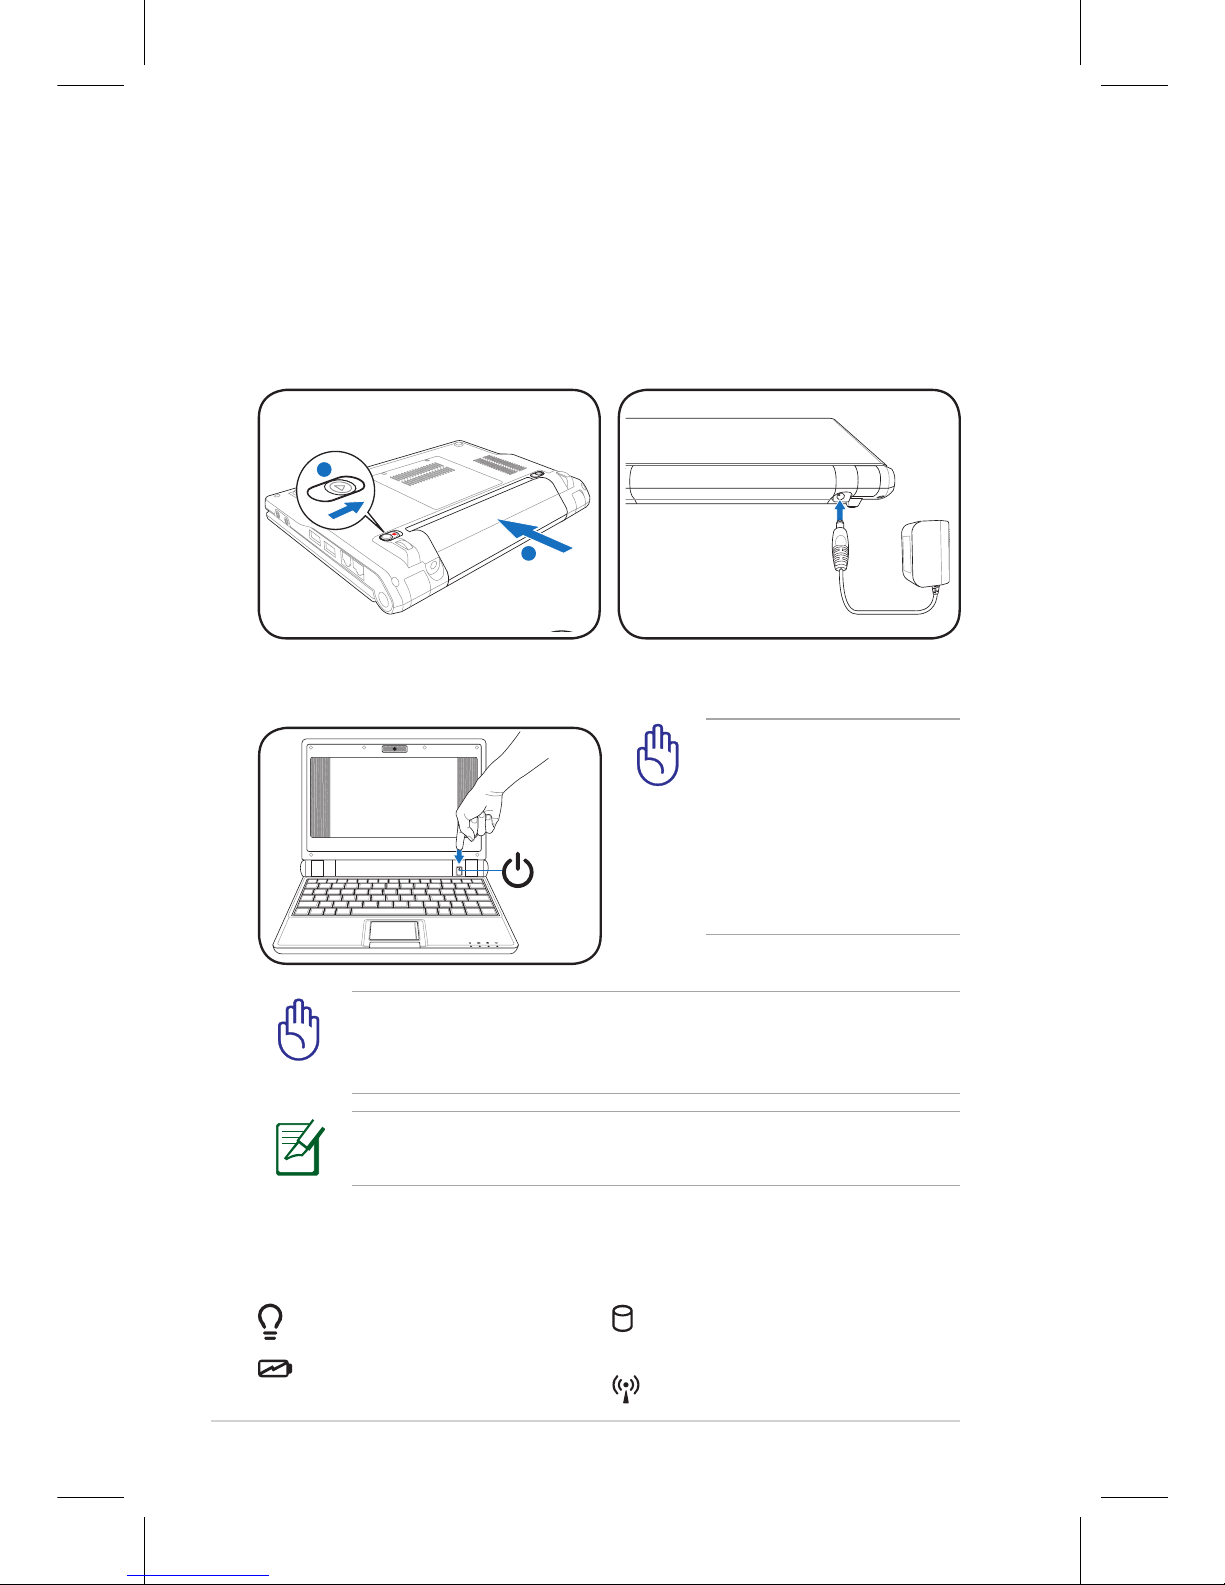
Powering on your Eee PC
These are only quick instructions for using your Eee PC. Read the full
manual for detailed information.
1. Install the battery pack
2. Connect the AC power
adapter
1
1
2
3. Turn ON the Eee PC
Page 3
Quick Use Guide - 3
Shutdown
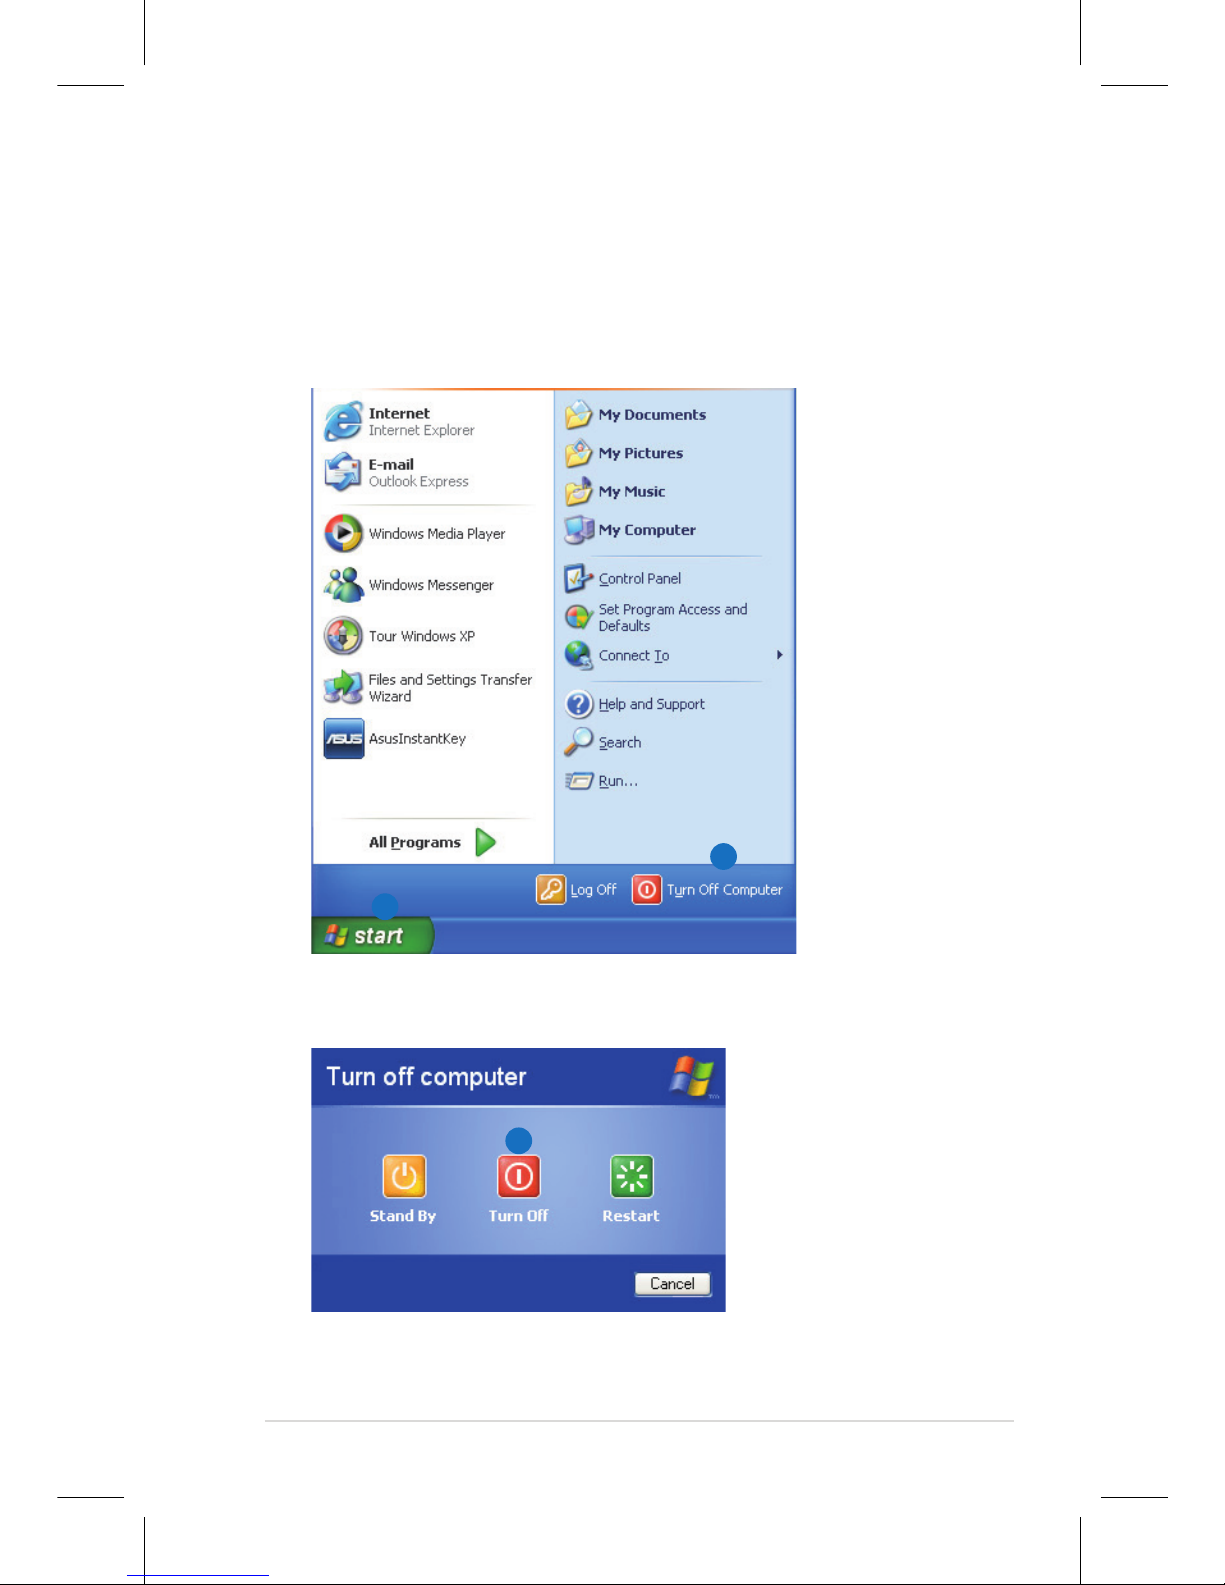
Do the following instructions to turn down your Eee PC.
1. Click the start button to display the start menu.
2. Click Turn Off Computer.
1
2
3. Select Turn Off to power off your Eee PC.
3
Page 4
Quick Use Guide - 4
Launching for the First Time
For the first time you start your Eee PC, the Windows wizard
will launch automatically and lead you through setting up your
preferences and some basic information. Follow the wizard
instructions to finish the initialization.
Conguring a network connection
Wireless Network Connection
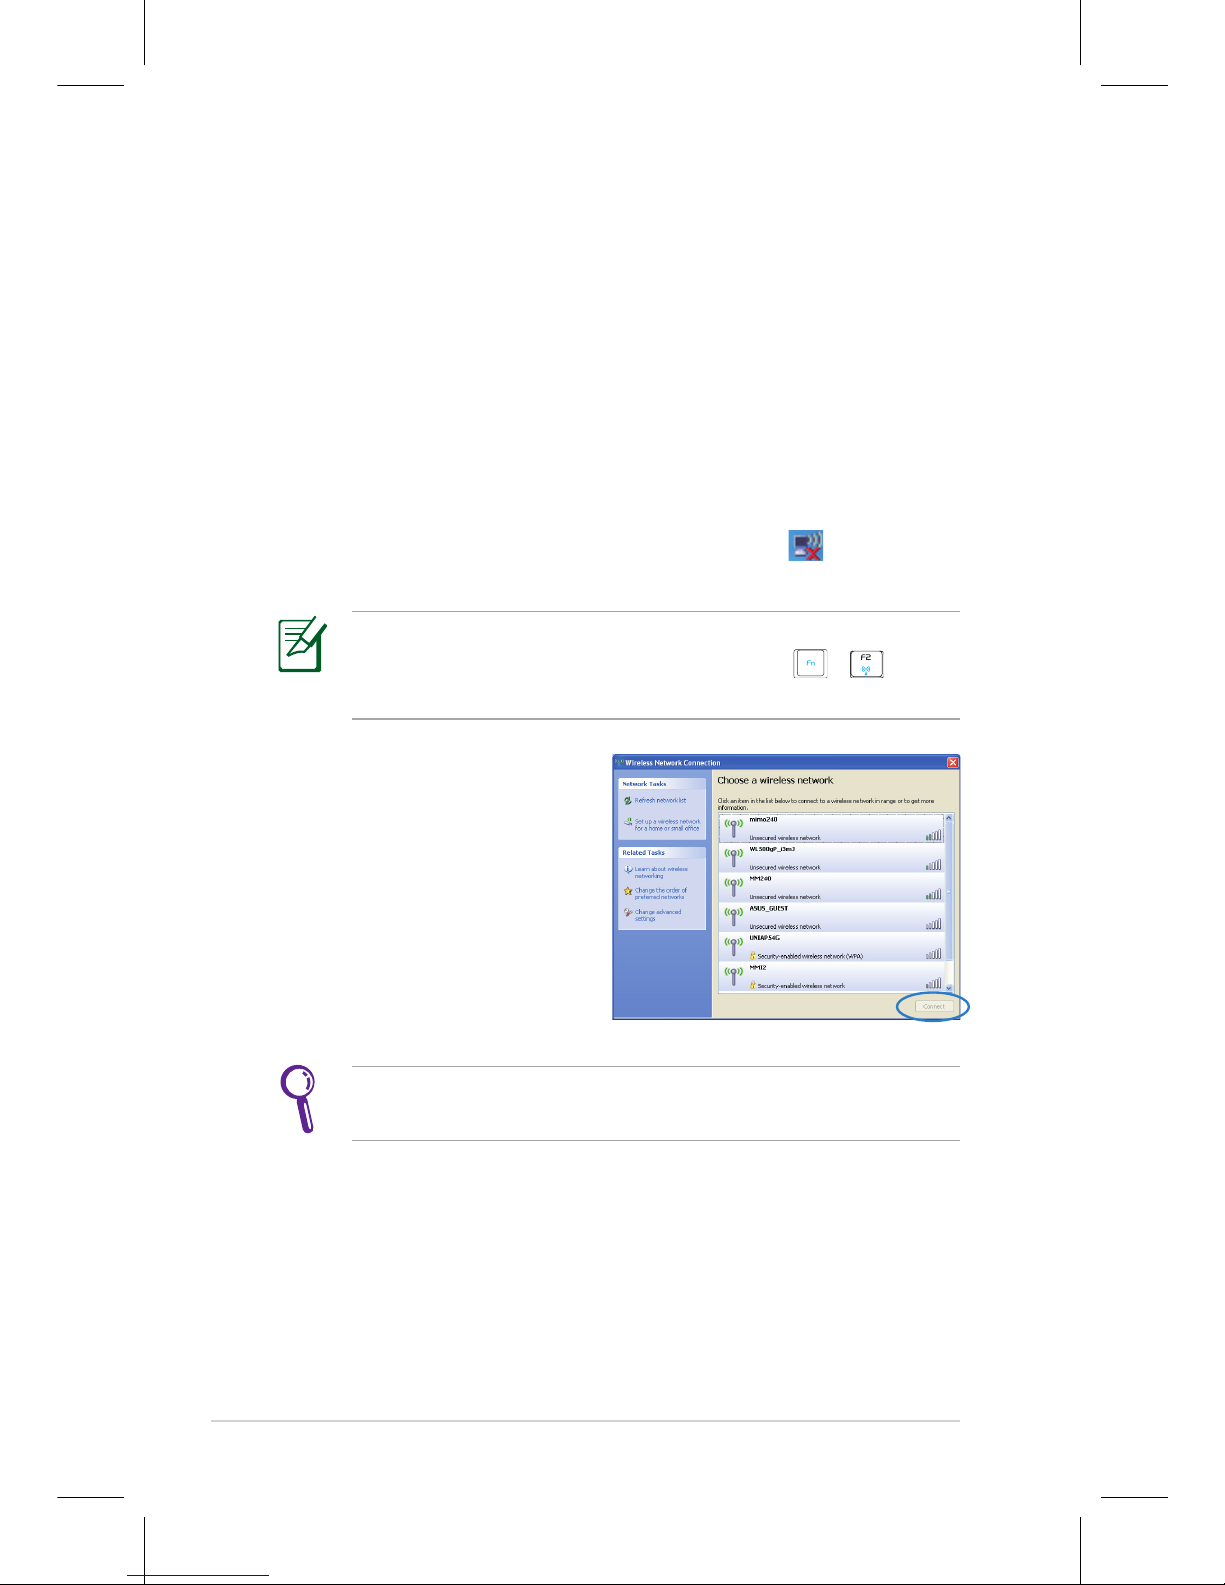
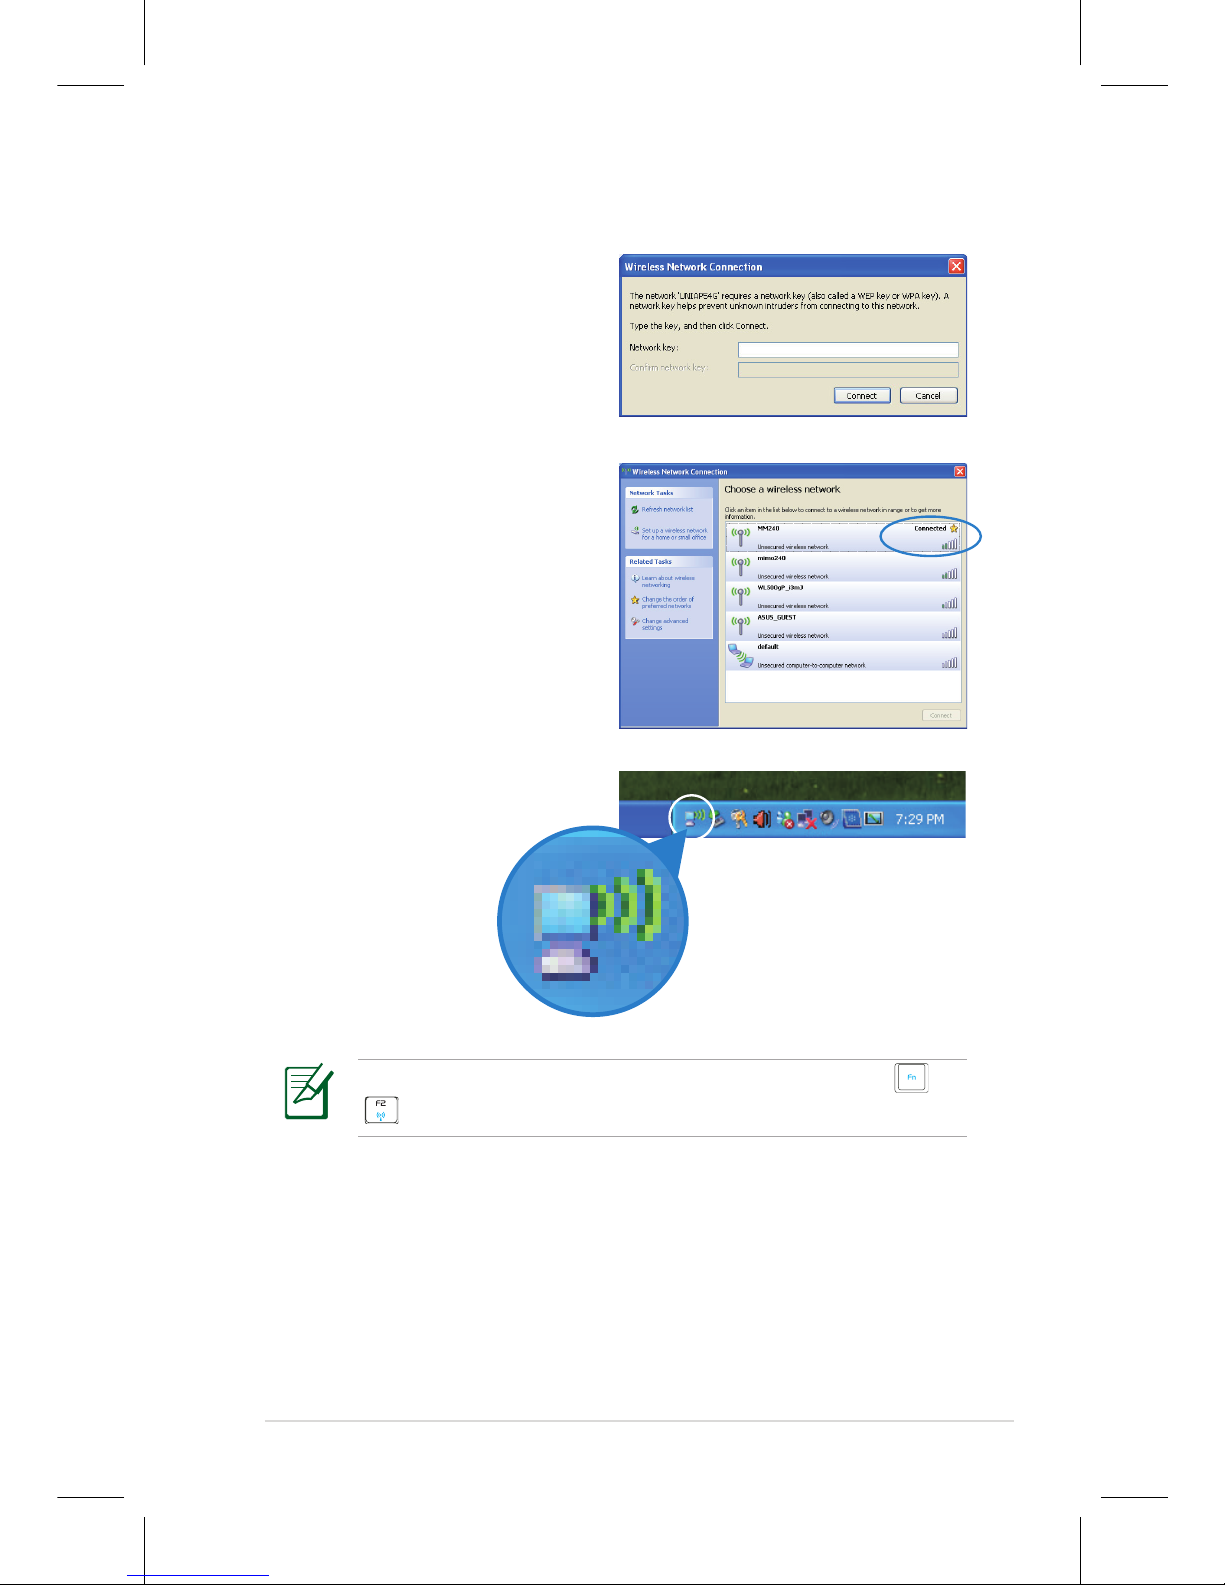
1. Double-click the crossed wireless network icon in the
Notification area.
2. Select the wireless access
point you want to connect
to from the list and click
Connect to build the
connection.
If you cannot find the desired access point, click Refresh
network list in the left pane and search in the list again.
If the wireless connection icon does not show on the taskbar.
Activate the wireless LAN function by pressing + (<Fn>
+ <F2>) before configuring a wireless network connection.
Page 5
Quick Use Guide - 5
3. When connecting, you may
have to enter a password.
4. After a connection has been
established, the connection
is shown on the list.
5. You can see the wireless
network icon in the
Notification area.
The wireless connection icon disappears when you Press +
(<Fn> + <F2>) to disable the WLAN function.
Page 6
Quick Use Guide - 6
Local Area Network
To establish a wired network, follow the instructions below:
Using a dynamic IP:
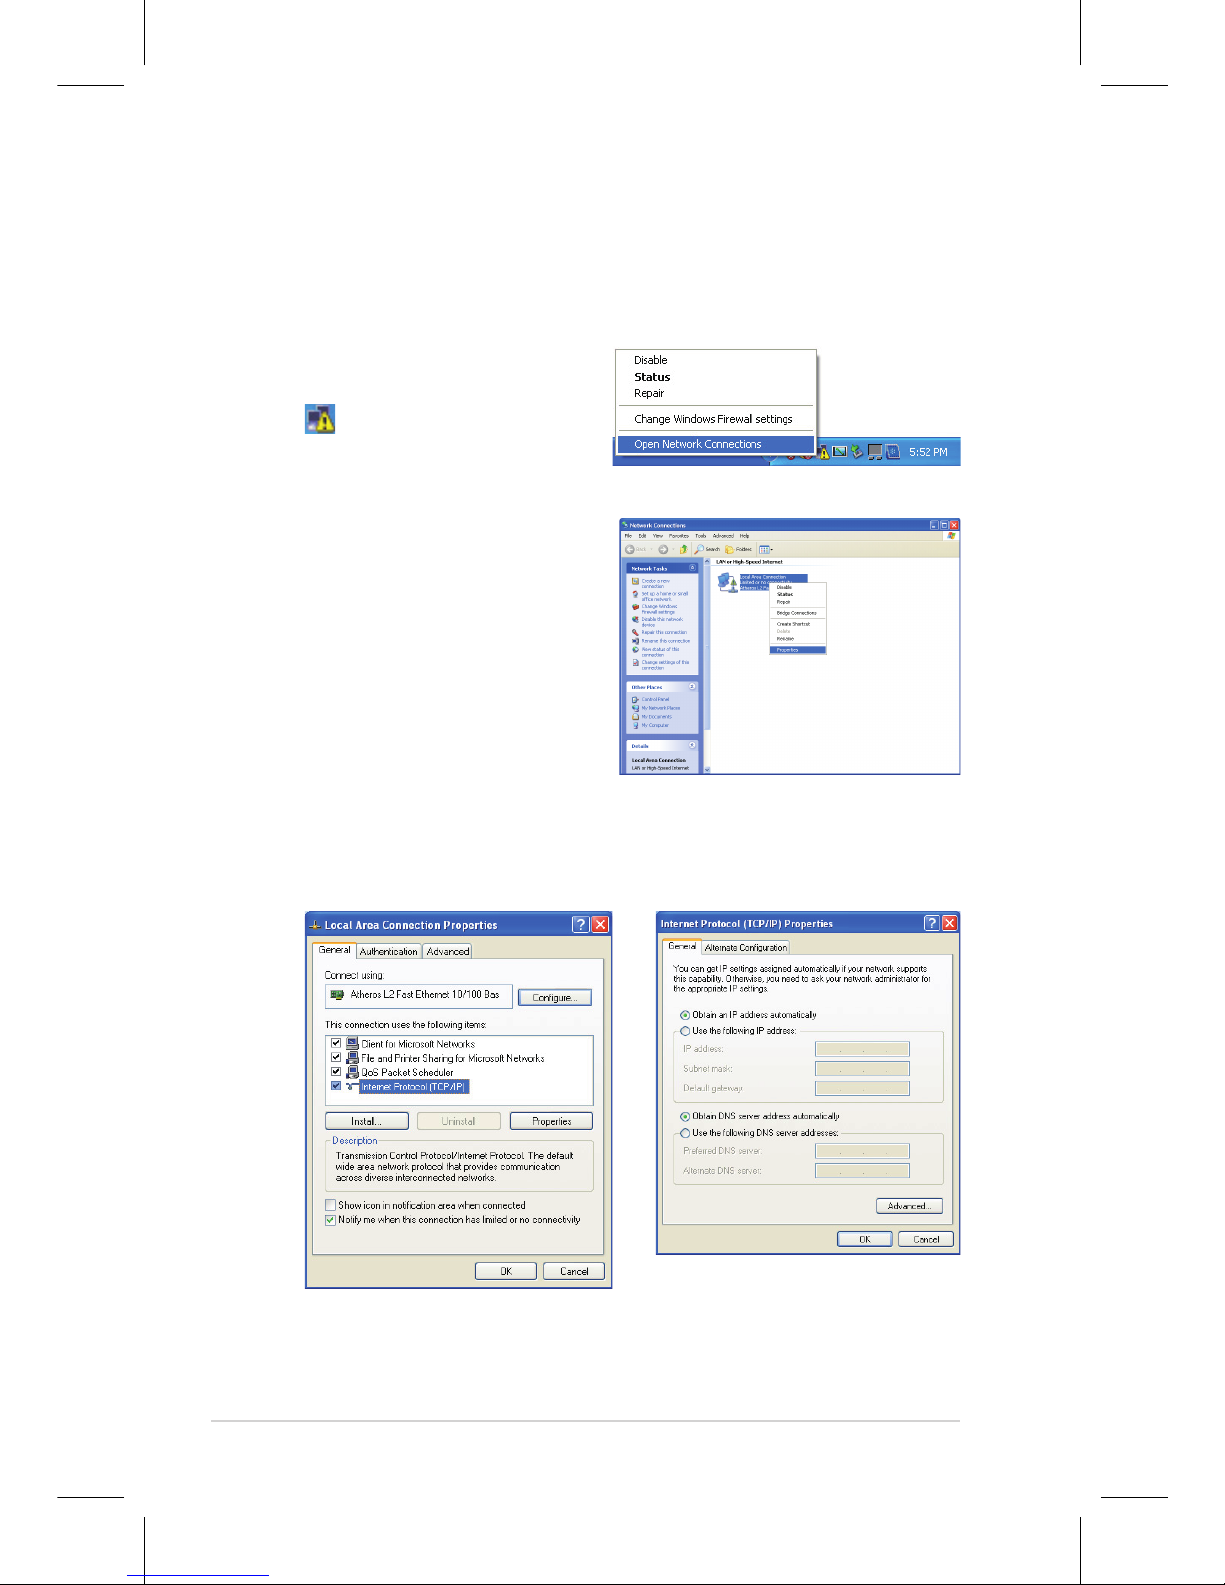
1. Right-click the network icon
with a yellow warning triangle
on the Windows® taskbar
and select Open Network
Connections.
3. Click Internet Protocol
(TCP/IP) and click Properties.
2. Right-click Local Area
Connection and select
Properties.
4. Click Obtain an IP address
automatically and click OK.
Page 7
Quick Use Guide - 7
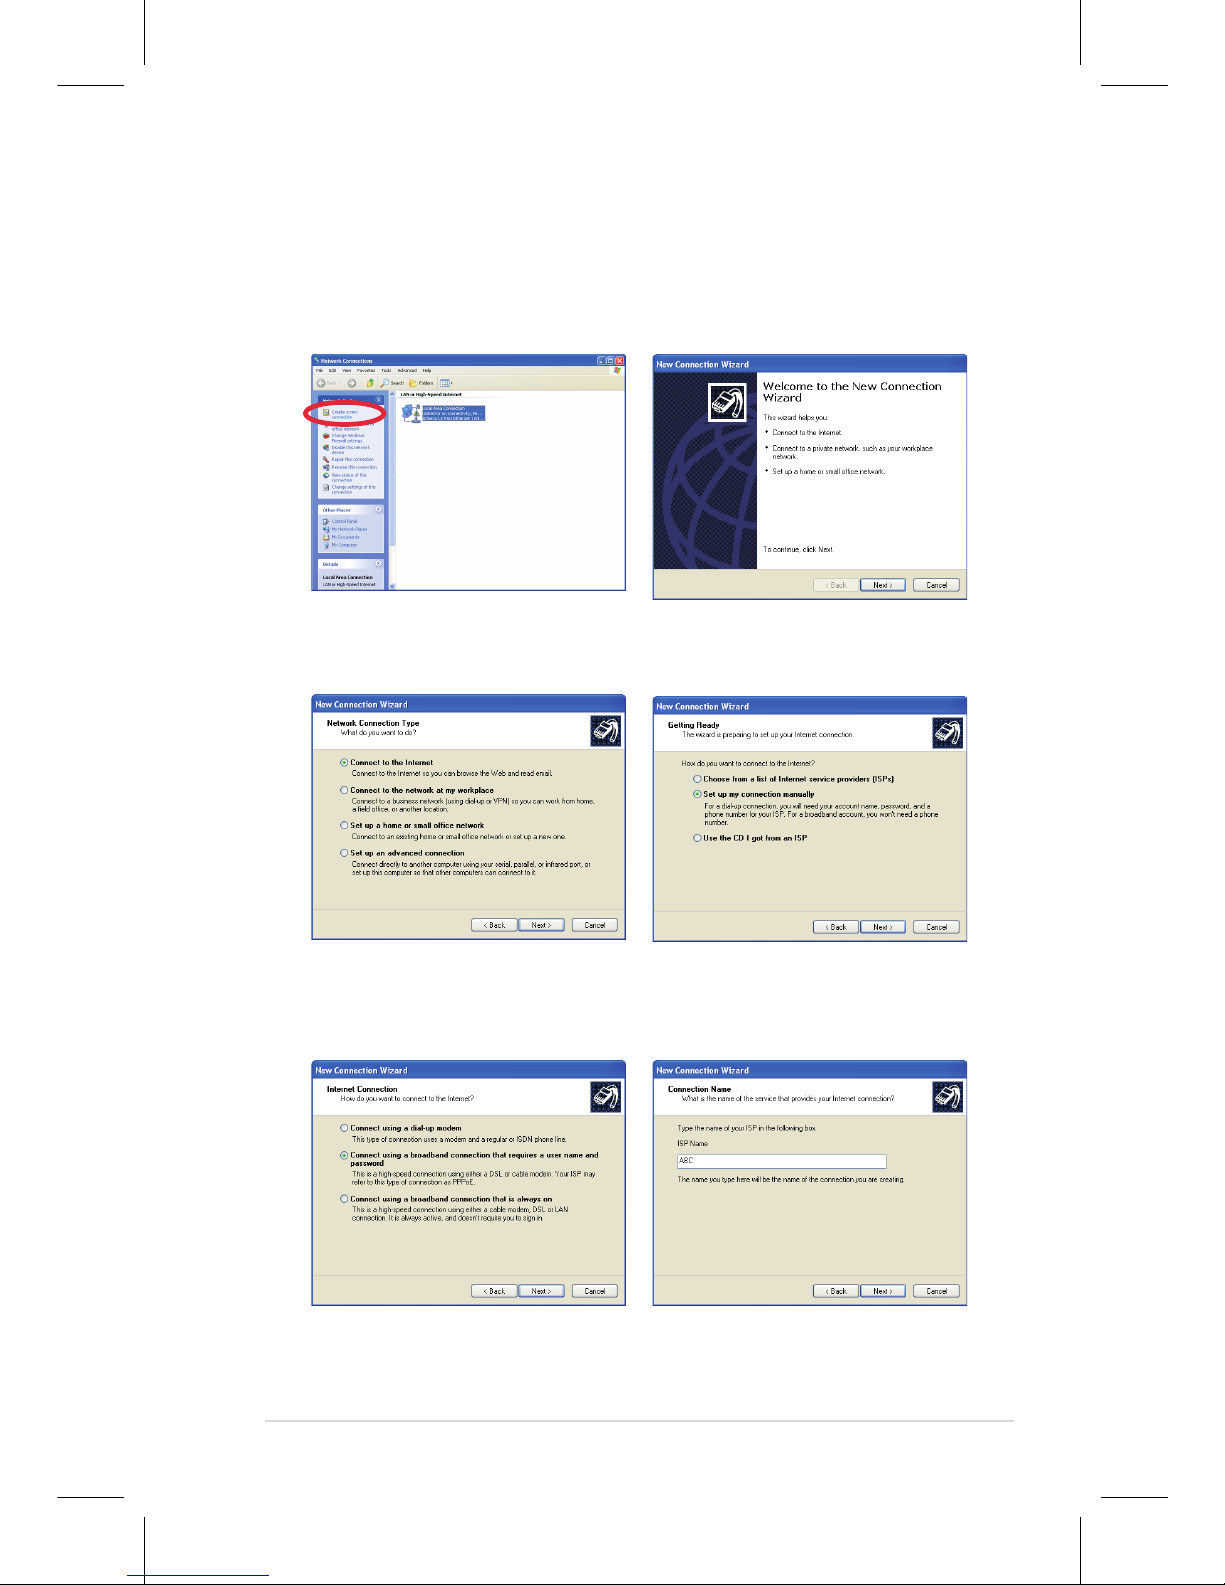
5. Click Create a new
connection to start the New
Connection Wizard.
6. Click Next.
7. Select Connect to the
Internet and click Next.
8. Select Set up my
connection manually.
9. Select your connection type
and click Next.
10. Enter your ISP Name and
click Next.
Page 8
Quick Use Guide - 8
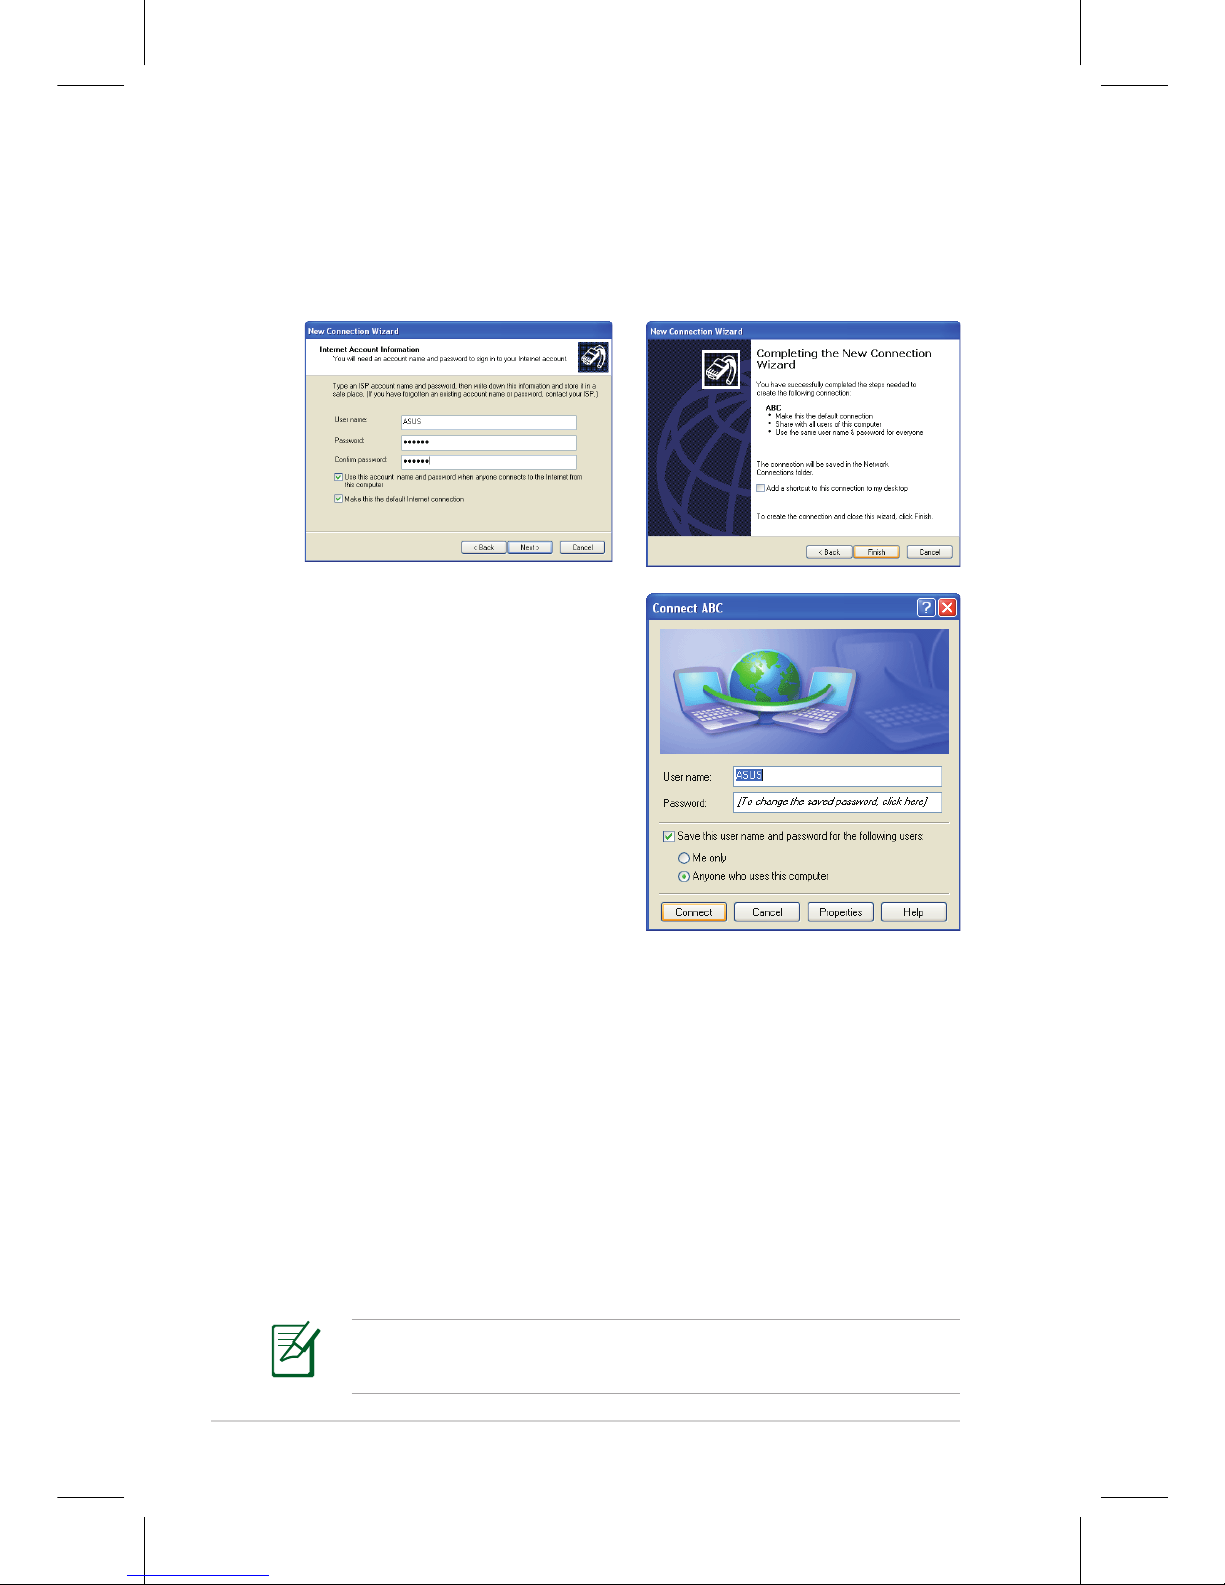
11. Enter your User name and
Password. Click Next.
12 Click Finish to finish the
configuration.
13. Enter your user name and
password. Click Connect to
connect to the Internet.
Using a static IP:
1. Repeat the step 1–3 of Using a dynamic IP to start the static IP
network configuration.
2 Click Use the following IP address.
3. Enter the IP address, Subnet mask and Gateway from your
service provider.
4. If needed, enter the preferred DNS Server address and
alternative address.
5. After entering all the related values, click OK to build the
network connection.
Contact your Internet Service Provider (ISP) if you have problems
connecting to the network.
 Loading...