

Page 1
ASTRO TOOL CORP.
CYCLE CONTROLLED C-FRAME STYLE CRIMP TOOL
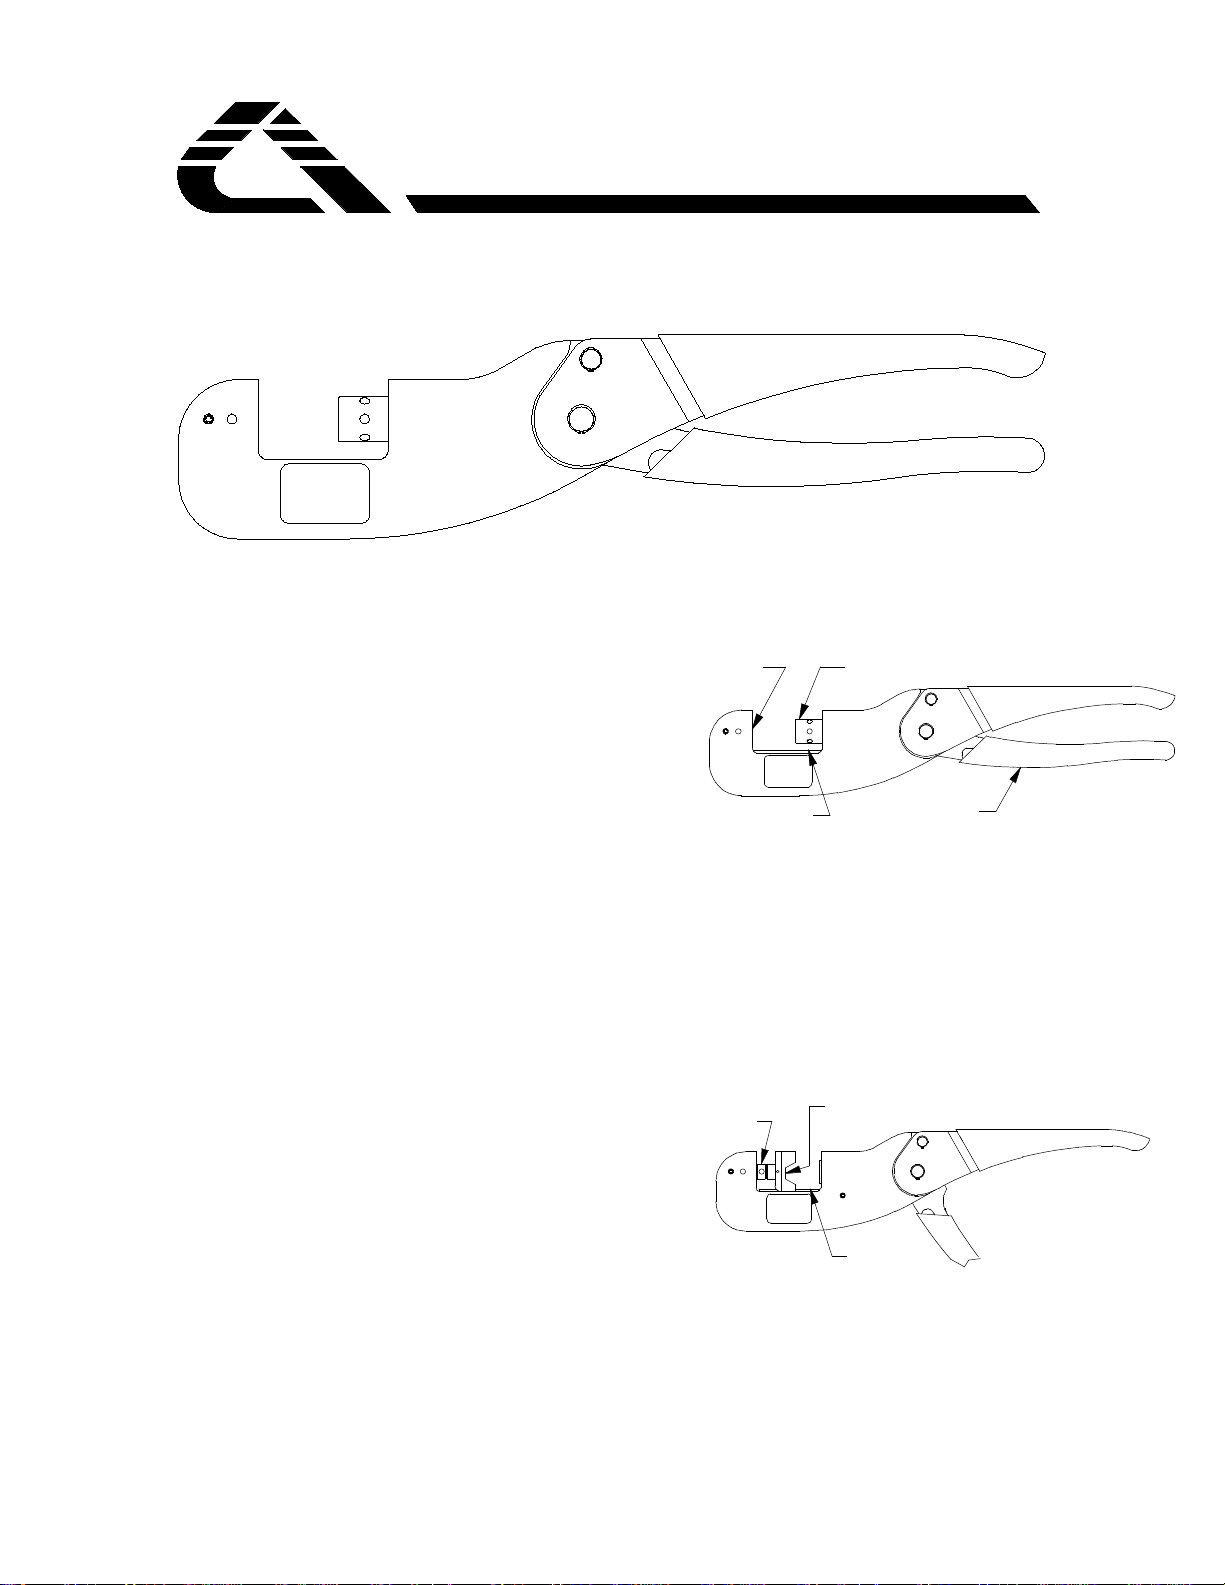
Movable Di e
Nest
Key
Stationary
Die Nest
Ratchet
Handle
Shank
GENERAL:
CONNECTOR ASSEMBLY TOOLING
620175 (M22520/5-01) AND ASSOCIATED TYPES
INSTRUCTIONS FOR USE OF 620175 CRIMP TOOL
The Astro Tool Corp. 620175 Hex Die Crimping
Tool is a cycle controlled, manually operated, Cframe tool for crimping shield terminating ferrules,
RF connector fittings, and other terminations
requiring an open frame crimp tool.
There is only one set up operation required installing the required die set. Die sets are available
in single, double and triple hex cavities. Special
form crimps are also obtainable, consult the factory
for details.
The Tool's precision cycle control mechanism
assures a high quality, repeatable crimp. The in-line
action of the dies and toggle mechanism reduces the
compression force required to complete the crimp.
For long life and optimum performance, this tool
should be kept clean and handled with the care of
any other precision device.
OPERATION
a. Open and close the tool several times and
observe the precision cycle-control mechanism.
Note that the tool cannot be opened without
completing its cycle.
b. Identify the parts in figure #1:
1. Ratchet Handle
2. Movable Die Nest
3. Stationary Die Nest
4. Key
Figure #1
c. Die Installation
1. The tool must be in the fully open position
as shown in figure #2.
2. Locate the Stationary Die and engage the
keyway of the die with the key of the tool.
Press the die into place. See figure # 2.
Press
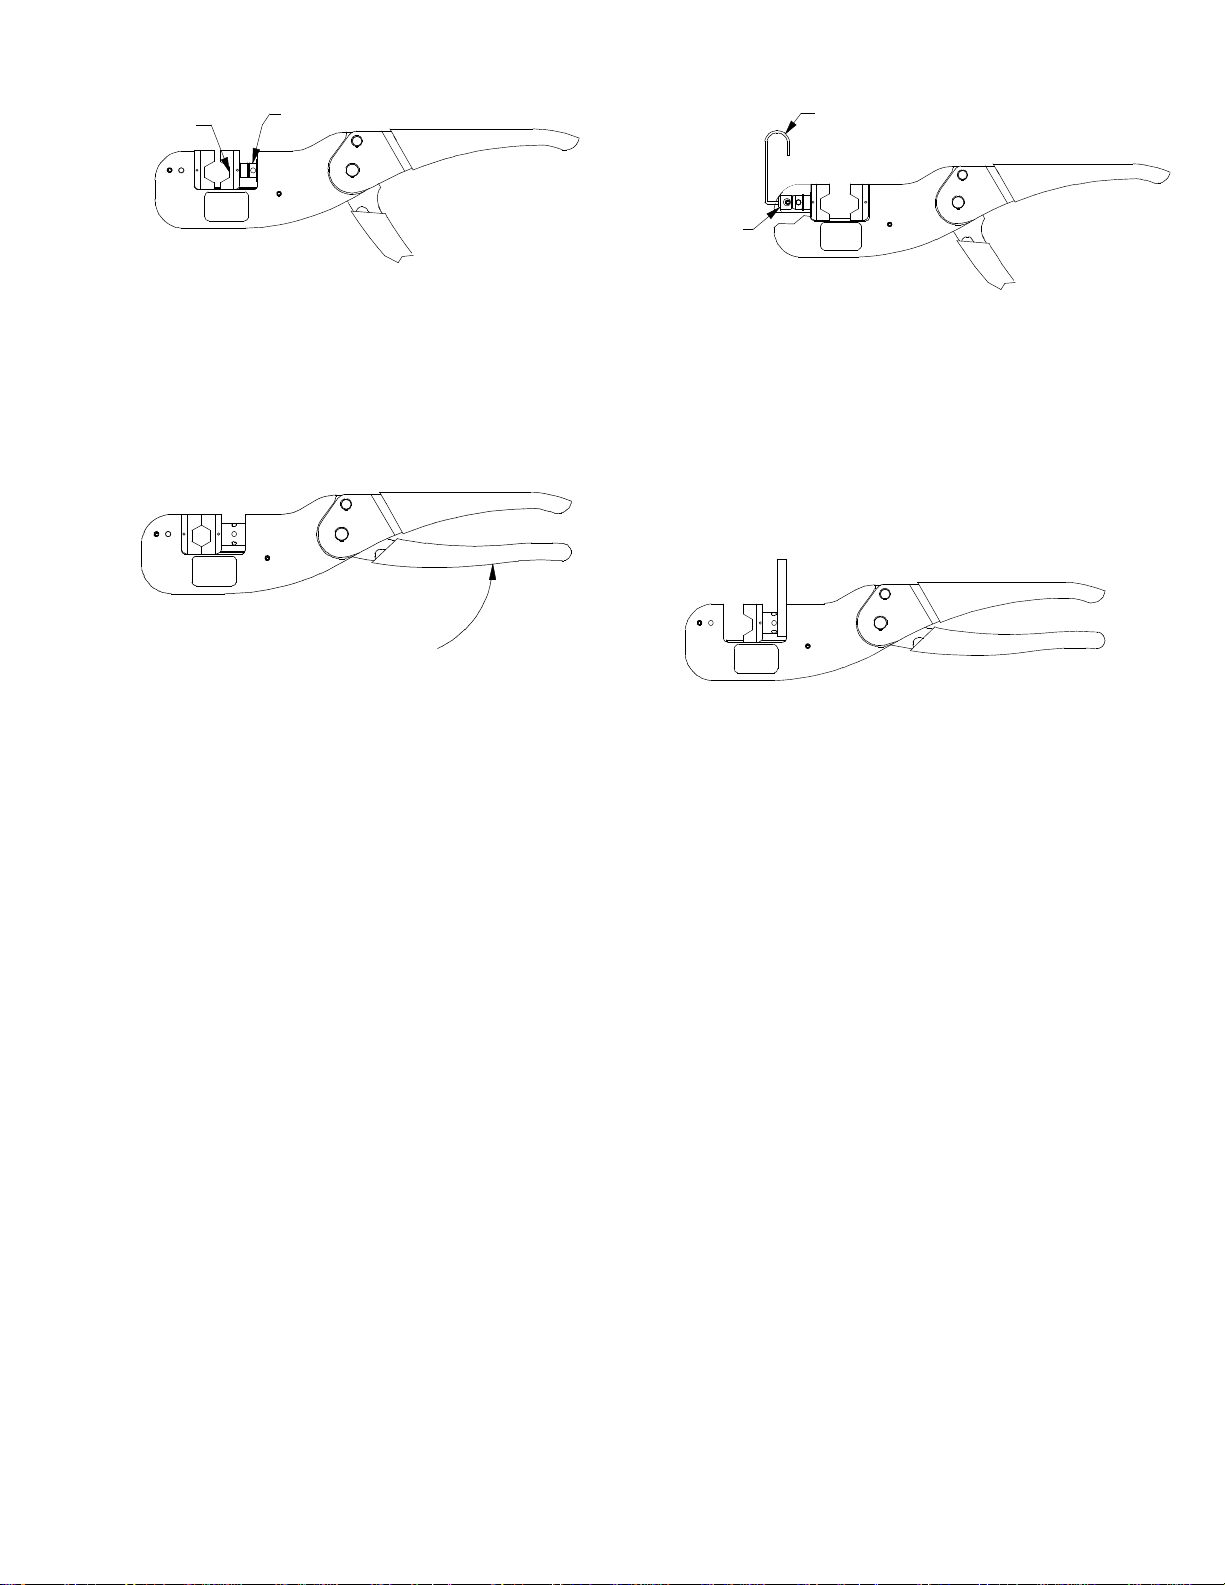
3. Locate the Movable Die and engage the
keyway of the die with the key of the tool.
Press the Die into place. See figure # 3.
Key
Figure #2
1 5-21-15 TI175-95-1
Page 2
Press
Shank
Figure # 3
DRT5
Button
NOTE: To determine which Die is Stationary
or Movable; Die Post must align with Die
Nest when Die Half is engaged with key.
Figure #5
NOTE: Always remove the Stationary Die
First.
4. Cycle the tool to insure that the dies are
seated properly. See figure # 4.
Figure # 4
d. Crimping Operation
1. The tool must be in the fully open position.
Insert the prepared connector through the tool
opening and place in the appropriate cavity.
For RF connector fittings, use the die face as a
locational stop. For shield t erminations, locat e
the crimp by eye.
2. Squeeze the handles together until the
positive stop is reached. The tool will release
and return to the fully open position.
3. Remove the crimped termination.
e. Die Removal
1. The tool must be in the fully open position.
2. To remove the Stationary Die, locate the
Die removal Tool (P/N DRT5). Place the tool
against the button at the end of the tool.
Gently tap Die Removal Tool. The die will
release from the retainer and slide out of the
die nest. See Figure # 5.
3. To remove the Movable Die, hold the tool
in the fully closed position. Hook the
Removal Tool around the Movable Die nest as
shown in figure # 6. Move the handles to the
fully open position and the die will release
from the retainer and slide out of the die nest.
Figure # 6
TOOL SERVICE
Astro Tool's 620175 Crimp Tool is designed for
long, reliable service. If the tool becomes
inoperative or does not gage properly, it is suggested
that you contact our Customer Service Department
for a Return Goods Authorization number and return
the tool to our factory.
Upon receipt of the tool, Astro will inspect and
overhaul each tool to put the tool back into
acceptable and efficient operating condition. Worn
parts will be replaced or repaired. Please note that
Astro's Quality Control system is traceable to The
National Institute of Standards and Technology
(N.I.S.T.).
Service charges for tools not under warranty will
be advised upon request.
Parts that Astro deems to have been damaged due
to neglect, misuse or accident; and parts that have
been altered or repaired by persons other than Astro
Tool Corp. employees will be replaced subject to
additional charge for such parts.
ASTRO TOOL CORP. MANUFACTURERS OF INSTALLING, REMOVAL, CRIMP TOOLS
AND CONNECTOR SERVICE KITS
21615 S.W. T-V HWY. • BEAVERTON OREGON 97003 • 503-642-9853 • FAX 503-591-7766
2 5-21-15 TI175-95-1
 Loading...