

Page 1
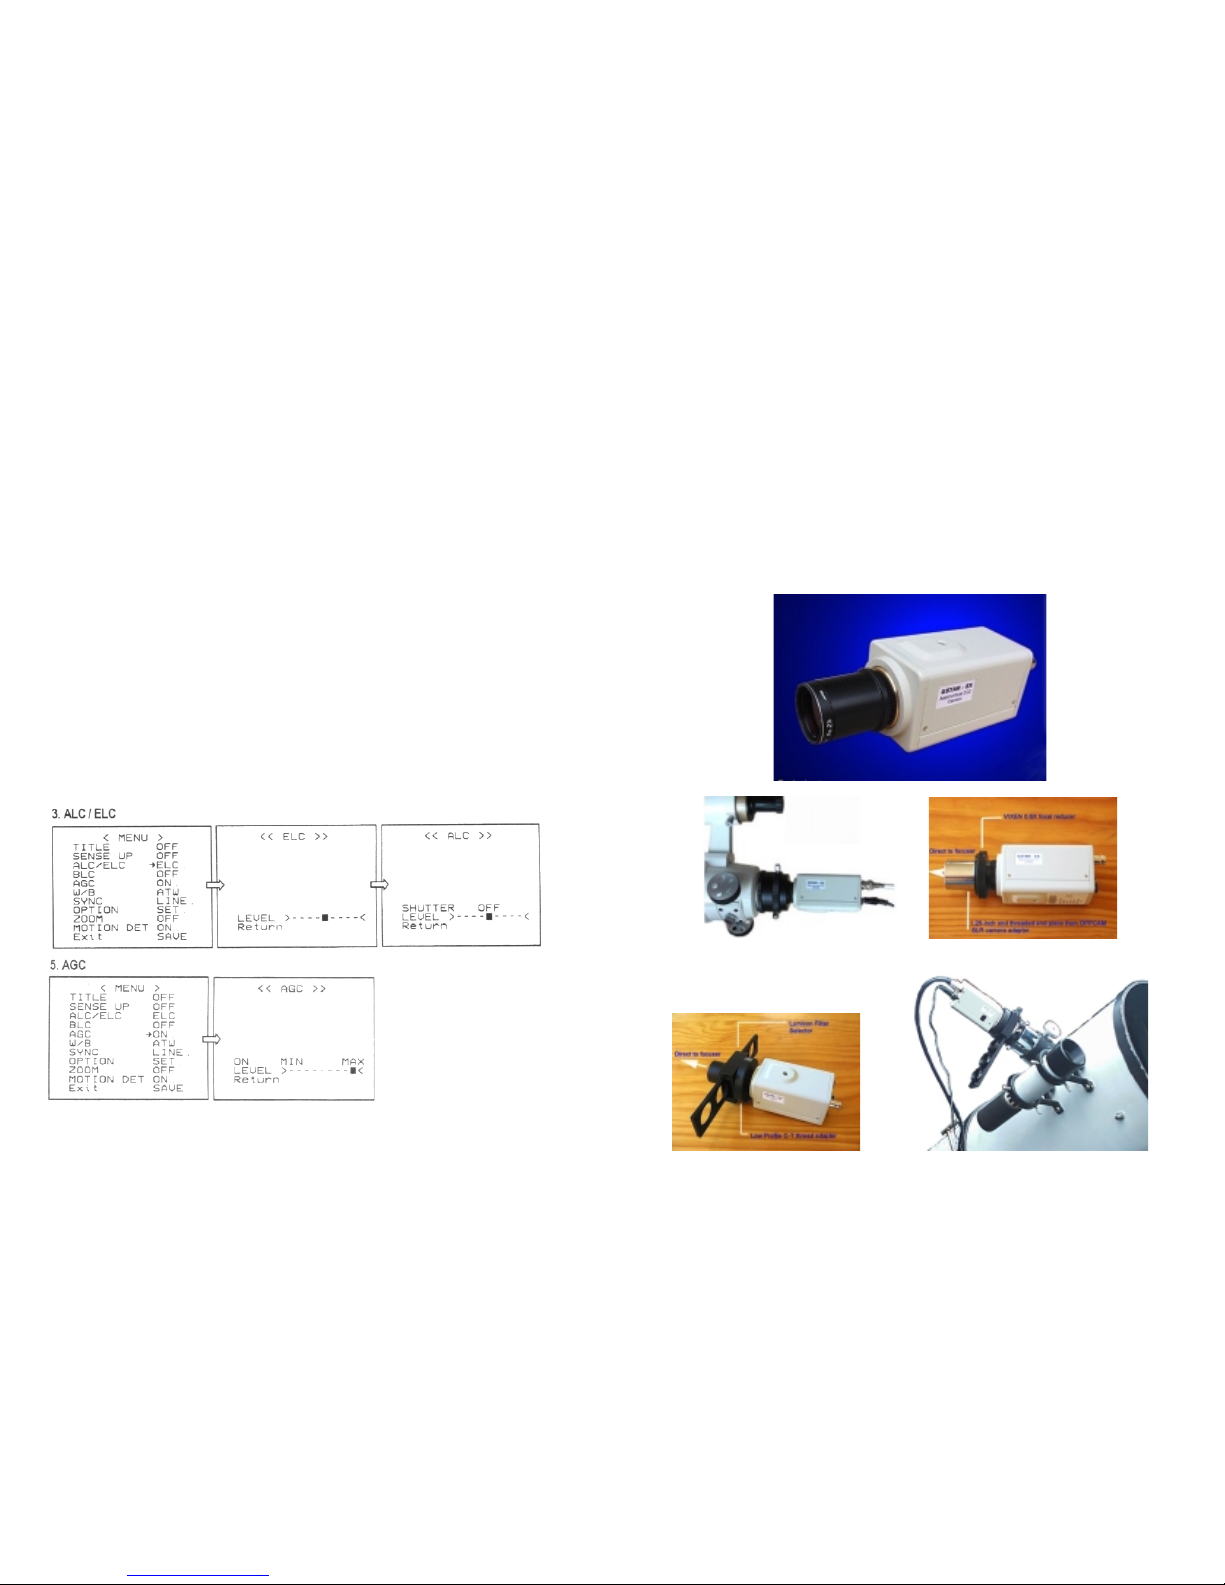
Image Sensor: 1/2 inch Sony ExView HAD CC D ( 795( H) x 596(V) pixels)
Sensor Pixels: 8.6um(H) x (8.3um(V )
Resolution: Hi-res 600TVL (better than SVHS)
Capture Size: 768 x 576 pixels (max frame capture size - depends on video
capture card used)
Standard: CCIR or EIA - Monochrome (Black and White)
Sensitivity: 0.0001 LUX
Shutter Speeds: 1/50 or 1/60 sec to 1/12,000 second (16 steps) - Automatic
and Manual control
Integration Mode: Deep Sky Mode - X2 to X128 (max integration) (11 steps)
Signal Gain AGC: Automatic and Manual control
Signal Processing: A/D converter 10 bit AGC/AD converter (8 bit output)
Video Outputs: 1x Composite (BNC) and S-Video - 1Vp-p
Communication: RS232
Gamma Adjust: For deeper contrast of the planets and Moon
Digital Zoom: Multi-step from 1x to 2 x internal image rescaling (useful where
optical magnification is limited)
Picture Enhance: via On Screen Display menu
Mirror Function: A handy function for use with refractors
Operating Temp: -20° to +50°C
Interface: 5 buttons for OSD control on back panel plus RS- 232 interface for
computer control
Power: 12VDC regulated 200mA (centre positive)
For more information visit – http://gstarex.MyAstroShop.com.au/
Quick Reference Guide
GSTAR-EX
Quick Start User Guide
Page 2
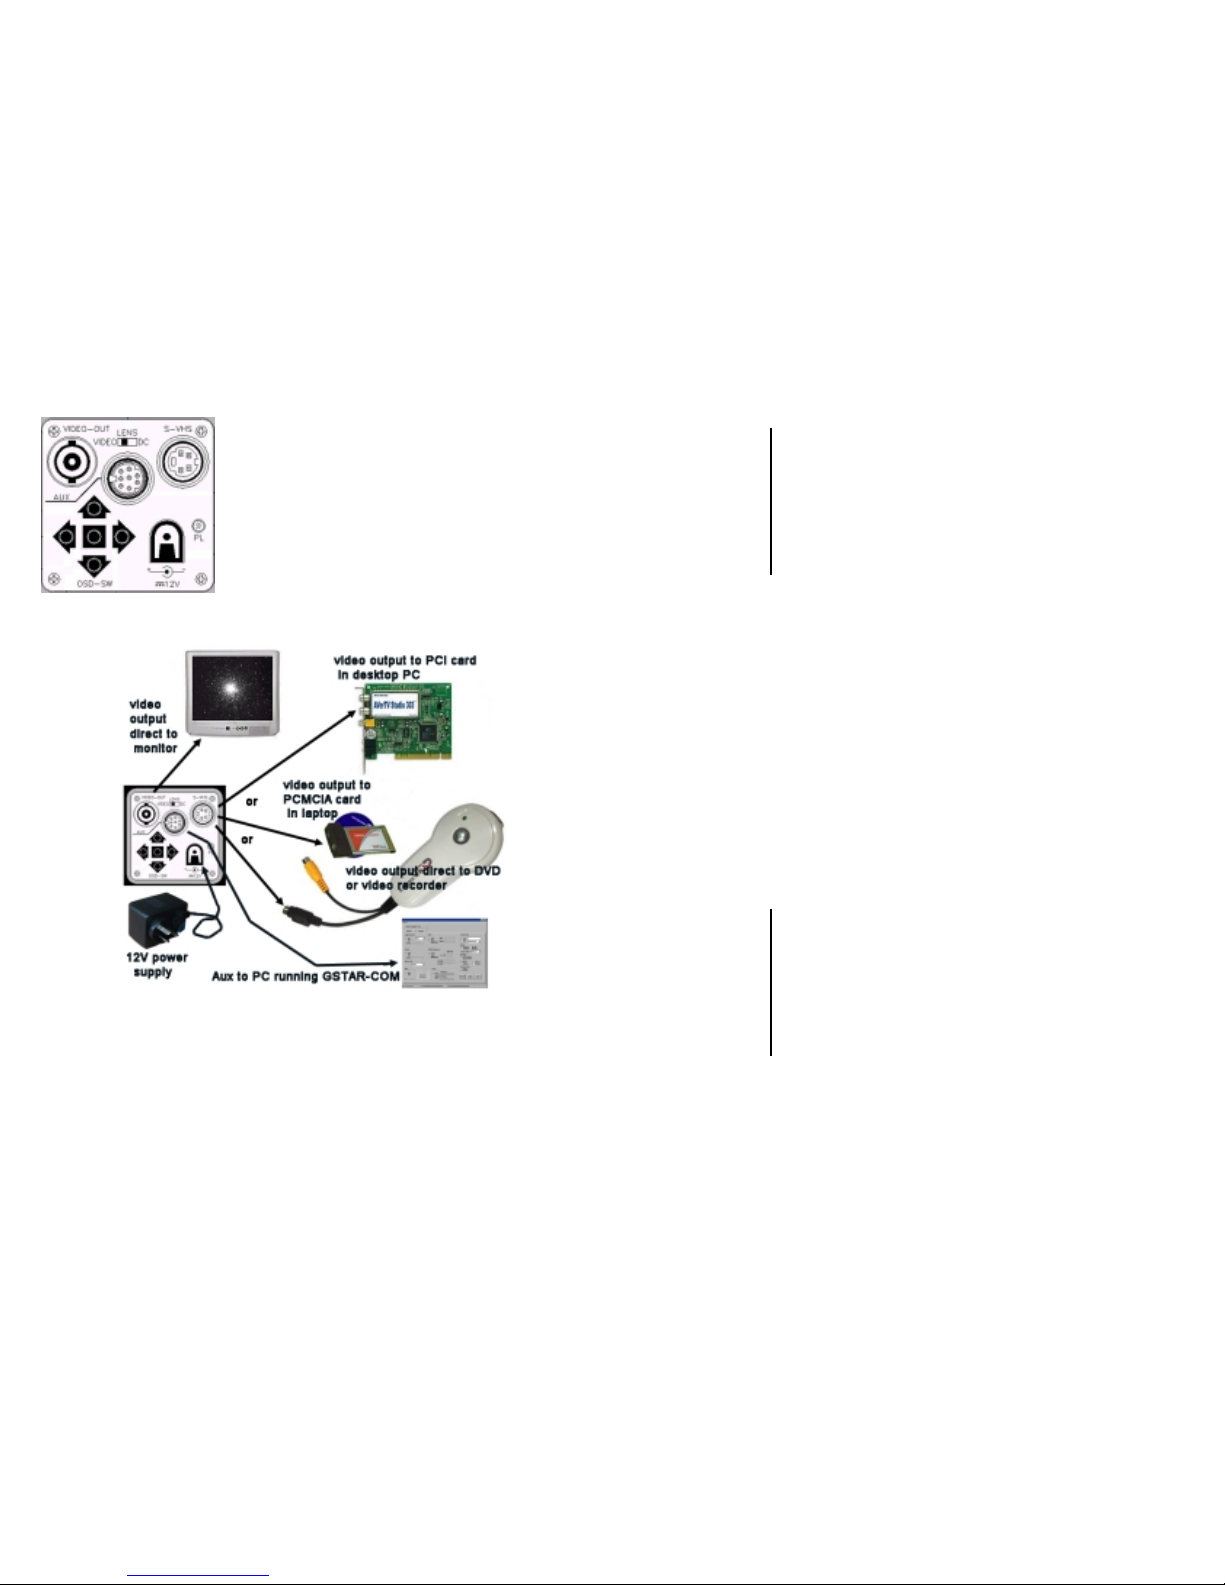
Video Out
- BNC connector
Lens switch
- Set to VIDEO
S-VHS Out
(preferred)
Aux
iliary for GSTAR-COM controller
OSD
5-way buttons
* Press and hold centre button to activate display.
12VDC input
power socket
Plug in and switch on the regulated 12VDC Plug Pack before connecting to the camera 12V socket, this
will prevent power surges when switching on the mains.
Use the most direct connection possible from the cameras video output to the input of the recording
device and keep signal cable as clear as possible away from mains power extension leads and other AC
appliances to avoid induced noise in the image.
Once connected and switched on, adjust the monitor to see the widest dynamic range – not too dark, not
too bright. Computer software can adjust this further, increasing contrast for example.
Always attach fittings with the cameras CCD pointing downwards to avoid dust and other foreign object
falling on the CCD chip.
Optimal camera settings for deep sky viewing and imaging
TITLE OFF
SENSE UP x128
ALC/ELC ALC - shutter to off
BLC OFF
AGC MANU - level set to maximum
W/B ATW
SYNC INT
OPTION SET - GAMMA to 0.45
ZOOM OFF (ON and maximum for focusing)
MOTION DET OFF
EXIT SAVE
Focusing the camera:
Set SENSE UP from OFF to X6 or X8 depending in how
bright or faint the stars are in the field
This gives a rapid feed back on the screen
Using the Zoom set to maximum helps to fine focus
When focused set SENSE UP to X128
Set ALC/ECL to ALC – Shutter to OFF
Setting the AGC (Auto Gain Control) to manual will prevent any bright object (star)
from auto adjusting the contrast
Once the GAMMA is set to 0.45 you don’t have to worry about it again
Some very bright objects may require the SENSE UP to be set lower
than X128 to prevent over-exposing, eg cores of bright globular cluster
When settings are OK go to EXIT and SAVE
Camera settings for planetary viewing and imaging
TITLE OFF
SENSE UP OFF
ALC/ELC ALC - shutter speed to suit target
BLC OFF
AGC OFF or (MANUAL if some gain needed)
W/B ATW
SYNC INT
OPTION SET - GAMMA to 0.45
ZOOM OFF
MOTION DET OFF
EXIT SAVE
Setting SENSE UP to OFF will give you the fastest capture rate
Set the AGC (Auto Gain Control) to OFF for minimum visible background noise.
If the object is still over-exposed, increase the shutter speed to obtain the best exposure
 Loading...