

Page 1
Model:
8077SE
Foreseen Use of the Tool
Do not use the tool outside of the design intent.
Never modify the tool for any other purpose, or for its use.
Safety Precaution
Product Type:
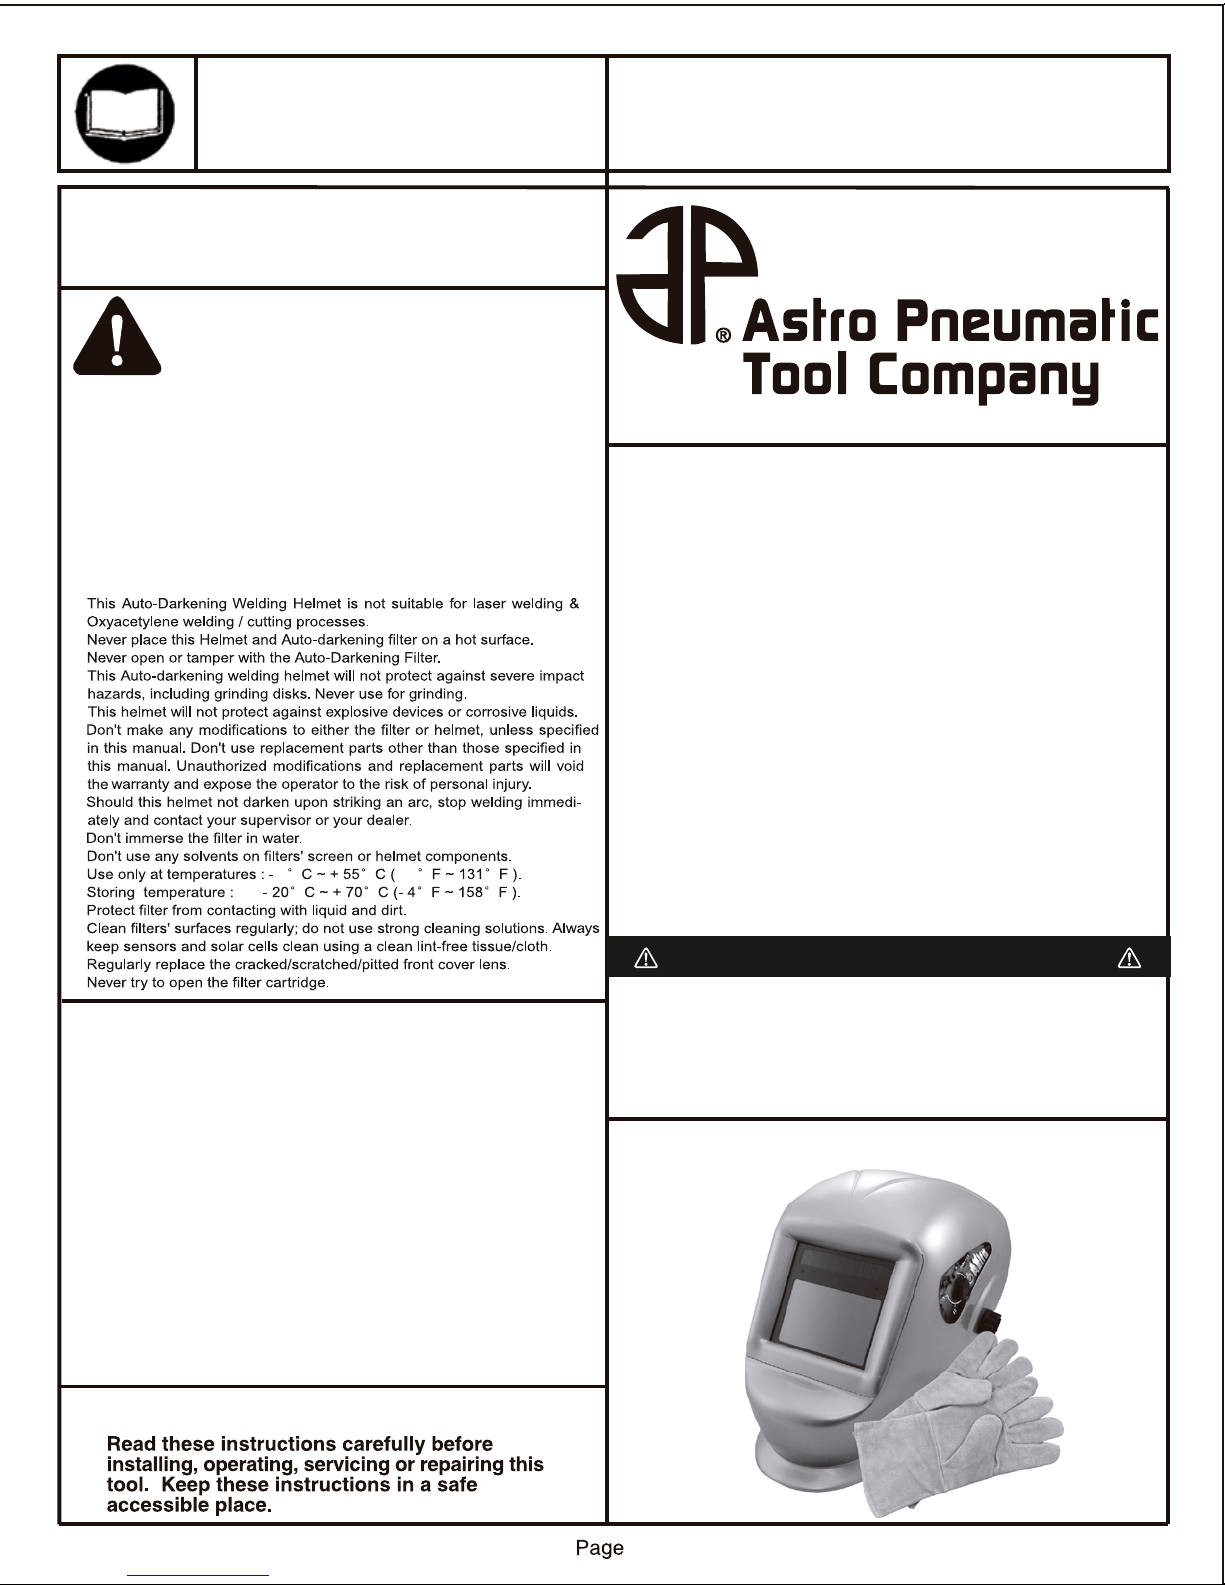
LARGE VIEWING AREA DELUXE AUTO-DARKENING
SOLAR WELDING HELMET AND WELDING GLOVES
Caution: To help prevent personal injury
Auto-Darkening Welding Helmets are designed to protect the eye and
face from sparks, spatter, and harmful radiation under normal welding
conditions. Auto-darkening filter automatically changes from a light
state to a dark state when an arc is struck, and it returns to the light
state when welding stops.
Auto-Darkening Welding Helmets comes ready for use. The only thing
you need to do before your welding is to adjust the position of the
headband and select the correct shade number for your application.
•
•
•
•
•
•
•
•
•
•
10
14
•
•
•
•
•
www.astrotools.com
1 YEAR LIMITED WARRANTY
• Astro Pneumatic Tool Co. warrants our products to the original user against defective
material or workmanship for a period of 1 year (except where noted on our price
schedule) from the date of 1st use. Astro reserves the right to determine whether the
product failed because of defective material, workmanship or other causes and to charge
back for missing parts. Astro Pneumatic Tool Co., at its discretion, will repair products
covered under this warranty free of charge. The distributor should direct the original user
to return the product (with the exceptions listed below) with the distributor’s name,
address, adequate proof of date of purchase or a copy of warranty card, and a short note
explaining the problem. Failures caused by accident, alteration, or misuse are not
covered by this warranty.
• If one part of this product fails, please do not return the entire product. Astro will
replace free of charge component parts of this product that fail within 1 year of first
use by the original user. Items included in this category include but are not limited
to kits, hand tool kits and any other product where there are multiple items or
components that make up the unit. Please contact the phone number below in
order to obtain the replacement components covered under warranty.
• Astro Pneumatic Tool Co. or its authorized service representatives must perform all
warranty repairs. Any repair to the product by unauthorized service representatives
voids this warranty. The rights under this warranty are limited to the original user and may
not be transferred to subsequent owners.
• This warranty is in lieu of all other warranties, expressed or implied, including warranties
of merchantability and fitness for a particular purpose. Some states do not allow the
exclusion of limitations of incidental or consequential damages so the
above limitations may not apply to you.
PLEASE DO NOT RETURN ANY PRODUCT WITHOUT CALLING
1-800-221-9705 FOR INSTRUCTIONS
PRODUCT INFORMATION
• Larger viewing area: 96MM x 62MM
• German made lens
• Automatically changes filter screen from clear to
dark in 1/20,000 second
• Variable shade adjustment - 9-13 DIN
• UV/IR Protection: Up To DIN 16 At All Times
• Great for use with MIG/MAG, TIG & ARC Welding
• Operator can adjust the time the filter returns from dark to clear
• Automatic Power On / Off (no button to push)
• Utilizes high performance solar cells as power supply
• Battery lifetime up to 4000 hours
• Full face and front of neck protection
• Specially designed headband for greater comfort
• Meets EN, DIN, ISO & ANSI Z87.1 standards
• Large size 13.5" Leather Welding Gloves with flannel lining included
Important
Unpacking
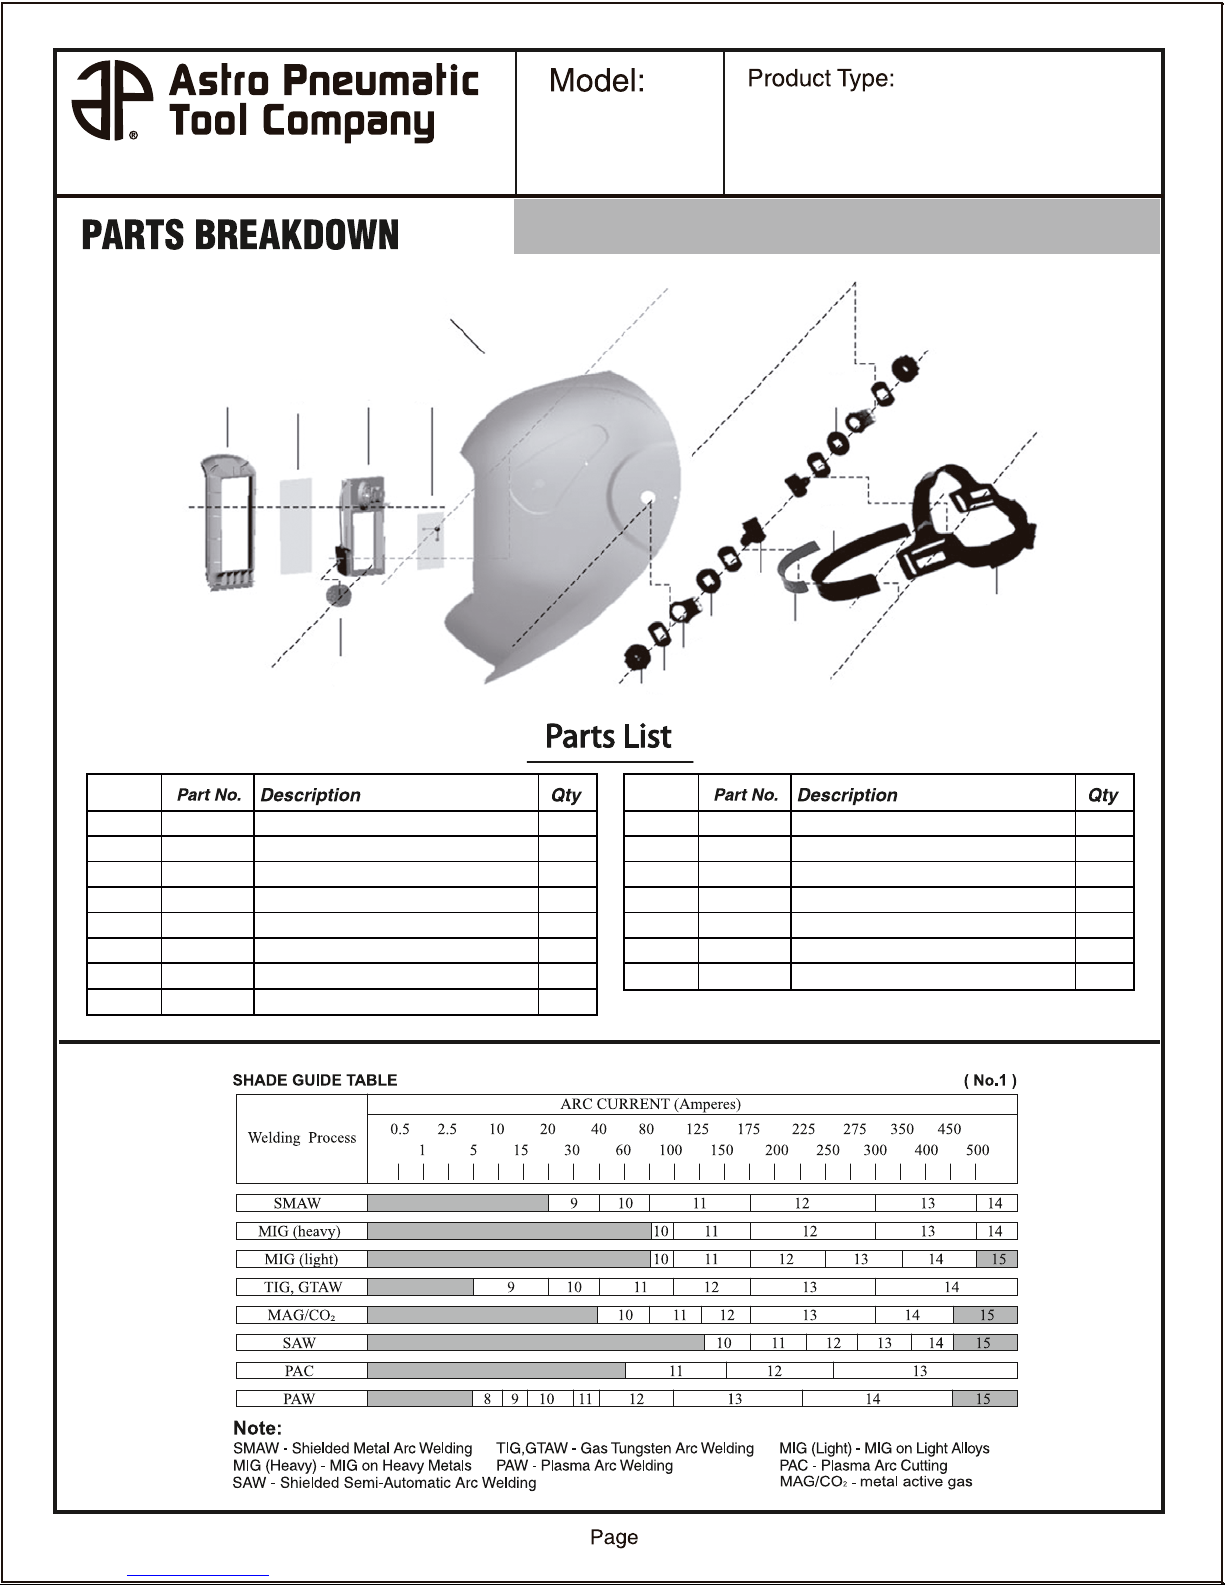
When unpacking, check the parts diagram and part number
listing on page 4 to make sure all parts are included. If any
parts are missing or damaged, please call your distributor.
LARGE VIEWING AREA DELUXE AUTO-DARKENING
SOLAR WELDING HELMET AND WELDING GLOVES
MADE IN CHINA
1
Page 2
8077SE
LARGE VIEWING AREA DELUXE AUTO-DARKENING
SOLAR WELDING HELMET AND WELDING GLOVES
ASSEMBLY & OPERATION
The helmet comes ready assembled but before it can be used
it must be adjusted to fit the user properly and set up for
delay time,sensitivity and shade level.
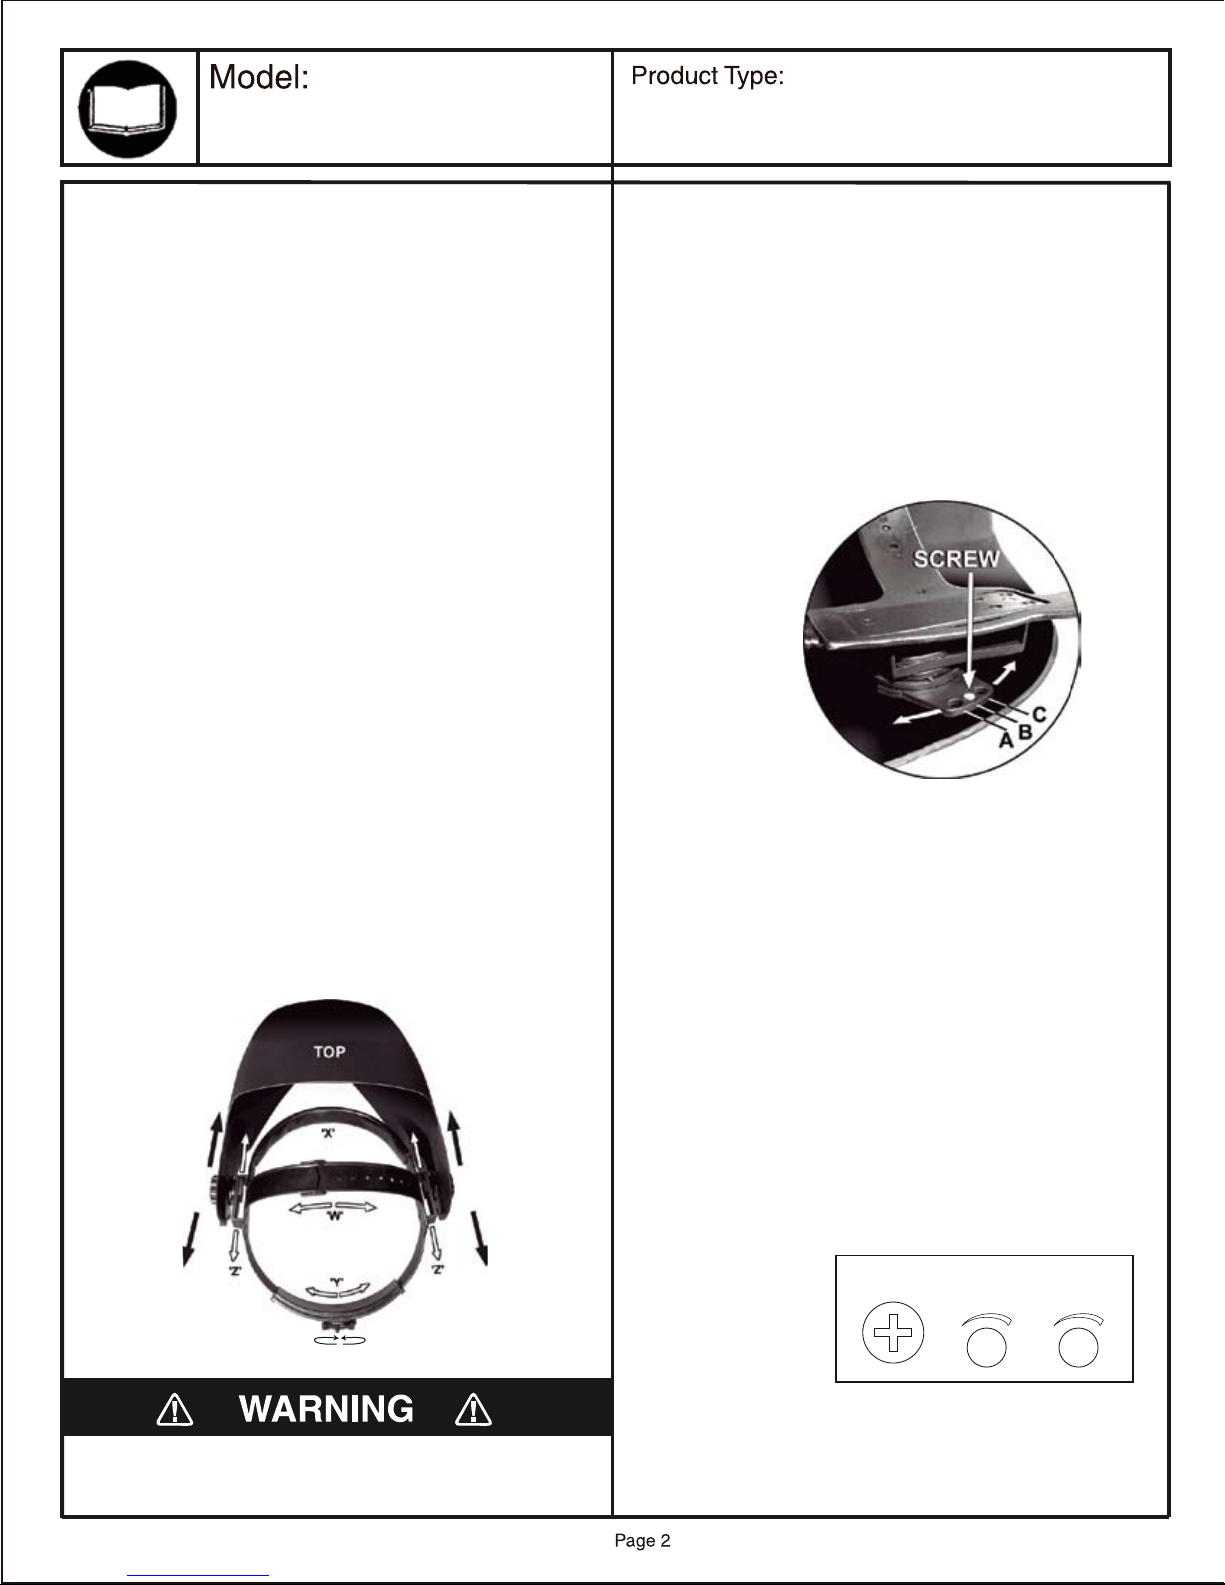
ADJUSTING THE FIT OF THE HELMET
• The overall circumference of the headband can be made larger
or smaller by rotating the knob on the back of the headband.
(See adjustment "Y" in fig.1) This can be done whilst wearing the
helmet and allows just the right tension to be set to keep the
helmet firmly on the head without it being too tight.
• If the headband is riding too high or too low on your head adjust
the strap which passes over the top of your head. To do this
release the end of the band by pushing the locking pip out of the
hole in the band. Slide the two portions of the band to a greater
or lesser width as required and push the locking pip through the
nearest hole (See adjustment "W" in fig.1)
• Test the fit of the headband by lifting up and closing down the
helmet a few times while wearing it. If the headband moves while
tilting re-adjust it until it is stable.
ADJUSTING DISTANCE BETWEEN HELMET & FACE
• Step 1: Undo the block nut (See "T" in fig.1) to adjust the
distance between the helmet and your face in the
down position.
• Step 2: loosen the block nut on either side of the helmet and
slide it nearer to or further from your face.
(See adjustment "Z" in fig.1) It is important that your eyes
are each the same distance from the lens otherwise the
darkening effect may appear uneven.
• Step 3: Re-tighten the block nut when adjustment is complete.
ADJUSTING ANGLE OF THE MASK IN THE DOWN POSITION
• If the lens is not properly aligned with the eyes in the down
position the mask angle can be further adjusted into one of three
preset positions using the tilt plate shown in fig.2. Behind each
pivot knob on the sides of the helmet there is a screw which
passes through the side of the mask and into one of the holes in
the tilt plate ( see A,B,C in fig.2 ).
• Partially undo each screw counterclockwise so that it withdraws
out of the tilt plate but remains in the side of the mask. Rotate the
assembly so that one of the alternative positions is aligned with
the end of the screw. Turn the screws clockwise again so that
they pass through the holes thus fixing the position of the tilt
plate.
fig.2
SELECTING SHADE LEVEL
• Select the shade level you require according to the welding
process you will use by referring to the "Shade Guide Table"
below for settings. Turn the shade control knob on the side of the
helmet to the shade number required.
SELECTING DELAY TIME
• When welding ceases the viewing window automatically
changes from dark back to light but with a pre-set delay to
compensate for any bright afterglow on the workpiece. The delay
time/response can be set to "short" to "long" as you require
using the dial knob on the back of the shade cartridge. (See fig.3)
fig.1
Sever personal injury could occur if the user fails to follow the
above mentioned warnings, and/or fails to follow the operating
instructions.
SENSITIVITY
• The sensitivity can be set from "high" to "low" using the dial
knob on the back of the shade cartridge. The"low" setting is the
normal setting for everyday use.
• Where the operation of the mask is disturbed by excess
ambient light or another welding machine close by, use the "low"
setting. (See fig.3).
'T'
sensitivitydelay time
fig.3
• Please adjust the sensitivity to the lowest level when you are
not working.
You are now ready to use the helmet, The shading may be
adjusted during use by re-setting potentiometer control.
Page 3
8077SE
MAINTENANCE INSTRUCTIONS
LARGE VIEWING AREA DELUXE AUTO-DARKENING
SOLAR WELDING HELMET AND WELDING GLOVES
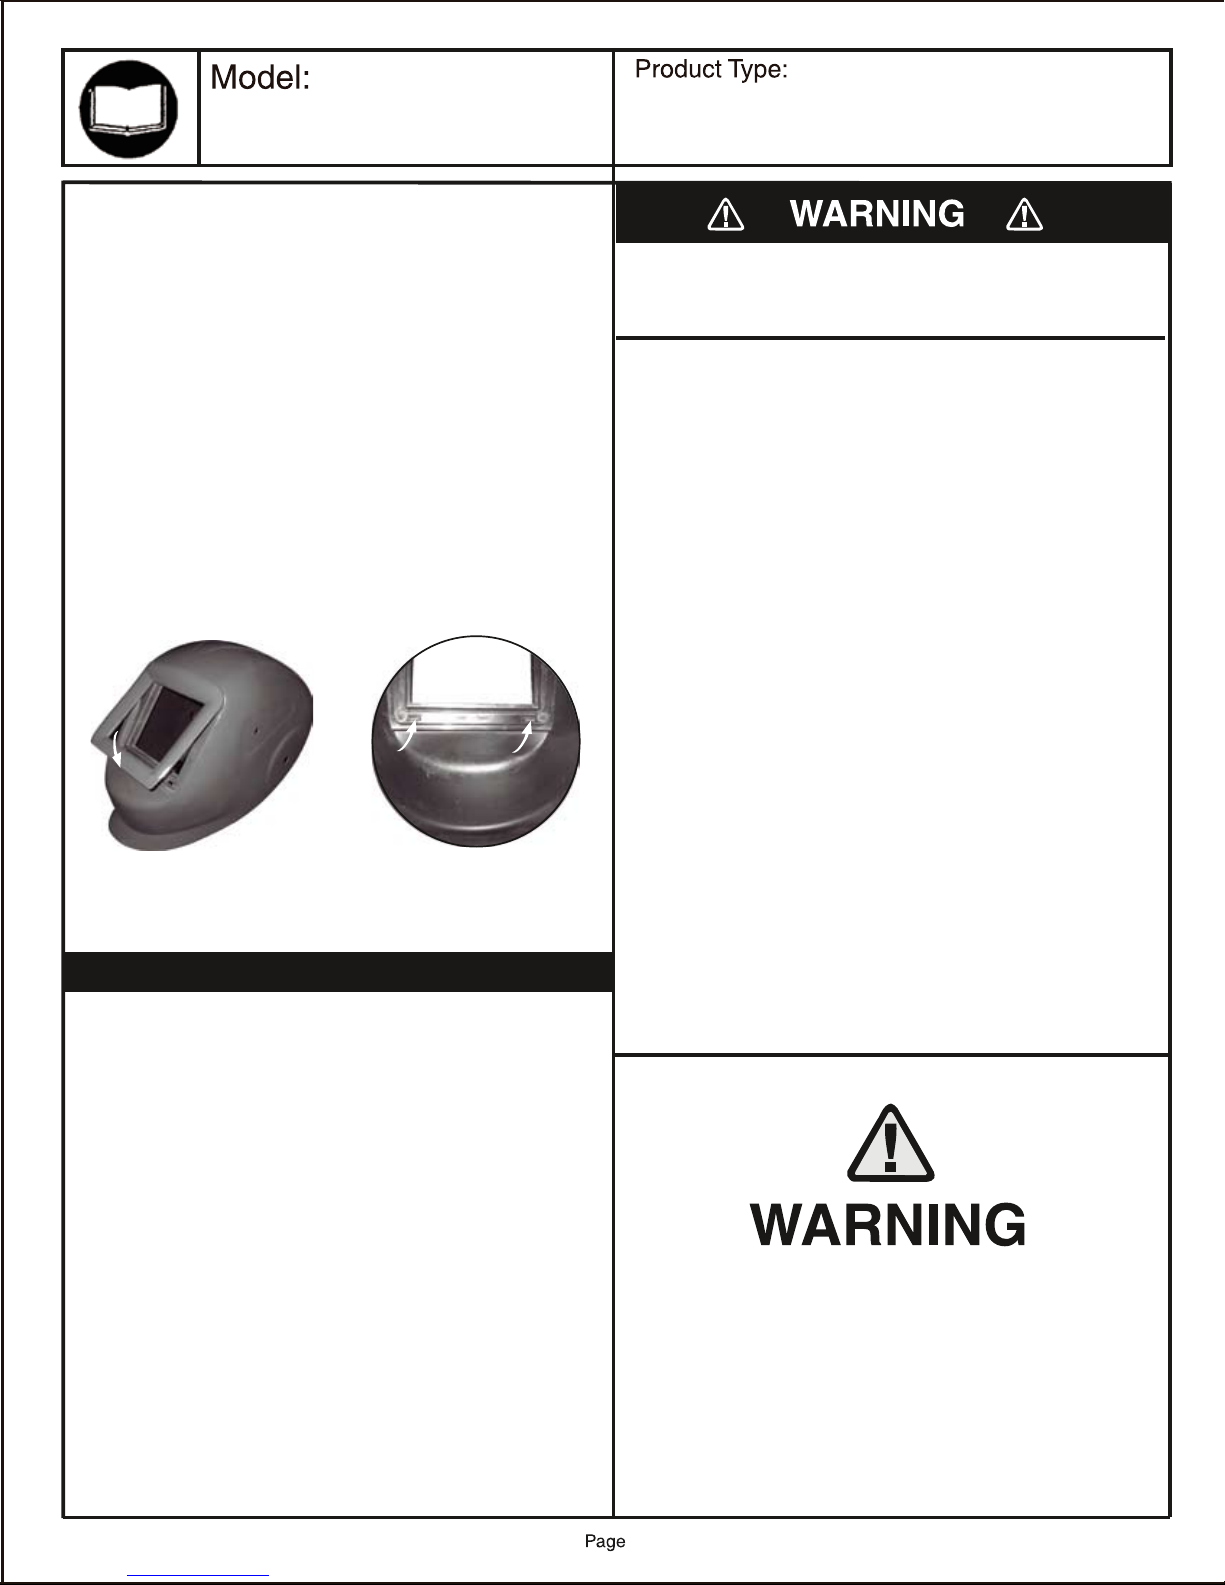
• REPLACING FRONT COVER LENS. Replacing the front
cover lens if it is damaged (cracked, scratched, soiled or pitted).
See fig.4
• CHANGING BATTERY. If "Low battery" alarm light is red,
please change it with new battery.
• CLEANING. Clean helmet by wiping with a soft cloth. Clean
cartridge surfaces regularly. Do not use strong cleaning solutions.
Clean sensors and solar cells with methylated spirit and a clean
cloth and wipe dry with a lint-free cloth.
• PLEASE ADJUST THE SENSITIVITY TO THE LOWEST
LEVEL WHEN YOU ARE NOT WORKING.
fig.4
fig.4a
Before using the helmet for welding ensure you
have read and understood the safety instructions
COMMON PROBLEMS AND REMEDIES
Irregular Darkening Dimming
• Headband has been set unevenly and there is an uneven
distance from the eyes to the filter's lens (Reset headband to
reduce the difference to filter).
Auto-Darkening Filter Does Not Darken Or Flickers
• Front cover lens is soiled or damaged (change lens cover)
• Sensors are soiled (clean the sensors' surface)
• Welding current is too low (turns the switch to the "slow"
position).
Slow Response
• Operating temperature is too low (do not use at temperatures
below - 10。C or 14。F).
Poor Vision
• Front /inside cover lens and/or filter lens are soiled
(change lens)
• There is insufficient ambient light
• Shade number is incorrectly set (reset the shade number)
TECHNICAL SPECIFICATIONS
Viewing Area: 96 x 62 mm (3.8"x2.4")
Cartridge Size: 110 x 106 x 9mm (4.3"x4.2"x0.35")
Arc Sensor: 2
Light State: Shade DIN 3.5
Variable Shade: From DIN 9 to DIN 13
Shade Control: External adjustable
Power On/Off: Fully Automatic
Sensitivity Control: Be adjustable by dial knob
UV/IR Protection: Up To Shade DIN16 at all time
Power Supply: Solar cell, battery can be changed (3V lithium)
Battery Lifetime: Over 4000hours before low battery alarming
Switching Time: 1/20,000 s. from Light to Dark
Dark to Light: 0.1~1.0s by dial control knob
Operatin g Tep.:
Storing Te mp er at ur e: - 20。C ~ + 70。C
Helmet Material: High -i mp ac t re sistant plastic /
Polyam id e Ny lo n
Total Wei gh t: 4 75 g
- 1 0。C ~ + 55。C
Welding Helmet Slips
• Headband is not adjusted properly (readjust headband)
User must stop using the auto-darking welding helmel
immediately if the above-mentioned problems cannot
be corrected. Contact Astro Pneumatic Tool Company.
3
Page 4
372 Old US Highway 52 South
Moun t Airy, NC 27030
LARGE VIEWING AREA DELUXE
8077SE
AUTO-DARKENING SOLAR WELDING
HELMET AND WELDING GLOVES
Call 1.800.221.9705 for questions concerning performance of the product
or other inquiries.
5
Index
No.
1
2
6
4
5
6
7
8
1
8077-01
8077-02
8077-03
8077-04
8077-05
8077-06
8077-07
8077-08
2
4 14
3
Frame
Front Cover Lens
Shade Knob
Auto-Darkening Filter Cartirdge
Shell (Welding Mask)
Block Nut
Washer
Adjustable Limitation Washer
11
12
10
13
9
15
8
7
6
Index
No.
1
1
1
1
1
2
4
2
9
10
11
12
13
14
15
8077-09
8077-10
8077-11
8077-12
8077-13
8077-14
8077-15
Left Limitation Washer
Screw
Right Limitation Washer
Front Headband
Adjustable Headband
Inside Cover Lens
Sweatband
1
2
1
1
1
1
1
4
 Loading...