

Page 1
IN-GROU
COMPACT HOUSING
INSTRUCTI
ON MANU
AL
ND AND SEMI IN-GROUND
Page 2
IMPORT
important informatio
start-up and mainte
and the user read the
ANT: The
instruction manual that yo
u are holding
n about the safety measures to adopt during
nance. Thus, it is extremely important that both the inst
instructions before beg
inning setup:
in your
hands cont
inst
allation,
ains
aller
1. GENERAL CHARACTERISTICS
Compact housing for a pool, to be
a housing unit with an injected plast
and the front part
According to the
recirculation of the
2.
LOCATION
It is advisable to locate the equipment away from the pool, at least 3.5 m. Placing
it closer
3. INST
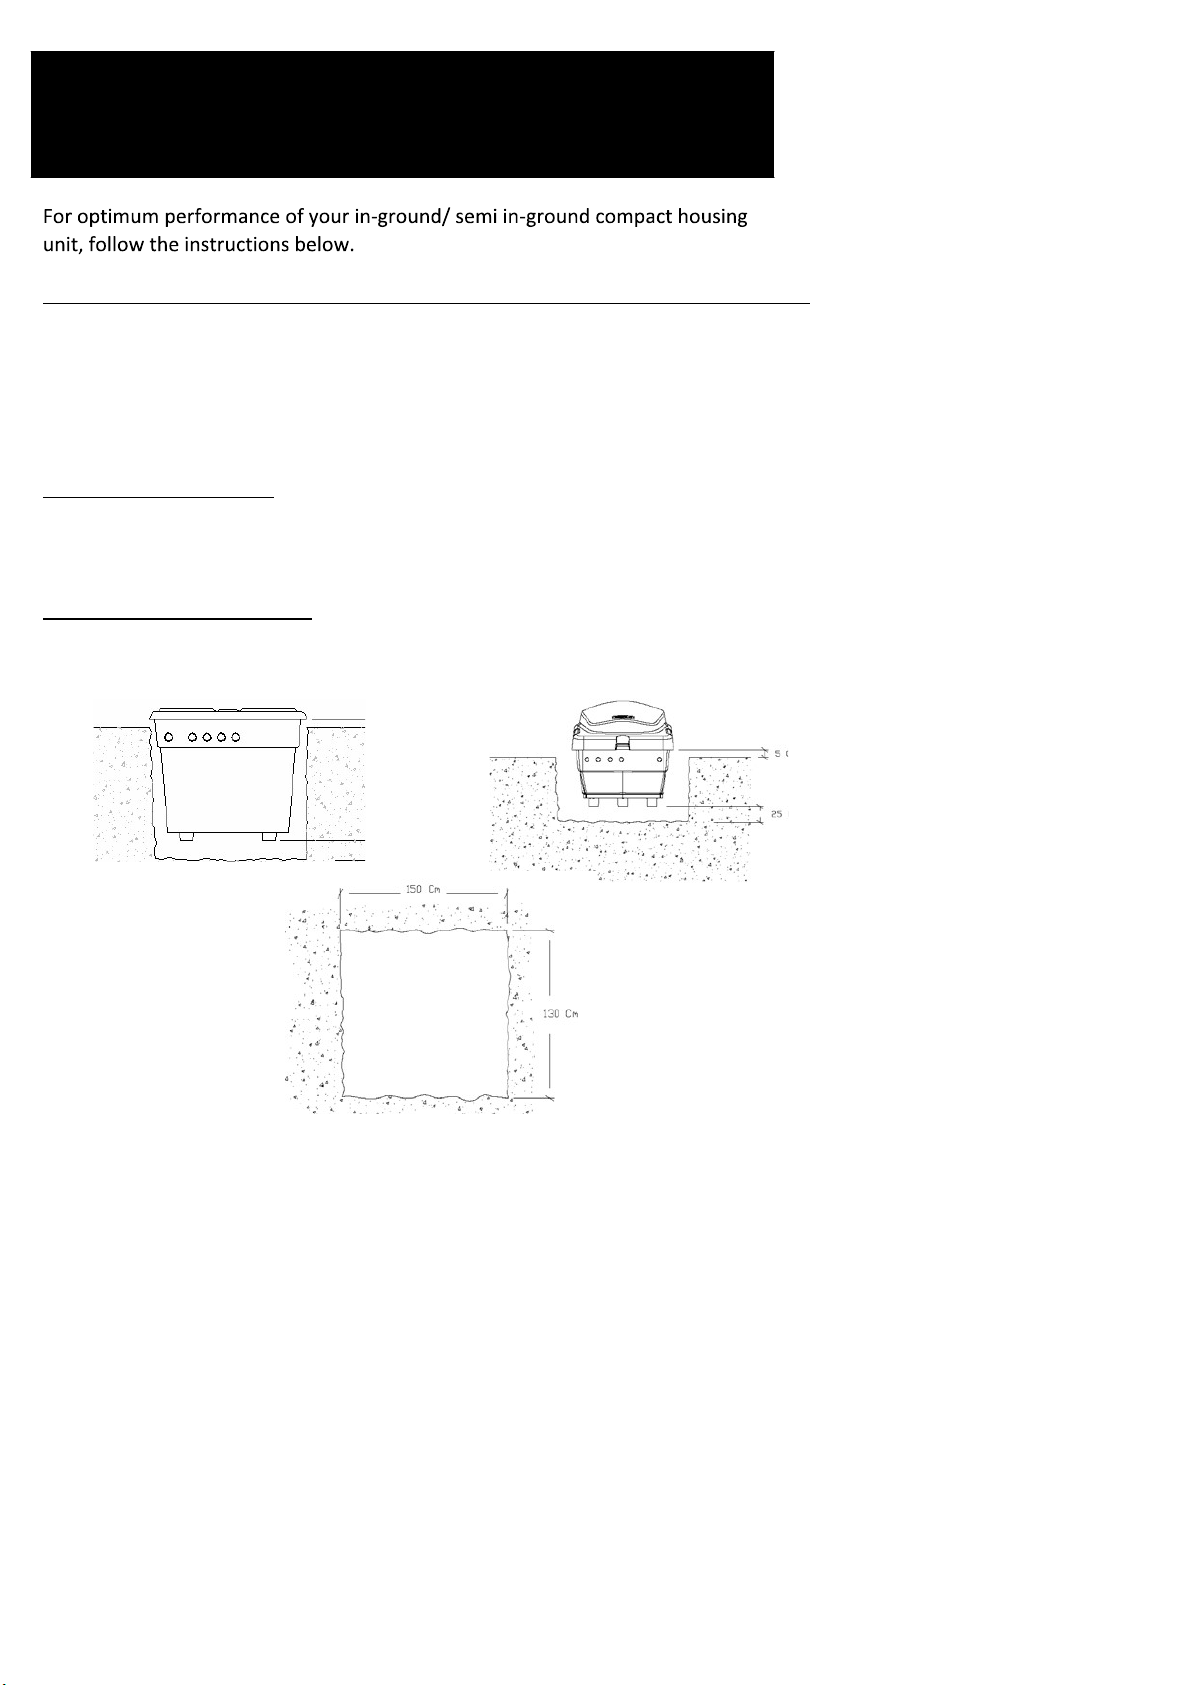
3.1. Do the excavation according to the measurements.
would mean non-compliance with the specific standard RBT ITC-BT-
ALLATION
can be easily
configuration, it houses the equipment for the filtration and
water in the pool tank.
inst
lifted.
alled
in-ground or semi in-ground, made up of
ic box and
two-piece
cover. The back is fixed
030.
Page 3
3
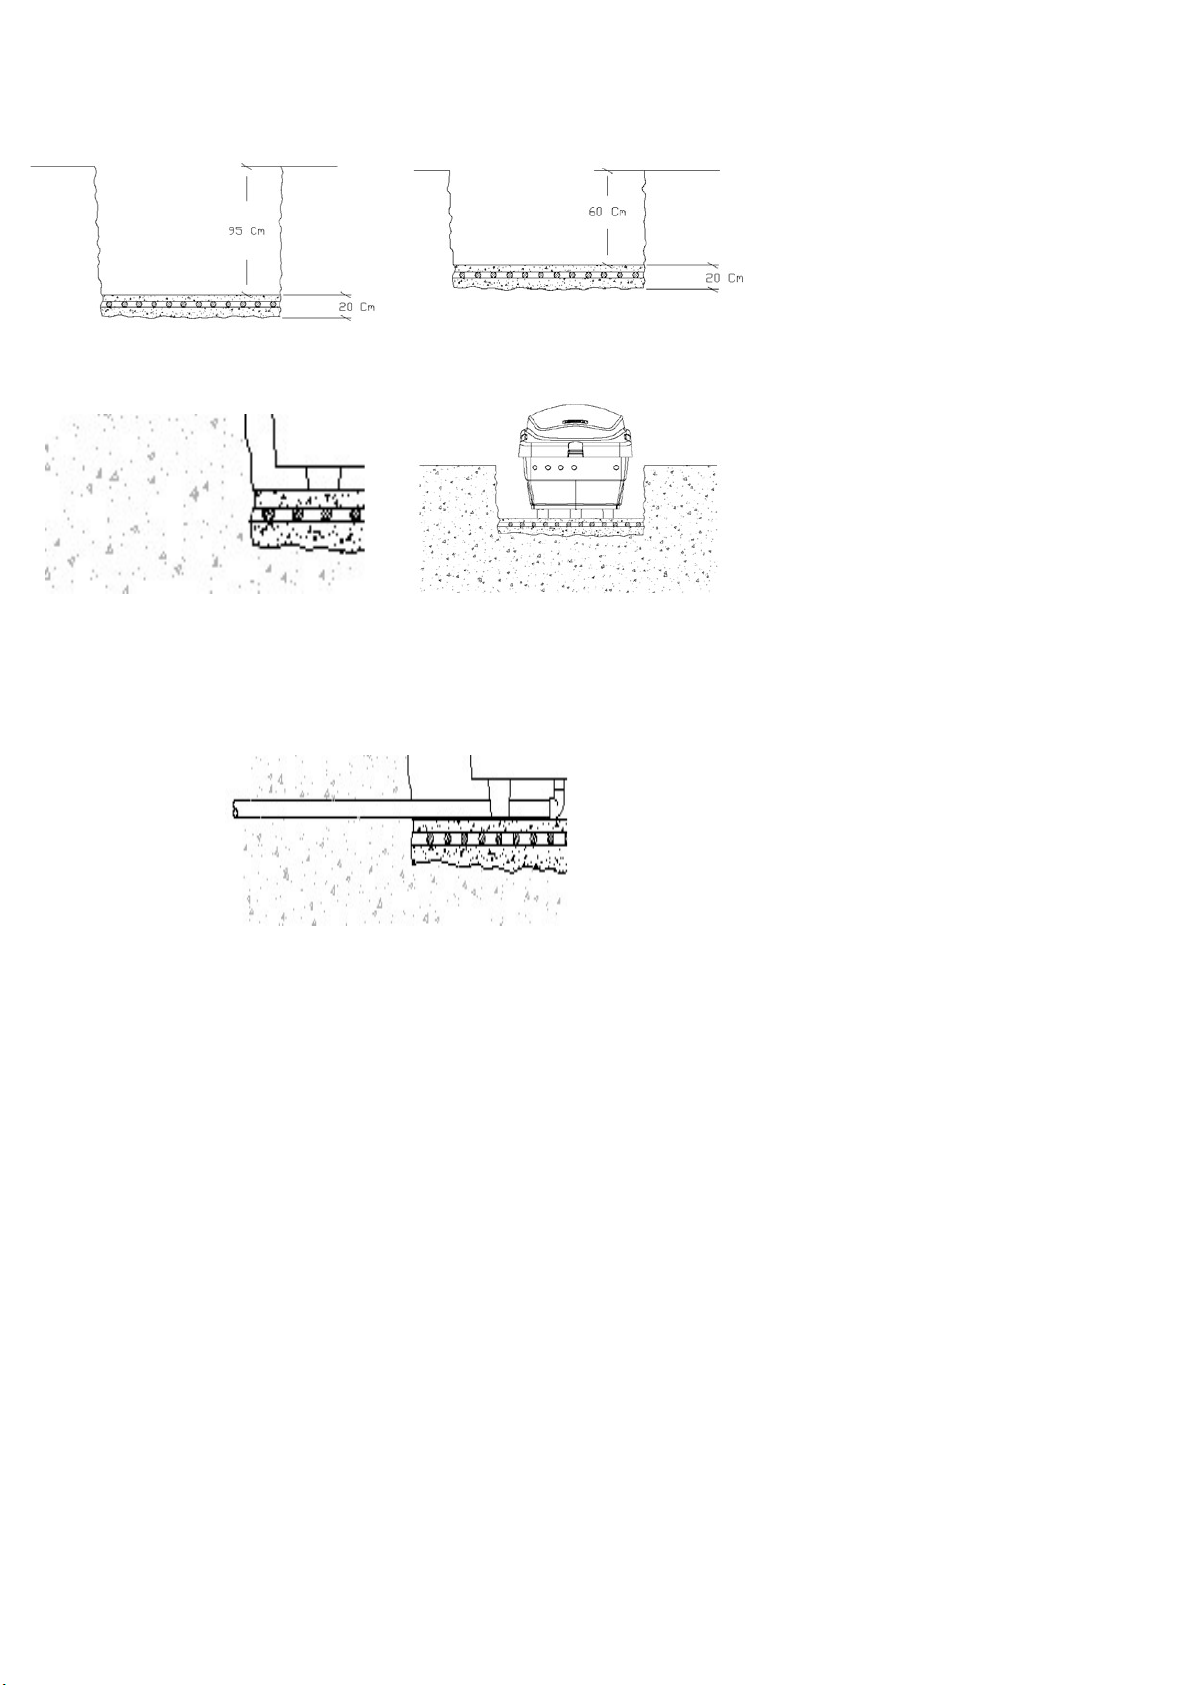
3.2. Make
a properly levelled concrete slab
.
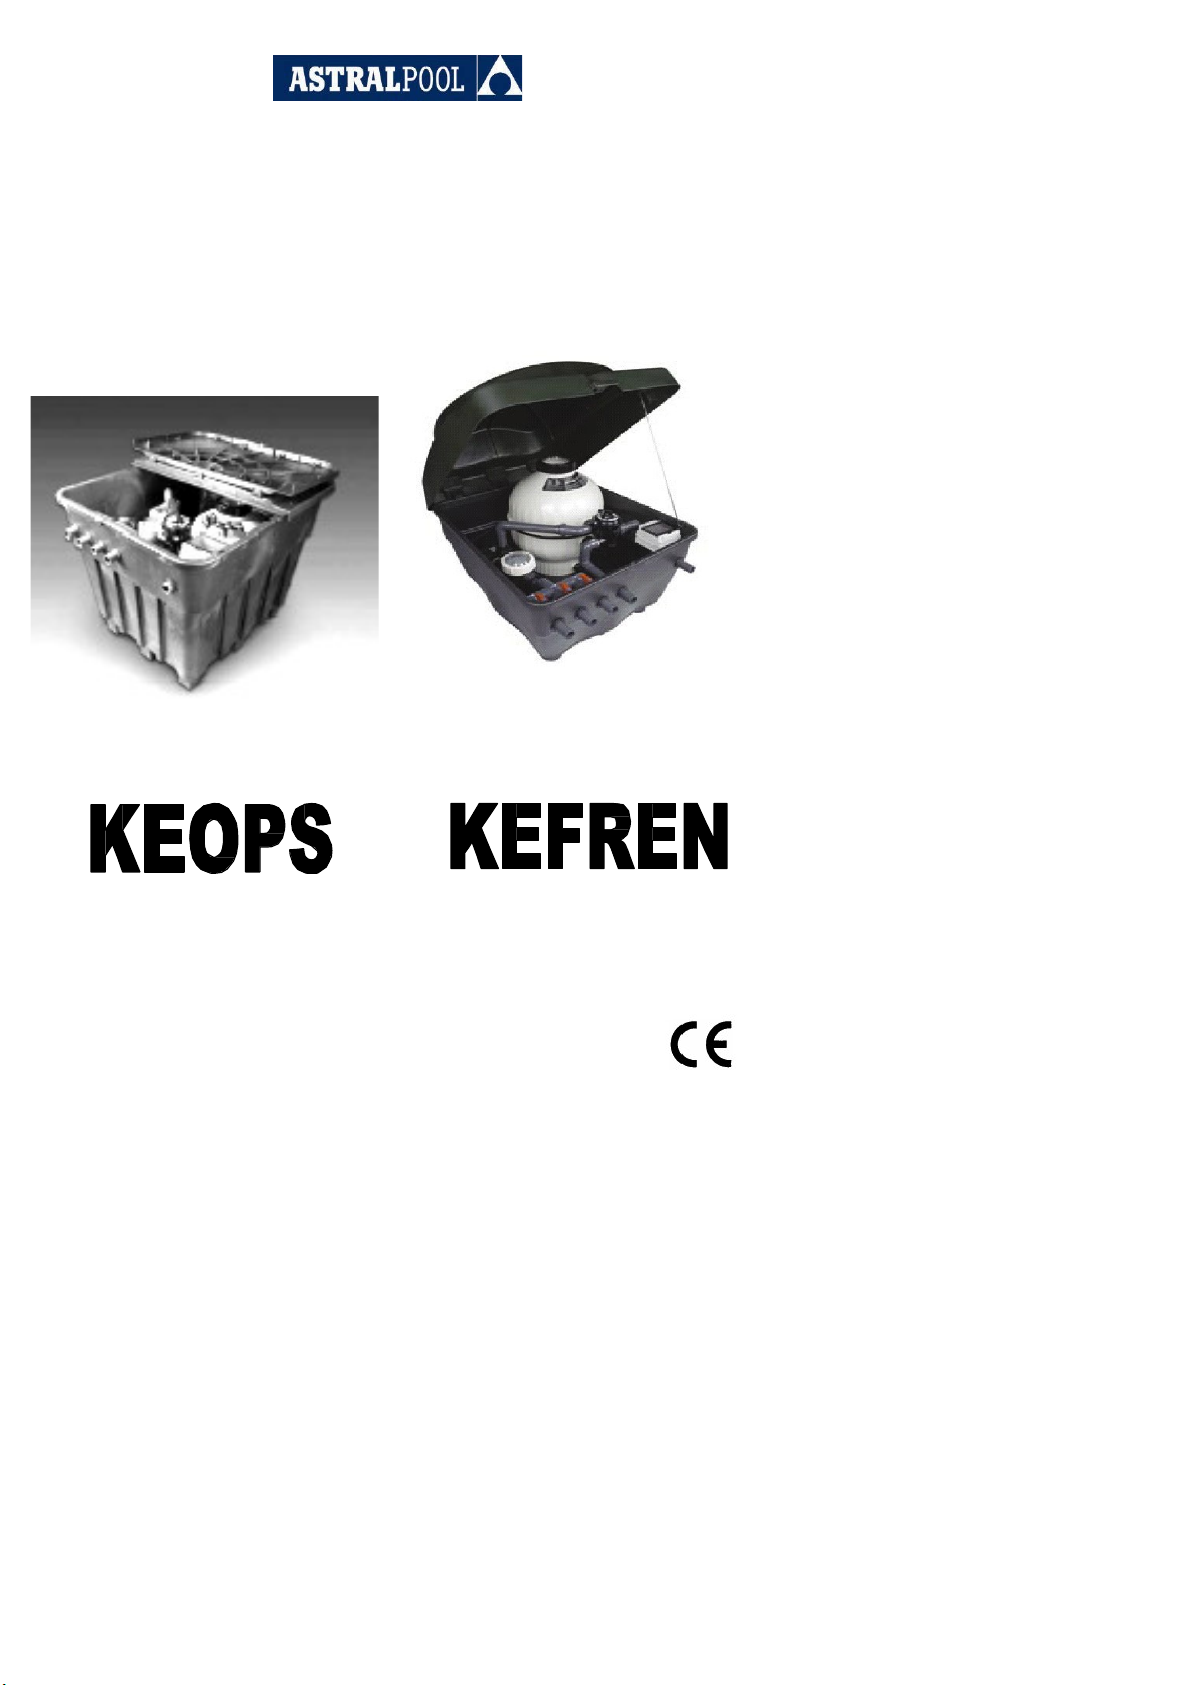
KEOPS
3.3. Position the unit.
3.4. Do the excavation to prepare for
and the electr
The
intake
Connect the sump to a general dr
ical supply.
and output pipes must rest o
ain with a slight slope.
KEFREN
laying the intake
n a bed of sand.
and output pipes to the poo
l
3.5. Perforate the unit on the side
diameter that matches the cable to be inst
depending on power consumption and drops in voltage.
Install a cable gland of the appropriate size for the cable sectio
where the electr
alled. Determine the section of the
ical supply is to enter, with a
n at the entry.
cable
Page 4
IMPORTANT:
F
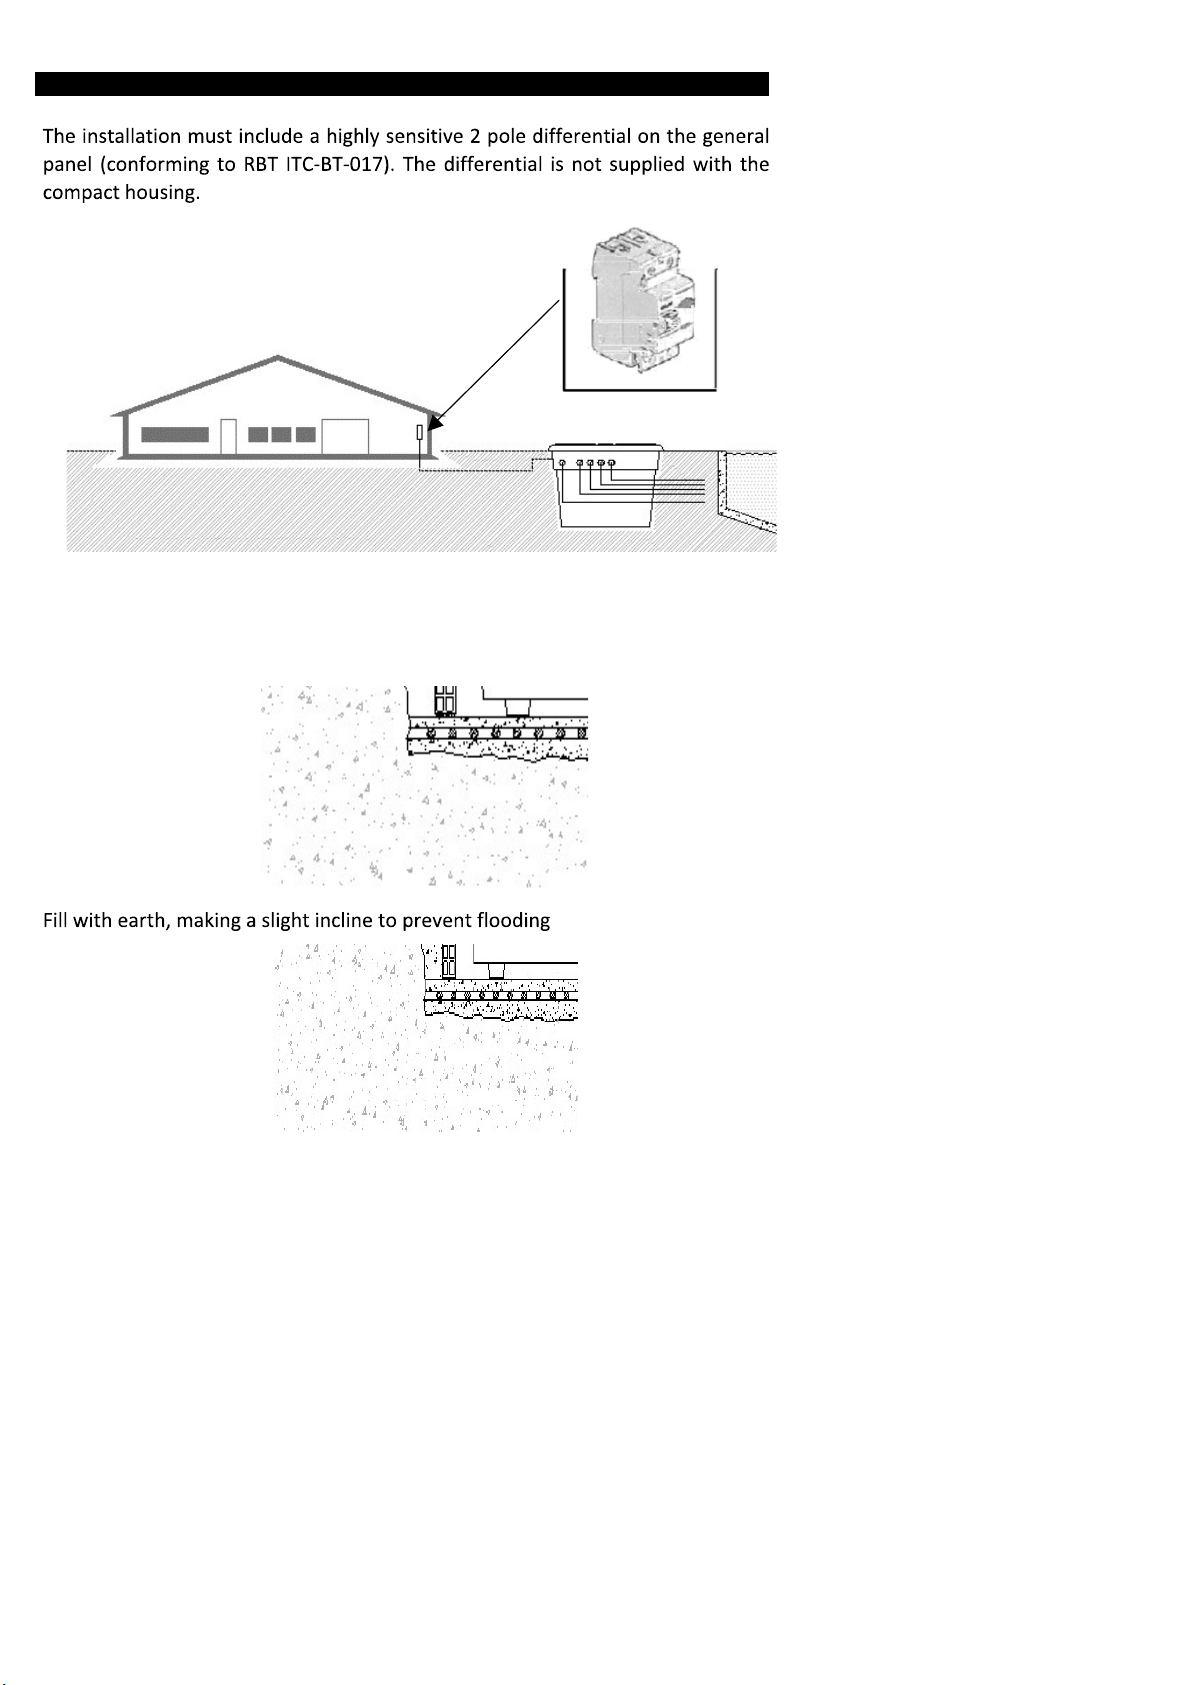
ill the side of the housing with gravel. In the case of very soft ground, b
ret
aining walls or, in the KEOPS housing, inst
31105R1000).
all the inner met
al reinforcement (ref.
uild
4
.
Page 5

5
IMPORTAN
T
ATTENTION
This equipment cannot be connected to a regular plug.
This equipment requires proper electrical installati
s
pecialist, following all the st
The supply to the unit must al
An earth connection is
Us
e a section cable with the appropriate power for the unit and for the distance to the
control panel.
required.
– VERY IMP
andards on electrical safety in force in each country.
ways be protected by a highly-sensiti
ORTANT
on. This must be done by a
ve differential.
Page 6
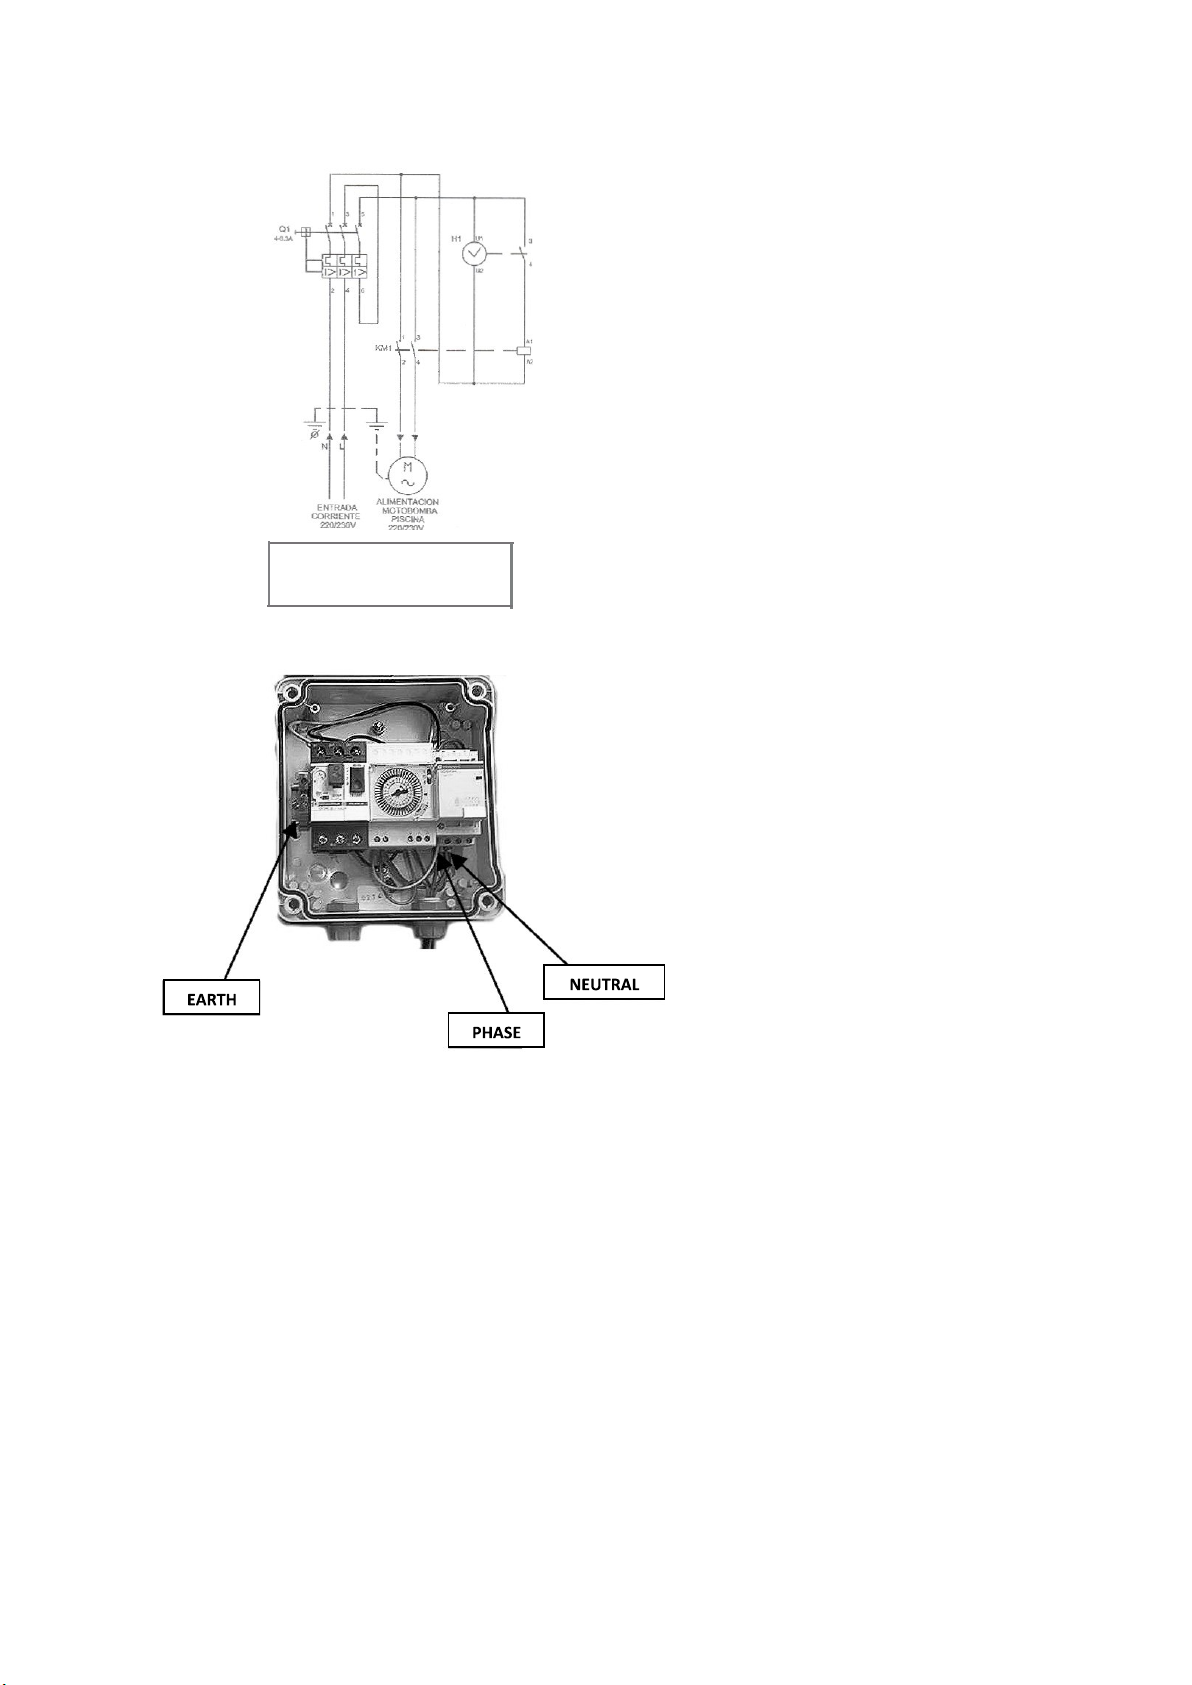
ELE
CTRICAL CONNECTION (ONLY FOR MODELS WITH ELECTRICAL CO
For s
afety reasons, place te
ends of the cables to be connected. Use cable H07
rminals
that are appropriate to the section of the cables on the
RNF.
ATTENTION
CONNECT THE EARTH LEAD-IN
WIRE WITH
EA
RTH WIRE
!
THE MOTOR PUMP
NTROL BOX)
6
Page 7

7
4. START-UP
1. Only in the KEOPS housing. Remove the two covers from the housing to beg
start-up. Unscr
2. Open the filter
the filter so sand does not get into it.
3. Fill the filter with the appropriate q
or up to 2/3 of the total filter height) of silex sand with a gr
4. Assemble the T manometer, the seal, the manometer
Teflon tape is not necessary, as this point is sealed by the seal. Do not tighten the T
of the manometer
5. Clean the remnants of silex from the mouth, cover and casket housing, and close
the filter. For more
If the unit is below the water level, yo
valves
and the air vent
6. Put the valves in the following positions:
- SKI
MMER
- SUMP
- P
OOL CLEANER OPEN
-
RETU
RN OPEN
- S
ELECTOR VALVE WASH
ew the screws that att
and fill it hal
with any tools
information, please consult the filter manual.
until the filter and the pump are full of
OPEN
OPEN
ach the cover to the housing, before lifting it.
fway with water. Protect the diffuser
uantity
(indicated on the specifications label,
; it is enough to do this with the hand.
u will only need to open the input and output
in the interior of
ain size of 0.4 - 0.8.
and the air purge cover.
water.
in
Page 8
8
7. Start up the pump
Perform the
indow of the selector valve.
w
8. Turn off the pump.
Position the selector valve to rinse
Stop the pump ag
9. Close the selector valve of the pool cleaner
10. Connect the pump
ote
: Any changing of the position of the selector valve must be done
N
pump stopped. Otherwise, the filter or the
IT IS RECOMMENDED THAT YOU USE A LOCK OR PADLOCK SO THAT
HILDREN OR OTHER UNAUTHORISED PERSONS
C
INTERIOR OF THE UNIT
washing operatio
and do
ain and put the selector valve in the filter position.
.
a filter wash
n until the water comes out
and run the pump for about 15 seconds.
.
.
inst
ATTENTION
clean and clear in the
with the
allation could be damaged.
CANNOT ACCESS THE
.
Page 9
9
5. US
ER MANUAL
ATTENTION
ALWAYS STOP THE PUMP BEFORE C
S
ELECTOR VALVE.
5.1. FILTRATION
With the pump stopped, put the selector valve
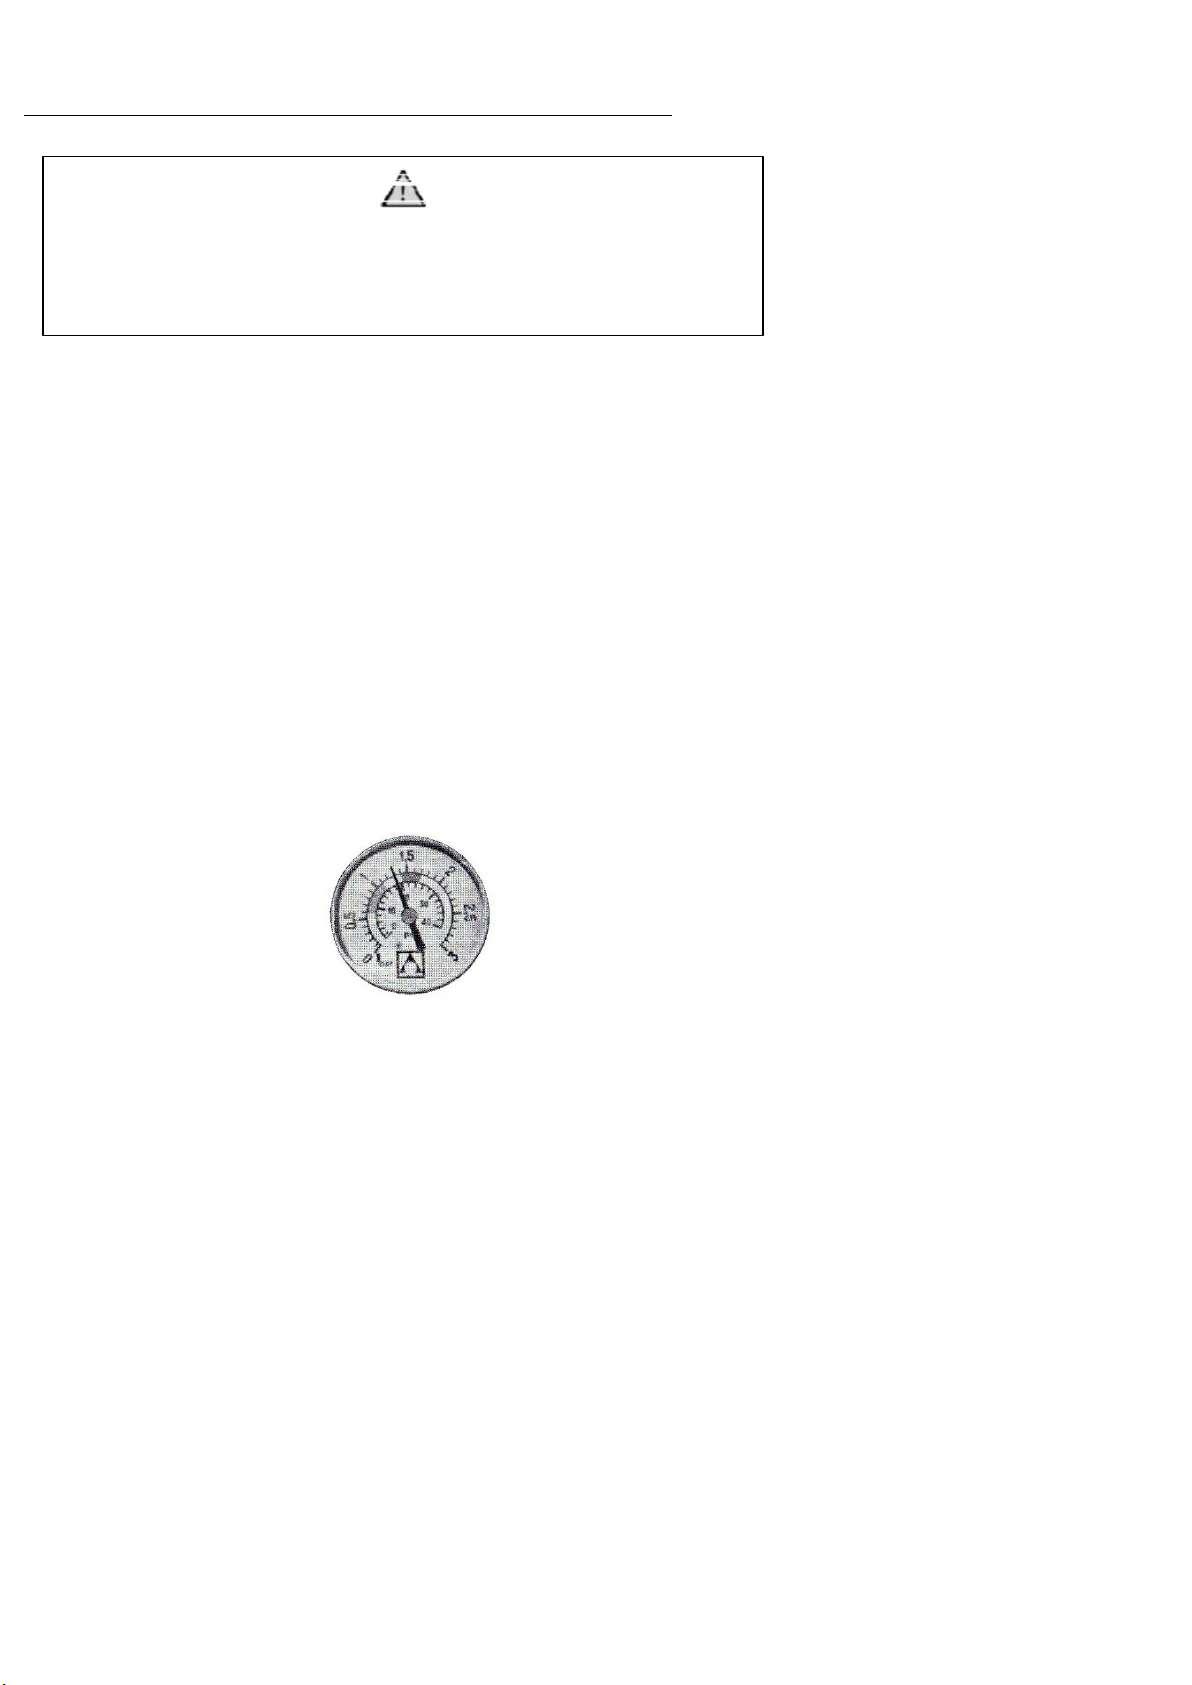
Periodically check the manometer during operation, which will indicate the degree of
saturation of the filter.
5.2. WASH
The solid part
rem
ain in the sand in the filter,
this, the pressure increases progressively.
WASH will be done (this is an approximatio
the
unit and the pool, its location, etc.).
Proceed as follows
Put the selector valve
m
inutes.
correct time, since it depends on the amount of dirt
icles
Always
in the pool that
:
in the WASH position and start the pump. Run this for 2
check the window of the selector valve to ensure that this
are
which constantly decreases the
HANGING THE POSITION OF THE
handle on FILTER. Start up the pump.
collected by the sump and the skimmers
When the pressure re
n; it depends on the dist
accumulated in the filter.
water fl
aches 1.3 kg/cm2,
ow. Due to
ance be
twee
is the
a
n
1.3 kg/cm2 - 18.5 PSI: This pressure indicates when it is necessary to proceed with a WASH
Page 10

10
5.3. R
INS
E
After doing a WASH of the filter
it is advisable to run a R
cloudy from going directly into the pool. To do this,
the selector valve o
Always
check the window of the selector valve to ensure that this
time, s
ince it depends on the amount of dirt
5.4. CIRCULATION
When you put the selector valve
circulate directly to the pool without passing through the filter.
5.5. DRA
IN
n R
INSE. Start
and before retur
INSE to prevent the first quantity of water that is st
up the pump
in this position, the water from the pump will
ning the equipment to filtration,
with the pump stopped, put
and run it for about
accumulated in the filter.
ill
a minute.
is the correct
If the pool does not
pump by putting the valve on DRA
close those of the skimmers
5.6. LOCKED
This position blocks the entry of
filter.
have
a dr
ain in the bottom,
and poo
water into the
it can be emptied using the filter
IN. To do this, open the valves of the sump and
l cleaner.
Page 11

11
WARRANTY
All of our products
delivery. Our warranty
after-sale service of defective pieces. The parts rep
this warranty will not extend the warranty of the orig
w
ill have their own warranty.
For the warranty to be valid, the buyer must have proof of the date of sale
and receipt of the product.
For the warranty to be valid, the buyer must strictly follow the
m
anufacturer’s instructions included in the documentation that comes wit
the product, whenever applicable according to the range and model of the
product. No warranty
products.
As for the parts, components
given in the documentation that comes with the product, where app
The warranty does
misused
unauthorised perso
non-original parts, or 4. The product
incorrectly.
Except where prohibited by
defective mater
does not
as covered by imperative national regulation
; 2. The product
limit or
come with a TWO YEAR warranty from the date of
includes in-factory repair and replacement or on the
laced or repaired under
inal product, but they
covers normal wear
and/or disposable materials, it w
not
cover the following
has been repaired, maintained or handled by an
n; 3. The product
legislation, the shipping
ials shall be paid by the buyer. The present warranty
infringe upon the rights that correspond to consumers
has been repaired or maintained wit
and tear due to use of the
ill follow that
: 1. The product
has bee
s
n inst
.
and return costs of
has bee
alled or set up
licable.
h
n
h
Page 12

 Loading...