

Page 1
CONSOLE TABLE
Console Table & Top
Examine all packaging material for small parts that may have come loose during shipment. Periodic checks are recommended to insure that all
components are in proper position, tight and free from damage. Keep this assembly instruction for future reference. Adult assembly is required.
Page 1 of 1
HARDWARE LIST
A (12) 1/4” x 3/4” Bolts
B (16) 1/4” Flat Washers
C (16) 1/4” Spring Washers
D (4) 1/4” x 5/8” Bolts
E (1) 4mm Allen Wrench
PARTS LIST
F (1) Top
G (1) Base
H (1) Bottom Support
I (2) Front Legs
J (2) Rear Legs
G
B
B
C
C
A
A
FIGURE 1
FIGURE 2
I
STEP 1 - Figure 1
Begin assembly by placing
the Base (G) upside down
on a clean smooth surface
to prevent scratching.
Fasten Front Legs (I) to
Base (G) using 2 Bolts (A),
2 Spring Washers (C) and
2 Flat Washers (B) per leg.
B
B
C
C
AA
G
QTYPAR T
12A
16C
HARDWARE QTYPAR T HARDWARE
B
16
D
1E
STEP 2 - Figure 2
Attach Rear Legs (J)
F
J
to Base (G) using 2
Bolts (A), 2 Spring
Washers (C) and 2
Flat Washers (B) per
leg.
STEP 3 - Figure 3
Attach Bottom
Support (H) to all 4
legs using 1 Bolt (A),
1 Spring Washer (C)
and 1 Flat Washer (B)
per leg. Tighten all
bolts from steps 2
and 3with Allen
Wrench (E) provided.
4
G
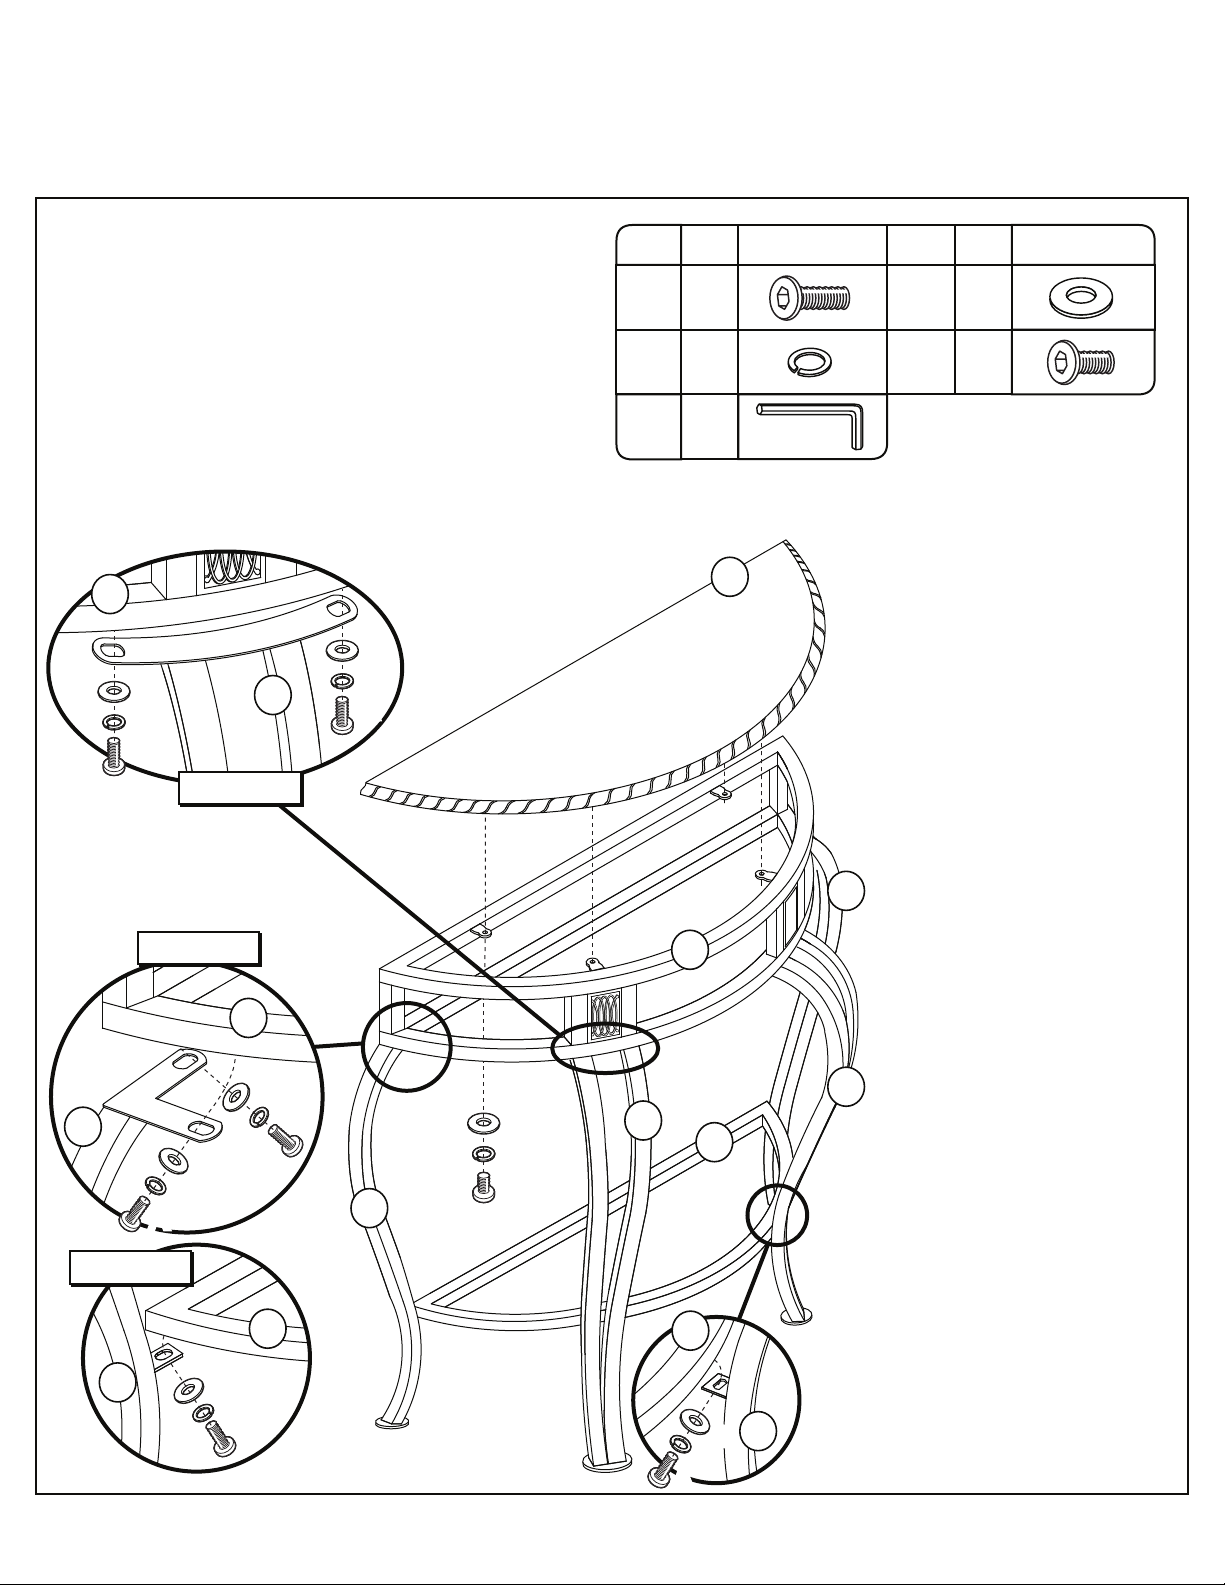
STEP 4 - Figure 4
Turn table assembly
I
to upright position
and attach Top (F) to
Base (G) using 4
Bolts (D), 4 Spring
Washers (C) and 4
Flat Washers (B).
Tighten all bolts with
Allen Wrench (E)
provided. The
assembly is now
complete.
J
CC
A
A
FIGURE 3
J
B
B
B
B
C
C
A
A
B
B
H
C
C
A
A
I
H
C
D
D
B
B
J
H
I
B
B
C
C
AA
CARE & MAINTENANCE
as they may cause damage to the finish. Periodic checks are recommended to make sure that all hardware is securely tightened.
:
The touch of a soft cloth is all the maintenance the finish will ever need. Please do not use harsh or abrasive cleaners for polishing,
 Loading...