

Page 1
Assembly Instruction Sheet
ToolsRequired:None
BulbRecommended: (2) Medium Base 75W Maximum
EstimatedAssemblyTime:15-20 minutes
Preparation:Identifyandinspectallpartsbeforebeginninginstallation.Checkpackage
contentlistanddiagramsbelowtobesureallpartsarepresent.Ifanypartsaremissing
ordamaged,donotattempttoassemble,install,oroperatethefixture.Contactcustomer
serviceforreplacementparts.
Warnings and Cautions
Turn off electricity at circuit breaker or main fuse box before installation. Consult a licensed electrician if in doubt.
These instructions are provided for your safety. It is very important you read them completely before installing
the fixture. We strongly recommend that a licensed, professional electrician perform the installation.
Disconnect fixture from power source before replacing bulbs. Make sure bulbs are given sufficient time to cool
before removal. Do not subject glass parts to any shock while in operation or shattering may result.
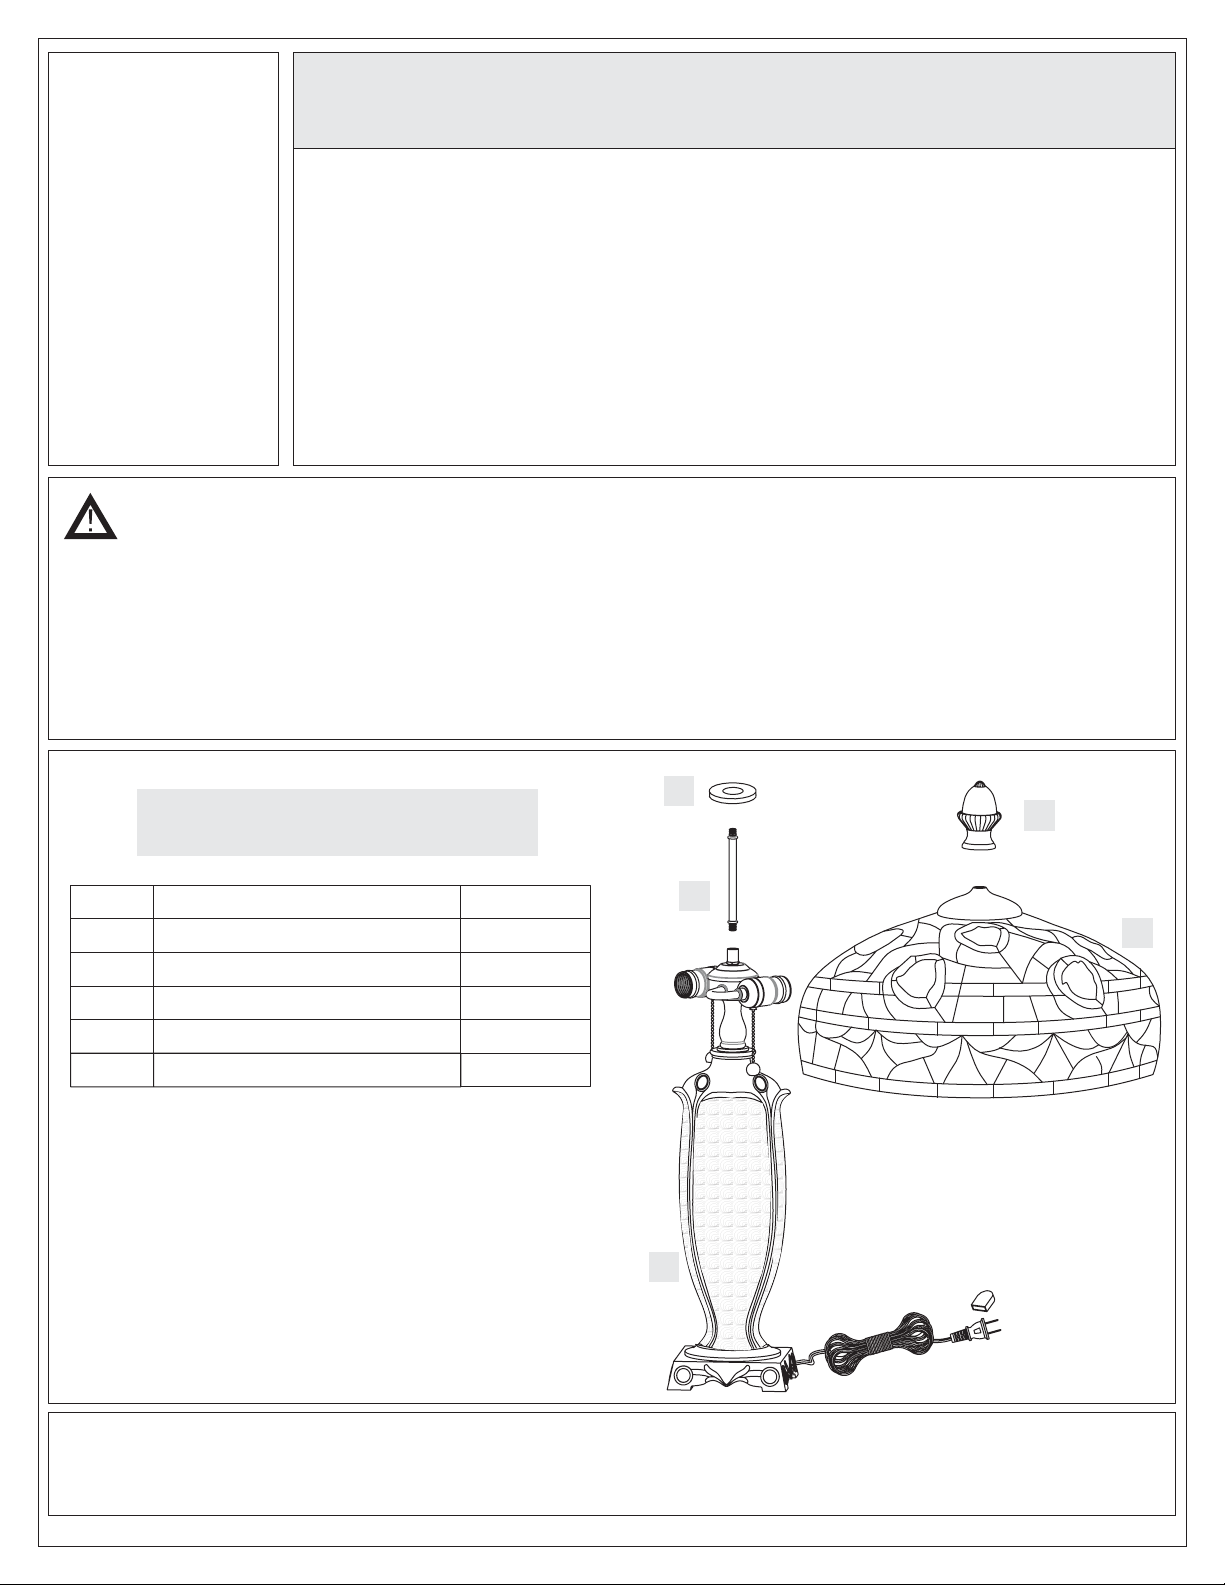
A
D
Part
A
B
C
D
E
Package Contents
Description
Flat Washer
Stem
Base
Finial
Shade
Quantity
1pc.
1pc.
1pc.
1pc.
1pc.
B
E
1of3
C
Page 2
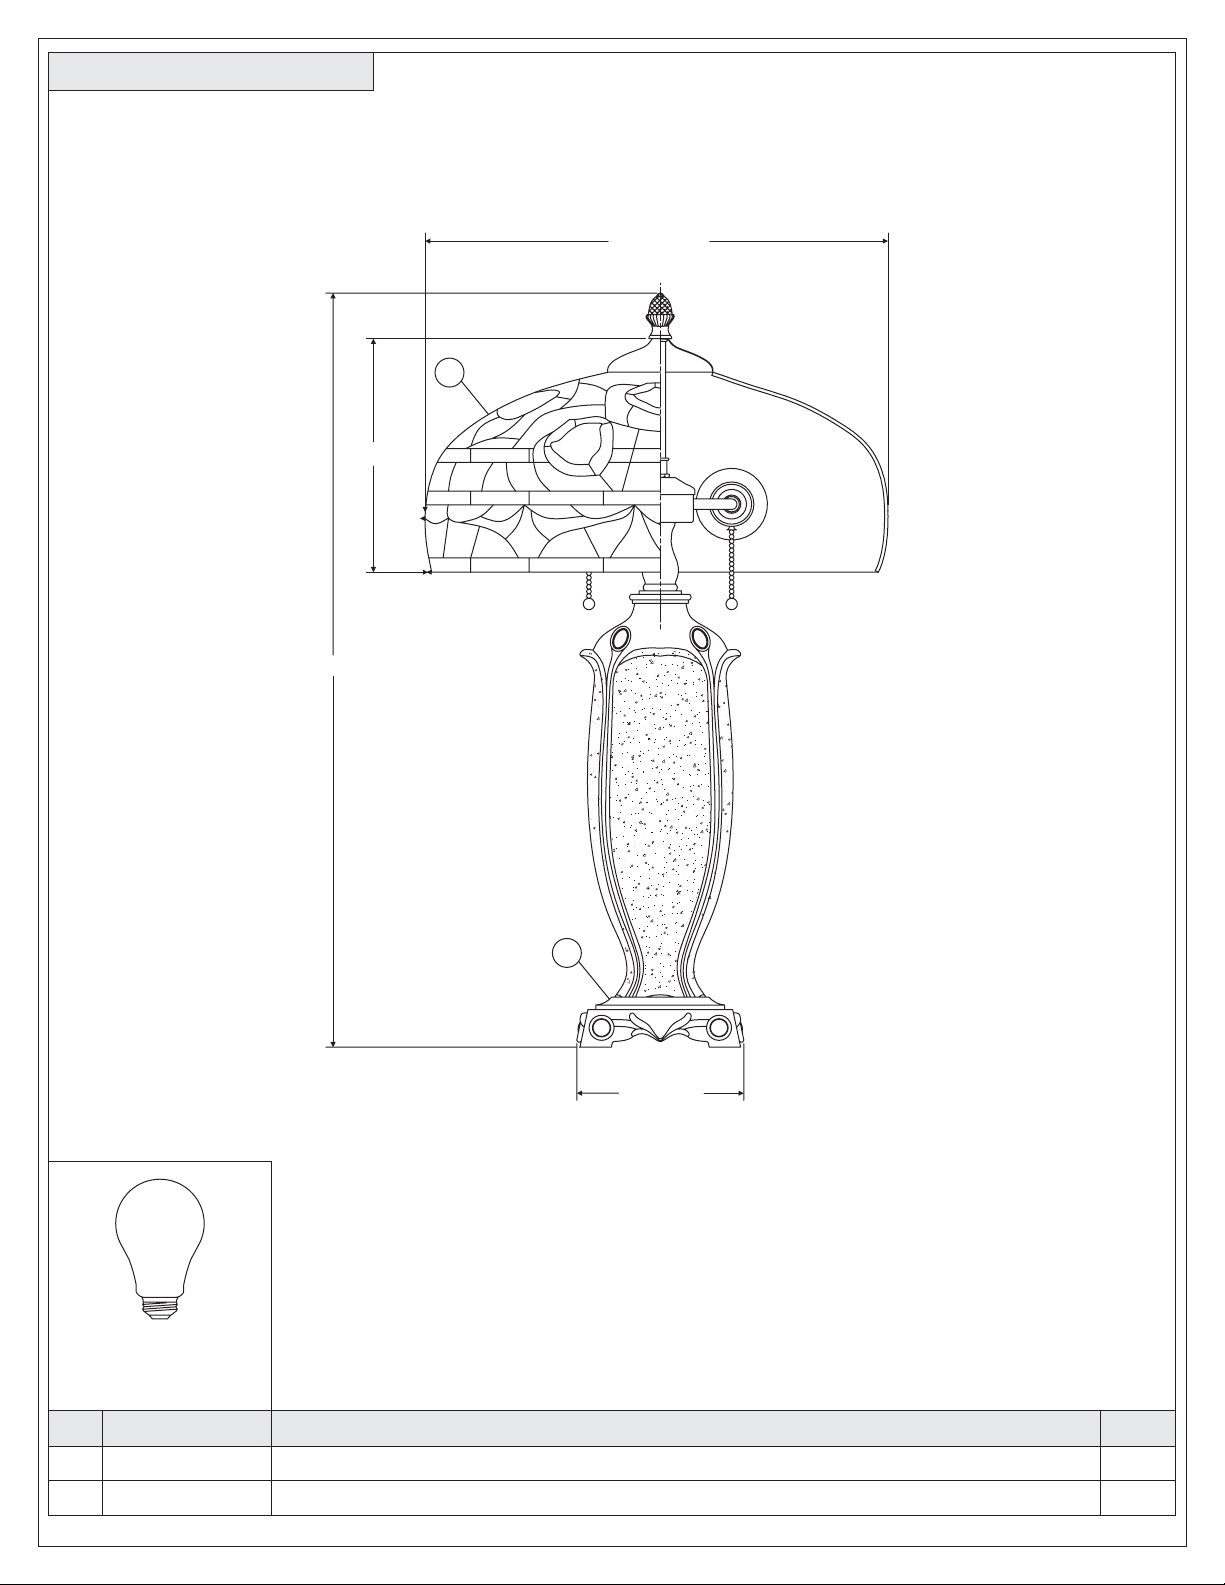
26”
15.5” Dia.
2
8”
(2) 75W Medium
Base Bulbs
(Not Supplied)
PART NUMBER
NO.
1
2
NOTE: ALL DIMENSIONS ARE ROUNDED UP TO THE NEAREST 1/2"
BASE
TIFFANY SHADE 16"D
1
5.5” Sq.
REPLACEMENT PART DESCRIPTION
2of3
REQ.
1
1
Page 3
Assembly Instruction Sheet
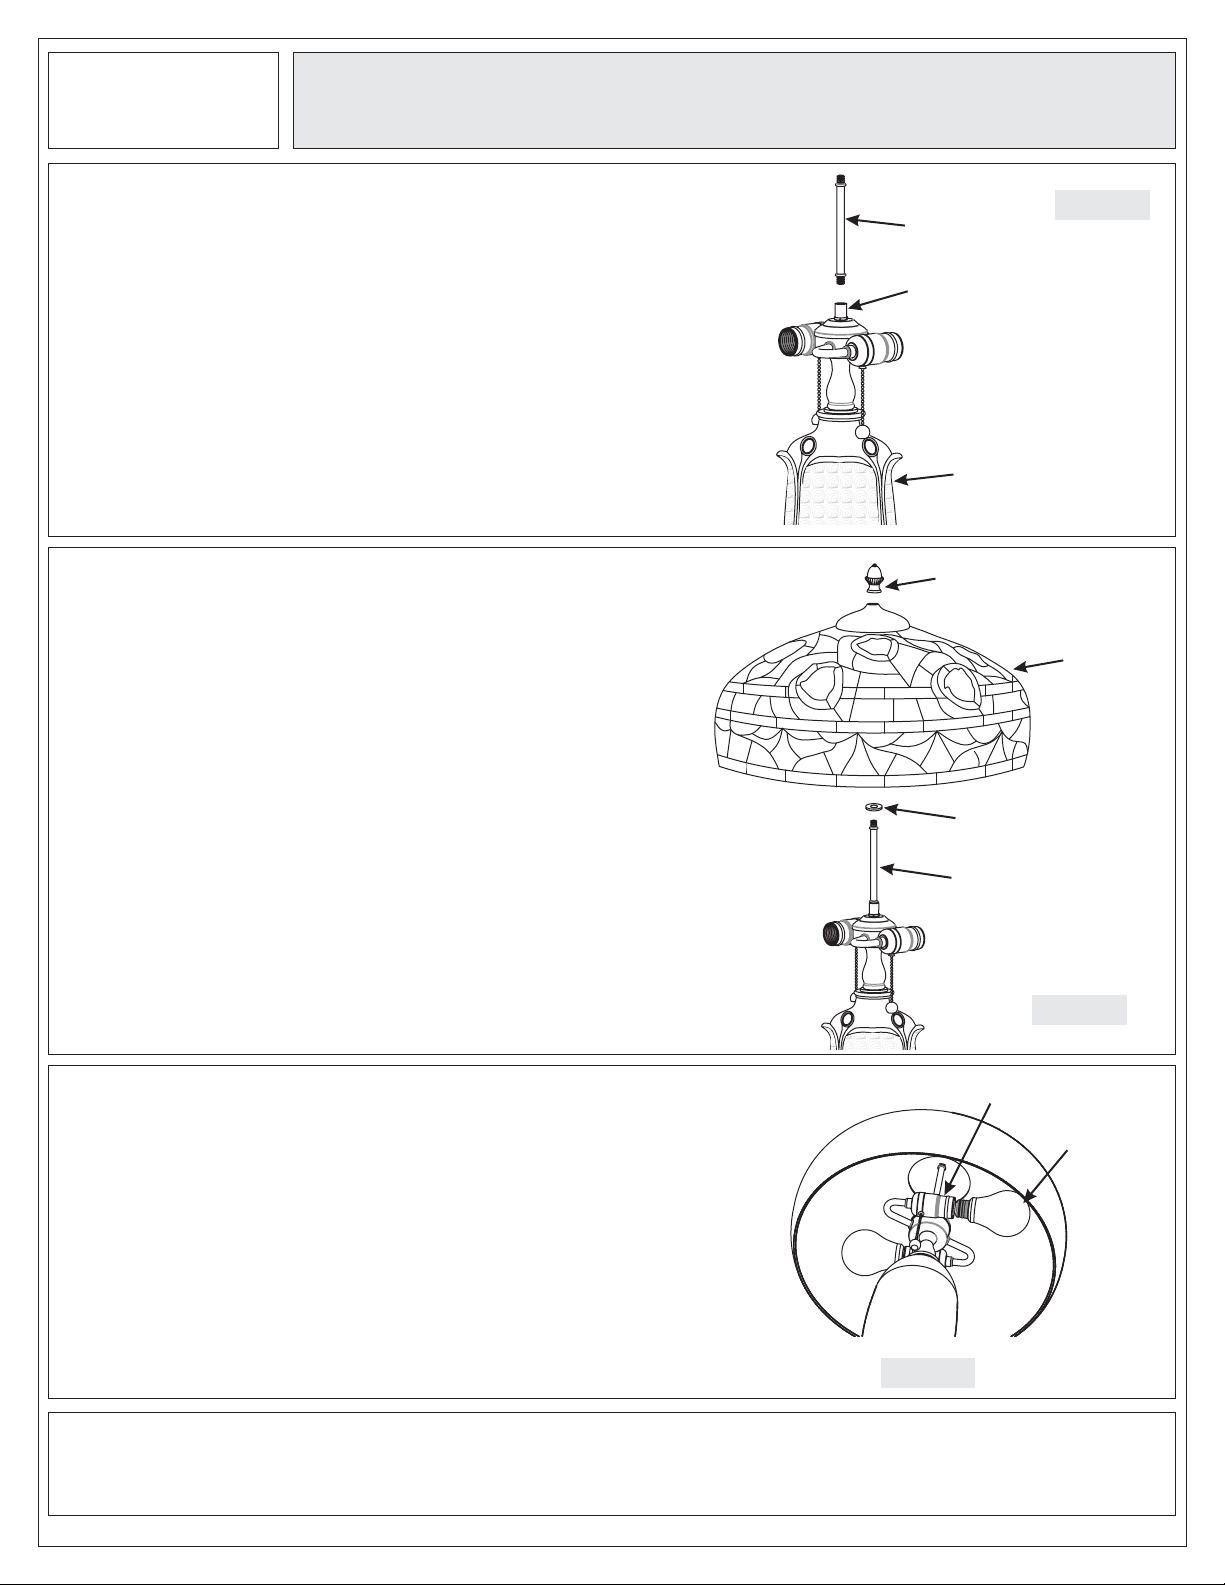
STEP 1 - Install Stem
A. Thread one end of the Stem (B) into the Coupling on the
top center of the Base (C). Hand tighten until snug.
STEP 2 Assemble Shade-
A. Place the Flat Washer (A) and the Shade (E) over the
top end of the Stem (B) and secure with the Finial (D).
Hand tighten until snug.
Figure 1
Stem
Coupling
Base
Finial
Shade
STEP 3 Install Bulb-
A. This fixture uses standard bulbs with medium screw
bases. Maximum 75 watts.
B. Insert bulb and screw snugly into place.
Your fixture is now assembled and ready to use. Enjoy!
Flat Washer
Stem
Figure 2
Socket
Bulb
Figure 3
3of3
 Loading...